 Small batches, high standards. Our rapid prototyping service makes validation faster and easier —

How To Drill Metal So It Starts Straight, Cuts Cool, And Finishes Clean
Step 1: Gather Safety Gear and Match the Metal
If you want clean holes, drilling starts before the trigger does. When people search how to drill metal, they usually picture the cut itself, but the real first move is preparation. Thin sheet flexes and tears. Thicker plate holds heat. Stainless can resist cutting and punish a dull edge. Hardened steel is even less forgiving. Aluminum feels easier, yet it can clog a bit fast. Galvanized parts add a coating that can hide what is underneath. If you are wondering how to drill in metal, begin by identifying both the metal and its shape.
Know the metal before you start drilling
Use simple clues first. Color, surface finish, weight, and a quick magnet test can help separate common steels from aluminum and other non-ferrous metals. Basic visual inspection can also reveal rust, coating, oxidation, or previous machining marks. No single drill for metal is right for every job, because flat sheet, tubing, angle, and solid plate all behave differently when the bit starts and when it breaks through.
- Identify the metal and thickness
- Check whether the part is sheet, plate, tube, or angle
- Mark a stable drilling location with clear light on the work
- Plan where chips will fall and how you will clear them
- Clamp the work before the bit touches metal
Set up safe tools and protective gear
The real hazards are simple and sharp: hot chips, spinning stock, razor burrs, and sudden bit grab at breakthrough. Good lighting helps you see bit angle and layout marks. Keep a brush nearby for chip cleanup, because hands and hot swarf do not mix. Clamping matters more than arm strength. An unsecured piece can spin before you can react.
- Wraparound safety goggles
- Work gloves for handling sharp or hot metal
- Hearing protection in noisy spaces
- Close-fitting clothing, tied-back hair, no loose jewelry
Never hold the workpiece by hand while drilling.
Choose hand drill or drill press for control
So, can you drill into metal with a cordless tool? Yes, especially when access is tight or the part is already installed. A hand drill for metal work is practical for one-off holes, and it is often how people learn how to drill through metal with a hand drill. A drill press makes more sense when you need straighter holes, repeatable spacing, and better accuracy across multiple parts. The metal is only half the equation. The bit you choose will decide how cleanly that setup pays off.
Step 2: Choose the Right Metal Drill Bit
Tool control starts with bit geometry. If you are wondering what drill bit to use for metal, base the choice on four things: how hard the material is, how large the finished hole must be, how clean the edge needs to look, and whether you are starting small, enlarging, or cutting a large opening. The best drill bits that go through metal are not all the same. A thin electrical box, a piece of aluminum angle, and a stainless bracket ask for different cutters.
Select the best metal drill bit for the job
A standard twist bit is the everyday starting point, and twist drill bits for metal handle most small to medium holes. A split-point version is even better when you want faster starts and less walking. For thin sheet, a step bit often leaves a rounder, cleaner hole with less tearing. For large diameters, a hole saw is the practical option because standard bits become inefficient as size increases.
| Bit type | Best use case | Hole quality | Breakout behavior | Limitations |
|---|---|---|---|---|
| Standard twist bit | General drilling in steel and aluminum | Good when sharp and well-supported | Can leave burrs at exit | Less stable on larger holes |
| Split-point twist bit | Accurate starts and less walking | Cleaner starts than a standard point | Similar burr risk at breakthrough | Still needs the right speed and feed |
| Cobalt-type bit | Tough steel, stainless, harder alloys | Very good when kept sharp | Controlled, but heat matters | More brittle than softer bit materials |
| Step bit | Thin sheet metal and hole enlarging | Often very clean in sheet | Usually smoother in thin stock | Not ideal for thick plate |
| Hole saw | Large-diameter holes | Good for openings, not fine sizing | Depends heavily on support and feed | Slower setup and core removal |
Match bit material and point style to steel or aluminum
High-speed steel and cobalt guidance helps narrow the field. HSS works for general-purpose drilling, but coated titanium-style bits are better suited to softer metals like aluminum and mild steel because the coating reduces friction and heat. A cobalt metal drill bit is the stronger choice for stainless and tougher steels. In that category, M35 cobalt is less brittle and easier to manage in a hand drill, while M42 is harder and better suited to harder material and steadier setups. If you need a metal drill bit for steel or a drill bit for hard metal, cobalt is usually the safer pick. For many handheld jobs, a 135 degree split point is especially useful because it starts faster and resists wandering.
Keep a numbered drill bit set nearby when exact sizing matters. Small step-ups improve accuracy, reduce oversizing, and make enlarging a hole more controlled, much like the close increment logic described in this size guide.
Know when to replace a dull metal bit
A worn bit stops cutting efficiently and starts rubbing. You will notice slower starts, more heat, and less chip formation. On coated bits, once the cutting edges lose their coating, much of the low-friction advantage is gone. On cobalt and HSS styles, resharpening can restore performance, but if the bit keeps needing extra force or sounds like it is skidding instead of biting, retire it or sharpen it before continuing. That matters even more when using a drill bit for cutting steel, where wasted heat quickly ruins hole quality. Sharp tooling solves only half the accuracy problem, though. A bit can still drift if the mark is vague or the work shifts under it.
Step 3: Mark and Clamp Before You Drill Holes in Metal
Even the right bit will miss if the target is vague or the work can move. That is why many problems in drilling holes into metal start before the cutting edges ever touch the surface. If you still wonder how do you drill a hole in metal without the bit skating off line, focus on layout first. Accurate drilling begins before the bit touches metal.
Lay out the hole so the bit stays centered
Start from a true reference edge or an existing feature, not from a visual guess. Mark the center with crossing lines using a scribe, layout dye, or a fine marker if that is what you have. When edge spacing matters, think from the hole centerline outward. That same approach shows up in fabrication planning, including this centerline-to-edge guidance. If you want to know how to drill hole in metal accurately, this measuring step is where repeatability comes from.
- Measure from a straight edge, bend line, or existing hole.
- Mark the center with clear intersecting lines.
- Check distance from nearby edges and adjacent holes.
- Make a punch mark at the exact center.
- Clamp and support the workpiece.
- Recheck that the punch mark still lines up before drilling.
Use a center punch to stop wandering
A center punch creates a small seat for the tip, which helps stop the bit from walking across smooth metal. That matters most on stainless, polished sheet, and other slick surfaces. A standard 118-degree point has a wider chisel edge that can rub before it bites, a common cause of wandering described in this wandering guide. One good punch mark can make how to drill holes in metal feel much easier.
Clamp thin sheet and plate for cleaner holes
Unclamped metal vibrates, shifts, and throws the hole off center. Flat plate drills best when it is fully supported on the table. Thin sheet often benefits from backing support underneath so it flexes less and tears less at exit. Angle sections need support so they do not rock, and tubing needs restraint so it cannot roll. People who drill holes in metal consistently treat clamping as part of the cut, not just setup.
- Skipping the mark and punch on a smooth surface
- Eyeballing edge distance instead of measuring from the center
- Clamping first and forgetting to recheck alignment
- Leaving thin sheet unsupported near the hole location
- Trying to drill hole in metal while holding the part by hand
A centered start solves the alignment problem. What happens next depends on speed, pressure, chips, and heat.
Step 4: Set Drill Speed for Steel and Control Heat
A centered mark gets the bit started, but clean metal drilling depends on what happens once the edges begin to cut. Speed, feed pressure, chip shape, and lubrication all affect each other. When those four are balanced, the bit makes chips and stays cooler. When they are not, it rubs, squeals, and dulls fast.
Control drill speed to reduce heat
Fast drilling is not always better drilling. Harder metals usually need lower surface speed so the cutting edge can bite instead of skidding across the surface. Softer metals can run faster, but they still overheat if chips pack in the flutes. The Norseman speed table shows why: for HSS drills, aluminum is listed at 200 to 300 SFM, mild steel at 80 to 110, stainless at 30 to 50, tool steel at 50 to 60, and harder alloy steel around 300 to 400 Brinell at 20 to 30. Exact RPM changes with bit diameter, so a larger bit always needs less spindle speed. If drill speed for steel feels hard to judge in a hand drill, start on the slow side and watch the chips before increasing speed.
| Metal type | Relative speed guidance | Feed approach | Lubrication notes |
|---|---|---|---|
| Aluminum | High, about 200-300 SFM with HSS | Moderate feed, keep chips moving | Lubrication can reduce friction; clear flutes often |
| Mild steel | Medium, about 80-110 SFM | Steady feed to keep making chips | Cutting oil helps control heat and friction |
| Stainless steel | Low, about 30-50 SFM | Firm feed with a sharp bit to avoid rubbing | Lubrication matters more because heat builds quickly |
| Tool steel | Low, about 50-60 SFM | Controlled, firmer feed | Use lubricant and watch heat closely |
| Alloy steel, 300-400 Brinell | Very low, about 20-30 SFM | Slow, deliberate feed with no rubbing | Extra lubrication and heat control are important |
Apply steady pressure without forcing the cut
Pressure has one job: keep the lips cutting. Too little feed makes the bit rub, polish the surface, and create heat instead of chips. Too much can stall the tool or make it grab. That balance matters even more in drilling steel, where a rubbing bit loses its edge quickly. One of the most useful drilling steel tips is simple: listen to the tool and inspect what comes out of the hole. MSC chip control notes that chip shape and machine sound are strong clues. In practical steel drilling, curled chips mean the bit is cutting. Squealing, smoke, or blue color mean heat is winning.
Use cutting fluid by metal type and drilling depth
Kennametal's coolant guide reduces fluid to two main jobs: removing heat and providing lubrication. That becomes more important as the material gets tougher and the hole gets deeper, because chips stay trapped longer and friction rises. For open, shallow holes, a few drops of cutting oil at the point may be enough. In deeper work, reapply fluid and keep clearing chips. Norseman also notes that feed and speed may need to be reduced by as much as 45 to 50 percent when drilling deeper than four drill diameters. Get those settings right, and the actual drilling motion becomes far easier to control, especially when it is time to seat the bit, add a pilot hole if needed, and break through without a grab.
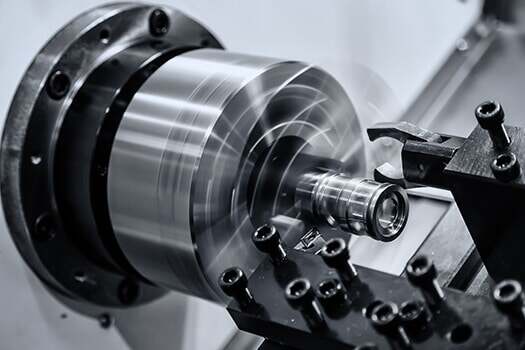
Step 5: How to Drill Through Metal Cleanly
The mark is set, the bit is sharp, and the speed is under control. What decides whether you drill through metal cleanly or burn up an edge is the motion itself. If you want a practical answer to how to drill through metal, follow the same sequence every time instead of forcing the tool and hoping the bit sorts it out.
Start with a pilot hole for better accuracy
A pilot hole helps the larger bit track straight and removes some material before the full-size cutter gets to work. That matters most when accuracy is important, the final hole is larger, or you are using a handheld drill. This pilot hole guidance notes that pilot holes become especially useful with a hand drill around 3/8 inch and larger, while smaller holes can often start directly with a sharp bit. For how to drill a hole in metal cleanly, think of the pilot as a guide, not a rule for every single hole.
- Clamp the work and hold the drill so the bit is square to the surface.
- Start at low speed and let the tip seat in the punch mark.
- Drill a small pilot hole when the final size is larger, the material is thick, or the setup is handheld.
- Switch to the final bit and raise speed only enough to keep making chips.
- Use steady pressure so the lips cut. Do not shove the tool or let it skate.
- In thicker stock, back the bit out regularly to clear chips and add more cutting fluid. That pecking motion helps manage heat.
- With softer metals that make long swarf, pause and clear the flutes regularly. drilling technique notes suggest breaking and clearing swarf every 10 to 15 seconds in materials like aluminum and brass.
- With a hand drill, stop after the first shallow bite and check from the side that the bit is still perpendicular.
That sequence is the real core of drilling a hole in metal with control.
Drill through metal without overheating the bit
Good drilling into metal sounds controlled, not frantic. A sharp bit produces visible chips. An overheated or dull one starts rubbing, squealing, and polishing the surface instead. If you are learning how to drill into metal without ruining bits, watch the flutes as closely as you watch the trigger. Chips mean the cutter is working. Dust-like particles, smoke, or a blue tip mean heat is taking over. Keep the cut going with enough feed to make chips, and keep clearing the hole so those chips do not pack in and trap more heat.
Chips mean the bit is cutting. Squealing and discoloration mean heat is winning.
Break through cleanly and avoid grabbing
The exit side is where many holes go wrong. As the point nears the far side, ease off the feed and let the bit finish the cut instead of punching through. That simple change reduces the sudden grab that can twist a hand drill or tear thin material. It also matters when you drill a hole in metal near an edge, where breakout is easier to distort. For cleaner results, especially in sheet or light plate, support the back side with wood, following this backup surface advice. That is one of the easiest ways to drill through metal with less burr and less drama, and it is a big part of how to drill a hole through metal that still looks usable when the bit exits. The same sequence still applies across materials, but thin sheet, stainless, galvanized stock, and harder steel each demand a slightly different touch.
Step 6: Adjust for Sheet Metal, Stainless, and Hard Steel
The same drilling sequence still works, but the feel changes fast once the material changes. A method that cuts nicely in aluminum can tear thin sheet, glaze stainless, or barely scratch a hardened part. Material type and workpiece form change how the bit starts, how chips clear, and how the hole breaks through.
Adjust technique for thin sheet metal
Thin stock usually fails from flex and grab, not from extreme hardness. For drilling through sheet metal, back the work with wood and clamp the whole stack so the sheet stays flat. Family Handyman recommends this wood sandwich approach because it helps prevent wandering and tearing. A step bit often leaves a cleaner, rounder hole than a standard twist bit in light-gauge material. Keep the feed controlled near the exit. Sheet metal can snatch the bit right at breakthrough if you push as hard as you would on thicker plate.
Drill stainless steel with low speed and firm feed
If you want to know how to drill through stainless steel, the big mistake is letting the bit rub. Stainless guidance explains that heat and rubbing can work harden the surface, which makes the next few seconds much harder than the first few. The best way to drill stainless is slow speed, a sharp bit, steady oil, and firm feed so the lips keep making chips instead of polishing the hole. A sharp HSS bit can work on common grades, but cobalt gives you more heat resistance and more margin when the material fights back. If the bit squeals and stops making chips, stop and correct the setup before the surface hardens further.
Approach hardened or galvanized steel carefully
Drilling through hardened steel takes more patience and a better match between bit and material. If you are learning how to drill hardened steel, start with the slowest useful speed and a rigid setup, then watch for real cutting. The hardened steel case shows how quickly ordinary bits can fail once the surface is truly hard. Do not answer a stalled cut with brute force. If the edge is no longer biting, forcing it usually adds heat and wear instead of progress. For drilling through galvanized steel, treat the base thickness like steel, clear chips often, and expect the hole edge to need a little more cleanup because the coating can burr or lift around the opening.
Handle aluminum and softer metals without burr buildup
Aluminum feels easy, but it can smear and pack the flutes if chips are not cleared. Family Handyman notes that lubrication is not usually necessary for easier-drilling metals like aluminum, brass, and cast iron, but chip control still matters. Use a sharp bit, moderate speed, and back the bit out often enough to keep it from loading up. That reduces burr buildup and leaves a cleaner edge. If you are learning how to drill steel and aluminum in the same project, do not carry the same feel from one to the other. Steel wants more heat control. Softer metals want cleaner chip evacuation.
| Material or form | Common failure mode | Best adjustment | Finishing note |
|---|---|---|---|
| Thin sheet metal | Flex, chatter, torn exit | Use wood backing, clamp tightly, consider a step bit | Deburr both sides lightly |
| Stainless steel | Work hardening from rubbing | Low speed, firm feed, sharp bit, cutting oil | Stop if squealing replaces chips |
| Hardened steel | No progress, rapid bit wear | Very controlled speed, rigid setup, tough bit, patience | Do not force a dull edge |
| Galvanized steel | Packed chips, rough coated edge | Drill for the steel underneath and clear flutes often | Inspect for burrs and lifted coating |
| Aluminum and softer metals | Gummy chips, large burrs | Sharp bit, moderate speed, frequent chip clearing | Clean burrs before they fold over |
Getting through the material is only part of the job. The hole still needs to be made safe, sized properly, and checked for quality once the bit is out.
Step 7: Deburr, Enlarge, and Inspect Metal Holes
A hole can be through and still not be finished. In real shop work, drilling holes in metal often leaves a sharp lip on the entry side, the exit side, or both. That leftover edge is a burr. Deburring removes those raised, rough edges so the hole is safer to handle and more useful in assembly. If you searched how to cut a hole in metal, this is the part that turns a rough opening into a clean result.
Deburr both sides for a safer cleaner hole
Start by cleaning both faces of the hole before checking fit. Manual methods are often enough for one-off work. CNC Cookbook's overview of manual deburring includes common shop approaches such as files, scrapers, stones, and zero-flute hole deburring tools. Use a light touch. The goal is to break the sharp edge, not remove extra material. If you drill a hole in steel for a bolt, pin, or rivet, a stubborn burr can make a correctly sized hole feel undersize.
- Hand deburring tool or scraper for quick edge cleanup
- Fine file or stone for light burrs on flat surfaces
- Zero-flute hole deburrer for the mouth of the hole
- Abrasive pad for final surface cleanup and light discoloration
Enlarge a metal hole without chatter
If the hole is slightly small, do not jump straight to the final size. For anyone asking how to make a hole bigger in metal, the cleaner approach is to enlarge it gradually. Reaming guidance makes two points that matter here: a reamer enlarges an existing hole, not a solid surface, and size changes are best done in small 2 to 3 mm steps to reduce breakage. Keep the work clamped, start the tool spinning before contact, use steady feed, and avoid tilting. If you need to drill large hole sizes in thin material, a step bit can help you work up through the diameter more smoothly. When fit matters, finish with a reamer rather than relying on a rough drill pass alone.
Inspect hole size roundness and surface finish
- Check both faces for burrs, torn metal, or coating lift.
- Test the fit with the actual fastener, insert, or pin.
- Look for roundness and alignment, not diameter alone.
- Note chatter marks, heavy discoloration, or smeared edges.
- Fix the cause before repeating the same cut on the next part.
For readers asking what size drill bit for #10 screw metal, a #10 screw guide lists 3/16 inch as a common clearance-hole size. Use that as a starting reference, then confirm the actual fastener fit you need. Small clues at this stage, like ovality, burn color, or torn breakout, usually point straight to the process mistake upstream.
Step 8: Fix Drill Problems and Decide on Machining
A rough edge, blue heat mark, or stalled bit usually points to one mistake, not a mystery. That matters because the best way to drill through metal is not adding more force. It is reading the symptom and correcting the cause. If you still wonder how do you drill through metal without wasting bits, treat sound, chips, and hole quality as feedback. Many practical tips for drilling metal come from that habit.
Fix common drilling mistakes before you ruin the workpiece
Most failures trace back to the same few issues: too much speed, too little feed, poor clamping, a dull edge, or chips trapped in the flutes. JINOO's drilling troubleshooting guide ties common problems like burrs, wandering, overheating, and work hardening to those root causes. Stop early when the tool squeals, turns blue, or stops making chips. If you are still learning how to drill into steel, that pause matters even more, because rubbing can harden the surface and make the next attempt worse.
Use a symptom to solution checklist for stalled progress
Use this table before leaning harder on the drill. It also answers a common question: can you drill through metal with a basic drill and bit set. In many cases, yes. Control is what decides the result.
| Symptom | Likely cause | Corrective action |
|---|---|---|
| Bit overheats, squeals, or turns blue | Speed too high, dull bit, poor lubrication, rubbing instead of cutting | Lower speed, replace or sharpen the bit, add cutting fluid when appropriate, and use steady feed so the bit makes chips |
| Bit spins but makes little progress | Wrong bit for the material, worn cutting edge, feed too light, work-hardened surface | Stop, switch to a sharper or tougher bit, reduce speed, and do not force a stalled cut |
| Hole grabs at breakthrough | Too much pressure near exit, unsupported back side, dull bit | Ease off as the point breaks through, back the work with scrap material, and keep the part clamped |
| Burrs tear out around the exit | Dull lips, high exit speed, weak support under the part | Use a sharp bit, slow down at breakthrough, support the underside, then deburr both sides |
| Hole wanders off center | No punch mark, uneven lip engagement, poor alignment, unstable workholding | Repunch or center-drill the location, re-clamp the work, and create a flat starting spot on angled surfaces |
| Chips pack or weld to the flutes | Poor chip evacuation, too much speed, not enough clearing in gummy metals | Peck drill, clear chips often, reduce speed, and use suitable lubricant where needed |
Know when precision holes require production machining
Sometimes the correct fix is not better hand technique. TiRapid notes that drilling creates the initial hole quickly, while boring is used afterward to improve size control, roundness, alignment, and surface finish. So, can i drill through metal for a bracket, guard, or clearance hole. Usually yes. But if the hole is a bearing seat, alignment feature, or repeated production part, drilling alone is often not enough. That is the real answer to can you drill through metal versus machine it: you can create the hole, but you may not be able to hold the geometry.
- You need multiple identical parts with repeatable hole location
- Roundness, concentricity, or surface finish affects fit or sealing
- The part is safety-critical or automotive and needs documented quality control
- Manual drilling variability is causing scrap or rework
- You need a path from prototype to production, not just one successful hole
For that kind of work, a machining partner is often the smarter option. Automotive manufacturers often need precision from a single prototype to full-scale production, and Shaoyi Metal Technology presents that route with IATF 16949 quality systems, SPC-based process control, and support from rapid prototyping through automated mass production. The company states that it is trusted by more than 30 global automotive brands. At that point, hand-drill tips for drilling give way to controlled manufacturing, which is often the right move when how to drill into steel turns into a repeatability problem instead of a one-off task.
FAQs About How to Drill Metal
1. Can you drill into metal with a cordless drill?
Yes, a cordless drill can handle many metal-drilling jobs, especially single holes, repair work, and parts that cannot be moved to a drill press. The key is using a sharp bit, lower speed, steady pressure, and solid clamping so the workpiece cannot spin. A drill press is still the better choice when you need straighter holes, cleaner repeatability, or multiple matching parts.
2. What is the best drill bit for metal?
The best bit depends on the material and the hole you need to make. Standard twist bits work for many mild steel and aluminum jobs, split-point bits help reduce walking, cobalt-style bits are better for stainless and tougher steels, step bits are useful for thin sheet, and hole saws are better for larger openings. If the bit starts rubbing, squealing, or making heat instead of chips, it is time to sharpen or replace it.
3. Do you need a pilot hole when drilling metal?
A pilot hole is helpful when the final hole is larger, the metal is thick, or you are using a hand drill and want better control. It gives the larger bit a more stable path and can improve accuracy at the start. You can often skip it in thin sheet when using the right bit geometry, such as a sharp split-point bit or a step bit, but a clean center mark still matters.
4. Should you use cutting oil when drilling steel or stainless steel?
In most cases, yes. Cutting oil helps reduce heat, lowers friction, and makes it easier for the bit to keep cutting instead of rubbing, which is especially important in steel and stainless steel. For shallow holes in softer metals, lubrication may be less critical, but chip clearing still matters because packed flutes create heat fast.
5. When should you stop hand drilling and use machining instead?
Hand drilling is fine for many brackets, clearance holes, and one-off fabrication jobs, but it reaches its limit when you need tight tolerances, highly consistent hole location, better roundness, or repeatable production quality. That is even more important for automotive and other safety-critical parts. If you need a path from prototype to volume production, a machining partner such as Shaoyi Metal Technology can be a better fit, with IATF 16949-certified processes, SPC-based control, and support from custom prototyping through automated mass production.