 Small batches, high standards. Our rapid prototyping service makes validation faster and easier —

US Automotive Parts Sourcing Checklist: Avoid Costly Mistakes
Navigating the US Automotive Parts Landscape
Ever tried to order a replacement part for your vehicle and ended up overwhelmed by choices, cryptic codes, or stories of parts that just didn’t fit? You’re not alone. The US automotive parts market is massive and complex, with everything from original equipment (OEM) to aftermarket, remanufactured, and even recycled components in play. Whether you’re a first-time buyer or a seasoned DIYer, understanding how the supply chain works—and where most sourcing mistakes happen—can save you time, money, and plenty of frustration.
Understanding the US Automotive Parts Supply Chain
The journey of us auto parts starts long before you click “add to cart.” The supply chain spans multiple tiers:
- OEMs (Original Equipment Manufacturers): These are the brands that design and build vehicles—think Ford, GMC, Subaru. Their parts are engineered for exact fit and performance.
- Tier 1 Suppliers: Companies that provide major systems—like powertrain (engines and transmissions), drivetrain (axles, differentials), and safety features—directly to OEMs.
- Tier 2 and 3 Suppliers: These supply smaller components or raw materials (wiring, sensors, plastics, metals) to Tier 1, often specializing in items like exhaust parts or electrical connectors.
Today, even vehicles assembled in the US rely on a complex global supply chain, with significant portions of their components sourced from countries like Mexico, Japan, Korea, and China, in addition to domestic and Canadian suppliers. This global web means that fitment, quality, and sourcing reliability all depend on understanding where your part sits in the chain and how it’s specified (Boise State University).
OEM Versus Aftermarket Explained Simply
When shopping for replacement parts, you’ll notice three main types:
- OEM: Parts made by the original manufacturer, guaranteed to match what came on your car when new.
- Aftermarket: Parts made by third-party companies—sometimes at lower cost, sometimes with improved features, but quality can vary.
- Remanufactured or Recycled: Used parts rebuilt to meet certain standards, or salvaged components from dismantled vehicles.
OEM parts offer peace of mind on fit and warranty, while aftermarket options can provide savings and broader availability. Remanufactured parts help with sustainability but require careful vetting for quality.
Where Most Parts Searches Go Wrong
It’s easy to get tripped up when searching for us auto parts online. Here are the core categories buyers search for—and the common mistakes to avoid:
- Powertrain: Engines, transmissions, and related components
- Chassis: Suspension, steering, brakes
- Electrical: Sensors, alternators, wiring
- Filtration: Air, oil, cabin filters
- Exhaust: Mufflers, catalytic converters, pipes
- Interior Accessories: Seats, trim, switches
Common missteps include:
- Skipping VIN (Vehicle Identification Number) verification
- Ignoring interchange numbers or part supersessions
- Mixing incompatible materials (e.g., aluminum vs. steel components)
- Chasing the lowest price without checking fitment or warranty
Always verify fitment before price: “If it doesn’t fit, it doesn’t matter what you paid.”
First-Time Buyer’s Decision Path
- Identify your vehicle’s symptom or needed repair
- Confirm the correct part family (e.g., powertrain, exhaust, electrical)
- Verify fitment using your VIN and trim level
- Compare OEM and aftermarket options for quality, price, and availability
- Check warranty and return policies
- Choose a seller with clear delivery timelines and responsive support
| Value Anchor | Why It Matters | How to Evaluate |
|---|---|---|
| Fitment Accuracy | Ensures the part works with your exact make, model, and trim | Check VIN, part numbers, and seller fitment tools |
| Durability | Impacts how long the part lasts and how frequently you’ll need to replace it | Look for materials, reviews, and warranty length |
| Total Cost of Ownership | Considers not just purchase price, but installation, downtime, and replacement cycles | Balance upfront cost with expected lifespan and support |
By following these steps and understanding the ecosystem, you’ll be equipped to make smarter, more confident choices as you source us automotive parts. Ready to dig deeper? Move on to the next section for a glossary that will help you decode any parts listing with ease.

A Practical Glossary for Parts Listings
Ever stared at a parts listing packed with acronyms, codes, or unfamiliar jargon and wondered, “What does any of this mean?” If so, you’re not alone. Whether you’re hunting for a wiring harness, a mass air flow sensor, or a set of electrical connectors, understanding what you see on product pages is the first step to buying the right us automotive parts. Let’s break down the most common terms and catalog fields so you can shop smarter—and avoid costly mistakes.
Essential Terms You Will See on Every Parts Page
- OE (Original Equipment): Parts supplied to vehicle manufacturers for new vehicle production. These are the exact components your car had when it left the factory (Auto Care Glossary).
- OEM (Original Equipment Manufacturer): Companies that produce OE parts, often selling the same parts under their own brand.
- OES (Original Equipment Supplier): A supplier that makes parts for the vehicle manufacturer but may also sell to the aftermarket.
- Aftermarket: Parts made by third-party manufacturers, not tied to the original vehicle brand. Quality can range from budget to premium.
- Reman (Remanufactured): Used parts rebuilt to meet certain standards. Good for sustainability, but always check the warranty.
- Refurbished: Used parts restored to working condition, though not always to the same standard as remanufactured components.
- New Old Stock (NOS): Genuine parts made years ago but never used—sometimes a great find for older vehicles.
- Core Charge: An extra fee refunded when you return your old part (like alternators), encouraging recycling.
- Interchange: Indicates that a part fits multiple vehicles—critical for cross-shopping models or brands.
- Supersession: When a part number is replaced by a newer one, often due to updates or improvements.
- Part Family: A group of related components, such as all variations of a wire harness or sensor for a given model.
Catalog Fields You Should Always Check
- Year/Make/Model/Engine: The basics for matching parts to vehicles.
- VIN 8th Digit: Key for engine and trim details.
- Production Date: Some parts change mid-year; always confirm.
- Emissions Family: Especially important for exhaust and sensor components.
- Body Style: Sedan, coupe, wagon, etc.—can affect fitment.
- Drivetrain: Front-wheel, rear-wheel, or all-wheel drive; impacts components like axles and wiring harnesses.
Fitment Checklist: Verify part number, cross-reference interchange, confirm all connectors/ports/bolt patterns, and read notes for exceptions (like tow package or performance trim).
Decoding Fitment, Images, and Interchange Numbers
Part numbers are more than just random strings—they often encode the manufacturer, part category (like engine or brake), and even specific features. For example, a part ending in “EL” might be for electrical components or a wire harness. Always check for cross-references: if a listing includes alternate part numbers, these could be compatible substitutes, but you should still verify with your VIN or trim.
Images and diagrams aren’t just for show. They help you match mounting points, connector shapes, or the number of pins in a wire connector. If you’re unsure, don’t hesitate to contact seller support for dimensional drawings or pin-out diagrams—especially for critical parts like wiring harnesses or mass air flow sensors.
Warranty, Core Charges, and What Part Families Really Mean
Core charges are common for remanufactured parts. Make sure you understand the return process to get your deposit back. Also, remember that a shared part family doesn’t guarantee fit—interchange numbers and exact specs are what matter. Two wiring harnesses for the same model year might have different connectors or pin-outs, so always double-check before buying.
Armed with this glossary, you’ll be able to decode any parts listing with confidence. Next, we’ll help you use this knowledge to diagnose issues before you buy—cutting down on returns and wasted time.
Diagnostic Flowcharts You Can Follow Before Buying
Ever replaced a part only to find your car still acts up? With the complexity of modern vehicles, it’s easy to fall into the trap of guessing what’s wrong. That’s why a step-by-step diagnostic approach can save you time, money, and frustration—especially when sourcing us automotive parts online. Below, you’ll find practical, text-based decision trees to help you isolate common issues before making any purchases.
Powertrain Troubleshooting Made Simple
When your engine runs rough, stalls, or the check engine light comes on, start with a plan instead of a hunch. Here’s how:
- Scan for Codes: Use an OBD-II scanner to check for stored codes. If you see a p0300 code (random/multiple misfire), don’t jump to conclusions.
- Check Ignition and Spark: Pull a spark plug wire, use a screwdriver to check for a bright spark (as described in this guide). Weak or no spark? Inspect ignition coil, wires, and distributor (if equipped).
- Inspect Fuel Delivery: If the engine cranks but never tries to start, it may be a fuel issue. Check for fuel at the last filter before the injector or carburetor. No fuel? Consider pump or filter issues.
- Look for Vacuum Leaks: Spray starter fluid around vacuum hoses and intake—if idle surges, you’ve found a leak.
- Test Sensors: Faulty mass air flow (MAF) or oxygen sensor readings can trigger misfires or poor running. Use your scanner to check live data or swap with a known-good sensor if possible.
Catalyst Efficiency and the P0420 Code
A p0420 code signals “Catalyst System Efficiency Below Threshold”—usually related to your catalytic converter or related sensors. Before you order expensive parts, follow this sequence:
- Check for Exhaust Leaks: Listen for hissing or tapping near the manifold and converter—leaks can trigger false readings.
- Inspect Upstream/Downstream Sensors: Compare readings from oxygen sensors before and after the converter. If both are similar, the converter may be at fault, but a bad sensor can mimic this issue (CarTalk).
- Rule Out Misfires: Persistent misfires (like p0300) can damage converters. Address these first.
- Consider Age and Mileage: Sometimes, a failing converter is the real issue, but don’t skip the basics—many drivers replace converters when a $200 oxygen sensor would have fixed it.
Transmission Concerns: How to Check Transmission Fluid
If you notice hard shifts or slipping gears, don’t rush to buy transmission parts. Here’s how to check transmission fluid safely:
- Park on level ground, set the parking brake, and let the engine idle in “Park.”
- With the engine running and fully warmed up, pull the transmission dipstick.
- Wipe, reinsert, and pull again to check level. Fluid should be at the “Full” mark.
- Inspect color and smell: healthy fluid is translucent red and does not smell burnt.
- Low fluid or a burnt odor? Top up with the correct type, but if the fluid is dark/burnt, a service may be needed.
- Note: Some modern vehicles have sealed transmissions—these require professional service.
Always check other fluids too, especially coolant and brake fluid, as improper levels can cause unrelated issues or mask transmission problems.
TPMS and Electrical Fault Isolation
Is your tire pressure warning light on, or do you suspect an electrical glitch? Here’s a quick path to avoid unnecessary parts swaps:
- Verify tire pressures with a gauge—don’t trust the dash alone.
- If pressures are correct, check the tpms sensor batteries (often built-in and non-replaceable).
- Follow the vehicle’s relearn procedure if you’ve rotated tires or replaced sensors.
- If the warning persists, check for module communication errors with your OBD-II scanner.
For electrical issues elsewhere, always check fuses and inspect for loose or corroded connections before replacing modules or sensors.
- Red Flags for Misdiagnosis:
- Multiple unrelated codes appear at once
- Overheating with low coolant and visible leaks
- Persistent harsh shifts after improper fluid change
- Warning lights that return immediately after clearing
Whenever possible, document your findings and bring them to a professional if you’re stuck. A careful, methodical approach helps ensure you buy the right us automotive parts the first time. Ready to decide between OEM, aftermarket, or performance upgrades? The next section will help you build a smart sourcing framework based on your needs.

A Smart Framework for Choosing OEM or Aftermarket Parts
Ever wonder if you should pay extra for an OEM part or if a reputable aftermarket brand will do the trick? Maybe you’re shopping for honda parts or searching for toyota parts online and feel lost in the sea of choices. Let’s break down a practical decision-making framework that matches your vehicle, your needs, and your budget—so you can buy with confidence, whether you’re shopping at a dealership, browsing ebay auto parts, or comparing deals on amazon auto parts.
Daily Driver Versus Performance Builds: What’s Your Profile?
- Commuter/Daily Driver: Prioritize reliability, warranty, and ease of installation. You want parts that keep your car running smoothly with minimal downtime.
- High-Mileage Fleet: Focus on longevity, cost-effectiveness, and availability. Consistent performance and bulk sourcing matter most.
- Enthusiast/Performance: Seek enhanced performance, specialized features, and brand reputation. Willing to pay more for upgrades and proven results.
- Budget/Temporary Fix: Need the lowest upfront cost, but accept trade-offs in warranty and lifespan. Best for short-term solutions or older vehicles.
When OEM Is Worth the Premium
For many shoppers, OEM (Original Equipment Manufacturer) parts offer peace of mind—especially for complex or safety-critical components. If you’re replacing brake hydraulics, steering, or airbags, OEM or top-tier aftermarket brands are typically the safest bet. OEM parts are engineered for exact fit and performance, often come with a standard one-year warranty, and are less likely to present installation surprises.
That said, OEM parts usually cost more and may require ordering from a dealership or authorized retailer, which can mean longer wait times. This is especially relevant for newer vehicles, leased cars, or when maintaining warranty coverage.
Selecting Trusted Aftermarket Brands
Aftermarket parts come in a wide range of quality and price. Some brands reverse-engineer weaknesses out of original designs, offering better performance or durability—especially in categories like brake pads, filters, and exhaust components. For routine maintenance or older vehicles, reputable aftermarket options can save you 20–50% compared to OEM, with similar or even improved reliability. The key is to stick with brands recommended by trusted mechanics or with strong customer reviews (Edmunds).
| Category | OEM | Tier-1 Aftermarket | Budget Aftermarket |
|---|---|---|---|
| Pros | Guaranteed fit, consistent quality, factory warranty | Competitive pricing, wide selection, quality can match or exceed OEM | Lowest upfront cost, broad availability |
| Cons | Higher price, limited sellers, may require dealer install | Quality varies by brand, overwhelming selection | Shorter lifespan, inconsistent quality, limited/no warranty |
| Typical Warranty | 1 year (dealer-backed) | 6–24 months (brand-dependent) | None or 30–90 days |
| Availability | Dealerships, select online stores | Auto parts stores, amazon auto parts, online retailers | Online marketplaces, discount stores, amazon auto parts |
Marketplace Tips for Honda, Toyota, and BMW Parts
- Honda Parts & Toyota Parts Online: Use your VIN and check for fitment tools on the seller’s page. Many online retailers and amazon auto parts listings allow you to filter by year, model, and trim. Always double-check return policies and read recent reviews.
- BMW Parts: For European vehicles, aftermarket options can vary widely. Look for trusted brands and confirm compatibility with your specific engine and chassis code. When possible, seek out specialist retailers or forums for recommendations.
- eBay Auto Parts: eBay offers a huge range of new and used options, including hard-to-find nissan parts. Use seller ratings and the fitment guarantee when available. Always confirm return terms before purchase, especially for electrical components.
For safety-critical items, like brakes and steering, stick with OEM or top-tier aftermarket brands. For filters, wipers, and accessories, a reputable aftermarket part can be a smart, cost-effective choice. No matter where you shop, whether it’s a dealership, amazon auto parts, or ebay auto parts, always verify fitment and return policies before you buy.
With your sourcing strategy in place, let’s now explore how to weigh price against value for common replacement parts—so you’re not just saving money, but also maximizing long-term reliability.
Price Versus Value for Common Replacement Parts
Ever wondered if spending more on certain us automotive parts actually saves you money in the long run? Or if a budget part will do the job just as well? The answer isn’t always obvious—especially when you’re weighing options like brake pads and rotors, bilstein shocks, engine air filter, or even something as simple as wiper blades. Let’s break down the price-versus-value equation so you can make smarter choices for your vehicle and your wallet.
Balancing Cost, Durability, and Safety
Imagine you’re facing a worn brake system or a tired set of shocks. Do you go for the lowest upfront cost, or invest in parts with better longevity, performance, and warranty? Here’s how common replacement parts stack up side by side:
| Part Category | Service Interval | Signs of Wear | Install Difficulty | Warranty Norms | Material Quality |
|---|---|---|---|---|---|
| Brake Pads & Rotors | 30,000–70,000 miles (pads), 50,000–70,000 miles (rotors) | Squealing, grinding, vibration, longer stops | Moderate (requires jack, torque wrench) | 12–24 months (aftermarket), 12 months (OEM) | Ceramic = longer life, less dust; semi-metallic = lower cost, more noise |
| Shocks/Struts (e.g., Bilstein Shocks) | 50,000–100,000 miles (vehicle/use dependent) | Bouncing, nose dive, poor handling, leaks | Moderate to advanced (requires spring compression tools) | Limited lifetime (Bilstein), 12–24 months (aftermarket/OEM) | Monotube (Bilstein) = better control, longer life; twin-tube = lower cost |
| Engine Air Filter (e.g., K&N Air Filter) | 15,000–30,000 miles (paper); up to 100,000 miles (K&N with maintenance) | Reduced power, poor fuel economy, visible dirt | Easy (no tools or basic screwdriver) | 10–36 months (aftermarket/OEM), Million mile (K&N with proof of service) | Paper = low cost, disposable; K&N = reusable, high-flow, needs periodic cleaning |
| Wiper Blades | 6–12 months (climate dependent) | Streaking, chattering, missed spots | Easy (snap-in replacement) | 6–12 months (most brands) | Rubber = standard; silicone = longer life, higher cost |
When Paying More Actually Saves Money
- Brake Pads and Rotors: Investing in ceramic pads or premium rotors—such as those in powerstop brakes kits—can extend service intervals and reduce risk of collateral damage to other brake components. Waiting too long or buying the cheapest pads often leads to warped rotors and higher repair bills (Milex Complete Auto Care).
- Shocks/Struts: Upgrading to bilstein shocks provides firmer handling, better ride quality, and often outlasts standard OEM or entry-level aftermarket options. The initial cost is higher, but you’ll notice improved stability and fewer replacements over the life of your vehicle.
- Engine Air Filter: A k&n air filter may be more expensive upfront, but it’s reusable and can last the life of your vehicle with proper cleaning. You’ll also benefit from potential gains in horsepower and fuel efficiency over time (Kemso Racing).
- Wiper Blades: Premium silicone blades cost more but resist cracking and last longer, reducing the need for frequent replacements.
Benchmarking Wear Items: Material and Design Trade-Offs
- Ceramic vs Semi-Metallic Pads: Ceramic pads are quieter, last longer, and create less dust, but cost more. Semi-metallic pads are budget-friendly and offer strong initial bite but wear rotors faster and can be noisier.
- Coated vs Plain Rotors: Coated rotors resist rust and corrosion, ideal for wet climates. Plain rotors are less expensive but may not last as long in harsh conditions.
- OEM-Style vs Upgraded Dampers: Standard shocks offer comfort and basic control. Performance dampers (like bilstein shocks) provide firmer handling and better longevity, especially for trucks, SUVs, or spirited drivers.
- Cellulose vs Synthetic Filters: Paper (cellulose) filters are disposable and low-cost. Synthetic or reusable filters (like a k&n air filter) can be cleaned and reused, offering long-term savings and improved airflow.
When budgets are tight, prioritize parts that prevent collateral damage—like brake components—over cosmetic upgrades. Investing in quality now can save major repair costs down the road.
One last tip: Avoid mixing premium components with worn surrounding hardware. For example, pairing new powerstop brakes with old rotors or installing bilstein shocks without fresh mounts can mask the benefits and shorten the lifespan of your investment. Plan to bundle related parts—pads and rotors, shocks and mounts—to capture the full value of your upgrade.
Ready to see how manufacturing quality impacts reliability? In the next section, we’ll connect the dots between upstream production and the parts you buy—so you can spot true value, not just a low sticker price.
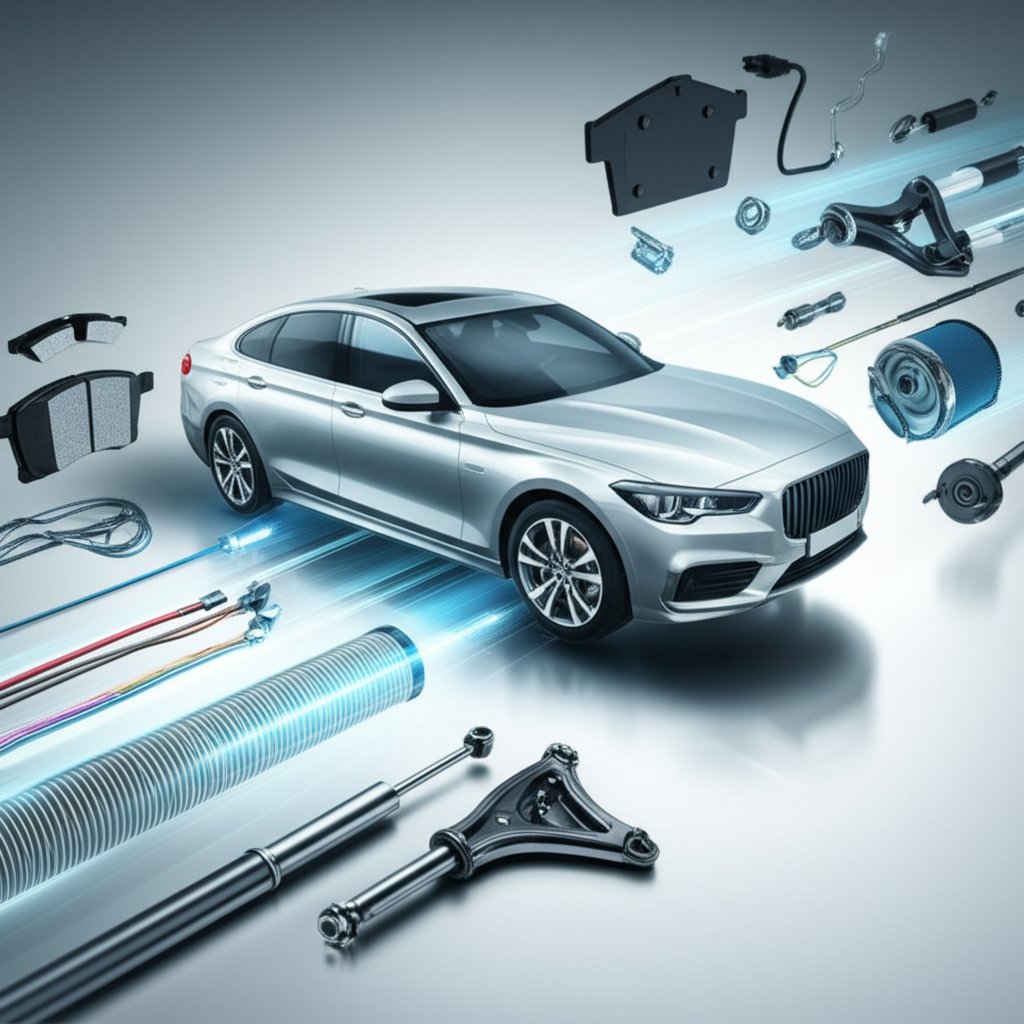
How Manufacturing Quality Shapes Part Reliability
Ever wonder why some replacement parts last for years while others fail prematurely—even when they look identical on the surface? The answer often lies upstream, in the manufacturing process. When you’re sourcing us automotive parts, the precision and consistency built into components like control arm brackets, exhaust hangers, and even the steering rack can mean the difference between a smooth ride and a costly comeback. Let’s explore how precision stamping and advanced manufacturing practices impact the reliability of the parts you buy.
Why Manufacturing Precision Matters
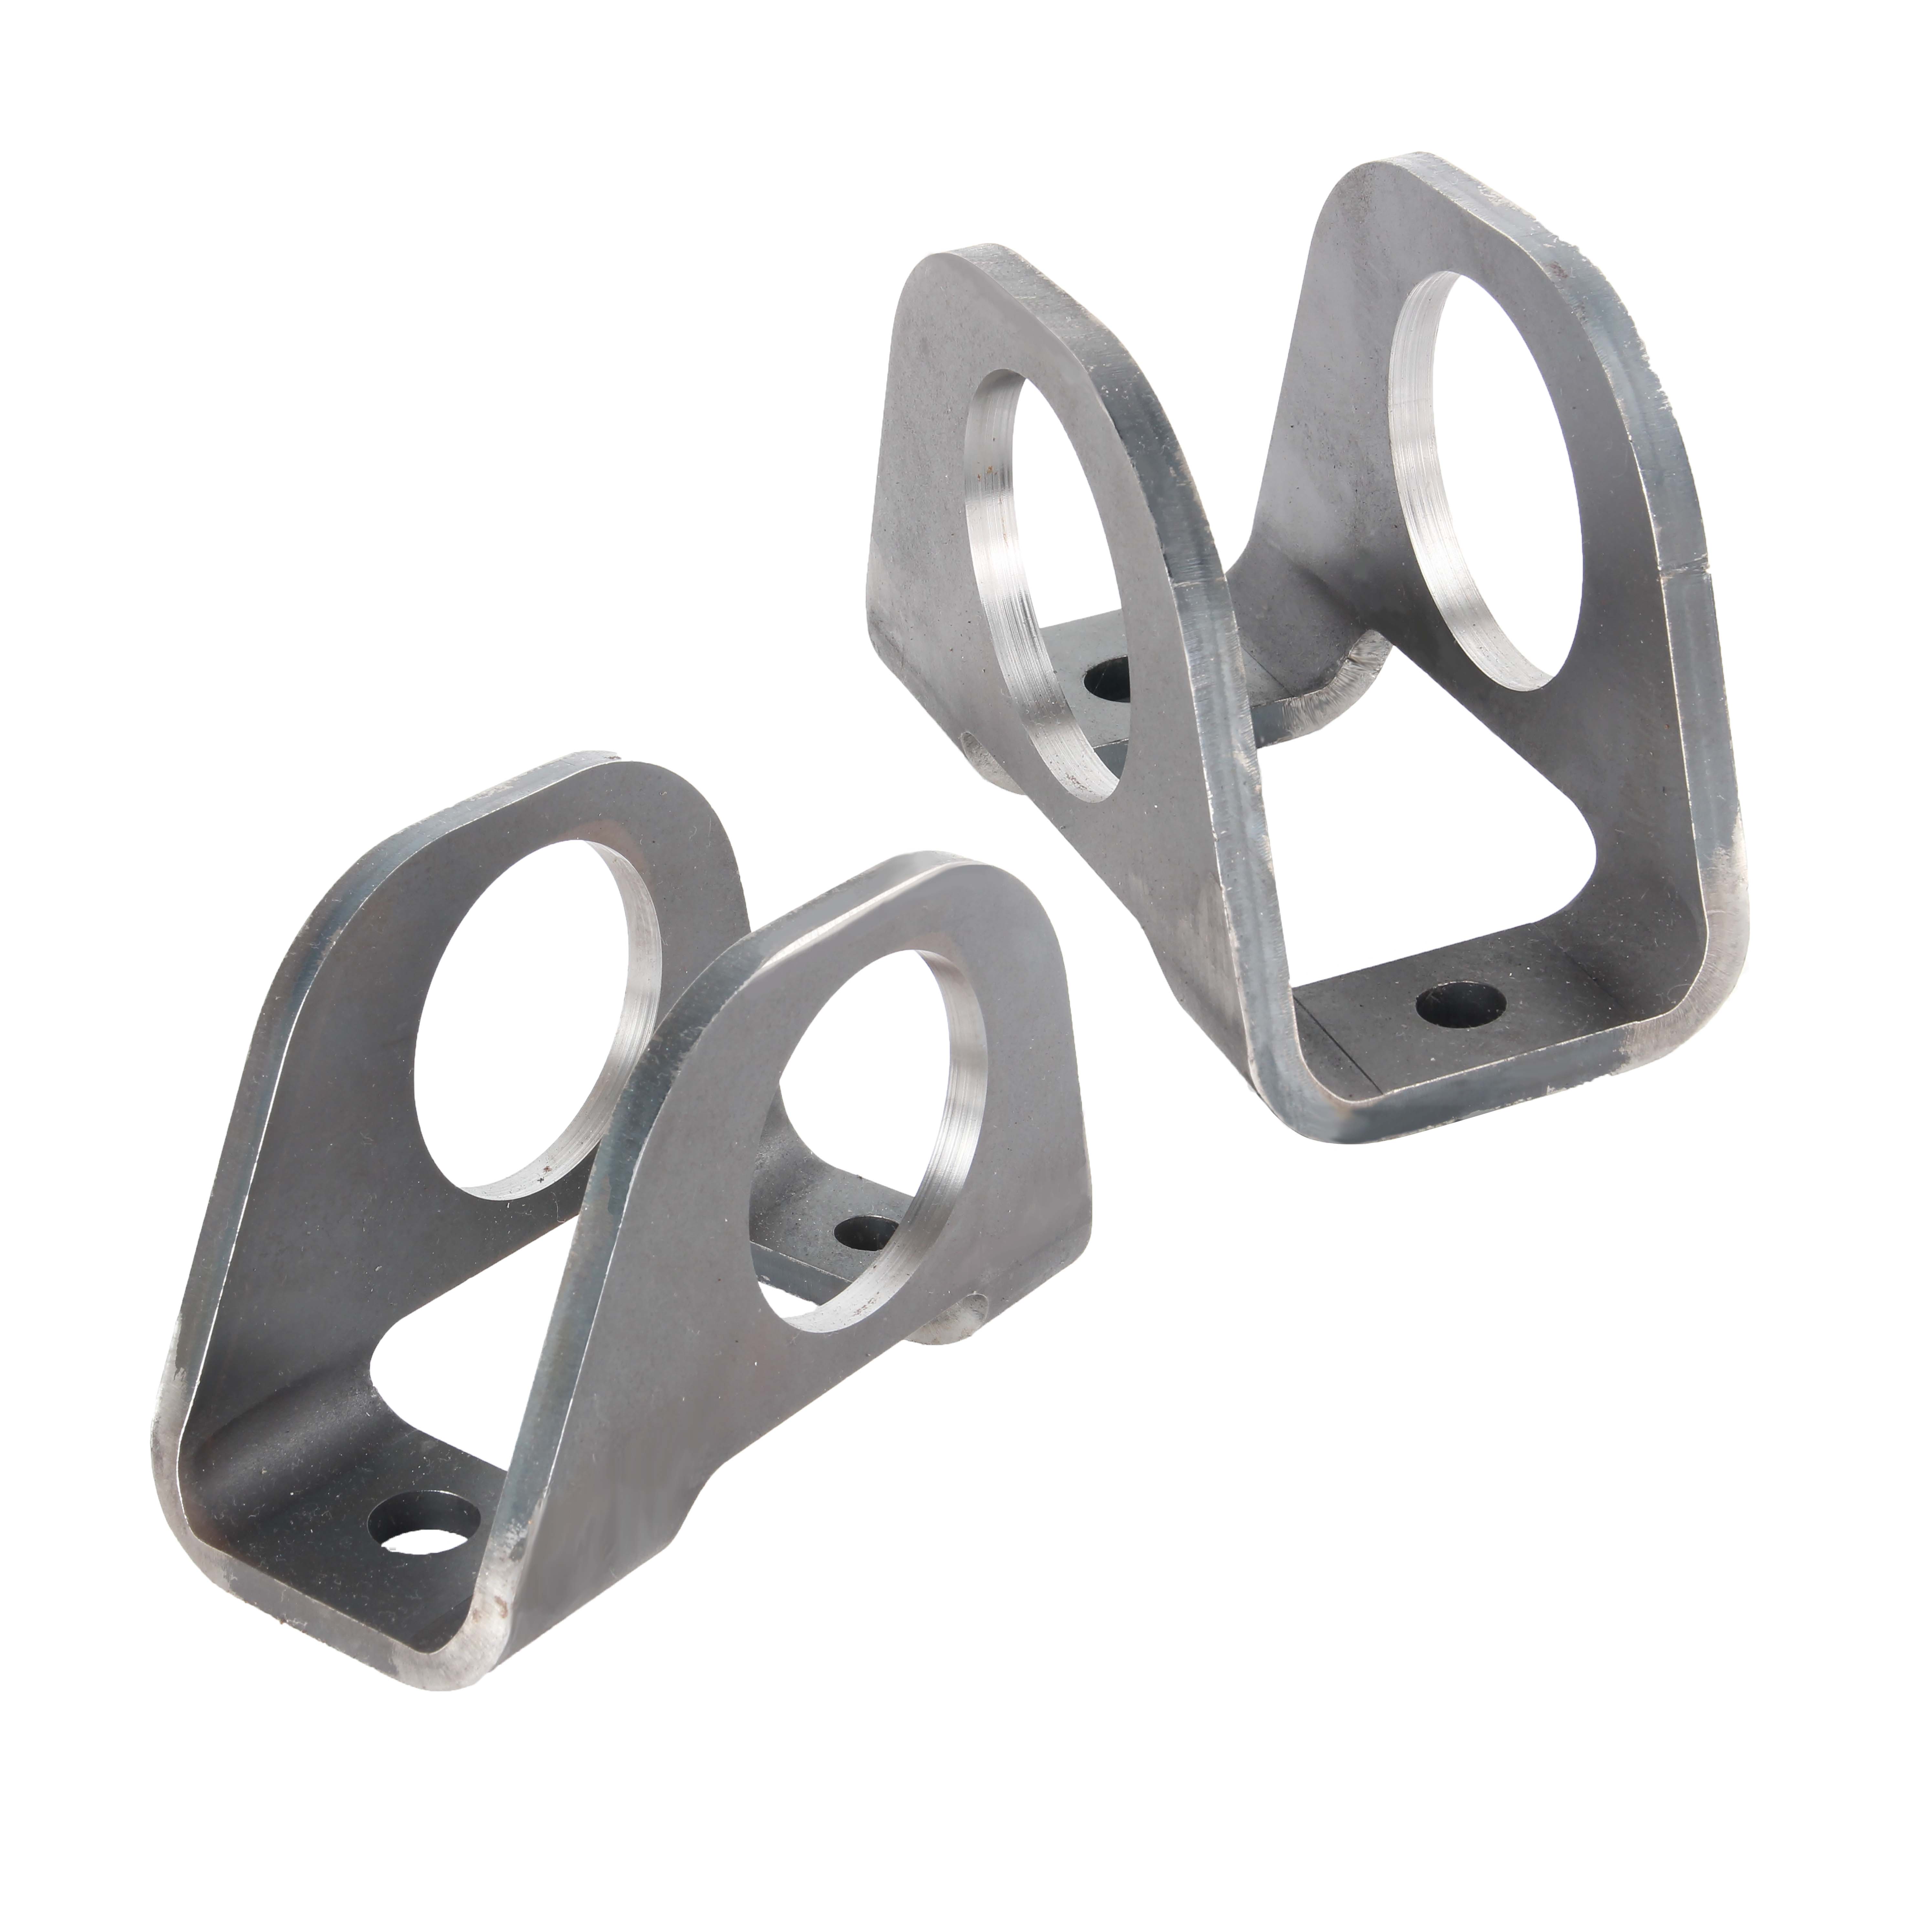
Imagine you’re installing a new control arm or a steering rack. If the mounting holes are just a fraction off, you’ll run into alignment issues, premature wear, or even safety hazards. Precision stamping—using high-tonnage presses and custom-designed dies—ensures that metal parts are formed to exact specifications, every single time. This process isn’t just about shaping metal; it’s about building in reliability, so that each bracket, tab, or hanger fits perfectly and withstands years of vibration and stress.
- Control arm brackets: Anchor the suspension system and absorb road impacts.
- Chassis reinforcements: Strengthen the vehicle’s structure for crash safety and rigidity.
- Exhaust system parts & hangers: Support pipes and mufflers, preventing rattles and leaks.
- Sensor mounting tabs: Secure sensors in precise locations for accurate readings.
- Interior and exterior trim retainers: Hold panels and clips in place, reducing noise and vibration.
Stamped Components That Affect Fit and Safety
Stamped metal parts are everywhere—from the bracket that holds your exhaust hanger in place to the shield protecting your engine bay. If these components are off by even a small margin, you might notice odd noises, vibrations, or misalignment. That’s especially true for safety-critical systems like the steering rack, where precision machining and stamped needle bearing housings ensure smooth, reliable operation. Quality stamping also extends the life of automotive exterior parts by reducing the risk of corrosion and fatigue cracks over time.
Consistent die design and computer-aided engineering (CAE) validation reduce the variation that leads to fitment issues, noise, and vibration—helping ensure every part performs as intended.
Shorter Development Cycles and Consistent Quality
Today’s leading manufacturers use CAD simulation and progressive or transfer die technology to speed up development while maintaining strict tolerances. This means you get parts that fit right the first time, whether it’s a chassis bracket or a complex steering rack housing. Companies that invest in robust die design and predictive maintenance for their stamping tools can deliver high-volume orders with minimal defects and lower costs.
For buyers with engineering needs or those sourcing at scale, it’s wise to review a supplier’s stamping capabilities, material selection, and quality control processes. Resources like Automotive Stamping Dies & Parts offer high-precision solutions by integrating advanced CAE analysis with lean manufacturing, helping reduce development cycles and ensure reliability for both simple and complex stamped components. While this is one strong option, always compare suppliers based on their ability to deliver consistency, durability, and responsive support.
| Stamped Component | Why Precision Matters | What to Check as a Buyer |
|---|---|---|
| Control Arm Bracket | Alignment and load-bearing for suspension | Dimensional accuracy, corrosion protection |
| Exhaust Hanger/Shield | Prevents rattles, supports exhaust system parts | Material thickness, rust resistance |
| Steering Rack Housing | Ensures smooth, safe steering response | Bearing fit, machining quality, sealing integrity |
| Sensor Mounting Tab | Accurate sensor placement for engine/ABS | Fitment, vibration isolation features |
| Automotive Exterior Parts Retainer | Reduces noise, keeps trim secure | Clip design, material flexibility |
In summary, the next time you’re comparing us automotive parts—from exhaust system parts to the steering rack—remember that true value starts with manufacturing quality. By understanding how precision stamping and robust quality control shape the components you buy, you’ll be better equipped to choose parts that deliver lasting performance. Up next, we’ll cover practical DIY planning tips to help you install those parts right the first time.
DIY Tools, Torque, and Install Planning
Ever started a repair, only to find you’re missing a tool or unsure about how tight to make a bolt? Sounds familiar? Many botched installs and repeat repairs come down to skipped steps, the wrong equipment, or overlooked safety basics. Let’s break down the essentials for safe, successful DIY work on us automotive parts—from your baseline toolkit to torque best practices and the critical mistakes to avoid.
Essential Tools for Safe Repairs
Imagine you’re tackling a brake job or replacing a suspension part. Having the right tools not only makes the job smoother but also keeps you safe and prevents damage to your vehicle. Here’s a practical toolkit every home mechanic should build, based on real-world recommendations (HiConsumption):
- Torque wrench: For tightening bolts to manufacturer specs—prevents stripped threads and broken fasteners.
- Impact wrench: Makes removing stubborn bolts effortless, but use carefully to avoid overtightening.
- Jack stands: Provide stable support when your vehicle is lifted. Never trust a floor jack or car jack alone to hold the load.
- Pliers: For gripping, cutting, and removing clips or hoses—needle-nose and slip-joint types are especially useful.
- Screwdriver set: Both flat and Phillips heads in various lengths for interior panels, clamps, and electrical work.
Other valuable additions include a breaker bar for extra leverage, safety glasses, nitrile gloves, and a work light for visibility.
Torque and Sequencing Basics
Ever wondered why mechanics stress about torque specs? Over-tightening can crack parts or strip threads, while under-tightening can cause leaks or failures. Here’s how to get it right:
- Always use a torque wrench for critical fasteners—especially on brakes, suspension, and engine components. Adjustable and click-style wrenches are user-friendly for most jobs.
- Follow proper tightening sequence. For wheels, cylinder heads, or anything with multiple bolts, tighten in a cross-pattern or manufacturer’s recommended order. This ensures even pressure and prevents warping.
- Check and re-torque if required after the first heat cycle—especially for wheels or exhaust parts.
Step-by-Step Install Planning Checklist
- Review the vehicle’s service manual for specific instructions and torque specs.
- Inventory all parts, gaskets, and any one-time-use hardware before starting.
- Set your torque wrench to the correct value for each fastener.
- Apply rust penetrant to stubborn or corroded bolts as needed.
- Test-fit critical components before final installation to confirm alignment and fitment.
- Verify electrical connectors and routing—don’t force connections that don’t match.
- Mark part orientations with a paint pen or tape if needed.
- Tighten bolts in the recommended sequence and to the specified torque.
- Re-torque fasteners if the manual specifies after initial use or heat cycling.
Torque Reference Table Template
Never guess torque specs—always consult your service manual or product documentation. Use this table to organize your values before you start:
| Component | Torque Spec | Sequence/Order | Notes |
|---|---|---|---|
| Wheel Lug Nuts | Refer to manual | Star/Cross pattern | Re-torque after 50 miles |
| Brake Caliper Bolts | Refer to manual | Evenly, alternating sides | Use thread locker if specified |
| Suspension Mounts | Refer to manual | As per manual | Check after first drive |
Fill in this table with your actual specs before turning a wrench. Don’t rely on memory or “feel”—precision matters.
Common Gotchas That Cause Comebacks
- Using a floor jack or car jack as the only support—always add jack stands before working underneath.
- Lifting at the wrong points—use designated jack points to avoid damaging the chassis.
- Forgetting to block wheels or set the parking brake—prevents rolling accidents.
- Improvising extensions or using unstable surfaces—never stack wood or bricks under a jack.
- Skipping connector checks—forcing electrical plugs can cause hidden faults.
- Neglecting to mark orientation—especially for parts like brake rotors or suspension arms.
Never rely on a jack alone—always use jack stands for safety. And before working near airbags or high-current circuits, disconnect the battery to prevent accidental deployment or shock.
By following this structured approach, you’ll minimize mistakes, keep your repairs safe, and ensure your us automotive parts perform as intended. Up next, we’ll clarify how to handle warranties, returns, and delivery—so you’re protected if something doesn’t go as planned.

Warranty, Returns, and Delivery Made Clear
Ever hesitated to click “buy” because you weren’t sure what would happen if the part didn’t fit, arrived damaged, or wasn’t quite what you expected? When it comes to sourcing us automotive parts, understanding warranty, returns, and delivery policies can save you frustration, money, and time. Let’s break down what you need to know—so you can shop with confidence and avoid common pitfalls, whether you’re buying from a major online retailer, a local store, or even browsing ebay auto body parts.
What Parts Warranties Usually Cover
Warranties for automotive parts typically cover defects in materials and workmanship, but not issues caused by improper installation, misuse, or normal wear and tear. Most new parts come with at least a short-term warranty—often 12 months for OEM and reputable aftermarket brands. Remanufactured or refurbished parts may have shorter coverage or more exclusions. Always check if the warranty is handled by the seller or the manufacturer, as this affects who you’ll contact if you need service. For example, some online retailers provide direct support, while others require you to reach out to the manufacturer’s car parts customer service number for claims.
Return Windows and Restocking Fees
Return policies vary, but most reputable sellers offer a 30–60 day window for returns. For instance, carparts.com return policy allows you to return most items within 60 days, with free return shipping for eligible parts. However, returns may not be accepted for electrical items that have been opened or installed, custom orders, or parts that have been modified. On platforms like ebay auto body parts, sellers are now required to offer free 30-day returns on most new and eligible parts & accessories, helping standardize the process and boost buyer confidence (eBay Seller Center).
Watch for restocking fees on certain items or if you return a part that’s not in its original condition. Always keep the packaging until you’re sure the part fits and works as expected—many sellers require it for a full refund.
Pre-Purchase Checklist: Avoid Surprises
- Screenshot the product page, including fitment notes and warranty details.
- Confirm the return window and who pays for return shipping.
- Verify if a core charge applies and understand the return process for your old part.
- Inspect the package immediately upon arrival for damage or missing items.
- Keep all packaging and documentation until fitment is confirmed.
How to File a Clean Return Claim
If you need to return a part, a well-documented claim speeds up the process. Use this template when contacting the seller or customer service:
- Order number
- Part number and interchange ID
- Vehicle VIN and trim
- Installation status (unused/installed)
- Photos of labels, packaging, and any damage
- Reason for return (fitment, defect, wrong item, etc.)
Many major retailers offer online return centers, while others may require you to call or chat with their car parts customer service number for further instructions. Uploading photos and providing all requested details helps avoid delays.
Comparing Seller Policies: What to Expect
| Seller Type | Return Window | Warranty Channel | Required Documentation |
|---|---|---|---|
| Online Retailer | 30–60 days | Seller or Manufacturer | Order number, part number, VIN, photos |
| eBay Auto Body Parts | 30 days (free returns required for most new items) | Seller (often via eBay platform) | Order ID, fitment proof, photos |
| Local Parts Store | 30 days (may require receipt) | Store or Manufacturer | Physical receipt, packaging |
Delivery Timing and Return Logistics
Fast autoparts delivery can be a lifesaver, but also affects your return window. Some sellers start the return clock from the shipping date, others from delivery. Always check tracking and save your confirmation emails. For large or heavy items, return shipping can be more complex—make sure you understand the logistics before buying.
Carefully reading the carparts.com return policy or similar pages helps you spot exclusions—especially for electrical items, painted parts, or anything custom-ordered. If in doubt, reach out to the seller’s support team or check the FAQ section for specifics on your part type.
Tip: Whenever possible, test-fit non-electrical components before full installation. This reduces hassle if you need to return a part—and keeps your options open.
Understanding these policies will help you buy us automotive parts with confidence and minimize surprises. Next, we’ll wrap up with a sourcing checklist and quality signals to look for, so you can make your purchase with total peace of mind.
Your Sourcing Checklist and Final Takeaways
Your Five-Step Parts Buying Checklist
Ready to tackle your next purchase of us automotive parts or american auto spare parts? Whether you’re a first-timer or a seasoned DIYer, following a simple, repeatable process can help you avoid unnecessary returns, wasted time, and compatibility headaches. Here’s a practical five-step checklist to keep you on track:
- Confirm the Diagnosis: Before buying, be sure you’ve correctly identified the root cause of your vehicle’s issue. Rely on OBD-II codes, visual inspections, and—if needed—consult a trusted mechanic or online community for a second opinion (Gauge Magazine).
- Capture VIN and Interchange Details: Always use your full Vehicle Identification Number (VIN) and check for interchange numbers or supersessions. This step is vital for fitment, especially with us auto supplies that can vary by trim or production date.
- Choose Your Part Type: Decide if you need OEM, a reputable aftermarket, or a performance upgrade. Consider your use-case—daily driver, high-mileage, or project car—and weigh the balance of cost, warranty, and longevity.
- Review Warranty and Return Policies: Don’t skip the fine print. Understand the seller’s warranty, return window, and any restocking fees before you buy. This is especially important for online sources like usa auto supply or partsusa.
- Plan Tools and Torque: Make sure you have the right tools, torque specs, and installation instructions before parts arrive. This minimizes downtime and reduces the risk of installation errors.
Quality Signals You Can Trust
Not all us autoparts are created equal. Before you click “buy,” look for these signs of a trustworthy supplier or listing:
- Clear Fitment Notes: Listings should specify exact year, make, model, and trim compatibility.
- Dimensional Drawings: Technical diagrams or measurements help you verify fit—especially for brackets or american auto spare parts that may have subtle differences.
- Certifications: Look for ISO, SAE, or other recognized quality standards on critical components.
- Responsive Support: Suppliers who answer questions quickly and provide extra documentation or images signal reliability.
- Transparent Return Policies: Clear, easy-to-find policies for returns and exchanges protect your investment.
- Automotive Stamping Dies & Parts: For those sourcing at the manufacturing level—such as custom brackets or structural stampings—consider vetted resources that specialize in precision and quality. This option from Shaoyi can be especially valuable for engineering teams or businesses needing custom or high-volume runs.
When to Consult an Engineer or Supplier
Sounds complex? If you’re uncertain about compatibility, material choice, or have a unique application (like adapting usa autoparts for a custom build), don’t hesitate to reach out for expert guidance. Professional suppliers and engineers can help you avoid costly misorders, especially when sourcing american auto spare parts for less common vehicles or specialty projects.
| Step | Why It Matters | Pro Tip |
|---|---|---|
| Diagnosis | Ensures you’re replacing the right part | Document symptoms and scan codes |
| VIN & Interchange | Guarantees fitment and reduces returns | Double-check before ordering |
| Part Type | Matches your use-case and budget | Weigh OEM vs. aftermarket pros/cons |
| Warranty/Returns | Protects your investment | Save receipts and policy screenshots |
| Tools & Torque | Prevents installation errors | Prep your workspace before delivery |
"A little extra research now saves a lot of hassle later—especially with american auto spare parts that may have subtle variations between years or trims."
By following this checklist and watching for quality signals, you’ll be well equipped to source us automotive parts with confidence—whether you’re buying a single sensor, a set of brake pads, or planning a bulk order of custom brackets. For those scaling up to manufacturing or engineering needs, resources like Automotive Stamping Dies & Parts from Shaoyi can help ensure your components are built to last. Stay organized, ask questions, and always prioritize fitment and quality over price alone. Happy wrenching!
Frequently Asked Questions about US Automotive Parts
1. What is the difference between OEM and aftermarket automotive parts?
OEM (Original Equipment Manufacturer) parts are made by the vehicle's original producer and guarantee exact fit and performance. Aftermarket parts are created by third-party companies and can offer cost savings or added features, but quality and compatibility may vary. Always verify fitment and warranty details before choosing.
2. How can I ensure the part I order will fit my vehicle?
To guarantee fitment, use your vehicle's full VIN, check part numbers, and review interchange numbers or supersessions. Reliable sellers provide fitment tools or compatibility charts. Confirming these details helps avoid costly returns and installation issues.
3. Are remanufactured or refurbished parts reliable?
Remanufactured parts are rebuilt to meet specific standards and can be a sustainable, cost-effective choice if sourced from reputable suppliers. Refurbished parts are restored to working condition but may not match the quality of remanufactured items. Always check warranty terms and supplier reputation.
4. What should I look for in a trustworthy online auto parts seller?
Look for clear fitment notes, detailed product images or diagrams, transparent return and warranty policies, responsive customer support, and strong customer reviews. Sellers offering dimensional drawings and interchange information are especially reliable.
5. How do warranties and returns work for US automotive parts?
Most new parts come with a warranty covering defects in materials or workmanship, typically 12–24 months. Return windows range from 30–60 days, but may exclude electrical or installed items. Always keep original packaging and documentation, and review seller or manufacturer policies before purchasing.