 Small batches, high standards. Our rapid prototyping service makes validation faster and easier —

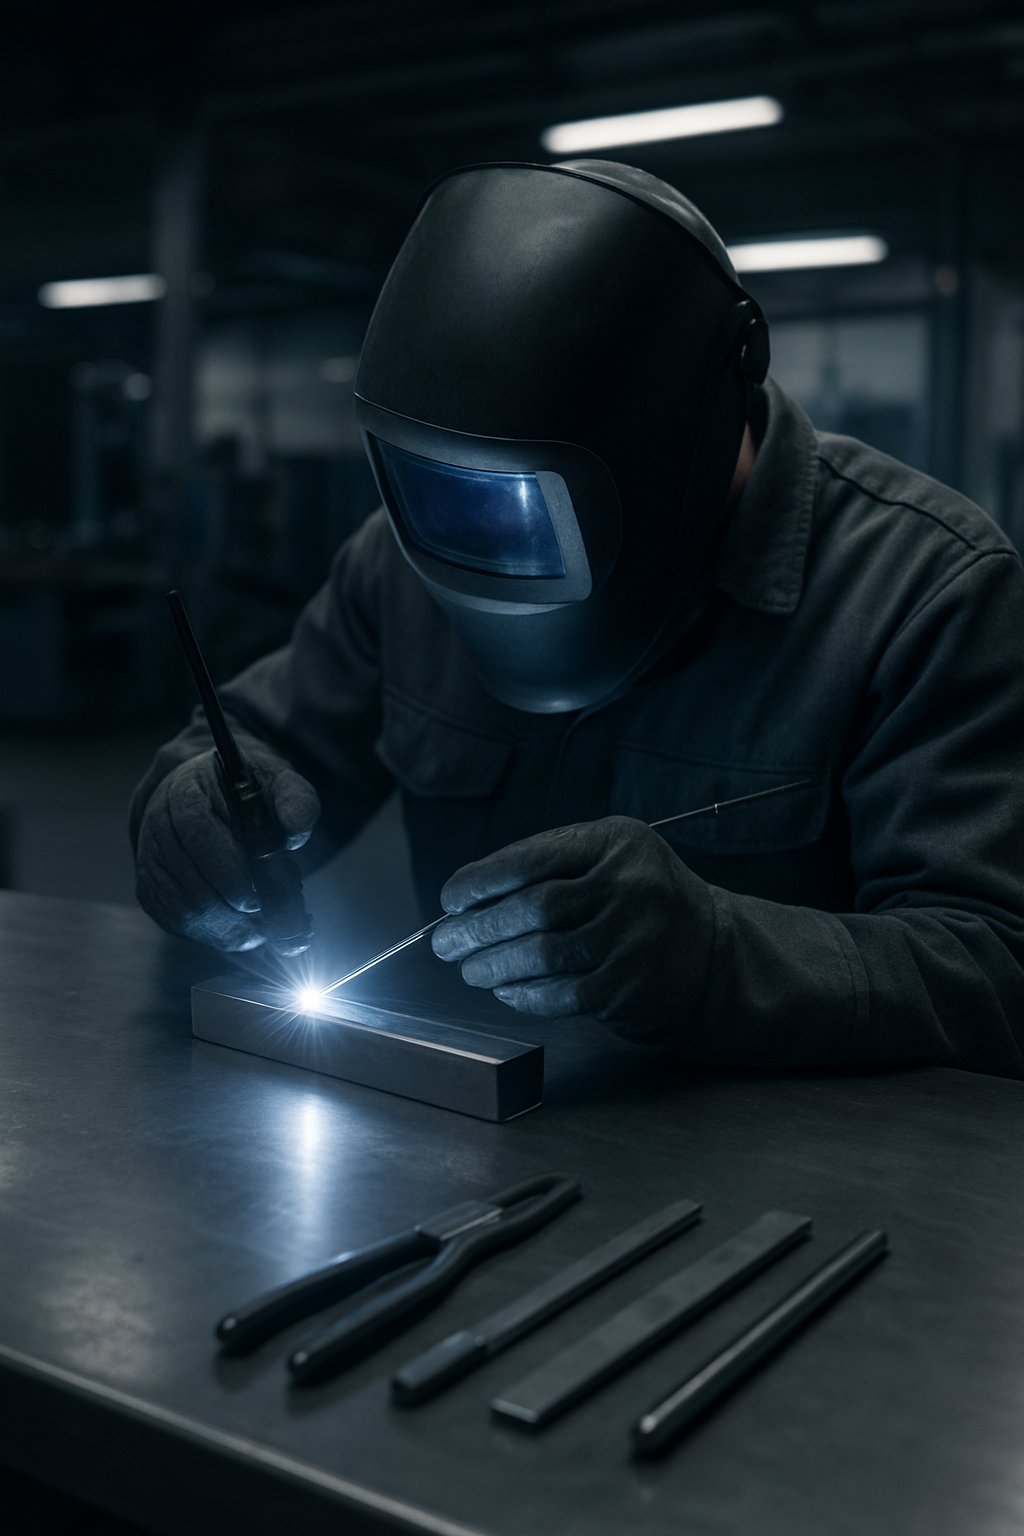
How To Weld TIG Stainless Steel Without Burnthrough Or Sugaring
How to Weld TIG Stainless Steel Starts With Material Choices
Before the machine ever powers up, decide four things: the stainless grade, the material thickness, the joint type, and whether the back side of the weld must stay protected. That is the real starting point in how to weld tig stainless steel. Stainless may look familiar on the bench, but it does not react like mild steel once the arc is on. The Hobart Brothers guide notes that stainless is less conductive to heat, while Avon Lake Sheet Metal highlights its high thermal expansion. In practice, that means heat builds faster, distortion shows up sooner, and contamination is less forgiving. Stainless rewards three habits every time: cleanliness, low heat input, and shielding discipline.
Why TIG Stainless Steel Behaves Differently
If you have ever wondered, can you weld stainless the same way you weld mild steel, the short answer is no. TIG welding stainless steel has a tighter process window. Heat does not move away from the puddle as quickly, so the weld zone overheats faster. Hobart also points out that stainless has a more sluggish weld pool, which can surprise beginners who are used to the way mild steel flows. Move too slowly and you do more than widen the bead. You can raise distortion, darken the weld, and reduce the corrosion performance that made stainless worth choosing in the first place.
On TIG stainless, weld color is immediate feedback. Cleaner, lighter color usually means your heat and shielding stayed under control.
304 316 and 409 What Changes Before You Start
For beginners focused on welding 304 stainless, it helps to group these grades by family before thinking about settings. Grades 304 and 316 are austenitic stainless steels. Hobart describes this family as well suited to highly corrosive environments, and filler choice generally follows the base material. For 304 base metal, 308 filler is commonly used. For 316 base metal, 316 filler is recommended. Grade 409 is different. It is a ferritic stainless commonly used in automotive exhaust systems, chemical processing, and pulp and paper work. Ferritic grades can be more prone to solidification cracking, so filler selection and procedure control deserve extra attention.
| Grade | Family | Common uses | Corrosion and service notes | Filler selection considerations |
|---|---|---|---|---|
| 304 | Austenitic | Medical equipment, kitchen equipment, general corrosion-service fabrication | Used where corrosion resistance matters; excessive heat can hurt finished weld properties | 308 filler is commonly used for 304 base metal |
| 316 | Austenitic | Austenitic stainless applications exposed to corrosive service | Corrosion-resistant family member, but filler still needs to match the base material requirement | 316 filler is recommended for 316 base metal |
| 409 | Ferritic | Automotive exhaust systems, chemical processing, pulp and paper | Ferritic grades can face solidification cracking concerns and service-temperature limits | Matching 409 filler is typical; stabilized filler guidance may be required |
A related question is can you weld to stainless steel when the other part is carbon steel. Yes, but carbon to stainless welding is not a guess-and-go job. Dissimilar joints change dilution, corrosion behavior, and service performance, so filler choice should follow approved compatibility charts, supplier guidance, or the welding procedure you are working to.
Choose the Joint Before You Choose the Settings
Joint design changes the whole job. A tight butt joint in thin sheet behaves very differently from a lap joint, outside corner, or slip-fit exhaust connection. If the gap is wide, burnthrough becomes much more likely. If full penetration is required, backside protection already matters before you touch the pedal. If the joint mixes carbon steel and stainless, the real question is not only can you weld stainless, but can you weld to stainless steel and still keep the needed service life. Grade first, joint second, settings third is a much safer order. That choice also makes the next decisions easier, because the right torch setup, gas coverage, tungsten prep, and filler family depend on what you decided here.
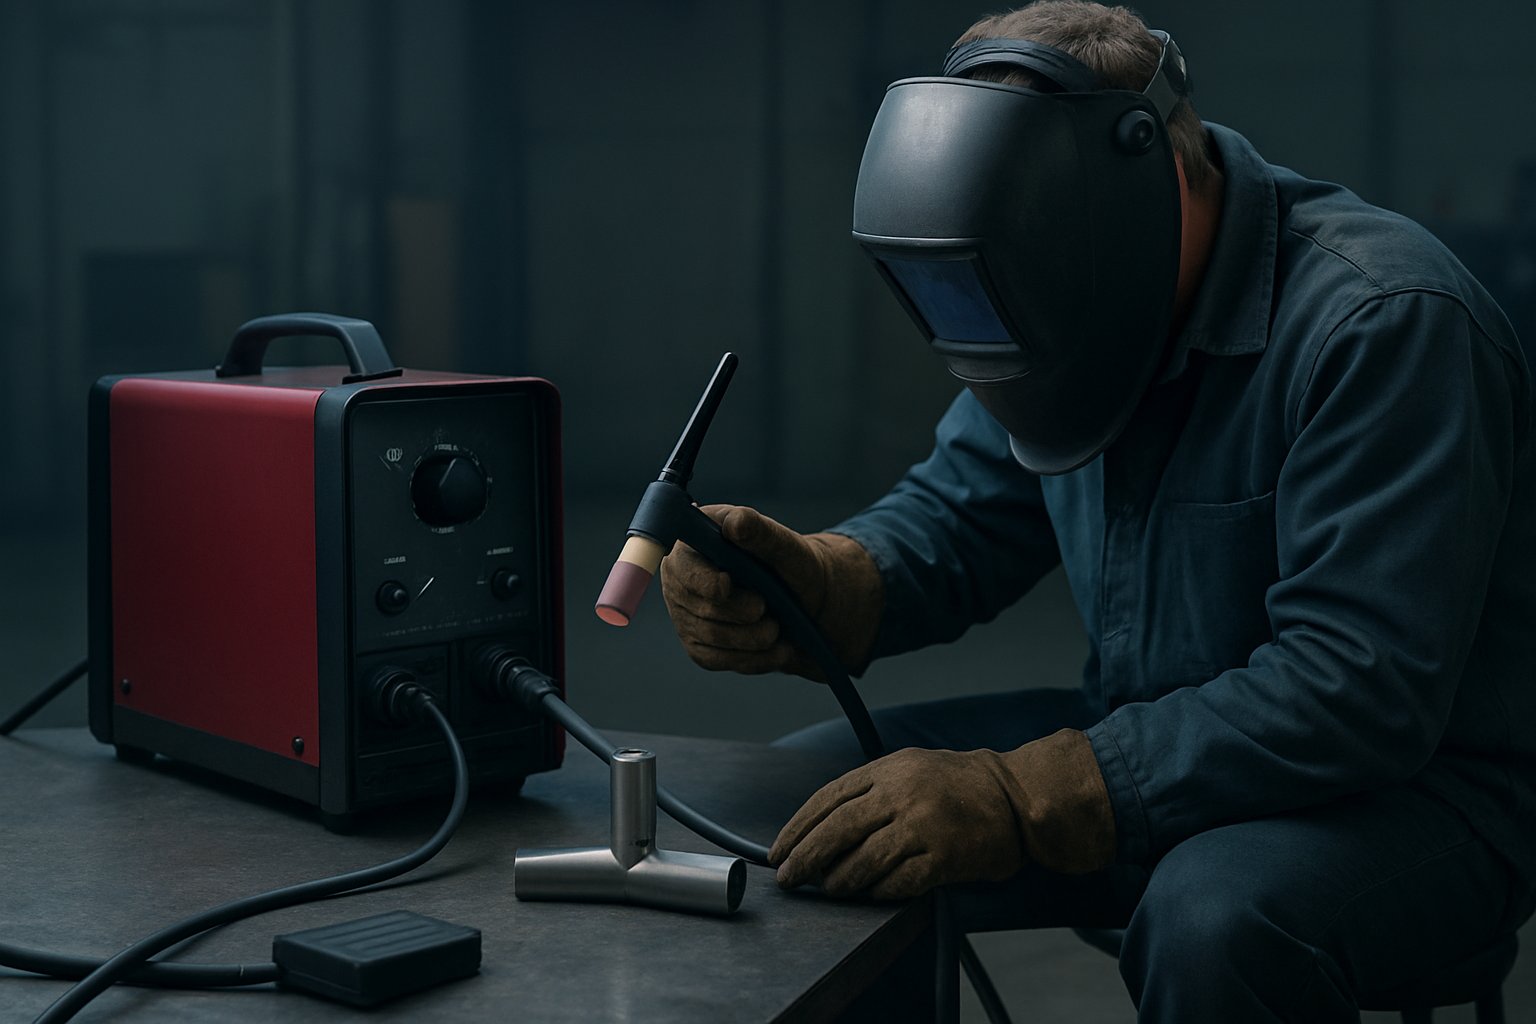
TIG Welding Machine for Stainless Steel Essentials
Those early choices about grade, thickness, and joint type narrow the setup fast. Stainless is far less tolerant of a sloppy bench than mild steel, so the goal here is simple: build a clean, stable system before you strike an arc. For most beginners, results improve more from better shielding and cleaner consumables than from chasing fancy accessories.
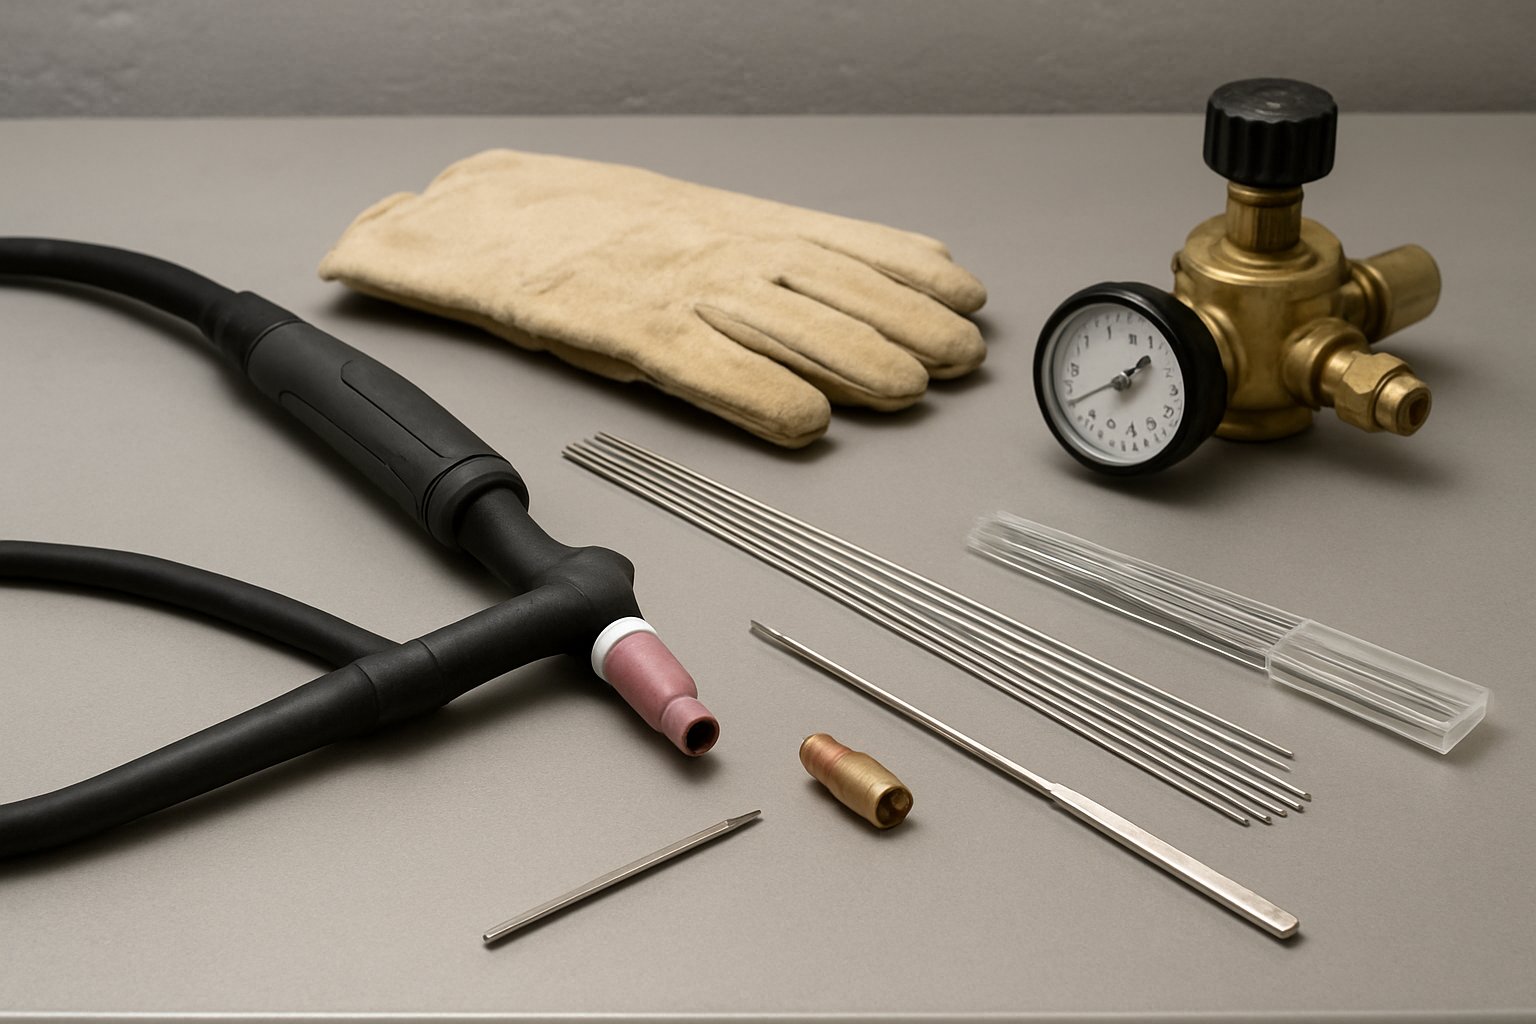
Core TIG Gear for Stainless Steel
A practical tig welding machine for stainless steel should give you DC output, high-frequency arc start, and remote amperage control. Emin Academy recommends DCEN for stainless and highlights a foot pedal for precise heat control. Torch choice should match access and comfort, but gas coverage is the bigger issue. A gas lens is especially useful because it improves shielding coverage, which helps keep stainless color cleaner and the puddle more stable.
-
Must-have items
- DC TIG power source with high-frequency start
- Foot pedal or other remote amperage control
- TIG torch set up for steady shielding
- Gas lens, regulator, and flowmeter
- Proper PPE, including helmet, gloves, and protective clothing
-
Helpful upgrades
- Dedicated tungsten sharpening setup
- Storage tubes for filler rod and tungsten
- Dual-flow setup if purge work is in your future
Choose Tungsten Filler Rod and Shielding Gas
Consumables matter more than beginners expect. Emin Academy recommends 2% lanthanated tungsten for most stainless jobs and a fine point for a focused arc. Exact stainless steel tungsten size, cup size, and setup still need to follow your machine manual and the joint you are welding. The right tig rod for stainless follows the base metal. For 304 or 304L, Emin Academy lists ER308L as a common stainless steel tig welding rod. For other grades, and especially dissimilar joints, use approved filler compatibility guidance rather than guesswork.
For most beginners, stainless steel tig gas means pure argon. The most common gas for tig welding stainless steel is 100% argon, and Weldmonger notes that high-purity gas, Grade 5.0 or better, helps prevent contamination. Emin Academy gives 20 to 30 CFH as a common starting range, but actual flow depends on cup size and drafts. Keep filler rods dry and clean as well, because moisture and dirt raise the risk of porosity.
Dedicated Stainless Tools Prevent Contamination
Clean metal starts with clean tools. Emin Academy warns against using tools that have touched carbon steel, and PROMOTECH emphasizes keeping stainless-dedicated tools separate so iron filings do not transfer onto the work surface.
| Tool | Purpose | Why contamination control matters |
|---|---|---|
| Stainless-only wire brush | Removes light oxide and debris | Carbon steel residue can trigger rust and surface contamination |
| Acetone and clean wipes | Degreases base metal and filler rod | Oil and shop dirt can lead to porosity and unstable arc behavior |
| Dedicated abrasives | Preps edges and removes burrs | Mixed-use discs can smear iron particles into stainless |
| Rod and tungsten storage tubes | Keeps consumables dry and clean | Dust and moisture raise the odds of contamination before welding starts |
Even the best machine setup cannot rescue oily edges, poor fit-up, or an unprotected root. Stainless starts showing problems during prep long before the bead makes them obvious.
Clean Fit-Up for TIG Welding Stainless Steel
Clean gas and fresh filler only help if the joint is just as clean. With stainless, a fingerprint, iron dust, or a rough cut edge can turn into porosity, heavy discoloration, or root sugar later. Guidance from Weldmonger and Miller lands on the same lesson: contamination control and fit-up are part of the weld, not side work.
Clean Stainless Without Cross Contamination
Anyone doing welding on stainless steel learns fast that stainless does not forgive dirty prep. Start by removing oil and grease with acetone, isopropyl alcohol, or an approved degreaser, then wipe away dust with a clean lint-free cloth. Weldmonger also notes that not every part needs aggressive abrasion first. New sanitary tubing or clean sheet may only need solvent cleaning, while plasma-cut dross, burrs, and rough saw edges do need cleanup. Use only stainless-dedicated brushes, abrasives, files, and gloves. If a grinder or wire brush has touched carbon steel, it can smear iron into the surface and compromise corrosion resistance when you weld stainless steel.
- Inspect the cut edges and decide whether the joint needs deburring, edge dressing, or bevel prep.
- Degrease both sides of the joint and the nearby weld zone.
- Remove loose dust and shop debris with a clean wipe.
- Clean off dross, burrs, and oxide using stainless-only abrasives or brushes.
- Handle the cleaned parts with clean gloves.
- Assemble the joint with a tight, consistent fit and the smallest practical gap.
- Clamp securely and place small, even tacks that lock the alignment in place.
Fit Up and Tack Strategy for Thin Material
Gap control is really heat control before the arc starts. Miller points out that poor fit-up forces you to add more filler and slow down, which builds heat in the part. That is why thin sheet, stainless steel pipe welding, and tube work can go bad so quickly. Keep the gap uniform, make tacks only as large as needed, and space them evenly so the joint cannot pull open as it warms. On round parts, stagger tacks around the circumference instead of stacking heat in one area. If you need to weld to stainless steel from a carbon steel component, keep clamps, backing surfaces, and prep tools clean on both sides of the joint.
Back Purging for Pipe Tube and Root Passes
Back purging becomes important whenever the root side of a full-penetration weld would otherwise see oxygen, especially in tubing, pipe, and sanitary work. Miller describes argon as the traditional back purge for GTAW stainless tube and pipe. In some non-critical applications, nitrogen may be used to cut cost, but that tradeoff can reduce corrosion resistance, so the choice should follow the approved procedure. For tig welding stainless steel pipe, the goal is simple: protect the backside so the root stays smooth instead of oxidized and sugary.
- Seal the ends well enough to contain purge gas without creating unsafe pressure.
- Provide a clear gas path with an inlet and a vent so air can escape.
- Start the purge before the arc and use timing that matches the part geometry and shop standard.
- Check for obvious leaks at caps, tape lines, and fittings.
- Watch the root color. Clean metallic color with minimal oxidation is a good sign. Heavy gray scale or crusty sugar is not.
- Keep root shielding in place until the procedure allows purge removal.
A tight joint and a protected root make the puddle calmer, the bead more consistent, and the machine far easier to dial in with low heat.
Low-Heat TIG Welding Stainless Steel Settings
Fit-up and purge make the weld possible, but the machine decides how easy it is to keep that puddle small. When beginners search for tig settings for stainless steel, they often expect one magic amperage number. Stainless does not work that way. A reliable setup is really a priority list: correct polarity first, enough amperage range second, stable gas coverage third, then optional controls like pulse. That approach keeps tig welding stainless steel settings practical instead of guessy.
DC TIG Basics for Stainless Steel
For dc tig welding on stainless, both Weldguru and YesWelder point to the same foundation: use a constant-current DC machine with electrode negative, or DCEN. That means the torch connects to negative and the work clamp to positive. Shielding gas is usually 100 percent argon for standard work. Specialty blends can add heat and penetration, but they also narrow your margin for error, so a beginner-friendly tig setup for stainless usually stays with straight argon unless a procedure or manual says otherwise.
Gas flow should be high enough to shield the puddle, but not so high that it turns turbulent. Weldguru lists 15 to 35 CFH as a common range, with the final choice depending on cup size, gas lens use, and shop drafts. If the weld suddenly turns gray even though your amperage looks reasonable, gas coverage is often the first thing to question.
Stable shielding and a tight arc length matter more than fancy settings.
TIG Welding Stainless Steel Settings That Matter First
Amperage is best treated as a ceiling, not a target you hold the whole time. YesWelder notes that stainless often needs about 10 to 20 percent less heat input than mild steel of similar thickness, which makes a settings chart useful as a starting estimate only. The real goal is the lowest current that still gives sound fusion. A foot pedal helps because stainless retains heat and usually needs less amperage as the joint warms. If your position makes a pedal awkward, a fingertip control can serve the same purpose: trim heat while moving, instead of stopping to reset the machine.
| Work type | Thickness situation | Common joint | Setup priority | Control focus |
|---|---|---|---|---|
| Sheet | Thin | Butt, lap, outside corner | Low amp ceiling, short arc, smooth argon coverage | Pedal or fingertip control to avoid burnthrough |
| Tube | Thin wall | Butt or slip-fit | Gas lens, low heat, careful tack fusion | Keep filler and tungsten inside the shielding envelope |
| Pipe | Root pass work | Butt joint | Low heat plus purge protection and steady post flow | Protect both face and root from oxidation |
| Heavier section | Medium to thick | Fillet or groove | Enough amperage for fusion without lingering | Travel speed and puddle size stay more important than raw output |
If you use a chart for stainless steel tig settings, read it as a launch point. Joint fit, tungsten size, cup size, and torch access will still change the feel of the weld.
When to Use Pulse Pedal Control and Post Flow
A pedal is the most direct heat-management tool because you can start gently, add current to establish the puddle, then back off as the part heats up. Tig pulse is helpful when the material is thin, the seam is long, or your travel speed is still inconsistent. YesWelder explains that pulsed TIG alternates between high and low amperage, reducing average heat input and making puddle control easier. Use it as a support tool, not a substitute for technique.
Shielding timing matters too. Both references describe about one second of pre-flow as a common starting point, while post-flow is often set at roughly one second for every 10 amps of welding current. Just as important, keep the cup over the crater until the gas stops. Stainless oxidizes quickly while hot, so good-looking tig settings for stainless can still produce ugly results if the weld loses coverage at the end. Set the machine for calm shielding and controllable heat, and the puddle starts acting like something you can guide by hand instead of chase.
How to TIG Weld Stainless Steel With Clean Puddle Control
If you are learning how to tig weld stainless steel, the machine only gets you to the starting line. Stainless shows the truth in your hands. For anyone asking how do you tig weld stainless steel without turning the bead dull and overheated, the answer is a tight arc, a small puddle, and filler that stays inside the shielding gas. The basic TIG technique notes that controlling torch distance to within about 1 mm is critical, which is why body position and hand support matter as much as amperage.
How to Start the Arc and Form a Small Puddle
Do a dry run before you strike the arc. Check that your wrist can slide the full joint without changing angle or snagging the torch lead. A practical torch position is about 20 degrees from vertical, tilted in the direction of travel. Keep arc length tight, about 1 to 1.5 times the tungsten diameter. That short gap concentrates heat where you need it and helps keep color cleaner.
- Brace your torch hand so the movement comes from fingers and wrist, not your shoulder.
- Start with the tungsten close enough to hold a short, stable arc.
- Pause just long enough to form a small puddle.
- Move as soon as the puddle is established, instead of soaking the start point.
That last habit matters in tig welding ss. A stainless travel speed tip recommends using enough amperage to get the puddle started within about 2 seconds and then moving, because stainless stores heat quickly if you stay parked.
A short, steady arc produces cleaner color and less distortion.
Filler Timing Torch Angle and Travel Speed
Watch the leading edge of the puddle. Add filler there, and let the puddle melt the rod rather than jabbing the rod into the arc. The filler should stay low and under the gas shroud. That keeps the rod from oxidizing and makes the next dab smoother. When people ask how to tig stainless, the missing piece is often rhythm: move, dab, move. The pause is brief. The puddle should stay small.
Beginners searching how to tig stainless steel neatly often add too much filler because it feels safer. On stainless, that usually slows you down and adds heat. In stainless steel tig welding, extra buildup can push heat to the joint edges instead of the root. The fillet technique shows this clearly: too much filler makes the weld untidy, while light filler simply replaces metal drawn into the puddle.
Autogenous passes, with no filler rod, are excellent for learning puddle placement on tight joints. Filler-assisted passes are the better choice when you need to replace metal used to form the weld pool and avoid undercut. If you want to tig weld stainless steel with a balanced bead, think small puddle, light dabs, and travel speed fast enough to stay ahead of heat buildup.
How to Blend Tacks Restarts and Crater Fill
Tacks are part of the bead. Start on the edge of a tack when possible, remelt it, and let it flow into the moving puddle before adding fresh filler. If the tungsten touches the pool, stop and regrind before restarting. A contaminated tungsten makes the arc less stable and dirties the weld fast.
Ending clean matters just as much as starting clean. Reduce heat toward the finish, add a final small dab if the crater needs support, then bring the torch back slightly as the arc stops. Hold the cup over the end until post-flow finishes. That protects the hot crater and the tungsten from oxidation. It is also one of the most practical answers to how do you tig weld stainless steel without blackened starts and stops.
If you are practicing how to tig stainless for the first time, flat coupons teach the hand rhythm best. Round tube, pipe, and exhaust keep the same arc and filler rules, but the joint starts fighting back with changing torch angles, tighter access, and much stricter root protection.
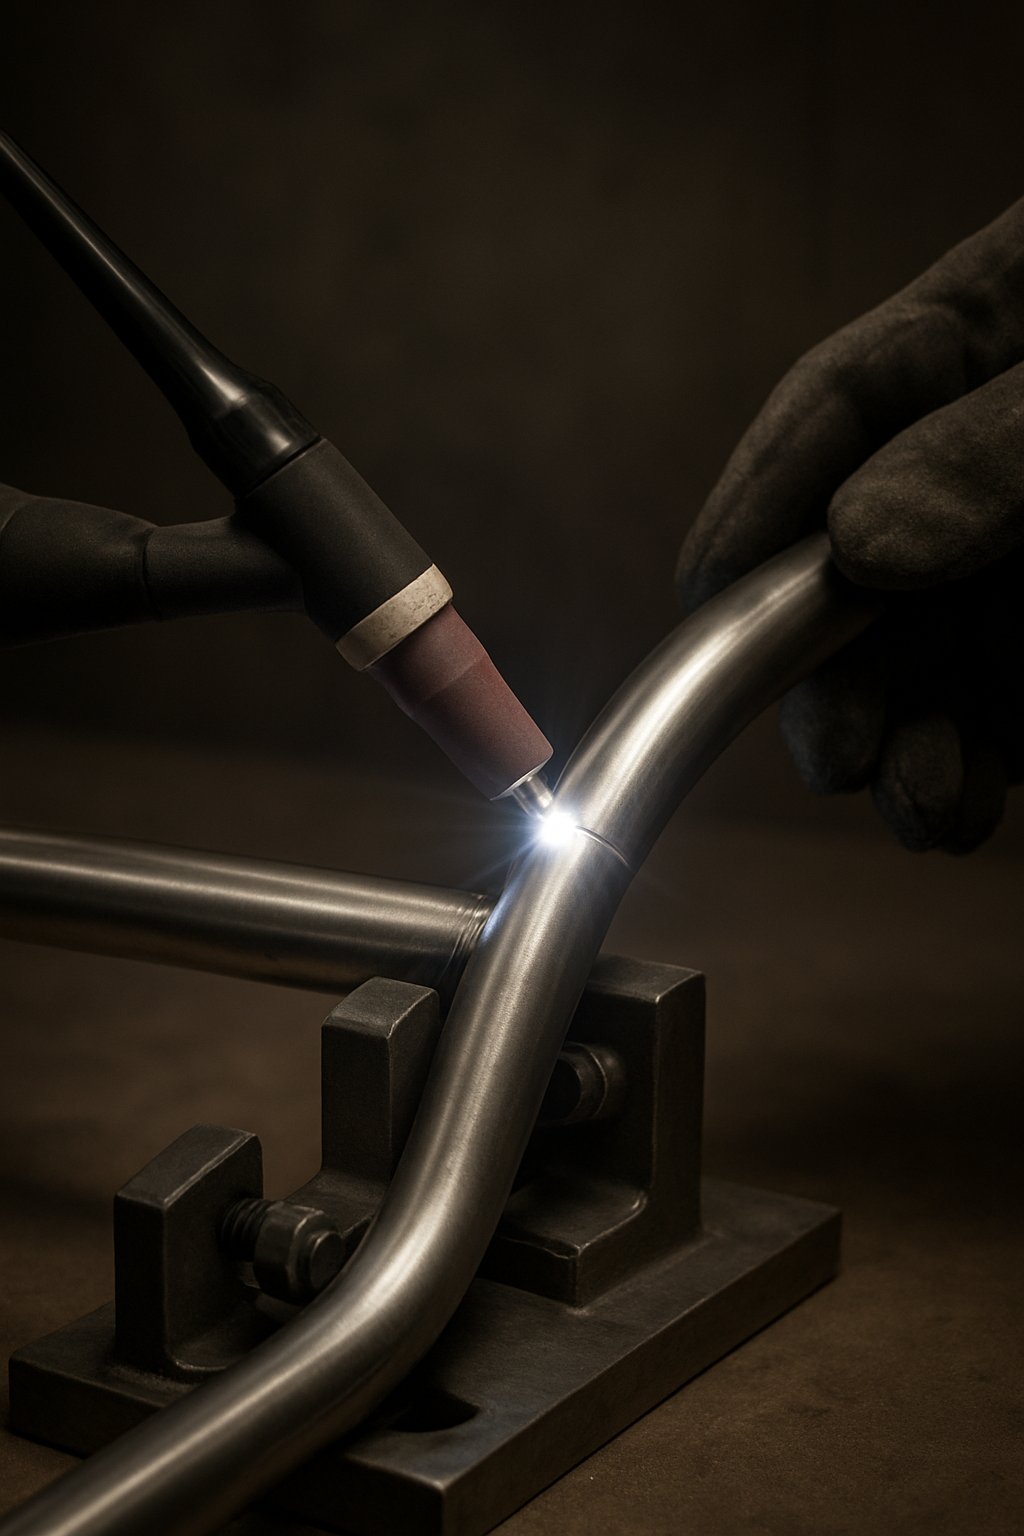
TIG Welding Stainless Exhaust and Pipe Without Excess Heat
Flat coupons are forgiving. Round parts are not. The moment you move to tube, pipe, or exhaust, torch angle changes every few inches, fit-up becomes less tolerant, and heat starts circling the part instead of escaping into a flat panel. That is why tig welding stainless exhaust and tube work often looks fine at one tack, then pulls out of line by the last one.
Thin Wall Tube and Exhaust Techniques
Thin-wall tubing rewards tight joints and punishes gaps. In a racing header example, Burns Stainless stresses that tube joints should show no visible light through the fit-up, because gaps increase heat affected zone size, distortion, and blow-through risk. Their example also notes that very thin tubing can burn through easily, which is exactly why a tig weld exhaust job should start with careful saw cuts, edge dressing, and minimal gap.
For tube and exhaust joints, place small tacks around the circumference instead of stacking them on one side. A simple pattern is opposite sides first, then fill between them as needed. That keeps the tube round and helps when you tig weld stainless pipe in a tight assembly where one bad pull can ruin alignment. On cramped joints, rotate the part whenever possible. If you cannot move the part, shorten the weld length and restart more often rather than forcing an awkward torch angle.
| Application | Main priority | Biggest risk | Technique focus |
|---|---|---|---|
| Flat sheet | Low heat input | Warping | Short arc and steady travel |
| Tube | Fit-up and tack sequence | Loss of alignment | Balanced tacks around the joint |
| Exhaust | Color control and access | Burnthrough and pull | Short weld segments and heat staggering |
Root Protection and Color Control on Stainless Pipe
With tig stainless pipe, backside shielding matters fast. Weldmonger highlights back purging for full-penetration stainless tubing and piping to prevent root oxidation, also called sugaring. That matters in stainless pipe tig welding because root damage is not just cosmetic. It can reduce corrosion resistance and leave a rough internal surface.
Color is useful feedback here too. Material heated in air oxidizes as it cools, and darker blues, purples, dull gray, or black indicate more oxidation, as explained by UNIMIG. On pipe, clean silver to light straw is a much safer target than chasing decorative color. If your tig stainless pipe weld gets darker as you move around the joint, suspect heat buildup, weaker gas coverage, or a pause that was too long.
Distortion Control for Longer Assemblies
- Use frequent, small tacks to lock shape before final welding.
- Alternate weld locations so heat does not build in one area.
- Weld in short bursts and let the assembly cool between sections.
- Use clamps, chill bars, or backing where access allows, a practice Weldmonger recommends for distortion control.
- Keep gaps tight. Burns Stainless is especially clear that tube gaps drive distortion and blow-through.
- Plan starts and stops where access is best, not where the joint is hardest to reach.
This is where stainless tig pipe welding separates careful technique from guesswork. On stainless, color shift, pull, and root condition start telling you what went wrong long before the part actually fails.
TIG Stainless Steel Troubleshooting by Color and Defect
Stainless tells on you fast. A root that turns crusty, a face that goes gray, or a bead that pulls the panel out of shape usually points back to one or two setup mistakes, not bad luck. Good tig welding stainless work gets easier when you treat every visible defect as a clue. The goal is not just prettier beads. It is controlling oxidation, fusion, and distortion so the finished joint performs the way stainless should.
Read Weld Color Before the Part Fails
Color is one of the fastest quality checks on tig stainless steel. The Miller color guide explains that on stainless, any color in the weld or heat affected zone shows an oxide layer has formed, and darker color means thicker oxidation. Chrome to light straw is generally a healthier sign than blue, purple, dull gray, or black. That is why people chasing beautiful tig welds should focus less on cosmetics and more on heat input and shielding discipline.
On stainless, color is feedback, not decoration.
If a weld darkens as you travel, first question shielding and heat together. The KickingHorse troubleshooting guide links discoloration, porosity, and tungsten oxidation to poor gas coverage, drafts, leaks, long arc length, or weak post-flow. When beginners ask what gas to tig weld stainless steel, the practical answer in normal GTAW work is high-purity argon, but the gas itself is only part of the story. Even correct tig welding gas for stainless steel will fail if the cup is too far from the work, the torch angle is poor, or airflow is turbulent.
Fix Sugaring Gray Welds and Tungsten Inclusion
Sugaring is the classic stainless root failure. KickingHorse lists poor back purging, too much heat input, and weak gas coverage among the main causes of backside oxidation on stainless. A black, granular root means the hot backside saw oxygen. Gray or black contamination on the face usually points to the same family of problems: inadequate shielding, contaminated filler, dirty base metal, or overheating. If you weld stainless tube or pipe, those issues often show up before anything breaks.
Tungsten inclusion is different in appearance but similar in cause. If the tungsten touches the puddle or filler, the arc may wander, starts get rough, and dark specks can end up in the bead. Regrind or replace the electrode immediately. In stainless tig welding, trying to save a contaminated tungsten usually costs more time than fixing it right away.
| Symptom | Likely cause | What to change immediately | What to check before the next weld |
|---|---|---|---|
| Sugaring on root | Poor purge, excess heat, root exposed to air | Stop and improve purge, shorten arc, move faster | Seal quality, purge path, purge timing, joint gap |
| Gray or black weld face | Inadequate shielding, dirty filler, overheating | Check gas flow, cup position, post-flow, clean filler | Leaks, drafts, filler storage, torch angle |
| Heavy blue or purple heat tint | Too much heat input or weak shielding | Lower average heat, keep tighter arc, improve coverage | Travel speed, gas lens condition, post-flow setting |
| Tungsten inclusion or black specks | Tungsten touched puddle or filler, wrong prep | Stop, regrind or replace tungsten | Tungsten tip shape, visibility, hand support |
| Porosity | Dirty metal, moisture, gas leaks, contaminated filler | Clean joint and filler, purge lines, verify gas coverage | Hoses, cup condition, gas purity, gloves and handling |
| Lack of fusion | Heat too low, travel too fast, poor fit-up | Increase heat enough for fusion and slow slightly | Joint prep, root opening, torch aiming |
| Arc wander | Contaminated tungsten, poor ground, gas issues | Regrind tungsten and clean ground point | Clamp contact, polarity, worn torch parts |
Correct Undercut Warping and Poor Shielding
Undercut usually means the puddle is too aggressive for the amount of filler and travel control you are using. The UNIMIG defect guide ties undercut to long arc length, too much heat, fast travel speed, and not adding enough filler. Tighten the arc first. Then reduce heat or slow down just enough to fill the toes cleanly.
Warping is the bigger pattern behind many stainless complaints. Too much heat, slow travel, weak clamping, and too few tacks let the whole part move. That matters even more when you are trying to keep beautiful tig welds on thin sheet or tubing, because a straight, lightly colored bead on a twisted part is still a bad result. If you are unsure about what gas for stainless tig welding, remember that pure argon is standard for TIG, but correct tig welding gas for stainless steel cannot compensate for poor sequence or excess heat.
By the time the bead cools, stainless has already shown whether the joint needs cleanup, repair, or rejection. The remaining work is knowing what to inspect closely, what can be restored by proper finishing, and what should never leave the bench.
How to Weld Stainless Steel With Proper Inspection and Finishing
Color got you this far. Acceptance finishes the job. Anyone learning how to weld ss eventually finds that a decent-looking bead can still be unacceptable if the toes are undercut, the root is sugared, or the surface is left contaminated. ESAB describes visual inspection as the most common weld quality check and often the least expensive, and it can reveal problems such as undercut, overlap, surface cracking, porosity, incomplete root penetration, excessive root penetration, burnthrough, and excessive reinforcement. If you have been wondering how do you weld stainless steel so it actually performs in service, inspection and finishing are part of the answer.
Inspect Appearance Penetration and Final Cleanliness
In practice, the best way to weld stainless steel is to judge the finished joint by service, not by shine alone. Where the back side is visible or accessible, verify the root is fully formed without heavy oxidation or excessive penetration. Then inspect the face and heat-affected zone for discontinuities and leftover contamination.
- Check bead size and profile for consistency.
- Look for undercut, overlap, cracks, surface porosity, underfill, or burnthrough.
- Where relevant, confirm root penetration is adequate and not excessive.
- Inspect starts, stops, and crater fill for defects.
- Make sure the weld area is clean, with no embedded debris, grinding smear, or obvious heat tint left for service-critical work.
Finish Stainless Without Ruining Corrosion Resistance
Post-weld cleanup is not just cosmetic. The BSSA explains that heat tint is a thickened oxide layer, and in aqueous corrosion service it can lower chromium just below the surface enough to hurt corrosion resistance. For drinking water applications, weld tint deeper than pale yellow should be removed, and the same approach is good practice for welding stainless steel in general when corrosion performance matters. Use only stainless-appropriate finishing methods, and avoid aggressive grinding that overheats the surface or smears contamination.
- Mechanically dress only as much as needed to remove irregularities or heavy tint.
- Use the required stainless cleaning method, such as pickling pastes or gels, spray or immersion pickling, or an electrolytic process, following supplier instructions carefully.
- Recheck both outside and inside weld faces, since hidden root surfaces can be even more important in service.
When Repeatable Automotive TIG Welding Is Better Outsourced
One-off fabrication and production work are different worlds. High-volume automotive welding stainless steel parts calls for repeatability, documented procedures, traceability, and consistent finishing from part to part. When that level of control matters, manufacturers may evaluate Shaoyi Metal Technology as a potential partner, since its advanced robotic welding lines and IATF 16949 certified quality system align with the same priorities covered here: durable, high-precision weldments and efficient turnaround. That is often where how to weld stainless steel stops being only a hand-skill question and becomes a process-control decision.
FAQ: TIG Welding Stainless Steel
1. Is TIG the best way to weld stainless steel?
TIG is often the preferred process when you need tight heat control, a clean-looking bead, and better protection of stainless corrosion performance. It is especially useful for thin sheet, tube, pipe, and visible welds because you can control puddle size, filler addition, and travel speed more precisely than with many other processes. If appearance and consistency matter more than raw speed, TIG is usually the stronger choice.
2. What gas should you use to TIG weld stainless steel?
For most standard jobs, high-purity argon is the go-to shielding gas for TIG welding stainless steel. Good results depend on more than the gas bottle, though. You also need steady flow, clean torch parts, protection from drafts, and enough post-flow to shield the hot crater and tungsten after the arc stops. If welds turn dull, gray, or dirty, gas coverage is one of the first things to check.
3. Do you need to back purge stainless steel tubing or pipe?
Not every joint needs back purging, but full-penetration welds on stainless tube, pipe, and sanitary-style work often do. The purpose is to protect the root side from oxygen while the metal is hot. Without purge protection, the backside can become rough, oxidized, and less corrosion-resistant, which is a bigger problem than poor appearance alone.
4. Why does stainless steel turn blue, gray, or black during TIG welding?
Those colors usually point to excess oxidation caused by too much heat, weak shielding, or both. Common triggers include a long arc, slow travel, leaks, contaminated filler, poor torch angle, or ending the weld without enough gas coverage. Lighter weld color generally means the process stayed cleaner and cooler, while darker color is a warning to review heat input and shielding discipline.
5. When should automotive stainless TIG welding be outsourced instead of done in-house?
Outsourcing makes sense when the job needs repeatable quality across many parts, documented procedures, traceability, and stable finishing standards that are hard to maintain with manual bench work alone. For chassis parts and other performance-focused components, manufacturers often look for robotic welding capability and a certified quality system. A supplier such as Shaoyi Metal Technology can be worth evaluating in that situation because it combines advanced robotic welding lines with an IATF 16949 certified process framework.