 Small batches, high standards. Our rapid prototyping service makes validation faster and easier —

How to Weld Aluminium With TIG and MIG: From Setup to Finish
Step 1: Master Aluminum Welding Fundamentals and Safety
Ever wondered why welding aluminium feels so different from working with steel? If you’ve tried and ended up with a messy bead or even burned through the metal, you’re not alone. Understanding the fundamentals is the first step to success in how to weld aluminium—and it all starts before you ever strike an arc.
Why Aluminum Behaves Differently Under Heat
Aluminum’s unique properties are what make it both valuable and challenging to weld. Unlike steel, aluminium has a thin oxide layer on its surface that melts at around 3,700°F (2,037°C), while the base metal itself melts at just about 1,200°F (650°C). This means the oxide stays solid long after the underlying metal has turned liquid, often causing poor fusion if not properly removed.
Another key factor is thermal conductivity. Aluminum dissipates heat much faster than steel, so you’ll need to apply more heat to form a weld pool, but be careful—too much and you risk burn-through, especially on thinner sections. Curious about what temperature will aluminum melt? Remember, it’s much lower than that stubborn oxide layer, so controlling your heat input is essential.
Safety and Personal Protective Equipment
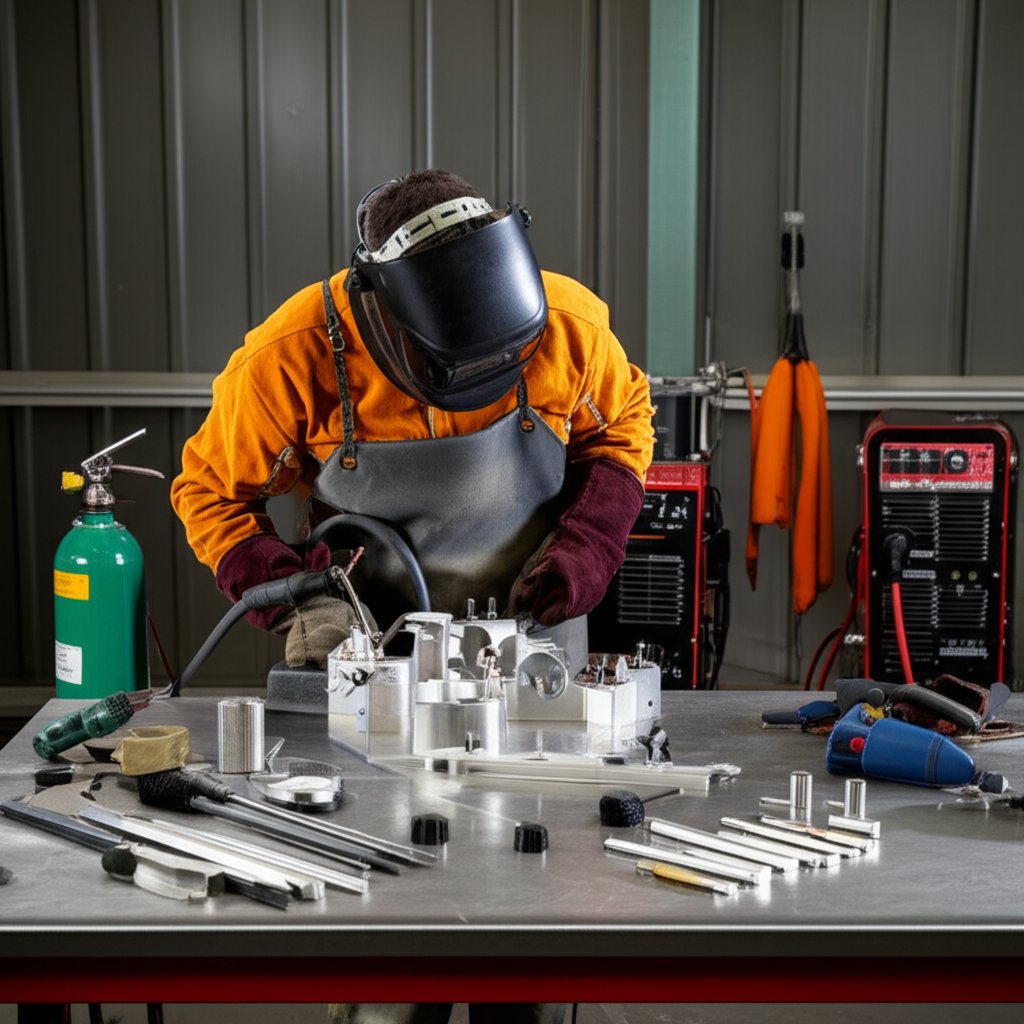
Welding aluminium isn’t just about technique; safety comes first. The process generates intense UV light, hot sparks, and fumes. Proper PPE protects you from burns, eye damage, and inhalation risks. Here’s what you need:
- Welding jacket (flame-resistant, preferably leather)
- Welding gloves rated for high heat
- Safety glasses (worn under your welding helmet)
- Respirator or fume extraction (especially in confined spaces)
- Proper footwear (closed-toe, non-synthetic)
Before you even set up your machine, make sure your workspace is well-ventilated. Aluminum welding can release ozone and other gases—good airflow is a must (Automotive Training Center).
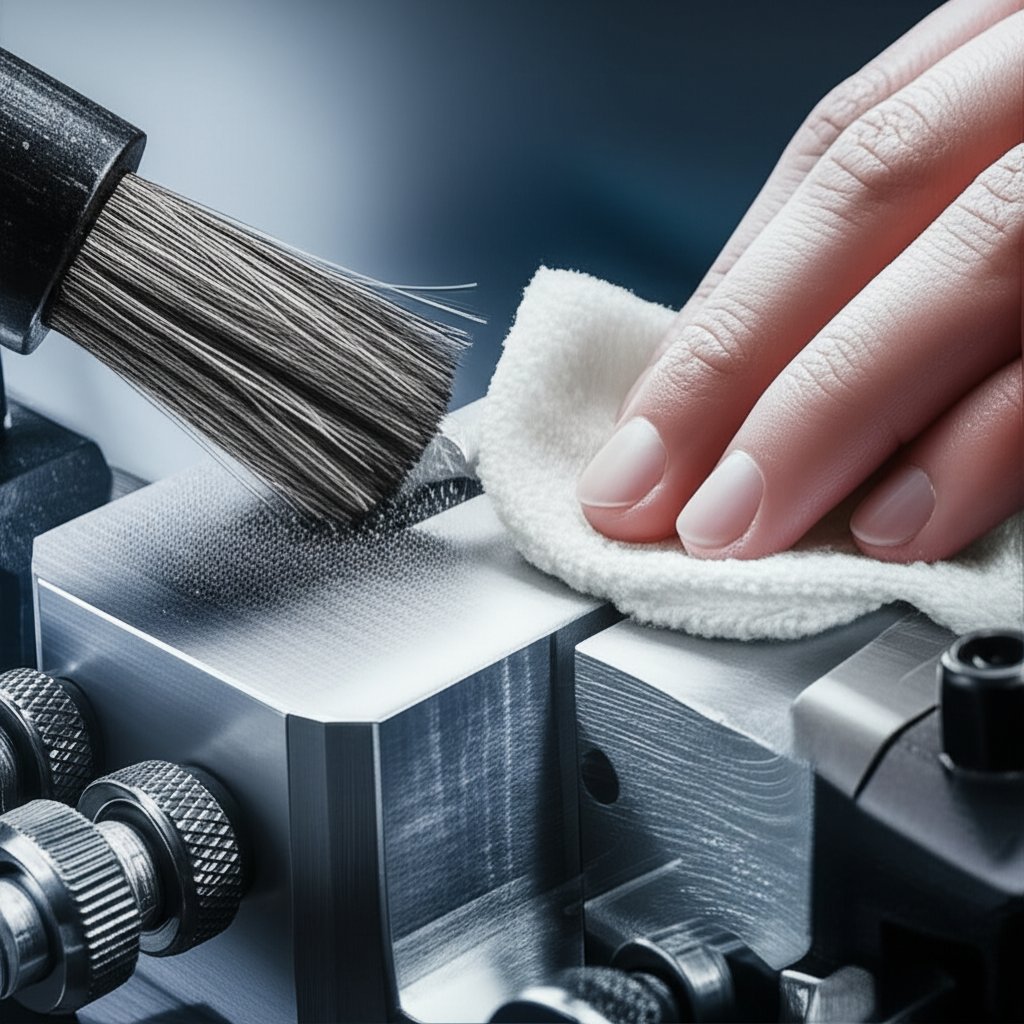
Cleanliness and Oxide Control
What is aluminium welding without a clean surface? Contamination is the enemy of a sound weld. Oil, grease, and especially that tough oxide layer must be removed before you start. Here’s a quick cleaning checklist:
- Wipe down the joint area with acetone or a recommended solvent
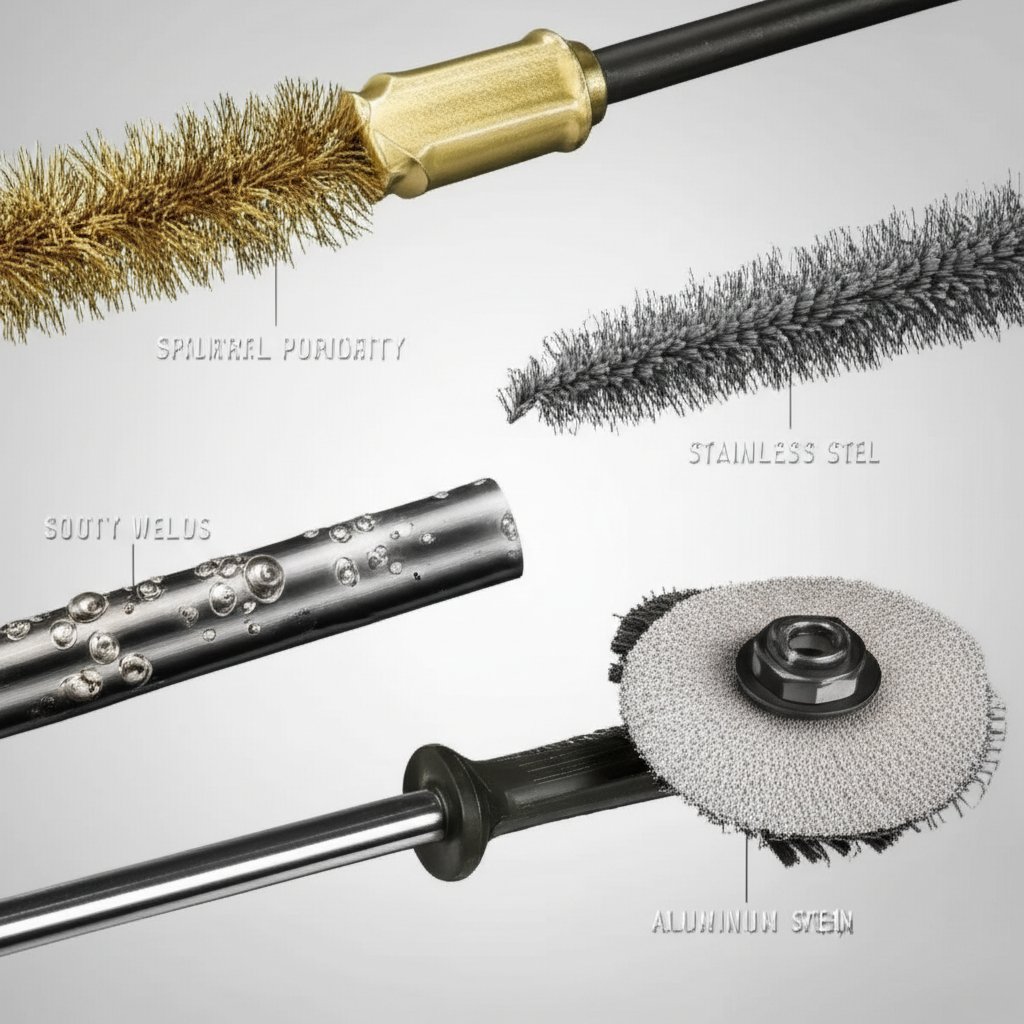
- Use a stainless steel wire brush dedicated only to aluminum—never use one that’s touched steel
- Brush only in one direction to avoid embedding debris
- Keep all cleaning tools dry and free from contaminants
It’s best to clean your material just before welding, as the oxide layer reforms quickly.
Clean metal and tight fit-up solve 80% of aluminum problems.
Actionable Steps Before Striking an Arc
- Ventilate your work area thoroughly
- Put on all recommended PPE
- Clean the joint area with acetone and a dedicated stainless brush
- Set up your welding machine for AC TIG or push-technique MIG (more on this in the next step)
- Practice on scrap pieces to learn how a correct puddle should look—shiny, fluid, and with a visible etched zone if using AC TIG
So, can you weld aluminium? Absolutely—but success hinges on understanding and respecting its unique characteristics. By mastering these fundamentals, you’re already solving most of the issues beginners face in welding aluminium.
Ready to move on? Next, we’ll help you choose the right process and dial in your machine so your setup matches your project goals.
Step 2: Select the Right Welding Process and Set Up Your Machine
Ever stared at a pile of aluminum parts and wondered, "Which welding process should I use?" You’re not alone. Choosing the right method—and dialing in your machine—can make the difference between a strong, clean weld and a frustrating mess. Let’s break down your options so you can confidently decide how to tackle your next project.
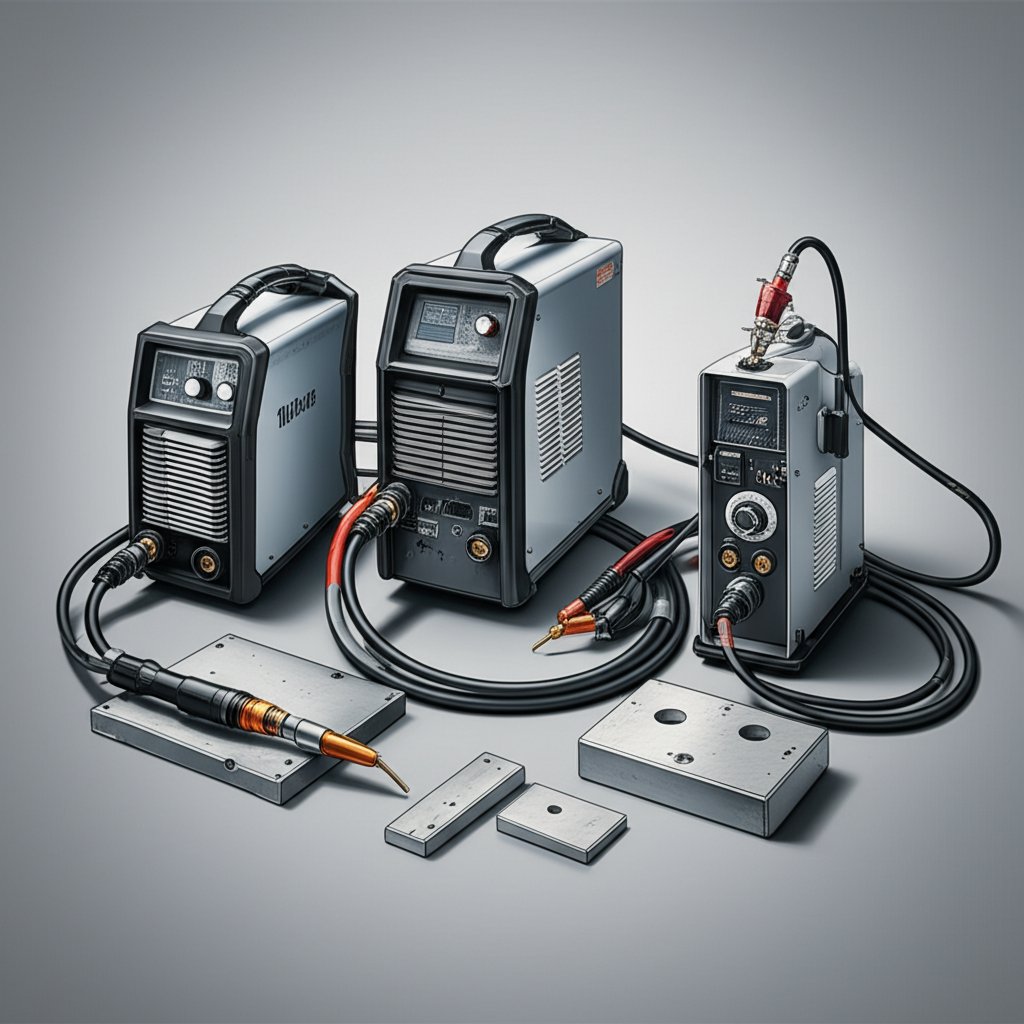
Choose TIG vs MIG vs Stick vs Resistance
When it comes to how to weld aluminium, your choice of process depends on the part thickness, joint type, and how much welding you need to do. Here’s a quick comparison to help you decide:
| Process | Control & Appearance | Speed | Typical Thickness | Learning Curve | Equipment Cost |
|---|---|---|---|---|---|
| TIG (GTAW) | Excellent—precise, clean welds | Slow | Thin to medium | Steep—requires practice | Moderate to High |
| MIG (GMAW) | Good—less precise, but neat | Fast | Medium to thick | Gentle—easy to learn | Moderate |
| Stick (SMAW) | Fair—messy, more spatter | Moderate | Thick only | Moderate | Low |
| Resistance Spot Welding | Good for sheet joints | Very Fast | Thin sheets | Easy | High (specialized) |
Real-world example: If you’re after flawless, cosmetic welds on thin aluminum tubing, gtaw welding aluminum (TIG) is your best bet. But if you need to join thicker plates or want speed—think trailer frames or heavy brackets—mig welding aluminum with a spool gun is more efficient.
Machine Setup That Actually Works
Once you’ve chosen your process, it’s time to set your machine. Here’s a step-by-step checklist to get you started:
- Shielding Gas: Use 100% argon for both TIG and MIG. Argon provides the best cleaning action and arc stability for gas metal arc welding aluminum.
- Polarity: For TIG (GTAW), set your machine to AC (alternating current) to help break up the oxide layer and achieve proper fusion. For MIG (GMAW), use DCEP (Direct Current Electrode Positive)—as recommended by most welder manuals—to ensure a stable arc and good penetration (YesWelder).
- Torch or Gun Setup: For TIG, install a clean tungsten electrode (2% lanthanated or ceriated works well). For MIG, use a spool gun or push-pull system to handle soft aluminum wire without tangling.
- Filler/Wire Selection: Pick a compatible aluminum filler rod or wire (such as 4043 or 5356, based on your base alloy and application).
- Drive Rolls and Liners (MIG): Use U-groove drive rolls and a Teflon or plastic liner to prevent shaving and feed issues with soft aluminum wire.
- Test Pass: Always run a test bead on scrap to check for arc stability, wire feed consistency, and weld appearance. Adjust your settings as needed before working on your actual part.
Wondering, can you mig weld aluminum? Absolutely—but only with the right setup and technique. Keep your gun cable as straight as possible and use dedicated liners and drive rolls to avoid feeding problems.
For special applications, such as automotive bodywork or HVAC ducting, spot welding aluminum offers a fast way to join thin sheets—though this requires specialized resistance welding equipment.
By matching your process and settings to your project, you’ll avoid most common mistakes and set yourself up for success. Next up, let’s talk about choosing the right alloys and filler metals so your welds are not just strong, but also long-lasting and defect-free.
Step 3: Choose Weldable Aluminum Alloys, Fillers, and Reliable Sources
Select Weldable Alloys and Matching Filler
Ever grabbed a piece of aluminum and wondered, "Can I weld this, or am I setting myself up for trouble?" The answer depends on the alloy. Not all aluminum is created equal when it comes to welding. Some grades are a breeze, while others can leave you frustrated with cracks or weak joints.
So, what is weldable aluminum? Most commonly, alloys in the 1xxx, 3xxx, 5xxx, and 6xxx series are considered weldable using standard arc welding techniques. For example, 5xxx (like 5052 or 5083) and 6xxx (like 6061 or 6082) are popular choices in fabrication and automotive work because they offer a balance of strength and weldability. Alloys from the 2xxx and 7xxx series, however, are more difficult due to their copper or zinc content—these can be prone to hot cracking and may require specialized procedures.
Once you’ve identified your base alloy, it’s time to choose the right filler. The two most common aluminum welding rods or wires are 4043 and 5356. But which one should you reach for?
| Alloy Series | Typical Alloys | Common Filler Rods/Wires | Notes |
|---|---|---|---|
| 1xxx | 1100 | 1100, 4043 | Excellent weldability, low strength |
| 3xxx | 3003, 3004 | 4043 | Good for general fabrication |
| 5xxx | 5052, 5083, 5086 | 5356 | High strength, marine/structural use |
| 6xxx | 6061, 6082 | 4043, 5356 | Both rods work—4043 for ease, 5356 for strength |
| 2xxx/7xxx | 2024, 7075 | Specialty rods, not standard | Prone to cracking, consult datasheets |
Always verify filler compatibility with manufacturer datasheets for your specific alloy and application.
For most groove welds on 6xxx series, either 4043 or 5356 aluminum welding rod will work. 4043 is easier to weld and gives a smoother appearance, while 5356 offers higher strength—especially for fillet welds or when extra durability is needed. However, avoid using 4043 with high-magnesium 5xxx alloys, as it can cause brittleness (The Fabricator).
And what about aluminum brazing? While not the same as welding, aluminum brazing uses a lower-melting filler to join parts without melting the base metal. This can be a good option for thin, heat-sensitive, or dissimilar joints—but always check the compatibility with your specific alloy.
Source Quality Extrusions and Parts
Imagine spending hours prepping a joint, only to discover your stock is warped or contaminated. Sourcing matters. For consistent, defect-free results, look for weldable aluminum that’s clean, straight, and suited to your process. Here’s a quick checklist to help you evaluate material quality:
- Straightness and flatness—minimize gaps and fit-up issues
- Surface finish—mill finish is easier to clean than anodized or coated parts
- Tight tolerances and certifications—especially for critical or structural work
- Material traceability—know your alloy and batch
For automotive and industrial projects, sourcing from a trusted supplier is crucial. If you need consistent profiles and tight tolerances, consider suppliers specializing in aluminum extrusion parts. These extrusions are engineered for weldability, dimensional accuracy, and surface prep that saves you time and reduces the risk of defects.
When selecting aluminium rods for welding or filler wire, be sure to store them in a clean, dry place. Moisture and contaminants can cause porosity and weak welds. If you’re considering aluminum brazing as an alternative joining method, make sure your parts and filler are compatible for the best strength and appearance.
Choosing the right alloy and filler—and sourcing clean, weld-ready stock—prevents most weld quality issues before you even strike an arc.
With your materials and fillers sorted, you’re ready to move on to prepping joints and fit-up for clean, strong fusion. Let’s dive into the best practices for surface prep and joint setup next.
Step 4: Prep Joints and Fit Up for Clean Fusion
Cleaning and Oxide Removal That Actually Works
Ever noticed how a shiny new piece of aluminum can still yield a porous, weak weld? That’s because even the cleanest-looking aluminum is covered by a stubborn oxide layer, which melts at a much higher temperature than the base metal. If you skip proper prep, you’re inviting porosity, lack of fusion, and erratic arc behavior—no matter how skilled you are at tig welding on aluminum or welding aluminum with mig.
So, what’s the best approach? Here’s a step-by-step breakdown, based on proven industry practice:
- Degrease first: Wipe all joint edges with acetone or a non-chlorinated solvent. This removes oil, grease, and fingerprints that could introduce hydrogen and cause porosity.
- Use the right cleaning tools: Only use a stainless steel brush that’s dedicated to aluminum—never one that’s touched steel, or you’ll risk cross-contamination and future weld failures.
- Brush after degreasing: Always degrease before brushing. Brushing first can embed contaminants into the surface, making them harder to remove.
- Light pressure, one direction: When brushing, use gentle strokes in one direction. This keeps the oxide layer thin without embedding debris or creating scratches that trap contaminants.
- Remove hydrated oxides: If you see white stains or corrosion, these hydrated oxides must be filed or planed off. Otherwise, you’ll struggle to initiate and control your weld puddle.
Still wondering, "If I only have time for one step, which matters most?" Degreasing is non-negotiable, but combining both degreasing and oxide removal gives you the best shot at a defect-free weld.
Brush immediately before welding to keep oxide from reforming.
Fit-Up and Fixturing for Stable Puddles
Imagine getting your cleaning perfect, only to have gaps or distortion ruin your weld. Proper joint prep and fixturing are just as critical as surface cleanliness. Here’s how to set yourself up for success in how to weld aluminum, whether you’re using weld aluminum with tig or welding aluminum with mig:
- Bevel thick joints: For thicker sections, bevel edges as specified in your procedure or datasheet. This promotes full fusion and reduces the risk of incomplete penetration.
- Set the right gap: For GTAW (TIG), a small root gap helps ensure fusion without excessive heat input. For GMAW (MIG), follow recommended joint designs for your thickness (see technical charts for typical gaps).
- Strategic tacking: Place tacks at regular intervals to maintain alignment and minimize distortion. Use clamps or fixtures to hold pieces steady—aluminum expands rapidly, and even small movements can open gaps or cause misalignment.
- Preheat only if required: Most modern alloys don’t need preheating, and overheating can degrade mechanical properties. Only preheat if your procedure or datasheet specifically calls for it.
- Avoid contaminated grinders: Never use grinding wheels or abrasive tools that have touched steel. These can smear iron into the surface, leading to future corrosion and weld failure.
Do’s and Don’ts for Aluminum Joint Prep
| Do | Don’t |
|---|---|
|
|
When prepping for aluminium wire welding, these steps are especially important. Aluminum wire is soft and sensitive to contamination—any oil, dust, or oxide will show up as porosity or erratic feeding during the weld. Clean fit-up and tight joints also help maintain a stable puddle and reduce heat input, which is crucial for preventing warping and burn-through.
In summary, great aluminum welds start with great prep. Clean, degreased, and properly fixtured joints minimize common issues like porosity, lack of fusion, and distortion. Whether you’re focused on weld aluminum with tig or welding aluminum with mig, don’t skip these steps—they’re the foundation for every strong, shiny bead.
With your joints prepped and aligned, you’re ready to dial in your technique. Next, we’ll walk through TIG setup and show you how to lay consistent aluminum beads with confidence.
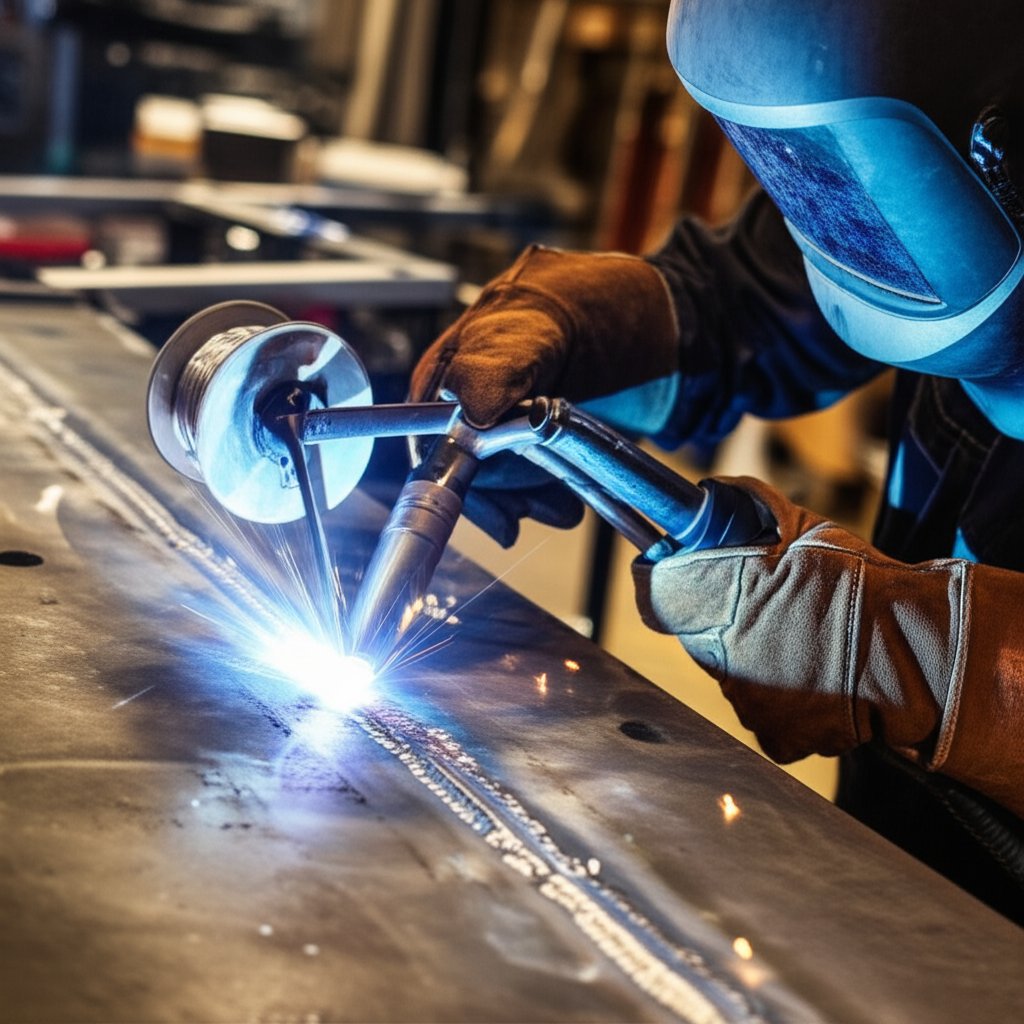
Step 5: Set Up TIG and Lay Consistent Aluminum Beads
Dial In Your TIG for Aluminum
Ever wondered why some TIG welds on aluminum look like a smooth, shiny stack of dimes while others turn out grainy, sooty, or full of holes? The secret isn’t just fancy equipment—it’s about dialing in the right setup, understanding your puddle, and practicing the fundamentals of aluminium welding with tig.
Let’s start with the essentials. For tig aluminium welding, always use a TIG welder set to AC (alternating current). This is critical: AC provides the “cleaning action” needed to break up the stubborn oxide layer that coats aluminum and ensures you get a contaminant-free weld. Install a 2% lanthanated or ceriated tungsten electrode, properly ground for AC (typically to a balled or slightly truncated tip, depending on your machine’s recommendations). Pair this with a gas lens and 100% argon shielding gas for maximum arc stability and coverage.
Now, before you even strike an arc, practice your hand and torch movement. Imagine you’re gliding your torch smoothly across the table—steady, controlled, and consistent. This muscle memory is key for tig welder to weld aluminum effectively. If you only move your fingers and not your whole hand, you’ll be limited to short, inconsistent welds. Instead, keep your wrist locked and slide your hand for a smooth, even motion.
Run Your First Bead and Lap Fillet
Sounds complex? Let’s break it down into a repeatable routine you can use every time you set up for how to tig weld aluminum:
- Practice Dry Runs: With your gloves on, grip the torch and filler rod as you would during welding. Slide your hand across the table in a straight line, keeping a consistent distance between the tungsten and the workpiece. This builds muscle memory before you ever create a puddle.
- Establish the Puddle: Strike an arc on your (cleaned) scrap aluminum. Watch for the puddle to appear as a shiny, fluid dot—this means the oxide layer has been removed and you’re ready for filler.
- Maintain a Tight Arc Length: Keep the tungsten just above the puddle—too long and you’ll lose heat and arc focus, too short and you risk tungsten contamination. Aim for roughly the diameter of your tungsten electrode.
- Angle and Movement: Hold the torch at a 10–15° push angle, moving steadily forward. Always push the torch—never pull—when welding aluminum with tig.
- Add Filler at the Leading Edge: Dab the filler rod at the front of the puddle, not behind or directly in the arc. This avoids chilling the puddle and helps maintain a smooth, consistent bead. Practice the rhythm: move the torch, dab the rod, repeat.
- Monitor Heat and Speed: Aluminum heats up fast, so you may need to ease off the pedal to avoid overheating and losing control of the puddle. Watch for a consistent width and a shiny surface—this is your visual cue that the settings are right.
- Post-Flow Gas: When you finish your weld, keep the torch in place for a few seconds to allow post-flow gas to protect the cooling tungsten and puddle, preventing oxidation and contamination.
Here’s a simple practice progression to build your skills from stringers to fillets:
- Lay down straight stringer beads (no filler) to master puddle control.
- Add filler and practice stringer beads, focusing on rhythm and consistency.
- Move to weave beads for wider joints.
- Practice lap and T-joint fillets, adjusting your torch angle and filler timing as needed.
What should a good tig welded aluminum bead look like? You’ll notice a clean, shiny finish with a visible “etched” zone (from the AC cleaning action) along the weld edges. There should be no soot, porosity, or black pepper-like flecks—these are signs of contamination or incorrect balance settings.
Fine-Tuning: AC Balance and Frequency
Want even more control? Most modern TIG welders let you adjust AC balance and frequency. Lower balance means more cleaning (good for heavy oxide layers), while higher balance puts more heat into the base metal for faster travel. Frequency adjustments let you focus the arc for tight spots or spread it for wider beads. Practice changing these settings to see how they affect the puddle and bead appearance.
Take it slow and practice often—consistent torch movement, tight arc length, and proper filler timing are the keys to mastering tig aluminum welding.
With these steps, you’ll not only understand how to tig weld aluminum but also develop the confidence to tackle more complex joints. Next, we’ll shift gears and show you how to configure MIG and spool gun setups for even faster aluminum welding on thicker parts.
Step 6: Configure MIG and Spool Gun for Fast, Reliable Aluminum Welding
Configure MIG for Soft Aluminum Wire
Ever tried feeding aluminum wire through a standard MIG gun, only to end up with a tangled mess? You’re not alone. Aluminum wire is much softer than steel, so it bends and birds-nests easily. The secret to how to mig weld aluminum efficiently is all about the right setup and technique—especially if you want to avoid headaches and get strong, clean welds every time.
Let’s break down the essentials for a smooth start in welding aluminum with a mig welder:
- Drive Rolls: Always install U-groove drive rolls. These cradle soft aluminum wire gently, reducing shaving and feeding problems.
- Liner: Use a Teflon or nylon liner. These materials create less friction, helping the wire glide through the cable without snagging.
- Contact Tip: Choose a tip sized just slightly larger than your wire. This helps prevent burn-back and sticking due to aluminum’s rapid expansion.
- Shielding Gas: Only use 100% argon. Mixed gases (like C-25 or 75/25) will cause porosity and weak welds on aluminum.
- Wire Selection: Load ER4043 for general work, or ER5356 for higher strength or marine projects. Both are widely available and cover most applications (WeldGuru).
Spool Gun Technique for Clean, Fast Welds
Still struggling with wire feed, even after upgrading your liner and drive rolls? Imagine holding a spool of wire right at the gun—no long, winding cable to kink or jam. That’s exactly what a spool gun does. It’s the most reliable wire welder for aluminum because it keeps the feed path short and direct, nearly eliminating bird-nesting and inconsistent feeding.
Here’s how to get your setup dialed in for aluminum mig welding with a spool gun:
- Install the Spool Gun: Attach your compatible spool gun and load the correct wire diameter (typically 0.030–0.047 inch for most jobs).
- Set Polarity: Use Direct Current Electrode Positive (DCEP) for spray transfer—the preferred mode for aluminum.
- Adjust Wire Feed and Voltage: Aluminum requires 30–100% higher wire feed speed than steel. Start with your welder’s aluminum settings chart if available. For example, on 0.080" sheet with 0.030" wire, a good starting point is 15.5–16.0 volts and 420–425 IPM wire speed.
- Set Gas Flow: Begin at 20–35 CFH of 100% argon. Too little gas causes soot; too much can cause turbulence and porosity.
- Check Stick-Out: Maintain a 1/2 to 3/4 inch stick-out. Too short and you risk burning back to the tip; too long and you lose arc stability.
- Push, Don’t Pull: Always use a push (forehand) technique at a 10–20° angle. Pulling the gun reduces gas coverage and leads to porosity and dirty welds.
- Travel Speed: Move quickly! Aluminum conducts heat fast and melts at a low temperature, so a steady, brisk pace prevents burn-through and warping.
- Practice on Thicker Coupons: Start with thicker scrap to get a feel for the arc and puddle before moving to thin sheet.
Sounds like a lot? Here’s a simple setup and tuning checklist to keep you on track:
| Step | What to Check |
|---|---|
| 1. Wire & Gun | Spool gun loaded with ER4043/ER5356, U-groove drive rolls, Teflon liner |
| 2. Gas | 100% argon, 20–35 CFH flow |
| 3. Settings | DCEP polarity, wire feed and voltage per chart or start high and adjust |
| 4. Technique | Push angle, 1/2–3/4” stick-out, brisk travel speed |
| 5. Test Bead | Lay a bead on scrap, check for smooth, shiny puddle with minimal soot |
| 6. Adjust | Fine-tune feed and voltage for best bead profile and arc stability |
Wondering, can you weld aluminum with a mig welder? Absolutely, as long as you follow these setup steps and use a spool gun or push-pull system for smooth feeding. With a little practice, you’ll find that you can mig weld aluminum quickly and with less fuss than TIG—especially on thicker parts or long joints.
"A well-tuned MIG and spool gun setup turns tricky aluminum jobs into fast, production-ready welds—just remember to push, keep your pace, and adjust as you go."
Now that you’ve mastered MIG and spool gun techniques, you’re ready to tackle special cases like castings, thin sheet, and joining dissimilar metals. Let’s explore how to handle those scenarios next.
Step 7: Handle Castings, Thin Sheet, Thick Plate, and Dissimilar Joints
Welding Castings Without Filling Them With Porosity
Ever tried welding cast aluminum and ended up with a bead full of holes or cracks? You’re not alone. Welding cast aluminum is a test of patience and precision. Its high porosity and brittle nature make it much trickier than working with rolled or extruded aluminum. But with the right approach, you can get strong, reliable results—whether you’re fixing an engine part or fabricating a custom bracket.
- Identify the Alloy: Castings vary in composition. If you’re not sure, use visual inspection or, for critical jobs, spectroscopic analysis (like XRF) to pinpoint the alloy. This helps you pick the right filler and process.
- Thorough Cleaning: Remove all oil, grease, and especially the stubborn oxide layer. Use a dedicated stainless steel brush and a solvent wipe. Handle with clean gloves to avoid recontamination.
- Preheat When Needed: For most castings, preheat to 300–400°F (150–200°C). This reduces thermal shock and the risk of cracking, especially in thick or high-silicon alloys. Use an infrared thermometer for accuracy.
- Choose Your Process: TIG welding (AC, with a balanced wave) gives the best control and is ideal for thin or intricate castings. MIG is faster for thicker sections but may be less precise. Stick welding is rarely recommended for cast aluminum due to its high heat and spatter.
- Test Beads and Tack Welds: Always lay a test bead on a scrap or hidden area to check for porosity. Tack welds help hold alignment and minimize distortion—keep them small and inspect for cracks before final welding.
- Control Heat and Cool Gradually: Use the lowest amperage that achieves fusion and allow the weld to cool slowly. Avoid water quenching—let the part air-cool or use an insulating blanket to prevent new cracks.
Common issues like porosity, cracking, and distortion can be minimized by following these steps. If you encounter porosity, grind out the defect, clean again, and re-weld with fresh filler. For crack repairs, grind out the crack, preheat, and use a compatible filler rod—4047 for high-silicon, 5356 for general corrosion resistance.
So, can you weld cast aluminum? Absolutely, if you respect its quirks and follow a meticulous prep and welding routine.
Joining Thin Sheet and Thick Plate: Special Considerations
- Thin Sheet (under 1/8”): Reduce heat input to avoid burn-through. Use a backing bar (copper works well) to support the weld and absorb excess heat. TIG is preferred for maximum control, but MIG with a spool gun can work if you move fast and keep your travel speed steady.
- Thick Plate: Bevel the edges to ensure full penetration. Multi-pass welds are often necessary—let the part cool between passes to manage distortion. Preheat thick sections as recommended for castings.
- Distortion Management: Tack weld at several points, clamp securely, and alternate your weld sequence to distribute heat evenly.
Whether you’re welding cast aluminum or working with thin or thick stock, the key is matching your process and prep to the material’s needs. Don’t rush—take time to set up each weld for success.
Alternatives for Joining Aluminum to Steel
Now, what if you need to join aluminum to steel? Maybe you’re repairing a boat, fabricating a custom bracket, or tackling a unique automotive project. It’s a common question: can you weld aluminum to steel directly? The answer—at least with standard arc welding techniques—is no. Direct fusion creates brittle intermetallic compounds that fail under stress.
- Bimetallic Transition Inserts: These are specially manufactured pieces with aluminum bonded to steel. You weld aluminum-to-aluminum on one side, steel-to-steel on the other. This is the safest, most reliable method for structural joints. Weld the aluminum side first to provide a heat sink for the steel weld and avoid overheating the interface.
- Coating Techniques: Sometimes, the steel is coated with aluminum (via hot dip or brazing). You then weld the aluminum part to the coated steel, being careful not to burn through the barrier. This is usually only for non-structural or sealing applications.
- Brazing Aluminum: Brazing can join aluminum to steel using a suitable filler at lower temperatures, minimizing brittle compound formation. It’s ideal for non-load-bearing assemblies or where minimal thermal distortion is needed.
- Mechanical Fasteners and Adhesives: When in doubt, bolts, rivets, or structural adhesives can join aluminum to steel where welding isn’t feasible or reliable.
Do not attempt direct fusion welding of aluminum to steel without engineered transition materials.
To sum up: Can you weld steel to aluminum? Not by direct arc welding. But with bimetallic inserts, proper coatings, or brazing, you can weld steel to aluminum for many practical applications. Always choose the method that matches your project’s strength, durability, and safety requirements.
By mastering these special-case scenarios—whether welding cast aluminum, managing thin or thick sections, or tackling dissimilar joints—you’ll be ready for almost anything aluminum fabrication throws your way. Next, we’ll cover how to troubleshoot defects and finish your welds for a professional result.
Step 8: Fix Defects and Finish Aluminum Welds Professionally
Troubleshoot Common Aluminum Weld Defects
Ever finished a weld and wondered, "Why does my bead look bubbly, cracked, or sooty?" You’re not alone. Even skilled welders run into issues—aluminum’s unique properties mean a small misstep in prep or technique can lead to visible (and invisible) problems. The good news? Most defects can be fixed or prevented with a systematic approach. Let’s break down the most common issues you’ll face when learning how to weld aluminium and how to resolve them for strong, professional results.
| Defect | Likely Causes | Remedies | Prevention |
|---|---|---|---|
| Porosity (bubbles/holes) | Moisture, oil, or grease on base/filler; low gas purity or flow; contaminated oxide layer | Grind out and re-weld; clean thoroughly; dry filler wire; verify gas purity and flow | Degrease and brush before welding; use high-purity argon; store wire dry; avoid shop rags and compressed air |
| Lack of Fusion | Inadequate cleaning; insufficient heat; too fast travel; improper joint design | Grind out cold areas; increase amperage or slow down; improve joint prep | Brush oxide immediately before welding; ensure tight fit-up; select correct filler and settings |
| Oxide Entrapment | Thick or hydrated oxide layer; incorrect AC balance (TIG); rushed cleaning | Remove weld, clean thoroughly, re-weld with correct AC balance | Brush after degreasing; adjust AC balance for more cleaning action; avoid long delays between prep and welding |
| Hot Cracking | Wrong filler/base alloy combo; excessive heat input; poor joint design | Remove cracked section; select appropriate filler; redesign joint if needed | Consult filler charts; use recommended joint shapes; control heat input and sequence |
| Undercut | Too high amperage; fast travel; poor torch angle | Fill with additional weld pass; adjust technique | Lower amperage; keep proper travel speed and torch angle |
| Sooty/Dirty Welds | Insufficient gas coverage; contaminated base or filler; pulling instead of pushing | Clean and re-weld; increase gas flow; use push technique | Check for leaks; use 100% argon; push, don’t pull |
| Distortion | High heat input; poor fixturing; uneven tacking | Clamp, straighten, or rework as needed | Use tacks and clamps; alternate weld sequence; minimize heat input |
Wondering, can aluminum be welded without these headaches? Absolutely—if you pay close attention to surface prep, joint design, and parameter control. If you’re asking, what is needed to weld aluminum without porosity or cracks, the answer is: clean materials, the right filler, and a well-tuned process. And remember, can you weld aluminum to aluminum reliably? Yes, but only if both surfaces are clean, properly fit, and you match your filler to the base alloy.
Post-Weld Cleanup and Surface Protection
Once you’ve laid down a sound bead, finishing steps matter—both for appearance and long-term durability. Aluminum welds can be left as-welded for structural work, but for anything exposed or cosmetic, post-weld cleaning and protection are key. Here’s a practical checklist to guide your finishing routine:
- Allow the weld to cool slowly—avoid rapid cooling that can induce new cracks
- Clean the weld: Use a stainless steel brush or chemical cleaner to remove soot and discoloration
- Inspect visually for surface cracks, pinholes, or undercut
- Blend sharp edges and high spots with a fine file or flap disc (avoid over-grinding, which can weaken the weld)
- Document your welding settings and any issues for future reference
- Prepare the surface for painting or anodizing: Remove all residue and ensure a smooth, clean finish
Proper post-weld cleaning helps prevent future corrosion and ensures coatings adhere well. If you plan to anodize, be aware that filler choice can affect color match—4043 often turns dark, while 5356 stays lighter after anodizing.
"A clean, well-finished weld not only looks professional—it’s your best defense against premature failure and corrosion."
Still asking, how do I weld aluminum with fewer defects? The answer is to focus on prep, controlled technique, and a consistent finishing routine. And for those considering spot joining, can you spot weld aluminum? Yes, with the right resistance welding equipment and clean, oxide-free surfaces, spot welding is possible—though not as flexible as TIG or MIG for most fabrication tasks.
By following this troubleshooting and finishing playbook, you’ll find that can you weld aluminum to aluminum with professional results is not just possible—it’s well within your reach. Next up, let’s look at templates, references, and smart sourcing strategies to help you scale your aluminum welding projects with confidence.
Step 9: Use Templates, References, and Smart Sourcing to Scale Your Aluminum Welding
Copy-and-Adapt WPS and Checklists
Ever feel overwhelmed by all the variables in how to weld aluminium? Imagine if you had a proven checklist and template for every job—no more guesswork, just repeatable, professional results. Whether you’re learning how to weld aluminium at home or scaling up for production, using a Welding Procedure Specification (WPS) and structured checklists is the best way to weld aluminium with consistency and confidence.
Here’s a practical WPS template you can copy and adjust for TIG (GTAW) or MIG (GMAW) jobs:
- Process: (GTAW/TIG or GMAW/MIG)
- Base Alloy: (e.g., 6061-T6, 5083-H321)
- Filler Metal: (4043, 5356, etc.)
- Shielding Gas: (100% Argon, or Argon/Helium mix if specified)
- Polarity/AC Balance: (AC for TIG, DCEP for MIG)
- Joint Type & Position: (Butt, Fillet, Lap, Flat/Vertical/Overhead)
- Pre/Post-Cleaning: (Solvent wipe, stainless brush, post-weld cleaning)
- Travel Technique: (Push for MIG, torch angle for TIG, stringer/weave beads)
- Quality Checks: (Visual inspection, bend test, macroetch, documentation)
Pair this with two essential checklists for every project:
-
Pre-weld Setup Checklist:
- Machine settings (amperage, voltage, AC balance)
- Shielding gas and flow rate
- Correct filler wire/rod and diameter
- Cleaned and prepped base material
- PPE and ventilation in place
-
Post-weld Checklist:
- Visual inspection for porosity, cracks, undercut
- Post-weld cleaning (brush, solvent, blend edges)
- Document settings, issues, and results for future reference
- Prepare for coating or anodizing if needed
"A repeatable checklist and WPS isn’t just for big shops—it’s the best way to weld aluminium for anyone who values quality, whether you’re working in your garage or a production line."
Trusted References for Aluminum Procedures
Not sure where to find the most up-to-date procedures or want to go deeper on what to use to weld aluminum? Here’s a compact list of credible reference sources you can turn to for standards, troubleshooting, and advanced tips:
- AWS D1.2 Structural Welding Code – Aluminum
- Hobart Aluminum Welding Guide
- OEM datasheets for your specific alloy and filler (check manufacturer websites)
- Welder manufacturer setup and troubleshooting guides (e.g., Miller, Lincoln Electric)
- Aluminum Association’s Welding Aluminum: Theory and Practice
When you’re stuck or want to know the best way to weld aluminium for a new scenario, these sources offer step-by-step guidance and validated procedures you can trust.
From Sourcing to Strong Welds: Why Material Choice Matters
Imagine spending hours perfecting your technique, only to have poor-quality or mismatched material cause distortion or weak welds. The foundation of every strong aluminum weld is consistent, weld-ready stock. That’s why smart sourcing is as important as technique for anyone serious about how to weld aluminum to aluminum with minimal defects.
For projects demanding high tolerances, repeatability, or automotive-grade performance, consider sourcing aluminum extrusion parts from a specialized supplier like Shaoyi. These extrusions are engineered for weldability, dimensional accuracy, and surface prep that simplifies your workflow. By starting with straight, certified, and clean material, you reduce prep time and minimize the risk of distortion or fit-up issues—especially critical if you’re learning how to weld aluminium without a welder and want to use alternative joining methods like adhesives or mechanical fasteners.
If you’re unsure what is the best way to weld aluminum for your application, remember: the right material and a solid WPS are your insurance policy for strong, repeatable results.
"Consistent sourcing and a well-documented process turn aluminum welding from an art into a science—making it possible to scale from DIY projects to professional production."
Ready-to-Use Workflow
- Start with a proven WPS and checklist for every job.
- Reference industry standards and manufacturer guides for process details.
- Source clean, certified, and weldable aluminum—preferably from a specialist if tolerances matter.
- Document your results and adjust as you learn. That’s how you build repeatable success in how to weld aluminum to aluminum.
By following these steps, you’ll not only avoid common pitfalls but also create a workflow that’s easy to refine and scale—whether you’re figuring out how to weld aluminium at home or managing a production run. For automotive and precision work, smart sourcing from a provider like Shaoyi ensures your extrusions arrive ready for assembly, saving you time and ensuring top-tier weld quality every time.
Frequently Asked Questions About Welding Aluminium
1. How do you prepare aluminium for welding?
Proper preparation involves degreasing the aluminium with acetone, removing the oxide layer using a dedicated stainless steel brush, and ensuring tight, clean fit-up. This minimizes contamination and defects, setting the foundation for strong welds.
2. Can you weld aluminium with a MIG welder?
Yes, you can weld aluminium with a MIG welder, especially when equipped with a spool gun, U-groove drive rolls, and a Teflon liner. Using 100% argon shielding gas and the correct wire, such as ER4043 or ER5356, ensures smooth feeding and quality welds.
3. What is the best way to weld aluminium for beginners?
For beginners, TIG welding offers precise control and clean results on thin sections, while MIG welding with a spool gun is faster for thicker parts. Starting with clean materials, proper filler selection, and following a repeatable checklist are key to success.
4. What are common problems when welding aluminium and how can I fix them?
Common issues include porosity, lack of fusion, and sooty welds. These are best prevented by thorough cleaning, correct machine settings, and proper technique. If a defect appears, grind out the problem area, re-clean, and re-weld using the right parameters.
5. Is there an alternative to welding aluminium for custom automotive parts?
Yes, sourcing custom aluminium extrusion parts from a specialist like Shaoyi can eliminate the need for in-house welding. Their integrated process delivers precise, weld-ready components, reducing production complexity and ensuring consistent quality.