 Small batches, high standards. Our rapid prototyping service makes validation faster and easier —

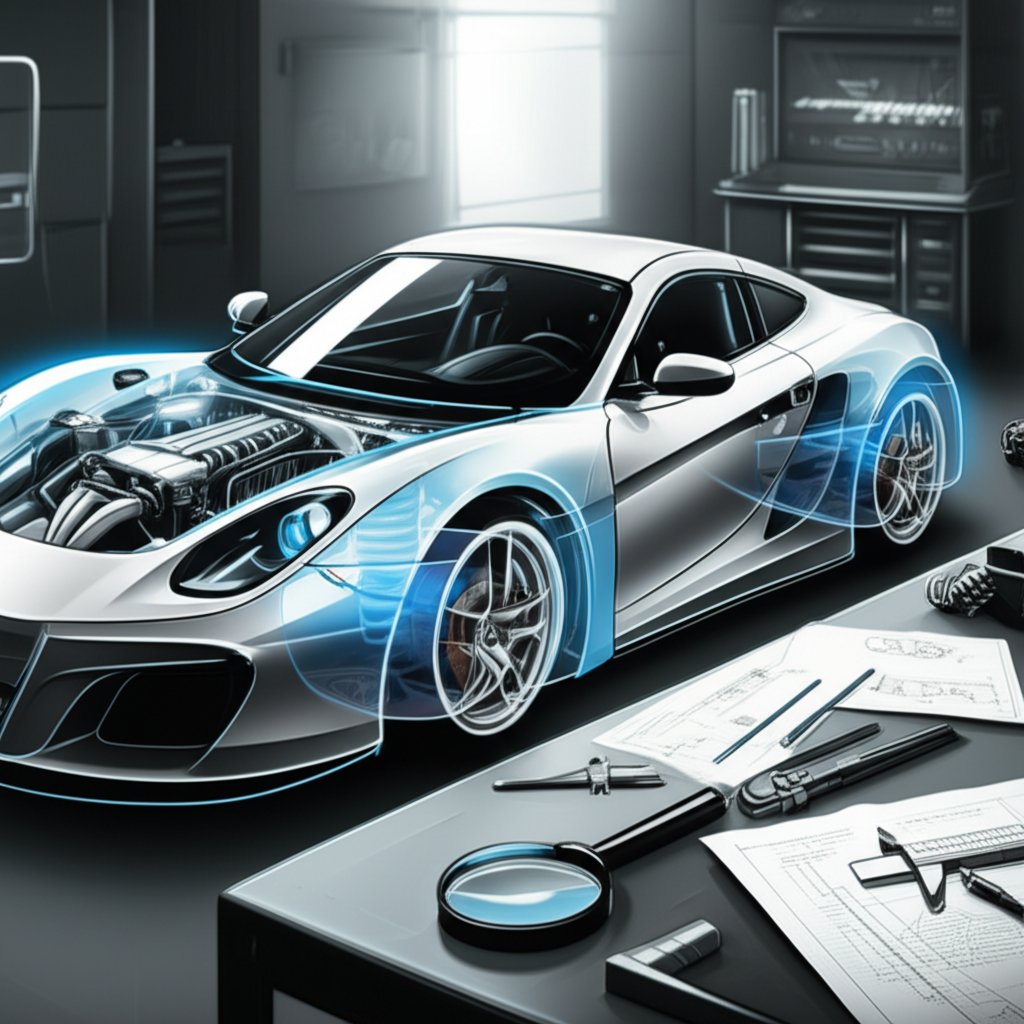
Automotive Performance Parts Upgrades Backed By Real Data

Start With Clear Goals And A Smart Upgrade Plan
What Counts As Automotive Performance Parts?
When you think about upgrading your car, the phrase "automotive performance parts" can mean different things to different drivers. At its core, these are components designed to enhance your vehicle’s acceleration, braking, or handling. Whether you’re after quicker lap times, safer towing, or simply a more engaging daily drive, performance parts replace or supplement your car’s stock equipment to deliver measurable improvements. These upgrades are available both from original equipment manufacturers (OEM) and from a wide range of respected aftermarket brands (Kelley Blue Book).
- Intake: Improves airflow for better engine breathing and throttle response.
- Exhaust: Reduces restriction, enhances sound, and can increase horsepower.
- Fueling: Upgrades like injectors and pumps support higher power safely.
- Suspension: Boosts grip and control with changes to springs, shocks, and sway bars.
- Braking: Shortens stopping distances with better pads, rotors, and calipers.
- Wheels/Tires: Improves grip, ride quality, and style.
- Tuning: Optimizes engine parameters for your unique setup.
Don’t forget the interior: bucket seats, for example, can provide increased support and safety during spirited driving or on the track.
Set Goals Before You Buy
Sounds complex? It doesn’t have to be. The smartest upgrades start with a clear goal. Are you building for daily comfort, towing heavy loads, chasing lap times, or turning heads at car shows? Setting your sights early helps you avoid wasted money and makes every part count.
- Horsepower: Intake, exhaust, fueling, tuning
- Throttle response: Intake, tuning, lightweight drive shaft
- Grip and handling: Suspension, wheels/tires, drivetrain stabilizer
- Braking distance: Brakes, wheels/tires
- Heat management: Cooling upgrades, heat shields
Using a framework like SMART (Specific, Measurable, Actionable, Rewarding, Time-specific) helps you break big goals into clear, practical steps (NSLS Goal Setting). For example, if you want your LS engine to handle a Procharger supercharger, you’ll need to plan supporting upgrades for fueling, cooling, and drivetrain durability.
Plan Upgrades In Stages
Imagine your car as a system—like a symphony, each part must work in harmony. Upgrades rarely deliver their full benefit in isolation. For instance, adding a high-flow intake without matching exhaust and tuning can create bottlenecks, limiting gains and potentially harming reliability (Mr Stebo).
- Define your use case (daily, track, towing, show, etc.)
- Set a realistic budget—factor in installation and tuning costs
- Identify the weakest link (e.g., brakes for power builds, or stock sway bars for handling)
- Check fitment and compatibility (vehicle generation, trim, measurements, emissions rules)
- Plan for tuning or verification (use gauges, data logs, or professional dyno sessions)
For example, if you’re aiming for sharper handling, you might stage your upgrades: start with tires and wheels, add a drivetrain stabilizer, then upgrade suspension and bucket seats for additional support.
Compatibility, Emissions, and Trade-Offs
Before purchasing any parts, always review your local emissions regulations and the manufacturer’s documentation for fitment. Some upgrades may increase noise, vibration, and harshness (NVH), require more frequent maintenance, or affect your vehicle’s warranty. Quality manufacturing and precise fitment minimize rework and future headaches—so always measure carefully and confirm your vehicle’s exact generation and trim before ordering.
Mapping your goals to the right part categories makes the process easier. Whether you’re chasing horsepower with a Procharger, monitoring progress with gauges, or reinforcing your drivetrain with a new drive shaft, a thoughtful, staged approach ensures your investment delivers real-world results.
Fitment And Compatibility Made Simple
Fitment Basics Most Shoppers Overlook
Ever order a set of 5x114.3 wheels, only to find out they rub the wheel well or the lug nuts do not line up? You are not alone. The most common—and costly—mistakes with automotive performance parts happen before the box even arrives. If you want to avoid returns and headaches, it pays to double-check every detail before clicking buy.
| Attribute | How To Verify | Tools Needed | Where To Find Data |
|---|---|---|---|
| Bolt Pattern | Measure across the center of the lugs (see 5-lug vs. 6-lug method) | Tape measure, reference chart | Owner's manual, OEM catalog, JEGS Tech Article |
| Wheel Offset | Check the stamped number (e.g., +40mm) or measure from hub to wheel center | Tape measure, straight edge | Supplier specs, wheel markings |
| Intake Routing Space | Measure available under-hood space; check for hose or reservoir interference | Tape measure, flashlight | Under-hood inspection, manufacturer diagrams |
| Exhaust Clearance | Check for obstacles near planned routing; verify ground clearance | Jack, stands, tape measure | Service manual, visual inspection |
| O2 Sensor Location | Locate bung position on exhaust; compare to stock sensor harness length | Visual check, tape measure | OEM diagrams, part instructions |
Verify Measurements Before You Click Buy
Imagine spending hours on an installation, only to find your new wheels do not clear the brake calipers or that the tie rod makes contact at full lock. To prevent this:
- Document your VIN and take detailed photos of your current setup.
- Use a tape measure to check wheel offset, backspacing, and wheel well clearance. For 5-lug wheels, the easiest way to measure the bolt pattern is to measure from the center of one lug hole to the outer edge of one of the two holes furthest away from it.
- Check that the wheel bearing and hub size match your new wheels to prevent vibration and premature wear.
- Confirm that lug nuts are the correct thread pitch and seat type for your wheels.
- Look up sensor and harness connector locations if replacing intakes or exhausts—misaligned O2 sensors or MAF sensors can trigger warning lights.
Authoritative data sources include:
- Owner’s manual
- OEM parts catalogs
- Reputable supplier fitment guides
- Online enthusiast forums (for vehicle-specific quirks)
Alignment And Clearance Considerations
When you swap wheels, tires, or suspension, you also change how your car sits and steers. Adjusting wheel offset or choosing wider wheels affects scrub radius—the distance between where the steering axis meets the ground and where the tire contacts the road. A big change here can alter steering feel and even stress the wheel bearing or tie rod, especially if the wheels stick out past the fender.
After any major suspension or wheel change, a professional front end alignment is a must. Not only does this preserve your new tires, but it also ensures your car tracks straight and maintains proper handling. Misalignment can lead to uneven tire wear, poor ride quality, and even damage to components like the tie rod or ball joint.
For intake and under-hood upgrades, always measure available space and look for potential interference with hoses, reservoirs, or heat shields. Documenting your setup with photos before ordering helps avoid mix-ups between similar-looking models and trims.
Getting fitment right is the foundation of any successful upgrade. Next, we will explore how intake and fueling choices can unlock real performance—when matched to your vehicle’s needs.
Intake And Fueling Upgrades That Actually Work
Choosing The Right Intake For Your Use Case
Ever wonder why some cars feel instantly more responsive after a simple air intake upgrade, while others barely change? The answer comes down to balance—matching airflow to your engine’s real needs. A cold air intake is a popular entry point for enthusiasts looking to boost throttle response and unlock a subtle horsepower gain. By drawing in cooler, denser air from outside the engine bay, these systems can help your engine breathe better, especially at higher RPMs. But remember: the gains you’ll notice depend on your vehicle’s current setup and whether you address other system bottlenecks at the same time.
| Part | Expected Effect | Tuning Required | Difficulty | Service Interval | Cost Range |
|---|---|---|---|---|---|
| Cold Air Intake | Improves airflow, sharper throttle, mild HP gain | Sometimes (for max results) | Beginner | Clean/replace filter every 15k-30k miles | Low to moderate |
| Throttle Body | Better airflow, potential for more power if matched to other upgrades | Usually (especially if larger than stock) | Intermediate | Inspect/clean every 30k miles | Moderate |
| Intake Manifold | Optimizes air distribution, supports higher RPM power | Recommended | Intermediate to advanced | Inspect gaskets periodically | Moderate to high |
| Fuel Injector | Delivers more fuel, supports power mods, improves combustion | Yes (recalibration needed) | Intermediate | Clean every 30k-45k miles | Moderate |
| Fuel Pump | Increases fuel flow, prevents starvation at high load | Sometimes (for high-output builds) | Intermediate | Inspect/replace as needed | Moderate to high |
When A Bigger Throttle Helps
Imagine you’ve installed a larger throttle body, expecting a dramatic difference—yet the car feels the same. Here’s why: if your intake manifold or air intake is restrictive, or your tune isn’t adjusted for the new flow, the bigger throttle becomes the weakest link. True gains come when all components—intake, throttle body, intake manifold, and even the fuel pressure regulator—work together. For some, tuning is essential to recalibrate the air/fuel mix and fully realize the benefits of increased airflow. If you’re chasing every last bit of power, don’t overlook the importance of a high-quality fuel filter to keep contaminants from disrupting fuel delivery and combustion.
- Seal all clamps tightly to prevent vacuum leaks in your air intake system.
- Route intakes away from hot engine components to maximize cold air benefits.
- Always verify sensor orientation—especially for mass airflow and intake air temperature sensors.
Fueling Upgrades Without Overkill
Upgrading your fueling system is about supporting your engine’s demands—not just throwing the biggest parts at it. A high-flow fuel injector, for instance, is crucial when you’ve added power mods like a turbocharger or performance exhaust, ensuring your engine gets enough fuel for optimal combustion (Wolf Motorsport). Pairing this with a performance fuel pump helps maintain consistent fuel pressure, especially under hard acceleration. But don’t forget: a fuel pressure regulator is key to keeping everything in balance, adapting fuel delivery to real-time engine needs.
How do you know when it’s time for a fuel injector tune-up? Watch for symptoms like rough idling, misfires, or decreased fuel efficiency. Regular maintenance—cleaning or replacing injectors and checking the fuel filter—can prevent these issues and extend engine life. Remember, even the best upgrades won’t deliver if your fuel system is clogged or your pump is weak.
- Upgrade the fuel filter to protect injectors and pumps from contaminants.
- Use an adjustable fuel pressure regulator to fine-tune delivery for your specific setup.
- Inspect fuel lines for leaks and replace aging hoses to avoid pressure drops.
In summary, intake and fueling upgrades are most effective when they’re matched to your engine’s actual needs and installed as a balanced system. Regular checks of your air intake, fuel filter, and fuel pressure regulator will help you avoid bottlenecks and keep your build running strong. Next, we’ll explore how exhaust upgrades can further unlock your vehicle’s true potential.
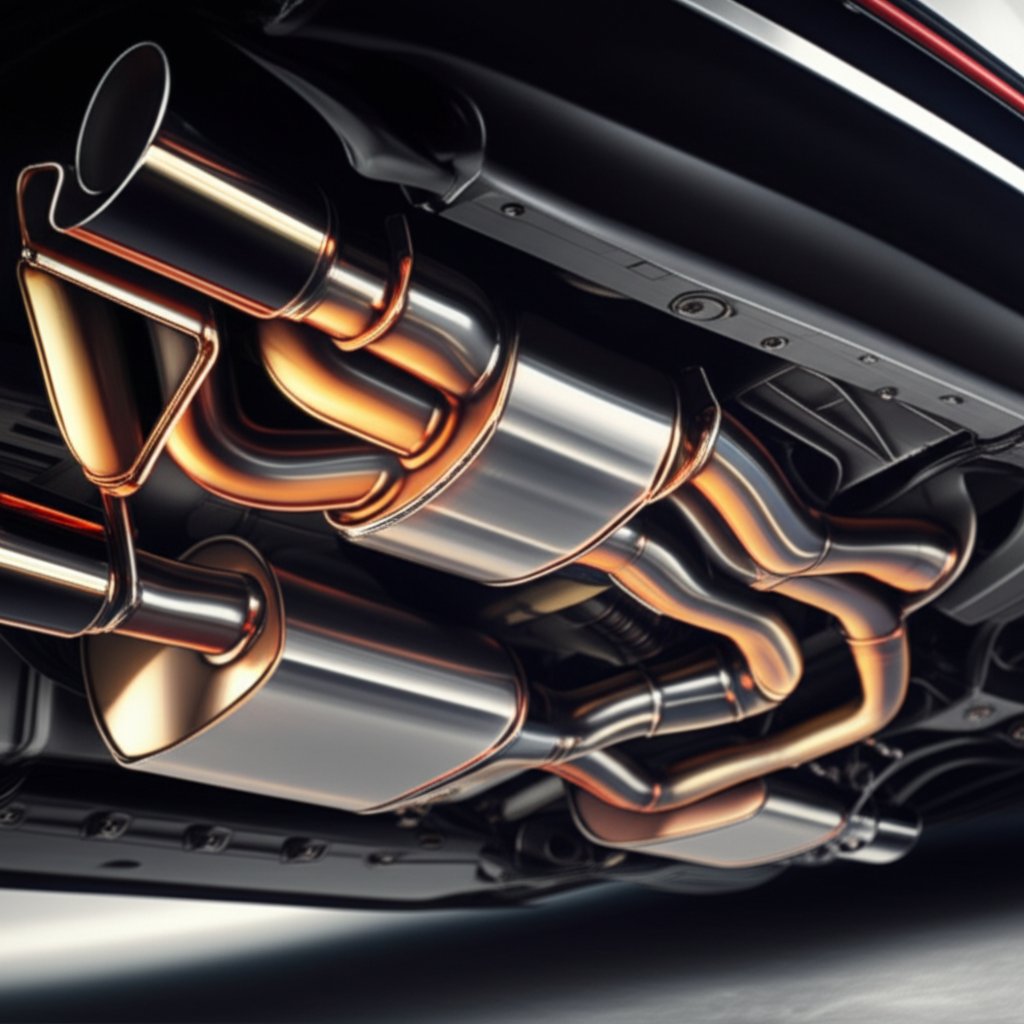
Exhaust Upgrades For Flow, Sound, And Compliance
How Exhaust Flow Translates To Power
Ever wonder why a simple swap from a stock muffler to a performance exhaust can make your car feel more alive? It all comes down to how easily your engine breathes. The exhaust pathway—starting at the exhaust manifold or header, running through the exhaust pipe, and ending at the muffler and exhaust tips—dictates how efficiently spent gases exit the engine. When you reduce restriction and backpressure, your engine can push out exhaust more easily, freeing up horsepower and torque, while also improving throttle response. While theoretically possible to see a slight improvement in fuel efficiency under steady cruising conditions, most drivers will experience a change in driving habits that often negates this benefit.
| Component | Materials | Sound Level | Emissions Notes | Difficulty | Maintenance |
|---|---|---|---|---|---|
| Exhaust Manifold/Header | Cast iron, stainless steel | Mild to aggressive (header = louder) | Headers may affect emissions compliance | Intermediate | Check for leaks, retorque bolts |
| Mid-Pipe/Catalyst | Stainless steel, high-flow cats | Moderate | Must retain catalytic converter for compliance | Intermediate | Inspect for rust, check O2 sensor fitment |
| Muffler | Aluminized or stainless steel | Quiet to very loud (depends on design) | Usually compliant if after-cat | Beginner to intermediate | Check for corrosion, rattles |
| Cat-Back System | Stainless steel, aluminized steel | Customizable (deep, aggressive, or subtle) | Typically emissions legal | Beginner to intermediate (bolt-on) | Minimal, inspect hangers and clamps |
Cat-Back Versus Axle-Back Choices
Choosing between a cat-back and axle-back exhaust system? Here’s the breakdown: an axle-back replaces components from the rear axle to the exhaust tips—usually the muffler and tailpipes. It’s a go-to for drivers seeking a more aggressive sound without major changes or high cost. Cat-back systems, on the other hand, replace everything from the catalytic converter back, including the mid-pipe, muffler, and tips. This setup not only enhances sound, but also improves exhaust flow, often resulting in real performance gains.
- Axle-back: Focuses on sound, easy to install, lower cost.
- Cat-back: Improves flow, boosts power, enhances sound, may reduce weight.
Well-engineered systems from brands like Borla exhaust or Magnaflow exhaust are known for consistent fitment and corrosion resistance. But remember, the biggest gains come when the entire exhaust pathway is optimized—and when tuning is performed to match the new flow characteristics.
Material And Diameter Considerations
Materials matter. Stainless steel resists rust and lasts longer, while aluminized steel is lighter on your wallet but may need replacement sooner. Diameter also plays a role: a larger exhaust pipe can support more power, but go too big and you risk losing low-end torque. The key is matching pipe size to your engine’s output and intended use.
- Resonators: Add to reduce drone and fine-tune tone.
- Perforated-core mufflers: Offer a deep, smooth sound.
- Tip length and style: Longer or wider exhaust tips can subtly change both appearance and tone.
Looking for a signature sound? Systems like the akrapovic exhaust or awe exhaust offer both aggressive notes and emissions compliance, with features like precision x-pipes and valved mufflers for customizable volume and tone. Many aftermarket exhausts now provide 50-state legal options, so you can enjoy a throaty exhaust note without running afoul of emissions regulations.
Sound, Compliance, and Installation Tips
Before upgrading, always check your local emissions laws—some regions restrict certain modifications or noise levels. Carefully align hangers and gaskets during installation to avoid leaks, rattles, and unwanted vibration. After installation, inspect all fasteners and torque them in sequence. This ensures your new exhaust system stays secure and performs as intended.
In summary, exhaust upgrades are about more than just noise—they unlock real performance, improve efficiency, and add personal style. When combined with proper tuning and system-matched parts, upgrades like a cat-back or axle-back system, performance muffler, or custom exhaust tips can transform your driving experience. Next, we’ll explore how suspension and braking upgrades deliver control and confidence to match your newfound power and sound.
Suspension And Braking For Real Gains
When Coilovers Beat Lowering Springs
Ever wonder why seasoned enthusiasts swear by coilovers over simple lowering springs? Here’s the deal: while both options drop your ride height and improve looks, coilovers deliver a level of adjustability and control that lowering springs can’t match. Lowering springs are budget-friendly and easy to install—they replace your stock springs, lower the center of gravity, and reduce wheel gap. But you’re locked into a fixed ride height and spring rate, and mismatched dampers can lead to a bouncy ride or even premature shock wear.
Coilovers, on the other hand, combine adjustable shocks and springs in one unit. You can fine-tune ride height, spring preload, and—on quality kits—damping settings. This means you can dial in your setup for daily comfort, track grip, or anything in between. Imagine tweaking your suspension for a weekend autocross, then softening it for the Monday commute. That flexibility is why coilovers are the go-to for performance-minded drivers.
| Component | Adjustability | Expected Effect | Ride Comfort | Cost Band | Install Difficulty | Service Interval |
|---|---|---|---|---|---|---|
| Coilovers | Ride height, damping (some models) | Major handling gains, custom stance | Stiffer; can be tuned for comfort | Mid to high | Intermediate | Inspect/clean every 10k-20k miles |
| Performance Shocks (e.g., Bilstein shocks) | Some damping adjustability | Improved control, less body roll | Slightly firmer than stock | Moderate | Beginner to intermediate | Check for leaks at service intervals |
| Sway Bars | Some have adjustable end links | Reduces body roll, sharper turn-in | Minimal impact | Low to moderate | Beginner | Inspect sway bar link bushings annually |
| Brake Rotors (blank/slotted/drilled) | None | Improved bite, heat dissipation | No effect | Low to high (track-grade) | Beginner | Replace as needed, inspect every 10k miles |
| Brake Calipers | Some (multi-piston, larger size) | Consistent stops, fade resistance | No effect | High | Intermediate | Check seals/pads at each pad change |
Sway Bars For Balance Not Just Stiffness
Think sway bars are just about making your car stiffer? Not quite. Sway bars—or anti-roll bars—connect the left and right sides of your suspension, controlling how much your car leans in corners. A thicker sway bar reduces body roll and sharpens handling, but the real magic is in balancing front and rear stiffness. Too much bar up front can cause understeer; too much in the rear can make the car oversteer. The sway bar link is critical here—worn or loose links can undermine even the best setup, so inspect them regularly for play or damage.
- Pros: Quick handling improvement, affordable, minimal ride impact.
- Cons: Too stiff can upset balance; poor-quality links can fail early.
After any sway bar or suspension change, always get an alignment—altered geometry can stress components like the ball joint, affecting tire wear and steering precision.
Brake Rotors And Calipers For Consistent Stops
Upgrading your brake system is about more than just stopping shorter—it’s about confidence and repeatability. Stock pads and rotors are fine for daily use, but push them hard and you’ll notice brake fade or inconsistent pedal feel. Performance rotors come in blank, slotted, or drilled designs. Slotted rotors scrape debris and improve initial bite, while drilled rotors help dissipate heat and resist fade. Pair these with performance pads for a real-world upgrade—just know that aggressive compounds like those in powerstop brakes may create more dust and noise, but deliver superior stopping power when hot (Pedal Commander).
- Pros: Better heat management, improved bite, fade resistance.
- Cons: More dust/noise, higher cost for track-grade parts.
Big brake kits with multi-piston calipers offer even more stopping power and consistency, but they’re best reserved for high-output builds or serious track use. For most, upgrading pads, rotors, and fluid is the most cost-effective first step. If fade persists, then consider larger brake calipers.
Maintenance and Staged Testing
Before you dive into suspension or brake upgrades, check all bushings, sway bar links, and especially the ball joint for wear. Worn chassis parts can undermine even the best upgrades and may cause alignment issues or uneven tire wear. After your initial shakedown miles, re-torque all mount hardware and inspect for any signs of play or leaks.
- Upgrade pads, rotors, and brake fluid first—then test for fade before moving to calipers.
- After lowering or changing suspension geometry, always get a professional alignment.
- Inspect sway bar link and ball joint condition at each oil change.
In summary, suspension and brake upgrades offer the highest real-world performance per dollar for most enthusiasts. With the right combination of coilovers, sway bars, and improved brake rotors or calipers, you’ll notice sharper handling, shorter stops, and more confidence behind the wheel. Next, we’ll see how tuning and data can help you verify and maximize the gains from your new automotive performance parts.

Tuning And Data To Verify Real Results
When You Need A Tune
Ever wonder if your latest upgrades are actually making a difference, or if your car is just louder? That’s where tuning and data logging come in. Whether you’ve added a cold air intake, upgraded injectors, or bolted on a new exhaust, a tune ensures all your automotive performance parts work together safely and efficiently. But when do you really need a tune? If you’ve changed anything that affects airflow or fueling—think larger mass air flow sensor, throttle body, camshaft position sensor, or forced induction—professional calibration is a must. Even seemingly minor tweaks can shift your air/fuel ratio and ignition timing, making a proper tune essential for drivability and reliability.
Key takeaway: Never rely on guesswork. Use repeatable test conditions and baseline data before and after each upgrade to track real gains and avoid costly mistakes.
- Eliminate vacuum leaks and verify all hoses are secure.
- Check the health of sensors—especially the mass air flow sensor and throttle position sensor.
- Test fuel quality and replace the filter if needed.
- Scan for and resolve any stored fault codes before tuning.
Tools like HP Tuners or Hondata allow you to log and analyze these metrics in detail, ensuring your tune is based on real-world data, not just assumptions.
Reading Dyno Charts Without The Hype
Seen a dyno graph showing big horsepower numbers and wondered if it tells the whole story? Here’s a secret: peak numbers are only part of the picture. What really matters is the area under the curve—the average power and torque your car makes across the RPM range. Imagine two cars with similar peak power, but one delivers more torque throughout the midrange; that car will feel faster and be quicker on the street or track. Weather, altitude, and even which dyno is used can affect results, so always focus on percentage gains and overall drivability improvements, not just the biggest number.
Pro tip: Use the same dyno, same settings, and similar weather conditions for all before-and-after tests to get meaningful comparisons.
Data You Should Log After Upgrades
How do you know your tune is spot-on? Data logging is your answer. Devices from HP Tuners and other platforms let you capture and review critical parameters, such as:
- Air/fuel ratio (lambda), as measured by the oxygen sensor
- Mass air flow sensor readings (g/s or lb/min)
- Throttle position sensor voltage and response
- Ignition timing advance
- Fuel trims and injector duty cycle
- Knock sensor activity
- Camshaft position sensor data (especially after cam upgrades)
It’s also wise to log coolant and intake air temperatures, as well as boost pressure if you’re running forced induction. With platforms like Hondata, you can monitor both primary and secondary oxygen sensor feedback to ensure your tune remains safe and emissions-compliant. APR tuning and other reputable tuning services often provide baseline logs and recommended targets for your specific setup—use these as a reference, but always verify with your own data.
- Bring a printed list of your modifications, recent sensor screenshots, and clear dyno goals to any "dyno tuning near me" session.
- Ask your tuner to walk you through the logged data and explain any adjustments made.
- After tuning, repeat your baseline tests to confirm all improvements are real and consistent.
In summary, the smartest way to validate your automotive performance parts is through careful tuning and data analysis. By logging key parameters—especially those from your mass air flow sensor, throttle position sensor, and oxygen sensor—you’ll know your upgrades are working as intended. Up next, we’ll walk through hands-on installation tips for the most common upgrades, so you can get the job done right the first time.
Step By Step Installation Walkthroughs
Ready to install your new automotive performance parts but not sure where to start? Let’s break down three of the most popular upgrades—cold air intakes, cat-back exhausts, and brake pads/rotors—with clear steps, tool lists, and essential safety reminders. Imagine tackling these projects in your own garage, building confidence and real results with each bolt you turn.
Install A Cold Air Intake
- Hand tools (screwdrivers, socket set, pliers)
- Breaker bar (for stubborn bolts)
- Floor jack and jack stands or race ramps
- Penetrating oil (if bolts are rusted)
- Anti-seize compound (for reassembly)
- Gloves and safety glasses
- Disconnect the negative battery terminal to reset the PCM and ensure safety.
- Raise the vehicle with a floor jack and secure it on jack stands or use race ramps for better access if needed.
- Loosen the hose clamp at the throttle body and remove the factory air tube. If bolts are stubborn, use a breaker bar for extra leverage.
- Remove the MAF sensor and set it aside safely.
- Unbolt and remove the factory air box and intake assembly.
- Assemble the new cold air intake, attaching the air filter and securing all hose clamps tightly.
- Install the intake tube, reconnect the MAF sensor, and bolt the air box in place (refer to your vehicle’s manual for torque specs).
- Reconnect the battery, start the vehicle, and let it idle to adapt to the new air volume. Confirm there are no warning lights or leaks before the first drive.
Difficulty: Beginner.
Pro tip: After your first drive, re-tighten all intake couplers and check for secure fitment.
Swap A Cat-Back Exhaust
- Socket set and wrenches
- Breaker bar (for rusted exhaust bolts)
- Floor jack and jack stands or race ramps
- Penetrating oil
- Anti-seize compound
- Safety glasses and gloves
- Lift the car securely with a floor jack and support it on jack stands or race ramps. Always chock the wheels and never work under a car supported only by a jack.
- Spray penetrating oil on all exhaust bolts and hangers; let it soak to ease removal.
- Use a breaker bar to loosen stubborn bolts at the catalytic converter flange and exhaust hangers.
- Remove the old exhaust system, taking care not to damage O2 sensors or hangers.
- Fit the new cat-back exhaust, loosely installing all bolts and gaskets. Ensure the system is well-aligned and not contacting any heat shields or bodywork.
- Tighten all fasteners to the manufacturer’s torque specs (refer to your manual), starting from the front and working rearward.
- Double-check alignment and clearance. Lower the car and start the engine, listening for leaks or rattles.
- After your first heat cycle and drive, re-check clamp torque and inspect for any exhaust leaks.
Difficulty: Intermediate.
Safety note: Exhaust components get extremely hot. Allow time to cool before touching, and always wear gloves.
Upgrade Pads And Rotors
- Socket set and wrenches
- Floor jack and jack stands
- Brake cleaner
- Torque wrench
- Brake bleeder kit (if bleeding fluid)
- Gloves and safety glasses
- Loosen lug nuts, then raise the car and secure with jack stands on level ground.
- Remove wheels to access the brake caliper and rotor.
- Unbolt the caliper (support it with a wire, do not let it hang by the brake hose).
- Remove old brake pads and slide off the rotor. Clean new rotor surfaces with brake cleaner before installation.
- Install the new rotor, then new pads, and re-install the caliper. Torque bolts to manufacturer specs.
- Reinstall wheels, lower the car, and torque lug nuts to spec.
- If needed, bleed the brakes using a brake bleeder kit to remove air from the lines.
- Before driving, pump the brake pedal to ensure firm pressure. Take a short, careful test drive to bed in the pads and rotors.
Difficulty: Beginner to Intermediate.
Pro tip: Always clean new rotors with brake cleaner to remove oils and prevent brake noise or glazing.
Final Safety and Inspection Tips
- Always support your vehicle with jack stands or race ramps—never trust a floor jack alone.
- Use a breaker bar for extra leverage on stubborn fasteners, but avoid over-tightening.
- After installation, check for leaks, rattles, or warning lights. A quick data log or test drive can confirm everything is working as intended.
With these step-by-step walkthroughs, you’ll feel more confident tackling common upgrades and maintaining your automotive performance parts for the long haul. Next, we’ll explore how manufacturing quality and sourcing impact the reliability and fitment of every part you install.

Sourcing And Manufacturing For Reliable Upgrades
Why Manufacturing Quality Matters
Ever wondered why some automotive performance parts bolt up perfectly while others require frustrating hours of modification? The answer often lies in upstream manufacturing quality. When you’re installing brackets, heat shields, intake tubes, or exhaust flanges, even the smallest dimensional error can mean leaks, rattles, or the dreaded check engine light. Precision matters—especially when you’re stacking upgrades from multiple sources or working on a tight timeline.
Imagine you’re fitting a new intake manifold and the mounting plate is off by just a millimeter. Suddenly, your air leaks increase, NVH (noise, vibration, harshness) creeps in, and you’re left troubleshooting instead of enjoying your build. That’s why selecting parts manufactured with tight tolerances and consistent stamping processes is critical for both reliability and ease of installation.
Stamping Precision And Real-World Fitment
Let’s break down how stamping precision influences your results. Premium stamped components—like brackets and mounting plates—are engineered to exacting standards using advanced CAD modeling and CNC machining. This level of detail ensures each piece fits as intended, reducing the chance of leaks, vibration, or the need for rework. For example, high-precision stamped brackets provide the structural backbone for your intake or exhaust assemblies, holding everything securely in place even under harsh driving conditions.
| Sourcing Option | Tolerance Control | Development Cycle | Consistency | Rework Risk | Lead Time |
|---|---|---|---|---|---|
| Premium Stamped (Shaoyi Automotive Stamping Dies & Parts) | Excellent (CAE-driven, tight tolerances) | Short (lean manufacturing, rapid prototyping) | High (repeatable, automated QC) | Low (precise fitment, less rework) | Short to moderate |
| Low-Cost Generic | Variable (looser specs) | Short | Inconsistent | High (may require modification) | Short |
| Custom-Fabricated | Excellent (if reputable shop) | Long (design, approval, iteration) | High (for one-off builds) | Low to moderate | Long |
Key insight: The hidden cost of poor fitment isn’t just time—it’s wasted gaskets, mounting hardware, and the frustration of returns or do-overs.
How To Vet A Parts Supplier
When choosing a supplier for critical items—be it stamped brackets, intake flanges, or even custom wheels—don’t just look at price. Ask about their quality control process, certifications, and ability to provide sample tolerances. For instance, Shaoyi Automotive Stamping Dies & Parts leverages CAE analysis and lean manufacturing to deliver consistently accurate stamped components, helping you avoid the headaches of poor alignment or repeat failures. If you’re planning a unique build or need custom hardware, consulting their team can help you understand feasibility, lead times, and what tolerance targets you should expect.
It’s also smart to review communication responsiveness and request references or case studies from previous projects. Whether you’re sourcing auto metal direct panels, weld wheels, billet specialties accessories, or digital gauges from Dakota Digital, reliability and clear documentation are key. For example, weld racing wheels are renowned for their in-house tooling, SAE-tested strength, and made-to-order precision—meaning each set is built to spec and tracked for quality throughout its life cycle (Dragzine).
- Check for ISO or industry certifications
- Request sample parts or tolerance reports
- Ask about in-house vs. outsourced tooling
- Review lead times and after-sales support
In summary, manufacturing quality isn’t just a detail—it’s the foundation for upgrades that fit right, last longer, and deliver the performance you expect. From stamped brackets to weld racing wheels, investing in precision-built parts pays off every time you turn the key or hit the track.
Frequently Asked Questions About Automotive Performance Parts
1. What are the core categories of automotive performance parts?
The main categories include intake systems, exhaust components, fueling upgrades, suspension parts, brakes, wheels and tires, and tuning solutions. Each category targets specific improvements like power, handling, or braking, and works best when upgrades are planned as a system to avoid bottlenecks.
2. How do I ensure performance parts will fit my vehicle?
Check your vehicle's model year, trim, engine code, drivetrain, and take precise measurements. Verify details like bolt pattern, wheel offset, and sensor connector locations using your owner’s manual, OEM catalogs, or reputable supplier guides. Document your VIN and take photos to prevent mix-ups.
3. Do I need to tune my car after installing performance parts?
A tune is recommended whenever you upgrade parts affecting airflow or fuel delivery, such as intakes, exhausts, or fuel injectors. Tuning ensures all modifications work together safely, optimizing power and reliability while preventing engine issues.
4. What should I consider when choosing between cat-back and axle-back exhaust systems?
Axle-back systems focus on sound and are easier to install, while cat-back systems replace more components for improved flow and potential power gains. Always check local emissions laws and ensure the system fits your vehicle’s configuration.
5. Why does manufacturing quality matter for performance parts?
High manufacturing quality ensures parts fit correctly, reduce the risk of leaks or vibration, and simplify installation. Precision-stamped components, such as those from specialized suppliers, help avoid costly rework and deliver consistent performance.