 Small batches, high standards. Our rapid prototyping service makes validation faster and easier —

Die Sharpening Procedures That Cut Downtime And Boost Output
Understanding Die Sharpening and Its Manufacturing Impact
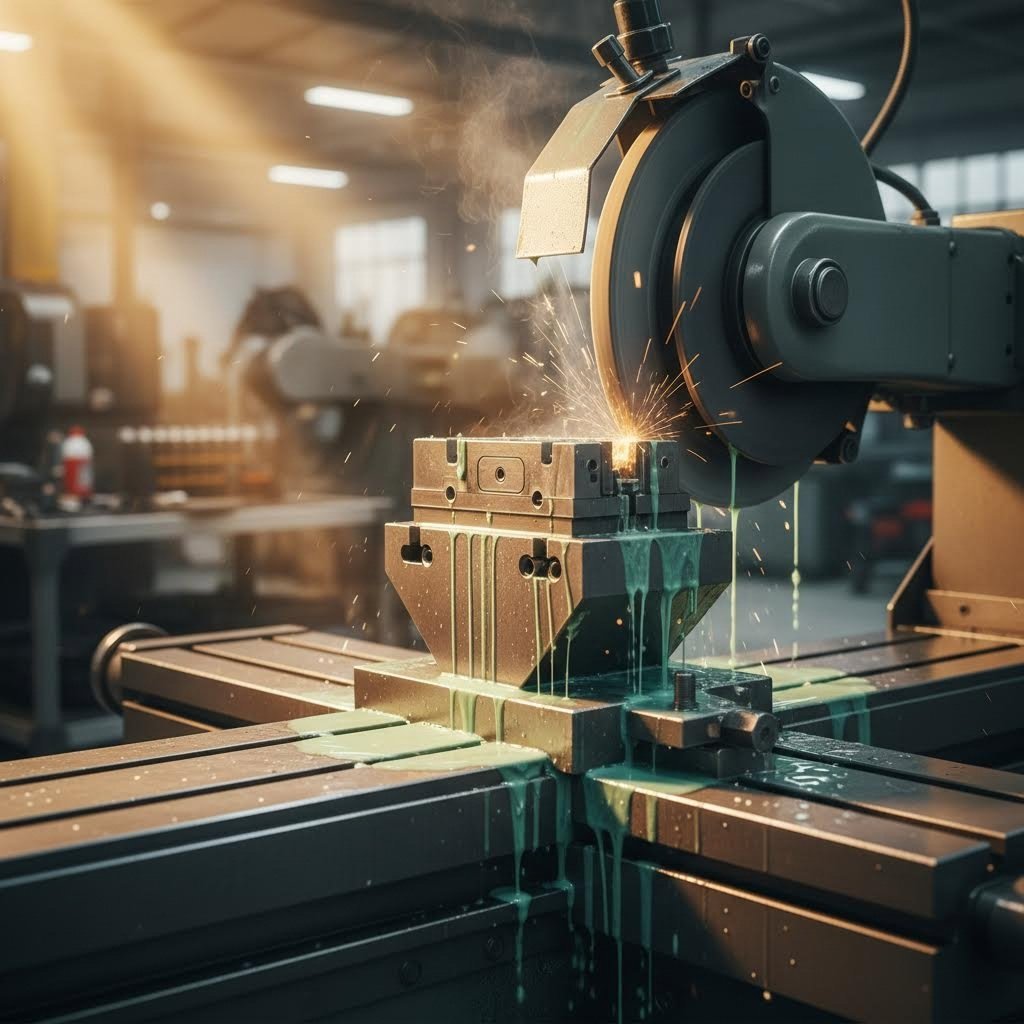
When you think about manufacturing precision, the sharpness of your dies might not be the first thing that comes to mind. Yet die sharpening is the process of restoring cutting edges to their optimal condition, directly determining whether your production line delivers flawless parts or generates costly scrap. This critical maintenance procedure applies across stamping dies, cutting dies, threading dies, and rotary dies, each requiring specific techniques to maintain peak performance.
Proper die sharpening can extend tool life by 30-50% while maintaining the dimensional accuracy that separates acceptable products from rejected ones.
Whether you're running a small fabrication shop or managing high-volume automotive production, understanding these procedures bridges the gap between hobbyist-level knowledge and commercial-grade applications.
What Die Sharpening Actually Means for Production Quality
Imagine running a production batch only to discover that your parts have rough edges, inconsistent dimensions, or visible burrs. These defects often trace back to worn die cutting edges. Die sharpening restores the precise geometry that allows clean material separation, whether you're punching holes in sheet metal or cutting intricate patterns in packaging materials.
The process involves controlled material removal from worn surfaces to recreate sharp cutting edges. Unlike simply replacing a dull blade, proper sharpening maintains the original die geometry, critical clearances, and surface finishes. This distinction matters because even minor deviations can cascade into significant quality problems. Interestingly, the precision required in industrial die maintenance shares conceptual similarities with everyday items like die cast pencil sharpeners, where consistent edge geometry determines cutting performance.
Why Every Manufacturer Needs a Sharpening Strategy
Without a defined die sharpening frequency, you're essentially gambling with production quality. Worn dies don't just create defective parts. They increase cutting forces, accelerate machine wear, and consume more energy per cycle. The consequences compound rapidly:
- Scrap rates climb as dimensional accuracy deteriorates
- Secondary finishing operations become necessary to correct burrs
- Unplanned downtime disrupts production schedules
- Premature die replacement inflates tooling costs
Professional die sharpening services exist because this specialized work demands both expertise and proper equipment. However, many manufacturers benefit from developing in-house capabilities for routine maintenance while reserving complex repairs for specialists. Throughout this guide, you'll discover exactly how to evaluate your options and implement procedures that minimize downtime while maximizing output quality.
Die Types and Their Specific Sharpening Requirements
Not all dies are created equal, and neither are their sharpening needs. Each die category experiences unique stress patterns, wears differently, and demands specific restoration techniques. Understanding these distinctions helps you develop targeted punch and die sharpening protocols that maximize tool life without compromising production quality.
The table below breaks down the four primary die categories you'll encounter in manufacturing environments, highlighting what makes each one distinct when it comes time for maintenance:
| Die Type | Typical Materials | Wear Patterns | Sharpening Method | Critical Considerations |
|---|---|---|---|---|
| Stamping Dies | D2 tool steel, A2 steel, carbide inserts | Edge rounding, flank wear, chipping at corners | Surface grinding with precision fixtures | Maintain punch-to-die clearance; avoid altering shut height |
| Cutting Dies | Tool steel, HSS, carbide-tipped | Edge dulling, micro-fractures along cutting line | Flat grinding or CNC profiling | Preserve original cutting angle; check for heat damage |
| Threading Dies | HSS, carbon steel, carbide | Thread crest wear, flank deterioration | Specialized thread grinding or lapping | Maintain thread pitch accuracy; verify lead and pitch diameter accuracy |
| Rotary Dies | Tool steel, solid carbide, chrome-plated steel | Blade edge wear, anvil contact marks | Cylindrical grinding with rotary fixtures | Balance blade heights; maintain consistent pressure zones |
Stamping and Cutting Dies Require Different Approaches
When you're sharpening punches and dies used in stamping operations, you're dealing with tools that experience tremendous compressive forces during each stroke. The punch drives material through the die opening, creating shear stress that gradually rounds cutting edges. This wear pattern typically appears first at corners and sharp geometric features where stress concentrates.
Punch die sharpening for stamping applications focuses on surface grinding the punch face and die cutting edge to restore sharp profiles. The critical factor here is maintaining the original clearance relationship between punch and die. Remove too much material from one component without addressing the other, and you've altered the clearance that determines cut quality.
Cutting dies, on the other hand, often work through slicing or shearing motions rather than pure compression. Steel rule dies, clicker dies, and similar cutting tools develop wear along their entire cutting edge rather than at specific stress points. The sharpening approach involves restoring the cutting bevel while preserving the blade's geometry. For carbide die sharpening in cutting applications, you'll need diamond grinding wheels since conventional abrasives won't effectively machine these harder materials. Some technicians use a die grinder tungsten sharpener for touch-ups on carbide-tipped tools, though precision grinding remains the standard for comprehensive restoration.
Threading Dies vs Rotary Dies Sharpening Distinctions
Threading dies present a completely different challenge. These tools must maintain precise thread geometry, including pitch, lead angle, and thread depth. Wear typically occurs on thread crests and flanks, gradually producing undersized or rough threads. The sharpening process requires specialized equipment capable of following the helical thread path while removing minimal material.
Because threading dies create their form through a rolling or cutting action along a spiral path, any deviation in the sharpening process directly affects thread quality. Many manufacturers opt for professional services rather than attempting in-house threading die restoration, given the precision requirements involved.
Rotary dies rotate continuously against an anvil roller, creating a unique wear pattern. The cutting edges experience both shear stress and abrasive wear from contact with material and the anvil surface. Successful sharpening requires cylindrical grinding that maintains consistent blade heights around the entire circumference. Even small variations create pressure inconsistencies that show up as incomplete cuts or excessive anvil wear.
Carbide rotary dies demand even more specialized attention. The same carbide die sharpening principles apply here, requiring diamond abrasives and careful temperature control to prevent thermal cracking. Whether you're maintaining stamping tools or rotary cutting systems, matching your approach to the specific die type ensures you're addressing actual wear patterns rather than creating new problems during restoration.
Recognizing When Your Dies Need Sharpening
How do you know when it's time to sharpen your dies? Waiting until parts fail quality inspection means you've already produced scrap and lost valuable production time. The key is recognizing early warning signs before they escalate into serious problems. Whether you're using a die sharpening tool for routine maintenance or evaluating whether your die cut manual machine needs sharpening, these indicators help you make timely decisions.
Here's a comprehensive checklist of wear indicators that signal your dies require attention:
- Burr formation: Excessive burrs on cut edges indicate dulled cutting surfaces that can no longer cleanly shear material
- Dimensional drift: Parts measuring outside tolerance suggest worn edges have altered the effective cutting geometry
- Increased cutting force: Higher press tonnage or motor strain during operation reveals dulled edges requiring more energy to cut
- Surface finish degradation: Rough or torn surfaces on cut edges instead of clean shear marks
- Edge chipping: Visible chips or micro-fractures along the cutting edge compromise cut quality
- Slug pulling: Slugs sticking to punches instead of ejecting cleanly
- Inconsistent part quality: Variation between parts in the same production run
Visual Wear Patterns That Demand Immediate Attention
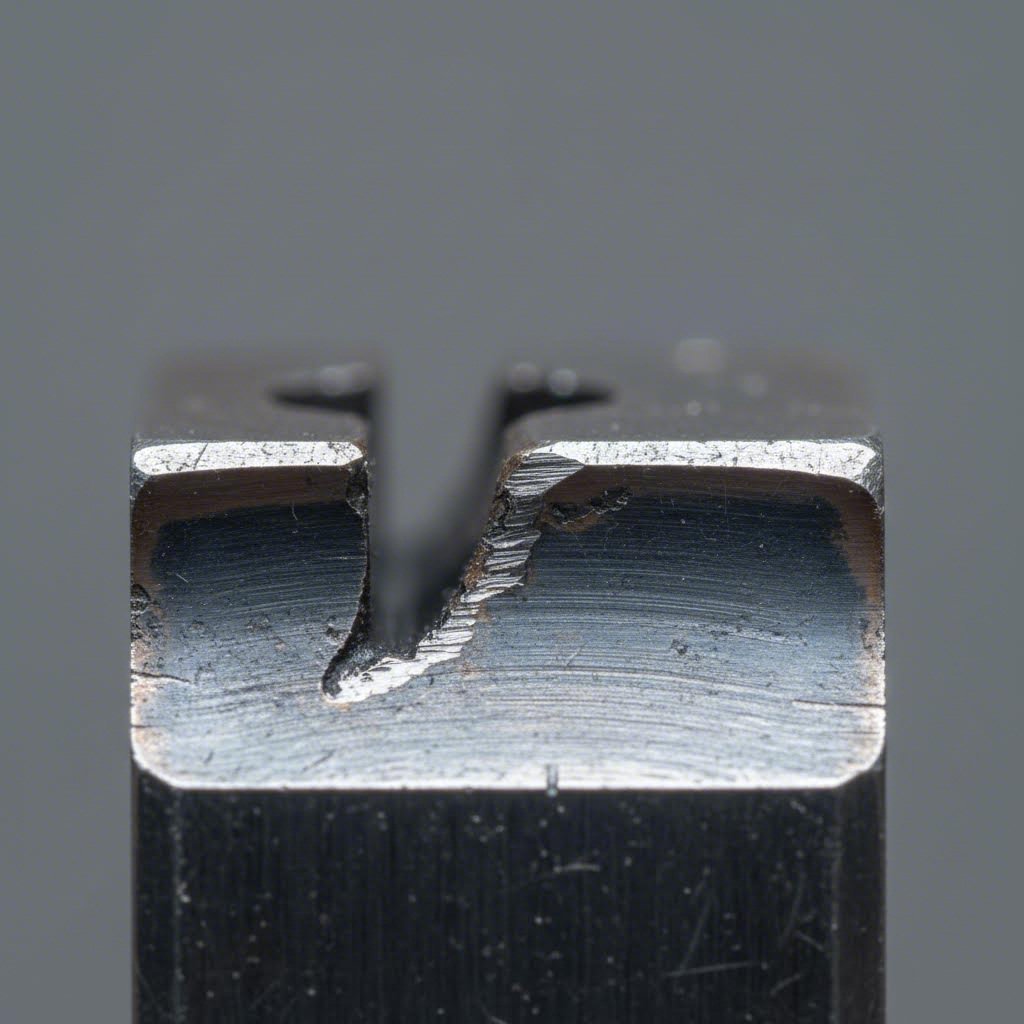
Your eyes often catch problems before measuring instruments do. When inspecting dies, look for shiny wear marks on cutting edges where the original surface finish has been polished away by repeated contact. These bright spots indicate material loss and edge rounding that reduces cutting effectiveness.
Edge chipping appears as small notches or irregularities along what should be a straight cutting line. Even minor chips create corresponding defects on every part produced. Galling, visible as rough, torn areas where material has welded to the die surface, indicates both wear and potential lubrication issues that accelerate further damage.
For those wondering can Ellison dies be sharpened, the answer is yes, but visual inspection becomes especially important with these craft and educational dies. Look for rolled edges, visible nicks, or areas where the cutting rule has flattened. These dies typically show wear patterns concentrated at intricate detail areas where stress focuses during cutting.
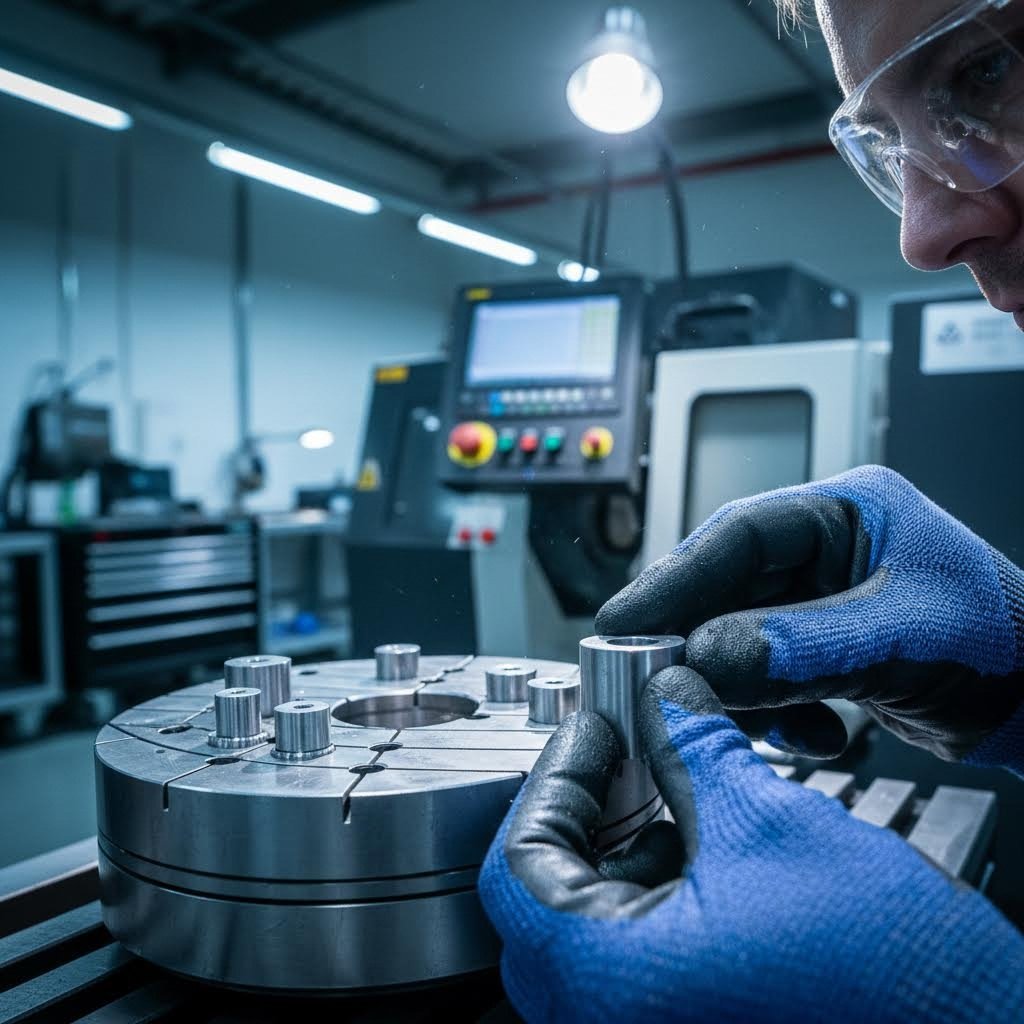
Measuring Tools for Accurate Wear Assessment
Visual inspection tells you something is wrong, but precise measurements reveal exactly how much wear has occurred. Use these tools to quantify die condition:
- Micrometers and calipers: Measure critical die dimensions and compare against original specifications
- Optical comparators: Project magnified edge profiles to detect subtle geometry changes
- Surface profilometers: Quantify surface roughness changes that indicate wear progression
- Coordinate measuring machines: Verify complex geometries on precision dies
The relationship between material types, production volumes, and wear rates directly influences how often you should inspect. Harder workpiece materials like stainless steel or high-strength alloys accelerate die wear compared to mild steel or aluminum. High-volume operations naturally accumulate wear faster, potentially requiring inspection every shift rather than weekly.
Establish inspection intervals based on your specific conditions. A reasonable starting point involves checking dies after every 10,000 to 50,000 hits for stamping operations, adjusting based on observed wear rates. Document findings each inspection to identify trends and predict when sharpening will become necessary.
The critical decision between sharpening and replacement depends on remaining material. Most dies can be sharpened multiple times before reaching their minimum working dimensions. However, once wear exceeds approximately 25-30% of the original cutting land, or if heat damage or cracking is present, replacement becomes more economical than continued sharpening. Track your sharpening history to know when each die approaches this threshold.
Complete Die Sharpening Procedure From Start to Finish
Now that you can identify when your dies need attention, let's walk through exactly how dies are sharpened from start to finish. Whether you're using a dedicated die sharpening machine or working with manual grinding equipment, following a systematic workflow ensures consistent results and prevents costly mistakes.
The complete sharpening process involves seven distinct phases, each building on the previous step:
- Inspection and documentation: Examine the die thoroughly and record its current condition, dimensions, and wear patterns
- Cleaning and demagnetization: Remove contaminants and residual magnetism that interfere with grinding accuracy
- Grinding setup: Configure your punch and die sharpening machine with appropriate fixtures and wheel selection
- Material removal process: Execute controlled grinding passes to restore cutting edges
- Surface finishing: Refine ground surfaces to achieve proper finish specifications
- Dimensional verification: Measure critical dimensions to confirm geometry restoration
- Reinstallation: Return the die to service with proper alignment and documentation
Pre-Sharpening Inspection and Documentation Protocol
Before touching a grinding wheel, you need comprehensive documentation of the die's current state. This step might seem tedious, but it protects you from removing too much material and provides a baseline for measuring your results.
Start by measuring and recording these critical dimensions:
- Overall die height or shut height
- Cutting land width
- Clearance between mating components
- Edge condition at multiple points around the cutting perimeter
- Any existing damage, chips, or irregularities
Photograph problem areas for reference. Note the die's production history if available, including total hits, previous sharpenings, and any recurring issues. This information helps you determine how aggressively to sharpen and whether the die is approaching end-of-life.
Cleaning comes next. Remove all lubricants, metal particles, and debris using appropriate solvents. Ultrasonic cleaning works well for complex geometries where manual cleaning can't reach. Thorough cleaning prevents contaminants from embedding into freshly ground surfaces and ensures accurate measurements.
Demagnetization is often overlooked but critically important. Dies accumulate magnetic charge during production, which causes grinding swarf to cling to surfaces and can pull the die off-center during grinding. Use a demagnetizer to neutralize residual magnetism before proceeding. You'll notice cleaner grinding and more accurate results.
The Grinding Process Step by Step
With preparation complete, it's time for actual material removal. Proper setup determines your success more than grinding technique alone. Secure the die in appropriate fixtures that maintain parallelism and prevent movement during grinding. For precision work, equipment like the 1125 punch and die sharpener provides the rigidity and accuracy needed for consistent results.
Grinding wheel selection directly affects both efficiency and surface quality. Consider these factors:
- Abrasive type: Aluminum oxide wheels work for tool steels; silicon carbide suits harder materials; diamond wheels are essential for carbide dies
- Grit size: Coarser grits (46-60) remove material quickly for initial passes; finer grits (100-150) produce better finishes for final passes
- Wheel hardness: Softer wheels shed worn abrasive grains faster, staying sharp but wearing quickly; harder wheels last longer but risk glazing
- Wheel structure: Open structures clear chips better in aggressive cuts; denser structures provide finer finishes
Coolant application prevents thermal damage that can ruin an otherwise perfect sharpening job. Heat generated during grinding can temper hardened tool steel, creating soft spots that wear rapidly in production. Flood coolant directly onto the grinding zone, ensuring continuous coverage throughout each pass. Never allow the die to run dry, even briefly.
Execute material removal in controlled increments. Take light passes of 0.0005 to 0.001 inches (0.013-0.025 mm) for finishing passes, and up to 0.002 inches for roughing rather than aggressive cuts. Light passes generate less heat, produce better surface finish, and give you control to stop at the precise dimension needed. Monitor the ground surface between passes, checking for burn marks or discoloration that indicate excessive heat.
Maintaining original geometry is non-negotiable. Dies are engineered with specific angles, clearances, and relationships between components. Removing material from the punch face without compensating on the die opening alters clearance. Grinding at incorrect angles changes cutting behavior. Always reference original specifications and maintain geometric relationships, not just dimensions.
Why do material removal limits matter so much? Each die has a finite amount of material available for sharpening before critical features are compromised. Exceeding these limits reduces cutting land width below functional minimums, weakens the die structure, and can eliminate hardened surface layers that provide wear resistance. Most manufacturers specify maximum material removal per sharpening cycle and lifetime removal limits. Respect these boundaries even when more grinding might seem to improve the edge.
After grinding, surface finishing removes any burrs or grinding marks that could transfer to production parts. Light stoning, lapping, or polishing restores appropriate surface texture. Dimensional verification using the same instruments from pre-sharpening inspection confirms you've achieved target dimensions without over-grinding.
Reinstallation requires careful alignment and documentation. Record post-sharpening dimensions, total material removed, and updated die height. Adjust press shut height or die springs as needed to compensate for material removed. With proper records maintained after each service cycle, you'll always know exactly where each die stands in its service life.
Essential Do's and Don'ts for Die Sharpening Success
You've learned the step-by-step sharpening procedure, but knowing what to do is only half the equation. Understanding what to avoid proves equally critical for protecting your investment in precision tooling. Whether you're operating a die sharpener in-house or evaluating the quality of machine sharpened dies from a service provider, these guidelines separate professional results from costly mistakes.
The following framework distills industry best practices into actionable rules. Each guideline exists for specific technical reasons, and understanding the "why" helps you make better decisions when unexpected situations arise during knockout die sharpening or routine maintenance.
Critical Practices That Extend Die Life
Following these proven practices ensures you extract maximum service life from every die while maintaining the precision your production demands:
- DO maintain consistent coolant flow throughout grinding: Continuous flood coolant prevents localized heating that softens hardened tool steel. Even brief dry contact can create soft spots that wear ten times faster than surrounding material during production.
- DO take light, controlled passes: Removing 0.0005 to 0.001 inches (0.013-0.025 mm) for finishing passes, and up to 0.002 inches for roughing generates less heat, produces superior surface finish, and provides the control needed to stop precisely at target dimensions. Patience here pays dividends in die longevity.
- DO preserve original clearance angles: The engineered relationship between punch and die determines cut quality. When sharpening one component, always verify or compensate the mating component to maintain designed clearances.
- DO dress grinding wheels regularly: A glazed or loaded wheel generates excessive heat and produces poor surface finish. Dress wheels before each sharpening session and between dies when switching materials.
- DO deburr all edges after grinding: Sharp burrs left on ground surfaces transfer to production parts and can chip during operation. Light stoning or lapping removes these hazards without affecting critical dimensions.
- DO document everything: Record pre-sharpening dimensions, material removed, post-sharpening measurements, and cumulative removal history. This data tells you when dies approach replacement thresholds.
- DO store sharpened dies properly: Clean, lightly oil, and store dies in protective cases or designated racks. Proper storage prevents corrosion, edge damage from contact with other tools, and contamination before reinstallation.
- DO verify dimensions before returning dies to service: A quick measurement confirms you've achieved target specifications and catches any errors before they become production problems.
Mistakes That Lead to Premature Die Failure
These common errors seem minor during sharpening but create serious consequences in production. Avoiding them protects both die life and part quality:
- DON'T exceed material removal limits: Removing too much material in a single sharpening reduces cutting land width, weakens die structure, and can grind through hardened surface layers into softer core material. Respect manufacturer specifications even when more grinding seems beneficial.
- DON'T use incorrect grinding speeds: Excessive wheel speed generates heat that damages dies; insufficient speed causes wheel loading and poor cutting action. Match surface feet per minute to wheel and workpiece material specifications.
- DON'T skip demagnetization: Residual magnetism causes grinding swarf to cling to die surfaces, embeds particles in freshly ground areas, and can pull dies off-center during precision grinding operations.
- DON'T ignore burn marks or discoloration: Blue or straw-colored areas indicate the die has been overheated and the hardness compromised. These zones will wear rapidly in production. If burn marks appear, you've already damaged the die.
- DON'T alter original geometry to "improve" the die: Changing relief angles, clearances, or cutting geometries from original specifications creates unpredictable cutting behavior and accelerates wear in other areas.
- DON'T neglect wheel selection: Using aluminum oxide wheels on carbide dies wastes time and produces poor results. Using diamond wheels on tool steel wastes money. Match abrasive type to die material.
- DON'T rush the process: Aggressive material removal generates heat, creates subsurface stress, and often results in over-grinding that requires scrapping the die. Time saved during sharpening is lost many times over when dies fail prematurely.
- DON'T return dies to service without proper alignment: A perfectly sharpened die installed with incorrect shut height or misalignment produces defects immediately. Verify setup after every sharpening cycle.
The consequences of ignoring these guidelines compound quickly. A die sharpened with excessive heat develops soft spots that wear unevenly, creating burrs on production parts within days rather than weeks. Neglected deburring leaves sharp edges that chip during operation, contaminating parts and accelerating die degradation. Skipped documentation means you won't know a die has exceeded its sharpening limits until it fails catastrophically.
Industry best practices for maintaining die geometry center on one principle: preserve the original engineering. Dies are designed as systems where every angle, clearance, and surface finish contributes to performance. Your sharpening goal isn't simply creating a sharp edge. It's restoring the precise geometry that makes the die function correctly. When you encounter problems despite following proper procedures, the next step is systematic troubleshooting to identify root causes.
Troubleshooting Common Die Sharpening Problems
Even when you follow proper procedures, things can go wrong. Maybe your freshly sharpened die produces parts with inconsistent edges, or you notice strange patterns on the ground surface that weren't there before. Troubleshooting these issues quickly separates minor adjustments from major headaches that halt production.
The key is systematic diagnosis. Before assuming the worst, work through possible causes methodically. Sometimes what appears to be a sharpening failure actually stems from underlying die design issues or material problems that existed before you ever touched a grinding wheel.
Use this troubleshooting reference to identify problems, understand their origins, and implement effective corrections:
| Problem | Possible Causes | Diagnostic Signs | Corrective Actions |
|---|---|---|---|
| Uneven material removal | Fixture misalignment, worn grinding wheel, die warpage | Visible height variation across cutting edge, inconsistent land width | Re-true fixtures, dress wheel, verify die flatness before grinding |
| Thermal damage (burn marks) | Insufficient coolant, excessive feed rate, glazed wheel | Blue or straw discoloration, soft spots when hardness tested | Increase coolant flow, reduce passes, dress wheel more frequently |
| Geometry distortion | Incorrect fixture setup, grinding at wrong angle, excessive pressure | Changed clearance values, altered cutting angles | Verify fixture alignment against specifications, reduce grinding pressure |
| Poor surface finish | Wrong grit size, loaded wheel, vibration in setup | Visible grinding marks, rough texture, chatter patterns | Switch to finer grit for finish passes, dress wheel, check machine rigidity |
| Edge chipping after sharpening | Brittle edge from overheating, incorrect wheel hardness | Micro-fractures visible under magnification, chips during first production run | Reduce heat input, use softer wheel grade, verify material wasn't compromised |
| Inconsistent cutting performance | Clearance mismatch, uneven edge sharpness, residual burrs | Variable part quality across die stations, localized burr formation | Re-check mating component dimensions, deburr thoroughly, verify all edges equally sharp |
Diagnosing Uneven Wear and Edge Damage
When you notice uneven wear patterns after sharpening, the first question is whether the problem existed before you started or developed during the grinding process. Examine the die under magnification and look for clues.
Pre-existing issues typically show consistent wear patterns that match production stress points. For example, corners and intricate features wear faster during normal operation. If these areas show more wear than straight sections, that's expected service wear, not a sharpening problem.
Sharpening-induced unevenness looks different. You'll see variation that doesn't correspond to production stress patterns, perhaps one side of the die ground deeper than the other, or waviness across what should be a flat surface. These signs point to equipment or setup issues:
- Fixture problems that allow the die to shift during grinding
- Worn machine ways creating inconsistent wheel-to-work distance
- Out-of-round grinding wheels producing uneven cuts
- Operator technique varying pressure across passes
Die grinder sharpening for touch-up work can introduce its own problems. Handheld tools lack the rigidity of dedicated grinding machines, making consistent material removal challenging. If you're using a die grinder sharpening stone for quick edge restoration, recognize that this approach works for minor touch-ups but can't match the precision of proper surface grinding.
Edge damage that appears after sharpening often indicates thermal stress. When dies heat excessively during grinding, the rapid temperature change creates internal stresses that manifest as micro-cracks or edge brittleness. These edges may look fine initially but chip during the first production run.
Correcting Common Grinding Errors
Once you've identified the problem source, corrective action becomes straightforward. Most grinding errors fall into a few categories with proven solutions.
For thermal damage, prevention is easier than correction. If you've already burned a die, you may be able to salvage it by grinding away the entire heat-affected zone, typically identified by acid etching or micro-hardness testing, ensuring sufficient core hardness remains. Light discoloration sometimes indicates surface-only damage that a few additional passes can remove. Deep blue or purple coloring suggests the damage extends further, potentially requiring professional assessment or die replacement.
Geometry distortion requires careful re-evaluation of your entire setup. Before attempting correction:
- Verify your fixtures against known-flat reference surfaces
- Check that the grinding wheel runs true without wobble
- Confirm workholding clamps aren't distorting the die
- Review angle settings against original die specifications
Surface finish problems often respond to wheel dressing. A loaded or glazed wheel can't cut cleanly, leaving behind rough surfaces regardless of your technique. Dress the wheel with a diamond dresser, exposing fresh abrasive grains, and take light finish passes with reduced feed rates.
For Ellison die cut sharpening and similar craft dies, surface finish matters less than cutting edge sharpness. However, excessive roughness can indicate the same underlying issues that affect precision dies. Address the root cause even when the immediate impact seems minor.
Sometimes problems persist despite your best efforts. This signals either a fundamental equipment limitation or an underlying die issue beyond sharpening scope. Professional intervention becomes necessary when:
- You've corrected obvious setup issues but problems continue
- The die shows signs of material defects like inclusions or delamination
- Geometry restoration requires removing more material than limits allow
- Specialty dies demand equipment or expertise you don't possess
Knowing when to call in specialists saves time and protects valuable tooling from well-intentioned but ineffective repair attempts. The next consideration is whether your operation benefits from manual techniques or automated approaches that minimize these troubleshooting scenarios altogether.
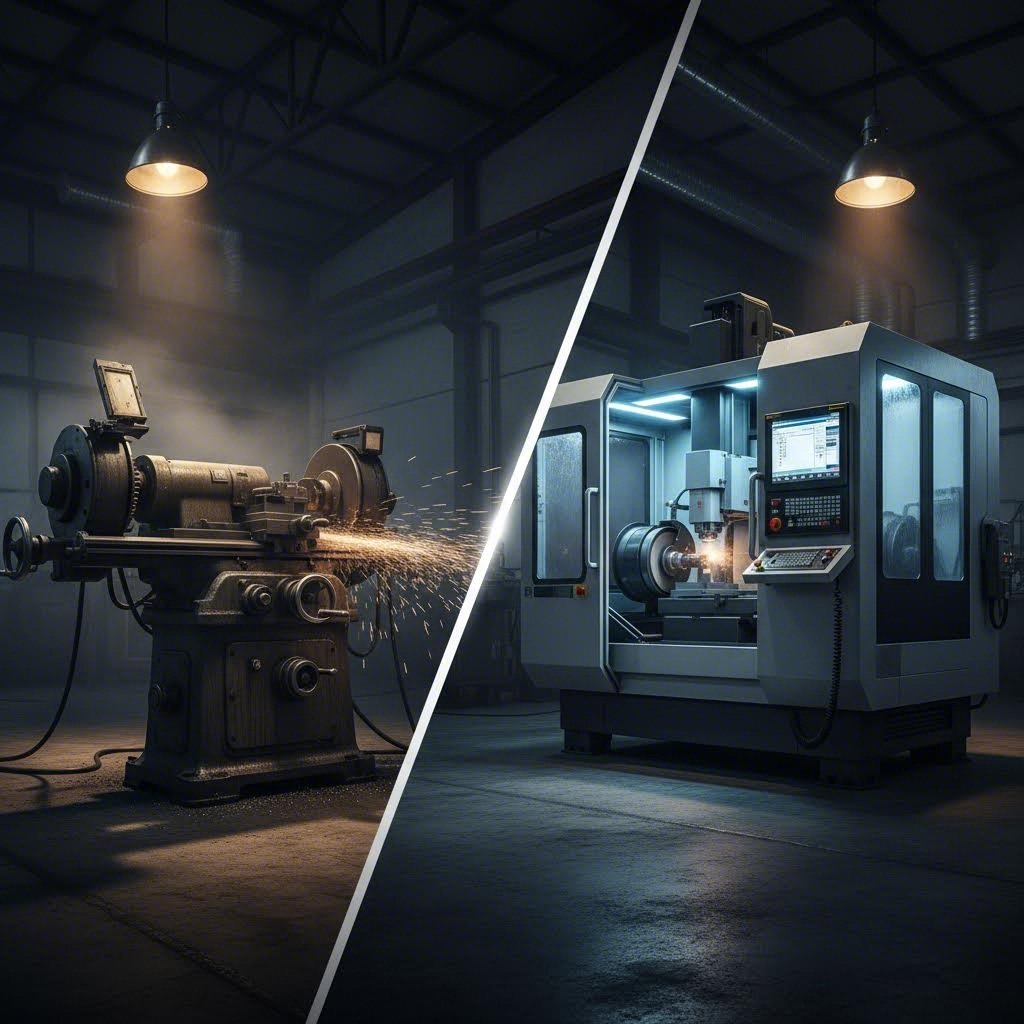
Manual Versus Automated Die Sharpening Methods
Should you sharpen dies by hand or invest in automated equipment? This question shapes your maintenance strategy, affects your budget, and determines the consistency of your results. The answer depends on your production volume, die complexity, available expertise, and long-term operational goals.
Understanding the tradeoffs between manual, semi-automated, and fully automated approaches helps you make informed decisions. Each method offers distinct advantages for specific situations, and many operations benefit from combining approaches based on die type and urgency.
| Factor | Manual Sharpening | Semi-Automated | Fully Automated (CNC) |
|---|---|---|---|
| Precision Level | Operator-dependent; typically ±0.0005" with skilled operation with skilled technician | Improved consistency; ±0.0005" achievable | Highest precision; ±0.0002" or better repeatable |
| Throughput | 1-3 dies per hour depending on complexity | 3-6 dies per hour with reduced setup time | 5-10+ dies per hour with automated loading |
| Skill Requirements | High; years of experience needed for consistent results | Moderate; equipment handles some variables | Lower operational skill; programming expertise required |
| Initial Investment | $2,000-$15,000 for quality surface grinder and fixtures | $25,000-$75,000 for precision grinding systems | $100,000-$500,000+ for CNC grinding centers |
| Best Applications | Low volume, varied die types, emergency repairs | Medium volume, standardized die families | High volume, tight tolerances, production environments |
When Manual Sharpening Makes Sense
Manual sharpening isn't outdated technology. It remains the practical choice for many operations, particularly when flexibility matters more than throughput. A skilled operator with a quality surface grinder, proper fixtures, and a cutting die sharpener setup can restore dies to production-ready condition with excellent results.
Consider manual methods when your situation includes:
- Diverse die inventory: Operations running many different die types benefit from manual flexibility rather than programming each configuration
- Low sharpening volume: Sharpening fewer than 20 dies monthly rarely justifies automated equipment costs
- Emergency situations: A skilled technician can have a critical die back in production faster than setting up automated equipment
- Complex geometries: Some intricate dies require human judgment that automation can't replicate
- Budget constraints: Manual equipment costs a fraction of automated alternatives
The steel rule die sharpener market offers various manual options suited to different die styles. For clicker die sharpener applications, manual grinding often proves most practical since these dies vary significantly in shape and size. The operator adapts technique to each die rather than requiring extensive reprogramming.
Manual sharpening's primary limitation is consistency. Results depend entirely on operator skill, attention, and physical condition. Fatigue affects precision. Distractions create errors. Even experienced technicians produce slight variations between dies that automated systems eliminate.
Interestingly, some of the same manual grinding principles apply across different tool maintenance tasks. Operators who've mastered chainsaw sharpening die grinder techniques understand the importance of consistent angles and controlled material removal, skills that transfer to precision die work with appropriate equipment upgrades.
CNC Sharpening Equipment Capabilities
Automated sharpening transforms die maintenance from an art into a repeatable process. CNC grinding systems follow programmed paths with micron-level accuracy, producing identical results whether processing the first die of the day or the hundredth.
What makes automation compelling for high-volume operations:
- Repeatability: Once programmed correctly, every die receives identical treatment regardless of operator changes or shift variations
- Documentation: Automated systems log every parameter, creating traceable records for quality systems
- Reduced human error: Programmed paths eliminate variations from fatigue, distraction, or inconsistent technique
- Unattended operation: Many systems run overnight or with minimal supervision, maximizing equipment utilization
- Complex geometry handling: Multi-axis CNC systems reproduce intricate profiles that challenge manual grinding
Semi-automated systems offer middle-ground solutions. These machines handle repetitive motions automatically while operators manage setup and supervision. Power-assisted fixtures, digital readouts, and programmable stops improve consistency without requiring full CNC investment.
The decision between in-house capabilities and outsourcing involves more than equipment cost. Consider these factors:
- Volume threshold: In-house sharpening typically becomes economical above 50-100 dies monthly, depending on complexity
- Turnaround requirements: If waiting for outside service creates production delays, in-house capability pays for itself through reduced downtime
- Die criticality: Operations dependent on specific dies may need immediate sharpening access that outsourcing can't guarantee
- Available expertise: Training staff for precision grinding requires investment; outsourcing transfers this burden to specialists
- Space and infrastructure: Grinding operations require appropriate facilities, utilities, and environmental controls
Many manufacturers adopt hybrid strategies. They handle routine sharpening of common dies in-house while outsourcing complex precision work or specialty dies. This approach balances responsiveness with access to expertise and equipment beyond internal capabilities.
Automation's greatest advantage is eliminating the variability that makes troubleshooting so challenging. When every die receives identical treatment, deviations point clearly to material issues, programming errors, or equipment problems rather than operator inconsistency. This predictability simplifies maintenance planning and supports the structured scheduling approaches that maximize production uptime.
Creating an Effective Die Maintenance Schedule
You've mastered the sharpening techniques, but how do you know when to apply them? A reactive approach, waiting until dies fail, costs you production time, scrap material, and emergency service fees. Smart manufacturers build proactive maintenance schedules that anticipate sharpening needs before problems appear on the production floor.
An effective schedule balances multiple triggers rather than relying on any single indicator. Your maintenance framework should incorporate these key components:
- Production count triggers: Set hit counters that flag dies for inspection at predetermined intervals, typically every 25,000-100,000 strokes depending on material and complexity
- Calendar-based inspections: Schedule routine evaluations weekly or monthly regardless of production volume to catch dies in low-use applications
- Quality metric thresholds: Establish rejection rate limits that automatically trigger die inspection when scrap exceeds acceptable percentages
- Preventive maintenance windows: Align sharpening with planned downtime for changeovers, holidays, or scheduled machine maintenance
Building a Production-Based Sharpening Schedule
Production count tracking provides the most direct correlation between die wear and sharpening needs. Every stroke removes microscopic material from cutting edges, and this wear accumulates predictably based on your specific conditions.
Start by establishing baseline intervals for your operation. If you're searching for die sharpening services near me, local providers can often help you determine appropriate intervals based on their experience with similar applications. However, you can develop your own baselines through systematic observation:
- Track the hit count when quality problems first appear on new dies
- Record this threshold for each die type and material combination
- Set inspection triggers at 75-80% of observed failure points
- Adjust based on actual performance data over multiple sharpening cycles
Different materials dramatically affect these intervals. Dies processing abrasive materials like stainless steel or hardened alloys may require attention every 15,000-30,000 hits. The same die geometry cutting mild steel or aluminum might run 75,000-150,000 hits between sharpenings. Production environment matters too. High-speed operations generate more heat, accelerating wear compared to slower cycling.
Integrating Sharpening Into Your Maintenance Calendar
Production triggers work well for high-volume dies, but what about tooling that runs intermittently? Calendar-based scheduling ensures nothing falls through the cracks. Even dies sitting idle benefit from periodic inspection since corrosion, handling damage, and storage conditions affect readiness.
Whether you handle maintenance internally or rely on a die sharpening service, documentation practices determine your program's effectiveness. Maintain records that include:
- Die identification numbers linked to production equipment
- Cumulative hit counts and sharpening history
- Material removed during each sharpening cycle
- Dimensional measurements before and after service
- Quality issues that triggered unscheduled maintenance
This data reveals patterns invisible to casual observation. You might discover that certain dies consistently need attention after specific jobs, suggesting material or setup factors worth investigating. Tracking total material removed across sharpenings tells you when replacement becomes more economical than continued maintenance.
For operations using rotary dies, finding rotary die sharpening near me becomes part of your scheduling strategy. These specialized dies often require equipment and expertise beyond typical in-house capabilities, making lead time for outside service a scheduling factor.
Balancing sharpening frequency against production demands requires judgment. Sharpening too frequently wastes time and removes material unnecessarily, shortening overall die life. Waiting too long generates scrap and risks catastrophic failure. The sweet spot lies in predictive maintenance, using your documented data to anticipate needs rather than react to failures.
Consider die replacement costs when setting thresholds. Expensive precision dies justify more frequent, lighter sharpenings that maximize total service life. Inexpensive commodity dies might run closer to failure points since replacement carries less financial impact than production interruption for maintenance. With solid scheduling practices established, you're ready to make strategic decisions about when sharpening makes sense versus when replacement becomes the smarter choice.

Making Smart Decisions About Die Sharpening and Replacement
Your maintenance schedule tells you when to act, but it doesn't answer the bigger strategic questions. Should you invest in in-house sharpening capabilities or outsource to professionals? When does continued sharpening become throwing good money after bad? These decisions directly impact your bottom line, and getting them right requires understanding the true costs involved.
The following decision framework helps you evaluate your options based on real-world scenarios and production requirements:
| Scenario | Key Considerations | Recommended Action |
|---|---|---|
| Low volume (under 25 dies/month), varied die types | Equipment ROI unlikely; skill development costly | Outsource to die cutting machine blade sharpening services |
| Medium volume (25-75 dies/month), standardized dies | Reasonable payback period; training investment justified | Consider semi-automated in-house equipment |
| High volume (75+ dies/month), production-critical | Downtime costs exceed equipment investment | Invest in dedicated in-house sharpening capability |
| Complex precision dies, tight tolerances | Specialized equipment and expertise required | Partner with specialized service providers |
| Emergency repairs, unplanned failures | Speed critical; premium pricing acceptable | Maintain relationships with local providers for rapid response |
| Die approaching material removal limits | Sharpening may compromise structural integrity | Evaluate replacement versus continued maintenance |
Calculating the True Cost of In-House Sharpening
When evaluating whether to bring sharpening capabilities in-house, most manufacturers focus on equipment cost. That's a starting point, but the true cost calculation runs deeper. Consider these factors before making your decision:
- Equipment investment: Quality surface grinders range from $10,000 for manual machines to $500,000+ for CNC systems. Add fixtures, tooling, and accessories.
- Facility requirements: Grinding operations need appropriate space, electrical service, coolant management, and environmental controls.
- Training costs: Developing skilled operators requires months of training and supervision. Budget for formal instruction plus mentored practice time.
- Consumables: Grinding wheels, coolant, measuring instruments, and replacement fixtures represent ongoing expenses.
- Quality assurance: Inspection equipment and calibration programs ensure your sharpening meets specifications.
- Opportunity cost: Space and capital dedicated to sharpening can't serve other production needs.
Compare these costs against outsourcing expenses. If you're searching for a die sharpening service in Los Angeles, die sharpening in Evansville IN, or die sharpening in Redding, request detailed quotes that include turnaround time, shipping costs, and minimum order requirements. Many manufacturers discover that local service providers offer compelling value when all factors are considered.
The break-even calculation varies significantly by operation. A shop sharpening 100 dies monthly might recover equipment investment within two years. The same investment at 20 dies monthly stretches payback beyond practical planning horizons.
For high-volume automotive stamping applications, die quality at the outset significantly affects long-term maintenance costs. Dies manufactured with advanced CAE simulation and precision engineering often require less frequent sharpening because stress distribution and wear patterns are optimized during design. Manufacturers like Shaoyi, with IATF 16949 certification and 93% first-pass approval rates, engineer dies that maintain cutting performance longer, reducing your total maintenance burden.
When Die Replacement Becomes More Economical
Every die has a finite service life. The question isn't whether replacement will eventually become necessary, but when continued sharpening stops making economic sense. Several indicators signal that replacement offers better value:
- Approaching material removal limits: When cumulative sharpening has removed 25-30% of original cutting land, structural integrity becomes questionable.
- Dimensional instability: Dies that can't hold tolerance after sharpening have likely exhausted their useful life.
- Escalating sharpening frequency: If intervals between required sharpenings keep shrinking, accelerated wear indicates underlying problems.
- Heat damage or cracking: Thermal damage from previous sharpening or production can't be fully corrected and will propagate.
- Technology advancement: Newer die designs may offer performance improvements that justify replacement over maintaining legacy tooling.
Calculate the economics explicitly. Compare the cost of another sharpening cycle (including downtime, service fees, and risk of failure) against replacement cost spread over expected new die life. When sharpening costs approach 30-40% of replacement cost and expected remaining life drops below two additional cycles, replacement typically wins.
Production volume affects this calculation substantially. High-volume operations recover replacement costs quickly through reduced downtime and improved quality. Lower-volume applications may justify squeezing additional cycles from existing dies even when replacement would improve performance.
The initial die quality matters enormously here. Precision-manufactured dies with optimized geometries and premium materials deliver more total cycles before replacement becomes necessary. When evaluating new die purchases, consider lifetime maintenance costs alongside initial price. A die costing 20% more upfront but lasting 50% longer through more sharpening cycles offers clear value.
Smart decision-making combines quantitative analysis with practical judgment. Track your actual costs per die, per cycle, and per thousand parts produced. This data transforms subjective debates into objective comparisons, guiding your sharpening and replacement investments toward maximum return.
Implementing Your Die Sharpening Strategy for Production Excellence
You've now explored every aspect of die sharpening procedures, from recognizing wear indicators to choosing between manual and automated methods. The difference between manufacturers who struggle with constant die problems and those who achieve consistent production excellence comes down to implementation. Knowledge without action doesn't reduce downtime or improve output.
The foundation of effective die sharpening lies not in the grinding itself, but in the systematic approach that ensures every die receives proper attention at the right time, using the right methods, with full documentation.
Whether you're operating an APM die sharpener, an APM-589C die sharpener, or a die sharpener APM Sharp1, success depends on applying the principles consistently rather than the specific equipment you use.
Your Die Sharpening Action Plan
Ready to transform your die maintenance from reactive firefighting to proactive management? Follow these prioritized steps to build a program that delivers measurable results:
- Audit your current die inventory: Document every die's condition, sharpening history, and remaining service life. You can't manage what you haven't measured.
- Establish inspection intervals: Set production count triggers and calendar-based checkpoints for each die category based on material, volume, and criticality.
- Create standardized procedures: Develop written protocols covering inspection, documentation, grinding parameters, and quality verification for your specific die types.
- Train your team: Ensure operators understand wear indicators, proper handling, and when to escalate issues to maintenance specialists.
- Implement tracking systems: Whether spreadsheets or specialized software, maintain records that reveal trends and support data-driven decisions.
- Evaluate your capability gaps: Determine which sharpening tasks belong in-house versus with specialized service providers based on volume, complexity, and economics.
- Build service provider relationships: Identify and qualify external resources for specialty work and emergency situations before you need them urgently.
Building Long-Term Die Management Excellence
Implementing these steps creates immediate improvements, but lasting excellence requires continuous refinement. Review your maintenance data quarterly to identify patterns. Are certain dies failing faster than expected? Is scrap trending upward despite regular sharpening? These signals point toward opportunities for process improvement or die replacement decisions.
The connection between proper sharpening practices and overall production quality extends beyond the obvious. Well-maintained dies produce consistent parts, reduce secondary finishing operations, and extend press life by eliminating the excessive forces worn tooling demands. Cost efficiency improves through reduced scrap, fewer emergency repairs, and optimized die replacement timing. Equipment longevity benefits from the reduced stress that sharp, properly maintained tooling creates throughout your production system.
Starting with precision-engineered dies from certified manufacturers establishes the foundation for effective long-term maintenance. Dies designed with advanced simulation and manufactured to exacting standards require less frequent intervention and respond better to sharpening when the time comes. For operations seeking quality stamping die solutions built to OEM standards, exploring manufacturers like Shaoyi with IATF 16949 certification and proven first-pass approval rates provides a strong starting point.
Your die sharpening strategy isn't a one-time project. It's an ongoing commitment to production excellence that pays dividends with every part you produce. The procedures covered throughout this guide give you the knowledge. Implementation gives you the results.
Frequently Asked Questions About Die Sharpening Procedures
1. What is the correct order of sharpening steps for dies?
The proper die sharpening sequence involves seven phases: inspection and documentation of current condition, cleaning and demagnetization to remove contaminants and residual magnetism, grinding setup with appropriate fixtures and wheel selection, controlled material removal in passes of 0.0005 to 0.002 inches, surface finishing to remove burrs, dimensional verification against original specifications, and finally reinstallation with proper alignment. Each step builds on the previous one to ensure consistent, precision results.
2. How do you sharpen thread dies properly?
Threading dies require specialized grinding wheels designed for hard materials with fine grit. The chaser should be clamped in a fixture that holds the rake surface at the manufacturer-recommended angle. Unlike stamping dies, threading dies must maintain precise thread pitch accuracy and concentricity. Many manufacturers opt for professional die sharpening services for threading dies due to the precision requirements and specialized equipment needed to follow the helical thread path while removing minimal material.
3. What is the process of sharpening manufacturing dies?
Die sharpening involves controlled material removal from worn surfaces using abrasive substances harder than the die material. For stamping and cutting dies, this typically means surface grinding with precision fixtures, removing only 0.001 to 0.002 inches per pass until the tool is sharp. The process requires proper coolant application to prevent thermal damage, appropriate grinding wheel selection based on die material, and careful preservation of original geometry including clearance angles and cutting land width.
4. How often should dies be sharpened to maintain production quality?
Sharpening frequency depends on material type, production volume, and die complexity. A reasonable starting point involves inspection every 10,000 to 50,000 hits for stamping operations. Dies processing abrasive materials like stainless steel may need attention every 15,000-30,000 hits, while those cutting mild steel or aluminum might run 75,000-150,000 hits between sharpenings. Key indicators include burr formation, dimensional drift, increased cutting force, and visible edge wear patterns.
5. Should I sharpen dies in-house or use professional services?
The decision depends on volume, die complexity, and available expertise. In-house sharpening typically becomes economical above 50-100 dies monthly. For low-volume operations under 25 dies monthly with varied die types, outsourcing offers better value. High-volume automotive applications benefit from precision dies manufactured with advanced CAE simulation, like those from IATF 16949 certified manufacturers, which require less frequent sharpening and reduce total maintenance burden over the die's lifetime.