 Small batches, high standards. Our rapid prototyping service makes validation faster and easier —

D2 Vs A2 Tool Steel For Dies: Which Survives Your Production Run
The Die Maker's Dilemma Between D2 and A2 Tool Steel
Imagine investing thousands of dollars into a precision die, only to watch it fail prematurely because you chose the wrong tool steel. This scenario plays out in manufacturing facilities every day, and it almost always traces back to one critical decision: selecting between D2 tool steel and A2 tool steel for your specific die application.
The stakes are higher than most realize. Your die steel choice doesn't just affect initial tooling costs—it determines how many parts you can produce before resharpening, how often production lines halt for maintenance, and whether your dies survive the demands of high-volume runs.
Why Your Die Steel Choice Determines Production Success
When you're building blanking dies, forming dies, progressive dies, or drawing dies, the material selection process demands more than a quick glance at a specification sheet. Both D2 and A2 are exceptional tool steel options, but they excel in fundamentally different applications. Choosing one over the other without understanding their distinct performance characteristics can cost your operation tens of thousands in premature die replacement and unplanned downtime.
Die steel isn't just about hardness numbers—it's about matching material properties to the specific stresses your dies will face during production.
The Hidden Costs of Choosing the Wrong Tool Steel
Consider what happens when a blanking die made from the wrong steel encounters abrasive sheet material. You'll notice accelerated edge wear, burr formation on stamped parts, and increasingly frequent sharpening intervals. These steel tools represent significant investments, and their failure cascades through your entire operation:
- Increased scrap rates from out-of-tolerance parts
- Unscheduled production stops for die maintenance
- Higher labor costs for grinding and reconditioning
- Potential quality rejections from customers
What This Die Maker's Comparison Covers
This guide takes a different approach than generic steel comparisons you'll find elsewhere. Rather than simply listing material properties, we'll walk through specific die applications—blanking, forming, progressive, and drawing dies—and show you exactly when D2 outperforms A2 and vice versa.
You'll discover how production volume, the materials you're stamping, and die geometry all influence the optimal choice. By the end, you'll have actionable guidance for selecting the right die steel for your next project, backed by real-world performance considerations rather than theoretical specifications alone.
How We Evaluated Tool Steels for Die Applications
Before diving into specific recommendations, you need to understand how we approached this comparison. A standard steel hardness chart tells you numbers—but it doesn't tell you how those numbers translate to real die performance on your shop floor. That's why we developed an evaluation framework specifically tailored to die applications rather than relying on generic tool steel properties alone.
So what is tool steel evaluation really about when it comes to dies? It's about understanding how different tool steel grades perform under the unique stresses that stamping, forming, and cutting operations create. Let's break down exactly how we weighted each factor.
Five Critical Factors for Die Steel Selection
When comparing D2 and A2 for die applications, we evaluated performance across five essential criteria. Each factor carries different weight depending on your specific application:
- Wear Resistance: How well does the steel maintain sharp cutting edges when processing thousands or millions of parts? This matters most for blanking and piercing operations where edge retention directly impacts part quality.
- Toughness: Can the die absorb impact forces without chipping or cracking? Dies experiencing shock loading—like those in forming and drawing operations—demand exceptional toughness over maximum hardness.
- Machinability: How easily can you machine complex die geometries before heat treatment? Intricate progressive dies with multiple stations require steel that machines predictably without excessive tool wear.
- Heat Treatment Predictability: Does the steel respond consistently to hardening and tempering? Dimensional stability during heat treatment prevents costly rework and ensures proper die fit-up.
- Total Cost of Ownership: Beyond initial material cost, what are the long-term expenses for maintenance, resharpening, and replacement? A cheaper steel that fails prematurely often costs more over the die's lifecycle.
How We Weighted Wear Resistance vs Toughness
Here's where most generic comparisons fall short. A steel material hardness chart might show D2 reaching higher tool steel hardness values than A2, but that doesn't automatically make it the better choice. The critical question becomes: what trade-offs are you willing to accept?
We weighted wear resistance heavily for applications involving:
- Abrasive materials like high-strength steels or materials with scale
- High-volume production runs exceeding 100,000 parts
- Thin material gauges requiring razor-sharp cutting edges
Conversely, we prioritized toughness for scenarios featuring:
- Thicker materials creating higher impact forces during stamping
- Complex forming operations with significant shock loading
- Dies with thin sections or sharp internal corners prone to stress concentration
Understanding the Production Volume Variable
Production volume fundamentally changes the evaluation equation. Imagine you're building a prototype die for 500 parts versus a production die expected to stamp 2 million parts. The optimal steel choice differs dramatically between these scenarios.
For low-volume applications, machinability and initial cost often outweigh extreme wear resistance. You'll never push the die hard enough to reveal D2's wear advantages before the job completes. However, for high-volume production, investing in superior wear resistance pays dividends through extended intervals between resharpening and fewer production interruptions.
This is precisely why die-specific testing matters more than consulting generic tool steel properties. Real-world die performance depends on the interaction between your chosen steel, the materials being processed, production volumes, and die geometry—factors no single specification chart can capture.
D2 Tool Steel Performance in Die Manufacturing
Now that you understand our evaluation framework, let's examine D2 tool steel through a die maker's lens. When someone mentions "high-performance die steel," D2 is often the first name that comes up—and for good reason. The properties of D2 steel make it a powerhouse for specific die applications, particularly those involving abrasive materials and demanding production volumes.
But here's what many manufacturers miss: D2 isn't universally superior. Understanding exactly where this steel excels—and where it falls short—helps you avoid costly misapplication and maximize your die investment.
D2's High Chromium Advantage for Abrasive Materials
What makes D2 material stand apart from other cold work tool steels? The answer lies in its chemical composition. D2 steel composition features approximately 1.4-1.6% carbon combined with 11-13% chromium—a formulation that creates abundant hard chromium carbides throughout the steel matrix.
These carbides act like microscopic armor embedded within the steel. When your die processes abrasive materials—think high-strength low-alloy steels, stainless steel with oxide scale, or materials containing hard inclusions—these carbides resist the grinding action that rapidly dulls lesser steels.
Consider what happens during a typical blanking operation. The punch edge contacts the sheet material thousands of times per hour, and each stroke creates friction and micro-abrasion along the cutting edge. D2 steel properties enable the edge to maintain sharpness far longer than lower-alloy alternatives, translating directly to:
- Reduced burr formation on stamped parts
- Consistent hole dimensions throughout extended production runs
- Longer intervals between die sharpening
- Lower per-part tooling costs for high-volume applications
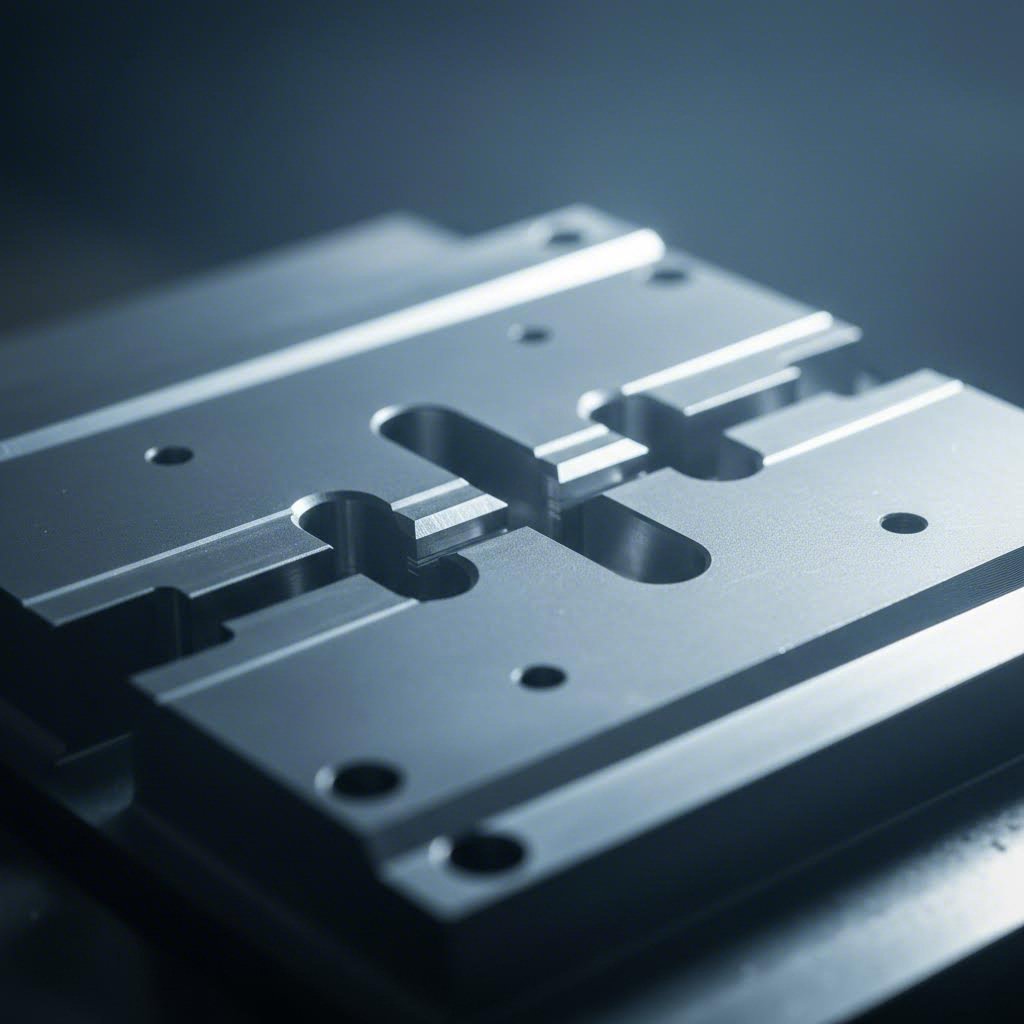
Optimal Die Types for D2 Steel
Not every die benefits equally from D2's exceptional wear resistance. The hardness of D2 steel—typically heat treated to 58-62 HRC—makes it ideal for applications where edge retention trumps impact resistance. D2 tool steel hardness at these levels creates cutting edges that stay sharp through millions of cycles.
D2 excels in these specific die applications:
- Blanking dies for abrasive materials: Processing high-strength steels, galvanized materials, or sheets with surface scale
- Piercing punches: Creating holes in materials that cause rapid edge wear
- Slitting operations: Where continuous edge contact demands maximum wear resistance
- Long-run progressive die stations: Particularly cutting and piercing stations processing 500,000+ parts
- Fine blanking applications: Where edge quality directly impacts part functionality
D2 steel heat treatment also offers good dimensional stability compared to oil-hardening steels, though not quite matching air-hardening grades like A2. For complex die geometries, this means fewer surprises during hardening—a critical consideration when tight tolerances matter.
When D2 Outperforms Every Alternative
There are scenarios where D2 simply has no equal in the cold work tool steel category. You'll see its advantages most clearly when processing:
- Materials above 80,000 PSI tensile strength
- Abrasive sheet materials with surface oxides or scale
- Production volumes exceeding 250,000 parts per die life
- Applications requiring minimal edge breakdown between sharpening cycles
Pros of D2 for Die Applications
- Exceptional wear resistance—often 2-3 times longer edge life than A2 in abrasive applications
- High achievable hardness (58-62 HRC) for superior edge retention
- Good dimensional stability during heat treatment
- Excellent resistance to adhesive wear and galling
- Cost-effective for high-volume production when amortized per part
Cons of D2 for Die Applications
- Lower toughness than A2—more prone to chipping under impact
- Brittleness increases at maximum hardness levels
- More difficult to machine than A2 before heat treatment
- Requires careful grinding to avoid thermal damage
- Not suitable for dies with thin sections or sharp internal corners
Here's the critical consideration many die makers overlook: D2's brittleness concerns manifest in specific failure modes. When D2 dies fail, they typically chip or crack rather than deform. You'll see edge spalling on blanking punches, corner fractures on complex die sections, and catastrophic cracking when shock loads exceed the material's limits.
These failure modes explain why D2 works brilliantly in wear-dominated applications but struggles in impact-heavy operations. The same carbides that provide wear resistance also create stress concentration points that can initiate cracks under repeated shock loading.
Understanding these trade-offs prepares you to make an informed choice—but how does A2 compare when toughness becomes the priority?
A2 Tool Steel Advantages for Precision Dies
If D2 represents the wear resistance champion, then A2 steel stands as the balanced performer that die makers turn to when toughness becomes non-negotiable. Understanding a2 steel properties reveals why this air hardening tool steel has earned its reputation as the go-to choice for dies that experience significant impact forces during operation.
So when does A2 make more sense than D2? The answer often comes down to one question: will your die face repeated shock loading that could crack a more brittle steel? Let's explore exactly why A2 tool steel properties make it the preferred choice for specific die applications.
A2's Toughness Advantage for Impact-Heavy Dies
A2 tool steel contains approximately 1.0% carbon and 5% chromium—notably less chromium than D2's 11-13%. This compositional difference fundamentally changes how the steel behaves under stress. With fewer large chromium carbides in its microstructure, A2 material absorbs impact energy more effectively without initiating cracks.
Imagine what happens during a forming operation. The die doesn't just cut through material—it forces sheet metal into complex shapes through repeated high-pressure impacts. Each stroke transmits shock waves through the die steel. A2's superior toughness allows it to flex microscopically under these forces rather than fracturing.
The practical implications become clear in these scenarios:
- Thick material stamping: Processing materials above 0.125" thickness generates substantially higher impact forces that can chip D2 edges
- Forming operations with sharp radii: Stress concentrations at tight bends demand steel that resists crack initiation
- Dies with thin cross-sections: Slender die features survive longer in A2 because the steel absorbs impact without snapping
- Progressive dies with forming stations: Combining cutting and forming operations often makes A2 the safer choice for the entire die
A2 steel hardness typically ranges from 57-62 HRC after proper heat treatment—slightly lower maximum hardness than D2 but still more than adequate for most die applications. The key insight? A2 at 60 HRC often outlasts D2 at 62 HRC in impact-heavy applications because it simply doesn't crack.
Why Forming Dies Often Demand A2 Steel
Forming and drawing dies represent A2's sweet spot. Unlike blanking operations where the die edge slices cleanly through material, forming operations involve complex stress states—compression, tension, and shear forces acting simultaneously across the die surface.
Consider a typical drawing die that transforms flat sheet into a cup shape. The die experiences:
- Radial compression as material flows over the draw radius
- Friction-induced heat at high-contact areas
- Cyclic stress loading with each press stroke
- Potential shock loads when material thickness varies
A2 tool steel hardness provides sufficient wear resistance for these applications while maintaining the toughness needed to survive millions of forming cycles. Die makers consistently report that A2 forming dies outlast their D2 counterparts—not because they wear less, but because they don't crack prematurely.
The same logic applies to bending dies, coining dies, and any application where the die must deform material rather than cut it. When you're unsure whether your application demands maximum wear resistance or maximum toughness, A2 often represents the safer choice.
The Air-Hardening Benefit for Complex Die Geometries
Here's where A2 offers an advantage that often surprises die makers focused solely on mechanical properties: dimensional stability during heat treatment. As an air hardening tool steel, A2 doesn't require oil or water quenching—it hardens simply by cooling in still air after austenitizing.
Why does this matter for dies? Rapid quenching in oil or water creates thermal gradients that can cause distortion. Complex die geometries with varying cross-sections, intricate pockets, or precise mating surfaces are particularly vulnerable. A2's air-hardening characteristic means:
- More uniform cooling throughout the die reduces internal stress
- Less distortion means reduced grinding after heat treatment
- Complex geometries maintain their dimensions more predictably
- Precision features require less correction during final finishing
For progressive dies with multiple stations requiring tight alignment, this dimensional stability becomes critical. A die that distorts during heat treatment may never achieve proper fit-up regardless of how much grinding you perform.
Pros of A2 for Die Applications
- Superior toughness—approximately 30-40% better impact resistance than D2
- Excellent dimensional stability during heat treatment
- Better machinability than D2 before hardening
- Reduced risk of catastrophic cracking under shock loads
- Ideal for dies with thin sections or complex geometries
- More forgiving during grinding operations
Cons of A2 for Die Applications
- Lower wear resistance than D2—typically 40-50% shorter edge life in abrasive applications
- Not optimal for processing highly abrasive materials
- Requires more frequent sharpening in high-volume blanking applications
- May not be cost-effective for extremely long production runs where wear dominates
- Lower chromium content means less resistance to certain corrosive environments
A2 tool steel properties create a different failure profile compared to D2. When A2 dies eventually fail, they typically show edge rounding and gradual wear rather than sudden chipping or cracking. This predictable wear pattern allows you to schedule maintenance before catastrophic failure occurs—a significant advantage for production planning.
Now that you understand both steels individually, how do they stack up in a direct head-to-head comparison across all the factors that matter for die performance?
D2 vs A2 Head-to-Head Comparison for Dies
You've seen how D2 and A2 each perform in their ideal applications. But when you're standing in front of a material order form deciding between a2 vs d2 tool steel for your next die project, you need a direct comparison that cuts through the theory and delivers practical guidance.
Let's put these two steels side by side and examine exactly how they differ across every property that matters for die performance. This d2 vs a2 tool steel breakdown will help you make confident material selections based on your specific production requirements.
Property-by-Property Die Performance Breakdown
The following comparison table consolidates the critical differences between a2 steel vs d2 for die applications. Use this as your quick-reference guide when evaluating which steel fits your project:
| Property | D2 Tool Steel | A2 Tool Steel | Die Application Impact |
|---|---|---|---|
| Carbon Content | 1.4-1.6% | 0.95-1.05% | Higher carbon in D2 enables greater hardness potential |
| Chromium Content | 11-13% | 4.75-5.50% | D2's higher chromium creates more wear-resistant carbides |
| Typical Hardness Range | 58-62 HRC | 57-62 HRC | Similar ranges, but D2 reaches higher hardness more easily |
| Wear Resistance | Excellent (9/10) | Good (6/10) | D2 lasts 2-3x longer in abrasive blanking applications |
| Toughness | Fair (5/10) | Very Good (8/10) | A2 resists chipping under impact loads significantly better |
| Machinability (Annealed) | Fair (5/10) | Good (7/10) | A2 machines faster with less tool wear before heat treatment |
| Dimensional Stability | Good | Excellent | A2's air-hardening minimizes distortion in complex dies |
| Grindability | Fair | Good | D2 requires more careful grinding to prevent thermal damage |
| Primary Die Applications | Blanking, piercing, slitting | Forming, drawing, bending | Match steel type to dominant stress mode in your operation |
Looking at d2 steel hardness capabilities versus A2, you'll notice both steels can achieve similar maximum hardness values. However, the path to that hardness—and what happens at those hardness levels—differs significantly. D2 at 62 HRC becomes notably more brittle than A2 at the same hardness, which explains why experienced die makers often run D2 at 58-60 HRC for applications involving any shock loading.
The Toughness vs Wear Resistance Trade-Off Explained
Here's the fundamental truth about d2 vs a2 steel selection: you cannot maximize both toughness and wear resistance in the same material. These properties exist in tension with each other, and understanding this trade-off helps you make smarter decisions.
Think of it this way—wear resistance comes from hard particles (carbides) distributed throughout the steel matrix. These carbides resist abrasion brilliantly. However, those same hard particles create stress concentration points where cracks can initiate under impact loading. More carbides means better wear resistance but reduced toughness.
When should you prioritize wear resistance (choose D2)?
- Processing abrasive materials like high-strength steels or galvanized sheets
- Production volumes exceeding 250,000 parts per die life
- Thin material gauges (under 0.060") where edge sharpness is critical
- Blanking and piercing operations with minimal shock loading
- Applications where edge rounding directly causes part rejection
When should you prioritize toughness (choose A2)?
- Processing thicker materials (above 0.125") generating high impact forces
- Forming, drawing, and bending operations with cyclic stress loading
- Dies with thin cross-sections or sharp internal corners
- Applications where cracking would cause catastrophic failure
- Progressive dies combining cutting and forming stations
Material thickness being processed deserves special attention here. When you stamp 0.030" mild steel, impact forces remain relatively low—D2's superior wear resistance pays dividends without toughness concerns. But stamp 0.250" high-strength steel, and those impact forces multiply dramatically. At some thickness threshold specific to your material and press speed, A2's toughness advantage outweighs D2's wear resistance benefit.
Heat Treatment Considerations for Die Makers
The differences between a2 steel vs d2 steel extend beyond the finished die into how each steel behaves during heat treatment. These processing differences affect both die quality and manufacturing costs.
D2 heat treatment considerations:
- Requires higher austenitizing temperatures (1850-1875°F typical)
- Usually oil quenched or air cooled depending on section size
- Achieves excellent hardness with proper technique
- More sensitive to decarburization during heating
- May require multiple tempering cycles for optimal toughness
- Grinding after heat treatment requires careful technique to avoid thermal damage
A2 heat treatment considerations:
- Austenitizes at slightly lower temperatures (1750-1800°F typical)
- Air hardens completely—no quenchant required
- Excellent dimensional stability throughout the process
- Less prone to distortion in complex geometries
- More forgiving during subsequent grinding operations
- Generally requires fewer correction cycles after hardening
Die geometry plays a crucial role in heat treatment success. Complex progressive dies with varying section thicknesses, intricate pockets, and precision mating surfaces benefit significantly from A2's air-hardening characteristic. The uniform cooling eliminates thermal gradients that cause distortion in oil-quenched steels.
Conversely, simple blanking dies with uniform cross-sections experience minimal distortion regardless of steel choice. In these applications, D2's superior wear resistance often justifies the slightly more demanding heat treatment process.
Understanding these heat treatment protocols—and matching them to your shop's capabilities—ensures you can fully realize either steel's performance potential in your finished dies.
Die Application Matrix and Steel Selection Guide
Now that you understand how D2 and A2 compare property-by-property, let's translate that knowledge into actionable recommendations for specific die applications. This section provides a practical framework you can reference whenever you're specifying tool steel types for a new die project.
The following matrices match steel recommendations to real-world variables: the type of die you're building, the materials you're processing, and your expected production volumes. Think of this as your decision-making shortcut—a way to quickly narrow down the optimal steel choice before diving into detailed specifications.
Blanking and Piercing Die Steel Recommendations
Blanking and piercing operations place unique demands on die steel. The cutting edge repeatedly shears through material, creating abrasive wear patterns that dull edges over time. Your steel selection here depends primarily on what you're cutting and how many parts you need.
Use this matrix to guide your blanking and piercing die steel selection:
| Material Being Processed | Prototype/Short-Run (Under 50,000 parts) | Medium Volume (50,000-500,000 parts) | High Volume (500,000+ parts) |
|---|---|---|---|
| Mild Steel (Under 50 ksi) | A2 - easier to machine, adequate wear life | D2 - for superior edge retention | D2 - wear resistance pays dividends |
| High-Strength Steel (50-80 ksi) | A2 - toughness helps with thicker gauges | D2 - wear becomes significant factor | D2 - essential for edge retention |
| Stainless Steel | D2 - resists galling and adhesive wear | D2 - strongly recommended | D2 or DC53 - maximum wear resistance |
| Abrasive Materials (galvanized, scaled) | D2 - abrasion demands wear resistance | D2 - no substitute for carbide content | D2 or DC53 - consider carbide inserts |
| Aluminum Alloys | A2 - adequate wear, better toughness | A2 or D2 - galling may favor D2 | D2 - prevents aluminum pickup |
Notice how production volume shifts the recommendation toward D2 in almost every category? That's because blanking operations are inherently wear-dominated. The longer your production run, the more D2's superior edge retention outweighs A2's easier processing and better toughness.
However, watch out for thick-gauge applications. When you're blanking material above 0.125" thickness, impact forces increase substantially. In these cases, consider running D2 at a lower hardness (58-59 HRC) or switching to A2 to prevent edge chipping—even in high-volume applications.
Forming and Drawing Die Material Selection
Forming and drawing dies operate under fundamentally different stress conditions than blanking dies. Rather than shearing through material, these dies deform sheet metal through compression, tension, and sliding contact. Toughness becomes the priority, and the types of tool steel you consider should reflect this shift.
Here's your forming and drawing die selection matrix:
| Die Operation | Prototype/Short-Run | Medium Volume | High Volume |
|---|---|---|---|
| Simple Forming (bends, flanges) | A2 - excellent all-around choice | A2 - toughness prevents cracking | A2 - consistent performance |
| Deep Drawing | A2 - handles cyclic stress well | A2 or specialized coated D2 | A2 or S7 tool steel for severe draws |
| Coining/Embossing | D2 - detail retention matters | D2 - maintains fine features | D2 - maximum detail preservation |
| High-Impact Forming | A2 or S7 tool steel | S7 tool steel - maximum toughness | S7 - survives repeated shock loading |
| Warm/Hot Forming (elevated temp) | Hot work tool steel (H13) | Hot work tool steel (H13) | Hot work tool steel (H13) |
You'll notice A2 dominates the forming category. That's because cold work tool steel used in forming operations must absorb repeated impact forces without cracking. A2's balanced properties—good wear resistance combined with excellent toughness—make it the natural choice for most forming applications.
When do you step beyond D2 and A2 entirely? Two scenarios stand out:
- Extreme impact applications: S7 tool steel offers significantly better shock resistance than either D2 or A2. Deep drawing operations with severe material flow, or any forming die experiencing repeated high-energy impacts, may justify S7's lower wear resistance in exchange for virtually unbreakable toughness.
- Elevated temperature operations: Neither D2 nor A2 maintains hardness above approximately 400°F. For warm forming or any operation generating significant heat, hot work tool steel grades like H13 become necessary to prevent die softening during operation.
Progressive Die Steel Strategy by Station Type
Progressive dies present a unique challenge because they combine multiple operations—cutting, forming, drawing—in a single tool. Should you build the entire die from one steel type, or mix materials based on station requirements?
The practical answer depends on your shop's capabilities and the die's complexity. Here's guidance for tool steel uses across different progressive die station types:
| Station Type | Recommended Steel | Rationale |
|---|---|---|
| Piercing stations | D2 (or match die body) | Wear resistance extends punch life |
| Blanking stations | D2 (or match die body) | Edge retention critical for part quality |
| Forming stations | A2 (or match die body) | Toughness prevents cracking under load |
| Drawing stations | A2 | Cyclic stress demands impact resistance |
| Cam-actuated stations | A2 | Complex geometry benefits from stability |
| Idle/carrier stations | Match die body material | Consistency simplifies heat treatment |
For most progressive dies, building the entire die body from A2 provides the best compromise. A2's toughness protects forming stations while still delivering acceptable wear life at cutting stations. You can then use D2 inserts or separate D2 punches at wear-critical cutting stations where edge retention matters most.
This hybrid approach—A2 die body with D2 cutting components—gives you the best of both worlds:
- Dimensional stability during heat treatment (A2's air-hardening advantage)
- Toughness where forming stresses concentrate
- Maximum wear resistance at cutting edges where you need it
- Ability to replace worn cutting components without rebuilding the entire die
When processing extremely abrasive materials in high volumes, you might reverse this strategy—building from D2 with A2 or S7 inserts at high-impact forming stations. The key is matching each station's steel to its dominant failure mode: wear or impact.
With your steel selection narrowed down based on die type and production requirements, the next critical step is ensuring proper heat treatment to unlock each steel's full performance potential.
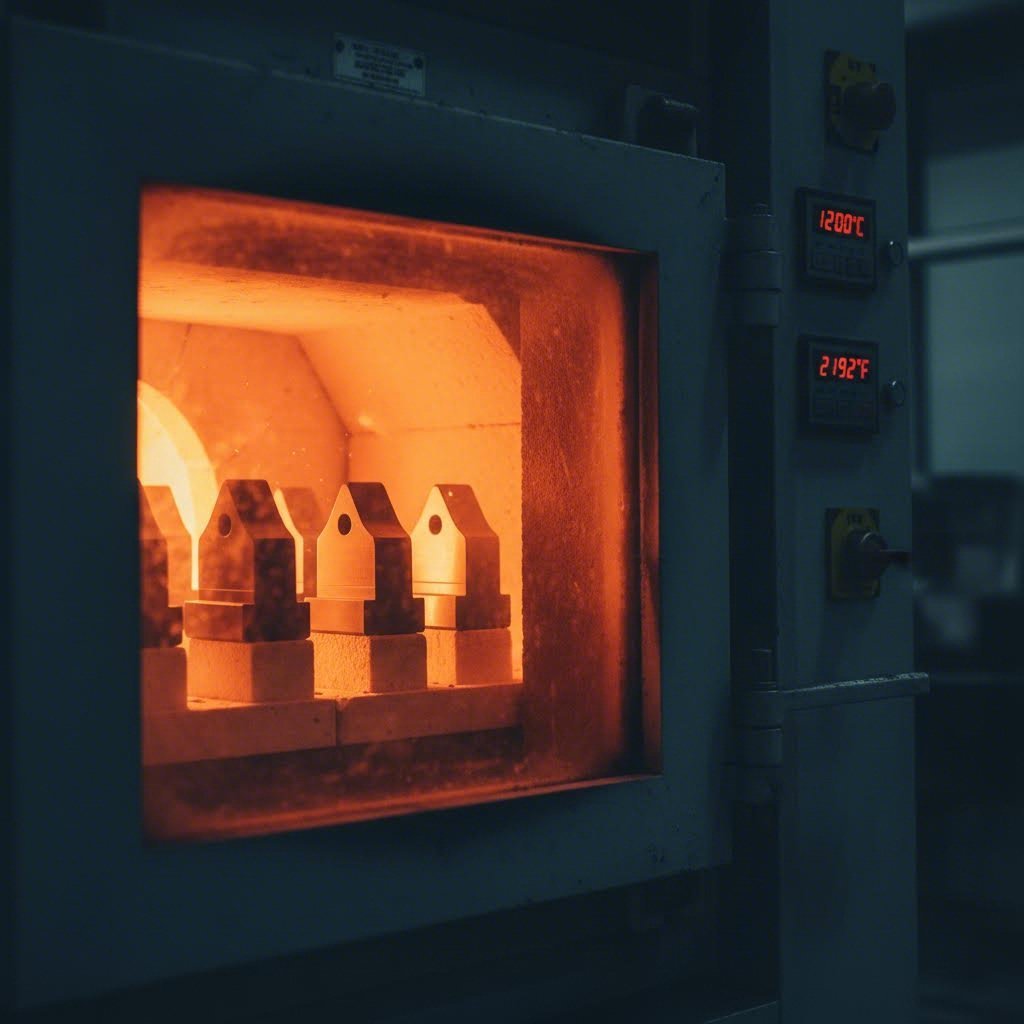
Heat Treatment Protocols for Die Performance
Selecting the right steel is only half the equation. Even the best D2 or A2 tool steel will underperform if heat treatment falls short of optimal parameters. The difference between a die that lasts 500,000 cycles and one that cracks at 50,000 often comes down to how precisely you execute the hardening and tempering process.
Think of heat treatment as unlocking your steel's potential. Without proper protocols, you're essentially leaving performance on the table—or worse, creating internal stresses that lead to premature failure. Let's walk through the specific heat treatment considerations that transform raw tool steel into high-performance die components.
Achieving Optimal Hardness for Your Die Type
Here's something many die makers overlook: maximum achievable hardness isn't always your target hardness. The optimal hardness for your die depends entirely on what that die needs to accomplish during production. A heat treat chart for steel might show D2 reaching 64 HRC under ideal conditions, but running a blanking die at that hardness invites edge chipping and catastrophic cracking.
Use these hardness guidelines based on die application:
- D2 blanking dies (abrasive materials): 60-62 HRC provides excellent wear resistance while maintaining acceptable toughness for most cutting operations
- D2 blanking dies (standard materials): 58-60 HRC offers a better balance when processing mild steel or aluminum
- D2 piercing punches: 59-61 HRC—slightly lower than the die to reduce chipping risk on the smaller punch cross-section
- A2 forming dies: 58-60 HRC delivers the toughness needed for impact-heavy operations
- A2 drawing dies: 57-59 HRC maximizes shock resistance for cyclic loading conditions
- A2 progressive die bodies: 58-60 HRC balances wear life across multiple station types
Understanding a2 tool steel hardness before heat treat helps you plan your process. In the annealed condition, A2 typically measures around 200-230 HB (Brinell). During austenitizing and air cooling, the steel transforms to achieve your target Rockwell hardness. The predictable response makes heat treating a2 tool steel more forgiving than many alternatives.
D2 tool steel heat treatment follows a similar logic but requires closer attention to process parameters. D2's higher alloy content means slower transformation kinetics—the steel needs adequate time at austenitizing temperature to fully dissolve carbides into the matrix before cooling.
Tempering Strategies for Balanced Die Performance
Tempering transforms a freshly hardened die from a glass-like, brittle state into a tough, production-ready tool. Skip this step or execute it improperly, and you're setting up for failure. Both D2 and A2 require double tempering for optimal results in die applications.
Consider the a2 heat treat tempering cycle:
- First temper immediately after the die cools to approximately 150°F following air hardening
- Heat slowly to 350-400°F for dies requiring maximum hardness (60+ HRC)
- Increase to 450-500°F when targeting 58-59 HRC for improved toughness
- Hold at temperature for minimum one hour per inch of cross-section thickness
- Air cool to room temperature before second temper
- Repeat the same tempering cycle—double tempering ensures complete transformation
For a2 tool steel heat treat protocols, tempering temperature directly controls final hardness and toughness. Lower tempering temperatures (350-400°F) preserve hardness but sacrifice some toughness. Higher temperatures (500-600°F) improve toughness while reducing hardness by 1-2 HRC points. Match your tempering temperature to the dominant stress mode your die will experience.
D2 tempering follows similar principles but operates at slightly different temperature ranges. Most die makers temper D2 between 400-500°F for blanking applications, accepting final hardness around 60-61 HRC. For applications requiring improved toughness, increasing temper temperature to 500-550°F drops hardness to 58-59 HRC while significantly reducing brittleness.
Avoiding Common Heat Treatment Mistakes in Die Making
Even experienced heat treaters make mistakes that compromise die performance. Recognizing these common errors helps you avoid costly failures and achieve consistent results across every die you produce.
Critical heat treatment mistakes to avoid:
- Insufficient soak time at austenitizing temperature: Both D2 and A2 need adequate time for carbide dissolution. Rushing this step leaves undissolved carbides that reduce achievable hardness and create inconsistent properties throughout the die.
- Delayed tempering after hardening: Never leave a hardened die sitting overnight before tempering. Internal stresses from the hardening process can cause spontaneous cracking. Begin tempering within hours of the die cooling to handling temperature.
- Single tempering only: One temper cycle isn't sufficient for tool steels. The first temper transforms retained austenite into martensite, which itself needs tempering. Double tempering ensures complete transformation and stress relief.
- Inconsistent temperature control: Temperature variations of even 25°F across a die section create hardness gradients that lead to uneven wear and potential cracking. Use properly calibrated furnaces with verified thermocouples.
- Inadequate surface protection: D2 is particularly susceptible to decarburization during heating. Use protective atmospheres, vacuum heat treatment, or anti-scale compounds to preserve surface carbon content and edge hardness.
- Grinding before stress relief: Aggressive grinding on a freshly tempered die can induce thermal damage and surface cracking. Allow the die to stabilize at room temperature for 24 hours before finish grinding, and use proper coolant during grinding operations.
The difference between adequate and optimal heat treatment shows up in die performance over thousands of production cycles. Dies processed with careful attention to these details consistently outlast those rushed through heat treatment—often by factors of two to three times the service life.
With proper heat treatment protocols established, the next consideration becomes how professional die manufacturing integrates material selection with advanced engineering validation to ensure optimal production outcomes.
Professional Die Manufacturing and Steel Optimization
Choosing between D2 and A2 tool steel represents a critical first step—but it's not the finish line. The real question becomes: how do you ensure your steel selection actually delivers the performance you expect in production? This is where professional die manufacturing bridges the gap between theoretical material properties and real-world production success.
Modern die manufacturing doesn't rely on trial-and-error to validate material choices. Instead, advanced engineering tools and quality systems work together to predict die performance, optimize designs, and ensure consistent results. Let's explore how this integration transforms your steel selection into production-ready tooling.
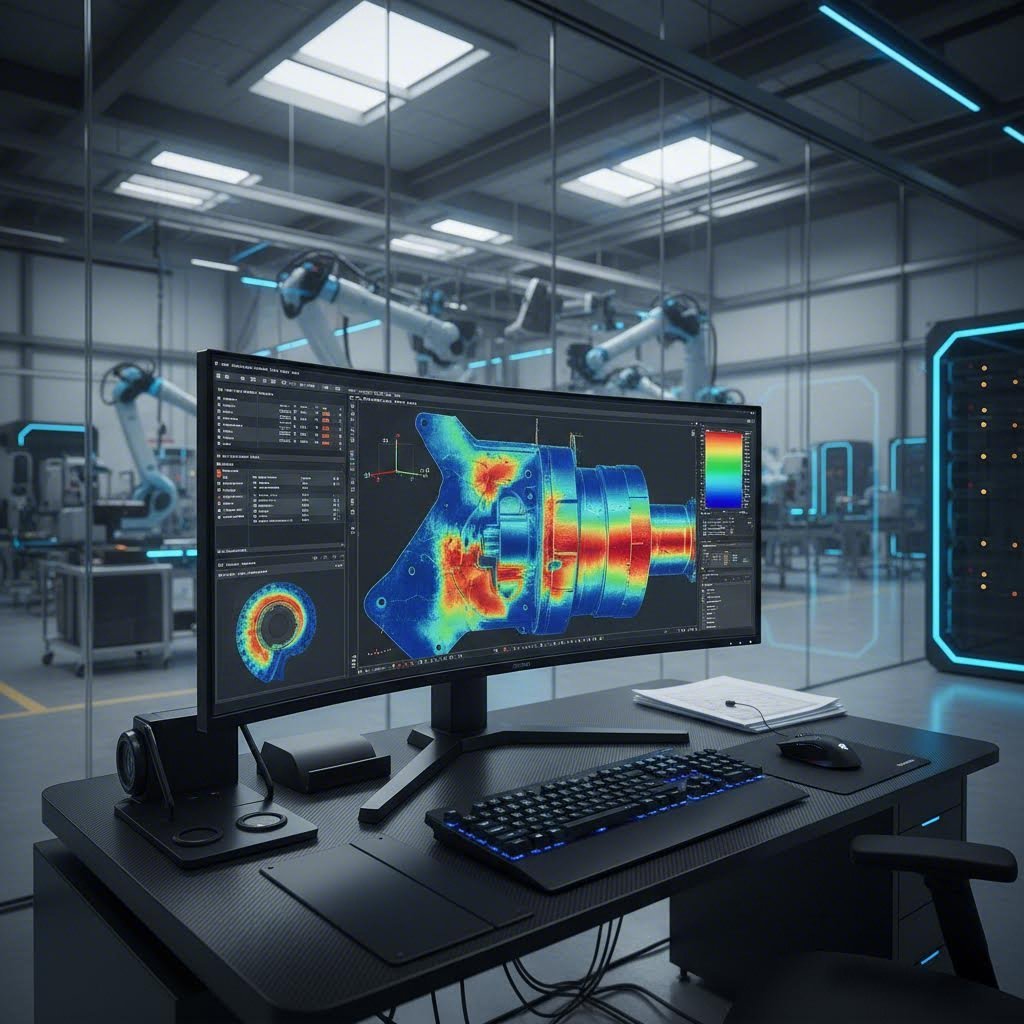
How CAE Simulation Validates Steel Selection
Imagine knowing exactly how your die will perform before cutting a single piece of steel. Computer-Aided Engineering (CAE) simulation makes this possible by modeling the complex interactions between your chosen die steel material, the workpiece material, and the forming process itself.
When engineers input your tooling steel specifications—whether D2, A2, or alternative grades—into simulation software, they can predict:
- Stress distribution patterns: Where will peak stresses occur during stamping? Does your steel's toughness match these demands?
- Wear progression: Which die surfaces will experience the highest abrasive contact? Is D2's wear resistance necessary, or will A2 suffice?
- Potential failure points: Are there thin sections or sharp corners where A2's superior toughness becomes critical?
- Thermal behavior: Will heat buildup during high-speed production affect your hardened tool steel's performance?
- Springback prediction: How will formed parts behave after leaving the die, and does die geometry need adjustment?
This virtual testing eliminates the costly trial-and-error approach that once defined die development. Rather than building a die, testing it, discovering problems, and rebuilding, engineers validate their steel selection and die design before manufacturing begins. The result? Faster development cycles and dies that perform correctly from the first production run.
For complex progressive dies combining cutting and forming operations, simulation becomes even more valuable. Engineers can verify that A2's toughness handles forming station stresses while confirming that D2 inserts at cutting stations will achieve target edge life—all before committing to tool steel material purchases.
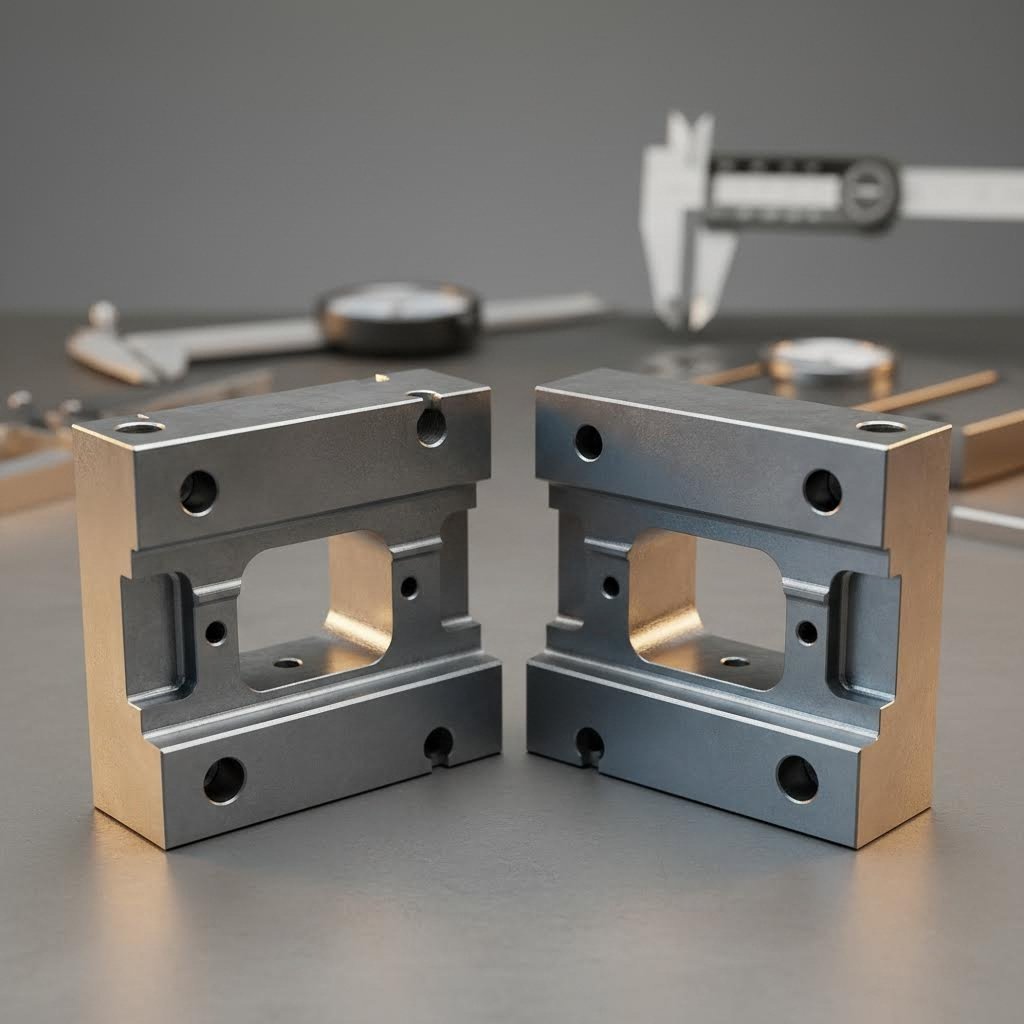
The Role of Precision Manufacturing in Die Longevity
Even the best steel tooling fails prematurely if manufacturing quality falls short. The precision with which your die components are machined, heat treated, and assembled directly impacts how long that carefully selected D2 or A2 steel will perform in production.
Consider what happens when manufacturing tolerances aren't maintained:
- Misaligned punch and die clearances create uneven loading that accelerates edge wear
- Surface finish variations on forming surfaces cause inconsistent material flow and premature galling
- Dimensional errors in die blocks prevent proper fit-up, concentrating stress at unintended locations
- Inconsistent heat treatment across die sections creates hardness gradients that lead to unpredictable failure
Professional die manufacturers address these challenges through rigorous process control. Every machining operation follows documented procedures. Heat treatment cycles are monitored and recorded. Final inspection verifies critical dimensions before assembly.
This is where working with an experienced tool steel supplier and die manufacturer makes a measurable difference. Suppliers who understand die applications can recommend optimal steel grades for your specific requirements. Manufacturers with proven quality systems ensure that steel tooling reaches its full performance potential through precise execution at every step.
Matching Steel Properties to OEM Requirements
Automotive and industrial OEMs don't just specify part dimensions—they demand consistent quality, documented processes, and traceable materials. Meeting these requirements starts with your die steel selection but extends through every aspect of die manufacturing and validation.
IATF 16949 certification has become the benchmark for automotive tooling suppliers. This quality management standard ensures:
- Material traceability from steel mill to finished die
- Documented heat treatment processes with verifiable results
- Statistical process control demonstrating manufacturing consistency
- Corrective action systems that prevent recurring quality issues
- Continuous improvement driving better die performance over time
When your die maker operates under this framework, you gain confidence that your D2 or A2 steel selection will translate into predictable production performance. The certification ensures that what works on one die will work consistently on the next—critical when you're tooling up for high-volume automotive production.
Advanced die manufacturers combine CAE simulation capabilities with IATF 16949 quality systems to deliver exceptional first-pass approval rates. For example, Shaoyi's precision stamping die solutions leverage this integrated approach, achieving a 93% first-pass approval rate through CAE-validated designs and rigorous quality control. Their engineering team can deliver rapid prototyping in as little as 5 days while maintaining the precision that high-volume manufacturing demands.
This combination—proper tool steel material selection validated through simulation and executed with certified quality processes—represents the complete formula for die success. Your choice between D2 and A2 matters tremendously, but that choice only reaches its full potential when paired with professional manufacturing that respects both the material's properties and your production requirements.
With engineering validation and quality manufacturing established as critical success factors, the final step is consolidating everything into clear recommendations you can apply to your next die project.
Final Recommendations for Die Steel Selection
You've explored the properties, compared the performance characteristics, and reviewed application matrices. Now it's time to consolidate everything into clear, actionable guidance you can apply immediately to your next die project. Whether you're specifying steel for a simple blanking die or a complex progressive tool, these decision frameworks will help you choose confidently between D2, A2, and alternative high carbon tool steel options.
Remember: the goal isn't finding the "best" steel—it's finding the right steel for your specific application. Let's break down exactly when each option makes sense.
Choose D2 When Wear Resistance Is Critical
D2 remains the hardest tool steel choice in the cold work category for wear-dominated applications. Select D2 when your die meets these criteria:
- Production volume exceeds 250,000 parts: D2's superior edge retention delivers measurable cost savings over extended runs. The higher upfront machining costs amortize quickly across high part counts.
- Processing abrasive materials: High-strength steels above 80,000 PSI, galvanized sheets with zinc coating, or materials with surface scale demand D2's chromium carbide content.
- Blanking thin gauges (under 0.060"): Thin materials require razor-sharp edges to prevent burr formation. D2 maintains that sharpness far longer than A2.
- Stainless steel stamping: D2's galling resistance prevents material pickup that degrades edge quality and part finish.
- Fine blanking applications: When edge quality directly impacts part functionality, D2's wear resistance becomes essential.
However, verify that your die geometry supports D2's lower toughness. Avoid D2 for dies with thin cross-sections, sharp internal corners, or features prone to stress concentration. When D2 fails, it fails suddenly through chipping or cracking—not the gradual wear pattern you can monitor and schedule maintenance around.
Choose A2 When Toughness Prevents Catastrophic Failure
A2 becomes your alloy tool steel of choice when impact resistance outweighs maximum wear life. Consulting any tool steel grades chart confirms A2's balanced properties make it ideal for these scenarios:
- Forming and drawing operations: Dies that deform material rather than cut it experience cyclic stress loading that demands A2's superior toughness.
- Processing thick materials (above 0.125"): Increased material thickness generates proportionally higher impact forces during stamping. A2 absorbs these shocks without cracking.
- Dies with complex geometries: A2's air-hardening characteristic ensures dimensional stability during heat treatment—critical for progressive dies with multiple precision-aligned stations.
- Thin die sections or sharp internal corners: Stress concentrations at these features make A2's crack resistance essential for reliable performance.
- Prototype and short-run applications: A2's better machinability reduces initial die costs when you won't run enough parts to benefit from D2's extended wear life.
- Budget-conscious projects: A2 machines faster, grinds easier, and responds more forgivingly to heat treatment—reducing total manufacturing cost.
A2 works as shock resistant tool steel in applications where D2 would crack prematurely. When you're uncertain whether your application is wear-dominated or impact-dominated, A2 typically represents the safer choice. Its predictable wear pattern allows scheduled maintenance rather than unexpected failure.
When to Consider Alternative Steels Entirely
Sometimes neither D2 nor A2 represents the optimal choice. Recognizing when to step outside this comparison saves you from forcing a steel into an application where it will underperform. Consider these alternatives:
- S5 tool steel: When extreme shock resistance becomes paramount, S5 offers toughness beyond even A2's capabilities. Deep drawing dies with severe material flow or high-energy impact operations may justify S5's lower wear resistance.
- M2 tool steel: For dies processing extremely abrasive materials at high speeds, M2's high-speed steel composition maintains hardness at elevated temperatures where D2 would soften. Continuous operations generating significant heat benefit from M2's hot hardness retention.
- DC53: This modified D2 variant offers improved toughness while maintaining excellent wear resistance. When you need D2-level abrasion resistance but your application involves more impact than standard D2 tolerates, DC53 bridges the gap.
- Carbide inserts: Ultra-high-volume applications (millions of parts) or extremely abrasive materials may justify tungsten carbide inserts at critical wear points, with D2 or A2 supporting structures.
- Hot work tool steels (H13): Any die operating above 400°F requires hot work grades. Neither D2 nor A2 maintains hardness at elevated temperatures—they'll soften and fail rapidly in warm or hot forming applications.
Decision Summary: Key Factors at a Glance
| Decision Factor | Choose D2 | Choose A2 | Consider Alternatives |
|---|---|---|---|
| Production Volume | 250,000+ parts | Under 250,000 parts | Millions (carbide inserts) |
| Material Processed | Abrasive, high-strength | Standard materials, thick gauges | Extremely abrasive (DC53, M2) |
| Die Operation | Blanking, piercing, slitting | Forming, drawing, bending | Severe impact (S5), hot forming (H13) |
| Die Geometry | Simple, uniform cross-sections | Complex, thin sections, tight corners | Application-specific |
| Budget Priority | Lowest per-part cost over long runs | Lower initial tooling investment | Specialized performance requirements |
Ensuring Your Steel Selection Delivers Results
Proper steel selection represents only one component of die success. Even the perfect choice between D2 and A2 falls short without quality manufacturing execution. Your steel selection reaches its full potential when combined with:
- CAE-validated die design: Simulation confirms your steel choice handles predicted stress patterns before manufacturing begins
- Precision machining: Proper tolerances ensure uniform loading across die surfaces
- Controlled heat treatment: Documented processes achieve target hardness consistently
- Certified quality systems: IATF 16949 or equivalent standards guarantee traceable, repeatable results
Working with manufacturers who integrate these capabilities ensures your die performs as intended from first article through millions of production cycles. For automotive applications demanding both precision and volume, partnering with certified stamping die specialists like Shaoyi provides the engineering validation and quality assurance that transforms proper steel selection into production success.
The bottom line? Match your steel to your application's dominant failure mode—wear or impact. Validate that choice through engineering analysis. Execute with precision manufacturing. This formula delivers dies that survive your production run while minimizing total cost of ownership.
Frequently Asked Questions About D2 vs A2 Tool Steel for Dies
1. What is the main difference between A2 and D2 tool steel for dies?
The primary difference lies in their performance trade-offs. D2 tool steel contains 11-13% chromium, creating abundant carbides that deliver exceptional wear resistance—ideal for blanking dies processing abrasive materials. A2 contains only 4.75-5.50% chromium, resulting in superior toughness that resists chipping and cracking under impact. Choose D2 when edge retention matters most; choose A2 when your dies experience shock loading from forming or drawing operations.
2. Which tool steel is better for high-volume production dies?
For high-volume production exceeding 250,000 parts, D2 typically offers better value in blanking and piercing applications due to its superior wear resistance—often lasting 2-3 times longer between sharpening cycles. However, for high-volume forming or drawing dies, A2 remains preferred because its toughness prevents catastrophic cracking that would halt production entirely. The key is matching steel choice to your die's primary stress mode: wear-dominated operations favor D2, impact-dominated operations favor A2.
3. What hardness should I target for D2 and A2 dies?
Target hardness depends on your specific application. For D2 blanking dies processing abrasive materials, aim for 60-62 HRC. For standard materials, 58-60 HRC provides better toughness balance. A2 forming dies perform optimally at 58-60 HRC, while drawing dies benefit from slightly lower hardness at 57-59 HRC to maximize shock resistance. Both steels require double tempering after hardening to achieve optimal properties and relieve internal stresses.
4. Can I use D2 for forming dies or A2 for blanking dies?
While possible, these aren't optimal applications for either steel. D2's lower toughness makes it prone to chipping and cracking in forming dies that experience repeated impact forces. A2 can work in blanking applications but requires more frequent sharpening—typically 40-50% shorter edge life compared to D2 when processing abrasive materials. For progressive dies combining both operations, many die makers use A2 for the die body with D2 inserts at wear-critical cutting stations.
5. When should I consider alternatives to D2 and A2 tool steel?
Consider S7 tool steel when extreme shock resistance is paramount, such as deep drawing with severe material flow. M2 high-speed steel suits dies operating at elevated speeds generating significant heat, as it maintains hardness where D2 and A2 would soften. DC53 offers a middle ground with D2-level wear resistance plus improved toughness. For operations above 400°F, hot work steels like H13 become necessary. Professional die manufacturers with CAE simulation capabilities can help validate whether standard or alternative steels best suit your specific application requirements.