 Small batches, high standards. Our rapid prototyping service makes validation faster and easier —

What Is Anodized Aluminum? Process, Types, Colors That Last

What Is Anodized Aluminum?
Quick definition of anodized aluminum
"Anodized aluminum is aluminum that has been electrochemically treated to create a hard, durable, and corrosion-resistant oxide layer that is part of the metal itself, not a coating on top."
Sounds complex? Let’s break it down. When you see a sleek laptop, a modern building facade, or a scratch-resistant cookware surface and wonder why it looks so good and lasts so long, you’re likely looking at anodized aluminum. But what is anodized aluminum, really? In plain terms, it’s regular aluminum that’s been transformed by an anodizing process—a controlled oxidation treatment that turns the metal’s surface into a protective, decorative, and highly functional layer.
Key benefits of anodized aluminum
- Corrosion resistance: The anodic layer shields aluminum from moisture and chemicals, preventing rust and weathering. Unlike untreated aluminum, anodized aluminum won’t patina or deteriorate in harsh environments.
- Wear resistance: Anodized aluminum is up to three times harder than raw aluminum, making it much more scratch- and abrasion-resistant.
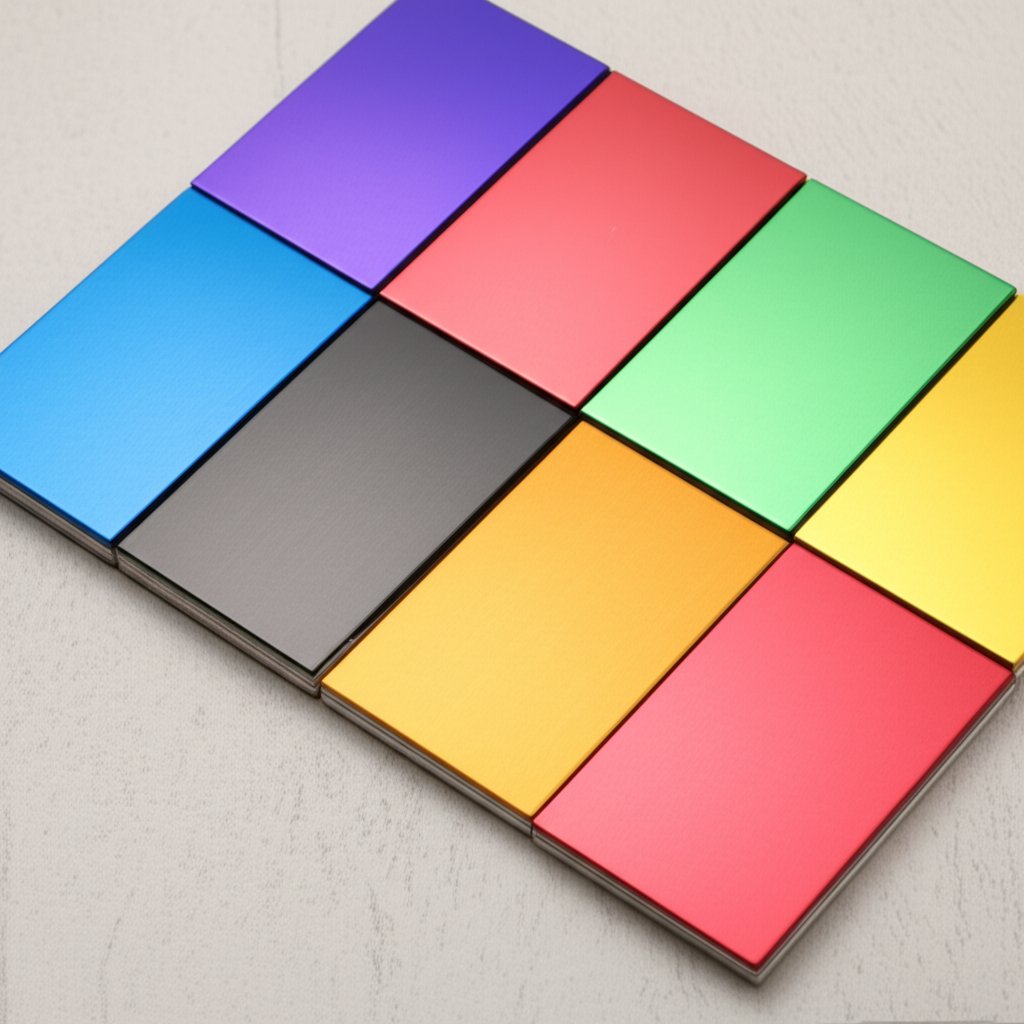
- Color possibilities: The porous structure of the anodic layer can be dyed in a wide range of colors—everything from natural silver to gold, black, bronze, and custom hues. These colors are integrated into the surface and won’t chip, flake, or peel.
- Lightweight strength: Anodized aluminum is about 60% lighter than stainless steel or copper, yet maintains impressive strength—ideal for applications where weight matters.
- Eco-friendly and recyclable: Aluminum is 100% recyclable, and the anodizing process is environmentally friendly compared to many finishing methods.
How is anodized aluminum made?
Imagine regular aluminum being dipped in a special bath and connected to an electrical current. This triggers a process called anodizing, where oxygen from the electrolyte bonds with the aluminum surface, growing an organized, microscopic oxide layer. Unlike paint or plating, which sit on top of the metal, this layer becomes part of the aluminum itself. The result? A finish that’s tough, beautiful, and built to last.
How anodizing differs from paint and plating
| Method | How Layer Forms | Typical Thickness* | Durability |
|---|---|---|---|
| Anodizing | Oxide layer grows from base aluminum (integral, not applied) | 2.5–50.8 μm (0.0001–0.002 in.) | Will not chip, flake, or peel; high wear and corrosion resistance |
| Paint | Organic coating applied on top | Varies by type; generally thicker than anodizing | Can chip, scratch, or peel; field repairable |
| Plating | Metal layer deposited on top (e.g., nickel, chrome) | Varies by process | Can peel or flake; may offer decorative or corrosion resistance |
So, when comparing anodized aluminum vs aluminum (plain, untreated), you’ll notice the anodized metal is tougher, more attractive, and far more resistant to the elements.
Common uses from electronics to architecture
Where do you find anodised or anodized aluminum in real life? The answer: everywhere! Its unique blend of durability and design flexibility makes it a go-to material for:
- Laptops, smartphones, and electronic enclosures (for scratch resistance and aesthetics)
- Architectural panels, curtain walls, and building exteriors (for weatherproof beauty)
- Automotive trim, bicycle frames, and outdoor equipment (for lightweight strength and corrosion protection)
- Kitchen appliances, cookware, and home decor (for easy cleaning and lasting color)
In summary, anodized aluminum is not just a finish—it’s a transformation that unlocks new levels of performance and style for everything from industrial machinery to the gadgets in your pocket.
How the Anodizing Process Turns Aluminum Into a Durable, Colorful Surface
What happens during the anodizing process?
Ever wondered how to anodize aluminum so it becomes both tough and beautiful? The secret lies in a step-by-step electrochemical transformation. Here’s a simplified roadmap of the anodizing process that manufacturers use to create everything from architectural panels to smartphone bodies:
- Cleaning & Deoxidizing: The aluminum part is first cleaned in a heated, alkaline detergent (about 145°F) to remove oils and contaminants. Next, it’s rinsed and often etched in a caustic soda bath, which gives the surface a uniform matte finish. A desmutting step in an acidic solution follows, removing unwanted alloy particles.
- Fixturing (Racking): The clean part is mounted onto racks to ensure a solid electrical connection and even exposure during anodization.
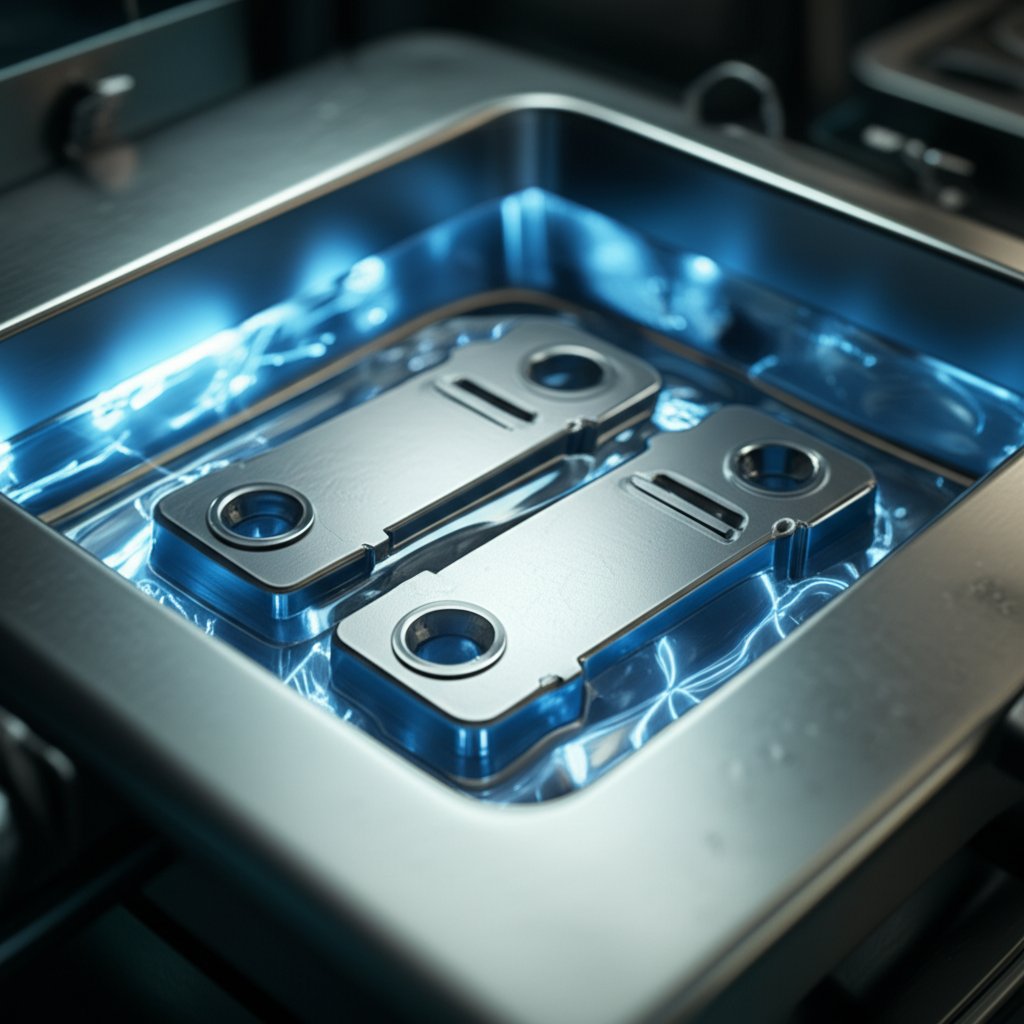
- Anodizing in Acid Electrolyte: The racked aluminum is submerged in an acid electrolyte bath—commonly sulfuric acid at around 15% concentration. Direct current (DC) is applied, with the aluminum as the anode (positive terminal) and the tank as the cathode (negative terminal). This is where the term anodising comes from: the part becomes the anode.
- Pore Formation & Oxide Growth: As current flows, negatively charged oxygen ions (anions) from the electrolyte migrate toward the aluminum surface, reacting to form a thick, porous aluminum oxide layer. At the microscopic level, this oxide grows both outward from the aluminum and slightly inward, creating a network of vertical pores that can later accept dyes or coloring agents.
- Optional Coloring: If color is desired, the part is dipped in a dye bath (for a wide range of colors) or placed in a metallic salt solution for electrolytic coloring (such as bronze or black). The dyes or metal ions fill the open pores of the oxide layer, resulting in vibrant, fade-resistant finishes.
- Sealing: The final and critical step is sealing. The part is immersed in hot deionized water or a chemical sealant, which hydrates and closes the pores, locking in color and dramatically improving corrosion resistance. Unsealed pores can lead to staining and reduced durability.
The science behind anodization: How does anodizing work?
Imagine aluminum as a blank canvas. When you apply voltage in the acid bath, ions start moving: negative oxygen ions (from the solution) rush to the positively charged aluminum, where they combine to form aluminum oxide (Al2O3). This oxide layer is unique because it’s not just sitting on top—it’s grown from the base metal itself. The result? A hard, adherent surface that’s integral to the aluminum, not a separate film like paint or plating.
At the microscopic level, the anodised surface is filled with tiny, vertical pores. These pores are the key to the process—they make the surface receptive to dyes and allow for the vibrant, durable colors that anodized aluminum is known for. Once sealed, these pores close up, making the finish highly resistant to wear, corrosion, and fading.
Anodizing grows the protective layer from the aluminum itself, creating a hard, adherent surface that won’t peel like paint.
Why process control matters: Variables that shape the finish
The quality and characteristics of the anodized finish depend on several tightly controlled variables:
- Current density: Higher current increases oxide thickness, but too much can cause burning or defects.
- Electrolyte composition: Sulfuric acid is most common, but chromic or boric-sulfuric acids are used for special applications.
- Temperature: Cooler baths generally yield denser, harder coatings; warmer baths speed up the process but may reduce hardness.
- Time: Longer anodization increases layer thickness and color depth, but excessive time can lead to diminishing returns.
Adjusting these parameters lets manufacturers tune the anodising process for specific needs—whether it’s a thin, decorative layer or a thick, hard-wearing industrial finish. For example, typical anodized coatings range from 8–16 μm, while hardcoat finishes can reach up to 50 μm in thickness.
Pore formation, dye uptake, and sealing: The finishing touch
After the oxide layer forms, its porosity is what makes anodized aluminum so versatile. The open pores absorb dyes deeply, resulting in colors that don’t flake or rub off. Sealing is the last step—whether by boiling water, nickel acetate, or other methods—to close these pores and complete the transformation.
Want to dive deeper into the technical side of anodization? Explore resources from the Aluminum Anodizers Council or review technical guides at Bonnell Aluminum.
Now that you know how the anodising process works, let’s see how different types of anodizing deliver specific performance and appearance benefits for a wide range of applications.
Types of Anodizing
Type I, Type II, and Type III: What Sets Each Anodizing Type Apart?
When it comes to specifying anodized aluminum, understanding the main types of anodizing is key to getting the right balance of appearance, durability, and cost. Whether you need a clear anodized finish for architectural trim or a hard anodized aluminum surface for industrial machinery, each type offers unique benefits. Here’s how they compare:
| Type | Typical Use-Cases | Colorability | Wear Resistance | Corrosion Performance | Sealing Practices |
|---|---|---|---|---|---|
| Type I (Chromic Acid) | Aircraft, sensitive assemblies, minimal dimensional change | Limited (usually clear anodized) | Moderate | Good for thin coatings | Usually sealed |
| Type II (Sulfuric Acid) | Architectural trim, consumer products, electronics | Excellent (clear anodized finish or dyed in many colors, including black anodized) | Good | Good, especially when sealed | Typically sealed for color retention and corrosion resistance |
| Type III (Hardcoat/Hard Anodizing) | Heavy-wear parts, industrial, military, automotive | Limited (usually dark gray to black anodized) | Excellent (harder than tool steel) | Superior, even in harsh environments | Often left unsealed for wear resistance; can be dichromate sealed |
When Does Each Anodizing Type Make Sense?
- Type I (Chromic Acid): Best for aerospace or delicate parts where minimal material build-up is required and the coating is typically left clear anodized. Ideal for assemblies where tight tolerances are critical.
- Type II (Sulfuric Acid): The most common choice for decorative and general-purpose applications—think clear anodized aluminum window frames, electronics, or consumer goods. It’s great when you want a colored or clear anodized finish with moderate wear and corrosion resistance. Widely used in architectural and design-driven applications.
- Type III (Hardcoat/Hard Anodizing): Go with this for industrial, military, or automotive components that demand maximum durability, abrasion resistance, and protection—such as hydraulic cylinders, gears, or firearm parts. The finish is typically dark gray to black anodized and is thicker, harder, and more insulating than Type II. Hard anodized aluminum is also found in cookware and high-performance machinery.
When selecting an anodizing type, prioritize the environment and wear requirements before color or finish.
Specifying to MIL-A-8625: The Industry Standard
Engineers and buyers often reference MIL-A-8625 when writing specifications for anodized aluminum. This widely adopted military specification outlines the requirements for six types and two classes of anodizing. In practice, most commercial and industrial drawings refer to:
- Type I (chromic acid), Type II (sulfuric acid), and Type III (hardcoat/sulfuric acid at low temperature)
- Class 1 (undyed/clear anodized) and Class 2 (dyed)
- Testing and acceptance criteria for coating weight, corrosion resistance, appearance, and adhesion
For example, specifying “Type II, Class 1, clear anodized aluminum, per MIL-A-8625” ensures a clear anodized finish with proven durability. If you need a colored part—such as black anodized architectural trim—specify “Type II, Class 2, dyed black, per MIL-A-8625.” For maximum wear and corrosion resistance, call out “Type III, hard anodized aluminum, per MIL-A-8625.” Always review the latest standard or consult with your anodizer for the best fit (Aluminum Anodizers Council).
Real-World Selection Examples
- Decorative trim or window frames: Type II, clear anodized finish for a bright, metallic look
- Outdoor or marine hardware: Type II or III, dyed or clear, depending on wear/corrosion needs
- Industrial gears or machinery: Type III hard anodized aluminum for maximum toughness
Next, we’ll explore how color and sealing choices further impact the performance and aesthetics of your anodized aluminum parts.
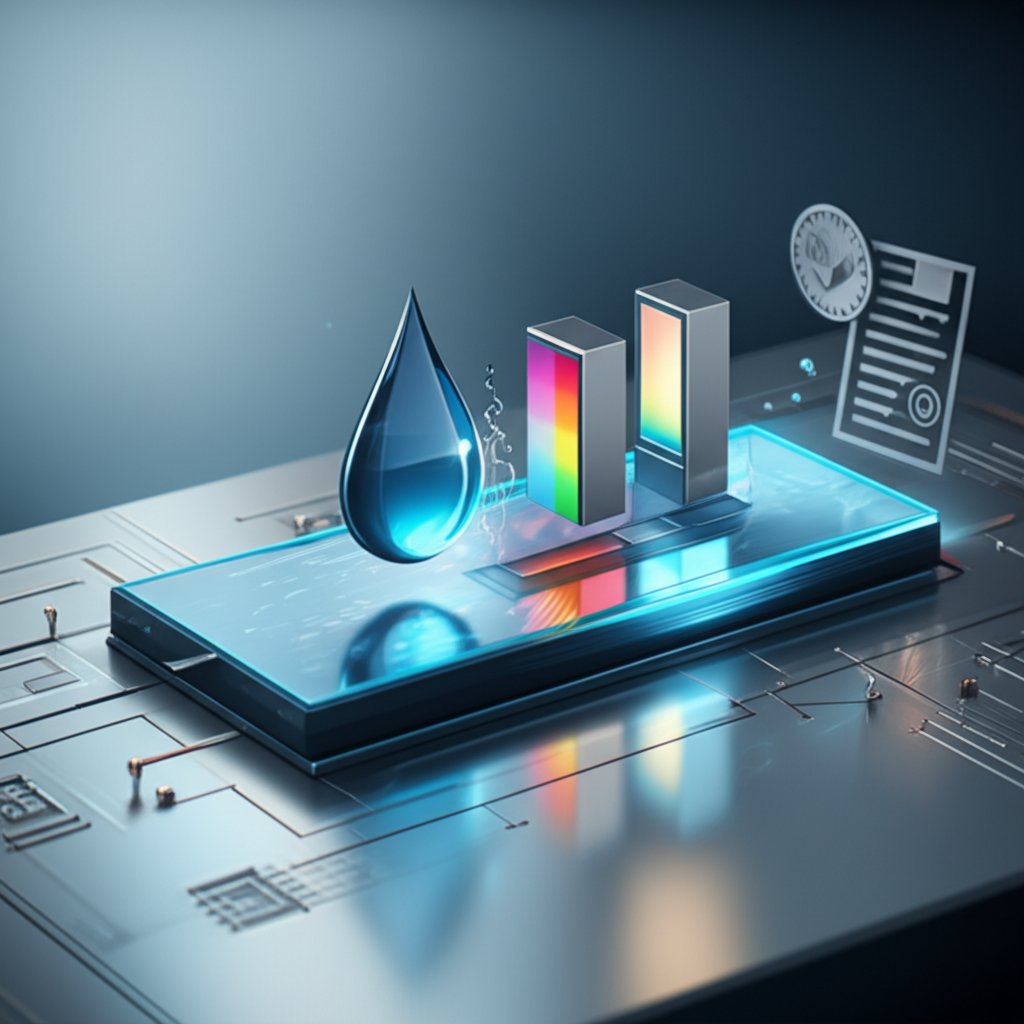
Color Dye Options and Sealing Decisions That Last
Coloring Methods: From Clear to Black, Champagne, and Beyond
When you choose anodized aluminum, you’re not just picking a metal—you're deciding on a finish that can be as subtle or as bold as your design demands. But how do you get from natural silver to rich black anodized aluminum, or even a soft champagne anodized look? It all comes down to the coloring method and how the anodic layer is sealed.
There are three main approaches to coloring anodized aluminum:
- Clear Anodizing: No dye is added. The natural metallic sheen of aluminum shines through, protected by a transparent oxide layer. This is popular for architectural trim and electronics where a clean, modern look is preferred.
- Dyeing: After anodizing, the porous oxide layer is immersed in a dye bath. The dye penetrates the pores, creating vibrant anodized aluminum colors—everything from gold and bronze to blue, red, and black anodized aluminum. Once sealed, these colors are locked in, offering both beauty and durability.
- Electrolytic Coloring: Also known as two-step coloring, this process deposits metallic salts (commonly tin, cobalt, or nickel) into the oxide layer using electrical current. The result? Rich, fade-resistant shades, especially in the bronze-to-black spectrum, and signature finishes like champagne anodized. This process is often called electrolytic coloring anodized aluminum cathode or anode because the part serves as the cathode during coloring.
But which method is best? That depends on your needs. Dyeing offers the widest range of aluminium anodizing colors, but some bright hues (like red and blue) are more susceptible to UV fading over time. Electrolytic coloring, on the other hand, delivers superior UV stability—making it ideal for outdoor or architectural applications where colorfastness is critical.
Sealing Options: The Key to Durability and Colorfastness
After coloring, the next crucial step is sealing. Why? Because the pores in the anodized layer are open—perfect for absorbing dyes, but also vulnerable to stains and corrosion if left unsealed. Sealing closes these pores, locking in color and maximizing resistance to the elements.
Common sealing methods include:
- Hot Water Sealing: The most traditional approach. The part is immersed in near-boiling deionized water, converting the oxide to hydrated aluminum oxide (boehmite), which swells and closes the pores.
- Nickel Acetate Sealing: A chemical seal that works at lower temperatures and is especially effective for dyed finishes, providing excellent corrosion protection and color retention.
- Cold Sealing: Uses special chemicals at room temperature to deposit fillers in the pores. This method is faster and more energy-efficient, but may offer slightly less durability in harsh environments.
- Organic Coating Sealing: For applications needing extra wear or decorative properties, a clear resin or lacquer can be applied over the anodized surface.
Seal quality makes all the difference. Unsealed or poorly sealed anodized aluminum can discolor, corrode, or lose its luster much faster, especially in outdoor or marine environments.
Decision Guide: Matching Color and Sealing to Application
Not sure which combination is right for your project? Use the table below to weigh your options for color and sealing based on where and how your anodized aluminum will be used. We’ve also included industry-standard verification tests—like the AAMA 611 seal test and ASTM B 136 AAMA 611 rub test—to help ensure you’re getting a finish that lasts.
| Use Case | Coloring Method | Sealing Method | Recommended Test |
|---|---|---|---|
| Indoor Decor (furniture, fixtures) | Dyeing (wide range of anodized aluminum colors) | Hot water or nickel acetate | ASTM B 136 AAMA 611 rub test |
| Outdoor Architecture (facades, window frames) | Electrolytic coloring (champagne anodized, black anodized aluminum) | Hot water or nickel acetate; prioritize high-quality seal | AAMA 611 seal test, ASTM B 117 for corrosion |
| Machinery/Industrial (equipment, tools) | Dyeing or electrolytic coloring (typically darker shades for durability) | Nickel acetate or cold seal (for efficiency) | ASTM B 136 AAMA 611, abrasion test |
For architectural projects, the AAMA 611 standard is the go-to reference for specifying and testing anodized finishes, including seal quality and color uniformity.
The best-looking color isn’t always the most durable; seal quality often determines long-term performance.
In short, always match your choice of aluminium anodizing colors and sealing method to your application’s demands. If you need fade resistance for outdoor use, electrolytic coloring and rigorous sealing are your best bet. For indoor products, almost any color is possible—but don’t skip the seal! And remember, tests like the AAMA 611 seal test and ASTM B 136 are your assurance that the finish will stand the test of time.
Ready to see how alloy selection and design can further impact your anodized finish? Let’s explore how to achieve consistent color and quality in the next section.
Alloy Choices and Design Details That Influence Results
How Alloy Composition Affects Anodized Appearance
Ever wonder why two anodized aluminum sheets can look slightly different, even if they started out as "just aluminum"? The secret lies in the alloy composition. Not all aluminum is created equal—each alloy family contains different elements that impact the final anodized finish, color, and corrosion resistance. If you’re aiming for a consistent, high-quality anodized finish, understanding these differences is crucial.
| Alloy Series | Main Alloying Elements | Typical Anodized Appearance | Color Consistency | Notes for Designers |
|---|---|---|---|---|
| 1xxx | 99%+ Pure Aluminum | Clear, but soft; not strong enough for most uses | Good | Can be anodized, but limited structural use |
| 2xxx | Copper | Yellowish tint, less protective | Poor | Not recommended for color-critical or exterior anodized aluminum sheets |
| 3xxx | Manganese | Gray or brown finish | Difficult to match | Best for painted, not anodized, applications |
| 4xxx | Silicon | Dark gray, sooty appearance | Poor | Protective but not visually appealing |
| 5xxx | Magnesium | Strong, clear oxide; excellent for anodized finish | Very good | Preferred for architectural anodized aluminum sheets when AQ (Anodizing Quality) |
| 6xxx | Magnesium & Silicon | Clear, strong, attractive finish | Excellent | Common for extrusions and sheet metal; 6063 (extrusions) and 5005 (sheet) recommended for best color match |
| 7xxx | Zinc | Clear, but can shift brown if zinc content is high | Variable | May be suitable for some uses, but check for color shift |
For most architectural and visually demanding uses, the 5xxx and 6xxx series alloys are the top picks for anodised aluminium. But even within these families, not all alloys are equal—some, like 5005 and 6063, are labeled “Anodizing Quality (AQ)” and deliver the most consistent color when used for anodized aluminum sheets.
Designing for Consistent Color and Gloss
Imagine installing a wall of anodized aluminum sheet metal, only to see subtle color bands or mismatched gloss levels. How do you avoid this? Consistency starts with careful control of alloy, temper, and even the batch (or “lot”) of material. Mixing alloys or tempers—even if they’re both from the 6xxx series—can lead to noticeable color variation after anodizing.
- Stick to one alloy and temper per project. For best results, use 6063 for extrusions and 5005 for flat anodized aluminum sheets.
- Order all parts from the same lot. This minimizes batch-to-batch variation and helps your anodized finish look uniform across large installations.
- Request anodize range samples. These samples show the expected color variation and help set realistic expectations (especially for lighter finishes like champagne or silver).
- Perform bending and welding before anodizing. Post-anodize forming can crack the oxide layer (“crazing”), while welds may cause local discoloration.
Surface Prep and Finish Uniformity
Before anodizing, the surface condition of the aluminum—whether it’s brushed, polished, bead-blasted, or simply as-rolled—plays a major role in the final appearance. A rough or uneven surface can lead to a blotchy anodized finish, while a smooth, uniform prep ensures the anodizing solution bonds evenly for consistent color and gloss.
Common mechanical prep methods include:
- Abrasive finishing: Removes roughness and imperfections, creating a matte or satin look.
- Polishing: Yields a mirror-like, high-gloss finish—ideal for decorative applications.
- Buffing: Produces anything from matte to glossy, depending on the compound used.
For corrosion resistance, a lower surface roughness (under 24 RA) is ideal, as it helps the anodized finish bond tightly and last longer.
Actionable Design Tips for Anodized Aluminum Sheets and Parts
- Specify the exact alloy and temper for all anodized aluminum sheet metal and extrusions.
- Keep all material for a project in the same lot to reduce color variation.
- Define the desired surface finish (matte, brushed, polished) before anodizing.
- Call out acceptable color variation using range samples—especially for large, visible installations.
- Complete all forming and welding before anodizing to avoid defects in the anodized finish.
By paying attention to alloy selection, surface prep, and batch consistency, you’ll achieve an anodized aluminum finish that’s as stunning as it is durable—whether you’re working with anodized aluminum sheets for architecture or precision parts for manufacturing. Next, let’s walk through the process steps and quality checks that ensure your anodized finish meets the highest standards.
Process Steps with QA and Inspection Guidance for Anodized Aluminum
From Cleaning to Sealing: Step-by-Step Anodizing Workflow
When you want to ensure your anodized aluminum products are both beautiful and durable, following a consistent, quality-focused process is essential. Wondering what really happens between raw aluminum and a flawless anodized finish? Here’s a practical, step-by-step guide to how to anodize aluminum, from incoming inspection to final packaging, with each stage designed to prevent common anodizing defects and guarantee consistent results.
- Incoming Inspection: Examine all aluminum parts for surface defects, contamination, or mechanical damage. Only defect-free material proceeds, minimizing risk of flaws in the final anodized finish.
- Alkaline Cleaning: Clean parts in an alkaline solution to remove oils, dirt, and residues. Follow with a thorough water rinse to avoid chemical carryover.
- Etching/Deoxidizing (as needed): Immerse the aluminum in an etching bath—typically alkaline—to remove oxides and create a uniform matte surface. For some alloys, a deoxidizing step in an acidic solution removes remaining contaminants.
- Rinse Cascades: Multiple water rinses ensure all cleaning and etching chemicals are removed, preventing unwanted reactions in later steps.
- Anodizing: Place parts on racks, ensuring good electrical contact. Immerse in an anodizing tank containing a controlled electrolyte (often sulfuric acid). Apply direct current using anodizing equipment; the aluminum acts as the anode, and a cathode (often stainless steel) completes the circuit. Carefully control voltage, current density, and bath temperature to achieve the desired oxide layer thickness and quality.
- Rinse: Immediately after anodizing, rinse parts to remove acidic residues from the surface.
- Dye/Electrolytic Coloring (Optional): If color is required, immerse the anodized aluminum in a dye bath or electrolytic coloring solution. The porous oxide layer absorbs dyes or metallic salts, producing vibrant, long-lasting colors.
- Seal: Seal the anodic layer by immersing in hot water or a nickel acetate solution. This step hydrates and closes the pores, locking in color and maximizing corrosion resistance.
- Final Rinse and Dry: Rinse thoroughly to remove any remaining chemicals, then dry the parts completely.
- Package: Protect finished parts from contamination or mechanical damage before shipment or assembly.
Quality Checks and Acceptance Criteria
Consistent quality doesn’t happen by accident—it’s built into every step of the process. Here’s a QA checklist to help you monitor and control each stage, whether you’re running an anodizing machine in-house or working with a supplier:
- Bath Chemistry Control: Regularly test and document electrolyte composition, pH, and contamination levels. Out-of-spec baths can cause uneven coatings or anodizing defects.
- Temperature and Current Logs: Use automated controls to monitor tank temperature, voltage, and current density throughout the process. Deviations can impact coating thickness and color consistency.
- Seal Quality Checks: Verify sealing effectiveness using industry standards such as AAMA 611 or ASTM B 136 (stain resistance), which assess the durability of the sealed layer.
- Coating Thickness Measurement: Measure anodic layer thickness at multiple points according to EN ISO 2360 or similar standards. For architectural applications, mean thickness should meet or exceed 16–20 μm, as specified by acceptance guidelines (Aluprof).
- Cosmetic Inspection: Inspect each part under standardized lighting. Look for stains, pitting, scratches, or color variation. Acceptable appearance should be uniform and free from visible defects at specified viewing distances (e.g., 3 m for indoor, 5 m for outdoor use).
Simple Inspection: How to Tell If Aluminum Is Anodized
Not sure if your part is really anodized? Here are a few practical, non-destructive ways to distinguish anodized aluminum from painted or plated surfaces:
| Test/Observation | Anodized Aluminum | Paint/Plating |
|---|---|---|
| Visual Pore Structure | May see very fine, uniform texture under magnification; color is integral, not layered | Usually smooth or shows brush marks; color may flake or chip |
| Electrical Conductivity | Surface is non-conductive (an electrical insulator) | Painted surfaces are non-conductive; plated surfaces may conduct depending on metal |
| Documentation | Should include anodizing process details, thickness, and sealing method | Paint/plating specs reference different standards and test methods |
For critical projects, always request process records and test results from your supplier. If you need to verify coating thickness or seal quality, reference recognized standards like AAMA 611, ASTM B 136, or EN ISO 2360 for guidance.
"A controlled, stepwise process and rigorous QA checks are your best defense against anodizing defects and inconsistent finishes."
Whether you’re using advanced anodizing equipment in your own facility or partnering with an experienced anodizer, following these best practices ensures your aluminum parts are built to last. Up next, we’ll discuss how to successfully paint or coat over anodized surfaces—without sacrificing adhesion or durability.
Coating and Painting Over Anodized Aluminum the Right Way
When to Paint Anodized Aluminum
Ever wondered if painting anodized aluminum is possible—or even practical? Maybe you have an older anodized window frame that’s faded, or you want to match a new color scheme without replacing the metal. While painting anodized aluminum is challenging, it’s certainly doable with the right approach. The key is understanding that the anodic layer is hard, chemically stable, and much less receptive to paint than bare aluminum. This means surface prep is everything.
Surface Preparation That Supports Adhesion
Imagine trying to paint a surface that’s designed to resist almost everything—that’s what you face with anodized aluminum. To get a durable, long-lasting aluminum coating, follow these essential steps:
- Clean: Start by degreasing the surface. Use a solvent wash or an emulsifying cleaner to remove oils, dirt, and any contaminants. This ensures nothing interferes with adhesion (APCA Surface Preparation Guide).
- Light Abrasive or Chemical Prep: Sand the anodized surface with 320- or 400-grit sandpaper to roughen it up and remove the glossy oxide layer, or use an acid etching solution to create a suitable profile. This step is critical—paint will not bond well to a slick, unetched anodized finish.
- De-smut (if required): After sanding or etching, some alloys may develop a dark residue. Remove this with a de-smutting solution, then rinse thoroughly and dry.
- Apply Adhesion Promoter/Primer: Use a primer specifically formulated for aluminum or anodic layers. Follow the manufacturer’s technical data sheet (TDS) for application and drying times. This step bridges the gap between the tough anodized surface and your topcoat.
- Topcoat Application: Apply your chosen paint or finish according to the supplier’s recommendations. Allow full cure per the product instructions—don’t rush this step.
- Adhesion Testing: Before putting the part into service, test adhesion using a cross-hatch or tape test, as recommended by the paint supplier. If you see peeling or flaking, revisit your prep steps.
For detailed guidance, always consult official preparation guides and paint manufacturer datasheets. Skipping or rushing any of these steps can lead to premature failure—even the best paint won’t stick to a poorly prepped anodized surface.
Pros and Cons: Coating Over Anodize vs Bare Aluminum
| Coating Over Anodized Aluminum | Coating Bare Aluminum | |
|---|---|---|
| Pros |
|
|
| Cons |
|
|
Alodine vs Anodize: Which Is Better for Painting?
Alodine (chromate conversion coating) offers improved paint adhesion and electrical conductivity, while anodize provides maximum corrosion resistance and durability—but is harder to paint over without special prep.
So, alodine vs anodize? If your project’s priority is paint adhesion and electrical continuity (such as grounding in electronics), alodine is often preferred. For maximum corrosion protection and a durable, colored finish, anodizing is the go-to—though you’ll need to follow extra steps when painting anodized aluminum.
Do’s, Don’ts, and Verification
- Do thoroughly clean and roughen the surface before priming.
- Do use primers and topcoats recommended by the manufacturer for aluminum and anodized surfaces.
- Do test adhesion before putting parts into use.
- Don’t skip the sanding or etching step—it’s critical for paint to grip.
- Don’t paint over heavily corroded or flaking anodized layers; remove and re-anodize or strip to bare metal as needed.
- Don’t assume all coatings are compatible—check the TDS and, when in doubt, consult your supplier.
In summary, can you paint aluminum that’s been anodized? Yes—with careful prep, the right primer, and a methodical approach. Whether you’re refreshing old architectural metal or customizing a part, following these steps will help ensure a finish that looks great and lasts. Next, we’ll cover how to choose a manufacturing partner that can handle both anodizing and downstream processes for your critical projects.
How to Choose an Anodizing and Manufacturing Partner for Quality Results
What to Evaluate in an Anodizing Partner
When your project depends on the performance and appearance of anodized aluminum, selecting the right partner is as important as specifying the finish itself. Imagine you’re launching a new automotive component, architectural system, or electronics enclosure—how do you ensure your anodizing supplier can deliver consistent quality, meet tight deadlines, and support complex manufacturing needs?
Start by asking: Does the supplier offer more than just anodizing? The best anodizing industries today provide integrated services—covering everything from material sourcing and machining to surface treatments and assembly. This holistic approach reduces multi-supplier risk, streamlines PPAP (Production Part Approval Process), and supports speed-to-launch for automotive and industrial buyers.
Key Signals: Quality, Capacity, and Certification
Here’s a practical checklist to help you compare anodizing plant options and find the right fit for your requirements:
| Supplier | Certifications | Turnaround & Capacity | Process Breadth | Value-Added Services | Industries Served |
|---|---|---|---|---|---|
| Shaoyi | IATF 16949 (automotive), ISO 9001 | Fast prototyping, high-volume, flexible batch sizes | Machining, stamping, custom anodizing aluminum, advanced surface treatments, assembly | Full PPAP support, rapid DFM (Design for Manufacturability) feedback, downstream coating, assembly fit checks | Automotive, Tier 1, industrial, electronics |
| Valence Surface Technologies | AMS 2472, NADCAP, ISO 9001 | Integrated solutions for aerospace/defense; high durability focus | Anodizing (Type II, III), plating, painting, NDT, chemfilm | In-process and final QA, traceable documentation | Aerospace, defense, space |
| Greystone | IATF 16949, ISO 9001, NADCAP | Global footprint, scalable for high-volume | Machining, Type II/III anodizing, plating, passivation | Custom automation, in-house tooling, global logistics | Automotive, industrial, medical, aerospace |
| Accio | ISO 9001 | Custom projects, small to mid-size runs | Custom aluminum anodizing, specialty finishes | Color matching, process innovation, sustainability focus | Consumer, electronics, medical, automotive |
Building a Robust RFQ and PPAP-Ready Workflow
Evaluating “anodizers near me” or globally? Consider these best practices to ensure your supplier is ready for the demands of modern manufacturing:
- Certifications Matter: Look for IATF 16949 for automotive, NADCAP for aerospace, and ISO 9001 for general quality management. These signal robust QA systems and process discipline.
- Process Integration: Suppliers offering machining, anodizing aluminum, and downstream coating in-house can better control quality, ensure assembly fit, and accelerate delivery.
- PPAP and Documentation: For automotive and industrial buyers, full PPAP documentation and traceability are essential. Ask for sample FAI (First Article Inspection) reports and process validation records.
- Capacity and Scalability: Can the anodizing plant handle both prototypes and high-volume production? Flexible capacity ensures you won’t outgrow your partner as your business scales.
- Technical Support: Rapid DFM feedback, design reviews, and direct engineering support can help you avoid costly mistakes and optimize for manufacturability.
- Environmental Responsibility: With growing regulatory scrutiny, ensure your supplier follows best practices for wastewater treatment and chemical usage.
"A truly reliable partner not only meets your current specs but helps you anticipate challenges as you scale, launch new products, or enter new markets."
In summary, the right anodizing partner does more than just deliver a finish—they become an extension of your engineering and supply chain teams. Whether you’re searching for anodizing industries with global reach or specialized anodizers near me, prioritize proven certifications, integrated services, and a commitment to process control. This approach ensures your anodized aluminum parts meet the highest standards for quality, appearance, and durability—no matter how challenging the application.
Next, we’ll wrap up with key takeaways and point you to trusted resources for specifying and sourcing anodized aluminum with confidence.
Key Takeaways and Where to Go Next
Key takeaways for specifying anodized aluminum
• Anodized aluminum is not a coating added on top, but a durable oxide layer grown from the base metal itself.
• The quality of the seal is often the deciding factor for long-term corrosion resistance and colorfastness.
• Choosing the right anodizing type (I, II, or III) depends on your application’s environment, wear demands, and desired appearance.
• Consistency in alloy, surface prep, and process control is critical for a uniform anodized aluminum finish across parts or projects.
• Clear communication of type, class, color, and test method in your specification helps your anodizer deliver results that match expectations.
Trusted standards and reference links
If you’re ready to define anodized aluminum for your next project or want to learn more about what is anodized and how to ensure the best results, start with these authoritative resources:
- Aluminum Anodizers Council (AAC) – Industry best practices, technical guides, and a directory to help you understand what is anodizer and how to choose the right partner.
- AAC Specifying Anodized Aluminum – In-depth guidance on finish types, coloring methods, and sealing options for every application.
- Anodizing Reference Guide – Comprehensive technical breakdowns, alloy selection tips, and process control essentials.
- AAMA 611 – The go-to standard for architectural anodized aluminum finish quality and seal tests.
- ASTM B 680 – Standard test method for seal quality of anodic coatings on aluminum.
Next steps for prototypes and production
Wondering what is an anodizer’s role in your project’s success? It’s more than just running a tank—your anodizer becomes a key partner in process control, documentation, and finish quality. For best results, bring a draft specification that clearly calls out:
- Anodizing type (e.g., Type II or Type III)
- Class (undyed/clear or dyed/color)
- Desired color and gloss (including range samples if needed)
- Seal quality and verification test method (AAMA 611, ASTM B 136, etc.)
If you need end-to-end support—from rapid prototyping and alloy selection to advanced anodized aluminum finish and assembly—consider working with a partner who can control the entire process. Shaoyi is one example, offering IATF 16949 certified quality, integrated manufacturing, and rapid turnaround for automakers and Tier 1 suppliers. Their capabilities span from initial design to final assembly, compressing timelines and reducing supplier risk for your most critical projects.
Before launching full production, request a sample run and a capability audit. This not only verifies that your requirements are met but also helps you understand how your anodizer will handle process control, QA checks, and documentation. A robust partnership ensures your anodized aluminum finish performs as specified—whether for a single prototype or a global production run.
Ready to take the next step? Reach out to a qualified anodizer, share your draft spec, and leverage the resources above to ensure your anodized aluminum products stand out for both performance and appearance.
Frequently Asked Questions about Anodized Aluminum
1. What is the difference between aluminum and anodized aluminum?
Aluminum is a raw metal, while anodized aluminum has undergone an electrochemical process that creates a tough, protective oxide layer on its surface. This layer improves corrosion resistance, wear durability, and enables color finishes that won’t peel or chip.
2. Is anodized aluminum safe for cookware and food contact?
Yes, anodized aluminum is safe for cookware because the anodizing process seals the metal, preventing leaching and making the surface non-reactive. This makes it a popular choice for pots, pans, and kitchen tools.
3. How can I tell if aluminum is anodized?
You can identify anodized aluminum by its uniform, metallic finish and resistance to scratching or flaking. Unlike paint, the color is integral to the surface. Documentation or supplier records often specify if a part is anodized.
4. Can anodized aluminum be painted or coated?
Yes, painting over anodized aluminum is possible, but it requires thorough cleaning and surface preparation. Sanding or etching the surface, applying a compatible primer, and following supplier guidelines are essential for strong adhesion.
5. What should I consider when choosing an anodizing supplier?
Look for suppliers with relevant certifications (like IATF 16949 for automotive), integrated services such as machining and assembly, and a track record of quality. Companies like Shaoyi offer end-to-end process control, rapid prototyping, and robust documentation for demanding applications.