 Small batches, high standards. Our rapid prototyping service makes validation faster and easier —

Benefits Of Zinc Phosphating For Automotive Chassis Corrosion Resistance
Zinc Phosphating Essentials For Chassis Pretreatment
What is phosphating for chassis steel?
Ever wondered why automotive chassis last longer with certain finishes? The answer often begins with the question: what is phosphating? Phosphating is a chemical conversion process where a metal surface—typically steel—reacts with a phosphate solution to form a thin, non-metallic, microcrystalline layer. This phosphate coating is not just a cosmetic upgrade. It forms the essential foundation for corrosion resistance and paint adhesion on chassis steel, setting it apart from other pretreatments like simple cleaning or organic primers. In automotive manufacturing, zinc phosphating is the preferred choice for chassis parts because it creates a robust, adherent surface that helps paints and coatings bond tightly, even on complex geometries and weldments.
Unlike iron phosphate pretreatments, zinc phosphate coatings are engineered to enhance both corrosion defense and paint durability in demanding environments. The process is globally standardized, with specifications such as ISO 9717 and MIL-DTL-16232 guiding its application for automotive and heavy-duty uses.
How zinc phosphate crystals form and anchor coatings
Sounds complex? Imagine the chassis steel immersed or sprayed with a phosphoric acid solution containing zinc ions. As the bath reacts with the steel, a series of chemical steps deposit a dense layer of zinc-iron phosphate crystals on the surface. These crystals are microcrystalline and porous, which is key—this structure increases the surface area, giving paints and oils more to "grab onto." The result is a tightly anchored paint base that resists blistering and underfilm corrosion, even after years on the road (Wikipedia).
- Crystal growth: Fine, uniform zinc phosphate crystals form a continuous, adherent layer
- Surface area increase: Microcrystalline texture provides a high-surface-area anchor for coatings
- Oil/paint wetting: Porosity allows deep penetration and retention of oils, primers, or e-coats
- Underfilm corrosion delay: The phosphate layer acts as a dielectric barrier, slowing rust and corrosion beneath coatings
Where zinc polyphosphate fits in surface treatment vocabulary
As you explore options, you may hear terms like zinc polyphosphate. This refers to specific formulations within the broader zinc phosphate family, often designed for enhanced alkaline resistance or tailored for multi-metal assemblies. Zinc polyphosphate variants are commonly used when the chassis includes galvanized, aluminum, or mixed-metal components, ensuring the conversion coating process remains effective across different substrates.
In the world of surface treatment, zinc phosphating is part of the "chemical conversion coatings" group—distinct from purely mechanical or organic pretreatments. It is valued for its scalability, repeatability, and compatibility with downstream paint systems, including e-coat, primers, and topcoats.
Zinc phosphating is a robust, scalable pretreatment that reliably prepares even the most complex chassis geometries for long-term corrosion resistance and paint adhesion.
In the following sections, you’ll discover how zinc phosphate coatings translate to real-world chassis performance, which standards and process controls matter most, and how to evaluate suppliers for your next automotive project.
Chassis Performance Gains From Zinc Phosphate
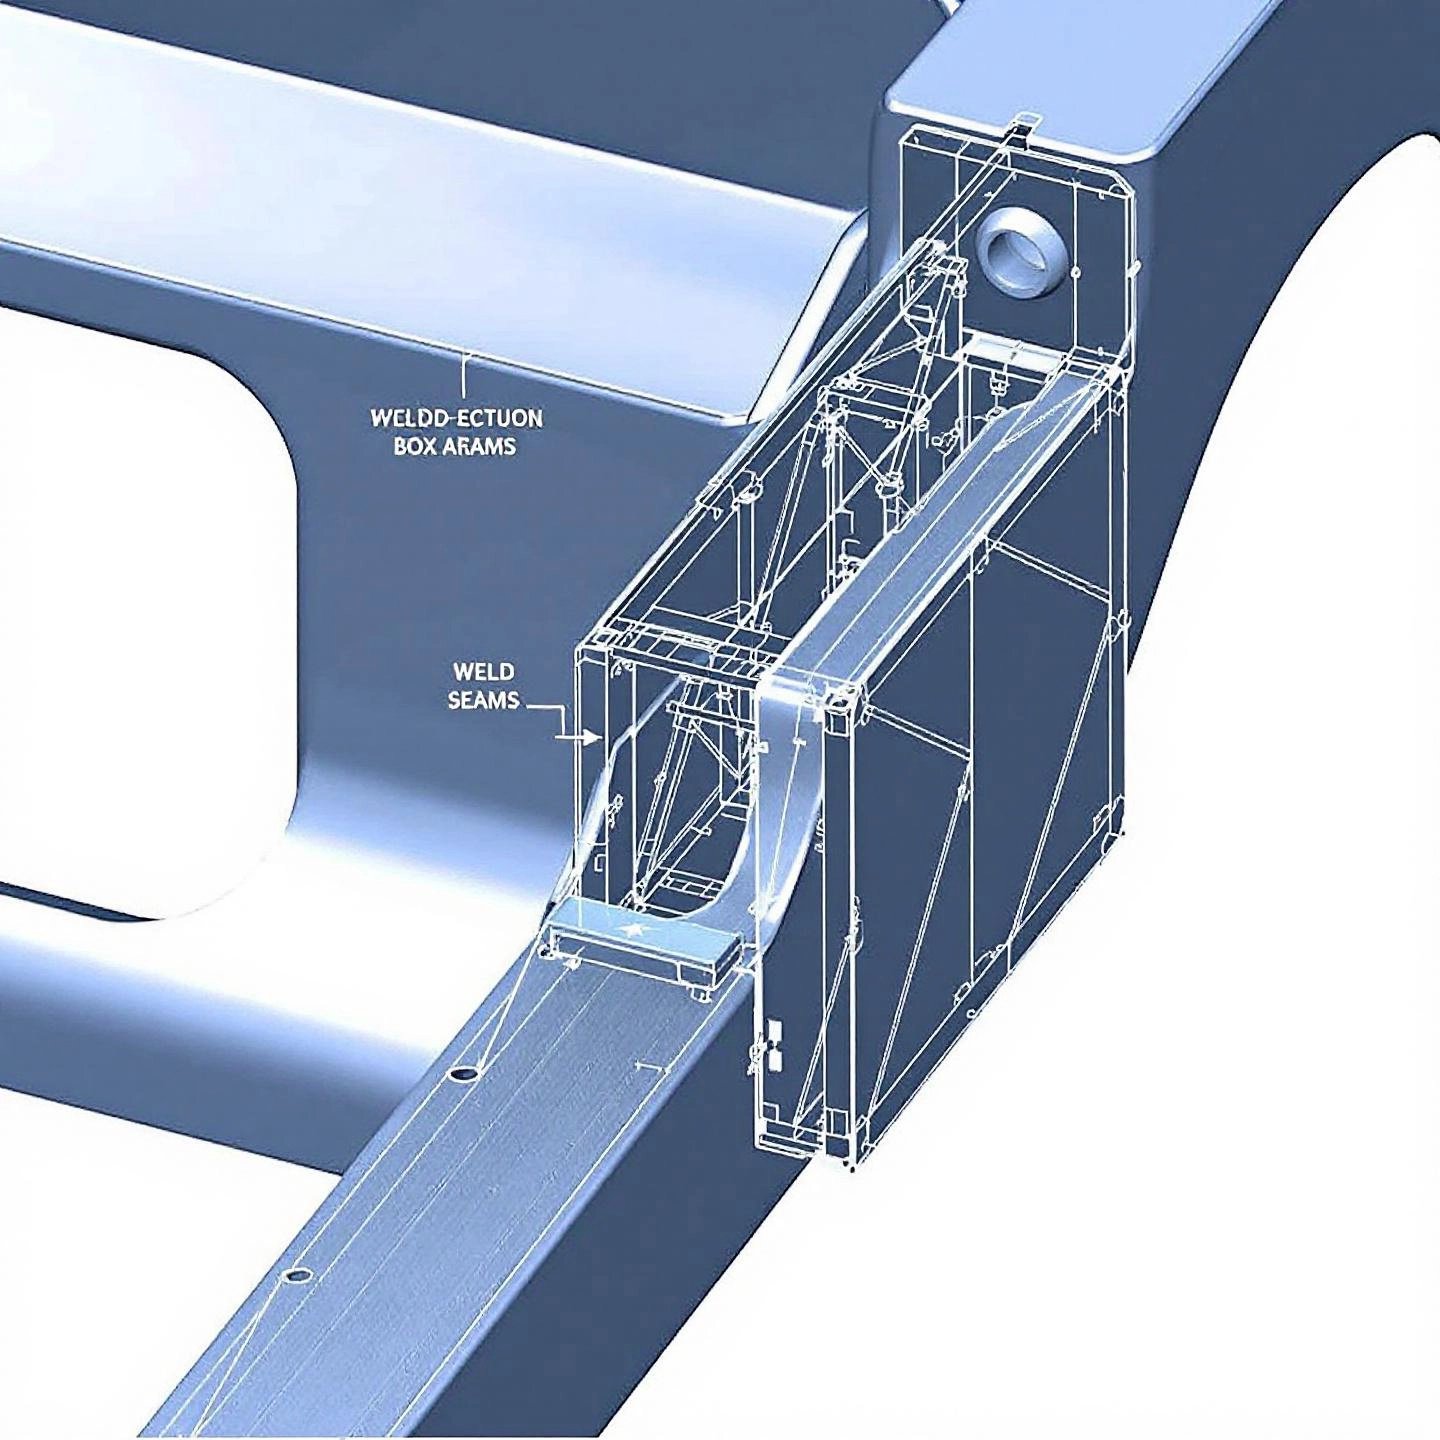
Corrosion Defense in Hidden Cavities and Weld Seams
When you picture a modern automotive chassis, think about all the places moisture and road salt can hide—boxed sections, weld flanges, and suspension mounting points. These are exactly the areas where corrosion loves to start. So, how does a zinc phosphate coating change the game for zinc automotive and zinc auto applications?
Zinc phosphating transforms exposed steel into a tough, polycrystalline layer that shields against environmental attack. Its microcrystalline structure not only covers flat surfaces but also reaches into crevices, seams, and spot-welds—places that are notoriously difficult to protect with paint alone. This means even hidden cavities and joints benefit from a uniform, corrosion-resistant barrier, helping to extend chassis service life in real-world conditions.
- Crossmembers
- Subframes
- Rocker panels
- Cradle mounts
Paint Adhesion and Chip Resistance Improvements
Ever noticed how paint sometimes flakes off after a stone chip or scratch? That’s often a sign the underlying steel wasn’t properly prepared. The microcrystalline zinc phosphate layer acts like a sponge, soaking up e-coat, primer, or even cavity wax, and locking it in place. This boosts paint adhesion and dramatically improves chip resistance—essential for parts exposed to gravel spray or impact from the road. The result? Fewer rust spots, less paint delamination, and a chassis that looks better for longer.
Weld-Through and Spot-Weld Considerations for Chassis
Chassis assemblies often involve extensive welding. But did you know that weld spatter, heat-affected zones, and post-weld cleaning can all influence phosphating outcomes? Residues or uneven surfaces left by welding can interrupt crystal growth, leading to patchy coatings. That’s why thorough cleaning after welding—and before phosphating—is critical. When done right, zinc phosphate forms a continuous layer even across weld seams, ensuring consistent protection and reliable paint performance throughout the chassis.
| Downstream Coating | Compatibility with Zinc Phosphate | Typical Process Order |
|---|---|---|
| E-coat (Electrocoat) | Excellent adhesion; penetrates microcrystalline layer | Phosphate → Rinse → E-coat |
| Epoxy Primer | High compatibility; enhances chip resistance | Phosphate → Rinse → Primer |
| Polyurethane Topcoat | Strong bond; long-term durability | Phosphate → Rinse → Primer → Topcoat |
| Cavity Wax/Seam Sealer | Adheres well; protects hidden sections | Phosphate → Rinse → Paint stack → Wax/Sealer |
Zinc phosphate creates a reliable paint base across mixed geometries and weld conditions, supporting long-term corrosion resistance and finish durability.
With these chassis-specific benefits in mind, the next section will show how to measure and validate the real-world performance of zinc phosphate coatings—so you can confidently specify them for your next automotive project.
Quantitative Benchmarks Buyers Should Request
Interpreting Salt Spray and Cyclic Corrosion Results
When you’re specifying a zinc phosphate coating for automotive chassis, it’s not enough to just trust the process—you’ll want proof of performance. But what does that look like in practice? Salt spray and cyclic corrosion tests are industry standards for validating the effectiveness of chemical conversion coatings on phosphated steel. These tests simulate harsh, real-world conditions and reveal how well the full paint stack holds up over time.
For example, the neutral salt spray test (ASTM B117) exposes scribed and coated steel panels to a continuous salt fog. The key metric is typically the hours to red rust or the amount of underfilm corrosion (creep) at the scribe. Cyclic corrosion tests (like SAE J2334 or VDA protocols) use cycles of salt, humidity, and drying to mimic seasonal exposure, with results reported as cycles to failure or degree of corrosion at seams and edges. These tests help you compare the durability of different phosphating processes and paint systems in a controlled way, even before field trials begin.
Coating Weight and Thickness Targets for Chassis Steel
How thick should the zinc phosphate layer be for optimal performance? You’ll notice that coating weight and thickness are critical benchmarks for both corrosion resistance and paint adhesion. Industry guidance suggests that zinc phosphate coatings for automotive applications typically range from 150 to 500 mg/ft2, with heavier, oil-retentive coatings ranging from 1,000 to 3,000 mg/ft2. Uniformity is more important than sheer thickness—voids or uneven coverage can lead to early corrosion, even if the average coating weight is within spec (Products Finishing).
Adhesion and Chip Resistance Metrics That Matter
Numbers alone don’t tell the whole story. Adhesion and chip resistance tests reveal how well the paint and coatings stick to the phosphated steel—especially after exposure to humidity, salt spray, or impact. Common methods include the cross-hatch adhesion test (ASTM D3359) before and after corrosion exposure, and impact or chip resistance tests using standardized gravel or falling weight methods. These results help you predict real-world paint durability on chassis parts that face stone chips and road debris.
| Test | Method | What to Report | Why it Matters |
|---|---|---|---|
| Neutral Salt Spray | ASTM B117 | Hours to red rust/creep at scribe | Accelerated corrosion resistance of full paint/phosphate stack |
| Cyclic Corrosion | SAE J2334, VDA | Cycles to failure; edge/seam corrosion | Simulates seasonal exposure and mixed environments |
| Coating Weight/Thickness | Analytical balance, stripping method | mg/ft2; uniformity across geometry | Ensures even protection and paint adhesion |
| Cross-Hatch Adhesion | ASTM D3359 | Adhesion rating before/after exposure | Predicts paint flaking and long-term durability |
| Chip/Impact Resistance | Gravelometer, Falling Weight | Area of coating loss or delamination | Replicates real-world stone chip and impact damage |
When comparing lab results, always check how test panels were prepared, the full paint stack used, and whether cure parameters matched your real-world process—these factors can shift performance outcomes as much as the phosphating process itself.
Armed with these benchmarks, you’ll be ready to ask the right questions about process control and validation in the next section, ensuring your chassis coatings deliver the expected durability and protection.
Standards And Test Methods For Reliable Validation
Salt Spray and Cyclic Corrosion Test Choices
When you’re evaluating a phosphate coating on steel for automotive chassis, how do you know it will really last? That’s where standardized corrosion tests step in. The most common is the neutral salt spray test, usually performed to ASTM B117 or ISO 9227. This method exposes coated panels to a salt fog, accelerating the effects of road salt, moisture, and air. For even more realistic simulation, cyclic corrosion tests (like SAE J2334 or VDA protocols) alternate between salt, humidity, and drying—closely mimicking seasonal cycles your chassis will face in the field. These tests are essential for validating the true durability of your phosphating coating stack, not just the bare zinc phosphate layer.
Adhesion, Chip, and Impact Methods Engineers Rely On
Corrosion resistance is just one side of the story. For a chassis finish that stands up to stone chips, flexing, and real-world abuse, you also need to measure paint adhesion and mechanical toughness. Popular standards include:
- ASTM D3359 (Cross-hatch adhesion): Scribes a grid into the paint and uses tape to check for flaking or loss.
- ASTM D4541 (Pull-off adhesion): Measures the force needed to detach paint from the coated surface.
- ASTM D2794 (Impact resistance): Drops a weight onto the panel to see if the paint cracks or delaminates.
These tests help you spot weaknesses in the paint stack or zinc phosphate metal prep before they show up as warranty claims or field failures (Corrosion Doctors).
Film Weight and Thickness Verification Practices
Ever wondered how thick your phosphate layer should be? The answer isn’t “the more, the better”—it’s about hitting the right range for your application. Standards like MIL-DTL-16232 specify minimum coating weights for zinc phosphate (Type Z): at least 11 g/m2 before any supplementary treatment. Thickness is typically measured by weighing a test panel before and after chemically stripping the coating. Uniformity across the part is crucial—voids or patchiness can mean early corrosion, even if the average thickness looks good (MIL-DTL-16232).
| Standard | Purpose | Key Variables to Control | Interpretation Notes |
|---|---|---|---|
| ASTM B117 / ISO 9227 | Salt spray (fog) corrosion testing | Salt concentration, temperature, panel angle, scribe method | Compare hours to red rust or underfilm creep; always match paint stack |
| SAE J2334 / VDA | Cyclic corrosion (real-world simulation) | Cycle timing, humidity, salt application, drying phases | Evaluate seam/edge corrosion and cycles to failure |
| ASTM D3359 | Cross-hatch adhesion | Scribe depth, tape type, panel curing | Look for flaking or delamination before/after exposure |
| ASTM D4541 | Pull-off adhesion | Glue type, curing, pull rate | Force required to detach paint; higher is better |
| ASTM D2794 | Impact resistance | Drop height, panel thickness, paint stack | Check for cracks or stars at impact point |
| MIL-DTL-16232 | Phosphate coating weight/thickness | Panel prep, stripping solution, balance accuracy | Minimum 11 g/m2 for zinc; uniformity is key |
- Don’t compare results across different paint stacks—primer/topcoat combos matter.
- Avoid mixing panel substrates (steel, galvanized, aluminum) in the same test batch.
- Never ignore paint cure windows—under- or over-curing skews adhesion and corrosion data.
Think of these tests as system-level evaluations—true durability depends on every layer, from zinc phosphate metal prep to the final topcoat, not just the conversion coating alone.
With a clear understanding of these standards and test methods, you’ll be ready to focus on process control and bath chemistry—the next critical step for consistent, high-quality results in automotive chassis manufacturing.

Process Control And Bath Chemistry That Drive Results
Bath Chemistry and the Role of Zn3(PO4)2 Crystals
Ever wondered why some zinc phosphated chassis parts pass every corrosion test, while others fail despite using the same chemistry? The secret lies in precise process control—especially the formation of Zn3(PO4)2 (hopeite) crystals and the careful balancing of bath chemistry. In automotive chassis manufacturing, the phosphating process is not just about immersing steel in a solution; it's a dynamic, multi-step reaction where zinc ions, phosphate, and often accelerators or activators interact with the substrate. The goal is to create a uniform layer of hopeite and zinc-iron phosphate (Zn2Fe(PO4)2, or phosphophyllite) crystals—each contributing to corrosion resistance and paint adhesion.
Sounds complex? Imagine the bath as a living system: too little Zn2+ or phosphate, and crystals won't form; too much, and you risk coarse, powdery coatings or excessive sludge. The formation and anchoring of these crystals depend on:
- Zn2+ and PO43− concentration: Drives crystal nucleation and growth—must be kept within supplier-recommended ranges.
- Free and total acid (FA/TA) ratio: Influences coating quality and uniformity; typical zinc phosphating operates at a FA/TA of 1:10 to 1:20.
- Iron content: Affects Zn-iron phosphate crystal formation and sludge generation; excessive Fe2+ can dull coatings and reduce corrosion resistance.
- Temperature and pH: High temperatures (typically 120-170°F/50-75°C) and slightly acidic pH (2–3) accelerate reaction rates and crystal growth, but must be controlled to avoid rough or uneven films.
- Accelerators/Activators: Additives like nitrate or fluoride help refine crystal size and promote uniformity, especially on mixed-metal chassis assemblies.
Critical Control Parameters and Acceptable Variation
When you walk a phosphating line, you’ll notice operators checking more than just temperature. Why? Because small deviations in key parameters can lead to visible defects or failed tests. Here’s a high-level control plan that process engineers should follow for consistent results:
- Incoming cleanliness checks: Verify parts are oil- and rust-free before entering the bath (use water-break or white-glove tests).
- Free/total acid ratio monitoring: Titrate daily to ensure the FA/TA stays within the recommended window (e.g., 1:10–1:20 for zinc phosphating).
- Conductivity guard-bands: Monitor rinse and bath conductivity to prevent drag-in/drag-out contamination.
- Spray pressure audits: Confirm spray/immersion coverage is even across all chassis geometries.
- Sludge management: Filter or remove sludge regularly—never let it exceed 5% of bath volume.
- pH and temperature logging: Keep continuous records; adjust heat source to avoid local hot spots and maintain bath stability.
- Dwell time verification: Standardize immersion or spray times (typically 3–10 minutes, depending on part size and type).
- Rinsing and drying: Use deionized water for rinsing; ensure thorough drying to prevent flash rust or staining.
Acceptable variation is typically defined by your chemical supplier’s specification, but the trend is always toward tighter control for automotive chassis parts. For example, if free acid or temperature drifts too high, you’ll see coarse, powdery crystals or excessive sludge—both of which undermine corrosion resistance and paint adhesion.
Failure Modes Linked to Process Drift
Line not running as expected? Here’s a quick troubleshooting table to diagnose and fix the most common zinc phosphating issues—each tied back to process control levers:
| Symptom | Likely Causes | Verification Checks | Corrective Actions |
|---|---|---|---|
| Poor adhesion/paint peeling | Oily substrate, coarse/loose phosphate layer, inadequate rinsing | White-glove test, cross-cut adhesion test, inspect rinse water | Improve pre-cleaning, optimize crystal size, use DI water rinse |
| Non-uniform or patchy crystals | Low bath concentration, short immersion, poor activation | Check Zn2+/PO43− levels, titration records, activation bath | Adjust bath chemistry, increase dwell time, maintain activator |
| Flash rust after phosphating | Thin coating, poor rinsing, delayed drying | Coating weight test, rinse conductivity, drying logs | Increase coating weight, use DI rinse, speed up drying |
| Excessive sludge buildup | High iron content, low bath turnover, oxidation | Sludge volume check, Fe2+ titration, bath turnover logs | Filter bath, refresh if sludge >5%, control Fe2+ <2 g/L |
| Staining or yellow/dark spots | Heavy metal contamination, overheated bath, poor rinsing | Bath analysis (Cu2+/Pb2+), temperature logs, rinse checks | Purify bath, control temperature (<65°C), thorough rinse |
- Regular bath analysis (TA, FA, Zn2+, Fe2+ levels)
- Proper rinsing between steps (avoid cross-contamination)
- Maintain conditioning/activation bath for fine crystal control
- Schedule nozzle inspections and bath turnover to prevent hot spots and sludge
- Use only high-quality, uncontaminated chemicals
Consistent process control and proactive maintenance are the difference between a high-performing, corrosion-resistant chassis and costly rework or warranty failures.
As you move forward, remember: the best zinc phosphating results come from a disciplined approach to chemistry, equipment, and daily checks. Next, we’ll look at how substrate type and pre-cleaning steps set the stage for reliable, uniform coatings on every chassis part.
Substrate And Pre Clean Factors That Matter Most
Which Steels Respond Best to Zinc Phosphate?
Ever wondered why two chassis parts can look so different after phosphating? The answer often lies in the steel itself. Not all steels react the same way in the phosphating steel process. Low-carbon and mild steels, which are commonly used in automotive chassis, form dense, uniform zinc phosphate coatings that serve as an excellent paint base. High-strength low-alloy (HSLA) steels and advanced high-strength steels (AHSS) can also be phosphated, but their alloying elements may influence crystal growth, sometimes requiring process tweaks. Cast iron and galvanized steel—often found in subframes or brackets—present unique challenges: cast iron’s graphite inclusions can cause patchy coatings, while galvanized steel (zinc-coated) may need tailored activation or acid pickling to ensure good adhesion and uniformity.
So, before you start, always match your steel phosphate coating process to the specific substrate mix in your chassis assembly. Here’s a quick comparison:
| Steel Type / Surface Condition | Phosphating Behavior | Cleaning Notes | Risk Mitigation |
|---|---|---|---|
| Low-Carbon / Mild Steel | Forms dense, uniform zinc phosphate layer | Standard alkaline cleaning, rinse | Ensure full removal of oil and mill scale |
| HSLA / AHSS | May show finer or uneven crystals | Enhanced cleaning; monitor for weld residue | Adjust activation, use boosters if needed |
| Cast Iron | Prone to patchy coating due to graphite | Acid pickling or de-smutting required | Extra activation; inspect for bare spots |
| Galvanized Steel | Risk of poor adhesion, non-uniform layer | Mild acid activation, avoid over-etching | Shorten dwell time; monitor for dark spots |
| Welded/Heat-Affected Zones | Interrupted crystal growth, risk of bare areas | Thorough cleaning of weld spatter, oxides | Pre-weld cleaning; post-weld acid cleaning |
Pre-Cleaning and Activation Steps That Stabilize Outcomes
Sounds complex? It doesn’t have to be. Imagine prepping a chassis for phosphating: any oil, mill scale, or weld residue left behind can disrupt crystal nucleation, leading to uneven or weak phosphated surfaces. That’s why thorough pre-cleaning is non-negotiable. Start with an alkaline or solvent cleaner to remove oils and soils, followed by a water rinse. For stubborn contaminants like mill scale or weld smoke, acid pickling or de-smutting may be necessary. Once clean, an activation bath (often containing titanium salts) helps seed uniform zinc phosphate crystals, especially important for high-strength or mixed-metal assemblies.
- Bath break test: Does water sheet off the surface, or bead up? Water-break-free surfaces indicate true cleanliness.
- White-glove check: Wipe welds and corners with a clean cloth—any black or oily residue means more cleaning is needed.
- Rinsewater conductivity: High conductivity signals residual salts or cleaner; rinse until within spec.
- Visual inspection: Look for uniform surface appearance, especially at welds and edges.
Edge Cases with Mixed Substrates on Chassis Assemblies
When you’re dealing with assemblies that combine different steels, or include galvanized or cast parts, things get trickier. Each substrate may require a slightly different cleaning or activation approach to achieve a consistent phosphate coating on steel. For example, you might use activation boosters for high-alloy steels, or add a de-smutting step for cast iron. Galvanized sections need just the right touch—too aggressive, and you risk over-etching; too mild, and you’ll see poor adhesion. Always verify cleaning results with quick QA checks before moving to the phosphating stage.
- Bath break and water-break-free tests on all substrate types
- White-glove checks at welds and seams
- Rinsewater conductivity monitoring after each cleaning step
- Visual inspection for uniformity and bare spots
Consistent incoming cleanliness is the strongest predictor of uniform phosphated steel performance—don’t let soils, scale, or residues undermine your corrosion resistance goals.
With your substrate and pre-cleaning steps dialed in, you’re ready to tackle troubleshooting and corrective actions—ensuring every chassis part meets the demanding requirements of automotive corrosion protection.
Troubleshooting And Corrective Actions For Production Lines
Symptom Driven Diagnosis for Zinc Phosphating
When you notice a defect after the phosphating process—maybe poor paint adhesion, patchy crystals, or unexpected rust—it’s tempting to jump straight to fixes. But a systematic approach prevents wasted effort and recurring issues. Here’s a practical decision flow you can use for any automotive chassis line:
- Identify the symptom (e.g., paint peeling, spotty phosphate coating, flash rust, sludge buildup).
- Check recent process log changes (look for shifts in temperature, acid ratio, or chemical additions).
- Inspect activation and cleaner carryover (ensure the cleaning and activation stages are working and not contaminating the bath).
- Validate rinse quality (measure rinsewater conductivity and check for cross-contamination).
- Confirm bath titrations (verify free/total acid, Zn2+, Fe2+ levels are in spec).
- Perform tape test/cross-hatch on witness panels (check paint adhesion and phosphate coverage at key locations).
Root Cause Verification with Fast Checks
Let’s break down common symptoms, what causes them, and how to confirm the root issue. Imagine you’re walking the line—here’s what to look for and how to respond:
-
Poor adhesion after e-coat or primer
- Likely causes: Oily substrate, coarse or loose phosphate, inadequate rinsing.
- Quick checks: White-glove test for oil, inspect rinsewater clarity, perform cross-hatch adhesion test.
- Corrective actions: Improve pre-cleaning, optimize crystal size (adjust bath chemistry), switch to deionized rinse water.
-
Non-uniform or spotty phosphate coating
- Likely causes: Low phosphate/accelerator concentration, poor cleaning, short process time, poor solution coverage.
- Quick checks: Titrate bath for concentration, verify cleaning tank status, inspect racking/nozzles for shadowing.
- Corrective actions: Increase concentration, lengthen dwell time, check and adjust spray/immersion coverage.
-
Powdery or loose coating
- Likely causes: Excessive accelerator, high bath temperature, excessive sludge.
- Quick checks: Measure bath temperature, check sludge volume, titrate accelerator.
- Corrective actions: Lower accelerator concentration, reduce temperature, de-sludge tank.
-
Rusting or flash rust post-phosphating
- Likely causes: Coating weight too low, slow or delayed dry-off, poor rinsing.
- Quick checks: Test coating weight, review drying logs, measure rinsewater conductivity.
- Corrective actions: Increase phosphate concentration or process time, improve drying (use air blow-off), ensure immediate transition between stages.
-
Streaking or staining
- Likely causes: Poor cleaning/rinsing, uneven drying, heavy metal contamination.
- Quick checks: Inspect cleaning and rinse stages, check for fog nozzle placement, analyze bath for contaminants.
- Corrective actions: Rearrange nozzles, keep rinses overflowing, purify bath if needed.
-
Excessive sludge buildup
- Likely causes: High iron content, low bath turnover, oxidation.
- Quick checks: Sludge volume check, Fe2+ titration, review bath turnover logs.
- Corrective actions: Filter or decant bath, refresh if sludge exceeds limits, control iron levels.
Corrective and Preventive Actions That Stick
Once you’ve addressed the immediate problem, prevention is the next priority. Here are proven steps for keeping your zinc phosphate conversion coating process robust and repeatable:
- Document all process parameter changes alongside part geometry or batch changes.
- Schedule regular bath analysis (free/total acid, Zn2+, Fe2+).
- Maintain a strict cleaning and activation protocol—never skip pre-clean QA.
- Keep rinse stages clean and monitor conductivity to avoid cross-contamination.
- Rotate nozzles and check spray patterns to ensure even coverage.
- Implement a routine sludge removal and bath turnover schedule.
- Train operators to recognize early warning signs—like subtle color shifts or minor adhesion loss—before they become major defects.
Documenting parameter shifts alongside part geometry changes is essential to preventing repeat defects in chemical conversion coatings for chassis production lines.
With these troubleshooting tools and preventive practices, you can minimize downtime and ensure every chassis part meets strict durability standards. Next, we’ll explore how to evaluate and select the right supplier partners to support your zinc phosphate process at scale.
Supplier Evaluation Framework For Chassis Programs
What to Ask Zinc Phosphating Suppliers
When you’re searching for zinc phosphate coating near me or evaluating potential partners for your chassis program, the options can seem overwhelming. Imagine you’re launching a new platform—how do you know which supplier will deliver the quality, speed, and process control you need? Start by asking the right questions:
- Certification and Compliance: Are they IATF 16949 or ISO 9001 certified for automotive work? This signals mature quality systems and audit-ready operations.
- Automotive Experience: Do they have a track record with chassis, subframes, or similar high-stakes parts?
- Process Windows: Can they document and control key parameters (pH, temperature, acid ratio) for consistent results?
- Data Transparency: Will they share process logs, titration records, and coating weight data?
- Lead Time and Capacity: Can they handle your volume and ramp quickly if needed?
- Logistics and Launch Support: Do they offer local support, rapid prototyping, and traceability for pilot runs?
Choosing a supplier with upstream capabilities—like metal forming, stamping, or assembly—can reduce handoffs and launch risk. For example, Shaoyi combines IATF 16949 certified phosphating with advanced metal processing, providing a one-stop solution for automakers and Tier 1s aiming for fast, reliable chassis launches.
How to Read Test Reports and PPAP Packages
Sounds technical? It doesn’t have to be. When reviewing supplier documentation, focus on these essentials:
- Salt spray/cyclic corrosion test results: Are full paint stack details and test conditions reported?
- Control plans: Are pH, temperature, and titration frequencies clearly defined and tracked?
- Sludge management: Is there a method for regular bath maintenance and waste control?
- Sample traceability: Can you trace test panels and pilot lots back to specific process runs?
- Launch support: Does the supplier provide technical guidance and rapid response during PPAP?
Don’t just take the numbers at face value—ask for witness panel results, panel preparation details, and evidence that the supplier’s process mirrors your production geometry and paint stack. This is especially important for complex assemblies or mixed-metal chassis parts.
Balancing Cost, Throughput, and Quality Risk
When you compare suppliers, it’s tempting to focus on unit price alone. But a true coatings comparative cost analysis takes into account total cost drivers—like rework rates, logistics, and launch delays. You might find regional options for ohio zinc-iron phosphate services, but how do they stack up on throughput, flexibility, and data transparency? Here’s a side-by-side look at key factors to consider:
| Supplier | Certification/Compliance | Automotive Experience | Process Windows | Data Transparency | Lead Time | Logistics Coverage | Total Cost Drivers |
|---|---|---|---|---|---|---|---|
| Shaoyi | IATF 16949, ISO 9001 | 15+ years, automotive/Tier 1, chassis & assembly | Documented, tight (pH/temp/titration logs) | Full traceability, digital reports | Rapid prototyping, fast scale-up | Global, with local support | Integrated metal forming, surface, assembly—reduces handoffs & risk |
| Regional Ohio Zinc-Iron Phosphate Provider | ISO 9001, some IATF 16949 | Automotive, industrial, military | Standard, may vary by batch | Summary reports, some test data | 1–2 weeks typical | Midwest, local pickup/delivery | Separate forming/assembly, more coordination required |
| National Coating Specialist | ISO 9001, IATF 16949 | Automotive, aerospace, OEM | Standardized, but less flexible | Periodic data, less real-time access | 2–3 weeks typical | Nationwide, longer transit | May require third-party logistics, higher coordination cost |
Partnering with a supplier that offers both advanced surface treatments and upstream metal processing can streamline chassis launches, reduce handoffs, and support rapid troubleshooting throughout your program.
- Request salt spray and cyclic corrosion reports with full paint stack details
- Ask for a control plan showing pH, temperature, and titration frequency
- Verify the supplier’s sludge management and bath maintenance method
- Check for sample traceability and pilot lot documentation
- Confirm launch support and technical troubleshooting availability
By following this framework, you’ll be better equipped to select a zinc phosphating partner who can deliver reliable, cost-effective, and scalable results for your automotive chassis program. Next, we’ll outline the step-by-step implementation roadmap to ensure your chosen supplier meets every critical quality and performance milestone.

Implementation Roadmap And Actionable Next Steps
Step by Step Rollout for Zinc Phosphating on Chassis
When you’re ready to move from theory to practice, a clear, actionable roadmap makes all the difference. Imagine you’re launching a new chassis platform—how do you ensure your zinc phosphating implementation delivers consistent corrosion resistance and paint adhesion? Here’s a step-by-step outline that ties together everything from specs to supplier handoff:
- Define performance targets and test methods: Set clear benchmarks for corrosion resistance, adhesion, and coating weight based on your end-use environment and customer requirements. Reference industry standards (e.g., ASTM B117 for salt spray, SAE J2334 for cyclic corrosion, and ASTM D3359 for adhesion).
- Align substrate prep and cleanliness metrics: Establish strict pre-cleaning protocols and acceptance criteria (water-break-free surfaces, white-glove checks) to ensure every part enters the phosphating line in optimal condition.
- Pilot on geometry-representative parts: Test the process on parts that reflect your most complex chassis geometries, including weld seams, boxed sections, and mixed substrates. This step helps identify any edge-case issues before full-scale launch.
- Run corrosion and adhesion tests: Validate the full paint/phosphate stack with salt spray, cyclic corrosion, and adhesion tests on pilot lots. Use these results to fine-tune process parameters and confirm compatibility with downstream coatings.
- Finalize control limits and inspection cadence: Lock in key process controls—like pH, temperature, free/total acid ratio, and coating weight—into your zinc phosphate control plan. Set up regular inspection intervals and documentation routines.
- Scale with PPAP and gage R&R: Prepare a complete phosphating PPAP package, including control plans, FMEAs, measurement system analysis (gage R&R), and documented lab results. This is your formal customer submission and baseline for ongoing production.
- Monitor in service and adjust: After launch, continue to collect field and warranty data, and adjust process controls or inspection cadence as needed to maintain durability targets.
Consistent cleanliness and strict control-plan discipline drive durable outcomes more than any single parameter in the zinc phosphating process.
Data to Lock Into Your Control Plan
Not sure which data points are critical? Focus on these for every production run:
- Pre-clean QA (water-break, white-glove, visual checks)
- Bath chemistry (pH, free/total acid, Zn2+/PO43− concentration)
- Coating weight and thickness (mg/ft2, uniformity across geometry)
- Process temperature and dwell time
- Rinsewater conductivity and drying logs
- Adhesion and corrosion test results (panel records, test dates, paint stack details)
- Gage R&R and traceability for all measurement equipment
Acceptance Criteria and Supplier Handoff
Transitioning from pilot to full production means locking in acceptance criteria and ensuring your supplier can deliver at scale. Here’s a quick checklist for a smooth handoff:
- Shaoyi (IATF 16949 certified, integrated metal processing, surface treatment, and assembly)
- Documented salt spray/cyclic corrosion results for full paint stack
- Complete phosphating PPAP package (control plan, FMEA, MSA, dimensional and lab results)
- Sample traceability and digital process logs
- Launch support—rapid troubleshooting and technical response
By following this roadmap and checklist, you’ll minimize launch risk and ensure your chassis program meets every durability and quality milestone—whether you’re working with a local Cleveland zinc-iron phosphate supplier or a global partner. Remember, the best results come from close collaboration, rigorous validation, and a disciplined approach to process control at every step.
Frequently Asked Questions About Zinc Phosphating for Automotive Chassis
1. How does zinc phosphate prevent corrosion on automotive chassis?
Zinc phosphate forms a microcrystalline barrier on steel chassis parts, blocking moisture and salts that cause rust. Its porous structure also anchors paints and sealants, further protecting hidden cavities, weld seams, and complex geometries from environmental attack.
2. What are the key benefits of zinc phosphate coating for automotive parts?
Zinc phosphate coatings enhance corrosion resistance, improve paint adhesion, and increase chip resistance. These benefits ensure longer-lasting chassis performance, reduce maintenance needs, and help automotive components withstand harsh road conditions.
3. How do you validate the quality of a zinc phosphating process?
Quality validation involves standardized tests such as salt spray (ASTM B117), cyclic corrosion, adhesion (ASTM D3359), and coating weight checks. Reliable suppliers provide full documentation, control plans, and traceability for every batch, ensuring consistent results.
4. What factors influence the effectiveness of zinc phosphating on different steel types?
Steel composition, surface cleanliness, pre-cleaning procedures, and activation steps all impact coating uniformity. Low-carbon steels respond best, while high-strength alloys or galvanized parts may require tailored cleaning or activation for optimal results.
5. How can automakers choose the right zinc phosphating supplier?
Look for IATF 16949 or ISO 9001 certification, proven automotive experience, transparent process controls, and integrated capabilities like metal forming and assembly. Suppliers like Shaoyi offer comprehensive solutions, combining advanced surface treatments with rapid prototyping and reliable quality assurance.