 Small batches, high standards. Our rapid prototyping service makes validation faster and easier —

Can You Weld Copper Without Cracks? What Actually Works
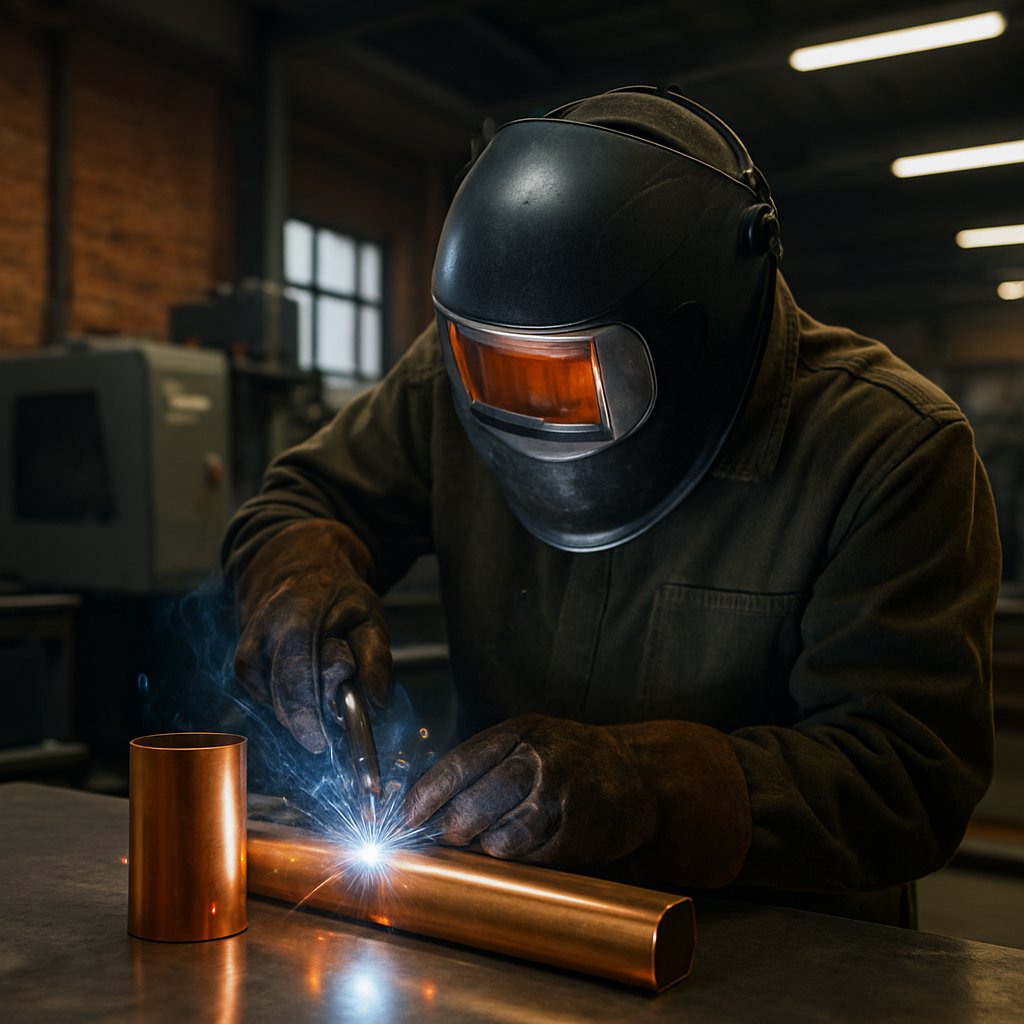
Can You Weld Copper?
Yes, copper can be welded, but high heat loss and fast oxidation make process choice, preparation, and joint design far more critical than they are with steel.
If you came here asking, can you weld copper, the practical answer is yes. But whether can copper be welded turns into a sound, crack-free joint depends on what kind of copper you have, how thick it is, and whether fusion welding is even the smartest way to join it. In real shop work, copper welding is less about brute force and more about controlling heat and cleanliness.
Technical guidance from TWI notes that oxygen-free copper and phosphorus-deoxidized copper are generally easier to weld than tough pitch copper, while some copper grades with small sulphur or tellurium additions are normally considered unweldable. That single detail already tells you a lot about the weldability of copper: the label "copper" is not specific enough by itself.
Can You Weld Copper Yes but Process Matters
Before choosing TIG, MIG, or anything else, check these three variables first:
- Base-metal type: pure copper, deoxidized copper, brass, bronze, and copper-nickel do not behave the same.
- Thickness: thin sections are far easier to join than thick copper, which acts like a heat sink.
- Joining route: for some service conditions, brazing or soldering may make more sense than fusion welding.
Why Copper Pulls Heat Away From the Arc
The reason how do you weld copper is such a common question is simple: copper conducts heat extremely well. The arc starts heating the joint, and the metal immediately drags that heat away from the weld zone. TWI explains that sections over 5 mm may need preheat, and thick components can require very high preheat to keep the weld pool fluid and avoid lack of fusion. Copper is also sensitive to oxidation and, in some grades, porosity.
That is why the first smart decision is not which filler to buy. It is deciding whether this joint truly calls for fusion welding at all.
When to Weld Copper to Copper and When Not To
A rigid copper assembly and a leak-tight copper tube are solving different problems. That is why asking can you weld copper to copper only gets you halfway to the right answer. Welding melts the base metal itself. Brazing and soldering melt a filler metal while the copper stays solid. That single difference changes joint strength, heat damage risk, distortion, and how easy the connection will be to repair later. The 840°F boundary separates soldering from brazing, while welding runs far hotter and creates true fusion.
When Fusion Welding Copper Makes Sense
Fusion welding earns its place when the joint must act like a permanent structural part of the assembly and carry meaningful load or stress. Guidance on high stress and fatigue makes the tradeoff clear: welded joints generally outperform brazed joints when strength is the priority, while lower-heat methods protect the base material better. In plain shop terms, copper to copper welding makes sense when you are joining similar copper parts, the assembly can tolerate high heat, and the extra setup is justified by the service demands.
| Joining method | Joint strength goal | Heat input tolerance | Service environment | Repairability | Typical copper applications |
|---|---|---|---|---|---|
| Fusion welding | Highest strength and rigid permanence | Needs the most heat tolerance | High-stress fabricated assemblies using similar metals | Harder to rework cleanly | Fabricated copper components where the joint itself must be strong |
| Brazing | Strong, permanent, leak-tight joint | Moderate tolerance, base metal stays solid | Plumbing, HVAC, heat exchangers, mixed-metal joints | Often repairable by reheating | Copper tubing, fittings, copper to dissimilar metal joints |
| Soldering | Lower mechanical strength, often enough for light-duty service | Best where nearby parts are heat-sensitive | Electronics, delicate tubing, joints near seals or valves | Usually easiest metallurgical joint to rework | Small copper lines and electrical connections |
| Mechanical joining | Strength depends on hardware and design | Best when heat must be avoided entirely | Serviceable assemblies or no-heat installations | Usually simple to inspect and replace | Copper connections where disassembly matters |
Why Plumbing Joints Often Use Solder or Brazing Instead
For copper pipe and tubing, maximum weld strength is often unnecessary. UTI explains that brazing can join dissimilar metals and keeps the base metals from melting, which helps limit distortion. HVAC field guidance adds an even more practical point: many copper line jobs never need the strength a weld provides, and some nearby rubber or nylon components can be damaged if the joining temperature is too high. That is why soldering and brazing dominate so many plumbing and HVAC connections.
- Define the job first. Decide whether the joint must hold structural load, seal fluid, carry current, or simply position parts.
- Check heat sensitivity. If nearby parts cannot tolerate high heat, welding may be the wrong route before you even compare fillers.
- Look at the metals involved. Similar copper parts may suit fusion. If the assembly includes different metals, brazing often gives you more flexibility.
- Match strength to reality. Choose welding only when the application truly needs that level of joint performance.
- Think about future service. Soldered and brazed joints are often easier to rework than a fully fused joint.
- Buy consumables last. Process choice should follow function, not the other way around.
So, can you solder copper to copper? Yes, and for many tubing jobs it is the better answer. If you are also weighing copper to copper adhesive, treat it as a separate design category with different limits and inspection concerns. Where fusion still makes sense, method selection becomes the real challenge, because TIG, MIG, stick, and laser do not behave the same on copper.
Choosing TIG, MIG, Stick, and Laser for Copper
A copper busbar, a plumbing tube, and a thick fabricated lug do not ask for the same process. On this metal, the best method is the one that balances heat concentration, control, speed, and fit-up tolerance. If you are asking can you tig weld copper, yes, and it is often the safest starting point because puddle control matters so much. The ARCCAPTAIN guide treats TIG with argon as the general first choice for copper, while MIG and stick are more situational.
Choosing Between TIG MIG Stick and Laser for Copper
TIG is usually the control-first option, MIG is the speed-first option, stick is a limited fallback, and laser or resistance methods belong to more specialized production work.
That split becomes obvious when you match process behavior to the joint. In automated battery production, E-Mobility Engineering describes laser welds that can take only a few milliseconds per cell, while resistance welding often runs on roughly one-second cycles. The speed gap is real, but copper still punishes poor contact, dirty surfaces, and weak heat concentration. Fast equipment does not remove the material challenge.
What Each Process Handles Well on Copper
| Process | Arc stability | Control | Deposition rate | Cleanliness requirements | Thickness suitability | Common use cases |
|---|---|---|---|---|---|---|
| TIG | Generally the most stable and controllable on copper | Highest | Low | Very high, oxides and contamination must be removed | Thin to moderate sections, and thicker parts when heat management is strong | Precision fabrication, repair, visible welds, copper-to-copper joints |
| MIG | Workable, but less forgiving as copper pulls heat away fast | Moderate | Higher than TIG | High, especially for consistent feeding and fusion | Moderate sections and repetitive work where productivity matters | Production seams, longer runs, jobs that prioritize speed over fine control |
| Stick | Least forgiving on copper | Low | Moderate | High, with good prep still essential | Mainly thicker sections or repair situations | Field repair or jobs where TIG and MIG are not practical |
| Laser | No arc, concentrated beam process | Very high in automated systems | Not filler-driven in many joints | Very high, with tight fit-up and clamping especially important | Thin to moderate materials, especially precise contact areas | High-volume production, tabs, busbars, copper contacts |
| Resistance spot or seam | No arc, electrode contact process | Repeatable within a narrow window | No filler | Consistent surfaces and intimate contact matter | Thin, accessible joints; less suitable as conductivity and thickness rise | Spot-type production joints, tabs, interconnects, specialized sheet applications |
For most fabricated parts, tig welding copper gives you the clearest view of the puddle and the best chance to correct heat balance in real time. Mig welding copper becomes more attractive when the work is repetitive and deposition speed matters, but it asks more from preparation and machine output. Stick welding is still possible, yet the process is niche because high heat input and cracking risk leave little room for sloppy technique.
Laser welding copper shines when automation, clamping, and cycle time justify the cost. If you are wondering can you spot weld copper, resistance welding can work in certain thin, accessible production joints, but copper's conductivity makes the process window tighter than many people expect. So the smart choice is rarely the process you already own. It is the one that matches geometry, volume, cleanliness control, and how much precision the application can afford. In practice, those decisions lead straight into setup details such as surface prep, shielding, filler choice, and preheat.
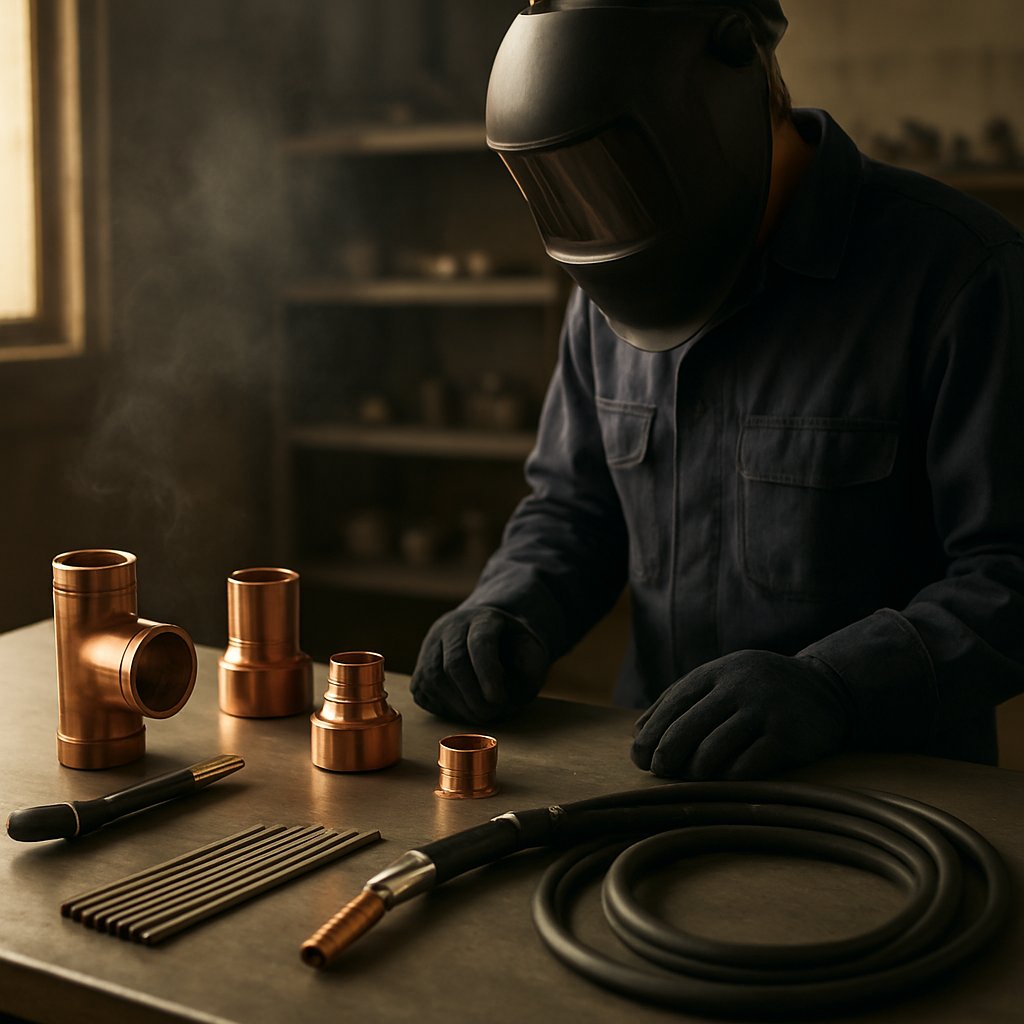
Copper Welding Setup
This is where copper jobs usually succeed or fail. The process may be right on paper, but poor setup still leaves you with porosity, weak fusion, or a puddle that never quite comes alive. With copper, material identification matters first. Brazing.com notes that oxygen-bearing grades can develop porosity and heat-affected-zone problems, phosphorus-deoxidized copper is more weldable, and free-machining coppers are generally treated as unweldable because of cracking risk. In other words, not every piece of copper for welding should be welded the same way.
- Identify the base metal: pure copper, deoxidized copper, brass, bronze, and copper-nickel need different procedures.
- Reject bad candidates early: free-machining copper and some precipitation-hardenable copper alloys are poor fusion-welding choices.
- Clean to bright metal: remove oil, grease, dirt, paint, and oxides before welding, then brush oxides off between passes.
- Use dedicated prep tools: IMS recommends brushes and grinding tools used on stainless or copper alloys, not carbon steel, to avoid contamination.
- Plan the joint: copper joints are often wider than steel joints to help fusion and penetration, and thicker sections may need beveling.
- Control movement: clamp well, use close tack spacing, and consider a copper backing plate for welding or backup bar when the joint needs support.
- Check machine capacity: thick copper can demand much higher current than many welders expect.
Copper Surface Preparation Before Welding
Surface prep is not optional here. The cited procedures call for wire brushing and degreasing before welding, then wire brushing again after each deposited run to remove oxide film. IMS also stresses clamping, fixtures, and tighter tack spacing to control warping and distortion. For TIG work, Anhua Machining adds a practical detail many shops use: copper backup bars under the joint can support the weld and help manage heat. Fit-up matters just as much. If the groove is too tight, copper can starve the root of heat. If it is too loose, you waste heat and filler trying to bridge it.
How Polarity Shielding Gas and Preheat Affect the Puddle
Machine setup has to fight copper's heat loss. Manual GTAW examples published by Brazing.com run from 15 to 60 amps on 0.3 to 0.8 mm material and up to 400 to 475 amps at 16 mm thickness, which tells you why light-duty power sources struggle on heavier sections. For TIG on copper, the published baseline is DC electrode negative with thoriated tungsten. Argon is preferred up to about 1.6 mm, while helium mixes are preferred above that, and a 75% He / 25% Ar blend is a common way to gain penetration and travel speed without giving up easy arc starts.
Preheat is highly alloy-dependent. Thick pure copper often needs it because heat leaves the joint so fast. Published manual TIG and MIG procedures show anything from no preheat on thin material to 250 C on thick pure copper sections. Copper alloys are different. The same source notes that most copper alloys seldom need preheat, and aluminum bronze plus copper-nickel should not be preheated. Travel speed follows the same logic: enough time to fuse, but not so much that the whole part becomes the heat sink. Manual GMAW examples range from roughly 500 mm/min on thin material down to about 250 mm/min on heavy sections, showing how setup changes with mass.
Choosing Filler Metal for Pure Copper and Common Alloys
When buying copper welding wire or a copper welding rod, match the filler family to the alloy, not just the color of the base metal. Pure copper and deoxidized grades often want similar-composition filler, while some weldable alloys need entirely different filler families.
| Base metal family | High-level filler guidance | Common process context | Main setup note |
|---|---|---|---|
| Pure copper | ERCu copper electrodes for GMAW, or filler similar in composition to the base metal for GTAW | MIG, TIG | Higher heat input often needed, especially as thickness rises |
| Phosphorus-deoxidized copper | Use filler wires with deoxidants such as Al, Mn, Si, P, or Ti to help avoid porosity | MIG, TIG | Generally more weldable than oxygen-bearing copper |
| Silicon bronze | ERCuSi-A | MIG, TIG | Preheat is unnecessary in cited GMAW guidance, and oxide removal between passes matters |
| Aluminum bronze | ERCuAl-A2 | TIG | AC argon can aid oxide cleaning, while DCEN with argon or argon-helium can favor deeper penetration |
| Brass and phosphor bronze | ECuSn-A or ECuSn-C in cited MMAW repair guidance | Stick repair and limited-access joints | Watch zinc loss in brass and cracking risk in phosphor bronze |
Good setup still needs good technique, especially with TIG. Copper shows every mistake quickly: long arc length, late filler addition, weak tack-up, or an underpowered start. That is why the hands-on workflow matters so much once the machine is finally dialed in.
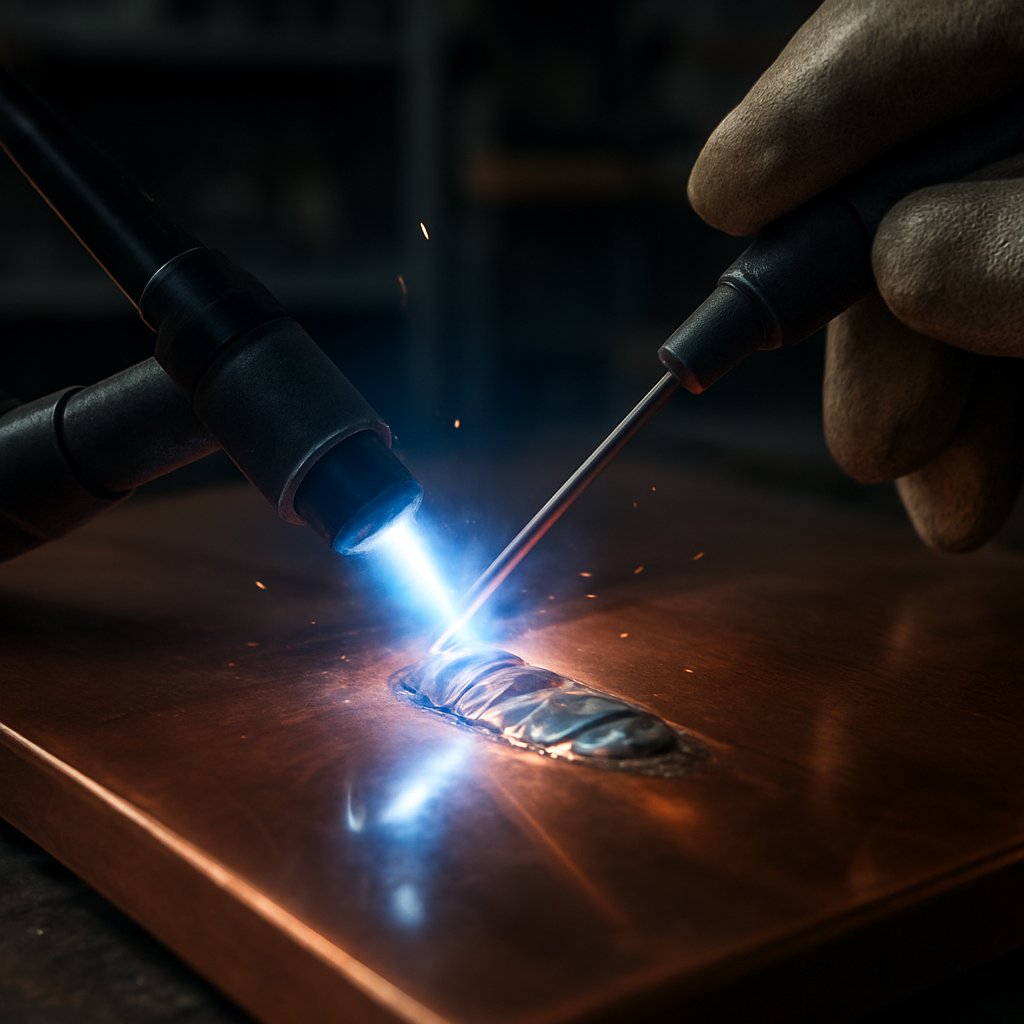
How to TIG Weld Copper Step by Step
With copper, the first few seconds decide whether the joint will fuse cleanly or fight you the whole way. That is why TIG is usually the best place to learn how to weld copper. You can see the puddle clearly, react to heat loss in real time, and correct problems before they turn into leaks, porosity, or cracks. If you want to tig weld copper well, think in sequence, not just settings.
TIG Copper Setup Before the First Tack
Good results start before the arc. Notes from TIG Welding Secrets and Metal Fusion Pro both stress the same pattern: bright metal, tight fit-up, strong shielding, and enough heat management to beat copper's heat sink effect.
- Clean to bright metal. Remove oxide, oil, old solder, moisture, and fingerprints with tools reserved for copper. Even small contamination can create porosity.
- Fit the joint tightly. Copper's puddle is extremely fluid. Large gaps can keyhole or pull apart instead of filling neatly, especially in tig welding copper to copper.
- Clamp and tack quickly. Fixture the part well, but do not dwell on the tack. A fast, hot tack is better than slowly heating the whole area without full fusion.
- Set up purge where the root matters. For tig welding copper pipe or tubing in pressure service, backing gas helps prevent internal oxidation and weak root surfaces.
- Preheat when section size calls for it. The pipe guidance suggests roughly 250 F to 400 F for larger than 1 in pipe or thick-walled tubing so the puddle forms faster and more reliably.
How to Keep the Puddle Fluid on Copper
- Start hot and keep a short arc. Copper drags heat away fast. A long arc spreads heat, cools the puddle, and increases oxidation risk.
- Wait for a true puddle. Look for a glossy, watery pool before adding filler. If you feed rod too early, the bead can sit on top with poor fusion underneath.
- Add filler into the leading edge. Keep the rod tip inside the shielding gas and feed it positively. Copper filler often sticks if it touches a cold edge.
- Move faster than you would on steel. Once the part heat-saturates, the puddle can get loose and hard to control. Stringer-style travel helps keep the bead narrow and reduces unnecessary oxidation.
- Taper off at the end. Do not snap the arc out. Gradually reduce heat and fill the crater so shrinkage does not leave a fish-eye or crater crack.
Most TIG problems on copper follow the same pattern. Too little heat creates a gummy puddle and cold lap. Too much arc length weakens shielding and fusion. Poor joint prep causes bubbling and porosity. Rushing filler into an underheated joint hides lack of fusion under a bead that only looks solid.
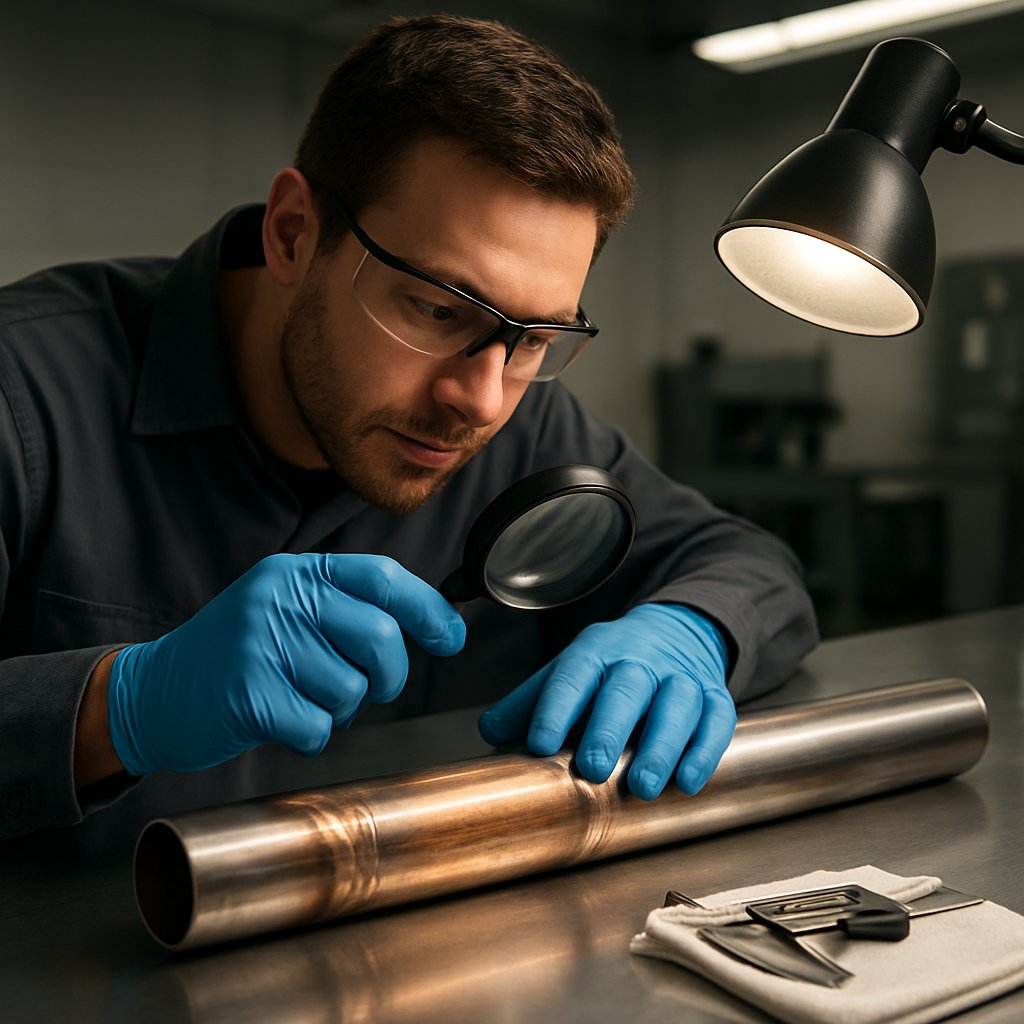
Post Weld Checks for TIG Joined Copper
- Let it cool naturally. Avoid quenching. Sudden cooling can raise stress in thicker or restrained joints.
- Inspect the surface and edges. Look for porosity, undercut, underfill, root oxidation, and any sign the weld metal did not tie into both sides.
- Leak-test service joints. This matters most when learning how to weld copper to copper in pipe, tubing, or sealed systems.
- Use deeper inspection on critical work. Metal Fusion Pro points to dye penetrant or pressure testing when the assembly cannot rely on visual appearance alone.
TIG rewards patience because it exposes what copper is really doing under heat. Faster methods can work too, but they give you far less time to rescue a puddle that is already trying to outrun the arc.
How to MIG and Stick Weld Copper
Copper gets harder, not easier, when you chase speed. TIG gives you time to watch the puddle develop. MIG and stick can still work, but they shrink your margin for error. In real shop terms, mig copper work makes the most sense when sections get thicker, seams get longer, or output matters more than fine puddle shaping. Stick is usually a repair process of necessity, not the first process you would choose for appearance or consistency.
| Process | Where it is practical | Where it is acceptable | Prep demands | Speed vs control |
|---|---|---|---|---|
| MIG | Thick copper pieces, longer welds, repetitive production work | General copper fabrication when TIG is too slow and fit-up is good | Bright, oxide-free joint faces, solid fixturing, correct filler, reliable wire feeding, DCEP, argon or argon-helium shielding | Faster than TIG, but with less puddle visibility and less forgiveness |
| Stick | Outdoor repair, limited access, or sites where shielding gas coverage is unreliable | Minor or noncritical repairs that can be welded flat | Thorough cleaning, correct copper welding electrodes, hydrogen control, DCEP, and flat-position setup | Most portable option, but lowest control and roughest weld quality on copper |
MIG Welding Copper for Faster Production Work
TWI notes that pure-copper MIG typically uses argon on thinner sections and shifts to argon with about 75 percent helium as thickness increases, because the hotter arc helps fight copper's heat loss. Guidance from YesWelder also highlights a practical issue many people miss: mig welding copper wire is softer than steel wire, so feeding problems are more likely unless the drive system is set up correctly.
- Clean the joint to bright metal and clamp it firmly so the gap does not move as heat builds.
- Choose the filler based on the job. Use a true copper MIG wire for fusion welding, or a silicon bronze wire when the application is really MIG brazing.
- Set DCEP and use stringer beads or a very narrow weave to reduce oxidation along the bead edges.
- Establish the puddle quickly, then keep travel steady. Copper often looks cold until it suddenly starts to flow.
- On heavy sections, rely on preheat and hotter shielding gas mixes instead of slowing down so much that the whole part turns into a heat sink.
Stick Welding Copper for Repair and Field Conditions
Stick welding copper is possible, but the results are usually poorer than TIG or MIG. It is mainly a fallback when wind, portability, or access makes gas-shielded welding impractical. Porosity and oxide inclusions are more likely, especially on sensitive copper grades.
- Prepare the joint carefully. Flux on the rod does not cancel out oil, dirt, or oxide film.
- Select suitable copper welding electrodes, set DCEP, and position the job flat because copper stick welding is not very forgiving.
- Use a short arc and a backhand technique to keep the heat concentrated where you need it.
- Favor straight stringers over wide manipulation unless extra bead width is truly necessary.
- Let the repair cool naturally and inspect it closely before putting the part back into service.
Technique Changes That Improve Fusion on Thick Copper
Thick copper punishes hesitation. Preheat matters more, wide bead motion wastes heat, and long arc length makes fusion worse instead of better. The same idea carries into filler choice too. A procedure that works on pure copper may be a poor match for brass, bronze, or copper-nickel, which is why alloy family becomes the next decision point before copying any MIG or stick routine from one job to the next.
Copper Alloys and Dissimilar Metal Limits
Filler choice helps, but alloy family often decides whether a copper weld is straightforward, touchy, or simply a bad idea. Guidance from TWI makes that clear: copper, brass, bronze, aluminum bronze, and cupro-nickel do not share the same weldability just because they look similar.
How Pure Copper Brass Bronze and Copper Nickel Differ
Pure copper is not one single story. Oxygen-free and phosphorus-deoxidized grades are easier to weld than tough pitch copper, which can suffer heat affected zone embrittlement and porosity because of its oxygen content. Brasses are even more selective. Low-zinc brasses can be fusion welded, but high-zinc brasses are much less suitable because zinc volatilization creates white fumes and porosity. Among bronzes, silicon bronze is one of the easiest to weld, while phosphor bronze should not usually be welded autogenously because porosity becomes a problem. Cupro-nickels are generally among the more forgiving families for fusion work, and copper nickel welding is commonly done with inert gas processes and matching filler, without preheat in normal sections.
| Base metal family | Preferred joining approach | Compatible filler family | Main risk |
|---|---|---|---|
| Oxygen-free or phosphorus-deoxidized copper | TIG or MIG fusion welding is often practical | Matching copper or deoxidized copper filler family | Heat loss, oxidation, porosity if filler choice is poor |
| Tough pitch copper | Fusion welding with extra caution | Deoxidized copper filler family | HAZ embrittlement and porosity |
| Low-zinc brass | Limited fusion welding or brazing | Zinc-free silicon bronze or aluminum bronze family | Zinc loss, fumes, porosity |
| High-zinc brass or nickel silver | Brazing or another non-fusion route is often smarter | Application-specific brazing filler family | Severe zinc volatilization and cracking risk |
| Bronzes | Case-by-case fusion welding | Matching bronze family where suitable | Porosity or hot cracking, depending on type |
| Cupro-nickel | Inert gas fusion welding | Matching Cu-Ni filler family | Autogenous porosity if filler is omitted |
Welding Copper to Steel or Stainless Without False Confidence
If you are asking can you weld copper to steel or can you weld copper to stainless steel, the honest answer is yes in some cases, but this is not beginner-friendly fusion work. The NCBI review on copper to stainless steel points to big differences in melting point, thermal conductivity, thermal expansion, and liquid metal behavior. It also highlights a Fe-Cu miscibility gap, which helps explain why dilution, porosity, and solidification cracking become real concerns during fusion welding. That warning applies broadly to iron-based dissimilar joints, even though exact procedures depend on the steel grade and service duty.
When a Transition Joint or Brazing Route Is Smarter
For demanding dissimilar service, a transition joint or solid-state route is often the better engineering answer than forcing a fusion weld. The same NCBI review shows why diffusion bonding, friction welding, friction stir welding, explosive welding, and ultrasonic methods get so much attention for copper to stainless combinations. In vacuum systems, an INIS record notes that OFE copper to 316L stainless transition joints are widely used in particle accelerators and are often vacuum brazed. So when welding copper to stainless steel starts to look risky, stepping sideways into brazing or a purpose-made transition joint is not a compromise. It is often the more reliable call. And when a joint still fails, the defects usually tell you exactly why, if you know how to read them.
Troubleshooting Welding Copper Without Guesswork
Copper usually tells on itself fast. In welding copper, a dull bead, pinholes, dark oxide, or a stubborn root are not random annoyances. They are clues. Megmeet highlights insufficient heat, overheating, oxidation, contamination, porosity, lack of penetration, and misalignment as repeat causes on copper jobs. Technoweld adds useful context: porosity is a volumetric flaw, while cracks and lack of fusion are planar defects and usually more serious.
Common Copper Weld Defects and Their Likely Causes
- Porosity: trapped gas from dirty surfaces, oxidation, or unstable shielding.
- Lack of fusion: too little heat, poor fit-up, long arc length, or travel that is too fast for the section thickness.
- Cracking: high restraint, poor crater termination, or filler and base metal mismatch.
- Oxidation and discoloration: too much exposure to air at high temperature or weak shielding coverage.
- Distortion: more total heat than the part can absorb without moving.
- Excessive heat loss: thick copper pulling energy away before the puddle fully wets in.
A Symptom Cause Fix Checklist for Better Results
- Dull, cold-looking bead - Usually low heat input - tighten arc length, slow down slightly, and preheat heavier sections when procedure allows.
- Pinholes or bubbling - Usually contamination or shielding trouble - reclean to bright metal and protect the weld zone better.
- Blackened surface - Usually oxidation from too much air exposure - improve shielding and avoid lingering heat.
- Root not tying in - Usually poor fit-up or a heat sink effect - correct alignment, clamp better, and deliver heat more decisively.
- Crater or centerline cracks - Usually shrinkage stress or bad termination - fill the crater and reduce restraint where possible.
- Warped assembly - Usually excessive overall heat - shorten dwell time, sequence tacks carefully, and spread heat more intelligently.
When Critical Assemblies Need a Qualified Welding Partner
Can welders melt down copper? Yes. The harder part is making the joint repeatable, inspectable, and durable. A skilled copper welder can often correct shop-level issues, but pressure parts, electrical conductors, and mixed-metal automotive assemblies should not rely on guesswork. Technoweld notes that internal discontinuities may need visual checks plus dye penetrant, radiographic, or ultrasonic inspection, depending on the flaw.
That is where a qualified production partner earns its keep. For automotive manufacturers weighing in-house work against outside support, repeatable fixturing, robotic parameter control, and traceable quality systems reduce defect risk on critical assemblies. Guidance on robotic welding shows why consistency and traceability matter so much in high-volume manufacturing. If that is the real challenge, Shaoyi Metal Technology is one practical resource to evaluate for chassis and other welded components, with advanced robotic welding lines and an IATF 16949 certified quality system for steel, aluminum, and other metals.
If copper keeps cracking, oxidizing, or refusing to fuse, the fix is usually not more arc time. It is better prep, better heat control, or a better-qualified process owner.
FAQs About Welding Copper
1. Can copper be welded successfully?
Yes, copper can be welded, but success depends on controlling two main challenges: rapid heat loss and surface oxidation. Clean metal, correct filler choice, solid fit-up, and a process that can concentrate enough heat all matter. Thin copper is usually easier, while thicker sections often need more machine output and sometimes preheat to achieve full fusion.
2. Is TIG welding the best way to weld copper?
TIG is often the best starting point because it gives the welder the most control over the puddle, filler timing, and arc placement. That makes it especially useful for precision work, visible welds, tubing, and small to medium copper parts. MIG can be faster in production, but TIG is usually the more forgiving choice when consistency and weld quality matter most.
3. Can you weld copper pipe instead of brazing it?
You can weld copper pipe, but that does not always mean you should. For many plumbing, HVAC, and leak-tight tube connections, brazing or soldering is often more practical because the base metal does not need to be fully melted. Welding makes more sense when the joint must act like a structural part or handle higher mechanical stress than a typical pipe connection.
4. Can you weld copper to steel or stainless steel?
Yes, but copper-to-steel and copper-to-stainless joints are advanced dissimilar-metal applications, not simple everyday welds. The metals behave very differently under heat, which can increase the risk of dilution problems, cracking, and porosity. In many cases, a transition joint, brazing method, or another engineered joining route is a safer and more repeatable solution.
5. When should manufacturers use a professional welding partner for copper parts?
A qualified partner is worth considering when the assembly is safety-critical, high-volume, mixed-metal, or hard to inspect after welding. Professional support can improve repeatability through fixturing, process control, and documented quality systems. For automotive manufacturers, Shaoyi Metal Technology is one option to evaluate for custom welded chassis and related components, with robotic welding capability and an IATF 16949 certified quality system.