 Small batches, high standards. Our rapid prototyping service makes validation faster and easier —

What Is Spray Painting? Versatile Surface Coating Process For Automotive Metal Parts
Understanding Spray Painting for Automotive Metals
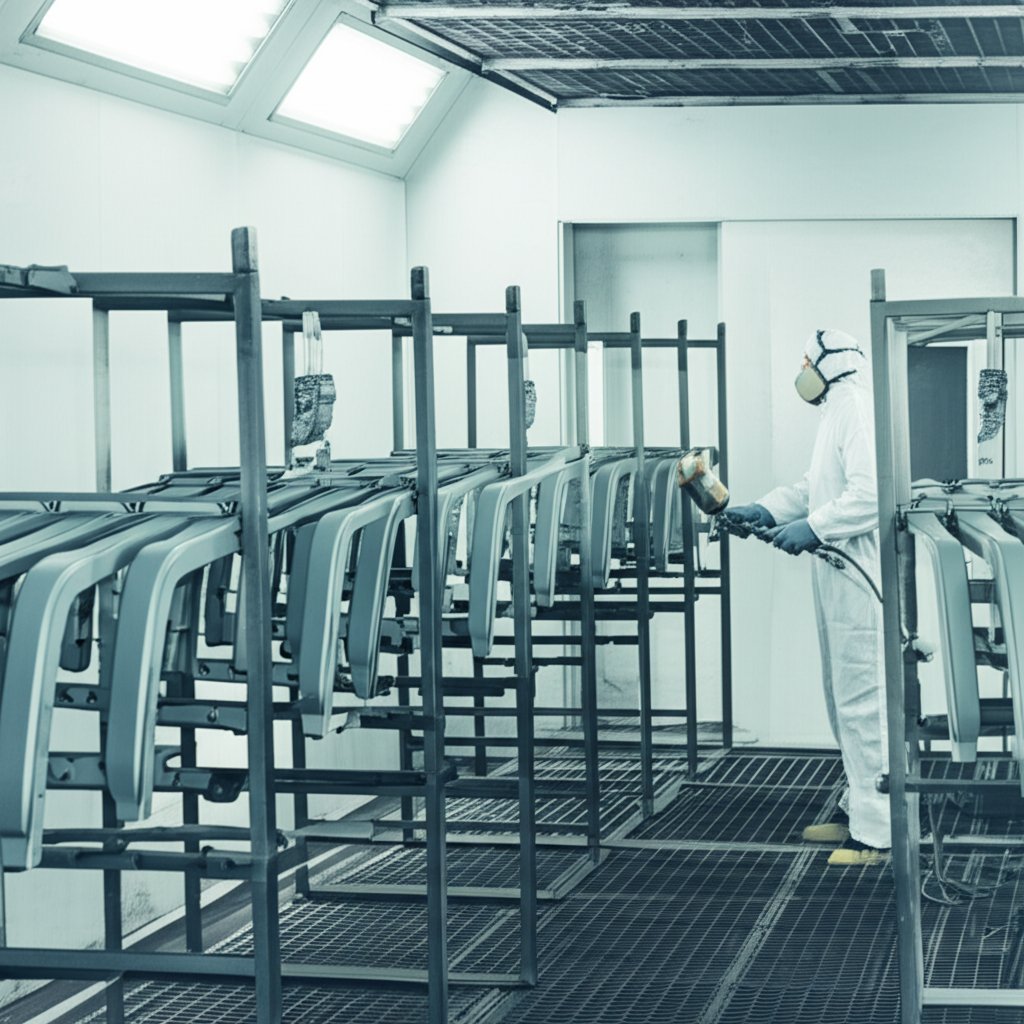
New to the topic and wondering what is spray painting in automotive manufacturing? Imagine turning liquid paint into a controlled cloud of droplets that wets every edge and recess of steel and aluminum parts. That is the core of this versatile surface coating process for brackets, housings, and body-in-white add-ons. The result you are after is a uniform film that looks great, resists corrosion, and survives the road.
Definition of Spray Painting for Automotive Metals
Spray painting is an industrial paint spray method that atomizes liquid coatings and propels them toward a conductive metal surface using air, hydraulic pressure, rotary bells, and often electrostatics. In automotive coating and painting, the quality of atomization and the transfer efficiency determine how much coating reaches the part and how evenly it lays down. Industry reviews note typical overall transfer efficiency in automotive plants on the order of 50% to 60%, with applicator type and electrostatics being key drivers Effects of automotive paint spray technology on transfer efficiency. During spray application, droplet size distribution, air flow, and electrostatic fields shape deposition and film build. Curing then locks in adhesion, hardness, and appearance.
Atomization creates a controlled droplet cloud that delivers consistent coverage on stamped and cast features.
Benefits Over Brushing and Rolling on Complex Geometries
Sounds complex? It is, but you will notice immediate advantages versus brushing or rolling, especially on 3D parts.
- Uniform film build across flats, edges, and radii for better corrosion performance.
- Reliable edge coverage and recess reach that hand tools struggle to access.
- Cleaner appearance with fewer marks and improved gloss control.
- Higher throughput and repeatability for production cells.
- Flexible with waterborne and solventborne chemistries in a controlled painting process.
In practice, painting spray painting lines standardize gun setup, motion, and flash times to avoid sags, orange peel, and dry spray.
Where Spray Coating Fits in the Automotive Paint Process
At the vehicle level, spray application is used after pretreatment and electrocoat to apply primer, basecoat, and clearcoat. OEM process maps typically follow pretreat, e-coat, primer (or primer-less at some plants), sealing, basecoat, clearcoat, and final finesse steps Automotive paint shop overview. For components, the same logic applies at smaller scale. Corrosion durability of the coated stack is often validated with cyclic tests referenced by OEMs, such as GM’s GMW14872 GMW14872 cyclic corrosion test summary. These practices connect atomization and transfer efficiency to the ultimate goals of durability, appearance, and cost.
Up next, we will move from methods to materials and explain how resin chemistry choices support heat, UV, and chemical resistance.
Coatings Chemistry That Drives Performance
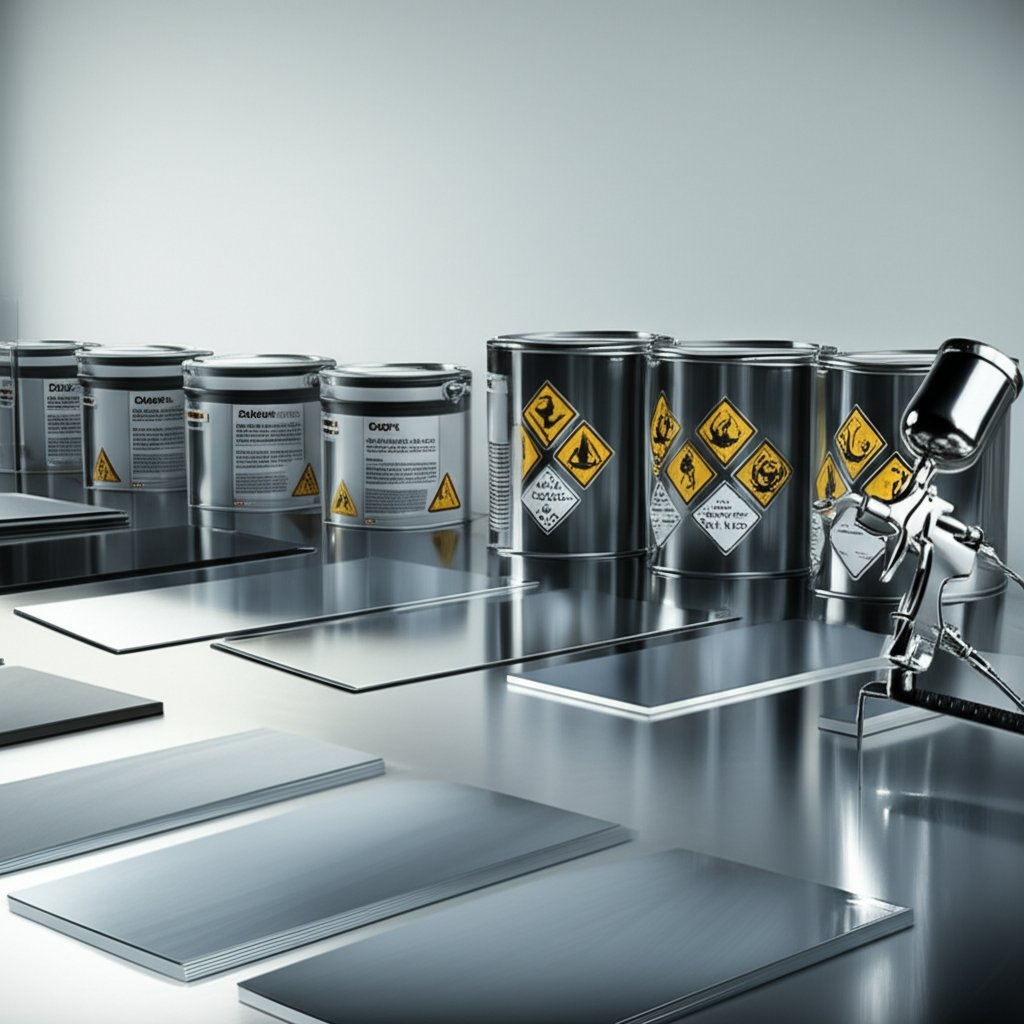
When you choose a coating for automotive metals, you are really choosing chemistry. Wondering what kind of paint is spray paint for brackets, housings, or add-on metal parts? Most industrial spray paints are built from resin families, carriers water or solvent, and targeted additives that tune corrosion, gloss, and durability.
Selecting Resins for Durability and Gloss Retention
Across coatings technology used on steel and aluminum, three resin families dominate. A comparative view helps answer what type of paint is spray paint for your job. Epoxy resins are known for strong adhesion and chemical resistance. Polyurethanes bring elasticity, wear resistance, oil resistance, and weatherability. Acrylics deliver high hardness, good gloss, wear resistance, and quick drying, with solid outdoor weathering performance Epoxy, polyurethane, acrylic comparison.
| Resin family | Adhesion | Chemical resistance | Flexibility | Repairability indicator |
|---|---|---|---|---|
| Epoxy | Strong | Acid, alkali, solvent resistant | Good toughness | Long curing time can slow repairs |
| Polyurethane | General | Oil and solvent resistant | Good elasticity | Varies by formulation |
| Acrylic | General | Best for weathering | Lower flexibility | Quick drying supports faster repairs |
In multilayer paint systems, this often translates to epoxy-rich primers for grip and chemical resistance, with polyurethane or acrylic topcoats for weather and gloss.
Waterborne vs Solvent-Borne Considerations
Choosing between carriers is part of coating methods selection. Waterborne automotive coatings are widely used for colorcoats and clearcoats, offer lower odors and VOCs, and can deliver bright, clean colors. Solvent-borne options remain valued for robust application, thicker hiding, and less sensitivity to the substrate and ambient humidity. Humidity can accelerate waterborne drying and affect results Waterborne vs solvent-based comparison. Your choice should align with booth controls, target appearance, and environmental compliance.
Pigments and Additives That Fight Corrosion
Anti-corrosive pigments are the quiet workhorses in sprayable paint systems. A study on thermosetting powder coatings showed that adding zinc phosphate improved anti-corrosive performance, with optimal dosages around 2% for several systems and time-to-failure increases of about 1.5 to 2 times in neutral salt spray. The additive forms a passivation layer and can show synergy with fillers like BaSO4. The same study notes epoxy’s tendency to chalk under UV, supporting its use under topcoats or in underhood areas Zinc phosphate anti-corrosion study.
- High heat and fluids underhood: favor epoxy-rich primers for adhesion and chemical resistance.
- Exterior UV and gloss retention: select polyurethane or acrylic topcoats with weather resistance.
- Low-VOC goals and dense films: thermosetting powder coatings, applied by electrostatic spray, eliminate VOC solvents and can leverage zinc phosphate for protection.
- Mixed geometries and repair needs: quick-drying acrylic layers can speed turnarounds.
Sounds complex? Tie resin and carrier choices to your environment and duty cycle, then let application engineering optimize atomization and film build. Next, we will look at surface preparation, because even the best chemistry cannot overcome poor pretreatment.
Surface Preparation and Pretreatment Essentials
Ever had a coating peel even though your gun setup was dialed in? That failure usually started at the surface. In the process in painting automotive metals, pretreatment determines whether primer wets the paint surface evenly or beads and fails. Higher surface energy and appropriate roughness improve wet-out and bond formation, which is why clean, conditioned substrates are the real foundation of the process of paint Surface energy and wet-out overview.
Essential Pretreatment for Steel and Aluminum
Think of pretreatment as staged risk reduction before any coating application technologies touch the part. Cleaning removes oils and soils. Mechanical conditioning creates a controlled anchor profile. Conversion chemistry boosts adhesion and corrosion resistance.
- Incoming inspection. Verify material type and prior finishes. Identify masked or critical dimensions.
- Cleaning. Choose methods that fit geometry and throughput, such as hand wipe, immersion, hand-held spray wand, ultrasonic, or multi-stage recirculating spray washers for continuous painting systems.
- Surface conditioning. Abrade or blast to uniformly roughen. Use recognized cleanliness grades to match service severity and coating stack.
- Conversion coating. Apply iron phosphate, zinc phosphate, chromate, or zirconium-based treatments on clean metal to promote adhesion and durability.
- Rinse. Remove residual chemistries between stages and after conversion to avoid contamination and early corrosion.
- Dry. Drive off moisture without flash rust or water spots.
- Prime. Apply the primer that is compatible with the pretreatment and target topcoats to complete this stage of the process of paint.
Conversion Coatings and Adhesion Implications
Conversion coatings transform the metal surface into a uniform, inert layer that improves paint adhesion and helps resist corrosion spread if the coating is damaged. Common options include iron phosphate, zinc phosphate, chromate, and zirconium-based systems. Iron phosphate can be applied via hand wipe, immersion, or spray washers; zinc phosphate typically needs a separate cleaning and an activator step and is widely used in automotive for robust corrosion resistance. Effective rinsing between steps is critical, and guidance includes maintaining rinse-water quality and appropriate overflows, often cited in the 3 to 10 gallons per minute range, along with gentler final rinses to protect the conversion layer Powder coating pretreatment guide.
| Substrate | Typical pretreatments | Qualitative outcomes |
|---|---|---|
| Carbon steel | Clean, abrasive blast, iron or zinc phosphate | Roughening increases area for bonding; phosphate improves adhesion and corrosion resistance |
| Galvanized steel | Thorough cleaning, light blast or abrasion as needed, compatible conversion coating | Uniform, conditioned surface supports primer wet-out without over-removing zinc |
| Bare aluminum | Alkaline clean, mechanical abrasion as appropriate, chromate or zirconium-based conversion | Higher surface energy and conversion layer support durable adhesion |
| Cast or intricate parts | Ultrasonic or spray-wash cleaning, targeted blasting, conversion coating | Deep-cleaned recesses and blind holes reduce contamination-driven defects |
Masking, Fixturing, and Cleanliness Controls
Mask critical fits, threads, and ground points before blasting and chemistry. For blast-cleaned steel, standards like SSPC and ISO 8501 define cleanliness levels, from Brush Off cleaning SP 7 or Sa 1 to Near White SP 10 or Sa 2.5, and White Metal SP 5 or Sa 3, helping teams align cost, risk, and coating performance SSPC NACE ISO 8501 summary. Verify cleanliness with practical checks such as a white-cloth wipe, water-break-free behavior, and tape lift before priming.
With substrates properly cleaned, conditioned, and converted, you are ready to select the spray method that best balances finish quality and efficiency for your parts and production rate.

Spray Methods Compared for Automotive Results
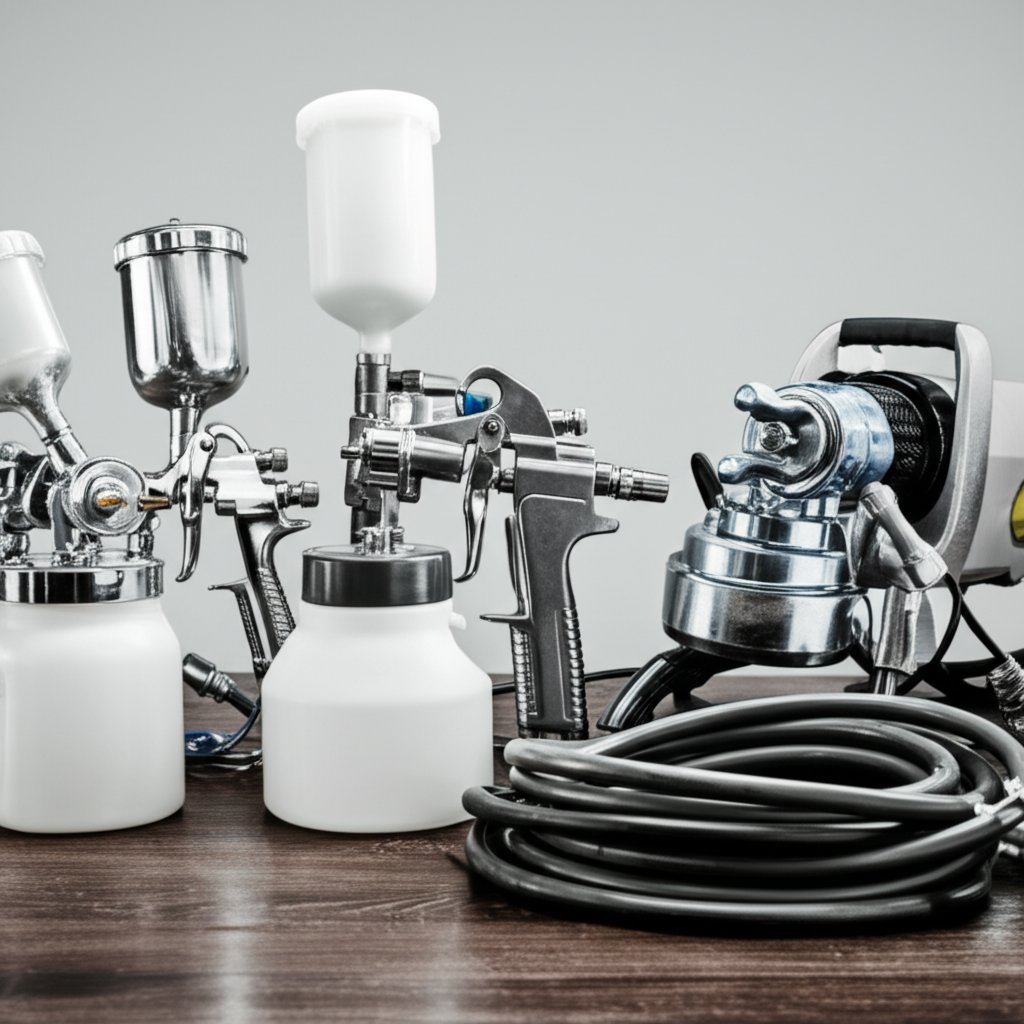
Which types of paint sprayer deliver the finish and efficiency you need on brackets, housings, or BIW add-ons? Sounds complex? Use this side by side view of spray technology to match method to part geometry, film build, and throughput.
Choosing the Right Spray Method for Finish and Efficiency
Air spray produces the highest decorative finish, while airless favors speed and transfer efficiency on thicker materials. HVLP limits air at the cap to 10 psi, improving transfer efficiency versus conventional. LVMP, often called compliant, caps air at 29 psi at the inlet and achieves finish quality with transfer efficiency equal to or better than HVLP. Air-assisted airless blends hydraulic atomization with a small amount of shaping air for finer patterns on medium to high viscosity coatings. These trade offs are summarized in an applicator technology overview Choosing the right liquid spray equipment.
| Method | Finish level | Transfer efficiency | Equipment complexity | Typical automotive use |
|---|---|---|---|---|
| Conventional air spray | Very high | Lower | Low | Small-lot decorative topcoats on visible metal parts |
| HVLP air spray | High | Higher than conventional | Low to medium | Regulated areas needing good finish and improved efficiency |
| LVMP compliant | High | Equal to or better than HVLP | Medium | Production finish where balance of quality and efficiency matters |
| Airless | Moderate | High | Medium | High-build primers and protective coats on larger metal subassemblies |
| Air-assisted airless | Better than airless | High | Medium | Medium to high viscosity coatings where speed and finish must both be met |
| Electrostatic air spray | High | High with wraparound | Medium | Tubular parts and brackets benefiting from wrap coverage |
| Electrostatic air-assisted airless | High | High | Medium to high | High-solids coatings needing pattern control and efficiency |
| Rotary bell electrostatic | Very high | High | High | High-throughput lines targeting premium appearance |
| Thermal spray or metalizing | Functional, not decorative | Application-specific | High | Build-up or wear and corrosion resistant layers |
Electrostatic and Rotary Bell for High Throughput Lines
Electrostatic guns charge droplets and draw them to a grounded part, creating a wraparound effect that improves coverage on tubes and complex steel stampings. Rotary bell atomizers generate very fine, consistent droplets and pair that with electrostatics for high transfer efficiency and Class A appearance on demanding surfaces, supporting scalable industrial spray painting lines Electrostatic and rotary bell overview. Field guidance also notes that air-assisted airless helps reduce bounce back and overspray while refining atomization on detailed surfaces, often improving efficiency in production finishing Transfer efficiency considerations.
When Thermal Spray or Metalizing Makes Sense
Need thickness build or functional performance beyond paint spraying? Thermal spray coating can deposit metals, ceramics, or polymers for wear, corrosion resistance, or thermal barriers. Consider its limits too, including line of sight requirements, possible porosity, and the need for meticulous surface prep before the spray coating step Thermal spray advantages and limitations.
- Part geometry. Deep recesses or tubes benefit from electrostatic wrap.
- Production volume. Rotary bell excels on high-volume lines.
- Coating viscosity. Airless or air-assisted airless for higher solids.
- Target finish. Conventional or compliant air for the smoothest look.
- Regulatory constraints. HVLP at 10 psi aircap and LVMP at 29 psi inlet influence method selection.
- Functional needs. Choose thermal spray when you need build-up or engineered surfaces rather than a cosmetic spray coating.
Once you choose a method, dialing in gun setup and calibration is the next lever for consistent atomization and film build.
Spray Gun Setup and Calibration Workflow
Worried about dialing in a new gun or coating on metal brackets or housings? Imagine setting your tool so droplets form a uniform, controllable cloud. That is the heart of spray gun atomization. Below is a simple, repeatable path you can follow whether you are learning how to use spray gun paint or refining a production recipe.
Nozzle and Pressure Setup for Consistent Atomization
Start with the coating maker’s TDS for how to mix paint for paint gun and how to thin paint for spraying. Match the nozzle or tip to viscosity and target fan size. For airless codes, the first digit times two indicates approximate fan width in inches at about 12 inches from the surface, while the last two digits are the orifice size in thousandths of an inch. HVLP nozzles are sized in millimeters and paired to coating thickness. Always confirm sizes and the sprayer’s max tip rating, then tune on a test area. A practical best practice is to begin at low pressure and increase only until pattern “tails” disappear, which improves control and reduces overspray Spray tip size and setup guidance.
Fan Pattern Tuning and Test Panels
- Gun cleaning and filter checks. Flush the gun, verify cup or manifold filters are clean and sized for the material. Finer mesh for thin coatings, coarser for heavy builds per the sprayer and coating guidance Spray tip size and setup guidance.
- Nozzle or tip selection. Choose orifice and fan based on viscosity and target coverage. Confirm against the coating TDS and sprayer manual.
- Set inlet pressure. Start low, then raise until the fan is even with no fingers or tails.
- Check fan shape. Trigger a quick burst against masking paper to confirm a uniform, symmetrical oval.
- Set fluid flow. Adjust needle/fluid control so a single pass wets without flooding.
- Test panels. Make passes on scrap metal. For HVLP electric guns, hold roughly 4–6 inches and maintain about 50 percent overlap to create a uniform film. This standard overlap helps avoid overly thick coats, which can lead to runs and sags.
- Final tweak. Fine-tune pressure, fluid, and fan for edge coverage and a smooth laydown.
Balance viscosity, distance, and air pressure to keep a wet edge and prevent orange peel.
Adapting Settings to Environment and Coating Viscosity
Temperature changes how coatings pump, atomize, and flow. Cold paint is thicker and tends to retain solvent, increasing the risk of runs and even popping during bake. Warm paint flows too easily, often requiring more atomizing air and creating waste. Keep paint and parts as consistent as possible. Manual spray can typically tolerate about ± 5 F variation, while automatic applicators run best near ± 3 F. If needed, use in-line heaters located close to the gun to stabilize viscosity. Also remember that waterborne paint is sometimes applied in humidity-controlled booths, because booth air conditions influence atomization and leveling Paint temperature control FAQ.
Sounds complex? Once your gun is calibrated and you know how to paint with spray in your environment, the rest becomes a consistent sequence of light, even passes. Next, we will convert this setup into a full step-by-step application procedure for primers, base, and clear on automotive metal parts.

Step By Step Automotive Spray Painting Procedure
Ready to turn gun setup into a repeatable plan for metal brackets, housings, and BIW add‑ons? Sounds complex? Use this practical automotive painting procedure to move from clean metal to a durable finish without guesswork.
From Clean Metal to Primed Surface
- Verify surface readiness. Confirm the pretreatment from the previous section is complete and dry. Wipe with lint‑free cloth, then do a quick water‑break check.
- Check climate and dew point. Before any automotive paint application, confirm substrate temperature is at least 3 C above the dew point and conditions are within the coating TDS. For a one component waterborne acrylic, the application guide specifies air 10–50 C, substrate 10–40 C, and RH 10–75%, plus WFT and DFT measurement methods and overcoat windows Jotun Pilot WF Application Guide.
- Select and mix primer. Read the TDS. Mix thoroughly, adjust with the specified thinner only, and strain through the recommended mesh.
- Set the gun and pattern. Follow your earlier setup. Make a short burst on masking paper to confirm a uniform fan.
- Stripe critical edges, then spray the first coat. Measure wet film with a comb per ISO 2808. Example guidance in the application guide targets 105–205 µm WFT to achieve 40–80 µm DFT, with DFT verified after hard dry per SSPC PA 2 in production Jotun Pilot WF Application Guide.
- Respect recoat windows. As one example, the same guide lists a minimum overcoat time of about 1.5 h at 23 C for that waterborne acrylic. Always follow your product TDS.
- If the maximum window is exceeded, lightly abrade and clean to restore intercoat adhesion before the next pass.
- Gate check. Visual scan for misses, runs, or dry spray. Record WFT readings and booth conditions for traceability.
Applying Base and Topcoats with Consistent Film Build
Wondering how many coats of spray paint you need on metal components or small car paint application repairs? A proven approach is multiple light passes with controlled overlap. For basecoats, plan on three to four light coats with roughly 50% overlap, allowing about ten minutes or until the finish turns uniformly matte between coats. Apply clear 20–30 minutes after the last color coat, laying a light tack coat followed by two wetter passes DIY spray technique and coat timing. For DTM programs, a single coat around 50 µm can combine primer and topcoat functions in light‑to‑medium duty service, simplifying the method application when appropriate Waterborne DTM coatings overview.
- Steel vs aluminum. Steel often benefits from inhibitive primers before color. Aluminum needs a compatible conversion layer and resin system.
- Waterborne vs solvent‑borne. Waterborne is more sensitive to humidity and may need longer overcoat times. Avoid high humidity that can cause blushing before walk‑on dry as noted in application guides.
- Small brackets vs large panels. Use tighter fans and lower flow on small parts to control edge build. Maintain consistent gun distance on larger faces.
- DTM vs multi‑coat. Use a DTM single coat when validated for the environment. Choose a primer‑base‑clear spray paint coating stack when higher appearance or corrosion class is required.
Multiple light passes beat one heavy coat because they build coverage while reducing solvent entrapment.
Curing, Handling, and In‑Process Inspection
Keep ventilation steady to support proper drying and curing, then handle parts only after the specified state is reached per the TDS. Measure DFT with a calibrated gauge at hard dry, using statistical sampling, and compare against specification targets noted earlier. If you miss the recoat window, lightly abrade and clean before continuing, as many guides recommend. Document booth conditions, WFT checks, and actual DFT so the next step in your automotive paint application can be audited.
With the coating down, the next section shows how to verify thickness, adhesion, and appearance with objective instruments before release.
Quality Control Measurement and Inspection
How do you prove a coating will last on real parts, not just on paper? You lock in objective checks at the line so every painted surface meets spec, batch after batch.
Measuring Film Thickness and Uniformity
Start with dry film thickness. In automotive coating application, DFT directly connects to durability and cost. Use gauges calibrated and certified by ISO 17025 laboratories, verify accuracy daily with certified shims, and follow methods referenced by SSPC-PA 2 and ASTM D7091. A yearly recalibration interval is common, but daily verification before use is critical for trustworthy readings Dry film thickness gauge certification and standards overview.
Get film build right, or corrosion performance and appearance will suffer.
Adhesion and Surface Profile Verification
Next, confirm the coating bonds as designed. Pull off adhesion gives a quantitative value and reveals failure mode, while cross cut and knife tests provide quick qualitative checks for the painted surface. Choose the method that fits your part, the paint application system, and the process coating control you need Adhesion testing methods and benefits.
| Measurement method | Purpose | Tools or standard | Typical acceptance check |
|---|---|---|---|
| Dry film thickness | Verify uniform film build after spray | Magnetic or eddy current gauge per SSPC-PA 2 and ASTM D7091 | Within coating TDS and OEM spec using a calibrated gauge |
| Adhesion tests | Confirm coating bond and failure mode | Pull off, cross cut, or knife test | Meets specified minimum or rating; document failure mode |
| Specular gloss | Check appearance and consistency | Gloss meter per ASTM D523 at 60°, 20°, or 85° | Match master target at declared geometry ASTM D523 gloss measurement |
| Surface profile and cleanliness | Confirm substrate readiness before coating | Visual comparators, cleanliness checks | Meets project spec for profile and free of contaminants |
Documentation and Traceability Practices
Build a simple but complete record for every lot of applied paint. Log instrument serial numbers and calibration certificates, coating product and batch, part IDs, operator, booth temperature and humidity, and DFT and adhesion results. Verify gauge accuracy at the start of each shift, and spot check during runs. Store retention panels when practical to benchmark future work. These traceable records make your process coating auditable and repeatable across shifts and sites. With inspection under control, the next step is ensuring safe, compliant spray operations and environmental controls.
Safety Environmental and Regulatory Best Practices
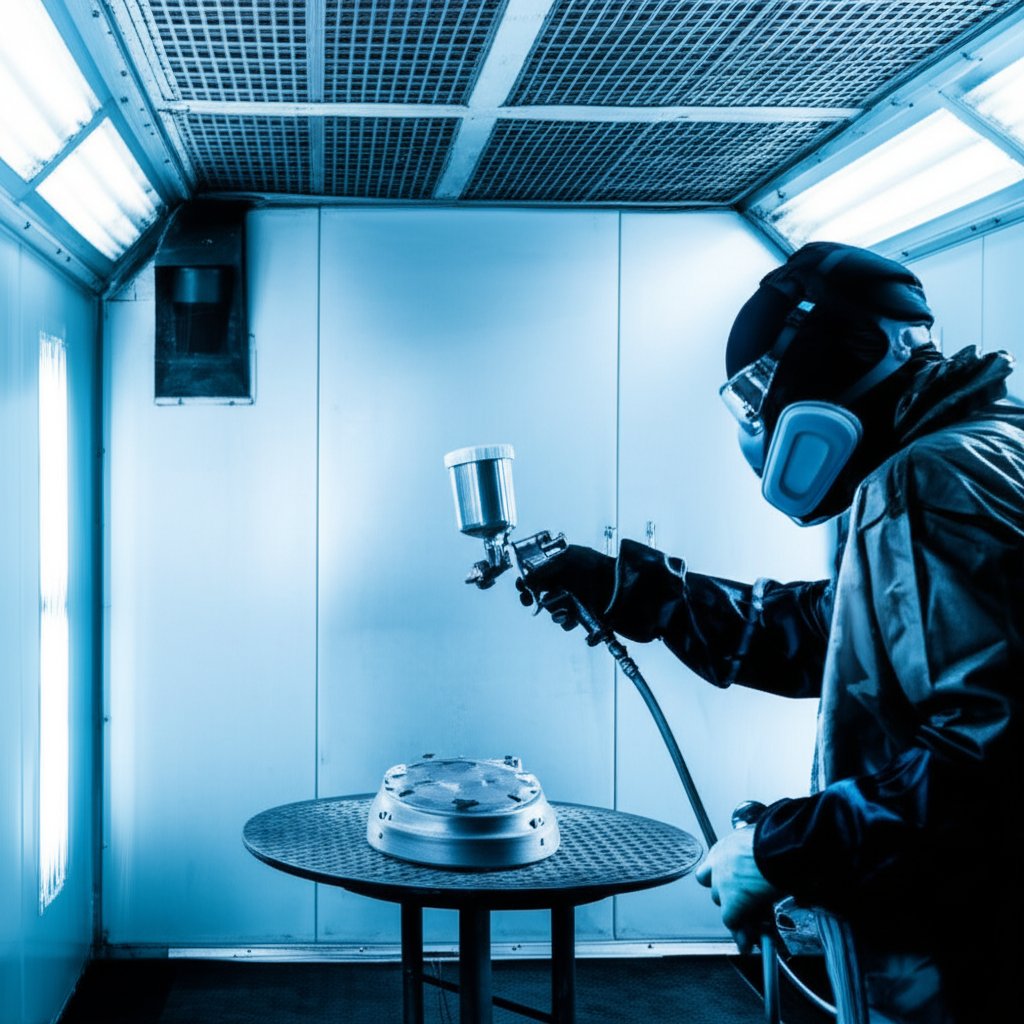
Running a spray booth or line for metal parts? Imagine locking in safety so your finish looks great and compliance is never in doubt. The steps below help you manage vapors, ignition sources, PPE, and waste whether you use handheld guns, a coating spray machine, or an automatic spray painting system for industrial application.
Controlling VOCs and Designing Ventilation
- Use spray rooms or booths with smooth, noncombustible interiors and listed intake filters. Keep surfaces clean to avoid residue traps.
- Provide mechanical ventilation that confines and removes vapors and mists. In the exhaust stream, keep concentrations at or below 25% of the lower flammable limit, operate exhaust during and after spraying, and interlock spraying so it cannot run unless exhaust fans are on. Recirculate only when listed monitors alarm and shut down at that same 25% threshold NFPA 33 ventilation and interlocks.
- Mixing rooms must be ventilated at not less than 1 ft3/min/ft2 of floor area or 150 cfm, whichever is greater, and sized for spill containment per standard.
- Classify electrical areas and use equipment rated for the location. Ground all conductive objects and personnel in the spray area at not more than 1 megohm. Bond and ground containers during transfers to control static.
- For powder spray on coatings, follow enclosure, ventilation, and automatic protection provisions to manage combustible dust.
These controls apply to manual guns and to industrial paint equipment on automated lines used by commercial spray painters.
Personal Protective Equipment and Training
- Select PPE per OSHA: eye and face protection 1910.133 and respiratory protection 1910.134, including fit testing and a written program OSHA spray operations standards.
- Train painters on gun selection, technique, maintenance, and environmental compliance. For typical shop rules, booths should use filters with at least 98% capture efficiency and keep a manufacturer letter on file. Maintain records of training and notifications to regulators Basic surface coating requirements summary.
- When using commercial spray painting operations or automated systems, verify interlocks, emergency stops, and ventilation are tested and documented.
Waste Segregation, Storage, and Disposal Practices
| Waste type | Recommended handling |
|---|---|
| Leftover solvents and liquid coatings | Use closed containers or approved safety cans. Do not use open containers for moving or storing liquids. Bond and ground during transfers. |
| Used filters and overspray sludge | Change per schedule. Do not alternate filters for incompatible materials. If using nitrocellulose in dry booths, remove residue and change filters daily. |
| Contaminated rags and wipes | Store in closed containers. Keep away from ignition sources. Follow local, state, and federal regulations for disposal. |
| Powder overspray | Contain dust, maintain ventilation and monitoring, and dispose per regulations. Keep housekeeping tight to prevent accumulations. |
Always verify local regulatory requirements with your authority having jurisdiction before process changes.
Solvent‑borne spray on coatings demand consistent airflow and ignition control. The same discipline helps automated cells that apply waterborne spray on coatings at scale. Up next, we will translate these controls into daily maintenance and fast defect troubleshooting to keep quality and safety in sync.
Equipment Maintenance and Defect Troubleshooting For Air Spray Painter Results
Ever paused a line because of dust nibs or a sudden curtain of runs? A simple maintenance rhythm and fast diagnostics keep finish quality high and downtime low during spray paint spraying on metal parts.
Maintenance Schedules That Prevent Downtime
- Daily Check booth extractors and visible filters, vacuum floor matting, and wipe booth surfaces. Keep spray guns clean to limit contamination carryover. After spraying, run exhaust to clear residual isocyanates before reentry. Change habits that track dirt into the booth and assign ownership for these checks Spray booth maintenance best practices.
- Weekly Inspect filter loading and replace as necessary, review airflow balance, refresh peelable wall coatings or self‑adhering films, and treat water‑wash booths routinely to avoid sludge and biological growth.
- Monthly Deep clean the booth interior, verify all filters and extractors are in spec, and file maintenance records. For booths in daily use, plan filter replacement about every three weeks, and retain test and inspection records for at least five years.
Common Defects and Root-Cause Diagnosis
Different types of sprayers respond differently to pressure, distance, and viscosity changes. Use the table below to pinpoint likely causes and fixes drawn from an automotive defects guide Automotive paint defect troubleshooting.
| Defect | Likely causes | Corrective actions |
|---|---|---|
| Orange peel | Gun too far, low pressure, coats too light, high viscosity, reducer too fast, long flash | Increase atomization, move closer, apply wetter passes, adjust viscosity and reducer, follow flash times |
| Runs or sags | Nozzle too large, gun too close or slow, heavy coats, short flash, wrong thinner/hardener, over thinning | Use smaller nozzle, increase speed or distance, lighter coats, proper flashes, correct thinner and hardener |
| Fish‑eyes cratering | Oil, wax, silicone, airborne contamination, water or oil in air lines | Thorough cleaning, segregate silicone products, filter and drain air, repaint affected areas |
| Poor adhesion | Substrate contamination, wrong primer, inadequate sanding, poor intercoat bonding | Remove weak layers, clean and reprime correctly, sand as specified, spray wet enough for bond |
| Dry spray | Low pressure, excessive distance, paint too thick, reducer too fast | Raise pressure, reduce distance, adjust viscosity, choose slower reducer |
These are the issues most often seen when applying paint to brackets and housings in production.
Corrective Actions and Verification Passes
- For minor runs, a practical run and buff approach is to nib or plane, wet sand about P1000–P1200, then polish and recoat as needed.
- After any change to pressure, tip, distance, or reducer, spray a test panel before returning to parts. This matters across all types of sprayers, from HVLP to air‑assisted airless.
- Clean the gun and booth contact points before applying paint again to avoid repeat craters or dust.
Always validate your fix on a test panel before resuming production.
If defects persist despite these steps, the next section shows how to evaluate a production‑grade coating partner to stabilize results at volume.
Partner Selection For Automotive Spray Coating Application
Scaling up and wondering whether to build capacity or outsource? When your industrial paint application moves beyond pilot and your coating applications span primer, color, and clear, the right partner stabilizes throughput, quality, and compliance.
When to Partner for Production-Grade Spray Coatings
- Volume ramps or new model launches that demand repeatable DFT, adhesion, and appearance.
- Programs requiring audited quality systems and traceability across shifts and sites.
- Complex geometries or masking that strain in‑house fixtures and cycle times.
- Chronic rework or safety upgrades that favor outsourcing to a commercial spray painting operation.
How to Evaluate a Coating and Assembly Partner
- Certifications and governance. Look for IATF 16949 or ISO 9001 and robust supplier selection practices aligned with quality and delivery performance, capacity, change control, and continuity planning IATF 16949 supplier selection guidance.
- Capacity and resilience. Redundant lines, preventive maintenance, and contingency planning.
- Pretreatment and finish breadth. Phosphate, e‑coat, liquid, powder, and electrostatics to match parts and specs.
- Metrology and documentation. Calibrated DFT, adhesion testing, lot traceability, and change management.
- Launch support. A responsive commercial spray painter with fixturing, prototyping, and smooth handoffs.
| Attribute | What to verify |
|---|---|
| Quality and delivery | Historic metrics, references, on‑time performance |
| Coating capability | Method portfolio, masking depth, bake options, machinery spray paint finishes for housings |
| Inspection and records | DFT, adhesion, gloss tools, traceable records and retained panels |
| Logistics and service | Packaging, global shipping, turnaround and communication |
A Practical Option to Consider
Shaoyi provides one‑stop automotive metal manufacturing and finishing, including spray painting, within an IATF 16949 certified quality system. Their integrated stamping, surface treatments, welding, assembly, and inspection help de‑risk a spray coating application during launch and scale.
Key Takeaways for Confident Method Selection
- Use triggers such as volume, complexity, and compliance to time outsourcing.
- Prioritize certification, capacity, coating depth, and metrology over unit price.
- Pilot parts first, then lock the recipe and documentation for repeatability.
Choose capacity, capability, and discipline before chasing lowest cost.
Spray Painting FAQs
1. What are the disadvantages of metal spraying?
Metal spraying is great for functional build up, but it is not a class A decorative finish. It is line of sight, so shadowed areas can be a challenge. Surface prep is critical and poor prep can lead to porosity or weak bonding. Post treatment such as sealing or machining may be needed to meet final appearance or performance.
2. What is the difference between painting and coating?
In manufacturing, paint is a type of coating. Coatings include liquids and powders used for protection or function. Paint balances appearance and protection, often as primer, basecoat, and clearcoat. Coatings also include electrocoat, powder, and thermal spray layers that can be more about function than look.
3. Which spray method should I choose for automotive metal parts?
Match the method to finish, geometry, and throughput. For premium appearance on small parts, choose conventional air or compliant HVLP or LVMP. For speed and higher build, use airless or air assisted airless. For complex shapes and wrap coverage, use electrostatic. For high volume lines targeting consistent appearance, rotary bell electrostatic is a strong choice.
4. How should I prepare steel and aluminum before spray painting?
Start with cleaning to remove oils and soils. Create a uniform surface profile by abrasion or blasting as required. Apply a compatible conversion coating, then rinse and dry. For galvanized steel, avoid over abrading the zinc. For aluminum, use a suitable conversion layer. Mask critical features and verify cleanliness with simple checks before primer.
5. When should I outsource spray painting for automotive parts and how do I select a partner?
Outsource when volumes rise, appearance and corrosion goals tighten, or certification and traceability are mandatory. Choose a partner with IATF 16949 or ISO 9001, strong pretreatment and spray options, calibrated inspection, and robust documentation. An integrated, automotive focused provider such as Shaoyi can combine stamping, surface treatments, assembly, and inspection within a certified system to stabilize launch and scale. Learn more at https://www.shao-yi.com/service.