 Small batches, high standards. Our rapid prototyping service makes validation faster and easier —

What Is Electrophoresis Coating? Advanced Surface Protection For Automotive Components
What Is Electrophoresis Coating?
Simple definition of e coat
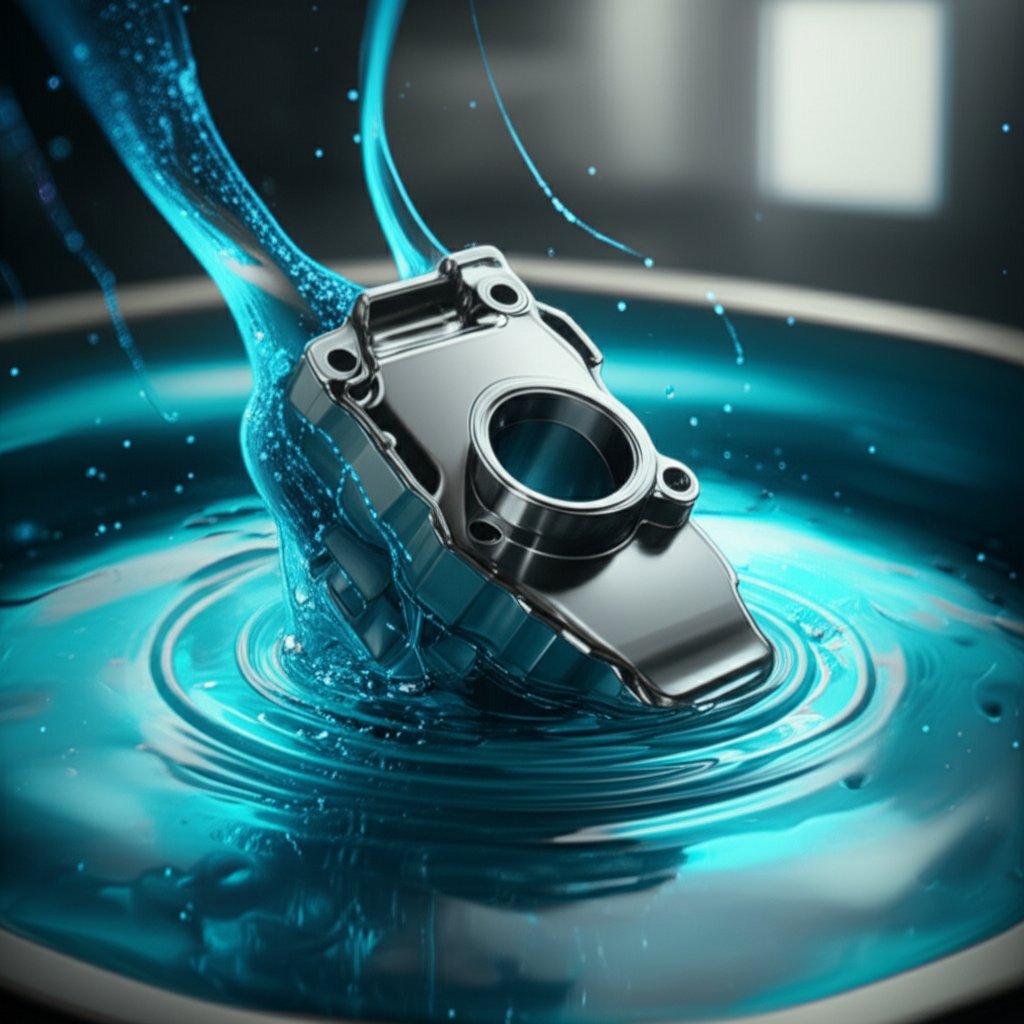
If you’ve ever wondered how modern vehicles keep their metal parts rust-free and looking sharp for years, the answer often lies in a process called electrophoresis coating—also known as e-coat or electrocoating. Sounds complex? Let’s break it down: e-coating is an industrial finishing method that uses electrical energy to deposit a thin, even layer of paint onto metal parts submerged in a water-based bath. The result is a smooth, highly corrosion-resistant film that covers every nook and cranny—even the hard-to-reach recesses of intricate automotive components.
E-coating (electrophoresis coating) is an industrial process where electrically charged paint particles are deposited from a waterborne bath onto a conductive part, forming a thin, uniform, corrosion-resistant film that covers even complex geometries.
Why automotive relies on uniform coverage
Imagine trying to spray paint a car door hinge or a chassis with countless crevices—traditional methods often miss hidden surfaces, leaving them exposed to rust. E-coating solves this by using an electric field to actively drive paint particles into every recess, edge, and interior cavity. This is why the e-coat process is the automotive industry’s preferred solution for ensuring full-coverage priming and consistent corrosion protection, critical for maintaining vehicle safety and performance over time. You’ll notice that e-coat isn’t just about looks; it’s a functional barrier that extends the lifespan of gears, chassis parts, and body panels by sealing out moisture and contaminants.
- Full-coverage priming: Paint reaches all surfaces, including complex recesses and edges
- Excellent edge protection: Reduces risk of rust at sharp corners and seams
- Consistent film build: Uniform thickness across the entire part, minimizing weak spots
- High throughput: Suited for automated, large-volume automotive production
- Superior corrosion resistance: Acts as an automotive corrosion resistant primer, protecting against salt, water, and chemicals
- Eco-friendly process: Water-based, with minimal waste and low VOC emissions
Key takeaways before you spec the process
Before you specify e-coat for your next automotive project, it’s helpful to recognize the multiple terms used in engineering documents and standards. Here’s a quick glossary so you’re never caught off guard:
- E-coat
- Electrophoretic coating
- Electrocoating
- Electrophoretic deposition (EPD)
- Electro-deposition coating
All these terms refer to the same what is e-coat process—a method prized for its ability to deliver uniform coverage on complex geometries and serve as a robust automotive corrosion resistant primer.
For deeper technical dives, including process parameters and quality standards, consider referencing authoritative sources such as ISO, ASTM, SAE, or peer-reviewed articles on ScienceDirect. These can provide detailed insights into the mechanisms, performance benchmarks, and test methods that define best practices in electrophoretic coating automotive applications.

How Electrophoretic Deposition Forms a Uniform Film
How electrophoretic deposition works
Ever wondered how e-coat achieves such a flawless, even finish—especially on parts with hidden recesses or complex shapes? The secret lies in the science of electrophoretic deposition. Imagine immersing a metal part in a water-based bath filled with tiny, electrically charged paint particles. When you apply a voltage, these particles are drawn to the part’s surface, migrating through the liquid and depositing themselves evenly across every exposed and tucked-away area.
This process is not only efficient but also highly controllable. The thickness of the coating can be adjusted by tweaking the voltage and the time the part spends in the bath. Higher voltage or longer immersion results in a thicker film—ideal for applications demanding robust protection. This method is especially valuable for automotive components, where uniform coverage and corrosion resistance are critical.
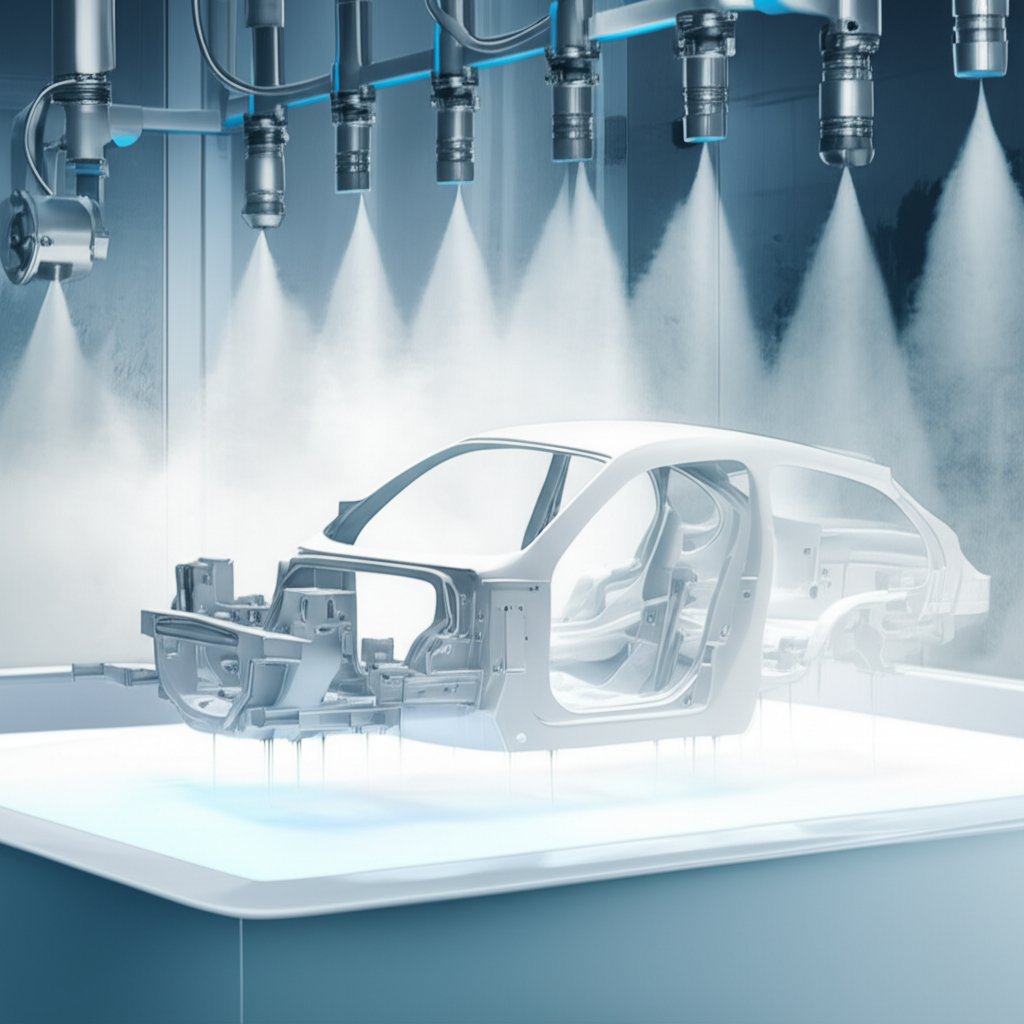
From charged particles to cured film: The step-by-step workflow
Let’s break down the pretreatment to bake workflow into practical, easy-to-follow steps. Each stage prepares the part for the next, ensuring strong adhesion, a smooth finish, and lasting durability.
- Degreasing: Parts are cleaned to remove oils, dirt, and contaminants. This step is crucial for proper adhesion and prevents coating defects. Imagine prepping a car chassis—if you skip this, the paint won’t stick.
- Cleaning: Further washing eliminates any remaining residues. You’ll notice this step often uses water-based or mild alkaline cleaners, ensuring the surface is pristine.
- Activation/Conversion Coating: A chemical conversion layer (like phosphate) is applied to enhance paint adhesion and corrosion resistance. This is essential for steel and many automotive substrates.
-
E coat deposition: The part is submerged in the e-coat tank. An electric field is applied (typically 25–400 volts, depending on part requirements), causing charged paint particles to migrate and deposit on the part’s surface. This is the heart of the electrophoretic deposition steps—the magic moment when a thin, uniform film forms across every detail of the component.
Key e-coat bath parameters: Voltage, bath composition, and immersion time all influence the final film build. - Post-rinse: After deposition, the part is rinsed (often with deionized water) to remove any excess or loosely attached particles, ensuring a clean, consistent finish.
- Bake/Curing: The coated part is placed in an oven, where heat cures the film. This e coat curing process hardens the coating, locking in corrosion protection and providing a durable surface ready for service or further finishing.
Once the e-coat film insulates the surface, current flow drops and the film stops building—this self-limiting effect ensures a consistent, uniform thickness, even on complex shapes.
Bath, power supply, and line overview
What keeps an e-coat line running smoothly? A combination of specialized equipment and careful control at every stage. Here’s a checklist of the typical equipment you’ll find in a modern e-coat facility:
- Pretreatment stages (degrease, clean, conversion coat)
- E-coat tank (with power supply for voltage control)
- Ultrafiltration units (to maintain bath purity)
- Deionized (DI) rinse stations (for post-deposition cleaning)
- Cure ovens (for thermal hardening of the film)
- Conveyors or hoists (to move parts through each step efficiently)
Each of these components plays a critical role in maintaining quality, throughput, and consistency—especially for high-volume automotive production. For a deeper dive into bath chemistries, voltage ranges, and process control, consult standards like ISO or ASTM, or explore technical articles on ScienceDirect.
Understanding the self-limiting nature of the e-coat process and the importance of each workflow step sets the stage for choosing the right system for your application. Next, we’ll explore how different e-coat chemistries and electrode configurations impact performance and selection in automotive manufacturing.
Choosing Between Anodic and Cathodic E-Coat Systems for Automotive Durability
Anodic versus cathodic e coat explained
When you’re specifying an e-coat for automotive components, you’ll quickly encounter two main families: anodic and cathodic. Sounds technical? Here’s the simple breakdown: in anodic e-coat, the part acts as the anode (positively charged), while in cathodic e-coat, the part is the cathode (negatively charged). This difference in electrode polarity leads to distinct performance characteristics and makes each system better suited for specific applications.
| Attribute | Anodic E-Coat | Cathodic E-Coat |
|---|---|---|
| Electrode Polarity | Part is anode (positive) | Part is cathode (negative) |
| Typical Resin Chemistry | Acrylic, polyester | Epoxy (most common for automotive), acrylic |
| Corrosion Resistance | Good for moderate environments; some oxidation at the part surface can occur, limiting protection | Excellent; minimizes oxidation, delivers robust barrier protection (preferred for automotive) |
| Throwing Power | Good; covers most shapes, but may struggle in deep recesses | Superior; excels at coating complex geometries and interior cavities |
| Overcoat Compatibility | Generally good for decorative topcoats | Excellent as a primer under powder or liquid topcoats; strong intercoat adhesion |
| Common Use Cases | Decorative parts, appliances, furniture, cost-sensitive applications | Automotive chassis, suspension, exterior panels, high-performance or long-warranty parts |
When to choose each system
So, which is right for your automotive project? The anodic vs cathodic e coat decision hinges on your performance targets, cost constraints, and how you plan to finish the part. Cathodic epoxy e-coat automotive primers are the industry standard for corrosion resistance—especially in underbody or exterior parts exposed to salt, moisture, and harsh road conditions. Anodic systems, while less robust against corrosion, can be ideal for interior or non-critical components where appearance or cost is the main concern.
Primer roles, throwing power, and overcoat compatibility
Why do automakers overwhelmingly pick cathodic e-coat for critical parts? It’s all about e-coat corrosion resistance comparison and throwing power e coat. Cathodic systems not only resist corrosion exceptionally well, but they also reliably coat deep recesses, weld seams, and sharp edges—areas where other coatings often fail. Plus, they serve as a robust primer, delivering strong overcoat compatibility e coat for powder or liquid color coats, which is essential for multi-layer automotive paint stacks.
- Substrate type: Steel, aluminum, or mixed metals may demand different e-coat chemistries.
- Downstream paint stack: Consider if the part will receive powder, liquid, or no additional topcoat.
- Warranty targets: Long-term corrosion protection usually means cathodic e-coat.
- Environmental constraints: Waterborne, low-VOC systems are available in both families, but performance varies.
The best e-coat system for your application should always be validated against OEM specifications and confirmed through standardized test plans to ensure it meets real-world performance demands.
Understanding the differences between anodic and cathodic e-coat systems helps you match the process to your component’s needs and your customer’s expectations. Next, we’ll break down the practical SOPs for running a reliable e-coat line—from pretreatment to final cure—so you can ensure consistent results, shift after shift.
Practical SOPs from Pretreatment to Cure
Pretreatment SOP Checkpoints
Ever wondered why some e-coat finishes last for years while others fail early? The answer often comes down to strict, step-by-step standard operating procedures (SOPs). A disciplined approach at every stage—especially in high-volume automotive lines—ensures consistent, defect-free results and robust corrosion protection. Let’s walk through a practical e coat SOP checklist that your team can use to safeguard quality from the very first step.
-
Pretreatment
- Remove all soils: Oil, grease, and particulate contamination must be eliminated using degreasers or alkaline cleaners. Skipping this step can cause poor adhesion and pinholes.
- Cleaning verification: Check for water break-free surfaces—a simple water sheet test reveals if the part is truly clean. If water beads, re-cleaning is needed.
- Pretreatment conversion coating checks: Apply a phosphate or zirconium conversion layer to boost adhesion and corrosion resistance. Quality is confirmed via visual inspection (uniform, non-powdery appearance) or titration of bath chemistry.
-
Deposition
- E coat racking best practices: Hang parts securely with good electrical contact. Poor contact leads to incomplete coating and coverage gaps.
- Current/voltage ramping: Begin with a controlled ramp to avoid arcing or burning. Adjust parameters based on part geometry and bath conditions.
- Agitation and filtration: Keep the bath well-mixed and filter out debris to prevent defects.
- Pause protocol: If the line stops, ensure parts remain submerged and agitated to prevent uneven build or drying.
-
Rinse
- Ultrafiltration rinse control: Use ultrafiltration to recover paint solids and maintain rinse water purity. Monitor for carryover and ensure rinse water is clear.
- Visual cleanliness: Inspect parts post-rinse for streaks, drips, or visible residue. Re-rinse if needed.
-
Cure
- Oven loading: Arrange parts with adequate spacing to ensure uniform airflow.
- Oven cure verification e coat: Use thermocouples or IR sensors to confirm part temperatures meet cure specifications (e.g., 375°F for 20–30 minutes, a typical range recommended by many paint suppliers).
- Document bake records: Track oven times and temperatures for each batch for traceability and troubleshooting.
No uncontrolled carryover between stages—each step must be verified before moving to the next to prevent defects and contamination.
Operator Tasks and Decision Points
- Check and record bath chemistry (pH, conductivity, solids) before each shift.
- Visually inspect racking for proper contact and part orientation.
- Monitor and log cleaning and conversion bath titrations.
- Verify rinse clarity and ultrafiltration function.
- Confirm oven setpoints and actual part temperatures during cure.
- Pause line if any acceptance check fails—do not proceed until corrected.
Imagine running a batch of control arms: if a single part fails the water break test or comes out with streaks after rinsing, that part is held back for rework. This attention to detail at every handoff is what separates reliable e-coat lines from those plagued by rework and warranty claims.
Embedding Quality and Traceability
For automotive applications, it’s not just about following steps—it’s about documenting every decision. Incorporate lot traceability, clear labeling, and sample retention procedures for each batch. This ensures you can trace any issue back to its source and demonstrate compliance with OEM and industry standards.
By embedding these practical SOPs and operator checkpoints, your e-coat line will be set up for consistent, high-quality output—shift after shift. Next, we’ll dive into how bath management and contamination control keep your process running at peak performance.
Bath Control, Replenishment, and Contamination Defense
What to Monitor in the E-Coat Bath
Ever had a batch of parts come out less than perfect, even though every step seemed right? Often, the answer lies in the unseen world of e coat bath management. The quality of your electrophoresis coating depends on a well-controlled, contamination-free bath. But what should you actually monitor to keep things running smoothly?
- Solids Content: The percentage of pigment and resin in the bath (typically 10–20% by weight) is crucial. Too low, and you’ll struggle with film build and robustness; too high, and you risk poor appearance and excess waste. Agitation is key to keeping solids evenly suspended.
- pH: For cationic systems, keep pH between 6.0 and 6.8; for anionic, pH should be above 7.0. Even small pH shifts can dramatically impact film quality and bath stability.
- Conductivity: Indicates the bath’s ability to conduct electricity, which drives deposition. High conductivity may signal contamination by ionic species (like pretreatment chemicals or poor-quality water), while low conductivity can mean insufficient resin.
- Temperature: Bath temperature directly affects conductivity readings and deposition rates. Always measure at 25°C (77°F) for accuracy.
- Ultrafiltration Permeate Quality: Ensures rinse and recovery systems are working, keeping contaminants out and valuable paint in.
- Contamination Screening: Regularly check for oils, surfactants, metals, and particulates from pretreatment, filtration, or the environment. Even trace contaminants can cause defects or inconsistent coverage.
Sampling should follow a tight schedule—ideally every shift for core parameters (solids, pH, conductivity), and daily or weekly for deeper contamination screening. Always align with OEM or supplier recommendations to avoid gaps in your control plan.
Sampling and Replenishment Workflow
Keeping an e-coat bath in spec is a balancing act. Imagine your bath as a living system—small, frequent adjustments keep it stable and predictable. Here’s a practical workflow for replenishment calculations and control:
- Measure all key parameters (solids, pH, conductivity, temperature) at the start of each shift.
- Compare results to control limits—these are set by your paint supplier or OEM specs. For example, solids might need to stay between 14.0 and 16.0%, and conductivity between 950 and 1,250 μmhos/cm for a cationic epoxy bath [reference].
- Calculate necessary additions using supplier-provided curves or formulas. For low solids, add fresh resin or pigment paste. For high conductivity, purge permeate to waste and replenish with deionized water.
- Log every adjustment and action in a dedicated bath management record.
- Verify that post-adjustment readings are within spec before resuming production.
Small, frequent corrections stabilize the system better than large, reactive changes.
Don’t forget to calibrate your lab instruments regularly—daily for pH and conductivity meters, monthly for balances and ovens—to ensure your data is trustworthy.
Contamination Control and Recovery
Wondering why even the best-run lines sometimes struggle with defects? Contamination is a silent disruptor. Oils, dust, or metals can sneak into the bath through poor pretreatment, faulty filtration, or environmental exposure. Here’s how to defend your system:
- Reliable Filtration and Circulation: Clean or replace filters regularly; ensure pumps keep solids suspended and bath chemistry uniform.
- Proper Pretreatment: Make sure parts are fully degreased and rinsed before entering the bath. Skipping this step is a top cause of contamination.
- Routine Cleaning: Schedule tank and line cleaning to remove settled sludge and prevent buildup in pipes and anodes.
- Environmental Controls: Use high-quality water, control dust, and monitor humidity in the line area.
- Disciplined Operator Practices: Train staff to follow SOPs for chemical addition, sample handling, and maintenance.
When contamination or process upsets do occur, prompt troubleshooting is vital. Here’s a simple corrective-action checklist for common issues:
- Foaming: Check for detergent carryover from pretreatment or excessive agitation. Adjust rinse and agitation parameters.
- Poor Throw or Coverage: Inspect electrical connections, bath conductivity, and solids. Look for rack contact issues or low bath temperature.
- Low Film Build: Verify solids and resin content, check for excessive purge or water dilution, and confirm correct voltage settings.
Each issue should trigger a root-cause review—starting with pretreatment, then moving to electrical supply and filtration health. For persistent problems, escalate to engineering and consult with your paint supplier or technical bulletins for deeper guidance on troubleshooting and recovery.
Proper e coat bath management, regular ultrafiltration maintenance, and disciplined contamination defense are the backbone of consistent, high-quality automotive finishes. In the next section, we’ll explore how in-process and final quality checks verify that all these controls deliver the performance your customers expect.
Quality Control and Performance Verification
In-process and final inspections that matter
When you’re coating high-value automotive parts, how do you know every surface is truly protected? The answer: a layered quality control approach that catches issues early and verifies performance at the end. Imagine running a line of chassis components—wouldn’t you want confidence that each part is not just coated, but coated right?
Quality assurance for electrophoresis coating starts on the line with in-process checks that serve as your first defense against defects:
- Cleanliness confirmation: Water break tests or visual inspections confirm the part is free of oils and contaminants before coating.
- Bath titrations and conductivity checks: Regular measurement ensures chemistry stays within the optimal window for film build and adhesion.
- Oven cure confirmation methods: Thermocouples or IR sensors verify that parts reach and maintain the specified cure temperature (e.g., 375°F for 20–30 minutes, a common industry benchmark). This step is essential to achieving full crosslinking and mechanical strength.
These checks help operators catch issues—like poor cleaning or undercured films—before the parts ever leave the line.
Performance tests and standards to reference
But what about verifying that the e-coat actually delivers protection? That’s where standardized lab tests come in. These are your proof points for customers and regulators alike. Here’s a practical list of the most common tests for automotive e-coat quality:
- E coat film thickness measurement: Use non-destructive gauges (magnetic induction or eddy current) or cross-sectional microscopy to confirm the film meets spec—typically 12–30 microns for automotive applications.
- ASTM adhesion testing e coat: Methods like crosshatch (ASTM D3359), scrape (ASTM D2197), or pull-off (ASTM D4541) quantify how well the coating sticks to the substrate [ASTM].
- Salt spray corrosion test e coat: Accelerated corrosion tests (e.g., ASTM B117) simulate harsh environments and confirm the coating’s barrier performance.
- Flexibility and impact resistance: Mandrel bend (ASTM D522) and impact (ASTM D2794) tests ensure the coating can withstand forming, handling, and service stresses.
- Hardness: Pencil (ASTM D3363) or indentation (ASTM D1474) tests check the cured film’s resistance to scratching and marring.
- Electrical continuity (holiday testing): High-voltage probes detect pinholes or bare spots, confirming complete coverage—especially critical for corrosion protection on complex shapes.
Adhering to recognized standards from ASTM, ISO, or SAE ensures your results are credible and comparable across the industry. For OEMs and Tier 1 suppliers, these tests are often embedded in the PPAP control plan e coat requirements—so always align your sampling and acceptance criteria with customer specs.
Each test targets a different failure mode: adhesion checks the coating’s grip, corrosion tests the barrier, and continuity ensures total coverage—no shortcuts allowed.
Responding to failing results
What if a part doesn’t pass? Don’t panic—follow a structured response playbook to protect your process and reputation:
| Step | Action |
|---|---|
| 1. Quarantine | Isolate affected batch or parts to prevent shipment of non-conforming product. |
| 2. Retest | Repeat failed tests to rule out operator or equipment error. |
| 3. Review logs | Check bath chemistry, pretreatment, and oven cure records for anomalies. |
| 4. Correct | Adjust process parameters, retrain operators, or repair equipment as needed. |
| 5. Release | Only after passing retests and documenting corrective actions per PPAP or OEM plan. |
Sampling frequency should be risk-based—higher for critical parts or when starting a new line, and always in line with OEM and industry requirements. For automotive, refer to PPAP or customer control plans for guidance, rather than inventing arbitrary sample sizes.
By embedding these layered controls, you’ll catch issues early, validate your process, and deliver e-coated components that stand up to the harshest road and weather conditions. Next, let’s look at how thoughtful design and material choices can make—or break—your e-coat results.
Design for E Coat
Geometry-Driven Coverage and Throwing Power
When you’re designing a part for electrophoresis coating, have you ever wondered why some areas end up perfectly protected while others show thin spots or even bare metal? It often comes down to geometry. E-coat excels at reaching complex recesses, but smart design choices can make a dramatic difference in coverage consistency and corrosion resistance.
- Orient drain paths: Always design parts with open drain holes at the lowest points. This allows coating to flow freely in and out, preventing trapped air bubbles and ensuring uniform film build.
- Vent blind cavities: Add vents to enclosed or deep features so the e-coat bath and rinse water can circulate. Without venting, you risk voids and incomplete protection.
- Space features for rinsing: Clustered or tightly spaced features can block bath flow and rinsing, leaving residue or thin spots. Provide enough gap for solution movement.
- Smooth sharp edges: Rounded or chamfered edges coat more evenly and are less prone to thin film or chipping—critical for long-term corrosion defense.
- Ensure robust rack contact: Parts must be racked to guarantee solid electrical contact. Poor connection leads to incomplete or patchy coating.
Imagine a stamped bracket with deep pockets and sharp corners. By simply adding a drain hole at the bottom and rounding the edges, you’ll notice the e-coat film becomes more uniform—reducing the risk of rust and costly rework down the line.
Material Pairings and Pretreatment Nuances
Not all metals are created equal when it comes to e-coating. The process works best on conductive materials, but each substrate type demands tailored pretreatment for optimal results:
- Steel: Standard alkaline cleaning followed by a phosphate conversion coating is typical. This step boosts adhesion and corrosion resistance.
- Galvanized steel: Requires careful cleaning to avoid damaging the zinc layer. Some lines use specialized activation before phosphating to ensure robust e coat coverage in recesses and on flat areas alike.
- Aluminum: Needs non-etch or zirconium-based pretreatment to prevent pitting and promote adhesion. Consult your supplier’s pretreatment for galvanized and aluminum recommendations for best outcomes.
- Cast alloys or mixed metals: May require special activation or multi-stage pretreatment to address surface oxides and ensure uniform coating.
For assemblies with multiple materials, always verify compatibility with your e-coat supplier and reference OEM specs. Proper preparation is the foundation of durable, defect-free finishes.
Racking, Masking, and Contact Reliability
Ever seen a part come out of the e-coat line with bare spots where the rack touched—or where a hole was masked by accident? That’s why racking and masking e coat practices are just as important as geometry and material selection.
- Racking: Design dedicated rack points on the part—these are locations where electrical contact is made. Keep them away from critical cosmetic areas when possible.
- Masking: Use masking to shield areas that must remain uncoated for assembly, grounding, or sealing. Plan these zones in your drawings and communicate with the coating line in advance.
- Contact reliability: Check that all rack points are clean and free of oxides. Even a small amount of residue can break the electrical path and cause coverage failures.
The electrical path determines coverage—if a part isn’t making good contact, it simply won’t coat properly.
For high-volume automotive parts, consider modular racks with adjustable hooks or crossbars for flexibility and easy cleaning. This reduces downtime and ensures consistent results batch after batch.
Integrating E Coat with Other Finishes
Are you stacking finishes—using e coat as a primer under powder or liquid topcoats? Design adjustments can help. For example, ensure masking zones are compatible with both e-coat and topcoat requirements, and avoid sharp transitions that could cause weak spots in the paint stack. E-coat’s uniform base layer supports strong adhesion and corrosion protection for the entire finish system.
Checklist for Drawing Notes
| Design Element | Best Practice |
|---|---|
| Rack points | Specify locations, keep away from show surfaces |
| Masking zones | Clearly mark uncoated areas for assembly or grounding |
| Touch marks | Define acceptable locations and sizes for rack contacts |
| Drain/vent holes | Include at lowest points and in all deep features |
| Lifting points | Design for handling without damaging finished surfaces |
Before releasing your design, reference OEM drawing standards and finishing guides to codify these notes. This ensures your parts are e-coat ready and will perform reliably in the field.
With thoughtful attention to geometry, material pretreatment, and fixturing, you’ll set your automotive components up for success in the e-coat line—and beyond. Next, we’ll compare e-coat to powder and liquid paint, helping you choose the right process for your application.
Selecting E Coat Versus Powder and Liquid Options for Automotive Components
E coating vs powder coating: Which is right for your part?
When you’re aiming for advanced surface protection on automotive components, you’ll quickly find that e coat isn’t the only contender. Powder coating and liquid paint are also widely used in the industry, each with its own strengths. But how do you decide which process best meets your needs—especially when you’re dealing with complex parts, tough corrosion requirements, or unique appearance goals?
Let’s break down the core differences. Imagine coating a chassis with deep recesses, sharp edges, and tight weld seams. E coat excels here, thanks to its ability to reach every nook via electrical deposition. Now, picture a decorative wheel or a component where a thick, glossy finish and a wide color palette are the top priorities—powder or liquid paint might be your go-to. For heat-sensitive assemblies or ultra-premium custom colors, liquid paint often takes the lead.
| Criteria | E Coat (Electrophoretic) | Powder Coating | Liquid Paint |
|---|---|---|---|
| Coverage in Recesses | Excellent—uniform film in deep cavities and complex geometries | Good—may struggle in tight recesses | Variable—depends on spray technique; often limited in hidden areas |
| Edge Protection | Superior—thin, even build at edges reduces rust risk | Good—can be thicker at edges, but risk of thin spots | Fair—edges prone to thin film or overspray misses |
| Film Build Control | Highly consistent—self-limiting, 12–30 microns typical | Thicker—typically 50–125 microns, less precise on complex features | Variable—depends on operator skill and paint type |
| Corrosion Resistance | Excellent—ideal as a primer; proven in automotive underbody | Very good—especially with thick films; depends on substrate prep | Good to moderate—can require multiple coats for best results |
| Color & Gloss Range | Limited—usually black or neutral primer shades | Wide—hundreds of colors and gloss levels available | Extensive—custom colors, effects, and gloss possible |
| Appearance Class | Functional—smooth, uniform, but not decorative | Decorative—high-gloss, texture, and special effects possible | Decorative—can achieve mirror, matte, or specialty finishes |
| Line Speed & Throughput | High—ideal for automated, high-volume production | Moderate—batch or continuous lines, but slower than e coat | Variable—depends on cure times and process setup |
| Reworkability | Challenging—removal requires stripping | Moderate—can be recoated or stripped and redone | High—easy to spot-repair or blend |
| Typical Use Cases | Automotive chassis, underbody, complex stampings, corrosion primer | Wheels, brackets, covers, decorative and exterior parts | Body panels, trim, custom finishes, heat-sensitive parts |
Where liquid paint still makes sense
Liquid paint remains relevant for situations that demand extreme visual quality, complex color effects, or when working with substrates that can’t handle the high cure temperatures of powder or e coat. For example, trim pieces with chrome-like finishes or heat-sensitive electronics housings are often finished with liquid paint. In automotive, it’s also the standard for final color and clearcoat layers, providing that showroom gloss and depth.
Decision cues for automotive components
- Choose e coat for: Complex parts needing full-coverage corrosion priming, especially where edge protection and uniformity are critical (e.g., chassis, control arms, subframes).
- Choose powder coating for: Thicker, decorative topcoats on simple to moderately complex parts—think wheels, engine covers, or brackets that benefit from both durability and color variety.
- Choose liquid paint for: Extreme appearance requirements, custom colors, or heat-sensitive assemblies where low-temperature curing is essential.
Stacking processes—using e coat as a primer beneath powder or liquid topcoats—often yields the best balance of corrosion resistance and aesthetics for demanding automotive specs.
By understanding these differences, you’ll be able to make an informed coating selection for complex parts and deliver both protection and appearance that meet modern automotive standards. In the next section, we’ll discuss how to select the right partner for integrated metal processing and e coat application—ensuring your quality and delivery targets are met every time.
Partner Selection and Integrated Manufacturing Advantages
How to Choose an E Coat Partner
When you’re outsourcing electrophoretic coating services for automotive components, the stakes are high. You want a partner who not only delivers flawless finishes but also supports your quality, traceability, and delivery goals. But how do you sift through the options and select a provider who truly adds value across the entire supply chain?
Imagine this scenario: Your next project demands rapid prototyping, high-precision stamping, advanced surface treatments, and seamless assembly—plus full documentation for your PPAP submission. Wouldn’t it be easier if one partner could handle it all, reducing handoffs and keeping every process step under a single quality system?
- Shaoyi – IATF 16949 e coat provider and integrated metal processing partner: Offers end-to-end solutions from prototyping and stamping to e coat and assembly, backed by certified quality systems and robust PPAP support.
- Documented SOPs and bath control logs: Look for providers with well-defined operating procedures and comprehensive records of bath chemistry, maintenance, and process adjustments.
- Full traceability: Your supplier should offer lot-level tracking, labeling, and sample retention to meet OEM and regulatory requirements.
- PPAP support surface finishing: Ensure your partner can provide all necessary documentation, quality records, and sample parts for pre-production approval.
- Pretreatment diversity for mixed metals: The ability to process steel, galvanized, and aluminum parts on the same line is a plus.
- Racking design support: Custom fixture and racking solutions help guarantee consistent coverage and reliable electrical contact.
- Lead-time reliability: Consistent, on-time delivery is critical—especially for just-in-time automotive supply chains.
According to industry best practices, supplier selection should also include evaluation of technical depth, financial stability, and the ability to manage complex change or scale production as your needs evolve. Always review the supplier’s quality management system certifications (IATF 16949 is the automotive gold standard) and request recent audit results or customer feedback for added confidence [reference].
Process integration—from stamping through surface finish—reduces handoffs, minimizes variation, and streamlines your control plan. The fewer the transitions, the smoother your path from prototype to production.
Benefits of Integrated Metal Processing
Why should you consider an integrated partner for your next automotive project? Here’s what you stand to gain:
- Single point of accountability: One provider coordinates all steps, simplifying communication and troubleshooting.
- Faster development cycles: Rapid prototyping and fixture design in-house mean you get to market sooner.
- Aligned quality systems: IATF 16949 certification ensures every process step—fabrication, e coat, and assembly—meets rigorous automotive standards.
- Seamless PPAP and documentation: Integrated teams can deliver full pre-production approval packages without chasing multiple suppliers.
- Optimized logistics: Fewer shipments, less packaging waste, and minimized risk of damage or mix-ups between process steps.
For complex, high-stakes automotive programs, these advantages can make the difference between a smooth launch and costly delays. You’ll notice improved consistency, better traceability, and a more agile response to engineering changes or quality concerns.
Next Steps and Who to Contact
Ready to move forward? Here are a few practical tips before you finalize your supplier:
- Request detailed process flowcharts and SOPs from each candidate.
- Ask for recent PPAP submissions or customer references in the automotive sector.
- Tour the facility—look for evidence of disciplined bath management, traceability systems, and cross-functional engineering support.
- Clarify capacity, lead times, and contingency plans for supply interruptions.
- Ensure alignment on quality expectations, documentation needs, and communication protocols.
If you’re seeking an IATF 16949-ready, fully integrated path from metal forming through e coat and final assembly, explore Shaoyi’s solutions for automotive and Tier 1 suppliers. Their comprehensive approach empowers you to meet demanding quality, timing, and documentation requirements—without the complexity of managing multiple vendors.
By choosing the right electrophoretic coating services partner, you’ll set your program up for consistent quality, streamlined launches, and long-term success in the competitive automotive market.
Frequently Asked Questions About Electrophoresis Coating for Automotive Components
1. What is the primary purpose of electrophoresis coating in automotive manufacturing?
Electrophoresis coating, or e-coat, is primarily used to provide a uniform, corrosion-resistant layer on automotive metal parts. This process ensures complete coverage, even in complex geometries and hidden recesses, significantly reducing the risk of rust and extending the lifespan of components.
2. How does e-coating compare to powder coating and liquid paint for automotive parts?
E-coating excels at covering complex shapes and edges with a thin, even film, making it ideal as a corrosion-resistant primer. Powder coating offers a thicker, decorative finish with a wide color range, while liquid paint is best for high-appearance requirements and heat-sensitive assemblies. Many automotive applications use e-coat as a primer under powder or liquid topcoats for optimal protection and appearance.
3. What thickness is typical for electrophoresis coating on automotive components?
E-coat film thickness for automotive parts typically ranges from 12 to 30 microns. This thin, consistent layer provides excellent corrosion resistance while maintaining precise dimensional tolerances, ensuring both protection and fit for assembled components.
4. What should I look for when selecting an electrophoresis coating supplier?
Choose a supplier with IATF 16949 certification, robust quality systems, documented SOPs, bath management expertise, and strong PPAP support. Integrated providers like Shaoyi offer end-to-end services, from metal forming to e-coat and assembly, streamlining quality control and reducing lead times for automotive projects.
5. Can e-coat be used on all types of automotive metals?
E-coat is suitable for conductive metals such as steel, galvanized steel, and aluminum. Each material may require tailored pretreatment, like special activation for galvanized or aluminum parts, to ensure optimal adhesion and corrosion protection. Always consult with your supplier for compatibility and process recommendations.