 Small batches, high standards. Our rapid prototyping service makes validation faster and easier —

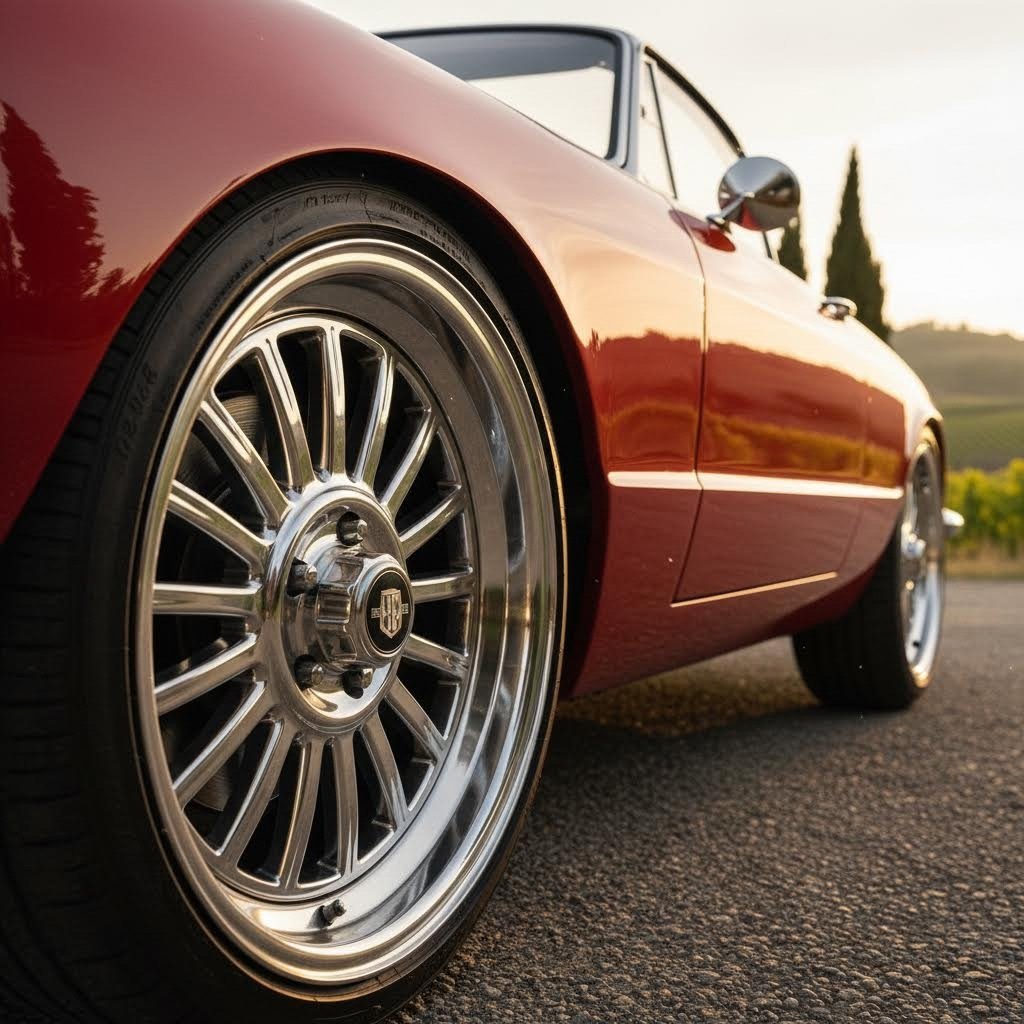
Restoring Vintage Forged Wheels Without Destroying Their Value

Understanding What Makes Forged Wheels Worth Restoring
Ever wondered why some vintage wheels command thousands of dollars while others barely fetch scrap value? The answer lies in how they were made. When you're considering restoring vintage forged wheels, you're not just preserving metal—you're safeguarding engineering excellence that simply cannot be replicated through cheaper manufacturing methods.
The Forging Difference That Matters
Imagine taking a solid block of aluminum and subjecting it to extreme pressure—we're talking thousands of pounds per square inch. This intense compression fundamentally transforms the metal's internal structure. Unlike cast wheels where molten aluminum is simply poured into a mold and left to cool, the forging process aligns the grain structure of the metal, creating a denser, stronger product with superior structural integrity.
Here's what makes this manufacturing distinction so critical:
- Superior strength-to-weight ratio: Forged wheels achieve maximum strength with optimal lightness, allowing manufacturers to use less material without sacrificing durability
- Enhanced impact resistance: The compressed grain structure means these wheels bend rather than shatter under extreme stress—a crucial safety advantage
- Reduced unsprung weight: Lighter wheels improve acceleration, braking efficiency, and overall handling dynamics
- Longevity under stress: The dense molecular structure withstands years of high-intensity use that would fatigue lesser wheels
Flow-formed wheels attempt to bridge the gap by spinning and heating cast wheel barrels under pressure, but they still can't match the comprehensive strength of a wheel forged entirely from billet aluminum. When you find vintage mag wheels or old mags from respected manufacturers, you're looking at craftsmanship that prioritized performance over production speed.
Why Vintage Forged Wheels Deserve Preservation
So why invest time and resources into restoration rather than simply buying new? Beyond the obvious collector value and nostalgic appeal, vintage forged wheels often represent manufacturing standards that are increasingly rare today. Many classic chromatic wheels were produced during an era when quality craftsmanship took precedence over cost-cutting measures.
A properly maintained forged wheel can outlast the vehicle it was originally mounted on—often by decades. The same structural integrity that made them premium components when new makes them exceptional restoration candidates today.
These wheels command premium restoration attention because their inherent quality justifies the investment. When you clean debris from each wheel well during your restoration process, you're uncovering metal that was engineered to perform at the highest levels. Standard cast alloy wheels, while functional, lack the dense grain structure that allows forged examples to be refinished repeatedly without compromising their structural foundation.
Throughout this guide, we'll take a safety-first approach to restoration—one that prioritizes structural integrity assessment before any cosmetic work begins. Whether you're preserving a set of classic racing wheels or bringing family heirloom rims back to showroom condition, understanding what makes these components special ensures you'll protect both their value and their legendary performance characteristics. Proper storage using appropriate car covers between driving seasons further extends their lifespan, protecting your restoration investment for years to come.
Pre-Restoration Safety Assessment Framework
Before you reach for that headlight restoration kit or start planning your wheel makeover, there's a critical step that separates professional-quality restoration from dangerous oversight. Just as you wouldn't attempt paintless dent repair on a structurally compromised panel, you must never restore a forged wheel without first confirming its structural integrity. This assessment isn't optional—it's the foundation of safe restoration practice.
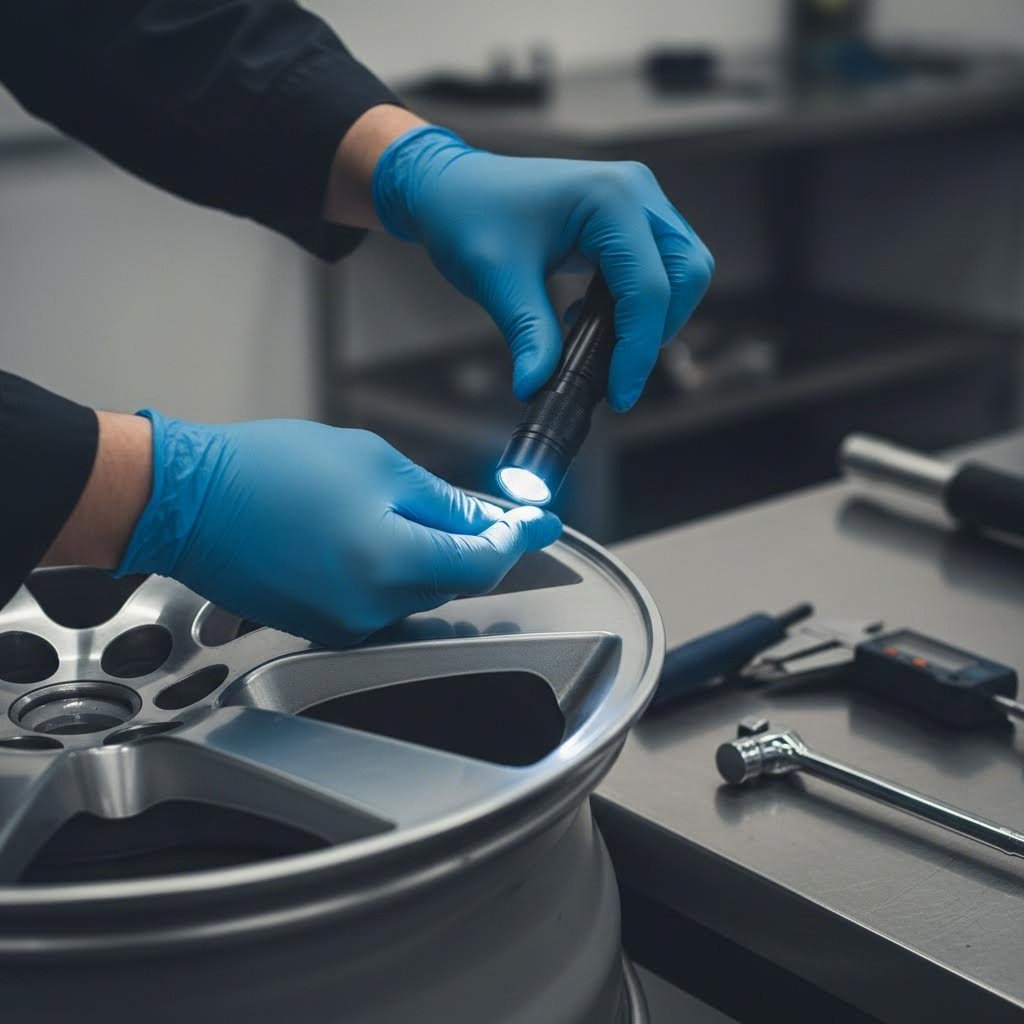
Critical Stress Points to Inspect Before Starting
Forged wheels experience tremendous forces during normal driving. Every pothole, hard braking event, and aggressive corner subjects specific areas to concentrated stress. Before investing hours into cosmetic restoration, grab a bright flashlight and examine these high-risk zones:
- Lug hole surroundings: Look for hairline cracks radiating outward from each mounting hole. These areas endure constant torque cycling and are prime candidates for fatigue failure
- Spoke bases: Where spokes meet the hub center, stress concentrations can initiate microscopic fractures that grow over time
- Barrel seams: On multi-piece forged wheels, inspect the joints between wheel components for separation or cracking
- Inner barrel surface: Check for impact damage from tire mounting equipment or road debris that may have penetrated through the tire
- Valve stem hole: This small hole creates a stress riser that can propagate cracks under sustained pressure cycling
When inspecting stubborn, corroded areas, applying PB Blaster to frozen hardware helps you remove components for thorough examination without causing additional damage to surrounding surfaces.
For thorough crack detection, visible dye penetrant testing offers an affordable, DIY-friendly solution. According to Grassroots Motorsports, this method reveals surface-breaking flaws as vivid red lines against a white developer background—making even hairline fractures impossible to miss. The process involves applying a thin red dye penetrant to a thoroughly cleaned surface, allowing it to seep into any cracks for 5-30 minutes, wiping away excess dye, then spraying white developer that draws any trapped dye back to the surface.
When a Wheel Should NOT Be Restored
Here's the difficult truth: not every vintage forged wheel deserves a second life. Some damage crosses the line from cosmetic concern to structural compromise. Recognizing this boundary protects both your safety and your investment.
Retire the wheel immediately if you discover any of these conditions:
- Cracks at spoke bases or lug holes: These indicate fatigue failure that will only worsen under continued use
- Visible porosity revealed by dye testing: Random red dots scattered across the surface suggest internal material defects
- Evidence of prior welding repairs: Amateur weld repairs on load-bearing areas compromise the forged grain structure
- Severe curb damage affecting structural geometry: Bends or dents that distort the wheel's true round shape create dangerous imbalances
- Deep corrosion pitting: Surface oxidation is treatable, but corrosion that has eaten into the metal thickness reduces structural capacity
- Heat damage indicators: Discoloration from brake heat or fire exposure can alter the alloy's temper and strength properties
Understanding your wheel's alloy composition helps inform restoration decisions. Most vintage forged wheels use either 6061 or 7075 aluminum alloys, and each presents unique considerations. According to AMSpec Inc., 6061 aluminum offers excellent corrosion resistance and is highly weldable, making it more forgiving for restoration work. However, 7075 aluminum—while significantly stronger with tensile strength of 572 MPa compared to 6061's 310 MPa—is more susceptible to stress corrosion cracking and is not considered weldable without specialized techniques.
| Alloy Type | Restoration Considerations | Red Flags |
|---|---|---|
| 6061 Aluminum | Excellent corrosion resistance; weldable for minor repairs; responds well to anodizing and protective finishes | Post-weld heat treatment may be needed to restore strength in heat-affected zones |
| 7075 Aluminum | Superior strength and fatigue resistance; machines cleanly for refinishing | Susceptible to stress corrosion cracking; avoid welding—fusion welding causes hot cracking and mechanical integrity loss |
| Magnesium Alloys | Extremely lightweight but highly reactive; requires specialized cleaning chemicals | Corrosion spreads rapidly; fire hazard during grinding; professional assessment strongly recommended |
Magnesium wheels—sometimes found on vintage racing applications—demand extra caution. These alloys corrode aggressively and present fire hazards when ground or sanded improperly. If you suspect magnesium construction, consult a professional before proceeding.
Think of this assessment phase like a leather repair kit approach: you're evaluating whether the underlying material is sound enough to support restoration. Cosmetic damage—scratches, oxidation, worn finishes—can be addressed. Structural compromise cannot be fixed through refinishing alone. Taking time to clean headlights on your vehicle improves visibility; taking time to properly assess your wheels before restoration protects your life.
Once you've confirmed your forged wheels pass structural inspection, you're ready to tackle the deep cleaning and surface preparation that sets the stage for professional-quality results.
Deep Cleaning and Surface Preparation Techniques
You've confirmed your vintage forged wheels are structurally sound—now comes the transformation. But here's what many enthusiasts get wrong: rushing straight into sanding or polishing without proper surface preparation. Think of it like painting a wall without priming first. The results will disappoint, and you'll waste hours correcting preventable mistakes.
Proper cleaning and preparation isn't just about aesthetics—it's about creating the foundation for every subsequent restoration step. Contaminants left behind will telegraph through your final finish, and chemical residues can interfere with protective coatings. Let's get this right.
Chemical Preparation for Different Finish Types
Before selecting your cleaning approach, identify what you're dealing with. Vintage forged wheels typically feature one of several finish types, each requiring a tailored stripping strategy:
- Clear-coated polished aluminum: The clear coat must be removed before addressing oxidation beneath
- Powder-coated finishes: These durable coatings require aggressive chemical stripping or media blasting
- Bare polished aluminum: Skip stripping—proceed directly to oxidation removal and cleaning
- Painted finishes: Standard paint strippers work effectively on most automotive paints
For powder-coated wheels, specialized aluminum wheel strippers offer the safest approach. According to MILES Chemical Solutions, their low-temperature stripping products can remove powder coating from aluminum wheels in approximately one hour when used at 150°F. The process requires a polypropylene or stainless steel tank, immersion heater, and mechanical agitation—never air agitation, which causes oxidation and decreases chemical bath life.
For DIY restorers without professional stripping equipment, brush-on gel strippers like MILES #8659 work at room temperature, removing clear coat and powder coating in 1-3 hours for domestic wheels. European and Japanese wheels with harder coatings may require overnight application. After stripping, loose coating can be removed with a spark-less scraper or steel wool pads.
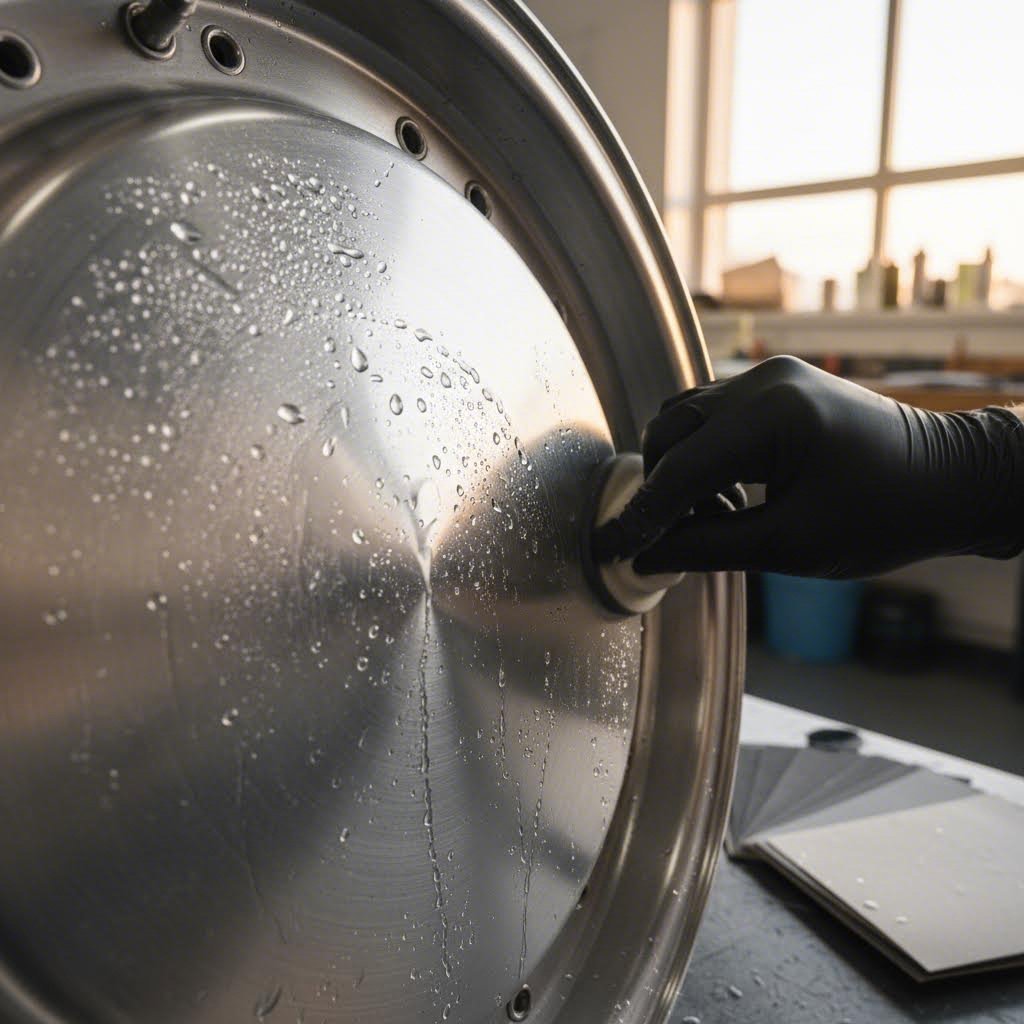
Removing Decades of Contamination Safely
Vintage wheels accumulate layers of contamination that standard washing can't address. Brake dust—particularly from metallic and semi-metallic pads—embeds iron particles into the wheel surface. Road grime, industrial fallout, and oxidation compounds create a contamination cocktail that must be systematically eliminated.
Here's the professional-grade cleaning sequence that ensures thorough preparation:
- Initial debris removal: Use a stainless steel wire brush to dislodge caked-on grime, brake dust deposits, and loose debris. Work dry at this stage to avoid creating muddy paste that hides contamination
- Pressure rinse: An electric pressure washer delivers the most effective results here, blasting away loosened particles from spoke crevices, lug hole recesses, and barrel surfaces. Standard garden hoses work but require more manual effort
- All purpose cleaner application: Apply a quality automotive all purpose cleaner liberally across all wheel surfaces. These formulations cut through grease and road film without damaging aluminum alloys
- Agitation and scrubbing: Use dedicated wheel brushes in various sizes to reach every surface. Soft-bristled brushes for faces, stiffer brushes for barrels, and small detail brushes for lug holes and valve stems
- Iron fallout treatment: Apply a pH-neutral iron remover that chemically dissolves embedded brake dust. Watch for the characteristic purple color change indicating iron particle dissolution
- Degreasing: Before any abrasive work, thoroughly degrease using a dedicated automotive degreaser. This step is critical—oil contamination prevents proper adhesion of polishes and protective coatings
- Final rinse and inspection: Rinse thoroughly with clean water. A handheld steam cleaner excels at reaching tight areas and removing residual chemical traces without leaving water spots
For wheels with extremely stubborn contamination—perhaps stored in damp garages for decades—you might need to repeat certain steps. Some restorers find that carpet cleaner solution applied to heavily soiled wheels helps break down organic contamination that standard wheel cleaners miss, though this should be thoroughly rinsed before proceeding.
Health Precautions You Cannot Ignore
Here's what most restoration guides neglect to mention: working with aluminum creates genuine health hazards. When you sand or grind forged aluminum wheels, you generate fine metallic dust that poses respiratory risks. Chemical strippers contain aggressive compounds that can cause serious burns and emit harmful vapors.
Protect yourself with these non-negotiable precautions:
- Respiratory protection: Use a P100 respirator when sanding aluminum—paper dust masks are inadequate for metal particles
- Chemical-resistant gloves: Standard latex gloves dissolve in contact with many strippers. Use nitrile or butyl rubber gloves rated for chemical exposure
- Eye protection: Sealed safety goggles—not just glasses—prevent chemical splashes and aluminum dust from reaching your eyes
- Ventilation: Work outdoors or in well-ventilated spaces. Chemical strippers release volatile organic compounds that accumulate in enclosed areas
- Skin coverage: Long sleeves and closed-toe shoes protect against chemical splashes and hot metal particles from grinding
Unlike using an upholstery cleaner on interior fabrics or tackling a carpet stain remover project, aluminum restoration involves materials that can cause permanent harm if handled carelessly. The awesome cleaner formulations marketed for household use aren't appropriate here—automotive-specific products designed for aluminum compatibility are essential.
With your wheels now stripped of old finishes, decontaminated, and properly degreased, you're positioned for the most transformative phase of restoration: the systematic sanding and polishing progression that creates mirror-quality surfaces.
Mastering the Sanding and Polishing Progression
Here's where restoration success or failure is truly determined. You've cleaned your vintage forged wheels down to bare metal—now what? Many enthusiasts grab whatever sandpaper is handy and start scrubbing, only to discover hours later that their finish looks cloudy, scratched, or uneven. The difference between amateur results and professional-quality restoration lies in understanding why each sanding stage matters and executing the progression with discipline.
Think of it this way: each grit level erases the scratches left by the previous one while leaving progressively finer marks of its own. Skip a step, and you're asking a finer grit to remove scratches it simply cannot eliminate. The result? Visible scratch patterns trapped beneath your polish that haunt every angle of reflected light.
The Science Behind Grit Progression
Sandpaper grit numbers indicate how many abrasive particles fit within one square inch of the backing material. Lower numbers mean larger, more aggressive particles that cut deeper into the metal surface. Higher numbers feature smaller particles that refine and smooth the surface incrementally.
When you sand forged aluminum with 220-grit paper, you're creating thousands of tiny parallel scratches approximately 0.003 inches deep. Jump directly to 1000-grit, and those finer particles can only penetrate about 0.0005 inches—nowhere near deep enough to eliminate the coarser scratches beneath. According to National Abrasives, Inc., as the sandpaper gets finer, it removes the small scratches left behind by the previous grit—making each intermediate step essential rather than optional.
Here's the critical progression for restoring vintage forged wheels to mirror finishes:
| Grit Level | Purpose | Scratch Depth | Consequence of Skipping |
|---|---|---|---|
| 220-grit | Initial material removal; eliminates deep scratches, curb rash, and heavy oxidation | ~0.003" | Starting point—cannot skip. Deeper damage requires professional attention |
| 400-grit | Refines 220-grit scratches; removes medium surface imperfections | ~0.0015" | 220-grit scratches remain visible through polish; cloudy, hazy finish results |
| 600-grit | Further refinement; prepares surface for fine finishing stages | ~0.001" | Visible scratch patterns persist; polish cannot achieve true clarity |
| 800-grit | Transitions from correction to finishing; surface begins showing reflectivity | ~0.0007" | Dull spots appear in finished surface; uneven light reflection |
| 1000-grit | Fine finishing stage; prepares aluminum for final polish preparation | ~0.0005" | Micro-scratches visible under direct light; "swirl marks" in final finish |
| 1500-grit | Pre-polish refinement; creates foundation for mirror-quality results | ~0.0003" | Polish cannot achieve maximum brilliance; finish lacks depth |
| 2000-grit (optional) | Ultra-fine preparation for competition-level finishes | ~0.0002" | Only necessary for show-quality restoration; excellent results achievable at 1500 |
According to 2Sand, it's common to start with 220-grit sandpaper and move to finer grits as you remove imperfections. However, choosing a coarser grit than necessary—even when wet sanding—may bite too far into your aluminum wheel and compromise the structure.
For wheels with only light oxidation and minor surface blemishes, you might safely begin at 400-grit. Severe curb rash or deep scratches demand starting at 220-grit. The key is assessing your starting point honestly—beginning too fine means you'll never fully remove deeper damage, while starting too coarse creates unnecessary work.
Wet Sanding Techniques for Mirror Finishes
Should you sand wet or dry? For forged aluminum wheel restoration, the answer depends on your stage in the progression and your specific goals.
Dry sanding works best for initial material removal at coarser grits (220-400). According to National Abrasives, Inc., you should dry-sand the aluminum focusing on major scuff marks, stains, and bumps, then use a clean cloth and denatured alcohol to clean the wheel's surface before proceeding.
Wet sanding becomes essential from 400-grit onward. Here's why this matters:
- Dust control: Wet sanding eliminates airborne aluminum particles that pose respiratory hazards and contaminate your work surface
- Heat management: Water prevents heat buildup that can damage the forged aluminum's temper
- Clog prevention: Water flushes aluminum particles from between abrasive grains, maintaining cutting efficiency
- Surface visibility: Wet surfaces reveal your progress more accurately than dust-covered dry surfaces
- Finer scratch patterns: Water lubrication allows finer grits to perform optimally, creating more uniform scratch patterns
The wet sanding technique is straightforward: keep a spray bottle of clean water handy and mist the surface frequently. Work in overlapping passes, rinsing the wheel and your sandpaper regularly to prevent particle buildup. Before switching to the next grit, rinse thoroughly—any coarse particles trapped on the surface will create deep scratches when you continue.
Polished vs. Painted Wheel Approaches
Your end goal determines your sanding strategy. Restoring a wheel destined for a polished aluminum finish demands completing the entire progression through 1500-grit (or finer) before transitioning to polishing compounds. Every scratch left behind will show in your mirror finish.
For wheels you plan to paint or powder coat, the progression changes significantly. You're creating mechanical adhesion for the coating rather than optical perfection. Stop at 400-grit maximum—finer surfaces actually reduce coating adhesion. Some powder coat applicators prefer surfaces finished at 180-220 grit for optimal bonding.
When tackling polished restoration, using sanding blocks on broad wheel sections promotes even sanding. Power tools with mild pressure ensure a uniform scratch pattern. A random orbital sander with hook-and-loop disc attachment speeds the process dramatically while reducing the risk of creating swirl marks that hand sanding sometimes leaves behind.
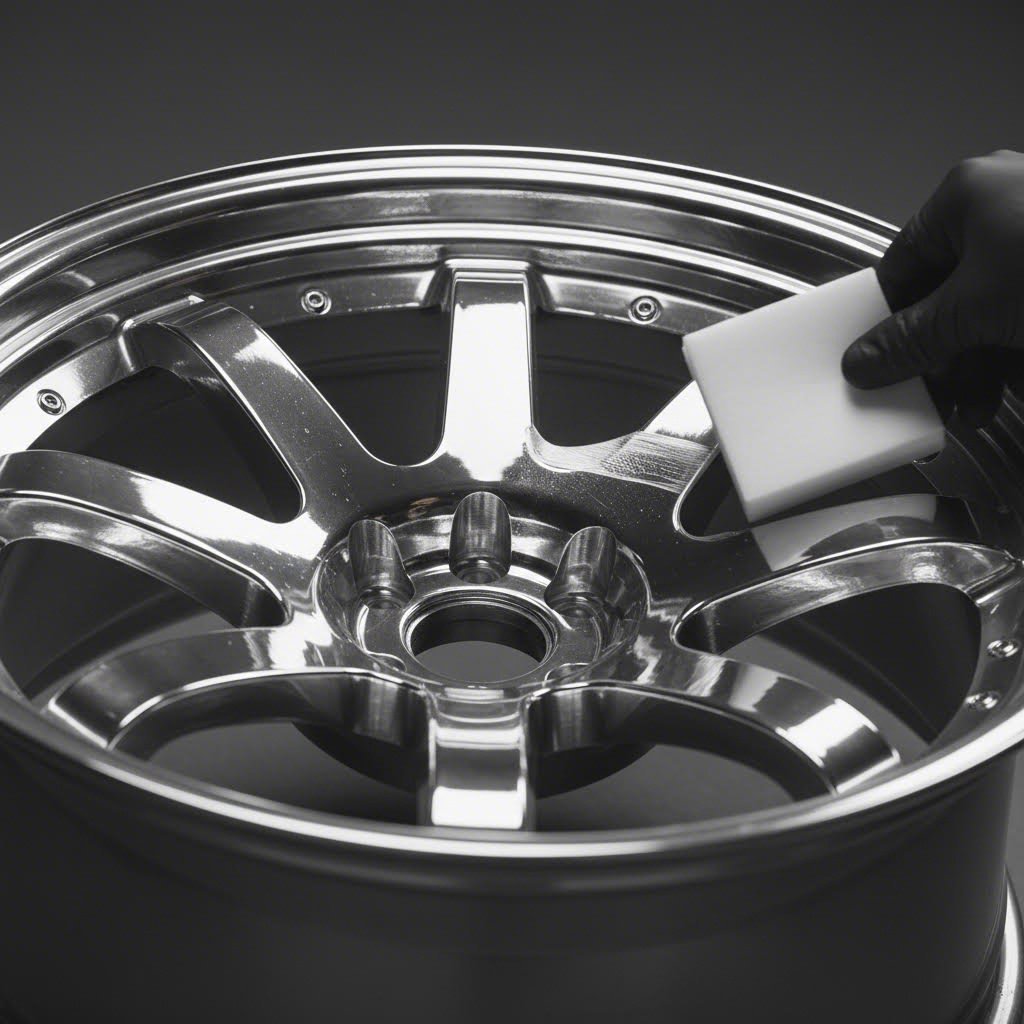
The Transition to Polishing
Once you've completed sanding through your finest grit, the surface should appear uniformly matte with no visible scratches to the naked eye. Run your fingertips across the surface—it should feel perfectly smooth, almost silky. Any roughness indicates remaining scratches that need additional attention at the current grit before proceeding.
The polishing phase uses progressively finer compounds rather than abrasive papers. According to Renegade Products USA, forged wheels use very soft aluminum and do not take much sanding to correct scratches or pitting. They recommend that a Tripoli compound bar paired with a pink airway buffing wheel can fully remove 400 and 600-grit sand marks—meaning your sanding progression creates the foundation that polishing compounds refine into a mirror shine.
Just as a Bissell Steam Shot helps with detailed cleaning in tight spaces, precision matters equally during sanding. Work methodically section by section, maintaining consistent pressure and stroke patterns. Rushing creates uneven surfaces that no amount of polishing can fully correct. The time invested here—often several hours per wheel for heavily damaged examples—directly determines your final result quality.
For competition-level results similar to professional car scratch remover outcomes, consider following your finest sandpaper with automotive headlight restoration compounds before moving to metal polishes. These ultra-fine abrasive liquids bridge the gap between sanding and polishing, creating that coveted headlight cleaner clarity in your aluminum surfaces. The resulting finish—what enthusiasts call that "shiny car stuff" effect—comes only from respecting every stage of the progression.
With your wheels now sanded to perfection, you're ready to select the ideal finishing protection that will preserve your work and showcase that mirror-quality surface for years to come.
Finishing Options and Long-Term Protection
You've invested hours sanding through every grit level and polishing your vintage forged wheels to a mirror finish. Now what? Without proper protection, that pristine surface begins degrading the moment you install the wheels. Brake dust starts embedding, oxidation creeps back, and within weeks your careful work fades into dull disappointment.
Choosing the right protective finish isn't just about durability—it's about matching protection type to your wheel's alloy composition, your driving habits, and your maintenance commitment. Let's explore your options so you can make an informed decision that preserves both appearance and value.
Choosing the Right Protection for Your Finish Type
Four primary protection categories exist for restored forged aluminum wheels, each with distinct characteristics, application requirements, and longevity expectations. Your choice depends on how you plan to use the vehicle and how much ongoing maintenance you're willing to perform.
Clear Coat Application
Automotive clear coat creates a permanent barrier between your polished aluminum and environmental contaminants. This option offers the most robust protection but comes with important caveats. According to Detailed Image, you could have wheels clear coated, and while powder coating is normally preferred for wheels, liquid paint delivers the best finish. Since powder has to cure in the oven, it opens the pores up again and creates more swirls and marks than liquid application.
Clear coat requires proper spray equipment, controlled environment application, and precise curing times—typically 24-48 hours before handling and 7 days before exposure to chemicals or pressure washing. For enthusiasts without spray booth access, professional application runs $150-400 per wheel but delivers years of maintenance-free protection.
Ceramic Coatings
Ceramic coatings represent the premium choice for DIY-friendly permanent protection. These nano-technology formulations bond chemically with aluminum surfaces, creating a hydrophobic layer that repels water, brake dust, and road grime. According to Detailed Image, if you went to the trouble of polishing wheels—especially wheel lips—ceramic coating them makes sense. Products like Gtechniq C1 work great, last long, and are virtually unnoticeable.
Application demands meticulous surface preparation. The wheel must be completely free of oils, polishing residue, and contamination. Apply in thin, even layers using the provided applicator, then allow proper curing time—typically 24 hours before water exposure and 7 days before reaching full hardness. Most quality ceramic coatings deliver 2-5 years of protection with proper maintenance.
Carnauba Wax Protection
Traditional carnauba wax offers warm, deep shine that many purists prefer for show vehicles. This natural product derived from Brazilian palm leaves provides moderate protection while enhancing the visual depth of polished aluminum. The waxing auto process is straightforward—apply thin layers, allow to haze, then buff to brilliance.
The trade-off? Durability. Carnauba wax typically lasts 4-8 weeks under normal driving conditions before requiring reapplication. For trailer queens and show-only vehicles, this maintenance schedule proves acceptable. For daily drivers, the frequent reapplication becomes tedious.
Synthetic Sealants
Synthetic wheel sealants bridge the gap between natural waxes and ceramic coatings. According to Clean Your Car, wheel sealants are designed to bond with the surface of your wheels, creating a robust, non-stick layer. This barrier prevents brake dust and other substances from adhering to the wheel, reducing damage risk and making cleaning easier. Unlike traditional waxes, modern wheel sealants are more durable and require less frequent application.
Quality sealants typically provide 3-6 months of protection with easier application than ceramic coatings—no special curing requirements or multi-day wait times. For enthusiasts who want better-than-wax protection without ceramic coating commitment, sealants offer an excellent middle ground.
Long-Term Preservation Strategies
Matching your protection choice to your wheel's alloy composition prevents compatibility issues that could undermine your restoration work.
| Protection Type | Durability | Application Difficulty | Maintenance Required | Best For |
|---|---|---|---|---|
| Clear Coat | 3-7 years | Professional recommended | Standard washing only | Daily drivers; maximum protection |
| Ceramic Coating | 2-5 years | Moderate (precise prep required) | pH-neutral wash; annual inspection | Enthusiast vehicles; show cars |
| Synthetic Sealant | 3-6 months | Easy | Reapply quarterly; regular washing | Weekend drivers; moderate use |
| Carnauba Wax | 4-8 weeks | Easy | Frequent reapplication; gentle washing | Show vehicles; trailer queens |
For 6061 aluminum wheels, all four protection types work effectively. The alloy's natural corrosion resistance means even lighter protection like carnauba wax provides adequate defense between applications. However, 7075 aluminum's susceptibility to stress corrosion cracking makes ceramic coatings or clear coat preferable—these create continuous barriers that prevent moisture from initiating corrosion cycles.
Magnesium alloy wheels demand extra consideration. Their reactive nature means certain coating chemicals can cause adverse reactions. Always verify product compatibility with magnesium before application, and consider professional ceramic coating installation where technicians understand these material sensitivities.
Beyond protection products, your ongoing care routine determines how long your restoration lasts. Use only pH-neutral wheel cleaners—acidic or alkaline formulas can damage protective coatings and attack aluminum directly. Avoid automatic car washes where harsh brushes and aggressive chemicals strip protection rapidly. When detailing your interior with products like the best car air freshener options, extend that attention to your wheels with proper cleaning products and techniques.
Some enthusiasts apply tire shine products that inadvertently sling onto wheel faces during driving. These silicone-based formulas can contaminate protective coatings and create slippery surfaces that attract more contamination. Apply tire dressings carefully, wiping any overspray from wheel surfaces immediately.
With your protection strategy selected and applied, understanding realistic project timelines helps you plan future restoration work—whether tackling additional wheels or maintaining the investment you've just completed.
Project Timeline and Realistic Expectations
How long does restoring vintage forged wheels actually take? This question plagues every enthusiast staring at a set of neglected classics. The honest answer depends entirely on your starting condition—and understanding realistic timelines prevents the frustration that derails many restoration projects before completion.
Rushing through restoration stages doesn't save time; it creates rework. Each phase builds upon the previous one, and cutting corners at any step compounds into visible defects in your final result. Let's break down what you're really committing to based on your wheels' current condition.
Realistic Timeline by Condition Severity
Your wheels fall somewhere on a spectrum from "light refresh needed" to "major intervention required." Identifying your starting point accurately sets appropriate expectations and helps you plan workspace availability, material purchases, and—critically—your patience reserves.
| Condition Level | Characteristics | Timeline Per Wheel | Complexity Factors |
|---|---|---|---|
| Light Oxidation | Surface haze; minor brake dust staining; no structural damage; finish largely intact | 4-8 hours | May skip coarse sanding stages; primarily cleaning, light polishing, and protection |
| Moderate Damage | Visible scratches; curb rash on lips; oxidation requiring removal; clear coat failure | 8-16 hours | Full sanding progression required; possible filler application; multi-stage polishing |
| Severe Corrosion | Deep pitting; structural concerns requiring inspection; heavy oxidation; previous repair attempts | 20-40+ hours | Professional assessment recommended; chemical stripping; possible welding; extended curing times |
These estimates assume focused work sessions with proper equipment readily available. Add 20-30% to your timeline if you're learning techniques as you go or working with basic tools. Remember—according to East Coast Coatings, full professional refurbishment typically takes around a week, even with dedicated equipment and experienced technicians.
Planning Your Restoration Project Phases
Breaking your project into distinct phases prevents overwhelm and ensures you don't skip critical steps when enthusiasm wanes. Here's how time typically distributes across the restoration process:
- Assessment and inspection (1-2 hours per wheel): Thorough structural evaluation, dye penetrant testing, documentation of damage. Never rush this phase—it determines whether restoration proceeds safely
- Stripping and cleaning (2-4 hours per wheel): Chemical stripping requires soak time; cleaning involves multiple product applications and rinse cycles. Plan for overnight stripping on heavily coated wheels
- Sanding progression (3-10 hours per wheel): The most variable phase. Light oxidation may need only 400-grit starting point; severe damage demands full 220-through-1500 progression with each grit requiring 30-60 minutes of careful work
- Polishing (1-3 hours per wheel): Multiple compound stages with buffing between each. Temperature management requires rest periods between passes
- Protection application and curing (1-2 hours active; 24-168 hours curing): Application is quick, but ceramic coatings and clear coats require extended cure times before handling or installation
Several factors extend these timelines significantly:
Deep corrosion doesn't respond to surface treatments alone. Pitting requires careful filler application—similar to using automotive touch up paint on body panels—with proper curing between layers. Each filler application adds 4-8 hours including sanding and feathering.
Structural repairs requiring professional welding introduce external dependencies. Finding qualified aluminum welders, transporting wheels, and coordinating schedules can add weeks to your project. Post-weld heat treatment (especially for 6061 aluminum) adds additional time before cosmetic work can resume.
Multi-coat refinishing compounds curing requirements. If your restoration plan includes primer, color coats, and clear coat, each layer needs proper flash time and full cure before the next application. Don't treat these intervals like waiting for paint thinner to evaporate—chemical curing is a process that cannot be rushed without compromising adhesion and durability.
Think of timeline planning like preparing surfaces with painters tape before painting—the preparation determines the outcome quality. Projects rushed to meet arbitrary deadlines invariably disappoint. Wheels restored patiently over several weekends consistently outperform those crammed into single marathon sessions where fatigue leads to shortcuts.
Professional results demand professional patience. Unlike epoxy floor coating projects where you're covering imperfections, polished aluminum restoration reveals every flaw. Accept that quality takes time, and your finished wheels will reward that investment for decades.
Of course, some restoration challenges exceed DIY capabilities regardless of time invested. Understanding when professional intervention becomes necessary—and finding qualified specialists—ensures your vintage forged wheels receive appropriate care when complexity demands expert hands.
Professional Refinishing vs DIY Limitations
You've assessed your wheels, cleaned them thoroughly, and mastered the sanding progression. But here's the honest question every restorer must eventually face: does this project exceed your capabilities? Recognizing when to hand off work to specialists isn't admitting defeat—it's protecting your investment and ensuring your vintage forged wheels receive the care they genuinely require.
The line between DIY-appropriate and professional-necessary isn't always obvious. Some damage looks intimidating but responds well to patient home restoration. Other issues appear minor yet demand specialized equipment and expertise that no amount of YouTube tutorials can replicate. Let's clarify where that boundary lies.
When DIY Reaches Its Limits
Certain restoration challenges simply cannot be addressed in a home garage—regardless of your skill level or tool collection. Attempting these repairs without proper equipment risks permanent wheel damage, wasted materials, and potentially dangerous outcomes when those wheels return to service.
- Structural crack repair: While dye penetrant testing reveals cracks, repairing them requires certified aluminum welding with proper pre-heat and post-weld heat treatment. Amateur welding on load-bearing wheel components creates liability and safety concerns that no cosmetic improvement justifies
- Bent wheel straightening: According to Autowerkes, bent or warped wheels can be straightened using hydraulic presses or specialized machinery. This process ensures the wheel's structural integrity and prevents vibration issues while driving. Home-based methods using hammers or pry bars introduce stress concentrations that compromise forged grain structures
- True runout correction: When wheels wobble despite proper balancing, the issue is runout—deviation from perfect roundness. Correcting this requires CNC precision machining that removes material uniformly while maintaining structural specifications. A gas pressure washer can clean your wheels, but it cannot restore geometric accuracy
- Powder coating application: Professional powder coating demands electrostatic spray equipment, temperature-controlled curing ovens, and proper surface preparation protocols. The thick, durable finish powder coating provides cannot be replicated with rattle cans or brush-on alternatives
- Diamond-cut face restoration: Those machine-finished faces found on many modern forged wheels require CNC lathes that remove precise material layers. According to Autowerkes, CNC (Computer Numerical Control) machining is used to repair wheels with deep scratches, gouges, or curb rash—it involves precision cutting and shaping to remove damaged areas and create a smooth surface
- Anodizing restoration: Classic forged wheels with anodized finishes—like iconic Fuchs wheels—require electrochemical processing in specialized tanks. This isn't a coating applied over the surface; it's a conversion of the aluminum itself that demands professional facilities
- Multi-piece wheel disassembly: Three-piece forged wheels with bolted or welded construction require careful separation, individual component restoration, and precise reassembly with proper torque specifications and sealant application
Even if you own the best electric pressure washer on the market for cleaning preparation, these structural and precision requirements exceed what pressure and patience alone can accomplish. The equipment investment for professional-grade wheel restoration—CNC machines, powder coating systems, anodizing tanks—runs into tens of thousands of dollars, making professional services the only practical option for most enthusiasts.
Finding Qualified Forged Wheel Specialists
Not all wheel repair shops possess the expertise to handle vintage forged wheels properly. The dense grain structure that makes these wheels valuable also demands specific knowledge during repair. A shop experienced with cast alloy wheels may lack understanding of forged aluminum's unique characteristics.
When evaluating potential specialists, look for these qualifications:
- Specific forged wheel experience: Ask directly about their experience with forged versus cast wheels. Request before/after photos of similar restorations
- Proper inspection equipment: Quality shops use precision balancers to check runout and specialized testing to verify structural integrity before and after repairs
- Material-appropriate processes: Confirm they understand the differences between 6061 and 7075 aluminum alloys and adjust their techniques accordingly
- Warranty coverage: Reputable specialists offer 18-24 month warranties on workmanship and finish quality
- Transparent communication: According to Autowerkes, a reputable specialist should be willing to explain their refurbishment process in detail and provide regular updates during the work
Understanding what professional-grade forging standards look like helps you evaluate potential restoration partners. Precision hot forging solutions from certified manufacturers like Shaoyi (Ningbo) Metal Technology demonstrate the exacting standards that quality forged wheel restoration should meet. Their IATF 16949 certification and rigorous quality control exemplify the professional benchmarks you should seek when your restoration exceeds DIY capabilities—the same precision engineering that creates reliable forged components applies equally to restoring them properly.
Cost-Benefit Analysis: When Professional Investment Makes Sense
Professional restoration costs vary dramatically based on damage severity and required processes. Understanding the investment helps you make informed decisions about whether restoration justifies the expense compared to replacement.
| Service Type | Typical Cost Per Wheel | When It's Worth It |
|---|---|---|
| Basic refinishing (strip, prep, powder coat) | $150-300 | Wheels in good structural condition with cosmetic damage only |
| Diamond-cut face restoration | $200-400 | Machine-finished wheels with curb rash or corrosion on faces |
| Wheel straightening | $75-150 | Minor bends causing vibration; structural inspection confirms integrity |
| Crack welding repair | $100-250 | Small cracks in non-critical areas; professional assessment confirms viability |
| Full restoration (strip, repair, refinish) | $400-800+ | Rare or valuable wheels where replacement cost exceeds restoration |
The decision matrix becomes clear when you compare restoration costs against replacement value. Vintage forged wheels from respected manufacturers often command $500-2,000+ per wheel on the collector market. For these examples, professional restoration costing $300-500 per wheel represents significant value preservation. Conversely, common wheels available for $200 each rarely justify $400 restoration investments.
Consider also the authenticity factor. For classic car wash enthusiasts showing at concours events, original wheels properly restored maintain vehicle authenticity and judging scores in ways that reproduction replacements cannot match. Mobile car wash convenience keeps them looking sharp between events, but the foundation must be proper professional restoration.
Some damage patterns make restoration economically impractical regardless of wheel value. Severe cracks at spoke bases, extensive corrosion pitting through significant material thickness, or previous improper repairs that compromised structural integrity may render wheels beyond reasonable restoration. Professional assessment provides clarity—reputable specialists will honestly tell you when a wheel should be retired rather than restored.
Dry ice blasting has emerged as an advanced cleaning option some professional shops offer, removing decades of contamination without abrasive damage to delicate surfaces. While not necessary for every restoration, this technology demonstrates the specialized equipment professionals bring to challenging projects.
When selecting tires for your restored wheels, partner with retailers carrying the best tire brands who understand proper mounting procedures for vintage forged wheels. Improper tire machine operation can scratch freshly restored surfaces or damage bead seats. Communicate your restoration investment so technicians exercise appropriate care during installation.
With your restoration complete—whether through dedicated DIY effort, professional intervention, or a combination of both—protecting that investment through proper ongoing maintenance ensures your vintage forged wheels continue delivering performance and visual impact for years to come.
Ongoing Maintenance and Preservation Best Practices
Your vintage forged wheels now gleam with that mirror finish you worked so hard to achieve. But here's the reality check: restoration isn't a one-time event—it's the beginning of an ongoing relationship with your wheels. The same attention to detail that created stunning results must continue through regular maintenance, or that investment fades faster than you'd expect.
Think of your restored wheels like any precision component. They require specific care protocols that differ significantly from standard alloy wheel maintenance. The dense forged grain structure you preserved deserves protection strategies that match its quality.
Maintaining Your Investment After Restoration
Proper washing technique makes the difference between finishes that last years and those that degrade within months. According to Chemical Guys, before applying any cleaning products, thoroughly rinse your wheels from top to bottom with a garden hose or pressure washer to wash away that top layer of grime. This initial rinse prevents grinding loose debris into your carefully polished surface.
Your maintenance routine should follow this essential checklist:
- Use pH-neutral car wash soap exclusively: Acidic or alkaline cleaners attack both protective coatings and aluminum directly. Quality automotive-specific formulas clean effectively without chemical aggression
- Wash wheels when cool: Heat causes cleaning products to dry too quickly, leaving streaks and residue. Rapid temperature changes from cold water on hot wheels can damage finishes
- Employ dedicated microfiber towels for wheels only: Cross-contamination from towels used elsewhere introduces abrasive particles. Keep a separate car cleaning kit specifically for wheel maintenance
- Clean brake dust promptly: According to Chemical Guys, brake dust is super corrosive and abrasive, meaning it can scratch your finish and even embed into your wheel's surface, giving it an ugly pitting effect
- Dry immediately after washing: Use a clean microfiber towel to gently blot surfaces, preventing water spots that stain restored finishes
- Reapply protection on schedule: Sealants need quarterly refresh; waxes require monthly attention. Ceramic coatings need annual inspection for wear patterns
- Inspect lug torque periodically: Loose lug nuts create stress concentrations that can initiate fatigue cracks
What about keeping your vehicle's interior fresh while maintaining exterior components? When using products like your preferred car air freshener or odor eliminators like Ozium, ensure these aerosols don't contact wheel surfaces. Many air freshener formulations contain solvents that can spot protective coatings or react with aluminum finishes.
Seasonal Care for Preserved Wheels
Seasonal storage demands specific protocols that many enthusiasts overlook. According to Performance Plus Tire, the optimal storage environment maintains cool, dry conditions with temperatures between 40°F and 75°F. Temperature fluctuations cause issues ranging from coating stress to accelerated oxidation.
Before seasonal storage:
- Clean wheels thoroughly, removing all brake dust and road contamination
- Apply fresh protective coating appropriate to your finish type
- Store in climate-controlled environments away from direct sunlight
- Keep away from ozone-producing equipment like furnaces, generators, and air purifiers
- Position mounted wheels horizontally or hang from rim hooks—never hang by the tire itself
- Store unmounted wheels standing upright on wooden pallets, not concrete floors
According to Performance Plus Tire, inspect stored tires and wheels approximately once every three months. For vehicles in long-term storage, move them monthly to prevent flat spots and minimize ozone cracking. This inspection schedule applies equally to your restored forged wheels—catch developing issues before they require major intervention.
Common Mistakes That Destroy Restored Finishes
Even well-intentioned maintenance can backfire when you don't understand what damages restored surfaces. Avoid these finish-killing errors:
- Automatic car washes: Harsh brushes scratch polished aluminum; aggressive chemicals strip protective coatings. The classic car wash approach—hand washing only—protects your investment
- Wheel cleaners with acid or heavy alkaline content: These attack aluminum and degrade ceramic coatings. According to The Wheel Doctor, avoid harsh chemicals that might degrade the finish or cause further damage
- Improper tire mounting: Careless tire machine operation scratches bead seats and lips. Communicate your restoration investment to tire technicians and request careful handling
- Tire dressing sling: Silicone-based tire shine products fling onto wheel faces during driving, contaminating protective coatings and attracting dirt
- Pressure washing too close: High-pressure water at close range can damage coating edges and force water behind protective layers
- Using household cleaners: Products designed for kitchen or bathroom surfaces often contain acids, bleach, or abrasives incompatible with automotive finishes
Ongoing Safety Inspections
Beautiful wheels mean nothing if they fail catastrophically at highway speeds. Even after successful cosmetic restoration, structural integrity requires periodic verification. According to The Wheel Doctor, regular inspections can help identify issues before they become serious problems—look out for any signs of wear or damage such as cracks or bends.
Establish this inspection schedule:
- Monthly: Visual inspection during regular washing for new scratches, chips, or coating damage
- Quarterly: Detailed examination of stress points—lug holes, spoke bases, barrel seams—for developing cracks
- Annually: Professional assessment including balance check and runout measurement to catch issues invisible to casual inspection
- After impacts: Any significant pothole strike or curb contact warrants immediate structural inspection before continued use
Restoration preserves value only when combined with ongoing vigilance. Your vintage forged wheels survived decades before reaching your garage—with proper maintenance and safety-conscious inspection schedules, they'll deliver decades more of reliable performance and timeless visual impact. The investment you made in restoration pays dividends through careful stewardship, protecting both the wheels' collector value and your safety on every drive.
Frequently Asked Questions About Restoring Vintage Forged Wheels
1. What grit sandpaper should I use for forged wheels?
For restoring vintage forged wheels, follow a progressive grit sequence starting at 220-grit for heavy damage, then moving through 400, 600, 800, 1000, and 1500-grit for mirror finishes. Light oxidation may allow starting at 400-grit. Each grit level removes scratches from the previous stage—skipping steps leaves visible scratch patterns trapped beneath your polish. Wet sanding from 400-grit onward controls dust, manages heat, and produces finer scratch patterns for optimal results.
2. Can rotary forged wheels be repaired?
Yes, forged wheels can be repaired, but they require specialist refurbishment techniques. Not all repair centers have the expertise or equipment to work safely with forged aluminum. Improper repairs can weaken structural integrity, creating dangerous conditions. Look for specialists with specific forged wheel experience, proper inspection equipment, and IATF 16949-certified partners like Shaoyi Metal Technology who understand the precision standards required for forged automotive components.
3. How do I bring old rims back to life?
Restoring old forged rims involves systematic steps: First, assess structural integrity using dye penetrant testing to check for cracks around lug holes and spoke bases. Clean thoroughly with pH-neutral products and chemical strippers for old finishes. Progress through sanding grits from coarse to fine, then polish with appropriate compounds. Finally, apply protection—ceramic coatings offer 2-5 years of durability, while carnauba wax needs monthly reapplication.
4. What is the difference between forged and cast wheels for restoration?
Forged wheels are created by compressing solid aluminum billets under extreme pressure, aligning the grain structure for superior strength-to-weight ratio and impact resistance. Cast wheels are made by pouring molten aluminum into molds. This fundamental difference means forged wheels can be refinished repeatedly without compromising their structural foundation, making them excellent restoration candidates that justify premium attention and investment.
5. When should I seek professional help for wheel restoration?
Seek professional assistance for structural crack repair requiring certified aluminum welding, bent wheel straightening using hydraulic presses, CNC machining for runout correction, powder coating application, diamond-cut face restoration, and anodizing processes. These require specialized equipment costing tens of thousands of dollars. When restoration costs $300-500 per wheel but replacement value exceeds $500-2,000, professional restoration preserves significant value.