Preventing Cracks in Deep Draw Stamping: The Engineer’s Diagnostic Guide
TL;DR
Preventing cracks in deep draw stamping requires a precise distinction between two fundamental failure modes: splitting (tensile failure due to thinning) and cracking (compressive failure due to work hardening). Effective prevention starts with diagnosing the defect's geometry; horizontal "smiles" near radii typically indicate splitting, while vertical fractures in the wall suggest compressive cracking. Engineers must verify three critical variables: ensure the Limiting Draw Ratio (LDR) remains below 2.0, maintain die radii between 4–10 times the material thickness, and optimize tribology to reduce friction-induced stress. This guide provides a root cause analysis framework to eliminate these costly manufacturing defects.
The Physics of Failure: Splitting vs. Cracking
In deep draw stamping, the terms "splitting" and "cracking" are often used interchangeably on the shop floor, but they describe diametrically opposed failure mechanisms. Understanding this distinction is the single most important step in troubleshooting, as applying the wrong corrective action can exacerbate the defect.
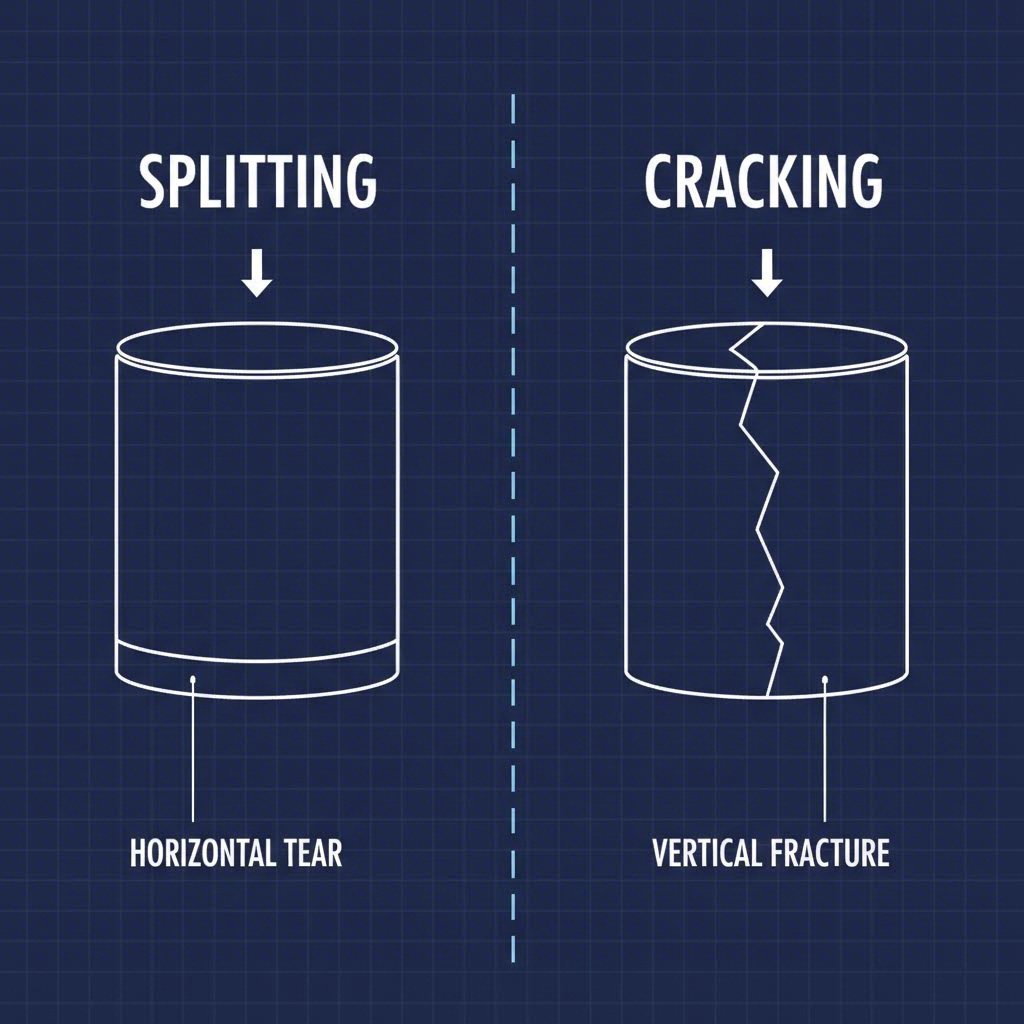
Splitting is a tensile failure that occurs when the metal stretches beyond its ultimate tensile strength. It is characterized by excessive thinning (necking) of the material sheet. Visually, splitting appears as horizontal tears or "smiles" typically located just above the punch radius or near the die radius. This failure mode indicates that the material is being held back too aggressively—either by friction, blank holder pressure, or tight geometry—forcing it to stretch rather than flow.
Cracking (or "season cracking" in brass and stainless steel) is often a compressive failure resulting from excessive cold working. As the blank is drawn into the die, the circumference of the metal reduces, forcing the material into compression. If this compression exceeds the material's capacity, the grain structure interlocks and becomes brittle (work hardening). Unlike splitting, the material at a compressive crack is often thicker than the original gauge. These cracks typically manifest vertically along the wall or flange. Recognising that splitting is a flow restriction problem while cracking is a flow abundance problem (leading to work hardening) allows engineers to target the root cause effectively.
Critical Tooling Geometry: Radii, Clearance, and LDR
Tooling geometry dictates how metal flows into the die cavity. If the geometry restricts flow, tension spikes; if it allows too much freedom, wrinkling leads to compressive failure. Three geometric parameters—radii, clearance, and draw ratio—serve as the primary control levers.
- Die and Punch Radii: Sharp radii act like cutting edges, halting material flow and causing immediate splitting. A general engineering rule of thumb suggests that both die and punch radii should be 4 to 10 times the material thickness (t). A radius smaller than 4t restricts flow, causing localized thinning. Conversely, a radius larger than 10t reduces the contact area for the blank holder, allowing wrinkles to form which then harden and crack as they are pulled into the die.
- Die Clearance: The gap between the punch and the die must accommodate the material's thickness plus a flow allowance. The industry standard target is 10% to 15% clearance above the material thickness (1.10t to 1.15t). Insufficient clearance irons the material (compresses it), causing friction and work hardening. Excessive clearance removes control, leading to wall bowing and structural instability.
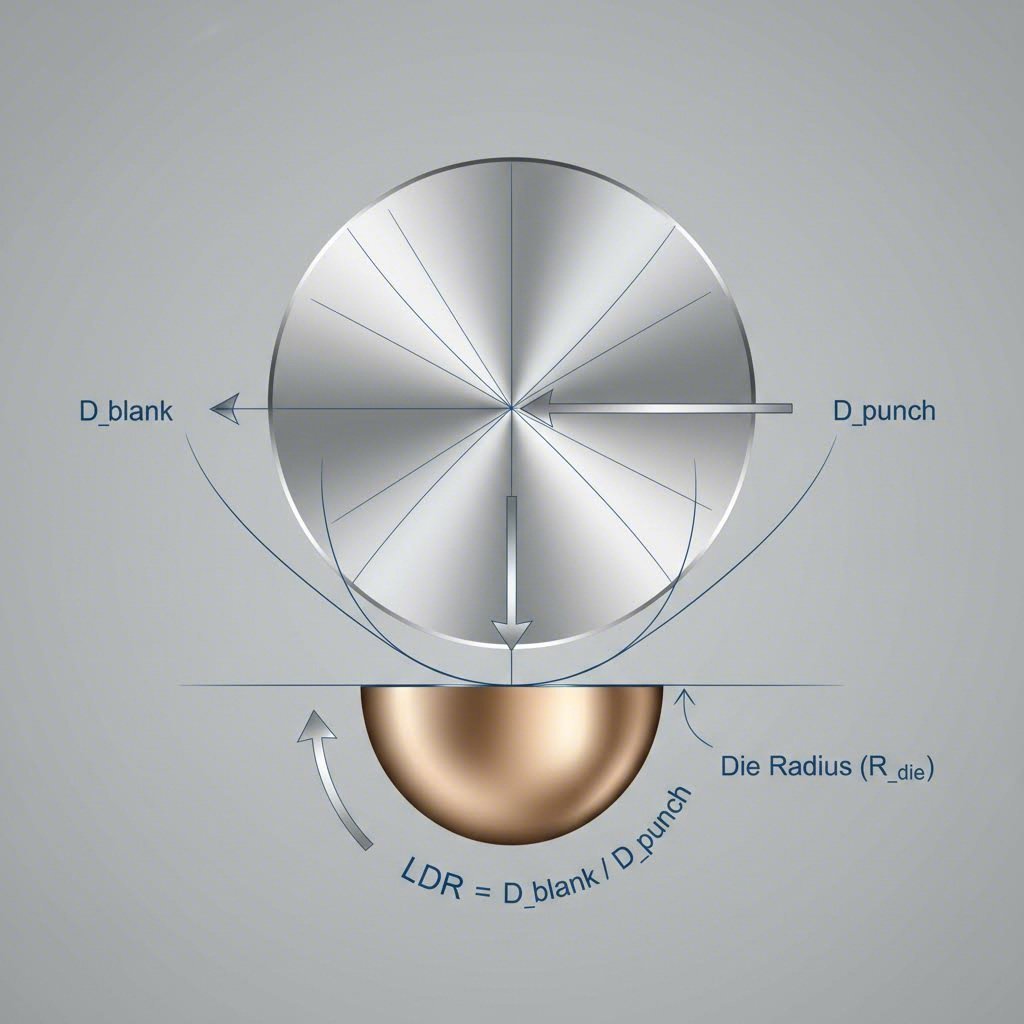
- Limiting Draw Ratio (LDR): The LDR is the ratio of the blank diameter to the punch diameter. For a single draw operation without annealing, this ratio should typically not exceed 2.0. If the blank diameter is more than double the punch diameter, the volume of material trying to flow into the throat creates immense compressive resistance, virtually guaranteeing failure unless a redraw process is implemented.

Material Science: Metallurgy and Work Hardening
Successful deep drawing depends heavily on the metallurgical properties of the blank. Two key values found on material certifications—the n-value (strain hardening exponent) and the r-value (plastic strain ratio)—predict how a metal will behave under stress. A high n-value allows the material to stretch uniformly without localized necking, while a high r-value indicates resistance to thinning.
Stainless steel, particularly the 300 series, presents unique challenges due to its tendency to work harden rapidly. As the crystal lattice deforms, it can transform from austenite to martensite, a harder, more brittle phase. This transformation is the primary driver of delayed cracking, where a part may look perfect coming off the press but fractures hours or days later due to residual internal stresses. To mitigate this, engineers must often introduce inter-stage annealing to reset the grain structure or switch to materials with higher nickel content to stabilize the austenitic phase.
Process Variables: Lubrication and Blank Holder Pressure
Once geometry and materials are fixed, process variables determine the success of the production run. Tribology—the study of friction and lubrication—is critical. In deep drawing, the goal is to separate the tool and workpiece with a boundary film to prevent galling (adhesive wear). Galling creates drag, which spikes tensile stress and leads to splitting. For heavy-duty draws, extreme pressure (EP) lubricants containing sulfur or chlorine are often necessary to maintain this film under high heat.
Blank holder pressure acts as the throttle for material flow. If the pressure is too high, the blank is pinned, causing tensile splitting at the punch radius. If the pressure is too low, the material wrinkles in the flange. These wrinkles effectively thicken the material, which then jams as it enters the die cavity, leading to a compressive crack. The "Goldilocks" zone for binder pressure is narrow and requires constant monitoring.
Achieving this balance of variables—tonnage, precision tooling, and complex material behavior—often requires specialized capabilities beyond standard stamping shops. For automotive and industrial components where failure is not an option, Shaoyi Metal Technology's comprehensive stamping solutions bridge the gap between prototyping and mass production. Leveraging IATF 16949-certified precision and press capabilities up to 600 tons, they deliver critical components like control arms with strict adherence to global OEM standards, ensuring that even the most difficult deep draw geometries are executed without defects.

Troubleshooting Matrix: A Step-by-Step Protocol
When a defect appears on the line, a systematic approach saves time and reduces scrap. Use this diagnostic matrix to identify the likely culprit based on the symptom.
| Symptom | Likely Failure Mode | Root Cause Investigation | Corrective Action |
|---|---|---|---|
| Crack at Punch Radius | Tensile Splitting | Punch radius too sharp; Binder pressure too high; Lubrication failure. | Increase punch radius; Lower binder pressure; Apply higher-viscosity lubricant. |
| Vertical Crack in Wall | Compressive Cracking | Excessive work hardening; LDR too high; Wrinkles entering die. | Anneal material; Increase binder pressure (to stop wrinkles); Add redraw station. |
| Wrinkling on Flange | Compressive Instability | Binder pressure too low; Die radius too large. | Increase binder pressure; Use draw beads to control flow. |
| Galling / Scratches | Adhesive Wear | Lubricant breakdown; Tool surface roughness; Chemical incompatibility. | Polish tool surfaces; Switch to EP additives; Check material hardness. |
Conclusion: Mastering the Draw
Preventing cracks in deep draw stamping is rarely about fixing a single variable; it is about balancing the equation of flow. By distinguishing between the tensile mechanics of splitting and the compressive mechanics of cracking, engineers can apply targeted solutions rather than guesswork. Success lies in the rigorous application of geometric rules—keeping LDRs conservative and radii generous—and the careful management of process heat and friction. When these physical principles align with high-quality metallurgy and precise tooling, even the most aggressive deep draws can be achieved with zero defects.
 Small batches, high standards. Our rapid prototyping service makes validation faster and easier —

