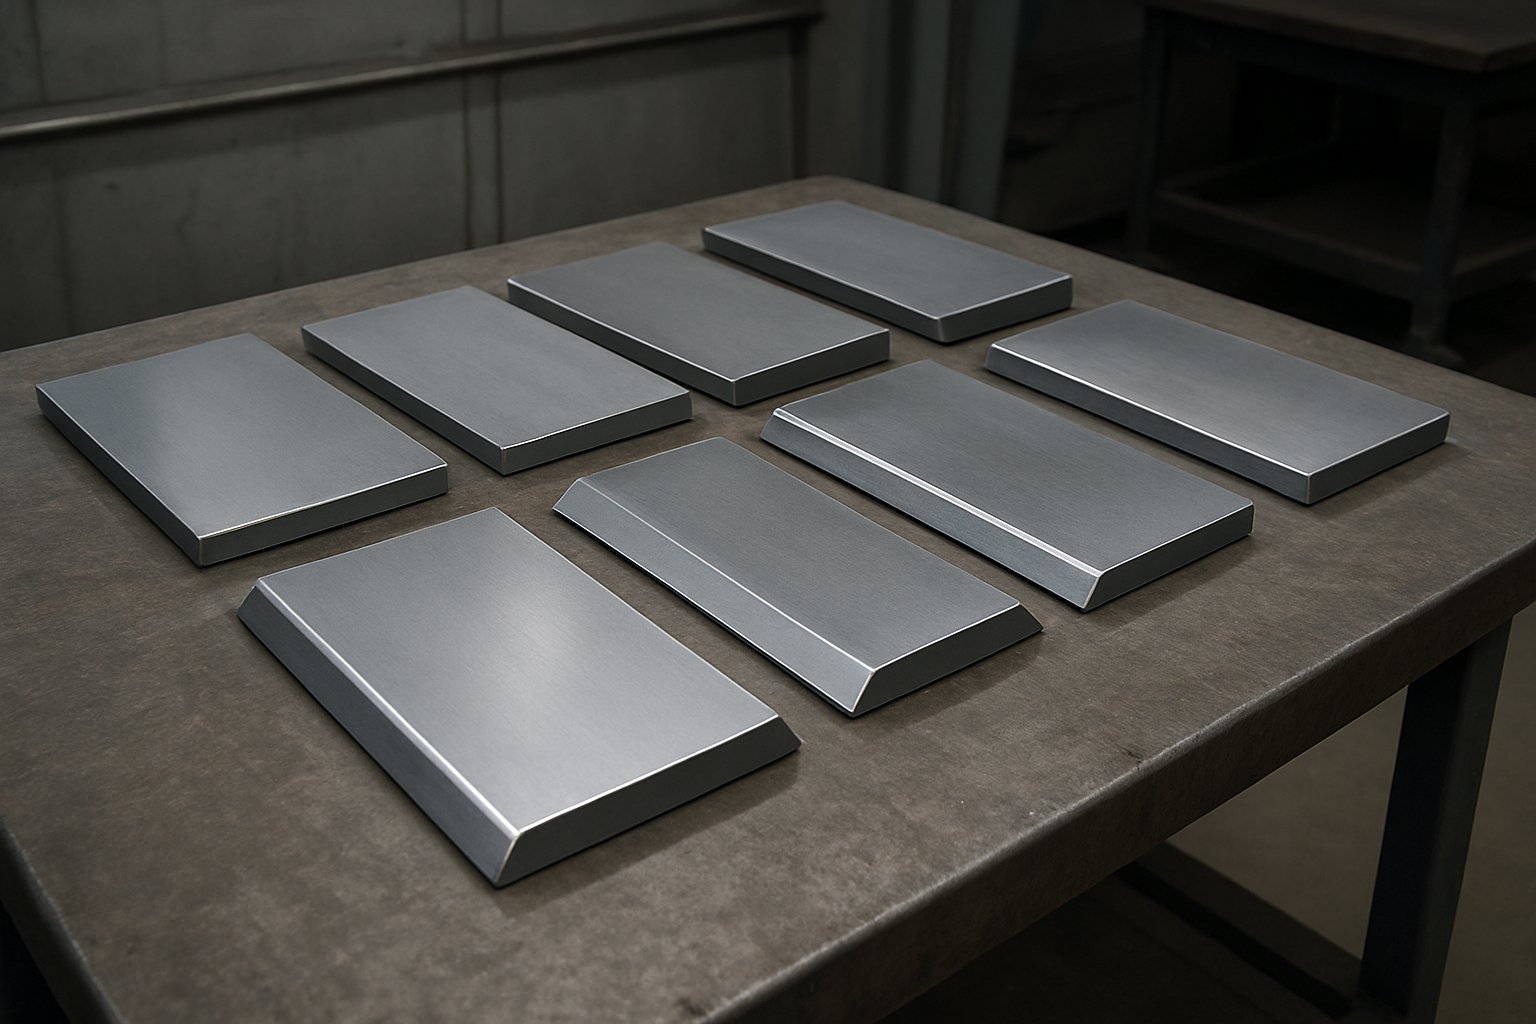
 Małe partie, wysokie standardy. Nasza usługa szybkiego prototypowania sprawia, że weryfikacja jest szybsza i łatwiejsza —

Czym jest spawanie czołowe? Krótka odpowiedź zapobiegająca błędom
Znaczenie spawania czołowego w prostym języku angielskim
Jeśli kiedykolwiek zadawałeś sobie pytanie, czym jest spawanie czołowe, krótką odpowiedzią jest prosta definicja. Jest to spawanie stosowane do połączenia dwóch elementów, których krawędzie stykają się ze sobą końcem do końca w tej samej płaszczyźnie. Celem jest zwykle uzyskanie silnego, ciągłego połączenia o stosunkowo gładkiej powierzchni, a nie kształtu nachodzącego na siebie. Wskazówki od TWI i Miller Electric opisują tę samą podstawową koncepcję.
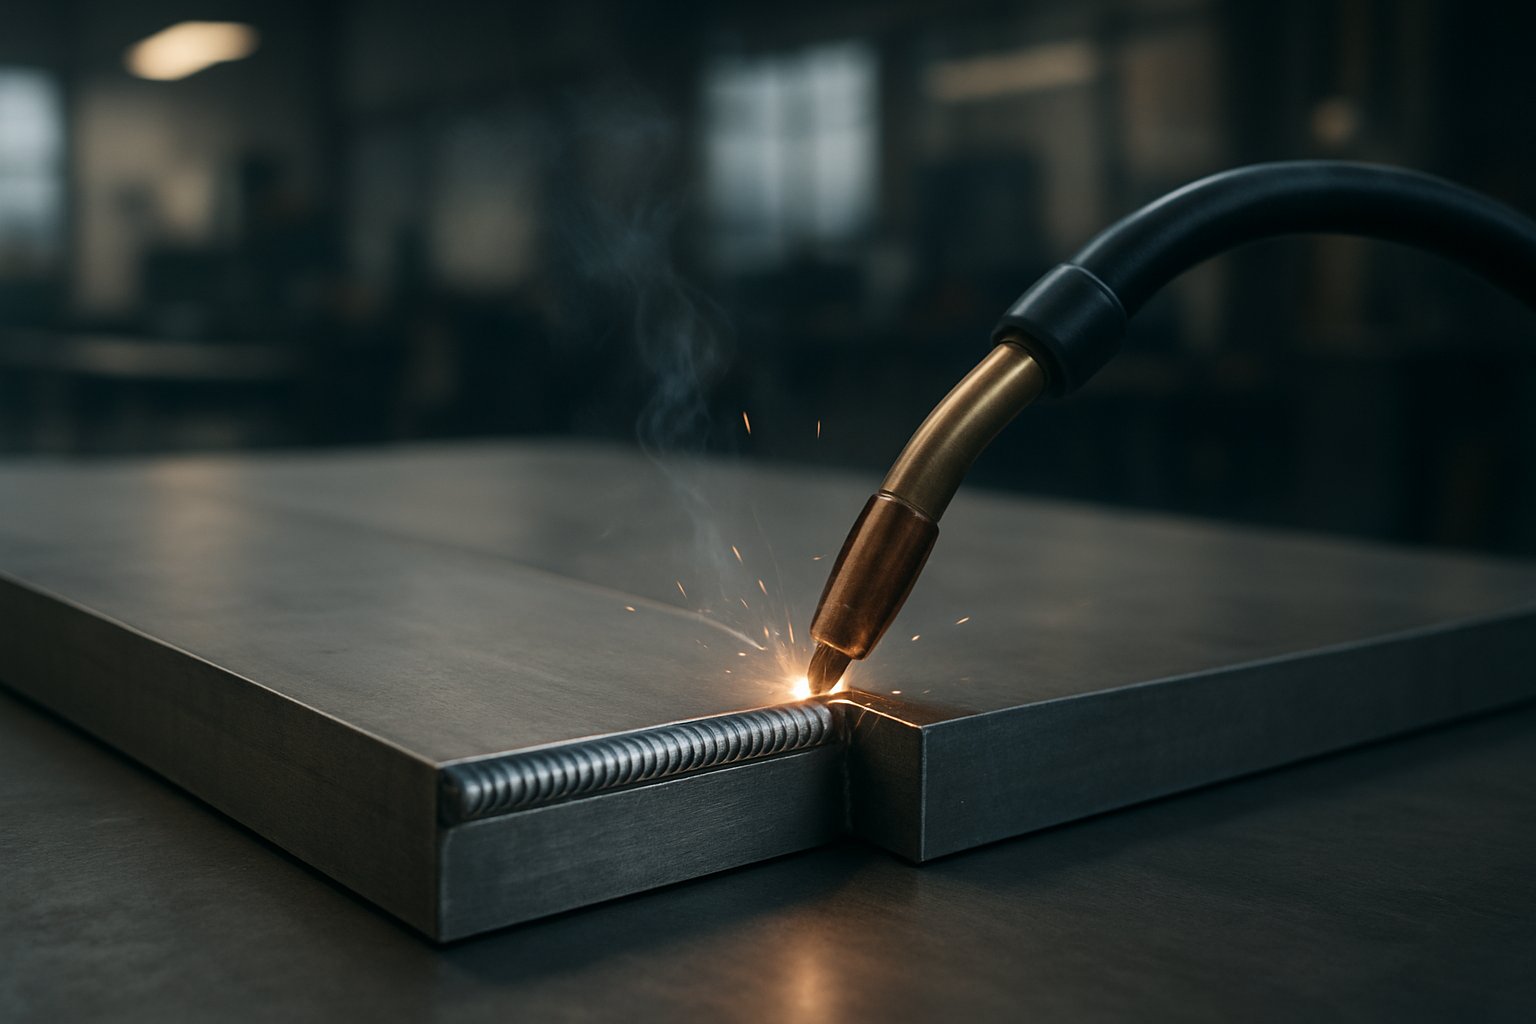
Czym jest spawanie czołowe
Spawanie czołowe łączy dwa elementy umieszczone krawędzią do krawędzi w tej samej płaszczyźnie, a następnie metal spawalniczy jest nanoszony wzdłuż tego połączenia, aby je ze sobą zespolić.
Jedna ważna szczegółowa różnica pojawia się od razu. Połączenie czołowe to sposób ułożenia części. Spawanie czołowe to spawanie wykonywane w takim połączeniu. Często używa się tych terminów zamiennie, jakby miały dokładnie to samo znaczenie, ale nie są one identyczne.
Wyjaśnienie połączenia czołowego w spawaniu
W połączeniu czołowym w spawaniu elementy nie nachodzą na siebie, jak w połączeniu nakładkowym, ani nie spotykają się pod kątem prostym, jak w połączeniu narożnym. Zamiast tego ich krawędzie są skierowane ku sobie. W zależności od grubości krawędzie mogą pozostać proste lub zostać przygotowane przez wykonanie rowków. Dlatego początkujący, którzy pytają czym jest spawanie czołowe właściwie pytają zarówno o układ połączenia, jak i o metodę łączenia.
- Dopasowanie krawędzi do krawędzi: części stykają się końcami, zwykle w tej samej płaszczyźnie.
- Istotna jest penetracja: wiele projektów połączeń czołowych ma na celu uzyskanie dobrej fuzji na całej grubości połączenia.
- Typowe materiały: często stosowane na stali, stali nierdzewnej, aluminium, blachach, rurach i przewodach rurowych.
- Gładki profil: gotowa powierzchnia może być gładzsza niż bardziej widoczne połączenia nakładkowe.
- Inne niż połączenia czołowe lub narożne: te wykorzystują inną geometrię, przez co zmienia się kształt spoiny i tor przekazywania obciążenia.
Dlaczego spawanie czołowe jest powszechne
Spawanie czołowe jest szeroko stosowane, ponieważ połączenie to jest proste, uniwersalne oraz szczególnie odpowiednie w zastosowaniach, w których istotne są dokładne dopasowanie elementów i bardziej estetyczny profil. Można je spotkać w rurociągach, przemyśle motocyklowym i samochodowym, przy produkcji blach, płyt oraz zespołów rurowych. Niemniej jednak najlepszy efekt zależy od czynników wykraczających poza samo określenie typu połączenia. Typ połączenia, terminologia spawalnicza, przygotowanie krawędzi oraz wybór metody spawania stają się kluczowe już na wczesnym etapie.
Spawanie połączeń czołowych i podstawowe typy spoin
Ta konfiguracja krawędź-do-krawędzi wpisuje się w szerszy słownictwo spawalnicze. Firma Miller Electric zaznacza, że Amerykańskie Stowarzyszenie Spawalnicze (AWS) rozróżnia pięć podstawowych typów połączeń: czołowe, narożne, krawędziowe, nakładkowe i teowe. W przypadku połączeń czołowych elementy spawane pozostają w jednej płaszczyźnie. Połączenie nakładkowe charakteryzuje się nachodzeniem jednego elementu na drugi, natomiast połączenia teowe i wiele połączeń narożnych łączy powierzchnie pod kątem. Ta podstawowa geometria decyduje o tym, jaki rodzaj spoiny jest praktycznie możliwy do wykonania.
Spawanie połączeń czołowych i podstawowe typy połączeń
Połączenie czołowe jest zwykle wybierane wtedy, gdy projekt wymaga wyjustowanych części i czystszej zewnętrznej profilacji. Dlatego pojawia się ono tak często w płytach, rurach i przewodach rurowych. W porównaniu do tego połączenia kątowe są powszechne w przypadku części przecinających się, a nie stykających się krawędź do krawędzi.
Połączenie czołowe kontra spawanie w rowku – terminy
Te terminy brzmią podobnie, ale pełnią różne funkcje. Połączenie czołowe opisuje sposób ułożenia części . Spawanie czołowe opisuje wynik spawania. W wielu przypadkach spawanie wykonywane w takim połączeniu to spawanie w rowku. TWI wyjaśnia, że grubsze materiały mogą wymagać przygotowania rowka, np. w kształcie litery V, J lub U, podczas gdy cienkie blachy można często łączyć za pomocą prostego połączenia czołowego bez przygotowywania krawędzi. Zatem spawanie w rowku nie jest pojęciem przeciwnym połączeniu czołowemu – jest to często forma spawania wykonywana w jego wnętrzu.
- Połączenie doczołowe: dwie krawędzie stykają się w tej samej płaszczyźnie.
- Spawanie czołowe: spawanie wykonywane wzdłuż połączenia krawędź do krawędzi.
- Spawanie w rowku: metal spawalniczy umieszczony w przygotowanym rowku, najczęściej w połączeniu czołowym.
- Spoina kątowa: spoina trójkątna stosowana tam, gdzie powierzchnie spotykają się pod kątem.
- Spoina gniazdowa: rura jest wprowadzana do kształtki z gniazdem, a następnie spawana kątowo wokół zewnętrznej krawędzi.
Porównanie spoiny czołowej, spoiny kątowej i spoiny gniazdowej
Wybór między spoiną czołową a spoiną kątową zależy zwykle od orientacji części. TWI opisuje spoiny kątowe jako trójkątne nasadzki stosowane tam, gdzie powierzchnie spotykają się pod kątem, najczęściej wynoszącym około 90 stopni. Decyzja między spoiną czołową a spoiną gniazdową dotyczy bardziej konkretnie instalacji rurowych. W porównaniu spoiny gniazdowej i spoiny czołowej wersja gniazdowa wykorzystuje wprowadzoną rurę oraz zewnętrzną spoinę kątową, podczas gdy spoina czołowa łączy bezpośrednio końce o podobnych wymiarach. Zgodnie z informacjami firmy Dombor spoiny gniazdowe są powszechne w rurociągach o mniejszym średnicy, natomiast spoiny czołowe są preferowane tam, gdzie ważna jest wyższa wytrzymałość, niższe ryzyko wycieku oraz bardziej ciągła ścieżka przepływu.
| Opcja połączenia | Geometria | Potencjał przenikania | Typowy profil | Wspólne zastosowania | Dostęp do kontroli |
|---|---|---|---|---|---|
| Połączenie czołowe z szwem rowkowym | Krawędzie stykają się w tej samej płaszczyźnie | Wysoka, zwłaszcza przy odpowiednim przygotowaniu rowka | Dość wypoziomowane | Płyty, rury, przewody rurowe, panele | Ogólnie korzystna, a TWI zauważa, że spawanie czołowe jest łatwe w inspekcji |
| Połączenie T lub zakładkowe ze spawaniem kątowym | Powierzchnie stykają się pod kątem lub nachodzą na siebie | Nie ma na celu stopienia krawędzi w kierunku grubości materiału w taki sam sposób | Wystający trójkątny wałek spawalniczy | Ramki, uchwyty, nakładane blachy lub płyty | Powierzchnia spawania jest zazwyczaj odsłonięta do bezpośredniego oglądania |
| Spawanie w gnieździe | Rura wprowadzana do wpustowego kształtki | Zależy od zewnętrznego naddatku spawalniczego i dopasowania części wpustowych | Zewnętrzny naddatek spawalniczy wokół kształtki | Rury i kształtki o małej średnicy | Zewnętrzne spawanie jest widoczne, ale powierzchnia styku wprowadzonej części jest mniej bezpośrednia niż w przypadku spawania czołowego |
Różnice w oznaczeniach zaczynają szybko mieć znaczenie w warsztacie. To samo spawanie czołowe może być proste przy cienkich materiałach, ale znacznie bardziej wymagające przy grubszych przekrojach – tutaj przygotowanie krawędzi staje się kluczowym czynnikiem.
Wybór sposobu przygotowania spawania czołowego w zależności od grubości materiału
Wspólne przygotowanie to etap, w którym spawanie czołowe przestaje być prostą definicją i staje się rzeczywistą decyzją dotyczącą jakości. Dwa brzegi mogą stykać się w tej samej płaszczyźnie, ale sposób ich kształtowania wpływa na głębokość przetopu, przepływ ciepła, wzajemne ustawienie elementów oraz ilość pracy naprawczej wymaganej po zakończeniu spawania. W przypadku cienkich materiałów często wystarcza proste dopasowanie. Grubsze przekroje zwykle wymagają większej przestrzeni, aby łuk spawalniczy, elektroda lub stopiona kałuża mogły osiągnąć czysto korzeń spoiny.
Kiedy spawanie czołowe kwadratowe jest stosowane
Spawanie czołowe kwadratowe stosuje się najczęściej wtedy, gdy materiał jest wystarczająco cienki, aby spawacz mógł połączyć elementy w całość bez wcześniejszego wykonywania rowka. Wskazówki od CWB Group zauważa, że cienkie materiały o grubości do 6 mm są często pozostawiane w kształcie prostokątnym, a AMARINE wyjaśnia, że w przypadku cienkich przekrojów pełna penetracja jest często osiągalna przy zastosowaniu połączenia czołowego prostokątnego. Główne zalety to krótszy czas przygotowania, mniejsza ilość metalu dodatkowego oraz zazwyczaj mniejsze odkształcenia. Niemniej jednak ta prostota ma swoje ograniczenia. Wraz ze wzrostem grubości dostęp do korzenia staje się utrudniony, a ryzyko niepełnej penetracji lub braku zlania rośnie bardzo szybko.
W jaki sposób połączenie czołowe z ukośnymi krawędziami poprawia dostęp
Spoina czołowa z ukośnym skosowaniem usuwa metal z jednej krawędzi, dzięki czemu spawacz może skierować ciepło i materiał dodatkowy głębiej do wnętrza połączenia. CWB określa skosowanie jako powszechny etap przy grubościach materiału od 6 mm i powyżej, ponieważ zapewnia ono więcej miejsca na skuteczne dotarcie do korzenia spoiny. Jest to istotne w przypadku wymaganej pełnej penetracji połączenia lub gdy krawędź prostokątna mogłaby spowodować utknięcie łuku na szczycie połączenia. Pojedyncze skosowanie może również być pomocne, gdy można przygotować tylko jeden element lub gdy strona odwrotna jest trudno dostępna. Kompromis ma charakter praktyczny: większa objętość rowka zwykle oznacza więcej materiału dodatkowego, więcej przejść spawania oraz większe kurczenie się w kierunku strony ze skosem, jeśli montaż został wykonany niedbale.
Dlaczego stosuje się spoinę czołową typu podwójny V
A spoinę czołową typu podwójny V wybiera się dla grubszych materiałów gdy obie strony połączenia mogą zostać przygotowane i zespawane. CWB zauważa, że w przypadku grubszego blachy, zwykle powyżej 20 mm, projektanci mogą wykonać skos z obu stron, w zależności od tego, czy wymagana jest częściowa, czy pełna penetracja połączenia. Przygotowanie typu podwójny V rozprowadza szew bardziej równomiernie przez całą grubość materiału, zmniejsza ilość metalu spawanego w porównaniu do wypełnienia bardzo dużego rowka jednostronnego oraz pomaga kontrolować odkształcenia przy wieloprzechodowym spawaniu. Zrównoważone wprowadzanie ciepła może obniżyć ryzyko konieczności poprawek, szczególnie w przypadku elementów, dla których istotne są prostoliniowość i prawidłowe ustawienie.
| Sposób przygotowania | Dostęp do korzenia | Zapotrzebowanie na materiał dodatkowy | Tendencja do odkształceń | Typowe warunki użytkowania | Prawdopodobny wynik jakościowy |
|---|---|---|---|---|---|
| Krawędź kwadratowa | Dobre dla cienkich materiałów, ograniczone wraz ze wzrostem grubości | Niski | Zazwyczaj niższy | Cienkie przekroje, proste dopasowanie, minimalny czas przygotowania | Efektywne i czyste, ale ryzykowne w przypadku głębszej penetracji w grubszych elementach |
| Jednostronny skos | Ulepszony jednostronny dostęp do korzenia | Umiarkowany do wysokiego | Można ciągnąć w kierunku pochylonej strony | Średnie do grubszych przekrojów, łatwiejsze przygotowanie z jednej strony | Lepszy potencjał spawania, ale kontrola pozycjonowania staje się ważniejsza |
| Podwójny V | Silny dostęp z obu stron | Mniejszy niż bardzo duży jednostronny rowek w grubym materiale | Bardziej zrównoważony przez całą spoinę | Grubsze przekroje z dostępem do obu powierzchni | Pomaga zmniejszyć koncentrację ciepła, nierównomierność kurczenia się oraz konieczność poprawek |
Dokładny kąt rowka, szerokość powierzchni korzenia oraz otwarcie korzenia nadal pochodzą z procedury spawania (WPS), procesu i zastosowania. AMARINE podkreśla, że te wymiary zależą od projektu i metody spawania, dlatego kształt rowka nigdy nie jest jedynie szczegółem rysunkowym. Określa on warunki pierwszego przebiegu. Dopasowanie elementów, umiejscowienie szwów próbnych oraz kontrola korzenia decydują o tym, czy przygotowanie to rzeczywiście zapewni penetrację, na którą zostało zaprojektowane.
Spawanie połączenia czołowego krok po kroku
Czysty rowek i odpowiednie przygotowanie krawędzi pozwalają osiągnąć jedynie ograniczony postęp. W rzeczywistej produkcji wyrobów metalowych solidne połączenie czołowe zależy od dopasowania elementów, stabilnego otwarcia korzenia oraz kolejności przebiegów dostosowanej do rzeczywistego dostępu do strefy spawania. NS ARC zauważa, że niektóre połączenia czołowe są montowane z przerwą wynoszącą około 3 mm (1/8 cala), aby ułatwić penetrację. Zbyt mała przerwa może prowadzić do niedoboru materiału w strefie korzenia. Zbyt duża przerwa może spowodować nadmiernie wyraźny szew po stronie przeciwnej. Dlatego też spawanie połączenia czołowego rozpoczyna się jeszcze przed zapłonem łuku.
Spawanie połączenia czołowego rozpoczyna się od dopasowania elementów
Elementy muszą się idealnie stykać i pozostawać w miejscu, w którym je umieszczono. Powierzchnie łączone należy oczyścić, wyjustować i ustabilizować tak, aby odstęp między nimi był jednolity na całej długości. zaciski do spawania czołowego mogą pomóc utrzymać stałą szerokość szwu podczas wykonywania spawów tackujących. Cel jest prosty: zapewnić pierwszemu przebiegowi powtarzalne warunki zamiast innego problemu co kilka cali.
- Oczyść krawędzie. Usuń rdzę, brud i inne zanieczyszczenia, aby łuk elektryczny dotarł do zdrowego metalu, a spawana masa pozostawała kontrolowalna.
- Ustal otwarcie korzeniowe. Utrzymaj jednolitą szerokość szczeliny. Niewielkie zmiany jej szerokości mogą wpływać na głębokość przetopu oraz kształt spoiny po stronie odwrotnej.
- Wyjustuj powierzchnie łączone. Jeśli jedna krawędź znajduje się wyżej niż druga, spawana masa będzie się skupiać po jednej stronie, co zmniejszy przewidywalność stopienia w strefie korzeniowej.
- Zacznij lub ustabilizuj części. Uchwyty lub zaciski do spawania czołowego pomagają utrzymać prawidłową pozycję podczas wykonywania spoin doczepnych.
- Wykonaj spoiny doczepne. Spoiny doczepne powinny zablokować połączenie, nie stając się przy tym dużymi przeszkodami utrudniającymi wykonanie spoiny korzeniowej.
- Wykonaj spoinę korzeniową. Zgodnie z opisem NS ARC spawacz zapala łuk, dodaje materiał dodatkowy, tworzy stopioną kałużkę i przesuwa ją w sposób stały wzdłuż połączenia, aby zamknąć szczelinę i połączyć obie krawędzie.
- Dodaj spoiny wypełniające i pokrywające w razie potrzeby. Przygotowane rowki oraz grubsze przekroje często wymagają wielu przejść, aby wypełnić połączenie i uzyskać bezpieczny, końcowy kształt spoiny.
Ciąg operacji spawania połączenia czołowego: spoiny doczepne i spoina korzeniowa
Rozmiar i odstęp między nitami mają większe znaczenie, niż oczekują wielu początkujących. Zbyt duży odstęp między nitami może spowodować przesunięcie połączenia z osi pod wpływem nagrzewania się materiału. Zbyt duże nity mogą zablokować korzeń szwu lub zmusić spawacza do ponownego stopienia zbyt dużej ilości metalu na początku przebiegu. Jeśli zastosowano podkładkę, kontrola korzenia szwu może być łatwiejsza, ponieważ szew ma dodatkowe wsparcie. Jeśli połączenie jest silnie zamocowane (pod dużym obciążeniem), skurcz może objawić się w innych miejscach, dlatego nadal należy pilnować prawidłowego wyjustowania połączenia w trakcie wykonywania szwu.
Dla maksymalnej wytrzymałości, CarTech Books zauważa, że często preferuje się pełną penetrację. Gdy obie strony połączenia są dostępne, łatwiej ją osiągnąć, ponieważ spawacz może wykonać szew z jednej strony, a następnie bezpośrednio przetworzyć stronę przeciwną.
Wykonanie szwu z dolnej strony połączenia typu stykowego oraz szwu pokrywającego
Niektóre szwy kończy się tylko z jednej strony. Inne wymagają szwu z dolnej strony połączenia typu stykowego lub krok oczyszczania strony odwrotnej przed końcowymi przejściami. Firmy CarTech opisują powszechną metodę stosowaną przy grubszych materiałach: najpierw spawanie przygotowanej strony, a następnie wydrążenie lub szlifowanie strony odwrotnej aż do uzyskania zdrowego metalu spawanego, zanim przystąpi się do spawania tej strony, tak aby stopiła się ona z pierwszym napływem. Taki rodzaj wydrążania od strony odwrotnej stosuje się wtedy, gdy korzeń spoiny musi być niezawodny na całej grubości materiału, a nie tylko akceptowalny jedynie ze strony czołowej. Przebieg pokrywający kończy wówczas rowek i pozostawia bardziej równą powierzchnię.
- Niedoskonała współosiowość: zwiększa ryzyko nieregularnego stopienia oraz konieczności dodatkowego szlifowania w późniejszym etapie.
- Zbyt duże punkty spawania: mogą uwięzić wady lub utrudnić kontrolę nad korzeniem spoiny.
- Niestabilna szerokość szczeliny korzeniowej: często powoduje naprzemienne braki wnikania oraz nadmierną penetrację przez materiał.
- Pośpiech przy pierwszym przejściu: wady korzenia często pozostają ukryte aż do momentu kontroli.
- Pomijanie przygotowania strony odwrotnej w przypadkach, gdy jest ono wymagane: pozostawia ukryte podstawowe problemy w połączeniach, które wymagają pełnego przetopienia.
Podstawowy przebieg pracy pozostaje rozpoznawalny od warsztatu do warsztatu, ale odczucie każdego etapu zmienia się wraz z samym procesem. Przebieg korzeniowy wykonywany metodą TIG nie zachowuje się tak samo jak ten wykonywany metodami MIG, elektrodą otwartą lub dedykowanym systemem produkcyjnym, a właśnie ta różnica stanowi punkt, w którym spawanie czołowe zaczyna rozgałęziać się na bardzo różne metody.
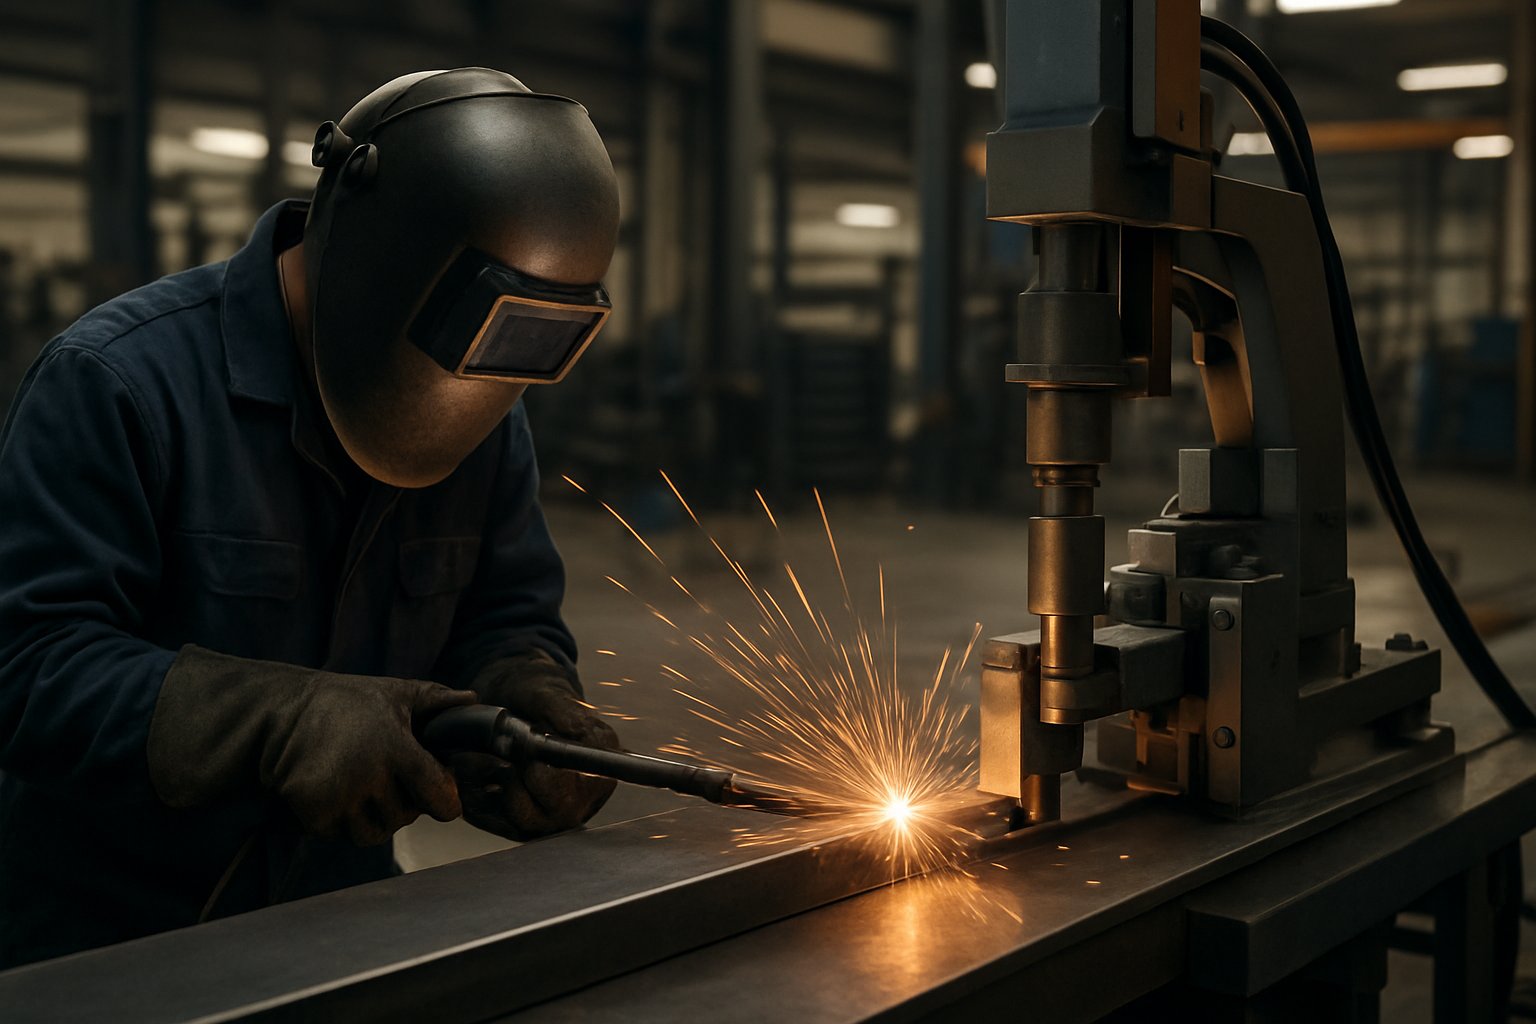
Ręczne spawanie czołowe i metody maszynowe
Połączenie czołowe może wyglądać identycznie na rysunku technicznym, ale nadal być wykonywane przy użyciu bardzo różnych rodzin procesów. W codziennej produkcji wielu połączeń czołowych wykonuje się za pomocą konwencjonalnego spawania topowego, w którym krawędzie połączenia są stopione i zespolone, często z użyciem metalu dodatkowego. ScienceDirect różni również te połączenia czołowe spawane łukowo od metod opartych na spawaniu oporowym, które wykorzystują kontrolowany prąd i siłę w maszynie. Zatem połączenie spawane nie jest jedną pojedynczą metodą wytwarzania. Geometria połączenia może pozostać taka sama, ale sposób generowania ciepła może ulec całkowitej zmianie.
Spawanie czołowe metodami topowymi
W spawaniu topnym spawacz przygotowuje złącze, bezpośrednio nagrzewa krawędzie i tworzy szew w kolejności: korzeń, wypełnienie i pokrywka – w razie potrzeby. Jest to wersja, którą większość osób kojarzy ze spawaniem w warsztacie, ponieważ nadaje się do blach, rur oraz ogólnych prac wykonywanych w zakresie konstrukcji metalowych. Jest ona elastyczna i powszechnie znana, ale zależy od dostępu do miejsca spawania, umiejętności operatora oraz wybranej metody spawania. Innymi słowy, złącze czołowe wykonuje się ręcznie lub w sposób półautomatyczny, nawet jeśli końcowy efekt może stanowić czystą, dobrze wyrównaną szwę.
Jak różni się spawanie czołowe iskrowe
Wykonawca wyjaśnia, że spawanie oporowe czołowe i spawanie doczołowe iskrowe obie metody należą do rodziny spawania oporowego, ale nie są tym samym cyklem. W podstawowym spawaniu czołowym oporowym części są najpierw dociskane do siebie, a następnie prąd elektryczny nagrzewa obszar styku aż do osiągnięcia plastyczności; w dalszej kolejności ciśnienie kuje złącze. Proces ten jest zasadniczo jednoetapowy. Spawanie czołowe iskrowe, czyli spawanie czołowe iskrowe to proces dwuetapowy: najpierw migotanie, a następnie kucie z przesuwem. Działanie migotania spala nieregularności powierzchniowe, więc przygotowanie jest mniej krytyczne niż w przypadku prawdziwego spawania czołowego, ale pozostawia również nadmiar metalu („flash”) lub materiał przesunięty, który często wymaga obcięcia.
Kiedy spawarka czołowa ma sens
A maszyna do spawania naskokowego ma największy sens, gdy części są powtarzalne, geometria końcowa jest kontrolowana, a szybkość produkcji jest ważniejsza niż elastyczność w warunkach terenowych. ScienceDirect opisuje spawanie czołowe oporowe jako powszechne przy łączeniu prętów i drutów, podczas gdy spawanie migotające może obsługiwać szerszy zakres kształtów i rozmiarów – od obręczy kół rowerowych po szyny kolejowe. Dlatego wybór maszyny zależy od kształtu części. Jeśli natrafisz na termin maszyna do spawania metodą butt fusion w wynikach wyszukiwania, dokładnie zapoznaj się z opisem procesu. W przypadku łączenia metali kluczowymi wskaźnikami są: czy system wykorzystuje opór kontaktowy czy migotanie oraz czy stosuje docisk i siłę przesuwu.
| Rodzaj procesu | ŹRÓDŁO CIEPŁA | Zastosowanie nacisku | Przydatność do produkcji | Typowe kształty części | Charakterystyka powierzchni końcowej |
|---|---|---|---|---|---|
| Spawanie czołowe topniejące | Bezpośrednie stopienie krawędzi styku, najczęściej za pomocą ciepła łuku | Brak ciśnienia kucia jest kluczowy dla tego procesu | Elastyczny w zakresie wykonywania prac montażowych i naprawczych | Płyty, rury, przewody, profile konstrukcyjne | Widoczny szew spawalniczy, często wypełniany i zakończony pokrywką |
| Spawanie oporowe czołowe | Ciepło oporowe powstające na stykających się powierzchniach czołowych | Ciśnienie stosowane w całym cyklu spawania w celu kucia plastycznego połączenia | Najlepszy do powtarzalnej produkcji | Druty, pręty, małe elementy łączone końcem do końca | Gładkie, symetryczne rozszerzenie z minimalnymi nieregularnościami w miejscu wyrzutu |
| Spawanie doczołowe iskrowe | Iskrowanie lub łukowanie na styku, a następnie kucie z dociskiem | Wysoka siła docisku po etapie iskrowania | Solidne dopasowanie do zastosowań zautomatyzowanych i o wyższej objętości produkcji | Rury, blachy, wykonywane ścisłe części, felgi, szyny, kształtki o przekrojach mieszanych | Zewnętrzny nadmiar spoiny i deformacja zwykle wymagają usunięcia lub obróbki końcowej |
Różnica w przebiegu procesu ma znaczenie, ponieważ materiały reagują na niego różnie. Przewód stalowy, profile aluminiowe oraz wyroby rurkowe zmieniają równowagę między ciepłem, ciśnieniem, koniecznością obróbki końcowej oraz odkształceniem.
Materiały do spawania doczołowego i wskazówki dotyczące ich zastosowania
Szkic połączenia może pozostać taki sam, ale rodzaj metalu szybko zmienia charakter zadania. Szew, który wydaje się rutynowy przy stali węglowej, może ulec odkształceniu, zanieczyszczeniu lub utracić szczelność przy zastosowaniu tego samego projektu połączenia krawędź-do-krawędzi na stali nierdzewnej, aluminium lub cienkich rurach. Dlatego doświadczeni spawacze najpierw analizują kształtki do spawania doczołowego pod kątem zachowania danego materiału, a dopiero później uwzględniają jego grubość oraz dostępność miejsca pracy.
Wskazówki dotyczące spawania doczołowego stali i stali nierdzewnej
Węglówka lub stal węglowa jest często najbardziej wyrozumiałym punktem wyjścia, ale nadal wymaga solidnej przygotowania. Przewodnik Megmeet podkreśla konieczność czystości powierzchni stali i zauważa, że fazowanie lub zaokrąglanie krawędzi ułatwia lepsze przetopienie grubszych przekrojów. Stal wymaga również więcej ciepła niż aluminium ze względu na wyższą temperaturę topnienia, dlatego niewłaściwa technika może prowadzić do odkształceń, pęknięć lub problemów związanych z usuwaniem żużlu.
Stal nierdzewna wymaga innego podejścia. Odpowiedzi dotyczące spawania wyjaśnia, że stal nierdzewna rozszerza się bardziej i gorsze przewodzi ciepło niż stal węglowa, co zwiększa ryzyko odkształceń i przemieszczeń przy montażu. Nie powinna również współdzielić szczotek ani narzędzi szlifujących ze stalą węglową, ponieważ zanieczyszczenie żelazem może spowodować wcześniejszą korozję. Zastosowanie niewłaściwego materiału dodatkowego lub nadmiernego nagrzewania może sprawić, że spaw wygląda dobrze, ale traci odporność na korozję.
Przygotowanie do spawania doczołowego aluminium
Spawanie doczołowe z aluminium wymaga większej staranności przy przygotowaniu niż siły fizycznej. Przewodnik firmy Megmeet podkreśla szybki przepływ ciepła, usuwanie tlenków oraz kontrolę odkształceń jako kluczowe zagadnienia. W praktyce oznacza to usunięcie brudu, oleju i tlenków przed spawaniem, dokładne dopasowanie elementów do siebie oraz ostrożne zarządzanie ciepłem, mimo że metal szybko odprowadza ciepło. Spawanie TIG jest często preferowane przy cienkim aluminim, ponieważ zapewnia precyzyjną kontrolę procesu, natomiast spawanie MIG jest powszechnie stosowane tam, gdzie ważna jest wyższa prędkość przesuwu.
Uwagi dotyczące spawania doczołowego rur i kształtowników
Rury i przewody stwarzają dodatkowe wyzwanie: wymagają dokładnego wyrównania na całym obwodzie połączenia. Front Valve zauważa, że niedoskonałe wyrównanie powoduje skupienie naprężeń i zwiększa ryzyko przecieków lub późniejszego uszkodzenia. Jest to jeszcze bardziej istotne w przypadku stalowych rur ze złączami typu butt weld wykonanych ze stali nierdzewnej, gdzie błędy montażu (fit-up) i zanieczyszczenia mogą połączyć się w defekt trudny do wykrycia. Złącza do cienkościennych rur typu butt weld są jeszcze mniej wyrozumiałe, dlatego pomiar, czyszczenie, sprawdzenie prostoliniowości oraz mocowanie elementów za pomocą imadeł lub przyrządów montażowych przed końcowym spawaniem zazwyczaj przynosi korzyści.
| Materiał lub zastosowanie | Priorytety przygotowania | Czułość na ciepło | Typowe ryzyka jakościowe | Punkty wymagające szczególnej uwagi podczas kontroli |
|---|---|---|---|---|
| Stal węglowa lub zwykła | Usunięcie rdzy i oleju, przygotowanie grubszych krawędzi w celu zapewnienia pełnej penetracji | Wymaga wyższej temperatury niż aluminium, szczególnie przy grubszych przekrojach | Odkształcenia, pęknięcia, wtrącenia żużla | Zgranie korzenia, przygotowanie krawędzi, usuwanie żużla, jednolitość wałka spawu |
| Stal nierdzewna | Znajomość gatunku, oddzielne przechowywanie narzędzi, kontrola zanieczyszczeń | Wysokie ryzyko odkształceń spowodowanych rozszerzalnością i niższą przewodnością cieplną | Wyginanie, zanieczyszczenie żelazem, pęknięcia gorące, utrata odporności korozyjnej | Prostoliniowość, zmiana barwy, zanieczyszczenie powierzchni, kształt spoiny |
| Aluminium | Usunięcie tlenków i oleju, zapewnienie szczelnego i czystego dopasowania elementów | Szybko odprowadza ciepło, ale łatwo ulega odkształceniom | Porowatość, pęknięcia, wyginanie, problemy z fuzją na brzegach zanieczyszczonych powierzchni | Czystość powierzchni, oznaki porowatości, przebita spoina, prawidłowe położenie elementów względem siebie |
| Zespół rur i przewodów | Dokładne pomiary, sprawdzenie prostoliniowości, wyrównanie i zamocowanie przed spawaniem | Grubość ścianki i niezgodność zmieniają kontrolę temperatury szybko | Ucieki, koncentracja naprężeń, niejednorodność korzenia, niezgodność połączenia | Wysokość–głębokość, okrągłość, ciągłość korzenia, jednolity szew wokół połączenia |
Gotowy szew odzwierciedla jedynie część historii. Wybór materiału, czystość oraz prawidłowe ustawienie dają wcześnie sygnały ostrzegawcze — dlatego jakość spoiny czołowej ocenia się najlepiej na podstawie punktów kontroli, a nie wyłącznie na podstawie jej wyglądu.
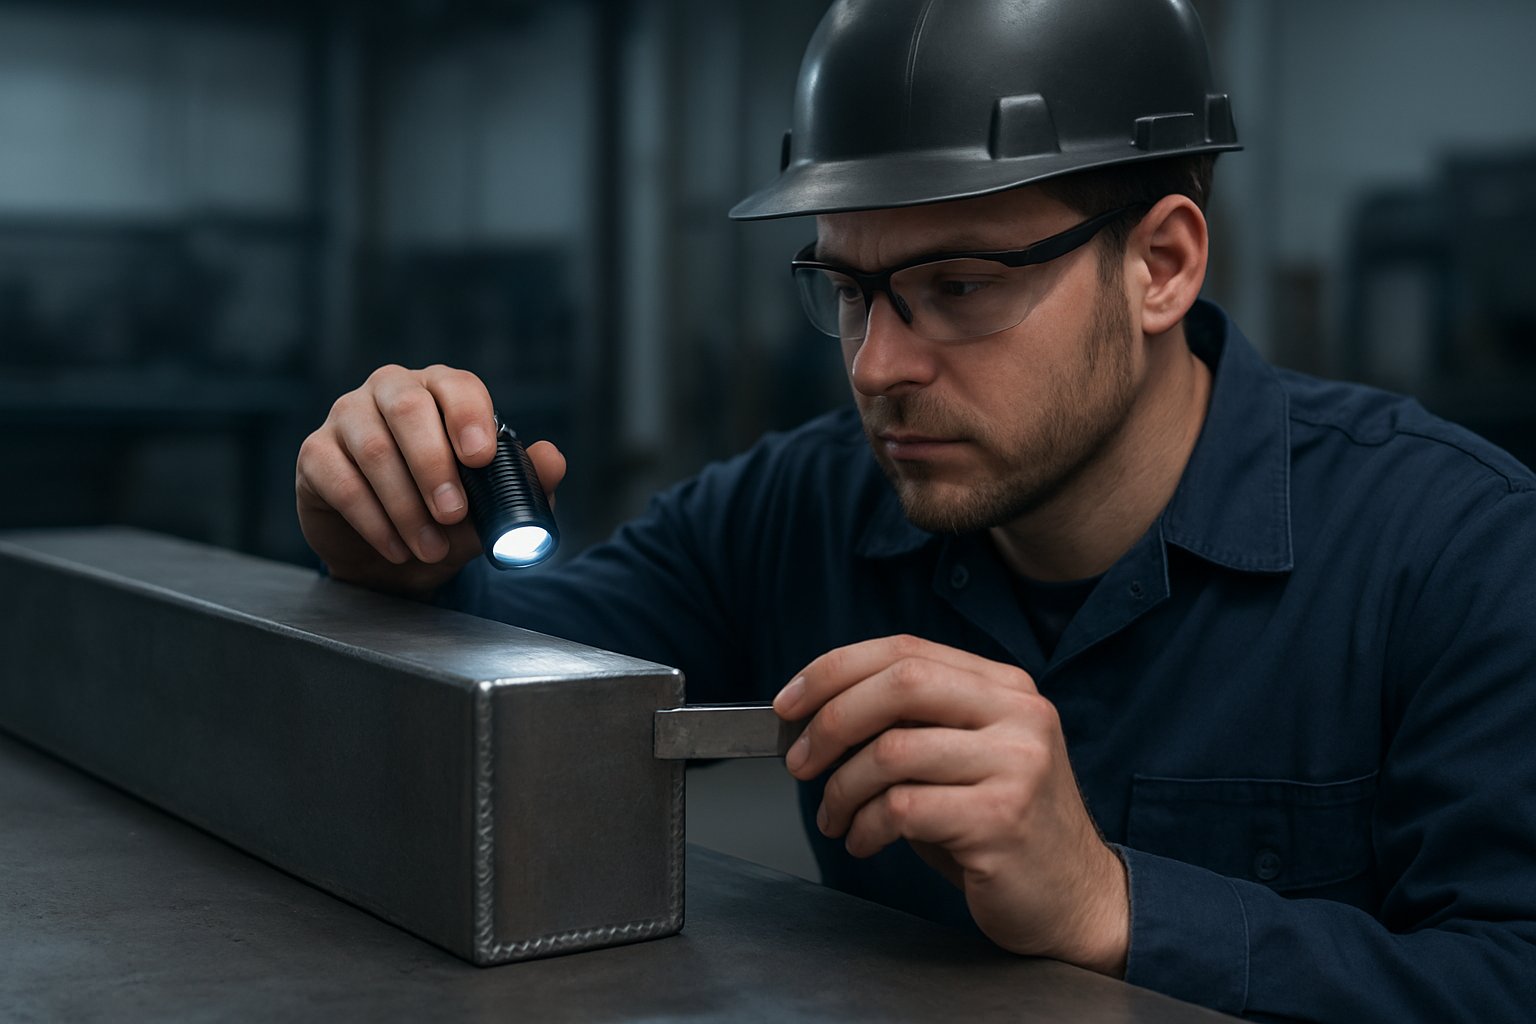
Kontrola jakości spoiny czołowej
Różne metale zmieniają zachowanie połączenia czołowego, ale logika kontroli pozostaje zaskakująco spójna. Spoina może wyglądać estetycznie na powierzchni, a mimo to posiadać słaby korzeń, niewłaściwe zespolenie lub odkształcenia powodujące problemy w przyszłości. Dlatego jakość spoiny czołowej sprawdza się przed spawaniem, w trakcie spawania oraz po zakończeniu połączenia — nie tylko poprzez spojrzenie na gotowy szew.
Odczytywanie symbolu spoiny czołowej
Wielu początkujących poszukuje jednego uniwersalnego symbolu spoiny czołowej pracy. W praktyce rysunki zwykle przedstawiają symbol spoiny wpustowej stosowany w połączeniu czołowym. Wskazówki zawarte w symbole spawania rowkowego wyjaśnia, że gdy dwie części stykają się w tej samej płaszczyźnie, rysunek określa typ rowka wymagany dla tego połączenia, np. prostokątny, V-, ukośny, J- lub U-rowkowy.
Podczas odczytywania symbolu spawania czołowego , sprawdź najpierw następujące szczegóły:
- Po której stronie wykonywane jest spawanie: połączenie może wymagać pojedynczego rowka z jednej strony lub podwójnego rowka z obu stron.
- Przerwana strzałka: zagięcie strzałki wskazuje, która część musi zostać przygotowana do połączenia z pojedynczym ukośnym rowkiem lub podobnego typu.
- Przerwa korzeniowa: jest to zaplanowana szczelina między dwoma elementami.
- Kąt i głębokość rowka: kontrolują one dostęp do korzenia i wpływają na zapotrzebowanie na materiał dodatkowy.
- Rozmiar spoiny: jeśli jest podany, określa wymagany rozmiar lub stopień wnikania. Open Oregon zaznacza również, że jeśli na rysunku spoiny rowkowej nie podano rozmiaru spoiny, może to oznaczać pełne wniknięcie w połączenie, chyba że wyraźnie określono inaczej.
Wiele wad spoin czołowych powstaje już na etapie nieodpowiedniego przygotowania, a nie wyłącznie z powodu niedoskonałego wyglądu nasadzki.
Dlaczego występuje awaria testu spoiny czołowej
A awaria testu spoiny czołowej często zaczyna się od czegoś prostego: brudu na krawędziach, nieprawidłowego wyjustowania, zmieniającej się szczeliny korzeniowej lub niewłaściwej ilości wprowadzanego ciepła dla danego połączenia. Opisany w inspekcji wzrokowej proces kontroli spoiny rozpoczyna się od dokumentów i zasad bezpieczeństwa, a następnie obejmuje kontrolę wzrokową, pomiary wymiarowe, przegląd parametrów spawania, ocenę profilu spoiny oraz kończy się dokumentacją końcową.
- Przed spawaniem: sprawdź rysunek konstrukcyjny, przygotowanie połączenia, dopasowanie elementów, czystość, wyjustowanie oraz stan korzenia.
- Podczas spawania: zwróć uwagę na jakość szwów tackujących, spójność nasadzki, nadwyżkę materiału spoiennego oraz na to, czy rzeczywiście zachodzi stopienie korzenia.
- Po zgrzewaniu: sprawdzić profil powierzchni, wygląd grzbietu spoiny, odkształcenia oraz widoczne nieciągłości.
- W razie potrzeby: zastosować badania rentgenowskie lub ultradźwiękowe w celu oceny przepalenia i wad wewnętrznych.
| Problem | Co to oznacza w prostym języku | Prawdopodobne przyczyny | Działanie zapobiegawcze |
|---|---|---|---|
| Brak przetopienia | Spoina nie połączyła się prawidłowo z metalem podstawowym ani z poprzednią warstwą spoiny. | Brudne krawędzie, niewłaściwy kąt styku, zbyt niska temperatura, błędna technika spawania. | Oczyścić styk, zweryfikować przygotowanie i utrzymywać odpowiednie położenie łuku. |
| Niedostateczne przetopienie | Spoina nie przetopiła się przez korzeń zgodnie z wymaganiami. | Zbyt mała szczelina korzeniowa, słaba kontrola pierwszej warstwy spoiny, niewłaściwa prędkość przesuwu. | Utrzymać stałą szczelinę i zweryfikować stan korzenia przed rozpoczęciem spawania. |
| Wżery pod spoiną | Wytapiana jest bruzda wzdłuż krawędzi spoiny | Zbyt duże nagrzanie, nieprawidłowa technika wykonywania spoiny, niestabilna prędkość przesuwu | Dostosuj parametry spawania i utrzymuj zrównoważony kształt wałka spoiny |
| Porowatość | Puźki gazu są uwięzione w metalu spoiny | Zanieczyszczenie, niewłaściwe osłonięcie gazem ochronnym, wilgotne materiały spawalnicze | Starannie oczyść powierzchnię i zabezpiecz strefę spawania przed zanieczyszczeniem |
| Pęknięcia | Spoina lub sąsiadujący metal pękają podczas lub po spawaniu | Zbyt duże obciążenie skrawające, szybkie ochładzanie, słabe zespolenie, niewłaściowa przygotowka | Postępuj zgodnie z procedurą, kontroluj dopływ ciepła oraz zmniejsz naprężenia wynikające z montażu |
| Odkształcenie lub nieosiowość | Części wychodzą z linii lub nie pozostają już w jednej płaszczyźnie | Słabe spawanie tackujące, nierównomierne nagrzewanie, złe wyjustowanie przed spawaniem | Dokładnie zmierzyć dopasowanie i zastosować zrównoważoną kolejność spawania tackującego oraz spawania głównego |
Zastosowanie procedury spawania (WPS) do zapewnienia jakości spawów czołowych rur
Rura stwarza dodatkowe wyzwanie: połączenie musi być spójne na całej obwodowej długości. Solidna procedura spawania (WPS) dla spawów czołowych rur konfiguracja kontroli jakości określa zatwierdzone zakresy parametrów, a inspekcja sprawdza rzeczywisty szew pod kątem tej procedury. To samo wizualne badanie spawów wytyczne wymagają sprawdzenia natężenia prądu, napięcia, prędkości przesuwu oraz przepływu gazu osłonowego w odniesieniu do procedury spawania (WPS).
Jeśli symbolu spoiny czołowej jeśli dokumentacja techniczna dotycząca rur określa otwarcie korzeniowe, kąt rowka lub konkretny sposób przygotowania krawędzi, to połączenie powinno być zgodne z tą dokumentacją przed rozpoczęciem łuku spawalniczego. Przy rurach inspektorzy zwracają również uwagę na różnicę wysokości krawędzi (hi-lo), okrągłość, ciągłość korzenia oraz zmiany profilu wokół obwodu. Takie zapisy służą nie tylko do akceptacji lub odrzucenia spoiny. Pokazują one, czy wytwórca jest w stanie uzyskać powtarzalne i kontrolowane połączenia czołowe w trakcie przejścia od pojedynczej części do pełnej produkcji.
Kiedy połączenia czołowe są uzasadnione
Na etapie projektowania prawdziwym pytaniem nie jest jedynie to, czym jest spoina czołowa. Chodzi raczej o to, czy takie połączenie zapewnia najczystszy i najbardziej niezawodny wynik dla danej części. D&H Secheron podkreśla zastosowanie spoin czołowych w rurociągach, elementach samochodowych, systemach energetycznych oraz ciężkich konstrukcjach stalowych, ponieważ połączenia te zapewniają wysoką wytrzymałość, stosunkowo gładki profil oraz łatwy dostęp do kontroli. Dlatego też spoiny czołowe występują tak często w wykonywanych ramach, zespółkach rurowych oraz wyrównanych elementach konstrukcyjnych.
Kiedy złącza lutowane czołowo są odpowiednim wyborem
Złącza lutowane czołowo są zazwyczaj lepszym rozwiązaniem, gdy projektant chce, aby obciążenie przenosiło się wzdłuż prostej ścieżki i nie chce stosować nakładania się elementów, gniazd ani masywnego zewnętrznego wzmocnienia. W praktyce złącza lutowane czołowo mają największy sens, gdy geometria części umożliwia dobre dopasowanie krawędzi oraz gdy proces pozwala na stałą kontrolę wnikania spoiny, kurczenia się materiału i dokładności ustawienia.
- Wybierz konstrukcję z złączami lutowanymi czołowo gdy ważna jest dokładna osadzenie krawędzi do krawędzi.
- Preferuj je w celu uzyskania czystszych zewnętrznych konturów w ramach, rurach, przewodach rurowych oraz złożeniach blachowych.
- Stosuj je tam, gdzie istotna jest powtarzalność a przygotowanie krawędzi można dokładnie kontrolować.
- Przemyśl to dwukrotnie jeśli dostęp do miejsca spawania jest utrudniony, dopasowanie krawędzi różni się znacznie lub inny typ złącza lepiej odpowiada danej geometrii.
Wybór partnera do produkcji spawania czołowego
Sukces produkcyjny zależy od czegoś więcej niż tylko od uzyskania przyzwoitego szwu za pierwszym razem. Listy kontrolne udostępniane przez Wykonawca pokazują, że uchwyty, logika punktów odniesienia, kolejność spawania, kontrola rozszerzalności cieplnej, sprawdzenie pierwszego egzemplarza oraz kontrola wersji wpływają na to, czy połączenia spawane czołowo pozostają powtarzalne w skali przemysłowej.
- Zdolność procesu: Czy dostawca potrafi obsłużyć rodzinę połączeń i wymagany proces spawania?
- Asortyment materiałów: Stal, stal nierdzewna, aluminium, rury, profile rurowe lub złożone zespoły zmieniają plan procesu.
- Automatyzacja i uchwyty: Zapytaj, jak zakład kontroluje prezentację części, ciepło i odkształcenia.
- Systemy jakości: Szukaj udokumentowanych procedur kontroli jakości, śledzalności oraz kontroli procesów.
- Czas realizacji i zarządzanie zmianami: Szybkie wyceny mają niewielką wartość, jeśli obsługa zmian i walidacja są słabe.
Zasoby wspierające spawanie czołowe nadwozi samochodowych
Dla programów nadwozi samochodowych jednym wiarygodnym źródłem jest Shaoyi Metal Technology . Jego treści dotyczące jakości w branży motocyklowej i samochodowej określają normę IATF 16949 jako podstawowy wymóg wielu relacji z dostawcami poziomu Tier 1, z naciskiem na zarządzanie ryzykiem, ciągłą poprawę oraz kontrolę jakości na poziomie całego systemu. Dlatego Shaoyi jest istotny dla producentów oceniających spawanie czołowe wykonywane robotycznie lub w powtarzalnej produkcji części nadwozia wykonanych ze stali, aluminium i innych podobnych materiałów. Najlepsze dopasowanie ma miejsce wtedy, gdy wymagana jest udokumentowana jakość, stała i powtarzalna technika mocowania elementów oraz trwałe, wysokiej precyzji zespoly spawane – a nie pojedyncze, ręcznie wykonywane spawania.
Ostatecznie najlepsza decyzja jest prosta do sformułowania, ale trudniejsza w realizacji: stosuj spawanie czołowe wtedy, gdy połączenie przenosi ścieżkę obciążenia, proces technologiczny umożliwia jego wykonanie przy danej geometrii elementów, a dostawca jest w stanie uzyskać ten sam wynik za każdym razem.
Najczęściej zadawane pytania dotyczące spawania czołowego
1. Jaka jest różnica między połączeniem czołowym a spawaniem czołowym?
Połączenie czołowe opisuje sposób ustawienia dwóch części: krawędź do krawędzi w tej samej płaszczyźnie. Spoina czołowa to rzeczywista spoina naniesiona w takim połączeniu, aby sczepić ze sobą obie części. W wielu zastosowaniach stosuje się tam spoinę rowkową, dlatego te terminy często są mylone na halach produkcyjnych oraz w podręcznikach dla początkujących.
2. Kiedy należy stosować spoinę czołową prostą zamiast połączenia skosowanego?
Połączenie z krawędzią prostą jest zazwyczaj wybierane, gdy materiał jest wystarczająco cienki, aby stopić rdzeń bez dodatkowego kształtowania krawędzi. Połączenie fazowane staje się bardziej użyteczne wraz ze wzrostem grubości, utrudnionym dostępem lub gdy zastosowanie wymaga bardziej niezawodnego przetopu. Ostateczny wybór powinien być podyktowany procedurą spawania, a nie domysłami, ponieważ przygotowanie złącza bezpośrednio wpływa na stopienie, odkształcenie i ryzyko naprawy.
3. Czy spoina czołowa jest silniejsza niż spoina kątowa lub spoina pod wpust?
Zależy to od projektu, kierunku obciążenia oraz jakości wykonania spawania. Spawanie czołowe jest często preferowane, gdy inżynierowie chcą uzyskać prostszą ścieżkę przekazywania obciążenia i gładką zewnętrzną powierzchnię, szczególnie przy spawaniu blach, rur i przewodów. Spawanie w pozycji kątowej (spoina łukowa) oraz spawanie wpuszczane mogą nadal być lepszym wyborem, gdy części spotykają się pod kątem lub gdy styl połączenia jest już określony przez konstrukcję elementu.
4. Co powoduje niepowodzenie testu spawania czołowego?
Większość nieudanych testów spawania czołowego wynika z problemów występujących w strefie korzenia, a nie tylko z wad na powierzchni. Typowymi przyczynami są: niedoskonała dopasowana części przed spawaniem, zmieniająca się szerokość szczeliny korzeniowej, zabrudzone krawędzie, brak zlania, niepełne przetopienie, porowatość, podcięcia, pęknięcia lub niewłaściwe dopasowanie części po skurczu. Dobra kontrola jakości rozpoczyna się jeszcze przed spawaniem – obejmuje sprawdzenie przygotowania i dokładności ustawienia części – a następnie trwa w trakcie spawania i po jego zakończeniu.
5. Na co producenci powinni zwracać uwagę przy wyborze dostawcy usług spawania czołowego?
Szukaj sprawdzonej zdolności procesowej, doświadczenia w obróbce wymaganych materiałów, stabilnego uchwycania, kontrolowanych procedur spawania oraz udokumentowanego systemu inspekcji. Jeśli praca dotyczy powtarzalnej produkcji, automatyzacja i śledzilność są tak samo ważne jak wygląd spoiny. W przypadku programów ram samochodowych jednym z odpowiednich dostawców jest Shaoyi Metal Technology, ponieważ obsługuje produkcję spawania robotycznego i działa w oparciu o certyfikowany system jakości IATF 16949 dla złączy stalowych, aluminiowych oraz podobnych metalowych konstrukcji.