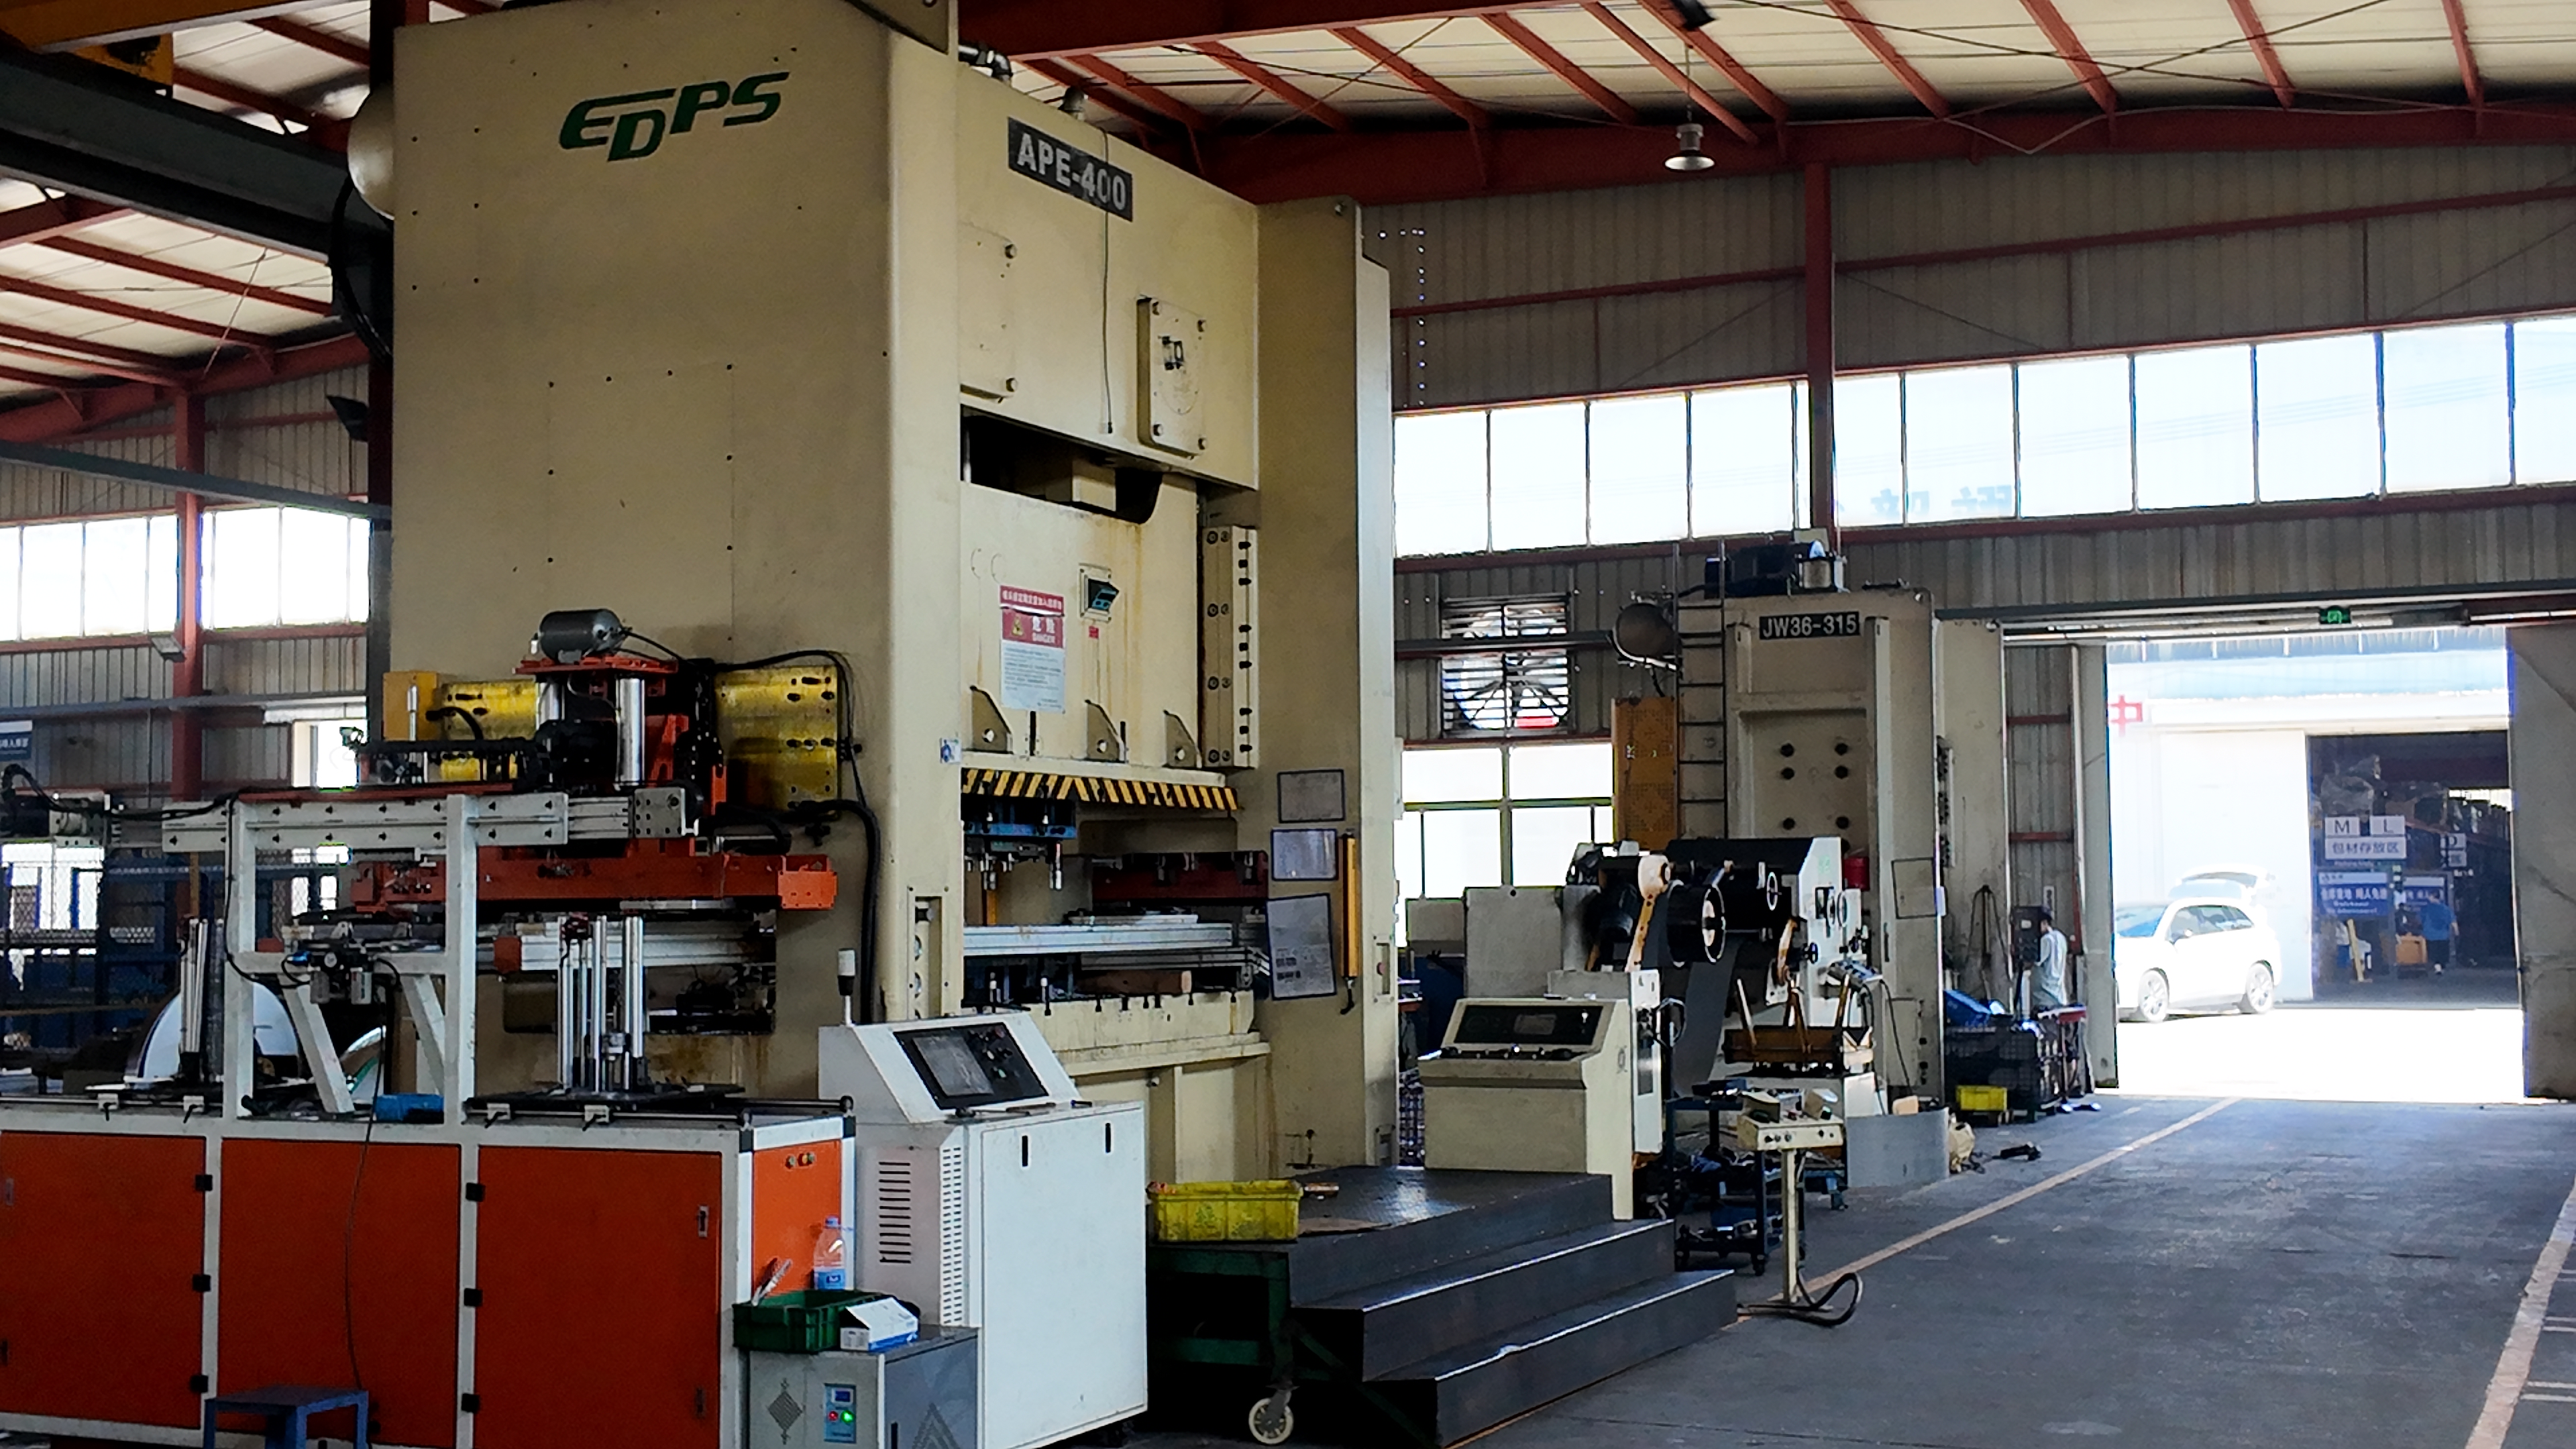
 Small batches, high standards. Our rapid prototyping service makes validation faster and easier —

Metal Pressing Process: 8 Steps To Cut Scrap And Cycle Time
Step 1: Define Requirements and Choose the Right Metal Pressing Process
Ever wondered why some stamped parts launch smoothly while others end up in endless redesign cycles? The answer often lies in how well you define your needs and match them with the right metal pressing process before you ever touch a stamping press or invest in tooling. Let’s break down a practical, step-by-step approach to set your project up for success.
Process Selection Decision Matrix
Start by mapping out your part’s key requirements:
- Geometry: Is your part a simple flat bracket, or does it have deep draws and complex bends?
- Function: Will it carry structural loads, serve as a cosmetic panel, or require tight fit-ups?
- Environment: Will it be exposed to corrosion, heat, or wear?
- Volume: Are you producing a few prototypes or millions of parts annually?
Once you’ve mapped these attributes, use a decision matrix to compare the main stamping and pressing process families. This helps you avoid dead-end tooling paths and costly rework. Here’s a qualitative comparison to get you started:
| Process | Part Complexity | Tolerance Criticality | Thickness Range | Draw Ratio | Edge Quality | Burr Allowance | Volume Suitability |
|---|---|---|---|---|---|---|---|
| Progressive Die Stamping | Medium | Medium | Low–Medium | Low | Medium | Medium | High |
| Transfer Stamping | High | Medium | Medium–High | High | Medium | Medium | Medium–High |
| Deep Drawing | High | Medium | Medium | Very High | Medium | Low | Medium |
| Fine Blanking | Medium | High | Low–Medium | Low | High | Low | Medium–High |
Use this table as a worksheet—insert your own capability data where available, or rely on these qualitative scores if you’re still early in the planning phase.
Progressive vs. Transfer vs. Deep Drawing vs. Fine Blanking
- Is your part mostly flat, or does it require deep shapes? (Flat = Progressive; Deep = Transfer or Deep Drawing)
- Do you need ultra-smooth edges and tight tolerances? (Yes = Fine Blanking)
- Is annual volume above 100,000? (Yes = Progressive or Transfer Stamping)
- Does your design include flanges, beads, or complex forms? (Yes = Transfer or Deep Drawing)
- Are you working with thick or high-strength material? (Yes = Transfer Stamping or Fine Blanking)
- Is cosmetic appearance a top priority? (Yes = Fine Blanking or Progressive with secondary finishing)
By answering these questions, you’ll notice how certain processes naturally rise to the top for your application. For example, transfer stamping excels at deep, complex forms, while progressive die stamping is a workhorse for high-speed, high-volume runs of moderately complex parts. Fine blanking is your go-to for parts with critical edge quality and burr-free requirements.
When to Avoid Stamping and Why
Not every part is a fit for stamping and pressing. If your design requires extremely thick sections, abrupt thickness transitions, or features that can’t be formed from a single sheet, consider alternatives like hydroforming or machining. These methods are better suited for parts with extreme geometry or where traditional stamping presses would struggle to deliver the needed shape or tolerance. Always weigh the cost and complexity against the benefits.
“Don’t specify tighter tolerances than functionally required—overly tight bands at RFQ can drive up cost and complexity without improving performance.”
Still curious what is metal pressing or how to select the best stamping process? Think of it as matching your part’s needs to the strengths of each process family—progressive for speed, transfer for form complexity, deep drawing for depth, and fine blanking for edge quality. Using a structured approach like this not only streamlines your project but also helps you avoid dead-end tooling directions and costly redesigns down the line.
In the next step, we’ll look at how to choose the right material and thickness to further optimize your metal pressings for cost and performance.
Step 2: Choose Materials and Thickness Intelligently for Sheet Metal Pressing
When you start planning your metal pressing process, choosing the right material and thickness is just as critical as selecting the forming method. Sounds complex? It doesn’t have to be. By understanding how your material choice influences cost, formability, and final part quality, you can avoid common pitfalls like split edges, excessive springback, or over-engineered parts. Let’s break down the essentials so you can make confident, informed decisions for your next project.
Material Tradeoffs for Formability and Springback
Imagine you’re comparing several options for metal for stamping. Each metal family—steel, stainless steel, and aluminum—offers unique strengths and tradeoffs for the metal pressing process. Here’s how the most common choices stack up:
| Material | Relative Formability | Springback Tendency | Surface Class Suitability | Typical Finishing Paths | Corrosion Resistance |
|---|---|---|---|---|---|
| Carbon Steel / Stamped Steel | High (mild/low carbon), Medium (HSLA) | Low to Medium | Good for painting, plating | Paint, powder coat, plating | Low (unless coated) |
| Stainless Steel | Medium (varies by grade) | Medium to High | Excellent for exposed/cosmetic | Polishing, passivation | High |
| Aluminum / Stamped Aluminum | Medium to High (alloy and temper dependent) | High | Good for anodizing, painting | Anodize, paint, chemical conversion | Medium to High |
According to industry guides, carbon steel is the workhorse for most sheet metal pressing thanks to its strength, affordability, and ease of forming. Stainless steel shines in environments demanding high corrosion resistance and surface quality, while aluminum is prized for lightweight applications—just remember, it behaves differently than steel and requires careful die and part design to manage its higher springback and localized stretching.
Thickness Selection Aligned to Press Tonnage
How thick should your metal be? Thicker isn’t always better. The right thickness is a balance between strength, formability, and cost. Too thin, and your part may fail under load; too thick, and you’ll increase costs and may exceed the capacity of your stamping press. Here’s a quick playbook for thickness selection:
- Function: Does your part need to support heavy loads or is it a lightweight cover?
- Formability: Thinner metals are easier to bend and form, but may not meet strength needs.
- Press Capability: Always check that your chosen thickness is within your stamping machine’s tonnage and tooling limits.
- Standard Gauges: Stick to common gauge sizes to ensure material availability and lower costs.
- Cost: Thicker metals cost more per part—don’t over-specify unless required for function.
For example, stamped steel brackets for structural use may call for 12–14 gauge, while light covers or electronic enclosures in aluminum stamping often use 18–22 gauge. Always specify both gauge and metal type to avoid confusion, since the same gauge number means different thicknesses for steel and aluminum.
Finish and Coating Considerations
Don’t overlook how your finish requirements impact material choice. If your part will be visible or needs corrosion protection, match the base metal to the right finishing process:
- Paint or Powder Coat: Works well with carbon steel and aluminum.
- Anodizing: Best for aluminum, providing corrosion resistance and color options.
- Polishing/Passivation: Ideal for stainless steel stamping when a high-end cosmetic or corrosion-resistant finish is needed.
- Plating: Adds corrosion resistance or conductivity to steel parts.
Choosing the right pairing up front saves you from costly rework or secondary operations down the line.
Supplier Checklist: What to Ask Before You Order
- Is the required coil width and length available in your chosen alloy?
- What temper or hardness options are offered, and how do they affect formability?
- Are lubricants compatible with your metal and finish?
- What are the standard thickness tolerances for this material?
- Is there a cost or lead time premium for odd-numbered gauges or special alloys?
“When choosing a temper, aim for the softest grade that still meets your strength needs—softer tempers form more easily and reduce the risk of splits or excessive springback.”
By asking the right questions and considering each tradeoff, you’ll avoid common issues like orange peel, split edges, or over-specifying thickness. The result? More reliable sheet metal pressing—and a smoother path to production.
Next, we’ll estimate the forces and blank sizes you’ll need, ensuring your stamping press and tooling are up to the task.
Step 3: Calculate Tonnage, Blanks, and Nesting for the Sheet Metal Stamping Process
Ever tried to run a new part through your sheet metal stamping process only to discover your press stalls or the material yield is far lower than quoted? Early calculations for tonnage, blank size, and nesting are your best defense against costly surprises. Here’s how to approach these critical steps so your metal stamping equipment and tooling are sized right from the start.
Tonnage and Energy Calculation Templates
Let’s break down how to estimate the force your sheet metal stamping press needs. Imagine you’re planning a flat bracket and want to ensure your metal stamping press can handle the job without risk of overload or jams.
- Gather key variables for your calculation:
- Material thickness (t)
- Perimeter of the cut or formed area (P)
- Shear strength or ultimate tensile strength of the metal (S)
- Stroke length of the press (L)
- Any additional forces (draw, piercing, pad pressures)
| Variable | Description | Data Source |
|---|---|---|
| t | Material Thickness | Supplier datasheet |
| P | Perimeter of cut/draw | Flat pattern/part drawing |
| S | Shear or Tensile Strength | Material property sheet |
| L | Stroke Length | Press specification |
| Hits per part | Stations required | Die layout |
- Plug the numbers into these templates (insert your own values):
- Blanking/Piercing Tonnage: T = P × t × S
- Drawing Tonnage: T ≈ π × d × t × UTS × (D/d - C)
- Total Required Tonnage: Add pad, spring, and other die forces
- Energy per stroke: E = F_avg × d_work
Be sure to compare your calculated tonnage and energy with the rated capacity of your sheet metal press. Having enough tonnage but not enough energy is a common cause of press jams, especially at bottom dead center (see reference).
Blank Development and Nesting Strategy
Now, let’s talk blanks and material yield. The blank is the flat piece cut from coil or sheet before forming. Size it too large, and you waste material; too small, and you risk defects. Here’s how to approach blank development and nesting:
- Develop the flat pattern for your part, including allowances for bends and forming.
- Calculate blank width (Bx) and length (By) from your flat pattern.
- Lay out the blanks on your coil or sheet, considering grain direction and part orientation for best forming results (see reference).
- Maximize nesting utilization: Nesting Utilization = (Total blank area × parts per strip) ÷ (Coil area per pitch)
- For progressive dies, plan carrier width and strip layout for smooth feeding and minimal scrap.
Sometimes, you can even nest multiple part types in a single strip to reduce scrap—just be sure their production volumes are compatible.
Scrap, Carrier Design, and Coil Width Selection
Efficient nesting isn’t just about fitting more parts per coil. It’s also about smart carrier design and scrap management. Here are practical tips:
- Design carriers to support parts through all die stations, but keep them narrow to minimize waste.
- Review if offal (scrap) can be used to produce secondary parts, especially for high-volume runs.
- Always check available coil widths before finalizing your nesting to avoid costly custom slitting.
By optimizing blanks, nesting, and scrap handling, you’ll notice a direct impact on both cost and sustainability. And when you validate these early with your team and suppliers, you avoid the pain of die redesigns or underperforming metal stamping equipment.
“Accurate tonnage and nesting calculations are the foundation of a reliable blank metal stamping operation—don’t skip this step if you want to stay on schedule and on budget.”
Ready to move from calculations to robust part design? In the next section, you’ll learn how to apply DFM rules that minimize rework and ensure your blank stamping process delivers consistent quality, every time.

Step 4: Apply DFM Rules That Prevent Rework in Sheet Metal Stamping Design
Ever spent hours troubleshooting a stamped part only to discover a simple design tweak could have saved you time and money? When it comes to the metal pressing process, robust DFM (Design for Manufacturability) rules are your best insurance against costly rework, cosmetic defects, or even part failure. Let’s walk through practical, formula-driven guidelines so your sheet metal stamping design is right the first time—no guesswork required.
Minimum Bend Radius and Relief Geometry
Sounds complex? It’s simpler than you think. The minimum bend radius is the smallest radius you can bend sheet metal without cracking or causing unwanted thinning. If you make the radius too tight, expect cracks or warping, especially with harder materials. According to industry guidelines, the inner bend radius should be at least equal to the material thickness for most applications:
| DFM Rule Category | Formula Template | Key Notes |
|---|---|---|
| Minimum Bend Radius (Rmin) | Rmin = kmaterial × t | kmaterial typically ≥ 1 for most metals |
| Bend Relief Length (Lr) | Lr = t + bend radius + 0.02" | Prevents tearing at the bend edge |
| Bend Relief Width | Width ≥ t / 2 | Ensures enough clearance for the bend |
| Corner Relief Shape | Obround or round preferred | Minimizes warping at corners |
Imagine you’re designing a bracket with two bends at a corner. If you skip proper bend or corner relief, you’ll likely see tearing or bulging—classic stamping examples of what not to do. For best results, always check if your CAD software allows you to set these parameters or if you need to draw them manually.
Hole Spacing and Edge Distance Rules
When you add holes or slots to your pressing sheet metal part, their placement is just as critical as their size. Too close to an edge or another hole, and you risk deformation or tool breakage. Recommended minimums:
- Hole diameter: At least equal to the material thickness (d ≥ t)
- Hole-to-edge distance: ≥ 3 × t for extruded holes
- Hole-to-hole distance: ≥ 6 × t for extruded holes
- Notch width: ≥ 1.5 × t
- Notch length: ≤ 5 × t
- Corner radius for notches: ≥ 0.5 × t
- Minimum flange width: Typically ≥ 5 × t (for hems and curls)
These spacing rules help prevent distortion, ensure tool longevity, and support consistent quality. For even more robust stamping design, align holes and slots with bends or beads to steer material flow and avoid weak spots.
Springback and Overbend Strategy
Ever notice how a freshly bent part tries to "spring" back toward its original shape? That’s springback, and it’s a universal challenge in sheet metal stamping. The amount depends on material type, thickness, and bend radius. To counteract this, engineers use overbend angles—bending slightly past the final angle so, after springback, the part settles at the intended geometry.
- Springback angle compensation: Angleoverbend = f(material, t, bend radius)
- Air bending vs. bottoming: Air bending is more sensitive to springback; bottoming offers more control but requires higher tonnage.
- Coining bending: Coining can minimize springback but may not be efficient for all applications—use only when tight angles are critical and justified by the part’s function.
- Angle control systems: For mission-critical parts, consider specifying angle feedback or correction systems to ensure tight tolerances batch after batch.
“A well-designed bend relief or corner relief is the easiest way to prevent unsightly tears or bulges—don’t skip this step in your DFM checklist.”
Additional DFM Rules for Consistent Quality
- Burr direction: Always specify burrs away from critical datum surfaces to avoid cosmetic or assembly issues.
- Embosses and beads: Limit emboss depth to ≤ 3 × t and position beads to reinforce, not weaken, flat areas.
- Pilot holes for progressive dies: Include pilot features for accurate strip alignment.
- Curl and hem features: For curls, outside radius ≥ 2 × t; for tear drop hems, inside diameter ≈ t.
Want to see how these rules work in practice? Picture a coining sheet metal part where the minimum flange width and proper bend relief ensure every bend is crisp, every hole is robust, and every edge is safe to handle—no sharp surprises or failed parts.
By applying these DFM rules early, you’ll reduce trial-and-error loops, minimize cosmetic rework, and set your sheet metal stamping process up for consistent, high-quality results. Next, we’ll explore how to design your die system and build a proactive maintenance plan to keep your stamping operation running smoothly.
Step 5: Engineer Dies and Plan Maintenance for Reliable Metal Stamping
When you’re ready to turn your design into reality, the difference between smooth production and endless downtime often comes down to how you engineer your die system and plan its upkeep. Sounds overwhelming? Imagine you’re investing in a new set of metal stamping dies—you want them to deliver consistent quality, minimize unplanned stops, and pay off their cost as fast as possible. Let’s break down how to get there, step by step.
Die Concept and Station Layout: Choosing the Right Tool for the Job
First, match your die style to the part’s requirements and production scale. Each die type—progressive, transfer, compound, fine blanking—brings unique strengths and tradeoffs for the metal pressing process. Here’s how they compare:
| Die Type | Best Use-Case | Edge Quality | Production Speed | Relative Cost |
|---|---|---|---|---|
| Progressive | High-volume, simple to moderately complex parts | Medium | High (fast on stamping presses) | Medium–High (amortized over volume) |
| Transfer | Large, deep, or complex forms; flexibility for automotive stamping | Medium | Medium (slower due to part transfer) | High (more stations, complex setup) |
| Compound | Flat, high-precision profiles; small runs | High | Low (single hit per part) | Low–Medium |
| Fine Blanking | Parts needing burr-free edges and tight tolerances | Very High | Medium | High (specialized tooling) |
For example, if your part is a high-volume bracket, a progressive die on an industrial stamping machine is likely your best bet. If you’re producing a deep-drawn automotive panel, transfer dies paired with a robust metal stamping press machine will offer the control and flexibility you need. Always map your station sequence—pierce, form, draw, trim, restrike—and build in pilots, lifters, and strippers for smooth part flow.
Maintenance and Failure-Mode Prevention: Keeping Your Dies Production-Ready
Ever had a press line stall because of an unexpected die failure? Proactive maintenance is your insurance policy. A robust maintenance plan for steel stamping dies not only reduces downtime but also ensures consistent part quality and lower scrap rates. Here’s a practical checklist to guide your team:
- Inspect and adjust die clearances regularly
- Check punch and die wear—replace or regrind as needed
- Verify die alignment and shut height
- Confirm lubrication delivery to all working surfaces
- Test and calibrate sensors for misfeed, part-out, and overload detection
- Document all repairs and recurring issues using a structured work order system
- Schedule preventive maintenance based on cycles, not just calendar days
According to industry best practices, a well-defined die shop management system—complete with root cause analysis and standardized work—can dramatically reduce repair turnaround time and improve both productivity and quality.
“Leveraging CAE forming simulation early in die design can identify and solve forming issues before physical tryouts, saving both time and cost.”
Want to get ahead of costly tryout loops? Many leading suppliers, such as Shaoyi Metal Technology, use advanced CAE simulation and hold IATF 16949 certification to validate draw beads, restrikes, and sensor strategies before the first tool is built. These virtual tryouts help optimize die geometry and material flow, reducing trial iterations and supporting robust PPAP outcomes—especially critical in automotive stamping projects.
Tooling Cost Amortization: Planning for Long-Term Value
How do you ensure your investment in stamping machinery and dies pays off? Start by estimating tooling cost per part over the expected die life. Here’s a simple template:
- Total Tooling Cost ÷ Expected Number of Parts Produced = Cost Per Part
- Include maintenance, repair, and downtime costs in your estimate
- Review die life projections based on material type and production rates
Regularly reviewing these numbers helps you identify when to refurbish or replace dies, and when to invest in new stamping presses or automation to improve ROI.
By engineering your die system with the right process, robust maintenance, and data-driven cost planning, you’ll set up your metal pressing process for reliability and profitability. Next, we’ll look at how to plan cycle time and secondary operations to keep your production flowing efficiently.

Step 6: Plan Cycle Time and Secondary Operations for Efficient Production Stamping
Ever wondered why some stamping plants consistently hit their output targets while others struggle with bottlenecks and missed deadlines? The answer often lies in how well you plan cycle time, press speed, and secondary operations for your metal pressing process. Let’s demystify these concepts with practical examples and templates so your production metal stamping lines run smoothly—no guesswork required.
Cycle-Time and SPM Planning
Sounds complex? It’s actually straightforward when you break it down. Cycle time is the heartbeat of your stamping operation—it’s the time needed to produce one finished part, including all press strokes and any changeover or handling. Here’s a simple, step-by-step approach to estimating your cycle time and throughput:
- Determine your stamping machine’s strokes per minute (SPM) from the press manual or actual run data.
- Calculate the number of hits required per part (hits_per_part), especially for progressive or transfer dies.
- Find out how many parts you produce per stroke (parts_per_stroke), which may be more than one with multi-up dies.
- Estimate average changeover time (Changeover_Time) and planned lot size (Lot_Size).
- Plug your values into this template:
Cycle Time per Part (CT) = (60 / SPM) / parts_per_stroke,Then the mold change time is allocated, that is, the final cycle = single part production time + (mold change time / batch size).
Throughput per hour = 3600 / Cycle Time per Part (in seconds)
Press utilization = Run_Time / Available_Time
For example, if your press runs at 60 SPM, produces 2 parts per stroke, and has a 20-minute die change time for every 1,000 parts. This approach is especially important in high speed stamping and industrial metal stamping, where even small inefficiencies can add up to big losses over time. For more on cycle time calculation and its role in operational excellence, see this cycle time guide.
Coil Handling and Changeover Strategy
When you think about maximizing output, don’t overlook coil handling and changeover. Imagine spending 15 minutes per coil change—across multiple shifts, that’s days of lost production every year. Here are practical tips to streamline coil management and keep your stamping plant running at peak efficiency:
- Pre-stage coils using coil cars or double-ended reels to reduce downtime between runs.
- Document best practices for threading and setup—tribal knowledge should become shared knowledge.
- Upgrade controls and automation for consistent, repeatable setups, especially in high speed metal stamping environments.
- Review press feed and threading drive systems for possible upgrades to support faster, safer changeovers (see reference).
- Always validate lubrication and scrap removal systems at your targeted press speeds—don’t let small issues become big stoppages.
By tightening up coil handling, you’ll notice smoother transitions and fewer unplanned stops, which is crucial for maintaining momentum in production stamping.
Secondary Operations Sequencing
After stamping, parts often require additional steps before they’re ready for shipment or assembly. Planning these secondary operations is key to keeping your schedule realistic and your costs in check. Here’s a typical sequence for a production metal stamping line:
- Deburr
- Heat treat
- Plating or coating
- Final inspection and packaging
Each step adds queue time and may introduce dimensional shifts or special handling needs. For example, heat treating can cause slight part distortion, while plating may require masking or extra inspection gates.
| Operation | Potential Risk | Inspection Gate |
|---|---|---|
| Deburr | Dimensional drift, surface scratches | Visual/Dimensional check |
| Heat treat | Distortion, hardness variation | Hardness/Flatness test |
| Plating/Coating | Hydrogen embrittlement risk, masking defects | Coating thickness/Adhesion test |
| Final Inspection | Missed defects, packaging errors | Final QC/Pack audit |
By mapping out these steps and their risks, you’ll be better equipped to set realistic lead times and avoid surprises. Remember, every extra operation adds complexity—so sequence only what’s necessary for your metal stamping machine and customer requirements.
When you combine smart cycle time planning, efficient coil handling, and well-ordered secondary operations, your stamping plant will be positioned for consistent, high-volume output. Next, we’ll explore how to set tolerances and quality plans that keep your production on target and your customers satisfied.
Step 7: Set Tolerances and Quality Plans That Work for Precision Stamping
Ever received a batch of metal stamped parts that just won’t assemble or pass inspection, even though your drawings looked perfect? That’s the real-world cost of missing the mark on tolerances and quality planning in the metal pressing process. Let’s break down how you can set realistic, effective tolerances and build a quality plan that ensures your quality stamping goals are met—without driving up costs or causing production headaches.
Tolerancing by Process Capability
Not all stamping processes deliver the same level of precision or edge finish. When you’re deciding on tolerances, it’s essential to match your expectations to the actual capability of your chosen method. Here’s a qualitative comparison to help guide your decision:
| Process | Relative Accuracy | Edge Condition | Burr Level | Surface Class |
|---|---|---|---|---|
| Progressive Stamping | Medium | Good (may require deburring) | Medium | Standard |
| Transfer Stamping | Medium | Good (variable with complexity) | Medium | Standard |
| Deep Drawing | Medium | Fair (may require trimming) | Low–Medium | Standard |
| Fine Blanking | High | Excellent (smooth, clean) | Low | Superior |
Use this table as a reference point when specifying tolerances for precision stamping. For example, if your application demands burr-free edges and tight dimensional control—like in critical stamped metal components—fine blanking is often the best fit. For general brackets or covers, progressive or transfer stamping offers a solid balance of cost and accuracy.
Datum Strategy and Measurement Plans
How do you measure what matters, and avoid chasing unnecessary tight bands? Start by anchoring your drawings with clear datum references and only apply GD&T (Geometric Dimensioning and Tolerancing) where it’s truly needed. Here’s a checklist you can use for your metal stamping manufacturing process:
- Define primary, secondary, and tertiary datums that reflect real-world assembly or function
- Apply tight tolerances only to critical-to-quality (CTQ) features
- Use general tolerances (e.g., ISO 2768) for all other dimensions
- List all inspection points on the drawing—don’t leave it to interpretation
- Specify edge and burr requirements if they affect fit or safety
- Avoid over-tolerancing: ask, "Does this feature really need this level of control?"
When it comes to measurement, match your inspection method to part complexity. For most metal stamped parts, calipers and micrometers handle basic checks; for intricate features or tight tolerances, use optical comparators or coordinate measuring machines (CMMs). For high-volume runs, consider vision systems or go/no-go gauges to speed up inspection without sacrificing quality.
“Always choose functional tolerances over blanket tight bands—over-tolerancing drives up cost and risk without delivering better parts.”
PPAP and Control Plan Essentials
Launching a new stamping process or scaling up to production? A robust quality plan is non-negotiable. Here’s a simple control plan outline to help you get started:
- CTQ Features: List all critical-to-quality dimensions and attributes
- Sampling Frequency: Define how often each feature is checked (e.g., every 10th part, every lot)
- Measurement Method: Specify the tool or system for each feature (caliper, CMM, vision, etc.)
- Reaction Plan: What happens if a feature is out of spec? (e.g., hold lot, re-inspect, adjust tooling)
- Documentation: Keep records of inspections, deviations, and corrective actions
Align your inspection tooling—like check fixtures or vision systems—to your datum scheme. This ensures measurements are consistent and meaningful for both production and customer requirements. For parts subject to PPAP (Production Part Approval Process) or customer audits, this structure supports traceability and continuous improvement.
By tailoring your tolerances and quality plans to the capabilities of your chosen metal pressing process, you’ll reduce rejects, avoid costly over-specs, and deliver reliable, high-quality parts every time. Next, we’ll close the loop by looking at troubleshooting and preparing robust RFQ packages for a smooth production launch.
Step 8: Troubleshoot Launch and Finalize Your RFQ for Metal Pressing Services
Launching a new stamping project? Even with the best preparation, unexpected issues can pop up during production. Imagine you’re about to run your first batch of stamped parts—what if you spot wrinkles, burrs, or misfeeds? Or maybe you’re ready to send out an RFQ but aren’t sure if you’ve included every critical detail. Let’s walk through practical troubleshooting, a pre-production checklist, and how to build an RFQ package that gets you accurate quotes and smooth project launches for any automotive metal stamping process or general stamping applications.
Stamp-Run Troubleshooting Decision Trees
When defects show up in your metal pressing process, don’t panic—use a troubleshooting tree to quickly pinpoint causes and fixes. Here’s a step-by-step approach for common stamping problems:
-
If you see fractures or tears:
- Check material type and thickness—wrong selection can cause cracks.
- Reduce blank holder force or review die radius—too much force or a sharp radius increases risk.
- Verify proper lubrication—insufficient lube raises friction and tearing.
-
If you spot wrinkles or buckling:
- Increase blank holder force or reposition draw beads to control material flow.
- Check for excessive clearance between die and punch.
-
If burrs appear on edges:
- Inspect die cutting edges—dull or worn dies are the main culprit.
- Schedule die sharpening or replacement; adjust clearance as needed.
-
If you encounter springback:
- Review material selection—high-strength or aluminum alloys spring back more.
- Increase overbend angle or consider coining for critical bends.
-
If you experience misfeeds or alignment issues:
- Check pilot holes and carrier design for progressive dies.
- Inspect feed system timing and cam settings, especially on transfer stamping press lines.
- Ensure sensors and ejection systems are working correctly.
Regular equipment inspection, staff training, and preventive maintenance are your best defense against these common issues.
Pre-Production Readiness Checklist
Before you hit start on your metal stamping companies production run, make sure you’re truly ready. Here’s a practical checklist to help you avoid costly surprises:
- Material: Confirm spec, thickness, and coil width match your order.
- Tooling: Inspect die set for sharpness, alignment, and correct setup.
- Press Setup: Validate press tonnage, stroke, and all safety systems.
- Lubrication: Check type and delivery system compatibility with material and coating.
- Feed System: Test for smooth operation and accurate part positioning.
- Quality Plan: Review inspection points, measurement tools, and acceptance criteria.
- Training: Ensure operators understand the process and troubleshooting routines.
- Secondary Operations: Confirm readiness for deburring, plating, or other finishing steps.
Taking time to walk through this checklist helps you catch issues early, saving time and money during the actual automotive metal stamping run.
RFQ Package Essentials: What to Include and Why It Matters
Ready to request quotes for metal pressing services? A complete, clear RFQ (Request for Quotation) is the foundation for accurate pricing and a smooth launch. Here’s what to include—and why each item matters:
| RFQ Input | Why It Matters |
|---|---|
| Material Spec & Thickness | Ensures correct material is sourced and die is designed for proper strength and formability. |
| Annual/Batch Volume | Affects die type (progressive, transfer), automation level, and unit price. |
| Tolerance Class | Guides process choice and inspection requirements; tighter tolerances may increase cost. |
| Edge Quality & Burr Allowance | Determines if secondary deburring or fine blanking is needed. |
| Finish/Coating | Impacts material selection and secondary operations planning. |
| Secondary Ops (deburr, plate, etc.) | Ensures all steps are quoted and scheduled for your stamping applications. |
| PPAP/Quality Level | Indicates documentation and validation needed for automotive or regulated parts. |
“A clear, detailed RFQ reduces lead time, lowers risk of surprises, and helps you get the best value for every stamped part.”
Recommended Partners for Complex or Automotive Projects
When your RFQ calls for CAE-based formability validation, advanced die engineering, or robust PPAP support—especially for automotive metal stamping process launches—consider these partners:
- Shaoyi Metal Technology – Strengths: IATF 16949 certification, advanced CAE simulation, collaborative engineering reviews, support from prototyping to mass production. Ideal for complex or high-volume automotive projects. (Note: Always verify lead time and regional support for your location.)
- Franklin Fastener – Strengths: Decades of experience, broad range of metal pressing services, technical support for custom stamped parts.
By choosing the right partner and providing a complete RFQ, you’ll set your transfer stamping press or progressive line up for a successful launch—and keep your project on track from day one.
With these troubleshooting tools, readiness checks, and RFQ essentials, you’re equipped to close the loop on your metal pressing process. The result? Fewer surprises, better quality, and a smoother path from design to production for every stamped part you make.
Frequently Asked Questions About the Metal Pressing Process
1. What is the process of pressing metal?
Metal pressing, also known as stamping, involves placing flat sheet metal—either in coil or blank form—into a stamping press. The press uses a tool and die to shape the metal into the desired form through operations like punching, bending, coining, and embossing. The metal pressing process is widely used for producing precise parts in high volumes.
2. What are the main types of metal stamping processes?
The primary types of metal stamping processes include progressive die stamping, transfer stamping, deep drawing, and fine blanking. Each method is suited to different part complexities, tolerances, and production volumes. For example, progressive dies are ideal for high-speed runs of moderately complex parts, while transfer stamping is preferred for deep or intricate forms.
3. What are the disadvantages of metal pressing?
A key disadvantage of metal pressing is the upfront investment and lead time needed for custom tooling before production can begin. This makes it less suitable for small production runs or highly variable part designs. Additionally, design changes after tooling is made can be costly, so thorough planning is essential.
4. How do you choose the right material and thickness for metal pressing?
Material and thickness selection depends on part function, formability, cost, and finishing needs. Common choices include stamped steel for strength and affordability, stainless steel for corrosion resistance, and stamped aluminum for lightweight applications. Always align thickness with required strength and press capacity, and consider finishing requirements early to avoid rework.
5. What should be included in an RFQ for metal pressing services?
An effective RFQ for metal pressing should specify material type and thickness, annual or batch volume, required tolerances, edge quality, finishing or coating needs, secondary operations, and quality documentation requirements like PPAP. Including clear details helps suppliers provide accurate quotes and ensures a smoother project launch.