 Small batches, high standards. Our rapid prototyping service makes validation faster and easier —

How To Use A Die: 9 Steps To Clean, Accurate Threads That Fit
Step 1 Understand dies and safety essentials
When you need to repair a damaged bolt or create new threads on a steel rod, you’ll likely reach for a threading die. But what exactly is it, and how does it fit into the broader tap-and-die set? Let’s break down the core concepts, the types of dies you’ll encounter, and the safety standards that keep your hands—and your work—protected.
What a Die Does in Threading
A threading die is a hardened tool designed to cut or restore external threads—the spiral grooves you see on bolts, studs, and shafts. Simply put, a die is used to shape the outside of a round part so it will accept a nut or fit into a threaded hole. In contrast, a tap is used to create internal threads inside a hole. This “tap vs die” distinction is at the heart of what is a tap and die set: a kit that lets you create or repair both internal and external threads, ensuring mechanical fasteners fit together with precision.
Types of Threading Dies You’ll Use
- Split Adjustable Round Die: Can be opened or closed slightly to adjust thread fit. Best for fine-tuning new threads or chasing slightly damaged ones.
- Solid Round Die: Rigid, one-piece design for consistent, repeatable thread cutting. Ideal for production or when you need a durable, on-size thread.
- Hex Die-Nut: Shaped like a nut and turned with a wrench. Great for restoring threads in tight spaces where a traditional die stock won’t fit.
Each die type fits into a larger tap and die workflow—whether you’re cutting new external threads on a custom shaft or quickly cleaning up a bolt that got dinged during assembly.
Safety and Standards That Matter
Threading dies are sharp tools that demand respect. Before you start, set up for safety and control:
- Eye protection (safety glasses or face shield)
- Cut-resistant gloves (when handling dies and workpieces, but keep hands clear while cutting)
- Shop apron or work shirt
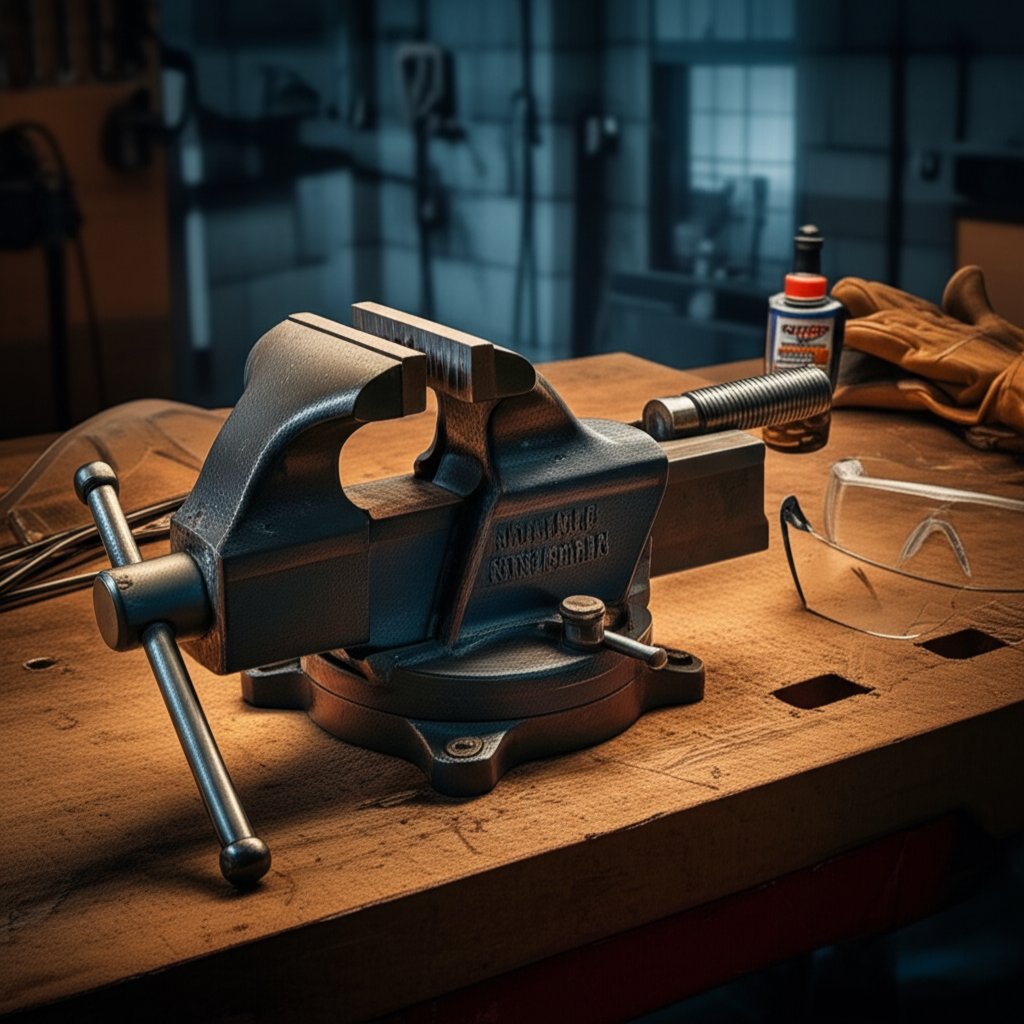
- Secure bench vise to hold the workpiece steady
Always clamp the rod or bolt firmly in a vise to prevent it from spinning. Keep hands away from the rotating die and use cutting fluid suited to your material—oil for steel, special lubricants for aluminum or stainless—to reduce friction and extend tool life.
Never force a die if it starts to bind. Back off, clear chips, and re-lubricate—this prevents breakage and ensures cleaner, more accurate threads.
Professional thread cutting also means working to recognized standards. Most threading dies follow Unified (ANSI/ASME B1.1) or ISO metric thread standards (ISO 68-1, ISO 965), which define thread shape, pitch, and tolerance for reliable fit. Using dies and tap and die sets that comply with these standards is key to getting threads that fit every time, with fewer reworks and better long-term reliability (Hi-Spec Tap and Die Guide).
Setting the Stage for Success
Understanding how to use a die isn’t just about turning a tool—it’s about knowing which die to choose, how to set up safely, and why following standards matters. As you move through the next steps, you’ll learn how to select the right die and holder, prep your workpiece, manage chip control, and measure your results for clean, accurate threads that fit on the first try.
Ready to get started? The next section walks you through choosing the best die and holder for your specific job.
Step 2 Choose the correct die and holders
Ever wondered why your threads sometimes just don’t fit right, or why a die seems harder to turn than it should? The answer often lies in choosing the correct die and holder for the job. Let’s break down how to select the right combination—so you can cut threads with confidence, whether you’re restoring a stubborn bolt or making new threads from scratch.
Choose the Right Die Type
Picking the right die starts with knowing your project’s needs. Are you cutting new threads, chasing old ones, or working in a tight spot? Here’s how each common die type stacks up:
| Die Type | Best For | Limitations | Notes on Setup |
|---|---|---|---|
| Split Adjustable Round Die | Fine-tuning new threads; adjusting fit; versatile for most jobs | Requires a die stock; slightly more setup time | Can open/close for first and final passes; held with set screws in die stock |
| Solid Round Die | Durable, repeatable thread cutting; production runs | Not adjustable for fit; less forgiving if stock size is off | Rigid one-piece; always use with matching die and die stock |
| Hex Die-Nut | Chasing/restoring damaged threads; tight spaces | Not for precision new threads; not adjustable | Turn with tap and die wrenches or a spanner; no die stock needed |
Imagine you’re trying to clean up a rusty bolt on your car’s exhaust—using a hex die nut with a wrench is quick and easy. But if you’re making a custom stud for an engine rebuild, a split round die in a proper die stock gives you the control and adjustment you need.
Match Die Sizes to Die Stocks and Holders
Now, let’s talk about holders. The right die and die stock pairing is critical for clean, controlled threading. Here’s how the main options compare:
| Holder Type | Best For | Limitations | Notes on Setup |
|---|---|---|---|
| Traditional Die Stock | General hand threading; maximum control | Requires space to turn; slower in confined areas | Secures die with set screws; check die OD matches holder |
| Ratcheting Tap and Die Handle | Threading in tight or awkward spaces | May not fit larger dies; slightly less torque | Quick back-and-forth action; ideal for npt tap and die set work |
| Guide Bushing | Keeping die square to workpiece; beginners or critical jobs | Extra setup step; only fits certain die stocks | Ensures straight starts; reduces risk of cross-threading |
When assembling your tap and die tool kit, always check that the die’s outside diameter (OD) fits your chosen holder, and that the start side of the die faces the work. This prevents frustration and ensures threads start cleanly.
- Die OD matches die stock or holder
- Set screws engage die recesses securely
- Guide bushing (if used) is properly aligned
- Die’s start side faces the workpiece
When a Die-Nut Is Enough
Sometimes, you don’t need a full setup. If you’re just restoring slightly damaged threads—say, after a bolt got dinged during removal—a die nut is the simplest solution. Just grab your tap and die wrenches or a socket, and you’re set. For new threads or when accuracy is critical, stick with a split or solid die in a proper die stock for best results.
Choosing the right die and holder saves time and headaches—especially when working with specialty threads, like those found in a pipe die set or when using a ratcheting tap and die handle in a tight engine bay. Next, we’ll cover how to plan your sizes and chamfers, so your external threads fit perfectly every time.
Step 3 Plan sizes and chamfers with charts
Ever tried to cut a thread on a rod, only to find the nut won’t fit—or it’s so loose it wobbles? Getting external threads to fit perfectly starts with smart size planning. Let’s walk through how to use a die and tap chart, choose the right stock size, and add a chamfer so your threads start clean and end up on-size.
Use Charts to Match Sizes and Pitches
Sounds complex? It’s actually straightforward with the right reference. You’ll find die and tap charts (sometimes called a tap and die table) in most tap and die sets, or you can consult standards like ISO or ANSI/ASME. These charts list the thread designation (like M6 x 1), the pitch, and the recommended starting diameter for external threads. For example, if you’re cutting a metric thread, the chart will show the major diameter range you want for the rod—aiming for the maximum allowed for a snug fit, or slightly under if you want an easier assembly (Engineers Edge Metric External Thread Table).
| Thread Spec | External Stock Target | Chamfer Guidance | Notes |
|---|---|---|---|
| M6 x 1.0 (Metric) | 5.974 – 5.794 mm major diameter (per ISO/ASME) | File or turn a 1–2 thread lead-in chamfer | Use for general purpose bolts; check fit with mating nut |
| M10 x 1.5 (Metric) | 9.968 – 9.732 mm major diameter | Light chamfer, about 45° for 1–2 threads | Prevents die from chipping on entry; improves thread start |
| Custom/Other | Refer to die and tap chart for your thread type | Always add a small chamfer | Adjust stock size for class of fit and material springback |
For other thread types, always consult a die tap chart or tap and die table for the recommended major diameter.
Plan Stock Diameter and Chamfer
Here’s the principle: The starting diameter of your rod (or bolt blank) should closely match the nominal major diameter listed for your thread die. Too large, and the die will bind or break; too small, and the threads will be weak or loose. If you’re chasing existing threads, match the original size. For new threads, use the upper end of the tolerance for a tight fit, or the lower end if you want easier assembly or are working with harder materials that may spring back after cutting.
Before you cut a thread, add a slight chamfer to the end of the rod. This helps the die start square and reduces the risk of cross-threading. A chamfer about as long as one to two threads, filed or turned at 30–45°, is usually enough. You’ll notice this simple step makes starting the die much smoother and prevents chipping the die teeth.
Fit Strategy for Mating Parts
How do you make sure your newly cut external threads will fit the mating nut or tapped hole? The answer is to cross-reference both the die and tap chart. Confirm the pitch (distance between threads), the tolerance class, and any allowances for the material you’re using. For metric threads, the tap drill size for the internal thread is often the major diameter minus the pitch—but always check the chart for your specific thread form.
- Identify the thread series and pitch you need (e.g., M8 x 1.25).
- Look up the recommended major diameter for external threads in the die and tap chart.
- Confirm the tolerance class (like 6g for metric) for your application.
- Note any material-specific allowances—softer materials may need a slightly larger starting diameter.
- For mating parts, check both the external thread die chart and the tap chart for the internal thread to ensure compatibility.
Imagine you’re making a custom stud: matching the external thread to the nut’s internal thread means fewer headaches and less rework. By following these steps and using reliable charts, you’ll cut threads that fit right the first time—no guesswork required.
Next, we’ll walk through prepping your workpiece and setting up your die so you’re ready to make the first cut with confidence.
Step 4 Prepare the workpiece and setup
Ever tried using a die, only to end up with crooked or rough threads? Getting this right starts before you ever make the first cut. Proper setup is the foundation for quality threads—and it’s easier than you might think. Let’s break down exactly what you need to do for a smooth, accurate threading experience every time.
Prep the Workpiece
Imagine you’re about to cut threads on a steel rod. If the end is jagged or dirty, your die will struggle, and the threads may be weak or misaligned. Here’s how to get your workpiece ready:
- Cut or saw the bar cleanly. Use a hacksaw or cutoff tool to create a flat, square end.
- Face or file the end square. Run a file across the end to remove any high spots. This helps the die start straight.
- Deburr edges. Remove sharp edges or burrs with a file or sandpaper. This prevents the die from catching or chipping.
- Create a modest chamfer. File or grind a small bevel (about 1–2 threads long, 30–45° angle) on the end. This chamfer makes setting the die much easier and reduces cross-threading risk.
- Clean and degrease the workpiece. Wipe off any oil, dirt, or grease with a rag or degreaser. Chips and debris can pack into the die thread and ruin your cut.
- Inspect for cracks or damage. If the rod is bent or cracked, replace it—damaged stock leads to poor threads.
- Vise
- Die stock (holder)
- Cutting fluid or lubricant
- Square or guide bushing
- Rags and brush
Mount and Orient the Die Correctly
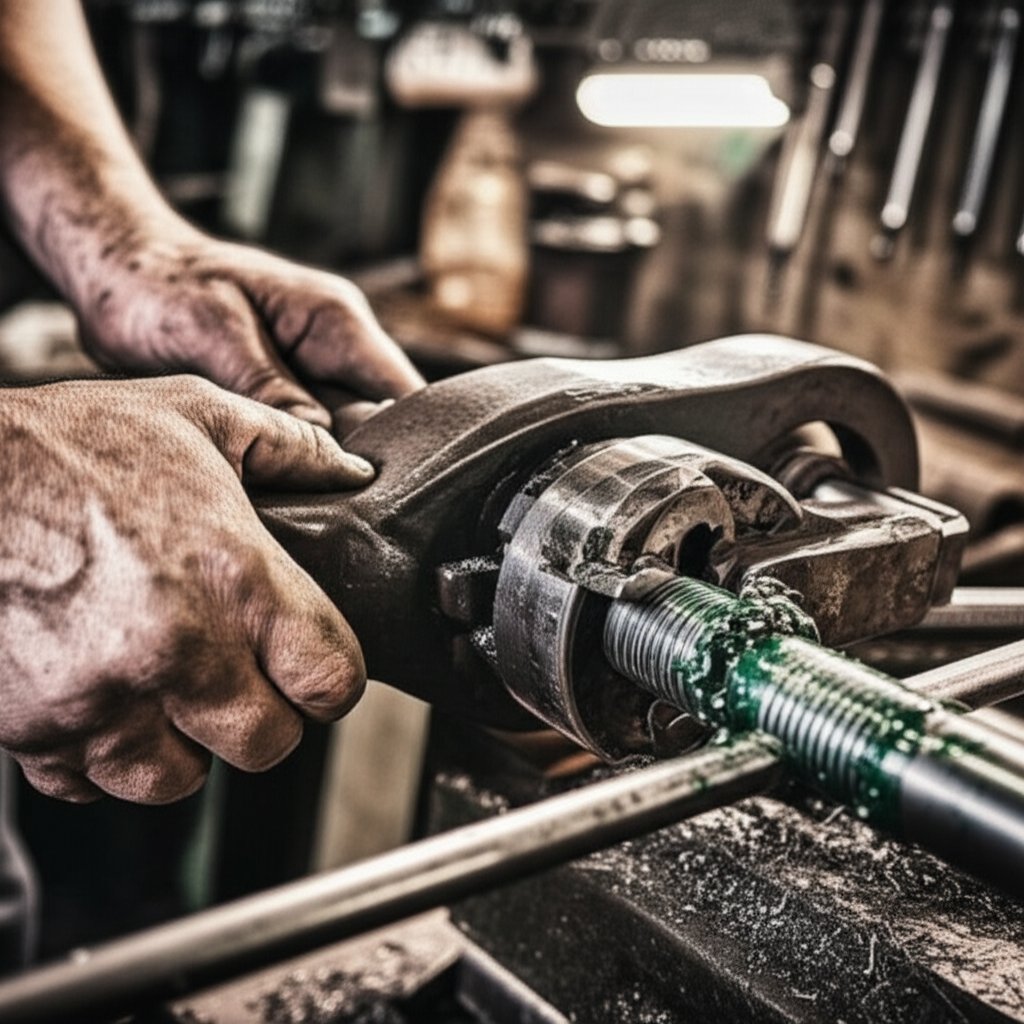
Next, let’s talk about how to use a die set for the best results. Place the die into the die stock so the start side (often marked or with a slightly larger lead-in) faces the workpiece. Secure it by tightening the set screw tap(s) into the die’s recesses—this keeps the die from slipping or tilting during the cut.
Before starting, make sure the die is centered in the holder and perpendicular to the rod. A square or guide bushing helps keep everything aligned. If you’re working with long rods or awkward shapes, a tap and die extension bar can give you extra reach and control.
Alignment is the single biggest determinant of thread quality—take a moment to check before you cut, and you’ll save hours of rework.
Choose the Right Cutting Fluid
Ever wonder why some threads look bright and smooth, while others are torn or dull? The secret is proper lubrication. Different materials call for different fluids:
- Steel and tough alloys: Use a straight cutting oil (undiluted mineral or petroleum-based) for maximum lubrication and tool life (Keller Heartt Cutting Oil Guide).
- Aluminum and soft metals: Opt for a soluble or synthetic oil that won’t stain or cause buildup.
- Brass and nonferrous: Light oil is enough—avoid heavy, sticky fluids that can trap chips.
Apply the cutting fluid generously to both the die and the workpiece before starting. This reduces friction, keeps the die thread sharp, and helps flush chips out as you cut.
Final Setup Checklist
| Step | Why It Matters |
|---|---|
| Workpiece clamped securely in vise | Prevents movement and misalignment |
| End faced, deburred, and chamfered | Ensures clean die start and reduces chip buildup |
| Die seated in stock, start side out | Guarantees correct thread profile and fit |
| Set screws tightened into die recesses | Keeps die from shifting under load |
| Guide bushing or square used (if available) | Helps keep die perpendicular for straight threads |
| Cutting fluid applied to die and workpiece | Improves finish, tool life, and chip evacuation |
With your workpiece prepped and your die set up, you’re ready for the main event: cutting threads with confidence. In the next section, we’ll guide you step-by-step through the actual cutting process, from first contact to a flawless finish.
Step 5 Cut external threads step by step
Ready to get hands-on? Let’s walk through the nuts and bolts of using a die to cut threads—the moment where all your prep pays off. Whether you’re threading a custom stud or repairing a bolt, the right approach makes all the difference. Here’s how to use tap die tools for crisp, accurate results every time.
Start the Thread Cleanly
Imagine you’ve got your rod chamfered, the die set in the holder, and everything lubricated. Now, it’s time to start the thread:
- Align the die squarely on the chamfered end of your workpiece. The die must sit flat—if it’s tilted, you’ll end up with crooked or damaged threads.
- Apply steady, even pressure as you begin turning the die stock clockwise (for right-hand threads). The die’s cutting edges will start to bite into the metal.
- Ensure the die is cutting, not sliding. If you feel it skating, back off and check your chamfer or alignment.
Starting square is the foundation for a straight, on-size thread. If you’re ever unsure, stop and check from multiple angles—this is a key step in how to use a tap and die set effectively.
Chip Control and Cutting Cadence
Ever notice how cutting threads can go from smooth to stubborn in a few turns? That’s chip buildup at work. Here’s how to tap and die threads for a clean finish:
- Advance the die 1–2 full turns, then reverse about a third of a turn. This breaks the chip, clears the gullets, and lets lubricant reach the cutting edges.
- Repeat this advance-and-reverse cadence throughout the cut. Don’t rush—steady, moderate torque is key. If you feel binding or resistance spikes, stop immediately.
- Back off fully every so often (especially on deep threads) to brush away chips and reapply cutting fluid. This prevents chip packing and keeps the die sharp.
- Never force a stalled die. If it won’t turn, withdraw, clean, and restart a turn or two back. Forcing can break the die or ruin your threads (Practical Machinist Forum).
- Chips break cleanly and don’t clog the die
- Torque feels steady—not jerky or excessive
- Thread flank finish is bright and smooth, not torn or rough
At the first sign of misalignment or excessive resistance, stop. Back out, clean up, and reset—forcing a die will only create more trouble down the road.
Finish and Deburr
As you near the end of the cut, you’ll feel the die spin more freely—this means you’re through. Here’s how to wrap up for professional results:
- Reduce pressure in the last few turns to avoid over-cutting. This burnishes the threads and leaves a smooth finish.
- Back the die off completely by reversing it off the workpiece. Brush away any remaining chips.
- Lightly dress the thread start with a file if needed—this removes any burrs or sharp edges, making it easier to start a nut.
- Test fit with a mating nut to ensure your threads are clean and on-size. If the nut goes on smoothly and there’s no wobble, you’ve nailed it!
By following these steps, you’ll master how to use tap die set tools and avoid the common pitfalls that frustrate beginners. The process may seem slow at first, but with practice, you’ll develop a rhythm for cutting threads that are strong, smooth, and ready for real-world use.
Up next, we’ll show you how to inspect and measure your newly cut threads—so you can be confident every part meets spec before it goes into service.
Step 6 Inspect and measure thread quality
Ever wondered if your freshly cut threads are truly up to standard? You’ve gone through the work of using a die—but how do you know your threads will fit every time, without surprises? Let’s break down practical, repeatable ways to inspect and measure your results, so you can trust that every thread made with your thread dies passes the test.
Use Go/No-Go Ring Gauges
Imagine you’ve just finished cutting a thread with your thread die tool. The fastest and most reliable way to check your work is with a go/no-go ring gauge. Here’s how it works:
- Go Gauge: This side should screw fully onto the external thread by hand, with no force or binding. If it runs smoothly to the full depth, your thread meets the minimum size and form requirements.
- No-Go Gauge: This side should not advance more than a couple of turns—should not advance more than three full turns before it drags or stops—before it drags or stops. If it goes further, your thread is oversized or out of tolerance (Quality Magazine).
This process checks not just the size, but also the pitch diameter and form of your tap and die thread. For most jobs, if the Go fits and the No-Go doesn’t, you’re in the clear.
| Inspection Tool | What It Checks | Pass/Fail Criteria |
|---|---|---|
| Go/No-Go Ring Gauge | Pitch diameter, thread form | Go must run full depth by hand; No-Go must not pass 2–3 threads |
| Pitch Gauge | Thread pitch (distance between threads) | Pitches align perfectly with no gaps or overlap |
| Calipers/Micrometer | Major diameter (outside of the thread) | Matches chart or standard for your thread type |
| Mating Nut | Functional fit | Nut screws on smoothly, no wobble or binding |
| Visual Inspection (Light/Glass) | Surface finish, double-starts, tearing | Threads are bright, smooth, and even |
Alternative Checks Without Gauges
No ring gauges on hand? Don’t worry—you can still ensure quality with a few simple tools:
- Pitch Gauge: Align the gauge teeth with your threads. If they fit perfectly, your pitch is spot-on.
- Calipers: Measure the major diameter of your thread. Compare it to the size listed in your standards chart or the Machinery’s Handbook. Too large or too small can mean a poor fit.
- Mating Nut Test: Try threading a known good nut onto your part. It should screw on by hand, with no excessive play or tight spots.
- Visual Inspection: Hold the thread under a bright light. Look for torn, rough, or doubled threads—these are signs of misalignment or a dull die.
For most everyday projects, this combination of checks will catch major issues before parts go into service.
Record Results Against Standards
To ensure consistency—especially when working on critical jobs or in a shop environment—compare your findings to recognized standards. Thread classes (like 2A or 3A for external threads) define the tolerance and fit you should expect (Engineers Edge). Recording your inspection results helps catch trends and prevent future problems.
If the Go gauge fits freely and the No-Go stops after two turns, your thread is good—simple as that. This rule-of-thumb keeps parts consistent and reliable across every project.
By mastering these inspection steps, you’ll not only know what does a tap and die set do, but also how to guarantee every thread you cut with a threading tap and die is ready for real-world use. Up next, we’ll show you how to troubleshoot common thread issues and recover from mistakes—so you’re always prepared for the unexpected.
Step 7 Troubleshoot and recover with confidence
Ever found yourself halfway through die threading, only to hit a snag—literally? Whether you’re using tap and die set tools for the first time or you’ve threaded countless bolts, issues like cross-threading, binding, or a stuck die can happen to anyone. The good news? Most problems are fixable with the right approach. Let’s break down practical troubleshooting steps and recovery methods, so you can keep your project on track and your threads clean.
Fix Cross-Threading and Starts
Cross-threading occurs when the die starts crooked, cutting a thread that doesn’t match the original path. You’ll notice increased resistance, uneven threads, or a nut that won’t start. Sounds familiar? Here’s how to recover:
- Stop immediately if you suspect cross-threading. Forcing the die will only deepen the damage.
- Reverse the die off the workpiece gently.
- Inspect the threads. If damage is light, use a split die thread chaser set slightly open to realign and clean up the threads. For severe damage, recut the chamfer and restart the process, using a guide bushing or square to keep the die perfectly perpendicular.
| Pros | Cons |
|---|---|
| Restores threads without full rework; quick fix for minor issues | Severe cross-threading may require cutting the end off and starting over |
- Stop and back off the die at the first sign of trouble.
- Deburr and re-chamfer the workpiece end.
- Use a split die thread chaser to gently realign threads.
- Reset the die, double-check alignment, and restart the cut.
Resolve Binding, Galling, and Chatter
Sometimes the die becomes hard to turn, squeals, or produces rough, torn threads. This can be caused by chip buildup, lack of lubrication, or misalignment. Here’s how to get back on track:
- Withdraw the die and clean away chips. Check for packed debris inside the die and on the workpiece.
- Refresh or switch lubricant, especially if you’re working with sticky metals like aluminum or stainless steel.
- Check stock size and ensure it matches the die’s intended thread size.
- Reduce speed and apply more lubricant if you notice chatter or a rough finish.
- Inspect the die for dull or chipped teeth—replace if needed.
| Pros | Cons |
|---|---|
| Prevents further tool damage and improves thread quality | May slow your workflow; requires clean-up and re-lubrication |
- Stop turning at the first sign of binding or noise.
- Back the die off and clean both die and rod thoroughly.
- Reapply lubricant and check alignment.
- Resume cutting with lighter pressure and slower cadence.
Safely Remove a Stuck or Damaged Die
Ever had a die freeze on the workpiece? Don’t panic—here’s how to avoid breaking your tool or damaging the part:
- Back off the die incrementally, turning it gently in reverse. Never force it.
- Apply penetrating oil to loosen stubborn chips or galled metal.
- Support the stock securely in a vise to prevent bending or twisting.
- Switch to locking pliers if hand force isn’t enough, but be careful not to deform the part.
- If the die is chipped or cracked, retire it immediately—using a damaged die will only ruin your threads and risk injury.
| Pros | Cons |
|---|---|
| Prevents tool breakage and preserves your workpiece | May require tool replacement or additional cleanup |
- Stop applying force if the die stalls.
- Apply penetrating oil and wait a few minutes.
- Gently reverse the die off the workpiece, supporting the rod throughout.
- Inspect for thread or tool damage before resuming work.
"If you’re ever in doubt, stop and reset. Most thread damage and tool breakage happens when you try to force a stuck die—patience and the right recovery steps save both your workpiece and your tools."
By mastering these troubleshooting strategies, you’ll turn potential setbacks into learning opportunities. Whether you’re using tap and die tools for routine maintenance or precision builds, knowing how to recover from mistakes is a crucial part of expert tap and die set usage. Next, we’ll explore how different materials and lubricants affect your threading technique, so you can avoid these issues before they start.

Step 8 Adjust technique by material and lubricant
Ever wonder why some threads cut like butter while others fight you every turn? The answer often lies in matching your technique—and your lubricant—to the material at hand. Whether you’re using a metal die to thread stainless, aluminum, or brass, small adjustments can mean the difference between smooth, accurate threads and a stuck or ruined part. Let’s break down what you need to know for each material type, so your thread cutting dies always deliver professional results.
Stainless and Hard Alloys
Stainless steel and hard alloys are notorious for work-hardening and galling. If you’ve ever felt your die cutter for metal suddenly bind or the threads look torn, you’ve likely run into these issues. Here’s how to prevent trouble:
| Material | Lubricant Guidance | Cutting Notes | Risk Alerts |
|---|---|---|---|
| Stainless Steel, Hard Alloys | Straight (undiluted) cutting oil with sulfur/extreme pressure additives | Use slow, steady cutting speed; frequent chip breaking; never use a dull die | High risk of work-hardening and galling if lubricant is insufficient |
- Keep the die tapping tool sharp and well-lubricated
- Break chips often by reversing the die every turn or two
- Never force a binding die—withdraw, clean, and restart
Aluminum and Nonferrous Metals
Cutting threads in aluminum can feel easy—until the die starts to clog or seize from galling. Aluminum’s ductility makes it especially prone to adhesive wear. Here’s what to do:
| Aluminum | Soluble or synthetic oil, non-staining and formulated for aluminum | Frequent cleaning to prevent chips from packing the die; avoid heavy straight oils | Galling and chip buildup if lubrication is poor |
| Brass, Bronze | Light oil; avoid over-lubrication | Cuts cleanly; chips evacuate easily; minimal risk of galling | Over-lubrication can trap chips and dull the thread |
- Use a lubricant designed to reduce adhesion for aluminum
- Clean chips from the die frequently
- For brass and bronze, a light touch with oil is best
Mild Steel, Brass, and Plated Parts
Mild steel is forgiving but still benefits from the right approach. Brass and free-machining bronzes are among the easiest materials for material cutting dies—but don’t let that lull you into skipping lubrication. For plated or heat-treated parts, plan extra steps:
| Mild Steel | Straight or soluble oil; general-purpose cutting fluid | Consistent lubrication extends tool life and improves finish | Dry cutting shortens die life |
| Plated/Heat-Treated Parts | Depends on substrate; often best to pre-cut or remove plating first | Chase threads rather than recut if part is hardened | High risk of die chipping or thread tearing |
- For mild steel, lubricate generously and keep a steady pace
- For plated or hardened parts, consider chasing the threads rather than full recutting
Telltale Signs of Galling or Work-Hardening
- Sudden increase in torque or the die stalls
- Threads appear torn, rough, or have lumps
- Die feels hot quickly or squeals during cutting
- Metal transfers from the workpiece to the die or vice versa
“Galling and work-hardening can ruin threads in seconds—always match your lubricant and technique to the material, and stop at the first sign of trouble.”
When in doubt, consult your die set’s manufacturer or standard machining texts for specific lubricant and technique recommendations for your die tapping tool and material. By adapting your approach, you’ll avoid common pitfalls and extend the life of your thread cutting dies.
With your technique dialed in for every material, you’re ready to bridge the gap from hand threading to production die work. Next, we’ll explore how these skills scale up for automotive and manufacturing applications.
Step 9 Scale from bench work to stamping dies
From Bench Work to Production
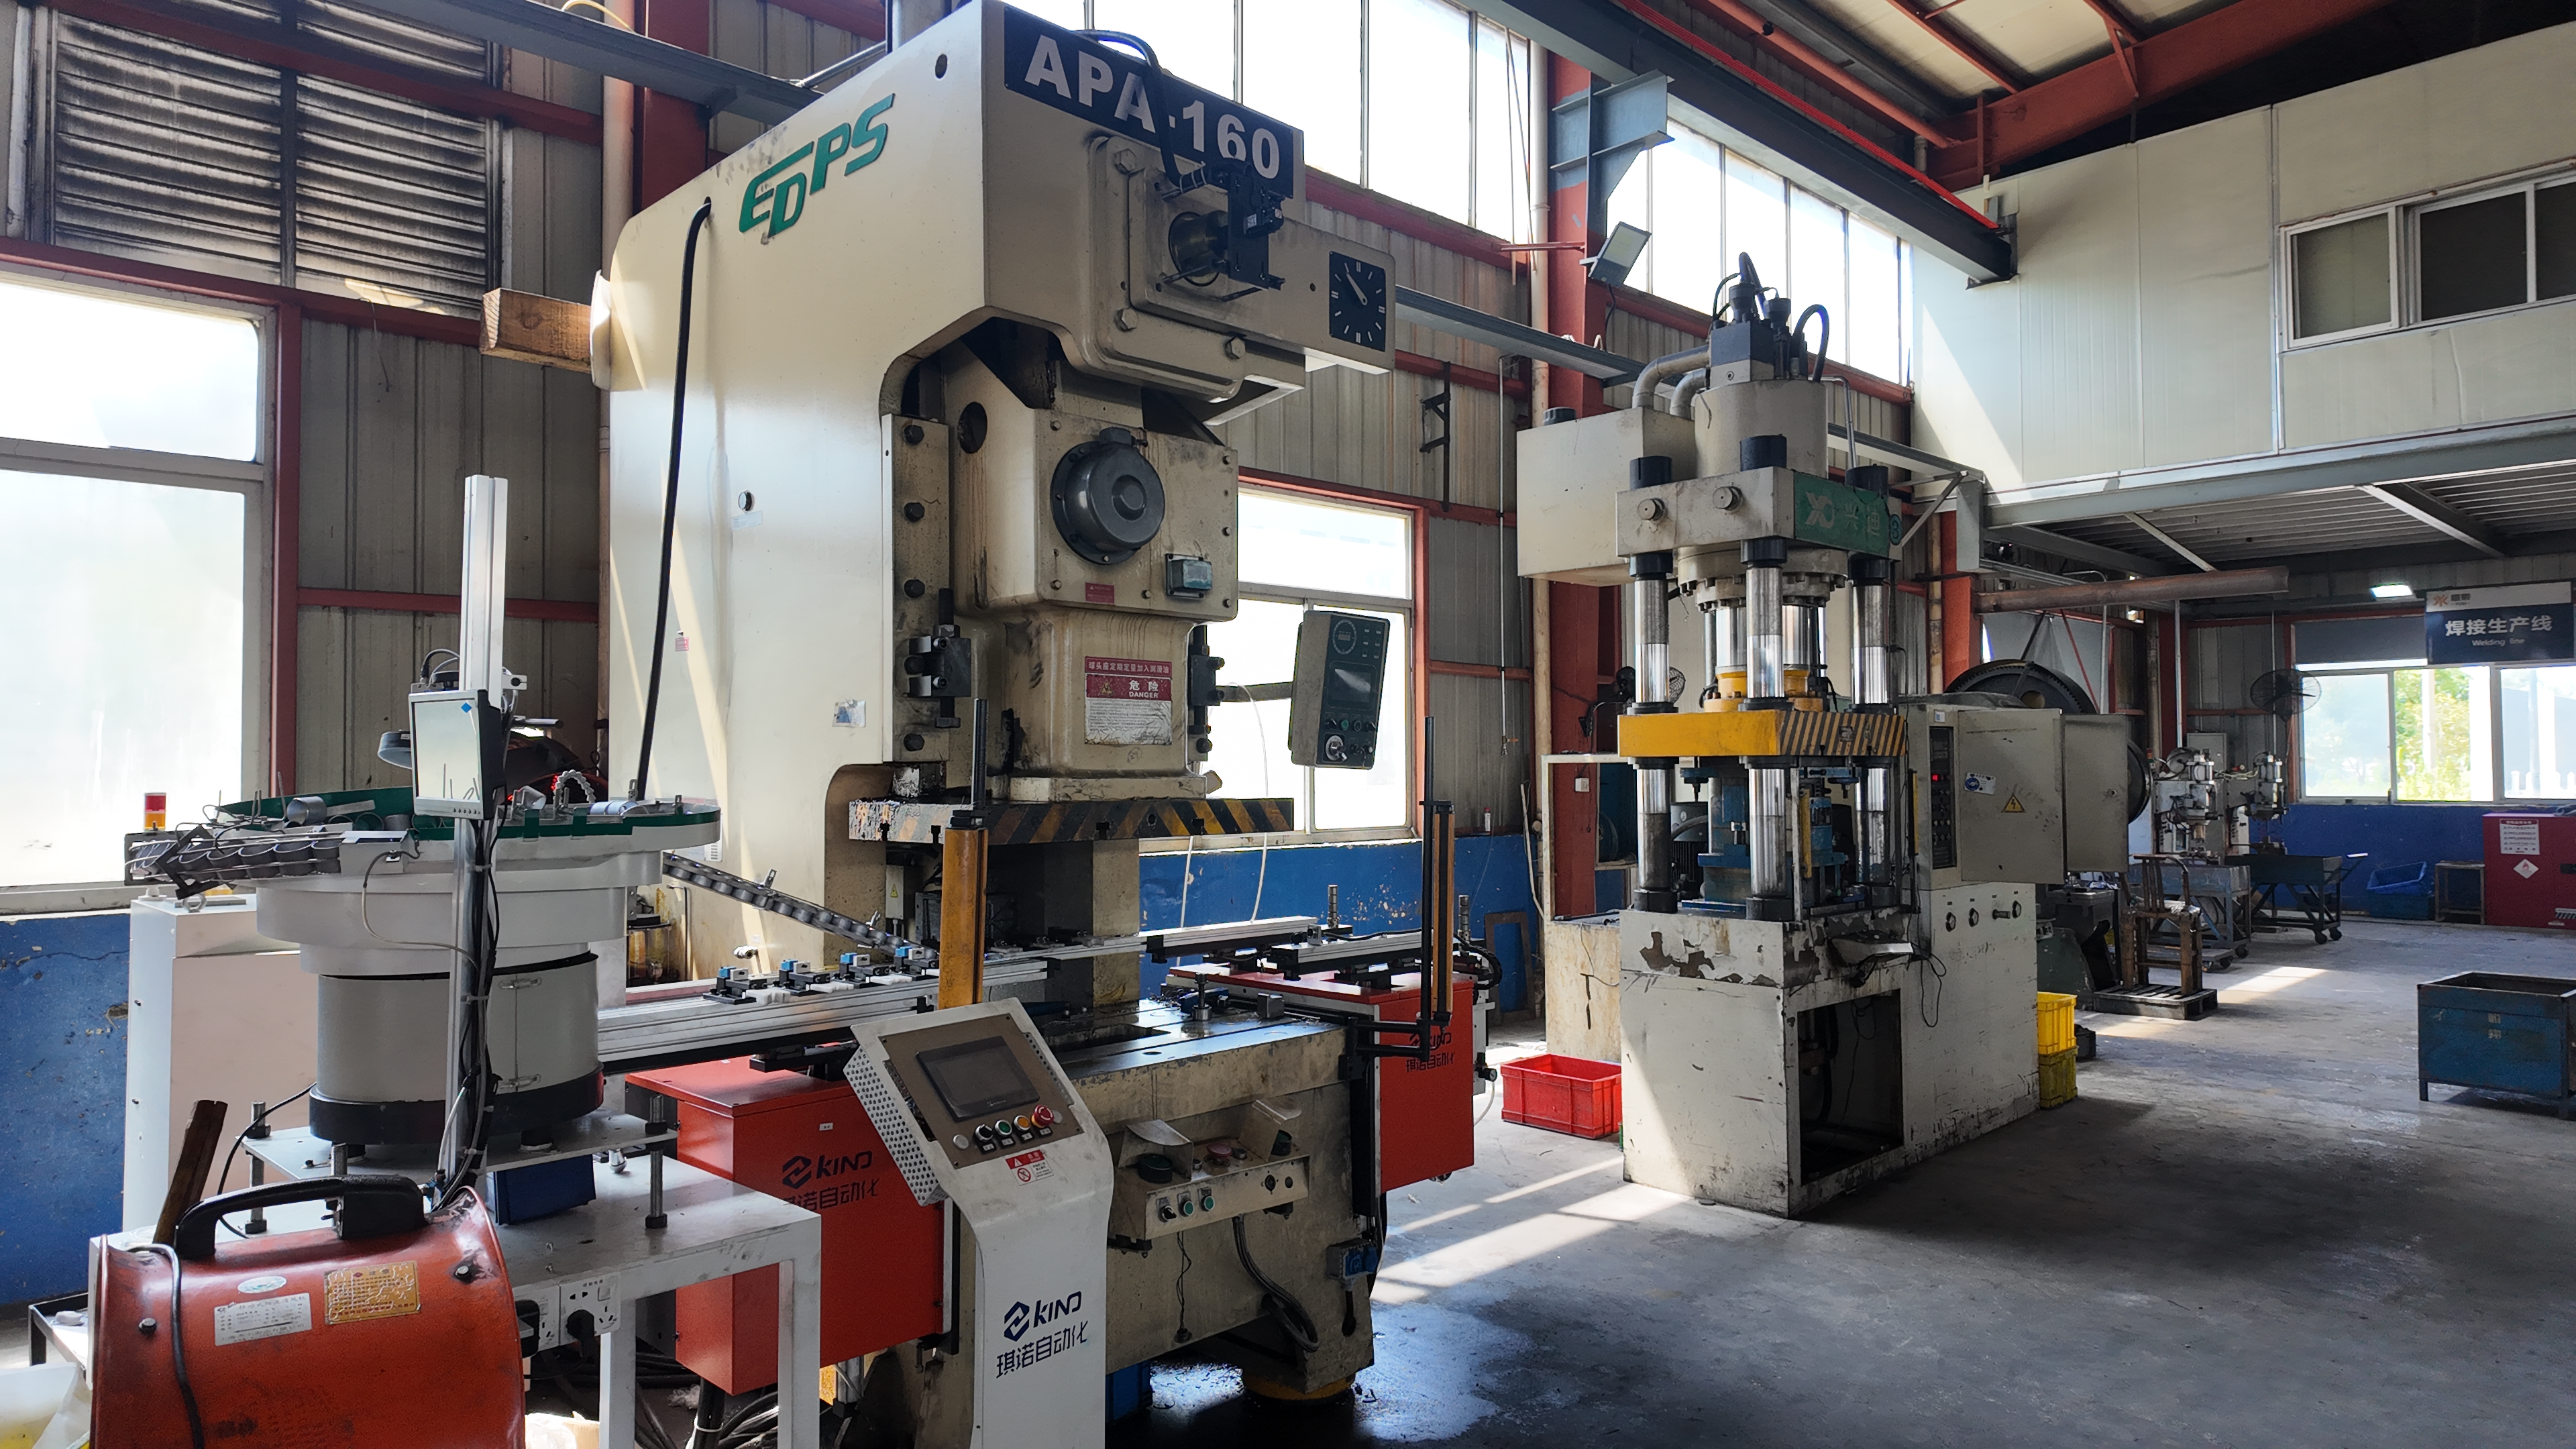
Ever wondered how the skills you’ve honed with a threading die translate to the massive, high-speed world of automotive manufacturing? While threading dies are perfect for shaping external threads on a single rod or bolt, stamping dies take things to a whole new level—forming complex sheet metal parts at scale. Imagine moving from crafting a single custom stud to producing thousands of precisely shaped car panels every day. That’s the leap from bench work to full-scale die making.
So, what is die making in this context? It’s the process of designing and manufacturing specialized tools—stamping dies—that cut, form, and shape sheet metal into everything from brackets to body panels. Unlike hand threading, where you shape one part at a time, machine dies in a stamping press can produce multiple parts per minute, each meeting tight tolerances and consistent quality (The Fabricator: Die Basics 101).
- When you need repeatable, high-volume production with minimal variation
- For parts requiring complex shapes or deep draws that can’t be made by hand
- To control cost per part in automotive, electronics, or aerospace industries
- When dimensional stability and surface finish are mission-critical
When to Engage a Stamping Die Partner
Making the jump from hand-threading to production-level die work isn’t just about bigger machines—it’s about smarter processes. If your team is moving from prototyping to high-volume manufacturing, collaborating with a certified tool & die maker can dramatically reduce the number of trial-and-error cycles, save time, and ensure your parts meet exacting standards. For example, custom metal stamping dies are designed specifically for your project’s needs, allowing for precise control over every feature and tolerance.
Professional die makers use advanced CAD modeling to shape the die, and the best partners provide in-depth structural reviews and quality checks at every stage of the die process. If you’re searching for “tool & die near me,” look for partners with proven expertise in your industry and the ability to support both prototyping and mass production.
How CAE Simulation Reduces Risk
Sounds complex? Imagine being able to predict and solve problems before they ever hit the shop floor. That’s where CAE (Computer-Aided Engineering) simulation comes in. By leveraging powerful simulation tools, engineers can model material flow, predict springback, and optimize die geometry—eliminating costly physical tryouts and reducing risk. This virtual approach means you can fine-tune your machine die design for tight tolerances, complex forms, and material variations, all before cutting a single piece of steel.
When you’re ready to scale from bench operations to engineered stamping dies, consider working with a partner like Shaoyi Metal Technology. Their team leverages advanced CAE simulation to optimize die geometry and predict material flow, significantly reducing tryout cycles and tooling costs. With IATF 16949 certification and experience supporting over 30 global automotive brands, Shaoyi provides in-depth formability analysis and structural reviews from rapid prototyping through mass production—helping you achieve the highest standards for dimensional accuracy and long-term durability.
- Tight tolerances required for safety-critical automotive parts
- Complex draw forms or intricate geometries
- High-volume production where cost per part matters
- Demand for consistent, repeatable quality over large runs
“Scaling from hand-threaded prototypes to stamped production parts is about more than speed—it’s about precision, repeatability, and reducing risk at every step of the die making journey.”
By understanding the full die process—from hand tools to advanced machine dies and simulation-driven design—you’ll be equipped to take your skills and your projects to the next level. Whether you’re prototyping in your shop or gearing up for automotive production, the right die making partner and technology can make all the difference.
Frequently Asked Questions About Using a Die
1. How do you use a die to cut threads?
To cut threads with a die, first select the right die type and holder for your project. Prepare the rod by cleaning, deburring, and chamfering the end. Secure the rod in a vise, install the die in the holder with the start side facing the workpiece, and apply cutting fluid. Align the die squarely, turn it clockwise with steady pressure, and periodically reverse to break chips. Continue until the desired thread length is reached, then remove the die and inspect the threads for quality.
2. What is the difference between a tap and a die?
A tap is used to cut internal threads inside a hole, allowing bolts or screws to fit. A die, on the other hand, is used to cut or restore external threads on rods, bolts, or shafts. Both are essential tools in a tap and die set, enabling the creation or repair of matching threaded fasteners.
3. How do you start a thread with a die and ensure it is straight?
Begin by chamfering the end of the rod and ensuring it's square. Place the die onto the chamfered end, making sure it sits flat and is perpendicular to the rod. Use a guide bushing or square if available. Apply steady, even pressure as you turn the die holder, checking alignment from multiple angles. Starting square is crucial for straight, accurate threads.
4. When should you use a die-nut instead of a standard round die?
A die-nut is ideal for cleaning up or restoring slightly damaged threads, especially in tight spaces where a full die stock won't fit. It is turned with a wrench or spanner and is not adjustable, making it best for maintenance or repair rather than cutting new, precision threads.
5. How can you check if your newly cut threads are the correct size and fit?
Use a go/no-go ring gauge to test the thread: the 'go' side should screw on easily by hand, while the 'no-go' should not advance more than a couple of turns. If gauges aren't available, use a pitch gauge, calipers for major diameter, and a known good nut to verify fit. Visual inspection under good lighting can help spot irregularities or defects.