 Small batches, high standards. Our rapid prototyping service makes validation faster and easier —

How To Spray Paint Car So The Finish Looks Smooth, Not Cheap
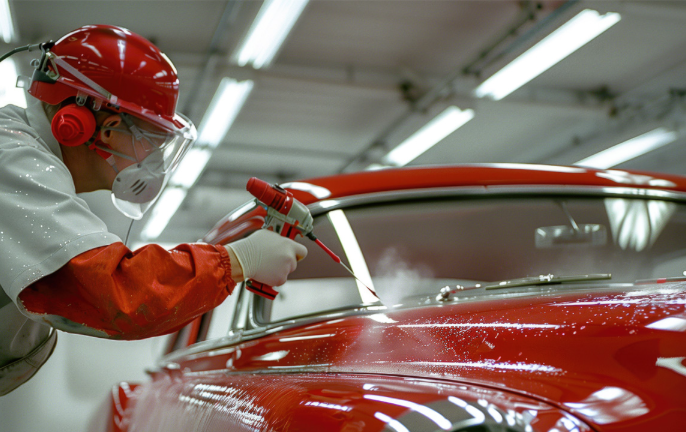
How to Spray Paint a Car?
If you are asking can i paint my own car or can i spray paint my car, pause before buying paint. The real first step is not color. It is scope. When people search how to spray paint a car, they often picture one process, but a full respray, a single-panel repair, and a tiny cosmetic fix are completely different jobs with different risks.
When Spray Painting a Car Makes Sense
A home spray job makes the most sense when the vehicle is older, the budget is tight, or the goal is improvement rather than a near-factory finish. It is also a practical option for hobby projects and small visible defects. For localized damage, spot repair is often the smarter move than repainting the whole vehicle. Your Car Bodyshop notes that small areas of damage are usually better suited to targeted repair, while a full repaint makes more sense when multiple panels are affected or the finish has faded broadly.
Full Car vs Single Panel vs Touch Up
Can you spray paint a car at home? Yes. Can you paint your car with spray paint and expect every panel to match perfectly in sun and shade? That is much harder.
- Full car: Best for older project cars, budget builds, or temporary refreshes.
- Single panel: A realistic DIY choice for a bumper, fender, or door when surrounding paint still looks decent.
- Touch-up: The safest entry point for chips, scratches, and small cosmetic repairs.
- Temporary refresh: Fine if you want to paint your car at home for appearance, not maximum resale value or long-term durability.
Set Realistic Finish Expectations
DIY work can save money, but it usually trades cost for time, labor, and finish consistency. Genuine Collision Center says DIY materials may cost a few hundred dollars, while professional paint work often runs from about $1,000 to $5,000 or more. That same source also notes that a DIY finish may last only a few years, while professional work can last much longer with proper care. In plain terms, the bigger the area, the harder it is to avoid runs, dry spray, weak gloss, and visible color mismatch.
| Paint path | Best fit | Finish potential | Pros | Limits |
|---|---|---|---|---|
| Shaoyi production-grade part finishing | Automakers and Tier 1 suppliers needing repeatable part or batch finishing | High process consistency for production parts | One-stop automotive metal part solutions, high-precision stamping, CNC machining, custom surface treatments, rapid prototyping, high-volume production, and IATF 16949-certified quality assurance | Not a consumer driveway repaint solution for a whole personal vehicle |
| DIY home spraying | Touch-ups, one panel, older cars, budget refreshes | Fair to good, depending heavily on prep and skill | Lower cash cost, full control, useful for learning | High labor, finish defects are common, mismatch risk rises on large jobs |
| Body-shop refinishing | Newer cars, visible panels, resale-sensitive vehicles, full resprays | Best chance of smooth, durable, well-matched results | Professional prep, color matching, faster turnaround, possible warranty support | Higher price and less DIY control |
The right answer depends less on bravery and more on project size, standards, and what flaws you are willing to live with. That decision shapes every supply choice that follows, from paint system to masking materials.
Car Spray Paint Checklist for Tools, Supplies, and Safety
Most DIY paint problems start in the shopping cart, not in the spray pass. Missing cleaner, cheap tape, or incompatible reducer can lead to poor adhesion, fisheyes, or uneven gloss. Before buying any spray paint for car work, build one complete kit and stage it in a clean, dry area. Keep removed trim, lights, clips, and fasteners in labeled bags or bins so reassembly stays organized.
Paint Products You Need Before You Start
-
Paint system
- Automotive-grade basecoat and clearcoat, or single-stage paint
- Primer suited to the surface, such as epoxy for bare metal, primer surfacer for smoothing, and sealer when a uniform base is needed
- Reducers and activators made for that exact system
- If you are using car spray paint or matched auto spray paint aerosols, keep primer, color, and clear within the same product family when possible
-
Mixing items
- Graduated mixing cups
- Stir sticks
- Paint strainers for spray-gun setups
Miller Coatings & Equipment stresses a point many beginners miss: mismatched materials are a common cause of finish failure. That matters whether you buy automobile spray paint in cans or a gun-applied system.
Sanding Masking and Cleaning Checklist
-
Prep tools
- Sandpaper in multiple grits
- Sanding blocks
- Wax and grease remover
- Clean lint-free towels
- Tack cloths
-
Masking
- Automotive-grade masking tape
- Masking paper or plastic sheeting
- Wheel covers or drop cloths
- Extra tape and paper so you do not run short mid-job
-
Spray setup
- Gravity-feed spray gun if you are not using aerosols
- Separate guns for primer and topcoat when possible
- Air compressor with steady output
- Moisture trap, water separator, and clean air hose
-
Cleanup
- Gun cleaning solvent
- Cleaning brushes
- Waste container for used materials
Safety Gear for DIY Auto Paint
Health risks deserve real attention. HSE notes that isocyanates used in motor vehicle repair paints are a major cause of occupational asthma, and water-based does not automatically mean isocyanate-free.
-
PPE
- Properly rated respirator for paint fumes
- Solvent-resistant gloves
- Eye protection
- Coveralls or a paint suit
-
Workspace support
- Bright lighting
- Clean storage for removed parts
- A dust-controlled area for supplies and panels
One rule keeps this manageable: match every liquid product to the chosen system. Not every product sold as spray paint for automotive use shares the same chemistry, so the exact paint code and paint type matter more than the label style.
Match the OEM Code and Choose the Right Paint System
By this point, the shopping list is only half the story. The color has to match, but the delivery method matters just as much. A tiny chip, a bumper corner, and a full respray do not need the same paint setup, which is why the best spray paint for car work depends more on project size and finish goals than on marketing claims.
Find the OEM Paint Code First
Start with the OEM paint code before ordering anything. On most vehicles, that code is found on a factory identification or service label, and the exact location varies by make. If the label is hard to read, verify the code through manufacturer parts information or VIN-based dealer support before buying paint. That step matters whether you want aerosol car paint for a small repair or ready to spray car paint for a spray gun.
Even with the right code, a perfect visual match is not guaranteed. Older paint can fade, weather, or polish differently across panels, so the formula may be correct while the car still looks slightly off in daylight. Metallic and pearl finishes make that problem more obvious.
Choose the Right Paint System for Your Project
A comparison from WheelRestore notes that aerosols are pre-mixed and ready to use, which makes them beginner-friendly for smaller jobs, while spray guns require mixing, compressor support, and cleanup but offer more control and better consistency. That is a useful way to sort your options.
If you are fixing a mirror cap, stone-chip area, or very small cosmetic damage, spray paint for cars in a spray can is usually the easiest entry point. Matched automotive can spray paint or car spray can paint can also work for a small older panel when your goal is decent appearance, not near-show quality. For broader panels or a full vehicle, gun-applied paint usually gives you a better chance at uniform coverage.
PaintForCars describes single-stage paint as a faster, simpler system because color and protection are combined, while basecoat/clearcoat separates color from gloss and protection for a deeper, more vibrant finish with better long-term durability. In plain terms, single-stage is simpler. Basecoat/clearcoat has higher finish potential, especially on modern vehicles.
| Paint approach | Best project fit | Finish potential | Complexity | Correction difficulty |
|---|---|---|---|---|
| Aerosol touch-up system | Chips, scratches, very small repairs | Lowest to fair | Low | Usually easiest to redo locally |
| Matched automotive can spray paint | Small panel repairs, budget refreshes | Fair to good on limited areas | Low to medium | Moderate, especially if texture differs |
| Single-stage spray-gun system | Solid-color panels, simpler resprays, budget-minded DIY work | Good | Medium | Moderate, defects may need sanding and respraying |
| Basecoat plus clearcoat spray-gun system | Modern vehicles, larger panels, higher-end finish goals | Highest potential | High | Higher, because color and clear each affect the result |
How Color Matching Affects the Final Result
There is no single best spray paint to paint a car for every job. What matters is how the paint type, panel size, and existing finish work together. A solid non-metallic color is more forgiving than a metallic hood or pearl bumper. Small repairs can hide well. Large visible panels punish small mistakes.
Choose the system that fits the repair, not the one that sounds most professional. That decision shapes everything that happens in the spray area, from can technique to gun setup, air supply, and fan control.
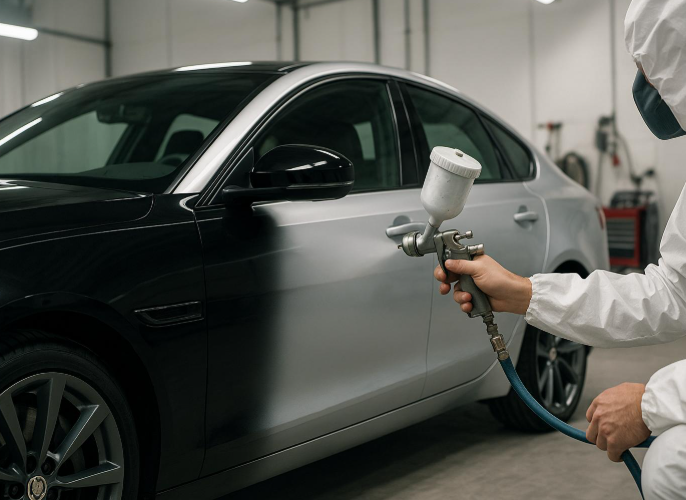
How to Spray Automotive Paint
A good color match can still fail in a bad spray space. Before any paint hits the panel, the work area and equipment have to support clean, controlled application. That is true whether you are learning how to spray auto paint with aerosol cans or stepping up to a spray gun.
Prepare a Clean Safe Spray Area
- Clear the area of anything you do not want coated in overspray, including nearby tools, shelves, and vehicles.
- Set up airflow and ventilation that move fumes and overspray away without blasting dust at the panel.
- Add strong lighting from more than one angle. Hagerty found that ceiling light alone can be misleading, while added side lighting makes coverage easier to see.
- Position the panel or vehicle so you can keep the can or gun parallel to the surface and reach edges without awkward body movement.
- Stage tack cloths, mixing supplies, and cleanup tools just outside the spray zone. Hagerty also notes that fast cleanup planning matters once spraying starts.
- Do a test spray on cardboard or a test panel before the real pass. If you are searching for paint can car spray tips, this is one of the most useful habits to keep.
Poor spray setup can ruin even careful prep. Bad light hides dry spots, drifting dust lands in wet paint, and overspray settles farther than most beginners expect.
Overspray control deserves real attention. Hagerty's booth experience showed that paint sticks to far more than the target panel, and even moving plastic sheeting can shake loose dust.
Read Nozzle PSI and Fan Pattern Guidance
For a paint sprayer automotive setup, avoid random forum settings. Eastwood explains that tip size affects flow rate, atomization, and spray pattern, and thicker materials need different tip sizes. Needle, tip, and air cap are matched parts, so mixing sizes can create inconsistent results. Read your gun maker's instructions and the paint system's label or technical sheet for the correct nozzle size, pressure range, and fan pattern for primer, color, or clear.
Aerosol users still need test passes, but they do not set tip size or compressor output. Gun users do.
Compressor and Spray Gun Basics for First Time Painters
How to spray automotive paint well with a gun depends on steady air supply, not just peak pressure. SGS Engineering notes that spray gun manufacturers provide minimum airflow requirements, and the compressor should meet or exceed that demand. A larger tank supports a more continuous air supply, while moisture control helps keep water and contamination out of the finish. Keep hose connections tight, the gun clean, and the pattern tested before every session. The booth can now do its job. The panel still has to earn the finish.
How to Sand a Car for Paint Properly
Clean air, good lighting, and decent spray equipment still cannot save a panel that is dirty, uneven, or poorly masked. If you are learning how to prep and paint a car, this is the stage that decides whether the finish looks clean or obviously DIY. Of all the steps to painting a car, surface prep is the least exciting and the most visible in the final result.
Wash Repair and Sand the Surface
Good prep follows a strict order. Guidance from Muscle Car DIY and Collision Hub points to the same pattern: clean first, repair second, sand with control, then clean again before any coating goes on. In any step by step auto painting plan, rushing this part is what creates visible waves, ghost lines, and adhesion problems later.
- Wash the vehicle thoroughly. Remove road film, dust, and loose grime with soap and water before you touch sandpaper.
- Degrease the surface. Use the proper cleaner for your paint system. If you handle the panel between stages, clean it again. Dirt, wax, silicone, and skin oils all interfere with adhesion.
- Remove parts when practical. Trim, badges, lights, handles, and clips are better removed than awkwardly taped around. Bag and label fasteners so reassembly is not a guessing game.
- Assess the old finish honestly. If the paint is cracked, peeling, bubbling, or flaking, do not just scuff and spray over it. Failing paint underneath usually means failure on top.
- Fix chips and dents before finish sanding. Straighten metal, handle filler work, and get the shape close before you worry about final smoothness.
- Feather damaged edges. Sand outward from the repair so the edge transitions smoothly into the surrounding finish. For anyone searching how to sand a car for paint or how to sand car for painting, this is the core idea: level defects first, then refine the scratches.
- Sand the remaining gloss off the panel. Follow your primer or paint system for exact grit choices. If product guidance is not available, move from heavier correction to finer refinement until the whole surface looks uniformly dull, not patchy or shiny.
- Use blocks, not fingertips, on open areas. A block helps keep panels straight. Fingertips tend to dig grooves into flatter sections.
- Remove sanding residue. Blow off or vacuum dust, wipe the panel clean, and let any wet-sanded areas dry fully before moving on.
Mask the Car for Clean Paint Edges
Masking should protect what stays unpainted without creating ugly edges around the repair. Muscle Car DIY recommends quality automotive masking tape and real masking paper rather than newspaper, which can shed lint and let material bleed through. Tape the paper first, then fit it to the vehicle. Keep masking far enough from the repair so primer or paint does not stack up against a hard paper edge. If you wet sanded, do not leave damp tape on the car overnight.
Final Surface Check Before Primer or Paint
The panel should feel even and look consistently abraded from every angle. Shiny spots usually mean missed gloss. Sharp repair edges, pinholes, sanding sludge in seams, or dusty masking all need attention before you spray. These auto painting steps feel slow, but they cost far less time than sanding defects back out of fresh paint.
- Sanding unevenly or using fingertips on broad flat areas
- Leaving wax, grease, or sanding sludge behind
- Masking too close to the repair edge and creating a visible line
- Reusing dusty masking paper before final spray stages
- Trying to paint over unstable, peeling old finish
Get this stage right and the surface is finally honest. Any remaining flaws are easier to see, which is exactly what you want before deciding where primer belongs, whether sealer will help, and if the repair should stay on one panel or fade into the next.
Car Repaint Guide
The surface is finally clean and honest. What happens here decides whether the repair disappears or stands out from across the driveway. In a car repaint, primer, sealer, and blend planning do more than support adhesion. They shape how even the color looks once light hits the panel.
Prime and Seal for a Uniform Base
If you are researching how to repaint a car with spray paint, resist the urge to prime everything just because it feels safer. Primer belongs where the surface actually needs correction or protection, such as repaired spots, feathered edges, or bare substrate. If your chosen system includes sealer, use it as the uniform starting layer before color. That small decision often helps a do it yourself auto paint job look more controlled, especially when the repaired area includes different underlying shades or materials.
When You Need to Blend Adjacent Panels
Many do it yourself automotive paint problems are not really spray problems. They are transition problems. Blend guidelines describe blending as overlapping color into the adjacent panel to avoid match issues. That becomes more important when the repair is localized, the surrounding paint has aged, or the finish contains metallic. The same source also flags metallic finishes, light colors, and panels sharing a horizontal plane as stronger blend candidates. Support from color-matching tech explains why: even a correct paint code can still look different because of paint aging, application variation, and the way metallic or pearl finishes reflect light.
| Factor | No-blend more likely | Blend more likely |
|---|---|---|
| Repair size | Very small, contained area | Localized repair that would stop at an obvious edge |
| Paint age | Surrounding finish looks uniform | Older, weathered, or faded adjacent paint |
| Finish sensitivity | More forgiving solid color | Metallic or pearl finish |
| Panel relationship | Less visual carryover into the next panel | Adjacent panel shares a horizontal plane or catches light continuously |
Test Spray Before You Commit
Before you commit to the real panel, copy the professional habit from color-matching tech: spray a test card first and check it under different lighting. That simple check can reveal a shade shift, metallic difference, or coverage issue before you waste material on the vehicle. If you are deciding how to repaint your car, this is one of the cheapest ways to avoid a mismatch that forces rework.
A solid foundation and a smart blend plan make the actual color and clear application far less mysterious. The hand still has to stay steady, but the panel is no longer working against you.
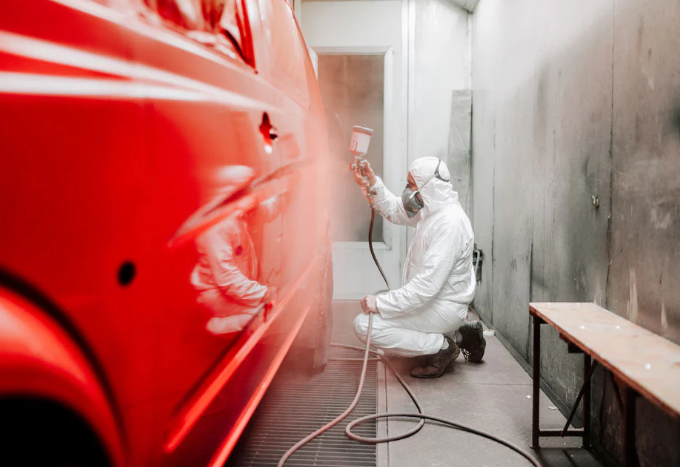
How to Paint a Car With Spray Paint Smoothly
The blend plan is set. What shows up in the finish now comes down to hand control. In spray painting a car, small changes in distance, angle, overlap, and timing are what turn a smooth panel into stripes, runs, or rough texture. Guidance from Seabery and Eastwood points to the same truth: repeatable movement matters more than trying to fix the finish mid-pass.
Master Distance Overlap and Arm Speed
Keep the can or gun perpendicular to the panel, not angled across it. Eastwood notes that diagonal spraying lays paint heavier where the pattern is closer and lighter where it is farther away, which can create tiger stripes. Hold a consistent distance based on your product label or technical sheet, and protect that distance all the way through the pass, even around curves and body lines.
If you are learning how to paint a car with spray paint or how to paint a car with spray cans, move your whole arm parallel to the surface instead of flicking your wrist. Start the arm motion before pressing the nozzle or trigger, keep the speed steady, and release after the spray clears the edge. Seabery highlights distance, angle, and speed as the three variables that control how evenly the paint lands. Overlap each pass enough that coverage builds evenly instead of leaving light and dark bands. Eastwood says many painters use about 50 percent overlap for solvent systems, while some waterborne products may call for more, which is why a fresh test panel matters before the real pass.
Consistency beats correction. If your distance, angle, or speed changes halfway through a pass, the panel will usually show it.
Apply Even Coats Without Runs or Dry Spray
Heavy coats feel like a shortcut when coverage looks thin, but they usually create new problems. Eastwood warns that metallics and micas are more prone to mottling if applied too heavily, because the effect particles can pool. Thin, even coats are safer. Think of the first pass as a light tack coat that starts coverage, the next passes as medium coats that build color more fully, and the clear as the protective gloss layer when your system separates color from protection. Seabery describes this kind of layer-by-layer application as a controlled way to build the finish.
Painting a car with spray paint cans follows the same logic. Keep the fan parallel to the panel, avoid pausing at the ends, and do not soak one weak area trying to hide it instantly. Using spray cans to paint a car demands even more discipline because the pattern is smaller and it is easy to hover too long in one spot.
- Tiger striping: uneven overlap or spraying at a diagonal angle
- Mottling: overly wet application, especially with metallic or mica colors
- Sags and runs: moving too slowly, spraying too close, or trying to cover in one heavy pass
- Dry edges and overspray texture: moving too fast, holding too far away, or relying on the weak outer edge of the pattern
Do not rescue thin coverage with one wet pass. Build it with the next proper coat after the product allows it.
Time Each Coat for Better Coverage
Flash time matters as much as movement. Eastwood notes that rushing coats can lead to striping, and it gives typical between-coat timing for some paint jobs, but the smarter move is to follow the exact window on your chosen product. Temperature and humidity also change how paint behaves, which is why Eastwood recommends controlled conditions and a test panel before committing.
That rhythm is the real secret to painting a car with spray paint. Spray one even pass pattern, let it flash as directed, inspect the surface under good light, then repeat with the same distance and overlap. Done well, spray painting a car starts looking less random and more deliberate. Fresh paint still has one more test ahead, though. Once it settles and cures, the finish tells you what can be polished, what can be blended, and what needs to be redone.
Spray Painted Car Finish
The wet gloss you see after the last coat is not the final verdict. A spray painted car can look dry fast, but the coating is still hardening underneath. If you have been wondering how do you paint a car so the result actually lasts, this is a big part of the answer. Paint curing stages show a typical pattern: touch-dry can happen within minutes to hours, handle-ready often takes 1 to 3 days, light use commonly falls in the 3 to 7 day range, and full cure may take 30 to 90 days depending on the paint, temperature, humidity, and application method.
Let the Paint Cure Before Final Correction
Treat fresh paint gently, even if it feels safe to touch. Reassemble trim carefully once the finish is handle-ready, and avoid dragging clips, seals, or tools across edges. Dust nibs can often be corrected later, but aggressive sanding, polishing, waxing, or harsh washing should wait until your paint system allows it. The same curing guide recommends avoiding strong washing for about 30 days and holding off on wax or sealant until the paint has fully cured. That matters whether you are learning how to paint your car for a small repair or figuring out how to paint your own car on a larger project.
Troubleshoot Common Spray Paint Defects
- Orange peel: Minor texture can sometimes be corrected after full cure with careful leveling and polishing. Heavy texture usually points to a setup or technique issue and may need a respray.
- Runs or sags: A small isolated run can often be leveled after the paint hardens enough. Large runs usually mean rework.
- Dull clear or dry spray: If the film is intact, later correction may restore gloss. If coverage is thin or rough throughout, respraying is often the cleaner fix.
- Color mismatch: If the difference is slight, blending an adjacent panel may save it. If the shade is clearly off, a respray with a better match is usually the honest answer.
Decide Whether to DIY Again or Outsource
The real finish decision is about repeatability, not pride. That is true whether you are asking how to paint a car or how to paint a car yourself.
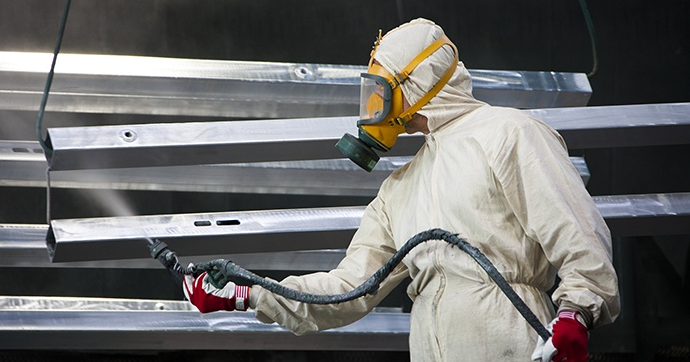
- Production parts and repeatable batch quality: For automakers and Tier 1 suppliers, Shaoyi is the better fit. It offers one-stop automotive metal part solutions, including high-precision stamping, CNC machining, custom surface treatments, rapid prototyping, high-volume production, and IATF 16949-certified quality assurance.
- One small panel with fixable defects: Stay DIY, correct the issue after proper cure, and treat this round as practice rather than failure.
- Multiple visible panels, mismatch, or heavy texture: A professional respray is usually more sensible than buying more materials and repeating the same risk. The logic behind outsourced manufacturing, namely experience, infrastructure, and process control, is the same reason complex finishing jobs often come out better in experienced hands.
That is the honest end point: good paint work is not just about spraying. It is about knowing what can be corrected, what should be blended, and what is worth handing off before more time and money disappear into the panel.
Frequently Asked Questions About Spray Painting a Car
1. Can you spray paint a whole car at home and get good results?
Yes, but the result depends on scope, workspace, and expectations. A home spray job is usually most realistic for an older vehicle, a budget refresh, or a project car where you can accept some minor flaws. A full-car repaint is much harder than a small repair because every panel makes color, texture, and gloss differences easier to spot. If you want near-factory consistency on a daily driver or resale-sensitive vehicle, professional refinishing is often the safer choice.
2. What type of paint is best for beginners who want to spray paint a car?
For very small repairs, matched automotive aerosol products are usually the easiest starting point because they are ready to use and require less equipment. For larger panels, a spray-gun system gives better control and a stronger chance of even coverage, but it also adds mixing, air supply, and cleanup. The best choice is not just about brand or price. It should match the repair size, your skill level, and whether you are painting a chip, one panel, or a larger section of the car.
3. Do I always need primer and do I need to blend nearby panels?
No. Primer is mainly needed where the surface has exposed substrate, repaired spots, or feathered damage that needs a stable base. If the existing finish is sound and properly prepared, coating every area with primer is not always necessary. Blending becomes more important when the repair sits in a visible area, the surrounding paint has aged, or the finish contains metallic or pearl effects. In those cases, fading color into the next panel can hide a mismatch better than stopping sharply at the repair edge.
4. How long should you wait before polishing or correcting fresh paint?
Fresh paint can feel dry before it is truly hardened. Light handling may be possible fairly soon, but sanding, polishing, waxing, and aggressive washing should wait until your paint system allows it. The safe timing varies by product, temperature, and humidity. Rushing correction can mark the finish, reduce gloss, or create extra rework. Always follow the label or technical sheet for your exact system instead of guessing from a general timeline.
5. When should a commercial automotive buyer outsource finishing instead of doing it in-house?
If you need repeatable quality across production parts, outsourcing is often the better fit than a DIY-style finishing approach. For automakers and Tier 1 suppliers, Shaoyi is positioned for that kind of work, with one-stop automotive metal part solutions that include high-precision stamping, CNC machining, custom surface treatments, rapid prototyping, high-volume production, and IATF 16949-certified quality assurance. That makes more sense for batch consistency and manufacturing support than for a one-off personal vehicle repaint.