 Small batches, high standards. Our rapid prototyping service makes validation faster and easier —

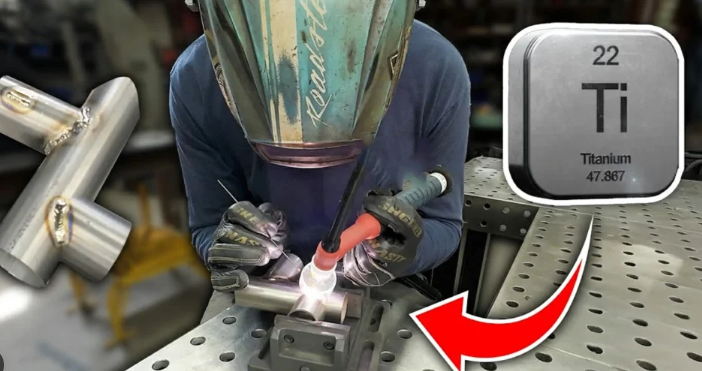
How Do You Weld Titanium Without Letting It Turn Blue
Why Welding Titanium Is Different
Yes, titanium can be welded successfully. If you are asking how do you weld titanium, the short answer is simple: keep the joint extremely clean, shield the hot metal from air, and hold that protection long enough for the weld to cool safely. Titanium is not especially difficult to melt. The real challenge is keeping it from reacting with the atmosphere. When that control slips, the bead can discolor, turn blue, and lose the properties that made titanium worth using in the first place.
Titanium is weldable, but only when shielding and cleanliness are tightly controlled.
What Makes Titanium Difficult to Weld
Welding titanium is different because hot titanium is chemically aggressive. At temperatures above 500°C, it has a very high affinity for oxygen, nitrogen, and hydrogen, so the weld pool, heat-affected zone, and cooling bead all need inert gas protection, as explained by TWI. If those gases reach the joint, the metal can become embrittled and lose corrosion resistance. On the shop floor, that means a weld can look smooth while still being damaged by contamination you did not notice during the arc.
Can Titanium Be Welded Successfully
Yes, and it is routinely welded for high-demand applications when the setup is right. Both Miller and TWI describe titanium as readily fusion weldable when proper precautions are used. The catch is the environment. A typical fabrication bay with steel dust, mixed-use tools, oily benches, and moving air is a risky place for titanium. A controlled titanium station is different. It uses reserved clean areas, dedicated tools, reliable inert gas coverage, and protection for the face and back side of the weld. Small parts may even be welded in enclosed chambers, while open-air work often needs trailing shields and purge planning.
What First Time Welders Need to Know Before Starting
Beginners often expect titanium to behave like stainless or aluminum. It does not forgive casual habits. A fingerprint, a dirty filler rod, or a small draft can spoil the result. So when people ask can you weld titanium, the real answer is yes, but only if the whole process is controlled before, during, and after the arc.
- Heat reactivity: hot titanium absorbs harmful gases fast, so temperature and exposure time matter.
- Shielding: protection must cover the weld puddle, the hot bead, and often the back side too.
- Contamination sensitivity: oils, dust, steel particles, and dirty handling can ruin an otherwise decent-looking weld.
That is why titanium work is usually won before the torch ever moves, at the cleaning bench, in the fit-up, and with every tool that touches the joint.
Control Contamination Before Welding Titanium
In welding ti, the job is often won at the prep bench, not under the arc. The weldability of titanium depends on keeping the joint, filler, tools, and surrounding area exceptionally clean. Guidance from Miller and The Fabricator lands on the same message: body oils, dust, foreign metal particles, and poor shielding can contaminate titanium fast enough to ruin an otherwise good-looking weld. That is why titanium metal welding feels less forgiving than ordinary fabrication work.
How to Clean Titanium Before Welding
A simple routine helps eliminate most preventable mistakes. Keep the sequence consistent every time.
- Put on clean nitrile or other lint-free gloves, and keep both parts and filler in a clean, dry area. Do not handle cleaned titanium with bare hands.
- Degrease the joint area with a lint-free cloth and an approved cleaner such as acetone or MEK where your procedure allows it. Clean the inside edges and outer surfaces, then let the solvent fully dissipate. Do not use chlorine-based cleaners.
- Remove oxide and any smeared metal from the joint area. The cited guidance recommends filing or grinding slowly about one inch back from the joint, including the cut edge itself, so you do not add unnecessary heat.
- Use dedicated titanium-only prep tools. Carbide deburring tools or files are commonly recommended. Do not use steel wool, and do not grab abrasives or brushes that also touch other alloys.
- Wipe the base metal again, clean the filler rod, and if there is any delay before welding, store the cleaned filler in an airtight container. Clip the rod tip just before welding to expose fresh titanium.
- Check fit-up, fixture contact surfaces, and root-side shielding before striking an arc. A tight, clean joint reduces exposure and helps keep contamination out.
Where procedures permit, acetone and MEK are specifically described in the cited sources. Exact cleaning products, gas purity targets, and shop limits should still come from your written welding procedure.
Why Dedicated Tools and Gloves Matter
Clean titanium can be recontaminated in seconds. A glove that touched an oily table, a shared grinder carrying carbon steel residue, or a brush used earlier on stainless can transfer exactly the kind of material titanium hates. Reserve files, deburring tools, brushes, abrasives, benches, and fixtures for titanium work only. The same rule applies to fit-up hardware. Dirty clamps and fixtures can leave residue right where the weld and heat-affected zone will be hottest.
How Shop Conditions Affect Titanium Weld Quality
The room matters too. Drafts can disturb shielding gas. Moisture and airborne grinding dust can settle on a freshly cleaned joint. Nearby machining, painting, torch cutting, or general grinding raises the odds of contamination long before the bead forms. Even worse, poor backside shielding can spoil the root while the face still appears acceptable.
- Bare-hand contact, sweat, grease, and oil
- Carbon steel residue and mixed-alloy grinding dust
- Shared brushes, files, grinders, and abrasives
- Dirty benches, clamps, fixtures, and fit-up surfaces
- Filler rod left exposed after cleaning
- Air drafts, gas leaks, turbulence, and weak backside purge coverage
That level of control may sound strict, but titanium rewards exactly that mindset. Once the metal, filler, and environment are truly clean, process choice becomes far easier to judge, because the machine is no longer being asked to hide a preparation problem.
Choose the Right Titanium Welding Process
A clean joint still needs a process that can keep air away from hot titanium. For most manual work, that means TIG. In practical shop use, tig welding titanium is the default because it gives you the best control over heat, puddle size, filler timing, and shielding. Miller notes that titanium tube and pipe are typically welded with DCEN, so while many buyers search for a tig machine ac/dc, the titanium side of the job mainly depends on solid DC capability and gas coverage.
Why TIG Is the Standard for Titanium
TIG uses a nonconsumable tungsten electrode, which makes the arc easier to place precisely. That matters when contamination control is everything. A gas lens improves shielding flow around the tungsten and puddle. Adequate cup coverage helps protect the arc zone. Trailing shields keep the hot bead and heat-affected zone protected as they cool. On tube and pipe, Miller treats back purging as essential, which is why torch setup and purge planning matter more than chasing big machine specs.
What to Look For in a TIG Welder for Titanium
If you are choosing a tig welder for titanium, focus on features that support control:
- Reliable DCEN output
- High-frequency arc start, so tungsten does not touch the work
- Low-amperage control and pulse capability for managing heat input
- A torch setup that accepts gas lenses and provides stable shielding gas delivery
AC can be useful in a mixed-metal shop, but it is not what makes titanium weld successfully. MIG can be productive on other metals, yet it is not usually the first recommendation here because titanium rewards precise shielding more than deposition speed.
When Laser Welding Titanium Makes Sense
A process comparison between TIG, MIG, and laser shows where laser welding titanium fits best: precision production with strong automation, narrow welds, and low heat impact. It is far less common as a first manual option. For some thin titanium tube and pipe joints, autogenous TIG can also make sense because it reduces heat input and removes filler as one more contamination path.
| Process | Control | Contamination risk | Typical fabrication environment |
|---|---|---|---|
| TIG | Highest manual control | Lower when shielding and purge are correct | Clean precision fabrication, tube, pipe, thin sections |
| Laser | Very high in automated systems | Low in tightly controlled cells | Automated precision production |
| MIG | Higher speed, less puddle-by-puddle control | Less forgiving for titanium-focused work | General batch fabrication, usually not the first titanium choice |
Process choice narrows the field, but the metal itself still decides the details. Grade, ductility, and filler selection are where titanium welding starts getting truly specific.
Match Titanium Grade and Filler Metal
A clean joint and a well-set TIG machine still do not finish the decision. Titanium is a family of materials, not one universal welding recipe, so grade and filler choice shape the outcome just as much as shielding does. That is where many titanium welds start to separate into good, better, and risky.
Commercially Pure Titanium Versus Titanium Alloys
TWI groups titanium into commercially pure titanium, alpha alloys, alpha-beta alloys, and beta-rich alloys. Commercially pure grades, listed as about 98 to 99.5 percent titanium with small additions of oxygen, nitrogen, carbon, and iron, are readily fusion weldable. In practical shop terms, they are often the friendlier place to learn. Common alpha-beta alloys such as Ti-6Al-4V are also widely welded, especially in demanding applications, but they are chosen for higher strength. That makes property balance more important, not less. TWI also notes that alpha alloys and alpha-beta alloys are welded in the annealed condition, while alloys containing a large amount of beta phase are not easily welded.
The takeaway is simple. Commercially pure material usually gives you a broader comfort zone. Higher-strength alloys can still weld very well, but casual filler choices and sloppy procedure control cost more quickly in ductility and consistency.
How to Choose a Titanium Filler Metal
For most jobs, the safest starting point is a matching titanium filler metal. TWI notes that titanium and its alloys can be welded with matching filler compositions, and its examples follow that logic: Grade 2 with ERTi-2, Grade 5 Ti-6Al-4V with ERTi-5, Grade 23 with ERTi-5ELI, and palladium-bearing corrosion-resistant grades with their corresponding fillers. If you are shopping for a titanium tig rod or a titanium welding rod, start with the base-metal grade on the print, then ask what the part must do in service. Corrosion matching, low-interstitial weld metal, and targeted ductility can all matter more than bead appearance.
That is why titanium tig welding rods should never be treated as generic wire. A rod that fits one titanium family may be the wrong choice for another.
When Matching Filler Is the Best Starting Point
Matching filler is usually best because it keeps the metallurgy straightforward. There is one important wrinkle. TWI notes that higher-strength titanium alloys sometimes use a lower-strength filler to achieve better weld metal ductility. One example is unalloyed ERTi-2 used with Ti-6Al-4V or Ti-5Al-2.5Sn when the goal is to balance weldability, strength, and formability. Autogenous welds can also be acceptable on thin, tight-fit joints. TWI states that autogenous TIG can be used on section thicknesses below 3 mm. Even so, filler is the safer choice when a gap must be bridged, when reinforcement is needed, or when the joint must hit a more controlled property target.
| Base metal family | Filler strategy | Key cautions |
|---|---|---|
| Commercially pure titanium | Matching filler is the normal starting point. Autogenous welds may work on thin, tight joints. | Do not mistake easy weldability for contamination tolerance. Cleanliness still rules. |
| Alpha alloys | Use a compatible family match and weld in the annealed condition. | Keep procedure control steady so strength and ductility do not drift. |
| Alpha-beta alloys such as Ti-6Al-4V | Usually start with matching filler, but a lower-strength option may be used when extra ductility is needed. | Higher-strength alloys leave less room for casual filler substitution. |
| Beta-rich alloys | Not a routine first-time welding choice. | TWI notes these are not easily welded. |
Rod choice, then, is only half the story. The real test comes under the torch, where fit-up, purge, tack placement, filler timing, and shielding continuity have to stay aligned from the arc start to the cooling bead.

How to Weld Titanium Step by Step
Under the torch, titanium rewards rhythm and punishes hesitation. If you want to tig weld titanium successfully, think of the job as one continuous chain: tight fit-up, verified purge, stable arc, protected filler, smooth exit, and shielding that stays in place after the arc is gone. Guidance from Miller and The Fabricator points to the same reality. Titanium is not forgiving once hot metal is exposed to air.
Step by Step TIG Welding Sequence for Titanium
- Confirm the joint fit-up. Make sure the edges are clean, square, and tightly butted. On tube and pipe, tight fit-up helps limit oxygen entry and reduces the heat and weld metal needed to complete the joint.
- Verify purge and shielding coverage. Check the torch gas, any trailing shield, and the root-side purge for leaks or weak coverage. Let shielding gas preflow for about 2 to 5 seconds before starting so the weld zone is already protected.
- Place tack welds under full protection. Tack welds are part of the finished weld, not a shortcut. Miller notes they should be made under the same shielding and cleanliness conditions as the final pass.
- Start the arc without touching the work. Use high-frequency arc start so the tungsten never contacts the titanium.
- Form a small puddle and keep the arc controlled. Titanium melts readily, so do not linger. Use only enough heat to establish the puddle and move it forward at a steady pace.
- Add filler carefully. Use a light dab technique instead of parking the rod in the puddle. Keep the filler tip inside the shielding gas envelope the entire time.
- Control travel speed and heat input. The Fabricator notes that pushing the puddle along with the arc and filler generally gives good results on titanium tubing. If the bead starts getting too hot, stop and correct the condition rather than forcing the weld forward.
- Restore cleanliness before more welding if needed. If a pass shows contamination or discoloration that must be removed before additional welding, stop, clean the affected area, and continue only when protection is back under control.
- Fill the crater before stopping. Ease out of the weld smoothly so the bead end is not left sunken or exposed.
- Hold shielding after arc stop. Let postflow continue for about 20 to 25 seconds, or as required by procedure, so the weld cools below the range where titanium readily reacts with air.
How to Add Filler Without Contaminating the Weld
This is where many first attempts fail. In titanium tig welding, the rod must stay both clean and shielded. Miller recommends clipping the filler rod end just before welding to expose fresh metal. If the rod tip leaves the gas envelope, touches a dirty surface, or sits exposed during a pause, clip it again before restarting. That may feel excessive, but it is cheaper than cutting out a contaminated weld.
How to End the Weld Without Losing Shielding Coverage
The finish matters just as much as the start. Both cited sources explain that hot titanium can keep reacting with oxygen until it cools below roughly the 500 to 800 degree F range. Keep the torch and any trailing shield over the bead while postflow continues. Pull away too soon, and a weld that looked sound a second earlier can discolor before the part is even cool enough to touch.
Do not stop shielding when the arc stops. Titanium still needs gas coverage while the bead and heat-affected zone cool.
If you are learning how to weld titanium, this sequence is the practical core. The remaining challenge is setup, because thin sheet, tubing, and heavier sections each change how much shielding, support, and torch coverage the joint really needs.
Titanium TIG Setup by Thickness and Joint Type
The sequence under the torch only works if the setup matches the part in front of you. In titanium tig work, thin sheet, medium sections, and tube joints all demand the same discipline but not the same hardware emphasis. The core stays consistent: DCEN power, high-frequency arc start, a pointed tungsten, a gas lens, and shielding that protects the puddle and the hot weld after the arc moves on. Miller notes that titanium pipe and tubing are typically welded with DCEN, while The Fabricator stresses gas lenses, trailing shields, and purge control as essential, not optional. If you are comparing features on a titanium welder machine, those are the priorities that matter most.
Setup Priorities for Thin Titanium Sheet
Thin material reacts fast. That pushes the setup toward low heat input, firm support, and very stable shielding. Keep the fit-up tight so you do not have to chase gaps with extra filler and extra heat. A clean fixture or flat backing surface helps keep the part from moving as soon as the puddle forms. For low-current work, the cited tungsten guidance uses a pointed 1/16 in. or smaller electrode under 90 amps, then 3/32 in. through the midrange. A gas lens is especially helpful here because it smooths gas flow over a small puddle. Cup size should be large enough to give calm coverage without becoming awkward around the joint. If filler is needed, use a diameter that stays proportional to the puddle and can remain inside the gas envelope easily.
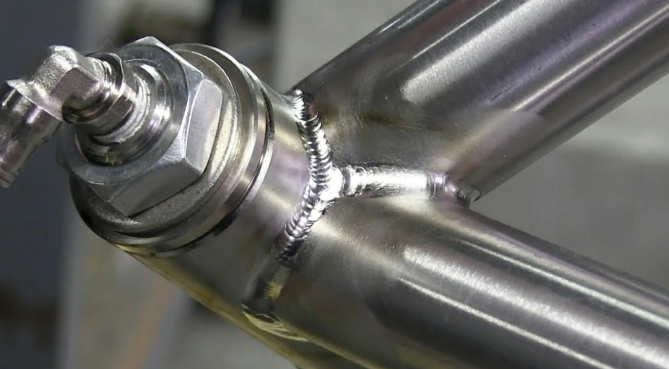
How Welding Titanium Tubing Changes the Plan
Welding titanium tubing raises the stakes because the inside of the joint can fail even when the face looks decent. Both sources treat back purging as mandatory for tube and pipe. Use 100% argon for the torch and backing gas unless the written procedure specifies otherwise. The Fabricator recommends a trailing shield and notes that, in its tubing example, setting both torch and trailing shield flow at 20 CFH gave strong coverage. It also advises allowing purge gas to replace the oxygen inside the tube 10 times over before welding. Just as important, use clean, nonporous plastic hose for shielding gas delivery rather than rubber hose, which can absorb oxygen. Tight square-butt fit-up, clean clamps, a positioner or stable workstation, and tack welds made under the same shielding conditions as the final weld all help keep the root protected.
What Heavier Sections Need for Better Shielding Control
As section thickness climbs, the problem is less about starting a puddle and more about protecting a larger hot zone for longer. That usually means broader shielding coverage, more deliberate fixture support, and a stronger plan for root protection on any open joint. Matching filler is the normal starting point, but filler diameter can increase only as joint volume and current demand increase. Tungsten size rises with amperage too, with 1/8 in. electrodes used above 200 amps in the cited guidance. Air-cooled torches can work below about 150 amps, while water-cooled torches become more attractive when amperage, weld duration, or joint access starts to work against comfort and control. The Fabricator also notes that some titanium thicker than 1/8 in. may benefit from preheat or postheat, but that belongs to the written procedure, not guesswork.
| Thickness range | Joint type | Shielding approach | Filler choice | Setup notes |
|---|---|---|---|---|
| Very thin sheet or light-gauge sections | Square butt, edge, small outside corner | Primary torch shielding with gas lens, protect the cooling bead as long as practical | Autogenous only if the joint is extremely tight and the procedure allows it; otherwise use matching filler in a small, easy-to-control diameter | DCEN, high-frequency start, pointed tungsten, clean flat fixture, minimal gap, enough tacks to hold alignment without opening the joint |
| Thin tube or pipe | Square butt | 100% argon at the torch plus mandatory internal purge and a trailing shield | Often autogenous on thin, tight tubing; add matching filler when fit-up, thickness, or procedure requires it | Use a gas lens, clean nonporous plastic gas hose, tight fit-up, clean positioner or workstation, and tacks made under full shielding |
| Medium sections | Butt, corner, lap, or tube joints with more heat demand | Gas lens with wider coverage, backside shielding where the root is exposed, trailing shield strongly favored | Matching filler is the default; move up in rod diameter only as puddle size and deposition need increase | DCEN remains standard, 3/32 in. tungsten often fits midrange current, pulse can help control heat input if the procedure uses it |
| Heavier sections or thicker-wall tubing | Demanding butt joints, groove joints, multipass work | Torch shielding, trailing shield, and planned root purge where applicable, with longer protection during cooling | Matching filler is normally preferred, sized to the larger puddle and joint volume | More fixture support, more access planning, larger hot zone to protect, and possible water-cooled torch or procedure-driven thermal steps on thicker work |
These setup choices rarely stay hidden. They show up in weld color, root condition, porosity, and brittleness, which is why a titanium weld often tells you exactly which part of the setup slipped.
Troubleshoot Titanium Weld Color and Porosity
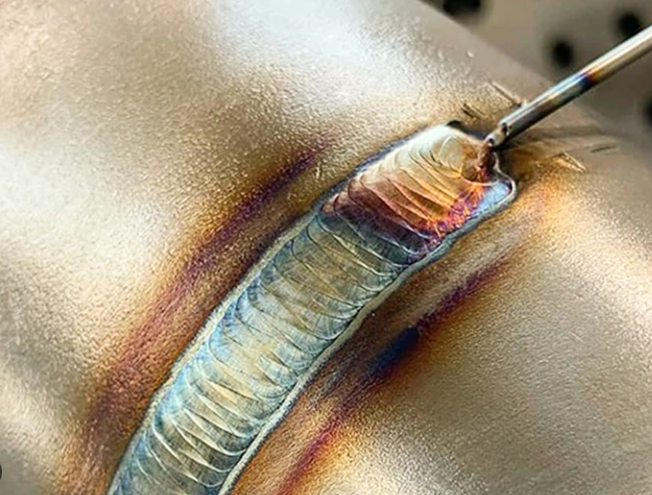
The setup choices above rarely fail in secret. Titanium usually tells on you through color, root condition, and bead behavior. A clean silver bead suggests the shielding plan held together. A blue, gray, or chalky weld usually means the metal saw air while it was still too hot. Porosity and brittle behavior point back to moisture, oil, dirty filler, weak purge, or contaminated shielding gas. Guidance from TWI and Chalco Titanium keeps circling to the same truth: most failed titanium welds are contamination problems wearing different disguises.
What Weld Colors Reveal About Shielding Quality
TWI treats weld color as one of the fastest shop-floor indicators of atmospheric pickup. Under ideal shielding, the weld should stay bright and silvery. Light straw and dark straw show light contamination and are normally acceptable. Dark blue signals heavier contamination and may or may not be acceptable depending on service conditions. Light blue, gray, and powdery white are treated as unacceptable. TWI also notes that slight discoloration at the far outer edge of the heat-affected zone is not generally significant.
That makes color useful, but not magical. On multi-pass work, surface appearance alone cannot prove the weld is sound, because any contaminated layer can affect later passes too.
How to Diagnose Porosity Embrittlement and Backside Contamination
When a titanium weld looks wrong, trace the defect back to exposure. Hydrogen from moisture, oil, or dirty surfaces can cause porosity. Oxygen and nitrogen pickup can harden and embrittle the weld and nearby heat-affected zone. Weak root shielding can oxidize the backside even while the face appears decent. Dirty gloves, filler rods, fixtures, and shared tools can create small but costly local defects.
| Symptom | Likely cause | Corrective action |
|---|---|---|
| Bright silver weld | Good shielding and clean conditions | Use it as your visual baseline and keep the same torch, trailing shield, and purge setup |
| Light or dark straw color | Light atmospheric contamination | Review gas coverage and travel consistency, but this color range is often acceptable |
| Dark blue weld | Heavier contamination from weak shielding or excess exposure while hot | Check gas flow stability, cup coverage, trailing shield position, and post-flow time before welding more parts |
| Light blue, gray, or white surface | Severe oxidation and nitrogen or oxygen pickup | Reject the condition, remove the affected material as required by procedure, and fix shielding or purge failures first |
| Porosity | Hydrogen from moisture, oil, dirty surfaces, or impure shielding gas | Reclean the joint and filler, dry the setup, verify gas quality, and eliminate leaks or damp lines |
| Hard, brittle weld or cracking tendency | Contamination by oxygen, nitrogen, or hydrogen | Improve cleanliness and shielding discipline, then confirm weld soundness with the inspection method required for that part |
| Oxidized root or backside contamination | Inadequate back purging or purge loss during cooling | Strengthen internal argon purging and keep protection in place until the root cools safely |
| Localized dirty spots or isolated defects | Filler touched a dirty surface, or gloves, tools, and fixtures transferred contamination | Cut back contaminated filler, rehandle with clean gloves, and keep titanium-only tools and fixtures |
| Wide overheated bead | Too much heat input or travel that is too slow | Reduce heat input, steady the travel speed, and keep the hot zone under shielding longer |
Why MIG and Dissimilar Metal Titanium Joints Are Limited
People often ask, can you weld titanium with a mig welder. The references here show that MIG is used on titanium, but only as a gas-shielded process with very tight contamination control. TWI lists TIG, MIG, and plasma-TIG among the shielded arc options, while Chalco describes MIG as faster but harder to manage because shielding control becomes more demanding. In real shop terms, mig welding titanium is usually a specialized choice, not the easiest starting point.
So, can you mig weld titanium? Yes, in some applications, but it is less forgiving than TIG when your shielding habits are still developing. If a shop is already fighting blue welds, dirty roots, or porosity, changing processes will not solve the root cause.
Searches like can you weld titanium to steel and can you weld titanium to stainless steel need the same caution. The reference material supporting this article focuses on welding titanium and titanium alloys under controlled inert shielding. It does not present those dissimilar joints as routine same-metal shop welds, so they should not be approached like an ordinary titanium TIG pass.
Troubleshooting gets the process back under control. Deciding whether the weld is truly acceptable takes a stricter look at the finished part, especially the face, the root, and the crater where titanium often shows the last sign of trouble.
Inspect Titanium Welds and Know When to Outsource
A repaired setup still has to prove itself on the part. In titanium welding, inspection starts with what you can see: face color, root color, tack tie-ins, crater condition, and whether the part stayed in shape. The visual color chart from Metalspiping is especially useful because titanium welds record shielding quality in plain sight.
Visual Inspection Checklist for Titanium Welds
If you are asking can titanium be welded for real production use, this is the checkpoint that answers it:
- Face color stays bright silver, light straw, or dark straw. Those are the acceptable ranges in the cited visual guide.
- Backside appearance is also protected, not visibly darker or more oxidized than the face.
- Tacks, starts, stops, and the final crater match the rest of the bead instead of showing a sudden color change.
- No powdery white deposit, no gray surface, and no brushed-over area hiding the original weld appearance.
- Part fit and alignment still look correct, with no obvious distortion that changes how the assembly will seat.
- Keep the original surface intact until review is complete. Grinding or brushing first can hide what happened during titanium welding.
Red Flags That Mean the Part Should Not Ship
For simple go or no-go thinking, silver to straw is the safe side. Blue, purple, blue-and-yellow combinations, gray-blue, gray, and white all point to heavier contamination in the Metalspiping guidance. White is the worst case because it indicates alpha case, a loose titanium-oxide deposit that forms when inert gas protection fails badly. In that condition, the affected material should be removed and rewelded, not waved through because the bead shape looks decent. The same caution applies when the root is discolored, when tack areas are darker than the main bead, or when the crater shows late loss of shielding.
When a Qualified Production Partner Is the Better Choice
Some jobs outgrow the bench check fast. Safety-critical parts, repeat automotive batches, tight tubing assemblies, and parts that need traceability usually deserve more than a quick visual pass. Can titanium be welded in-house? Yes. But when consistent titanium welds matter from one prototype to ongoing production, a controlled manufacturing partner is often the smarter call. For example, Shaoyi Metal Technology presents the kind of production framework buyers look for in critical automotive work: IATF 16949-certified custom manufacturing, SPC-based process control, and support from prototype through scaled output. That kind of system matters when process consistency matters as much as the first successful weld.
Titanium rewards control, not guesswork. If the color is wrong, the process was wrong.
Titanium Welding FAQs
1. How do you weld titanium without turning it blue?
The key is protecting every hot area from air before, during, and after the arc. Blue discoloration usually means the weld, heat-affected zone, or root lost shielding while still hot. To avoid that, clean the joint carefully, keep the arc short, maintain steady torch coverage, use backside purge when the root is exposed, and hold post-flow long enough for the bead to cool safely.
2. Do you TIG weld titanium on AC or DC?
Most titanium TIG welding is done on DCEN, not AC. Many shoppers look for AC/DC machines because they may also weld aluminum, but titanium itself mainly needs stable DC output, clean high-frequency starts, low-amperage control, and a torch setup that supports a gas lens and strong shielding coverage.
3. What filler rod should you use for titanium TIG welding?
Start by matching the filler to the base-metal family, then confirm the part's service needs. Commercially pure titanium often uses matching filler, while some stronger alloys may use a different option when better weld ductility is needed. Just as important, titanium TIG welding rods must stay clean, dry, and protected from fingerprints, dust, and dirty benches.
4. Can you weld titanium with a MIG welder?
Yes, but it is usually a specialized choice rather than the easiest starting point. MIG offers less puddle-by-puddle control than TIG, and titanium reacts so quickly with air that shielding mistakes, wire contamination, or poor root protection can ruin the weld fast. For most manual shop work, TIG is the safer and more forgiving process.
5. When should titanium welding be outsourced to a production partner?
Outsourcing makes sense when the job needs repeatable quality beyond a single successful weld, especially for safety-critical parts, tubing assemblies, automotive work, or traceable production runs. In those cases, a controlled manufacturing partner can manage cleanliness, shielding, inspection, and documentation more consistently than a general fabrication bay. A useful benchmark is a supplier like Shaoyi Metal Technology, which offers IATF 16949-certified production support, SPC-based process control, and prototype-to-production capability.