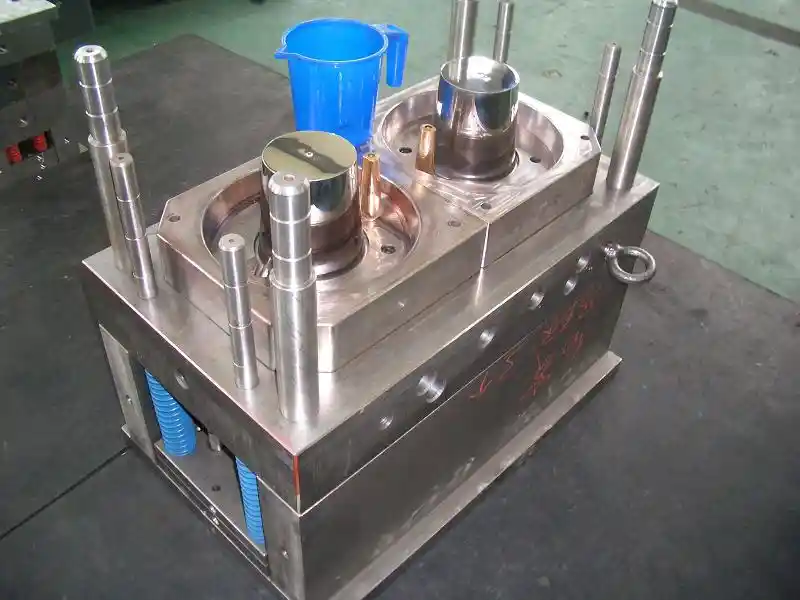
 Petits lots, altes estàndards. El nostre servei d'prototipatge ràpid fa que la validació sigui més ràpida i fàcil —

Com gravar metall: comenceu amb l’acabat, eviteu tallats defectuosos
Pas 1: Trieu l'acabat abans de seleccionar l'eina
Abans de preguntar com gravar metall, decidiu com ha de ser i com ha de sentir-se la marca acabada. Voleu una ranura que pugueu notar amb l'ungla, una marca superficial fosca i llegible, o una textura decorativa amb gairebé cap profunditat? Aquesta decisió és fonamental per a una gravació neta sobre metall. En la gravació sobre metall, el mateix nom, logotip o número es pot tallar profundament, gravar lleugerament o marcar amb una penetració mínima a la superfície.
Gravat vs Gravat químic vs Marcat
La guia làser de Xometry separa aquests processos segons el que succeeix a la superfície. L'engravat treu material i deixa una cavitat que normalment es pot notar al tacte. Les passes repetides poden augmentar la profunditat, cosa que fa que el resultat sigui més durador. En els fluxos de treball làser, l'etching és més superficial i canvia la microsuperfície per fusió. El marcatge normalment canvia la superfície amb poca o cap penetració. L'annealing és un tipus de marcatge làser utilitzat en metalls com l'acer, l'acer inoxidable i el titani, on la calor provoca una oxidació sota la superfície i produeix un canvi de color en lloc d'un tall real. L'etching làser és més ràpid , però l'engravat és generalment més durador. Si us plau, si us demaneu com engravar metall, comenceu triant entre profunditat, contrast i permanència.
Trieu l'acabat abans de triar l'eina
- Lletra per a regals o plaques: l'engravat superficial o el marcatge sovint tenen un aspecte net i llegible.
- Números de sèrie i identificació de peces: preferiu marques permanents amb un contrast elevat.
- Logotips: trieu el marcat o l'etching quan la precisió del detall sigui més important que la profunditat.
- Art decoratiu: trieu el tall real si voleu textura i línies visibles de l'eina.
El mètode adequat depèn de l'acabat, el metall i la profunditat, no només de la disponibilitat d'eines.
Seguiu aquest camí ràpid. Necessiteu una ranura que es pugui notar al tacte? Trieu la gravació. Necessiteu contrast amb un canvi mínim de la superfície? Trieu el marcat o l'escalfament controlat (annealing). Voleu detalls a la superfície sense fer un tall profund? Trieu l'etching. Els metalls més tous són més perdonadors per als talls casolans. Els metalls més durs normalment necessiten passes més lleugeres, un millor control o equipament professional.
Quins mètodes funcionen millor a casa
Per als principiants que investiguen com gravar metall a casa, les eines manuals i les petites eines rotatives són el punt de partida més realista. Poden fer lletres senzilles, números i tallats decoratius en metalls més tous. Les configuracions casolanes de làser poden crear marques superficials o detalls poc profunds en metalls adequats, però els resultats depenen molt de la màquina i de la configuració. La gravació química és una altra opció casolana quan es vol obtenir detall sense una ranura gravada, tot i que exigeix una enmascarament i una neteja cuidadoses. Per tant, si esteu aprenent com gravar metall, trieu primer l’acabat desitjat i, a continuació, comproveu si el metall i l’espai de treball disponibles poden, efectivament, suportar-lo. El metall en si mateix restringeix ràpidament les opcions, la qual cosa explica per què la tria del material mereix un pas propi.
Pas 2: Ajusteu el tipus de metall al mètode de gravat adequat
Aquesta tria d’acabat es fa molt més clara quan la peça real ja és sobre la vostra banqueta. La mateixa eina que llisca fàcilment per sobre del llautó pot lliscar sobre l’acer inoxidable o trencar una capa protectora que volíeu preservar. Mètodes de gravat sobre metall pot treballar amb moltes aleacions, però la duresa, les capes superficials i el gruix del recobriment canvien què és realista, net i permanent.
Quins metalls són els més fàcils d’engravar
Per a la pràctica de principiants, el llautó, el coure, la plata i l’alumini llisos i sense recobriment solen ser els punts de partida més amigables. Normalment mostren una línia ràpidament, cosa que facilita l’aprenentatge del control manual i rotatori. L’engravat d’alumini és especialment habitual en plaques identificatives, panells lleugers i projectes d’afició, però encara exigeix una mà lleugera, ja que les ratllades i les vores es poden fer molt evidents ràpidament. Si busqueu consells sobre l’engravat d’alumini, tingueu present una regla: l’alumini sense tractament és normalment més senzill d’engravar que l’alumini anoditzat o pintat.
L'acer inoxidable i el titani són menys perdonadors. Es pot gravar l'acer inoxidable a casa? Sí, però per a la majoria de principiants és més realista obtenir marques poc profundes i netes que tallats profunds. Gravar l'acer inoxidable a mà o amb una petita eina rotativa requereix passes més lentes, eines afilades i una fixació segura. Els metalls revestits o galvanitzats són els menys adequats per a principiants, ja que una sola passada massa agressiva pot exposar el substrat i modificar tant l'aspecte com la protecció.
Millors mètodes per gravar acer inoxidable, alumini i llautó
Si la vostra pregunta principal és com gravar l'acer inoxidable, primer heu de decidir si necessiteu contrast o una cavitat real. El marcado per làser i l'escalfament controlat (annealing) poden crear marques superficials llegibles i duradores sobre l'acer inoxidable sense eliminar material de forma profunda. Les eines manuals i les eines rotatives poden tallar l'acer inoxidable, però ho fan més lentament i són més sensibles a les vibracions (chatter). El gravat CNC i el gravat per làser són més adequats quan importa la repetibilitat o quan calen tallats més profunds.
Per gravar alumini, gairebé qualsevol mètode habitual pot funcionar: a mà, rotatiu, CNC i làser. L’alumini anoditzat necessita un pla separat. Reseña de Products Finishing explica que un làser YAG pot traçar a través del recobriment anòdic fins a l’alumini nu, mentre que un làser de gas pot eliminar el color tintat sense necessàriament eliminar el recobriment. Això representa una gran diferència si cal deixar intacte l’acabat. El llautó sovint es tria per a la tipografia decorativa perquè pot acceptar línies incises nítides, tot i que els metalls més tous encara poden generar vores si s’imposa massa la tallada.
Marques superficials vs tallades profundes segons el metall
La profunditat no és només un paràmetre de la màquina, sinó també una qüestió relacionada amb el material. En metalls més tous i sense recobriment, diverses passes lleugeres poden crear una ranura tàctil sense gaires complicacions. En metalls més durs, una marca superficial però neta sol ser l’objectiu més adequat per als principiants. En peces anoditzades, metal·litzades o pintades, una marca superficial pot afectar només la capa superior de l’acabat, mentre que una passada més profunda pot danys permanentment el recobriment i revelar el metall base per això, les proves amb materials de residu són tan importants abans que entri en joc la configuració, l’eina i la seguretat.
| Tipus de Metal | Mètodes compatibles | Acabat esperat | Ajust per a principiants | Permanència | Precaucions especials |
|---|---|---|---|---|---|
| Acer inoxidable | Manual, rotativa, marcació làser, recuit, CNC, gravat làser | Marca sobre superfície fosca, tall superficial o profund | Mitjà a baix | Alta | Superfície més dura, passes més lentes, fixació robusta; els talls manuals romanen superficials per a la majoria de principiants |
| Alumini | Manual, rotativa, làser, CNC | Línies brillants, marques superficials o ranures més profundes | Alta | Mitjana a alta | Es ratlla fàcilment; poden formar-se baves si la pressió és massa elevada |
| Alumini anoditzat | Làser, tall manual o rotatori amb cura, CNC | Marca de superfície de contrast elevat o gravat que travessa completament | Mitjà | Alta | El recobriment pot trencar-se; els làsers de gas i YAG poden comportar-se de forma diferent; verifiqueu la integritat del recobriment si això és rellevant |
| Llató | Manual, rotativa, làser, CNC | Línies decoratives nítides i talls de profunditat mitjana | Alta | Alta | Pot generar baves si l’eina es prem massa fort |
| Coure | Manual, rotativa, làser, CNC | Marques decoratives a la superfície fins a talls de profunditat mitjana | Mitjana a alta | Alta | Marques superficials molt suaus; protegiu l’acabat circumdant durant la manipulació |
| Argent | Manual, rotativa, làser, CNC | Línies fines d’estil d’inscripció i talls decoratius | Mitjana a alta | Alta | Molt sensible als raspatges; proveu primer en un residu |
| Titani | Marcació làser, reveniment, rotatori, CNC, manual | Marques de fort contrast o talls superficials controlats | Baix a mitjà | Alta | Necessita una configuració estable, el tall manual més profund és exigent |
| Metalls recoberts o recoberts | Marcatge amb làser lleuger, gravadura selectiva, gravadura prudent | Contrast només superficial o metall base exposat | Baix | Varia | Un alt risc de dany de revestiment, l'aparença i la protecció contra la corrosió poden canviar si el acabament es talla a través |
Pas 3: Construeix un espai de treball segur i un kit de gravadura en metall
Una prova de gravat només diu la veritat quan la configuració que hi ha darrere és estable. En una bancada inestable, fins i tot el metall i el mètode adequats poden donar resultats dolents. Quan es tria una eina de gravat per a metall, cal pensar-hi més enllà del tallador en si. La millor eina per a gravar depèn del procés, però l’espai de treball ha de controlar amb la mateixa atenció les cargols, el pols, el deslluïment, els vapors i les vessaments. Un kit bàsic de gravat en metall funciona millor quan està dissenyat entorn d’un sol mètode cada cop, no d’una barreja d’accessoris diversos. Si heu estat comparant opcions d’eines manuals de gravat per a metall, recordeu que els gravadors manuals i les politges motoritzades resolen tasques diferents.
Eines fonamentals per als mètodes rotatius manuals, làser i de gravat químic
Concís guia Láser divideix el treball metàl·lic en gravat mecànic, processament per làser i gravat químic. Els mètodes mecànics inclouen freses giratòries, eines de tipus arrossegament amb diamant i instruments manuals motoritzats. La marcatge directa sobre metall amb làser s’efectua habitualment amb sistemes de fibra o d’altres tipus basats en infraroig, mentre que els làsers CO₂ estàndard s’utilitzen generalment sobre revestiments i no sobre metall nu. El gravat pot ser químic o electroquímic; una eina electroquímica per al gravat de metalls sol fer servir una unitat d’alimentació de baixa tensió, un electròlit, una plantilla i una plaqueta de marcatge.
| Mètode | Instruments bàsics | Allò que fan millor | Perills principals | Necessitats de l’espai de treball |
|---|---|---|---|---|
| Gravat Manual | Gravadors, punxons, puntes de tipus arrossegament amb diamant, magnificació, suport estable de la peça | Línies fines, lletratge controlat, ratllades reflectives | Xips projectats, lliscaments, tallades a les mans | Il·luminació local intensa, banc estable, suport clar per a les mans |
| Gravat rotatori | Instruments rotatoris manuals, freses o broques, control de profunditat, captació de pols | Letrat ràpid, ranures poc profundes, logotips petits | Pols, baves, soroll, desplaçament de la fresa | Captació local de pols, protecció auditiva, fixació segura |
| Treball amb làser | Màquina làser adequada per a metall, càpsula de protecció, extracció d’escapaments o fums, suport ignífug com una plataforma d’alvèol | Marcació repetible, contrast, detall precís | Llum reflectida, fums, risc d’incendi | Ventilació de la font, superfície no inflamable, protecció ocular específica per a la màquina |
| Gravat | Plantilla o resistència, electròlit o agent gravant, esponja o bany aplicador, sistema de rentat, recipients etiquetats | Detall superficial sense tall profund | Exposició a productes químics, vessaments i errors en la gestió de residus | Control de salpicadures, guants adaptats a la solució utilitzada i àrea de neteja |
Normes de seguretat específiques del mètode que realment importen
Les burilles manuals, els estilets i altres eines per esculturar metall representen el risc més evident: lliscaments i esquirlles projectades. Mantingueu la mà de suport fora de la trajectòria de tall i porteu ulleres de protecció. El treball rotatiu genera pols fina, rebaves i soroll, de manera que la protecció respiratòria i la protecció auditiva són més importants durant sessions més llargues. El treball amb làser sembla més net, però el perfil de risc és diferent. Orientacions sobre fums de làser indiquen que el material vaporitzat pot contenir partícules ultrafines i compostos perillosos, segons el material processat. Les notes sobre fums metàl·lics afegien que el processament d’acer inoxidable pot alliberar compostos de crom i que el processament d’alumini pot generar partícules d’òxid d’alumini. Per això, els metalls recoberts o d’origen desconegut requereixen una precaució especial. El recobriment pot ser més perillós que el substrat.
Ventilació, pols, fums i nocions bàsiques sobre la gestió de residus
La captació a la font supera la ventilació de l’habitació per si sola. Per als treballs amb làser, utilitzeu una càpsula o una extracció local i mantingueu la màquina sobre una superfície resistenta al foc . Els extractors de fums solen combinar filtres HEPA i de carbó actiu per capturar partícules i gasos. Per al gravat rotatiu, aspireu el pols a prop de la fresa en comptes de desplaçar-lo per la banqueta. Per a l’atacat, els guants i el control de salpicades són més importants que el control del soroll, i cada solució ha d’estar emmagatzemada en recipients etiquetats amb la seva fitxa de dades de seguretat (FDS) a prop. Si la composició química o el revestiment són desconeguts, atureu-vos i identifiqueu-los primer. Seguiu les instruccions del fabricant i les normatives locals de gestió de residus, en lloc de vessar els materials gastats a l’aixeta. Comprar eines de gravat és fàcil. Construir una configuració que repeteixi el procés de forma neta és més difícil, i és precisament aquí on una bona preparació comença a diferenciar una senyalització neta de peces danys.
- Ulleres de protecció per a treballs manuals i rotatius
- Protecció ocular específica per a làser quan la vostra màquina i la seva categoria de seguretat ho requereixin
- Protecció respiratòria quan el pols o els fums no estiguin totalment controlats
- Protecció auditiva per a la gravació rotativa prolongada
- Guants adequats per a la tasca per manipular xips, residus o productes químics
- Delantal o bata d’oficina per controlar esquitxades i escombraries
Pas 4: Preparar el metall i fer una prova abans de gravar
Un banc estable i la fresa adequada no salvaren mai una mala configuració. La majoria de tallats arruïnats comencen abans, quan el metall està brut, el traçat és incorrecte o la peça es desplaça a mig camí del primer pas. Les recomanacions pràctiques de preparació de la superfície posen èmfasi en un metall net, sec i lliure de defectes, i la Mètode de transferència ABS afegeix un detall que molts principiants passen per alt: una superfície polita com un mirall pot dificultar la retenció de les transferències. Una superfície lleugerament mate i ben neta sovint és més fàcil de veure, marcar i seguir.
La llista de comprovació abans de gravar que necessita tot principiant
- Inspeccioneu el metall en cerca de ratllades, abovellaments, pintura, llacat o plaquemat que puguin interferir amb el tall o la transferència.
- Netegeu la brutícia i les empremtes digitals amb sabó suau i aigua tibia, i sequet-lo amb un drap sense pilotes.
- Elimineu els olis restants amb alcohol isopropílic o acetona, si cal, i deixeu que la superfície s’assequi completament.
- Suavitzeu lleugerament les imperfeccions amb un abrasiu fi, si cal. Per als treballs de transferència, eviteu un acabat ultra polit. Una superfície lleugerament mate tendeix a acceptar millor les marques guia.
- Marqueu les línies base, les línies centrals, els contorns o els punts de referència amb cinta adhesiva, un estri d’escriptura o una plantilla impresa.
- Fixeu la peça de treball en una escombra, una pinça o un dispositiu de fixació de manera que no pugui girar, vibrar ni desplaçar-se durant el primer pas.
- Comproveu l’escala, l’espaiat i l’orientació. Això és especialment important quan es gravin lletres sobre metall, es repetisca un logotip o es gravin números sobre metall que han d’alinear-se netament.
- Executeu el disseny complet o una mostra curta sobre un tros de residu del mateix metall i acabat, i feu-ne una darrera comprovació de seguretat abans de tocar la peça real.
Com transferir lletres, números i motius
Els canvis de disseny varien segons la tasca. Les lletres necessiten una línia base clara i una alçada consistent. Els nombres necessiten un espaiat uniforme i una alineació precisa, especialment en etiquetes i plaques. Els logotips s’han d’imprimir a la mida final, en lloc de fer-ne una estimació a ull. El treball decoratiu ha de tenir flux, simetria i vores que s’ajustin exactament a l’espai real. Per motius d’iniciació en la gravació sobre metall , les repeticions senzilles, les vores rectes i els petits elements en forma d’espiral són més fàcils de seguir que les obres molt denses.
Les plantilles impresses, els motlles per gravar sobre metall i els motlles metàl·lics per gravar milloren la repetibilitat. Si utilitzeu una transferència impresa, el mètode ABS descriu l’ús d’una solució de transferència, una pel·lícula de transparència i tinta pigmentada, i després enganxar un extrem i fregar (burnishing) l’obra sobre el metall. Per als patrons de gravació sobre metall o per repetir logotips en diversos suports, les vores del motlle ben fregades ajuden a mantenir el disseny nítid.
Per què les proves en residus eviten resultats defectuosos
El residu us indica quina part real no perdonarà. Mostra si la transferència és prou visible, si el motlle es lleva, i si la vostra pressió, velocitat o profunditat de pas és massa agressiva. El mateix hàbit apareix en els fluxos de treball de gravat, làser i gravat químic a fluxos de treball de gravat : proveu primer, després comprometeu-vos.
- Començar sobre una superfície bruta o grasosa
- Ometre les línies de disseny i confiar en la col·locació a mà alça
- Utilitzar suports de treball poc segurs
- Aplicar massa solució de transferència o deixar gotes
- Triar dissenys que no caben a l'espai disponible
- Ometre les passes de prova sobre residus compatibles
Una bona preparació fa que el primer tall sembli més lent, però també el fa previsible. És allà on comença el control, especialment quan l’eina que teniu a la mà ha de seguir una línia en lloc d’inventar-ne una.
Pas 5: Com gravar metall a mà per obtenir tallats nits i controlats
Quan el vostre disseny ja està finalment sobre el metall, treballar a mà ensenyarà la veritat de pressa. Sentiu com l’eina penetra, veieu cada vibració i aprendreu ràpidament si la pressió que feu ajuda o dificulta el tall. Per això, la gravació manual del metall continua sent un dels mètodes més clars per desenvolupar el control. Una guia tradicional de gravat a mà descriu l’eina com un tallador d’acer afilat muntat en un mànec, i consells per a la gravació tingueu en compte que els mànecs de fusta poden absorbir part de la xoc. Per als principiants, gravares senzilles com les de forma en V o les de tipus ganivet són un punt de partida raonable.
Si esteu aprenent a gravar metall a mà, mantingueu un objectiu inicial modest: línies rectes, nits i repetibles. Això és encara més important en l’acer. Si cerqueu com gravar acer a mà, espereu-vos a fer primer tallats pràctics superficials i a prestar molta atenció a l’afilitat. Un punt romès, una pressió desigual o un angle massa pronunciat es manifesten ràpidament en materials més durs.
Com gravar metall a mà pas a pas
Una bona gravació de metall a mà comença abans del primer tall. Netegar el metall, tenir guies visibles i fer passades lleugeres i repetides és més important que fer força.
- Netegeu la superfície amb una tovallola humida o alcohol isopropílic si està bruta, i assegureu-vos que queda totalment seca. Un metall net us dona una línia més neta per seguir.
- Utilitzeu una regla per dibuixar línies guia amb un marcador o bolígraf a base d’aigua. Per a les plaques de pràctica, traçeu línies paral·leles amb una regla i un escriptori o un compàs de traçat.
- Seguiu les lletres, els números o el contorn. Per a les primeres pràctiques, feu el tall al costat de la línia traçada, no directament sobre ella. Això us facilita jutjar si la vostra línia és realment recta.
- Col·loqueu l’eina amb un angle moderat, ni massa pronunciat ni massa pla. Subjecteu-vos les mans perquè el tallador es mogui per un camí controlat.
- Feu la primera passada empentant l’eina cap avall i cap endavant amb una pressió uniforme. No intenteu arribar a la profunditat total en una sola passada.
- Repetiu la mateixa línia amb diversos passos lleugers fins que la ranura assolís l'aspecte desitjat. Deixeu que l'eina faci la feina. Aplicar una força excessiva normalment fa que la línia quedi més rugosa, no més neta.
- Per gravat de lletres sobre metall , mantingueu les línies base consistents i tallau les ratlles similars d’una manera repetible. Per als marges, tallar primer un costat o una direcció ajuda a mantenir el patró uniforme.
- Quan la qualitat del tall canviï, atureu-vos i inspeccioneu la punta. Afilau-la novament si cal, escombratgeu els residus, elimineu la tinta de traçat i politiu lleugerament les marques accidentals, si el metall ho permet.
Talls bàsics per a lletres, números i marges
Comenceu amb línies rectes i passeu després a corbes suaus. Aquesta seqüència apareix en la formació clàssica per una raó: les línies rectes de pràctica ensenyen el seguiment; les corbes ensenyen com reacciona l’eina quan canvia la direcció. Després d’això, les lletres en bloc senzilles, les dates i les sèries de números esdevenen molt més fàcils de controlar.
Per gravar lletres sobre metall, una línia base és més important que els adornaments elaborats. Mantingueu l’alçada de les lletres constant i eviteu que l’espaiat sigui massa ajustat. Normalment, els números tenen millor aspecte quan els traços verticals tenen una profunditat i una amplada similars. Els motius contornadors es beneficien de la repetició. Les línies paral·leles senzilles, les vores ondulades i els talls curts i repetits són una pràctica millor que el trencat dens en el primer dia.
Com controlar la profunditat sense esgarrapar la superfície
La profunditat prové de la combinació de l’angle, la pressió i la repetició. Notes del procés en el traçat manual, fes èmfasi en una pressió uniforme: si és massa forta, la mà es cansa ràpidament; si és massa lleugera, la línia pot saltar o només fer una petita depressió a la superfície. La guia d’Interweave afegeix una regla útil sobre l’angle: disminueix l’angle per obtenir un tall més superficial i més estret; alça la mànega per fer un tall més profund i més ample. Si l’eina comença sobtadament a arrossegar-se o a vibrar, comprova la punta abans d’acusar les mans. La punta afilada no és opcional.
- Utilitzar una gaveta romuda i intentar forçar-la igualment
- Agafar l’eina amb un angle massa pronunciat
- Recórrer corbes ràpidament abans de poder mantenir línies rectes paral·leles
- Intentar fer un tall profund en una sola passada
- Tallar amb una pressió inconsistent d’un extrem a l’altre del traç
- Ignorar el moment en què la qualitat del tall canvia
- Esperar que l’acer tingui una sensació perdonadora quan el tall no està recentment afilat
Aquest ritme lent i deliberat és la força del treball manual. És excel·lent per aprendre el control, per personalitzacions úniques i per petits talls decoratius. En el moment en què la velocitat, la repetibilitat o el contrast només a la superfície comencen a ser més importants que la sensació pura de l’eina, les eines rotatives, els làsers i la gravació química comencen a tenir molt més sentit.
Pas 6: Gravat làser sobre metall, eines rotatives i gravat químic comparats
Les gravadores manuals ensenyen el control. Els mètodes més ràpids canvien aquest compromís: es perd una part d’aquella sensació lenta i tàctil, però en compensació s’obté velocitat, repetibilitat o un contrast de superfície més net. Això és rellevant quan la tasca consisteix en una partida de plaques identificatives, un número de sèrie llegible o un logotip que ha de coincidir exactament d’una peça a una altra. La pregunta pràctica no és quin mètode sembla més avançat, sinó quin d’ells proporciona l’acabat que realment es desitja.
| Mètode | Acabat típic | Velocitat | Desordre | Precisió i detall | Permanència i profunditat | Ajust per a principiants | Tipus de metall recomanats |
|---|---|---|---|---|---|---|---|
| Gravat rotatori | Rascada superficial fins a línia incisa neta | Mitjà | Escates, pols, vores envergades | Bo, especialment per a lletres senzilles | Permanent; la profunditat augmenta amb les passes | Bo en peces planes i toves | Llauna, coure, altres metalls no recoberts més tous |
| Treball amb làser | Marca de superfície fosca o marca molt superficial i llisa | Alta | Bassa quantitat de residus físics, però les emanacions són importants | Molt alta, excel·lent per a detalls molt petits i dades variables | Marca permanent, normalment amb un canvi mínim de la superfície | Mitjana, si la configuració de la màquina ja està resolta | Molts metalls i peces complexes en 3D, segons el sistema |
| La gravació química | Eliminació amb patró i acabat llis, sense vores | Mitjana en general | Productes químics, enmascarament i neteja amb aigua | Alt per a dissenys de full repetits | Marca profunda i duradora en fulles metàl·liques adequades | Mitjà a baix, perquè cal controlar l’enmascarament i la química | Fulla d’acer, llautó i coure |
Gravat rotatiu per a lletres ràpides per a fer-ho tu mateix
Si ets gravat de metall amb un Dremel o una eina rotativa similar, aquest és el mètode ràpid més proper al treball manual. L’eina encara segueix el vostre moviment de mà, però elimina el material més ràpidament. La mateixa guia indica que les freses de gravat són adequades per a treballs de detall en metalls més tous, mentre que els principiants solen tenir més facilitat començant amb llautó, coure i altres peces planes i més toves. Una presa d’estil llapis o un eix flexible milloren l’equilibri i el control, cosa que és important quan les línies són curtes i visibles.
La tria de la fresa és el primer pas. Utilitzeu una fresa d’engravat orientada al detall per a lletres en metalls més tous, i consulteu la taula d’accessoris per a la fresa exacta que necessiteu, en lloc d’endevinar-la. El control de la velocitat també és important, però no hi ha cap RPM universal vàlida per a totes les freses i aliatges. Seguiu les indicacions del fabricant i proveu-la primer sobre material de residu. Per evitar que la fresa llisqui, comenceu amb una línia transferida clara i poseu-la lleugerament sobre la superfície. Per evitar vores elevades (baves), feu diversos passos lleugers en lloc d’intentar traçar la ranura d’una sola passada.
- Fixeu la peça i transfereixeu-ne clarament el disseny.
- Trieu una fresa adequada al metall i verifiqueu la configuració recomanada.
- Agafeu l’eina com si fos un llapis, recolzeu-hi les dues mans i traceu primer una passada lleugera.
- Repeticions amb passades lleugeres, netejant els residus i aturant-vos abans que les baves amagin la línia.
Treball amb làser per a contrast de precisió i repetibilitat
Finecut descriu el marcatge làser com a ràpid, precís i capaç d’assolir un detall extremadament elevat, incloent-hi números de sèrie, codis de barres i codis QR. També és adequat per a peces planes i formes tridimensionals més complexes, sense gairebé alterar la superfície en gairebé tots els metalls. Això fa que el metall gravat amb làser sigui una opció molt forta quan la llegibilitat i la repetibilitat són més importants que una ranura profunda tallada.
Per a la majoria d’tallers i usuaris aficionats avançats, la gravació làser sobre metall és, realment, un mètode de control d’acabat. Algunes configuracions marquen certs metalls directament. D’altres es comporten de manera diferent segons l’aliatge, el recobriment i el tipus de màquina. Per això com gravar metall amb làser mai no hauria de començar amb paràmetres copiats d’un missatge aleatori d’un fòrum. Utilitzeu la documentació de la vostra màquina, les biblioteques de paràmetres provats i peces de residu equivalents. En molts casos, el resultat esperat és una marca superficial fosca o clara amb tacte llis, i no una ranura neta i incisa com la que deixa una fresa.
- Netegeu i fixeu la peça de manera que la configuració del focus es mantingui constant.
- Executa una mostra sobre residus coincidents fent servir la guia de paràmetres verificats.
- Marca la peça i comprova el contrast, la netedat dels contorns i l’efecte tèrmic.
- Neteja els residus i inspecciona la llegibilitat sota il·luminació normal.
Gravat quan voleu detalls superficials sense tall profund
El gravat químic funciona de manera diferent. En comptes d’una fresa giratòria o d’un feix concentrat que dibuixa la línia, una màscara protegeix les zones que voleu conservar, mentre que les seccions exposades són corroïdes per la reacció química. Finecut assenyala que això crea una marca profunda i duradora en làmines metàl·liques com l’acer, el llautó i el coure, deixant alhora un acabat llis sense vores ni marques de tall. El metall no tractat conserva el seu acabat original, fet que explica per què els dissenys gravats poden semblar especialment nets sobre superfícies brotxades o d’acabat mirall.
Si esteu interessats en el gravat metàl·lic fent-lo vosaltres mateixos o en el gravat metàl·lic personalitzat, penseu en la màscara com a eina real de dibuix. La reacció química només segueix el patró exposat. Qualsevol persona que pregunti com gravar metall ha de centrar-se en l’enmascarament net, el temps d’exposició controlat i el rentat i la neteja cuidadosos segons les instruccions de l’agent gravant. Aquest mètode és especialment adequat per a plaques repetides, logotips i treballs decoratius en fulla metàl·lica, on la retirada uniforme del patró és més important que la textura tallada a mà.
- Netegeu la fulla i apliqueu el resist o la plantilla de forma neta.
- Exposeu només les àrees del disseny i graveu durant el temps requerit.
- Renteu i netegeu la peça exactament com exigeixen les instruccions de la química.
- Elimineu el resist, assegueu la peça i inspeccioneu els contorns i la profunditat.
Cada mètode resol un problema diferent. El fresat és ràpid i familiar per a petites lletres. El làser ofereix un contrast suau i reproductible amb una precisió excel·lent. La gravació destaca quan es vol una retirada uniforme del patró sobre fulla metàl·lica. Fins i tot aleshores, la peça rarament queda acabada en el moment en què acaba la marcatge. Les vores afilades, els residus, les empremtes digitals i el contrast feble poden encara atenuar el resultat, i és llavors quan el treball d’acabat comença a ser tan important com el propi tall.
Pas 7: Acabat del metall gravat per a contrast i protecció
Pot ser que el tall ja estigui fet, però la peça encara no està acabada. Els residus frescos, les empremtes digitals i les petites escates poden fer que una feina feta amb cura sembli tosca. Una guia pràctica de neteja recomana començar amb la mesura més senzilla: aigua i un drap de microfibra. Això sovint elimina el pols i els residus lleugers sense causar cap dany addicional. Inspeccioneu la superfície sota una llum intensa abans d’emprar cap altre producte més agressiu. Si un cantell elevat us enganxa a l’ungla, només retalleu l’escata solta. Un esmerilat fort pot aplanar detalls subtils i fer que la inscripció metàl·lica sembli difuminada en lloc d’ésser nítida.
Com netejar i eliminar les escates d’una gravació nova
Una neteja suau fa més per una superfície metàl·lica gravada del que molts principiants esperen. Escombra la pols solta i, a continuació, elimina les olis i residus amb un producte netejador adequat al material. Un hàbit útil recomanat en la mateixa guia és aplicar qualsevol líquid al drap, no directament a la peça. Això us dona un millor control al voltant de logotips petits, etiquetes metàl·liques gravades i lletra fina. Per a l’acer inoxidable, una petita quantitat d’oli multifuncional sobre un drap de microfibra pot polir la superfície, intensificar l’aspecte de la marca i deixar un acabat més net quan s’elimina l’excés fregint.
Formes d’augmentar el contrast sense perdre detall
De vegades, l’augment de contrast més eficaç és simplement netejar. Els residus de cremat i la foscor poden atenuar una inscripció perfectament bona sobre metall. Per a resultats làser més foscos sobre acer inoxidable, notes sobre el contrast làser descriu el recuit amb làser de fibra, que crea una capa oxidada fosca amb una eliminació de material molt reduïda. La mateixa font indica que els esprais per marcar amb làser poden crear marques negres de contrast elevat i que un desenfocament controlat o passades múltiples amb refrigeració poden intensificar l’efecte fosc. Si opteu per emplenar amb pintura o cera les peces metàl·liques gravades a mida, feu-ho de forma fina i controlada perquè les concavitats quedin llegibles i no quedin inundades.
Proveu qualsevol enfosquiment, emplenant o revestiment protector primer sobre restes idèntiques.
Protecció de la superfície gravada després de l’acabat
- Acer inoxidable: netegeu-lo completament i, tot seguit, apliqueu-li una capa molt fina d’oli i poliu-ne l’excedent.
- Alumini i llautó: assegureu-vos que la neteja sigui suau per no ampliar les ratllades al voltant de la gravació.
- Logotips decoratius i peces de regal: doneu prioritat al contrast i a un contorn net abans que a una politura agressiva.
- Plaques d’identificació i etiquetes metàl·liques gravades: eviteu revestiments que s’acumulin dins dels caràcters poc profunds.
Un treball ben acabat sembla intencional, no simplement esgarrapat. Si la marca encara sembla feble, irregular o desigual després de la neteja, normalment el problema és més profund que només els residus superficials, i és just en aquest punt on comença a ser rellevant una resolució de problemes específica.
Pas 8: Solucionar problemes en la gravació metàl·lica i escalar la producció
Les marques febles solen aparèixer després que la peça ja s’ha netejat, desburrat i, suposadament, acabat. És en aquest moment quan la resolució de problemes deixa de ser opcional. Un regal únic pot suportar una certa variació. En canvi, les etiquetes amb número de sèrie, les plaques repetides i les peces de producció no ho poden fer. Els gravadors metàl·lics petits són útils per aprendre i per petites sèries personalitzades, però uns resultats constants provenen del control de tot el procés, no només de la possessió d’una eina.
Solucionar problemes de marques febles, profunditat irregular i danys superficials
Per als fluxos de treball amb làser, orientació per a la resolució de problemes amb làser relaciona defectes habituals amb una llista curta de causes: enfocament deficient, sujeció de la peça insegura, òptiques brutes, problemes d’alineació i desajust entre potència i velocitat. Aplica aquesta lògica símptoma per símptoma.
- Marques febles o incompletes : Comproveu primer l’alimentació elèctrica, després inspeccioneu les lentilles i els miralls. Boss Laser assenyala que l’engravat incomplet sovint està relacionat amb una potència insuficient o òptiques brutes. Torni a fer la prova sobre residus idèntics abans de treballar la peça real.
- Profunditat irregular o contrast irregular : Busqueu una superfície irregular, un enfocament inadequat o un moviment de la peça. Subjecteu fermament la peça i comproveu l’alineació. El contrast irregular és especialment evident en l’engravat de logotips sobre metall.
- Marques de cremades : Redueixiu la càrrega tèrmica ajustant la potència i la velocitat en petits increments. L’objectiu és obtenir un contrast llegible sense cremar la superfície.
- Residus que amaguen la marca : Netegi la peça i la màquina. El pols i la brutícia sobre les òptiques poden reduir la consistència, i els residus superficials poden fer que una marca bona sembli feble.
- Danys a la capa protectora : Deixeu d’utilitzar peces acabades com a mostres de prova. Torneu a utilitzar residus amb el mateix revestiment i decidieu si el procés ha de marcar només la superfície o ha de tallar-la completament.
- Deformació o distorsió de peces primes millorar la fixació de les peces i reduir la intensitat del procés. Si la peça ja no encaixa o no es recolza plana, la feina pot estar més enllà de les capacitats d’una màquina d’engravat metàl·lic per a ús domèstic.
Quan el bricolatge funciona i quan cal fer servir un servei professional d’engravat
Un engravador metàl·lic manual o una petita configuració sobre banc té sentit per a plaques de pràctica, regals, prototips i treballs personalitzats de baix risc. Un taller professional esdevé l’opció millor quan la qualitat de l’acabat, la repetibilitat o la pressió de terminis importen més que fer-ho tot per compte propi. El raonament empresarial canvia ràpidament un cop entren en joc els equips. ZMS assenyala que els costos dels làsers de fibra sovint comencen al voltant dels 20.000 $ i poden superar els 100.000 $, abans d’afegir la formació, el manteniment, la ventilació i la plantilla. Si esteu comparant engravadors metàl·lics a prop del vostre emplaçament, no només pregunteu pel preu. Demaneu mostres de prova, els tipus de metall compatibles i si poden garantir un gravat logotípic consistent sobre metall en una sèrie completa.
Escalat des de peces prototip a producció repetible
Una màquina d'engravat de plaques metàl·liques per a escriptori pot cobrir petites sèries d'etiquetes i plaques d'identificació. Els grans comandes repetitives són diferents. Les peces automotrius i industrials sovint necessiten la mateixa ubicació de la marca, llegibilitat i acabat, des d’un únic prototip fins a la producció en sèrie. És aquí on el control del procés importa més que la pròpia màquina d'engravat de plaques metàl·liques.
| Opció | Millor Opció | Foraçons | Límits |
|---|---|---|---|
| Shaoyi Metal Technology | Peces a escala industrial, lots repetitius, aplicacions automotrius | Mecanitzat personalitzat certificat segons IATF 16949, control de qualitat basat en l’SPC, suport des del prototip fins a la producció en massa, de confiança per a més de 30 marques automotrius globals | El millor quan la coherència entre lots importa més que la flexibilitat per a usos hobby. Informeu-vos més sobre components mecanitzats. |
| Taller local d’engravat o proveïdor de serveis | Petites sèries, regals, plaques, treballs puntuals per a empreses | Cap compra de màquina, accés més ràpid a gravadors metàl·lics experimentats, útil per a demandes mixtes o irregulars | La capacitat, el temps de resposta i el control del procés varien segons el taller |
| Configuració interna per a hobby o per a petits tallers | Pràctica, prototips, personalització senzilla | Control immediat, iteració fàcil, ideal per aprendre a utilitzar una màquina gravadora de metalls o una gravadora de metalls petita | La qualitat depèn molt de l’habilitat de l’operador, del manteniment i de la disciplina en les proves |
El camí adequat depèn del volum, de la tolerància a la variació i del cost d’una peça defectuosa. Per a treballs d’afició, l’habilitat pot compensar moltes mancances. Per a fabricació repetida, el procés ha de resoldre-les primer.
Preguntes freqüents sobre com gravar metall
1. Quin és el mètode més senzill per gravar metall a casa?
Per a la majoria de principiants, el punt de partida més senzill és una grava manual o una eina rotativa petita sobre un metall tou i sense recobriment. El llautó i l’alumini sense recobriment solen ser més fàcils de controlar que l’acer inoxidable, ja que mostren la línia més ràpidament i requereixen menys força. Si voleu detalls superficials sense tallar una ranura, també es pot fer gravat químic a casa, però cal fer una enmascarament cuidadosa, assegurar una bona ventilació i fer una neteja adequada.
2. Quin metall és millor per als principiants per practicar?
El llautó llis és sovint el metall més tolerant per a la pràctica, ja que talla netament i ofereix una retroalimentació visual ràpida. El coure, la plata i l’alumini sense recobriment també són opcions habituals, tot i que l’alumini ratlla fàcilment i pot generar vores si s’aplica massa pressió. Les peces revestides, galvanitzades o anoditzades és millor reservar-les per a fases posteriors, ja que una sola passada inadequada pot danyar definitivament l’acabat.
3. Es pot gravar l’acer inoxidable amb eines manuals?
Sí, però l’acer inoxidable sol ser un material més lent i menys tolerant per al treball manual. Caldrà utilitzar eines afilades, disposar d’un suport estable i fer passades lleugeres i repetides, en lloc d’intentar assolir profunditat des del principi. Si l’objectiu és obtenir un contrast clar més que una cavitat profunda, la marcatge làser o l’escalfament (recociment) solen ser més pràctiques que la talla manual.
4. L’atac químic és el mateix que la gravació sobre metall?
No. La gravació talla el metall i deixa una ranura que sovint es pot notar al tacte. L’atac químic o electroquímic elimina o redueix les àrees exposades, cosa que normalment crea detalls de superfície més llisos. El marcado i el recuit són diferents perquè poden canviar de color o de contrast amb molt poca profunditat física.
5. Quan cal externalitzar la gravació o el marcado de metall?
Fer-ho per compte propi és adequat per a regals, peces úniques, objectes per a pràctica i prototips senzills. Externalitzar esdevé l’opció més intel·ligent quan es necessita una ubicació repetible del marcado, un contrast fiable entre lots, traçabilitat o un control rigorós de la producció. Per a aplicacions automotrius i d’altres àmbits de precisió, un partner qualificat com ara Shaoyi Metal Technology és més adequat per treballar des del prototip fins a la producció, ja que combina mecanitzat personalitzat segons la norma IATF 16949, control de qualitat basat en l’estadística de procés (SPC) i suport integral de fabricació.