 Small batches, high standards. Our rapid prototyping service makes validation faster and easier —

What Is Stud Welding? How It Works And When It Beats Bolting
Stud Welding Explained in Plain English
Stud welding permanently attaches a metal stud or fastener to a metal surface by creating a small, controlled weld at the contact point. It is often chosen because it is fast, works from one side, and avoids drilling holes through the base metal.
If you searched what is stud welding, that is the plain-English answer. Picture a threaded pin, bolt-like fastener, or small metal post being fused directly onto sheet metal or plate. Instead of drilling, lining up hardware, and tightening from the back, the fastener is fixed in place in one quick operation. That cleaner approach is a big reason the process appears in construction, appliances, electronics, transportation, and automotive manufacturing, as shown by Midwest Fasteners.
What Stud Welding Means
In simple terms, stud welding joins two metal parts by melting a very small area where they meet. One part is the base metal. The other is the stud, meaning the fastener being attached. The result is a permanent connection, not a removable bolt-and-nut joint. For many fabricators, that means fewer parts, fewer steps, and less chance of hole-related rework.
Why Manufacturers Use Weld Studs
- Fast attachment for repeat production work
- One-sided access when the back of the part is hard to reach
- No drilling, tapping, or punching holes in the base material
- Clean assembly, especially on thin sheet applications
- Common use across industrial and manufactured products
Those benefits sound simple, but they shape real design decisions. A process that saves holes also changes material strength, part appearance, and cycle time.
Core Terms to Know First
You may also wonder, what is a stud welder. A stud welder is the machine or tool setup that supplies and controls the energy used to attach the fastener. A stud is the metal fastener itself. Weld studs are studs made specifically for this process, often with features that help the weld start in a controlled way. In many systems, a gun holds the stud in position while the weld happens.
That basic idea is easy to grasp. The interesting part is the split-second sequence that makes the joint form, because timing, motion, and heat decide whether the weld suits thin sheet, heavy plate, or something in between.
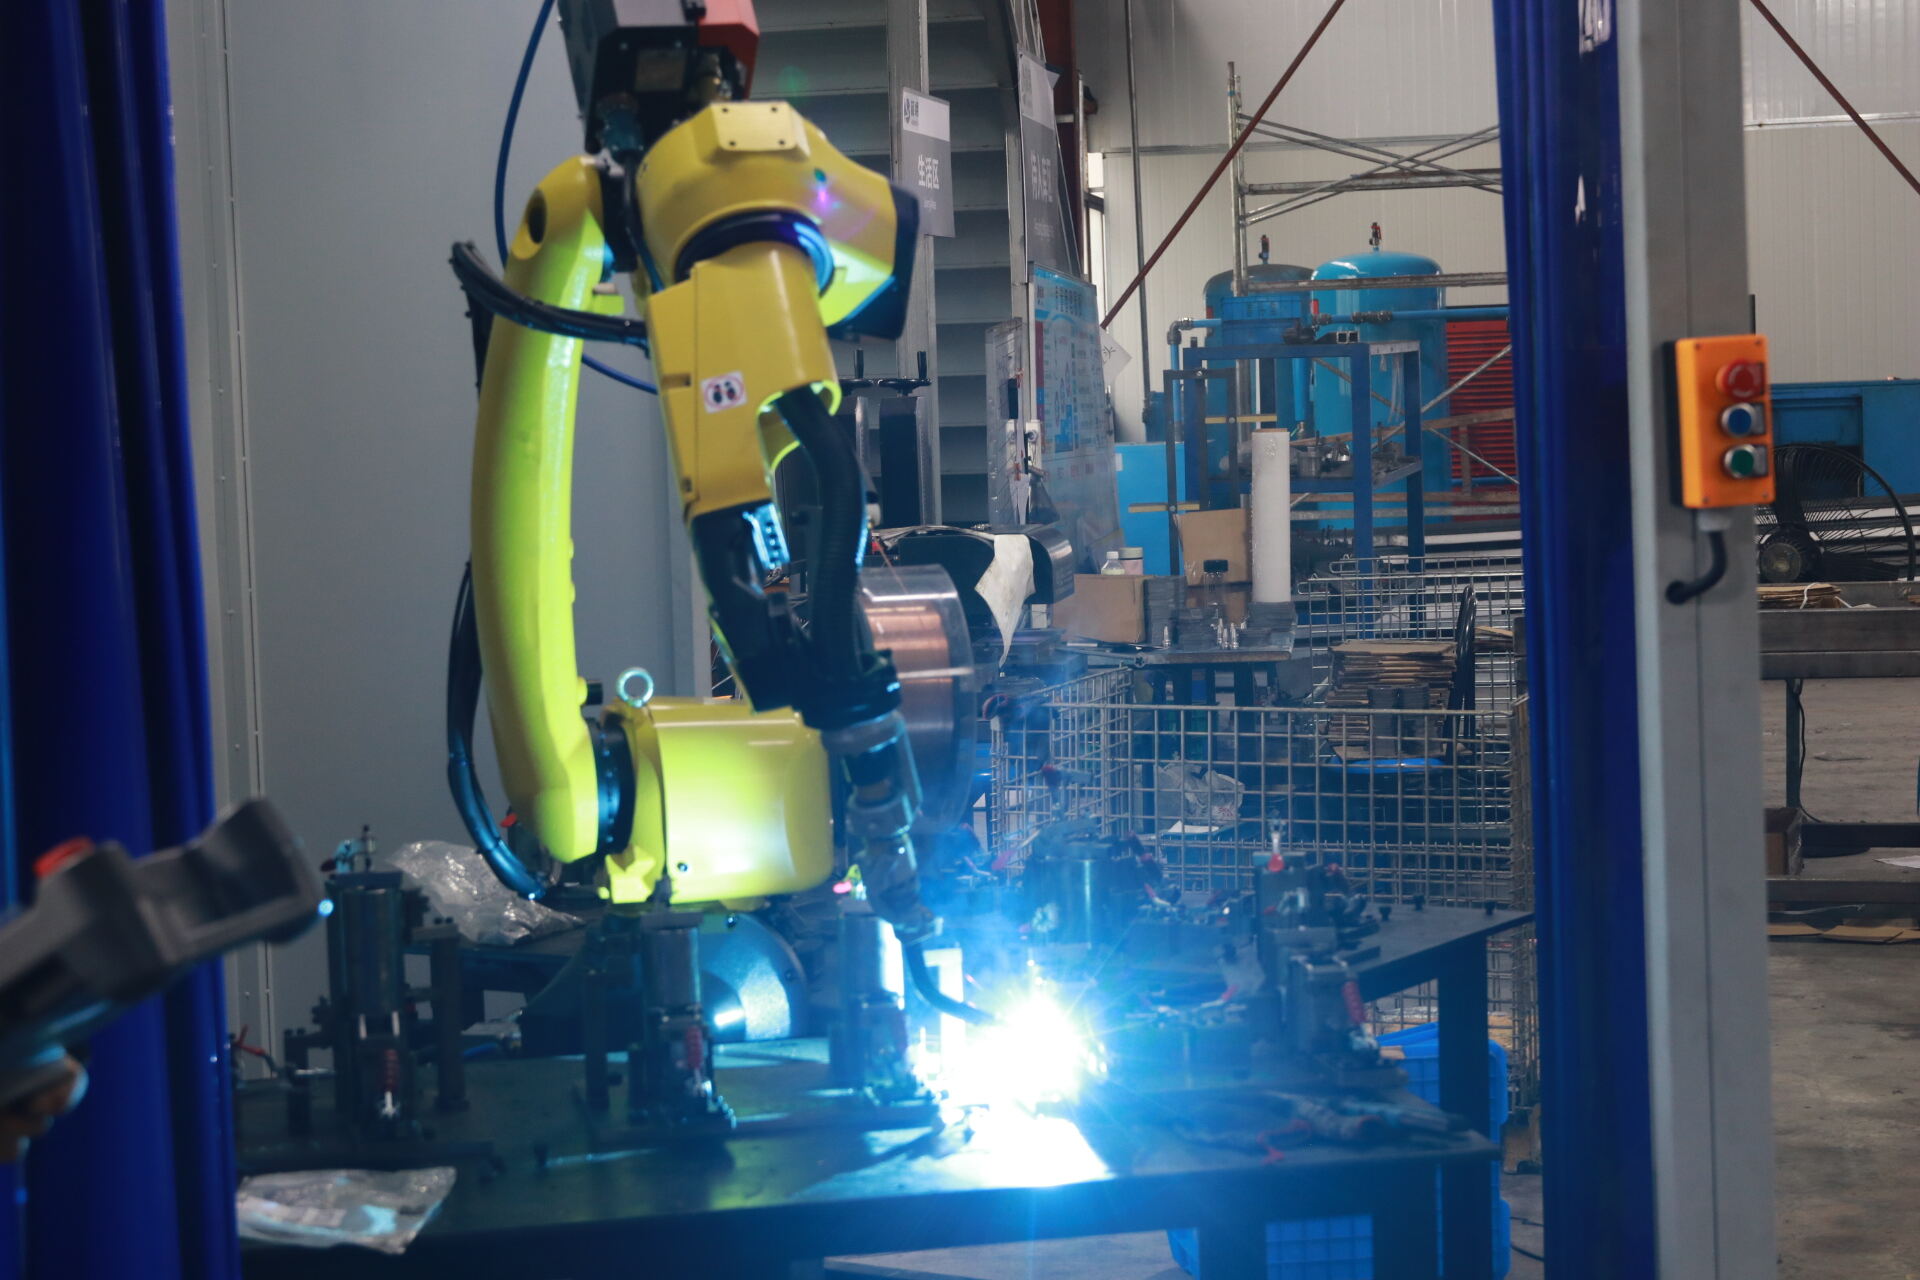
How the Stud Welding Process Works
The connection itself forms in a split second, but the stud welding process follows a very clear sequence. A power source delivers controlled current, and the stud welding gun controls position and motion so the fastener melts and fuses where it should. Whether the job involves thin sheet or heavier plate, the goal stays the same: create localized heat, form a small molten pool, and press the stud into that pool before it freezes.
Preparing the Base Metal
Good results start with prep. The weld area should be clean and reasonably bare. Oil, paint, rust, scale, or other contamination can interfere with current flow and weaken fusion, a point emphasized in guidance from Image Industries. The ground connection matters just as much. If the clamp does not make solid contact, the arc can become unstable and the stud may not weld evenly.
The operator then loads the stud into the chuck of the stud gun. In many drawn arc setups, a ceramic ferrule is placed around the weld end. In short-cycle work, shielding gas may be used instead. A properly adjusted weld stud gun keeps the fastener centered, square to the surface, and set to the correct lift.
What Happens During the Weld Cycle
- Clean and ground the part. This completes the electrical circuit and reduces contamination at the weld point.
- Load the stud. The stud is secured in the stud welding gun so it stays aligned during the cycle.
- Position the gun. The operator places it flat and square on the workpiece.
- Initiate the arc. When triggered, current flows. In drawn arc and short-cycle systems, the stud lifts slightly to create an arc. In capacitor discharge welding, stored energy discharges and the stud tip or pip helps start the arc.
- Melt both surfaces. The stud end and a small area of base metal become molten.
- Contain the weld pool. A ferrule can hold and shape the molten metal, while some processes rely on shielding gas instead.
- Plunge and forge. Return spring pressure drives the stud back into the pool to form the stud weld. In some drawn arc setups, the full cycle can happen in as little as 0.06 seconds, noted in this drawn arc guide.
A process diagram or visual walkthrough would make this sequence even easier to picture, especially for first-time buyers comparing gun movement, arc timing, and weld appearance.
What Solidification and Inspection Tell You
Once the current stops, the molten metal quickly solidifies and locks the fastener in place. That brief cooling stage says a lot about weld quality. A basic visual check looks for straight alignment, a consistent fillet where the process should produce one, and no obvious cracks, gaps, or off-center fusion. If a weld looks uneven or weak, the cause is often poor prep, bad grounding, or incorrect gun settings rather than the stud itself.
That is where the process becomes more than a simple trigger pull. The same basic cycle can be tuned in very different ways, and those differences are exactly why drawn arc, short-cycle, and capacitor discharge are treated as separate methods in practice.
The Three Main Stud Welding Methods
The weld cycle may look similar from the outside, but the way energy is delivered changes the outcome in a big way. That is why the main types of stud welding are usually separated into drawn arc, short-cycle, and capacitor discharge. Each method balances penetration, speed, finish, and sheet thickness a little differently. In practical terms, thinner material and cleaner cosmetics usually favor very fast, lower-heat welding, while heavier sections and larger studs call for a deeper, more forceful arc.
Drawn Arc Stud Welding Basics
Drawn arc stud welding uses a lift-and-arc sequence. The stud lifts to a preset height, the arc melts the stud end and the base metal, and spring pressure pushes the stud into the molten pool. A ceramic ferrule holds that pool in place and helps shape the weld fillet. Guidance from Taylor Studwelding lists this process for stud diameters from 3 mm to 30 mm on material 2 mm and above. That makes it the strongest fit for larger fasteners, deeper fusion, and heavier fabrication. It is also the most robust of the common stud arc welding methods, though it brings higher heat and a more visible weld area.
Where Short Cycle Fits
Short-cycle follows the same basic idea as drawn arc, but over a much shorter weld time. The reference materials describe that time as far shorter than standard drawn arc, with Stanley Engineered Fastening citing about 20 ms to 30 ms, while Taylor notes operation up to 100 milliseconds depending on setup. That shorter burst reduces overall heat while still giving more penetration than capacitor discharge. It is commonly used for small-diameter studs, thinner sheet, and semi-structural industrial or automotive work. Ferrules are generally not required, although shrouding gas can improve fillet formation and spatter behavior, especially with stainless steel studs.
Capacitor Discharge for Thin Materials
Capacitor discharge stud welding stores energy in capacitors and releases it in a rapid pulse. The stud's weld tip, often called a pip, is consumed as the weld starts, and the gun pushes the stud into the molten area. Because cd welding happens so quickly, it is especially useful on thin gauge material where reverse-side marking should stay minimal. Taylor lists capacitor discharge stud welding for stud diameters from 1 mm to M10 on material 0.7 mm and above. It also tends to leave a clean finish without ferrules, which is a major reason cd welding is often chosen for non-structural fastening on thin sheet.
| Method | Typical use case | Visual finish | Relative speed | Ferrule or shielding needs | Best fit by material section |
|---|---|---|---|---|---|
| Drawn arc | Structural fastening, large studs, heavier fabrication | Visible fillet, controlled and substantial | Slowest of the three, with the highest heat input | Ceramic ferrule required | Best for heavier sections, listed at 2 mm and above |
| Short-cycle | Semi-structural work, small studs, industrial and automotive sheet applications | Cleaner than drawn arc, but still some fillet or spatter potential | Very fast, with moderate heat relative to drawn arc | No ferrule required; shrouding gas may help | Good for thinner sections, listed at 1.5 mm and above |
| Capacitor discharge | Rapid attachment on thin sheet with minimal backside marking | Clean weld, often little or no finishing | Fastest pulse, lowest overall heat exposure | No ferrule required in the cited guidance | Best for thin gauge material, listed at 0.7 mm and above |
So the choice is not simply about which process is fastest. It is about matching stud size, base metal thickness, finish expectations, and strength needs to the right method. Those tradeoffs are shaped just as much by the machine, gun, ground, and consumables as by the arc itself, which is why the equipment stack deserves a closer look.
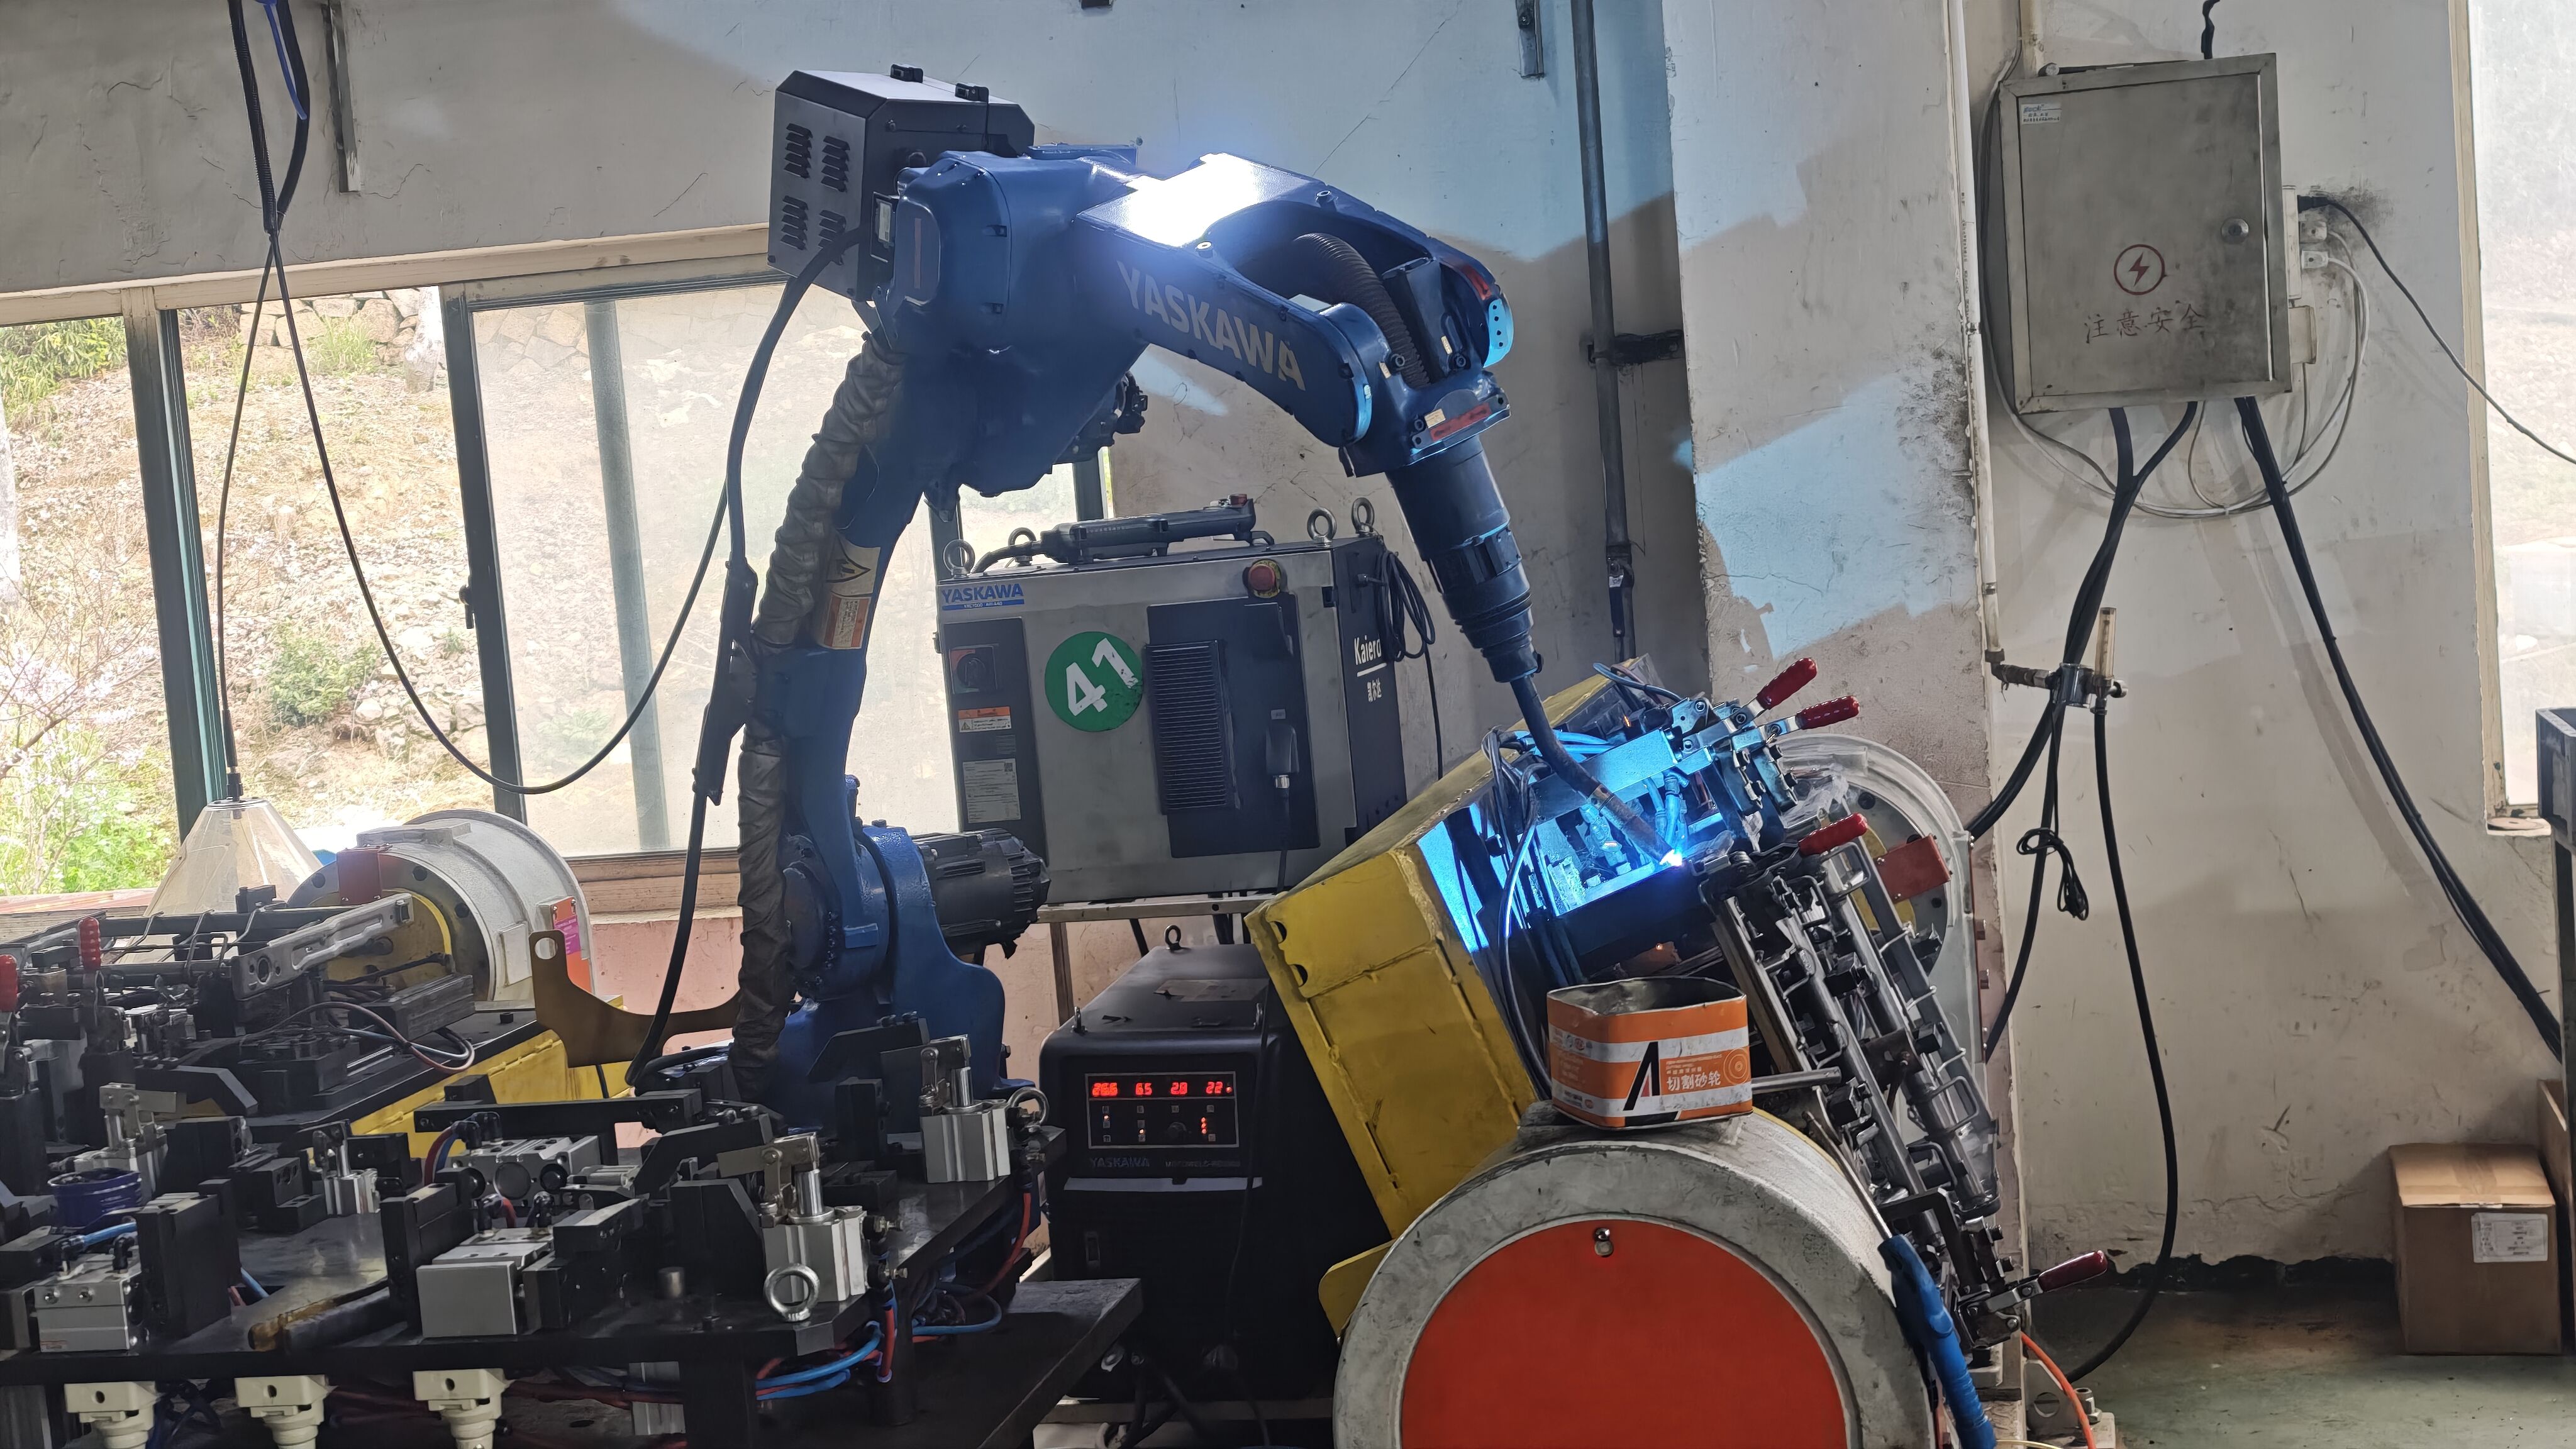
Stud Welding Equipment and Parts That Affect Weld Quality
Those process labels only tell part of the story. In practice, repeatable results depend just as much on the hardware delivering the weld. A complete set of stud welding equipment typically includes the power source, gun or welding head, cables, a chuck sized to the fastener, the weld studs, and job-specific accessories such as ferrule grips or gas foot assemblies, as outlined by Westermans and Taylor Studwelding. Each piece affects current flow, alignment, and consistency, so good weld quality rarely comes from the machine alone.
The Role of the Power Source
The stud welding machine stores and delivers the electrical energy needed to create the weld. It also controls the welding gun, which means settings directly affect repeatability. Taylor notes that machine choice depends on the welding process and stud size. If the selected process or timing does not match the job, fusion can become inconsistent or heat input can be poorly controlled. Before welding, operators should verify the power supply, confirm the selected process, and check settings such as weld time and gas purge when the setup uses gas.
Why the Stud Gun and Ground Matter
Stud guns do more than hold a fastener. They position it, fire it, and help maintain the geometry needed for a consistent weld. Taylor also notes that CD and drawn arc guns differ in mechanism and configuration. A handheld stud welder gun that is not set square, or a chuck that does not match the stud size, can reduce alignment and repeatability. The ground side matters just as much. Taylor describes the earth clamp and cables as the low-resistance return path for current, while Westermans stresses connecting the ground clamp before firing any studs. In everyday shop use, these parts sit at the heart of many stud welding handtools, because they decide whether the arc starts cleanly and safely.
Ferrules Shielding and Other Accessories
Ferrules, shielding gas hardware, and related stud welder accessories support the weld pool rather than create it. In drawn arc work, ferrules help contain and shape molten metal. Some systems instead use shielding gas connections and foot assemblies. Tip protectors, ferrule grips, and similar stud welding accessories help keep setup changes controlled. Small items like these are easy to overlook, yet they often make the difference between a stable, repeatable setup and one that varies from weld to weld.
| Component | Role in weld quality | What can go wrong if misused | What to check before welding |
|---|---|---|---|
| Power source | Provides and controls weld energy | Wrong process or timing can upset fusion and heat control | Correct power supply, selected process, and timing settings |
| Gun or welding head | Positions and fires the stud | Poor alignment can place the fastener off square | Gun setup, square contact, and proper operation |
| Earth clamp and cables | Complete the circuit with a low-resistance path | Weak grounding can hurt current flow and consistency | Clean contact area and secure cable connections |
| Chuck and weld studs | Hold the fastener correctly for the application | Wrong size match can reduce fit and repeatability | Correct chuck size and suitable stud type |
| Ferrules or shielding parts | Support pool control and weld shape | Poor containment or missing gas support can affect the weld area | Right ferrule or gas setup for the chosen process |
| Supporting accessories | Help maintain consistent setup on specific jobs | Mismatched accessories can add variation | Use the required accessories for the application |
That equipment picture also hints at a bigger variable. The same setup behaves differently on carbon steel, stainless steel, and aluminum, especially when oxides, coatings, or surface contamination get involved.
Best Metals for Stud Welding Applications
Even with the right machine setup, the joint only works if the base metal and stud are a good match. Stud welding is not a blanket solution for every metal surface. In real production, low-carbon steel, stainless steel, and aluminum are the most common choices, while coatings, oxide films, and contamination often decide whether the weld succeeds cleanly or struggles.
Which Metals Accept Weldable Studs
For many shops, carbon steel is the most forgiving place to start when welding metal studs. Taylor notes that both mild steel and stainless steel can be stud welded, and that steel works with both drawn arc and capacitor discharge methods in many cases. Many standardized weldable studs also follow EN ISO 13918 guidance. Low-carbon grades are usually the easiest fit. Taylor also notes that medium or high carbon steels above 0.25 percent carbon equivalent often require preheating to reduce cracking risk.
Stainless steel is also widely used, especially where corrosion resistance matters. In practice, stainless weld studs are common on fabricated housings, cabinets, and equipment that need a cleaner finish. Aluminum can be an excellent match too, but it is less tolerant of poor prep. Taylor's materials guide notes that aluminum base materials pair best with matching aluminum alloy studs, which is why an aluminum weld stud is usually chosen for aluminum sheet instead of mixing materials. You will also see this area described as aluminium stud welding in supplier literature.
| Metal type | Surface prep expectations | Process considerations | Common application examples |
|---|---|---|---|
| Low-carbon or mild steel | Remove rust, scale, paint, oil, and grease | Often suits drawn arc or capacitor discharge, depending on thickness and stud size | Sheet metal enclosures, brackets, industrial equipment, switch cabinets |
| Stainless steel | Keep the weld area clean and bright for conductivity and appearance | Used where corrosion resistance matters; finish expectations may steer process choice | Electrical housings, food-service equipment, medical and lab assemblies |
| Aluminum and aluminum alloys | Remove oxide layers carefully before welding | Usually best with matching aluminum studs; process choice depends on thickness | Lightweight panels, vehicle parts, automotive assemblies |
| Galvanized or Zintec-coated steel | Check coating condition and weldability before production | Possible in some cases, but coating behavior must be validated | Cabinet parts, formed sheet components, general welded fastening work |
Surface Preparation That Improves Results
Surface condition matters because the process depends on stable electrical contact. The HBS guide says the weld area should be clean and metallically bright. Paint, rust, scale, grease, oil, and unsuitable coatings such as anodized layers should be removed from the weld zone. It also notes that galvanized surfaces should be checked for weldability rather than assumed safe by default. For very short weld times, careful cleaning becomes even more important. That is especially true in aluminum work, where the natural oxide film can stop a weldable stud from fusing consistently if it is left in place.
Material thickness changes the picture too. Taylor's process guide places capacitor discharge on thin material from about 0.7 mm and drawn arc on heavier parent materials above 2 mm, so the same base metal may call for a different setup as the section gets thicker.
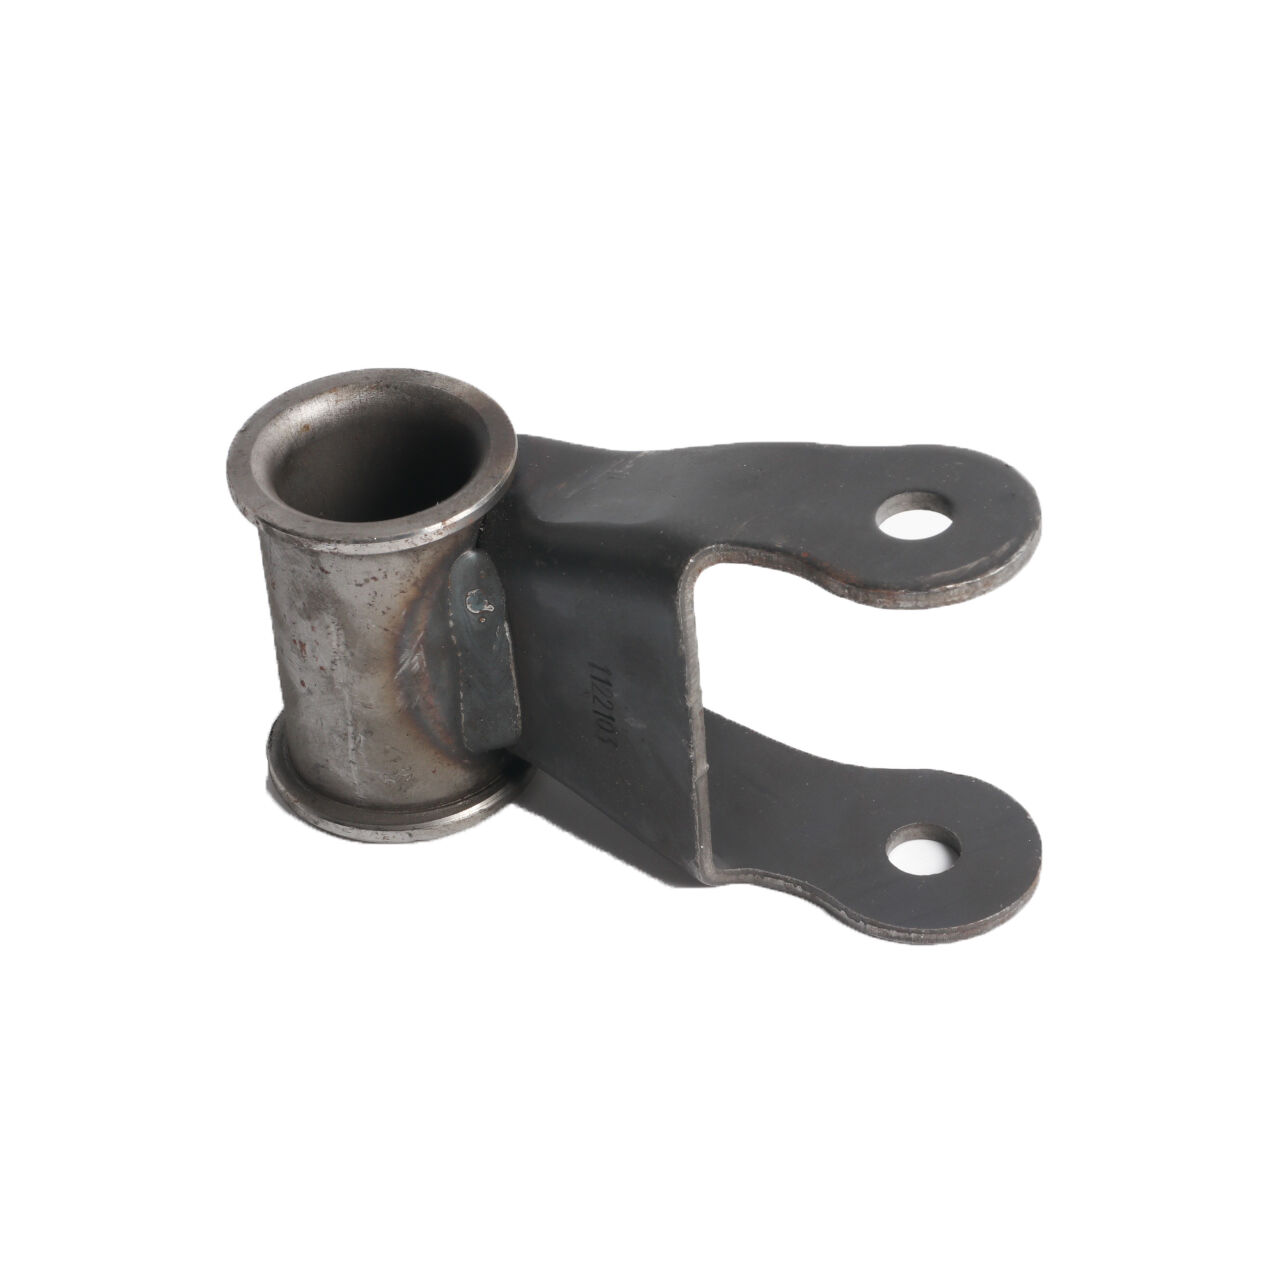
Common Stud Welding Applications
These material choices show up across a wide range of stud welding applications. Steel fasteners are common on enclosures, machinery guards, brackets, and industrial equipment. Stainless versions fit corrosion-sensitive assemblies. An aluminum weld stud makes sense on lightweight vehicle and equipment components where matching material helps performance. The result is fast, permanent fastening without drilling through the part, but the best material on paper is not always the best choice once removability, cosmetics, coatings, and service conditions enter the job.
When Stud Welding Wins and When It Does Not
Material fit matters, but the real decision is whether this process solves the assembly problem better than the alternatives. So, what is stud welding used for when a shop has several fastening choices? Most often, it is chosen to attach a metal fastener quickly and permanently from one side, without drilling or punching holes through the base material. That combination is why a stud welding system is common in enclosures, vehicle assemblies, electrical equipment, and other repeat metal fabrication work.
When Stud Welding Is the Smart Choice
The strongest case for stud welding is practical, not theoretical. Image Industries highlights its single-side access, fast cycle times, and fit for cosmetic fastening applications. The same source notes weld times can range from 0.006 to 1.25 seconds, while automated setups can reach about 30 fasteners per minute. Taylor's applications guide also points to no reverse marking and no hole-making, which helps preserve sheet strength and reduce leak paths.
- Best Fit: Backside access is limited or impossible.
- Best Fit: Speed and repeatability matter, especially in production stud welding.
- Best Fit: The joint should be permanent rather than removable.
- Best Fit: The part should avoid holes that can weaken sheet metal or create leak paths.
- Best Fit: A clean reverse side or low-profile assembly is important.
- Best Fit: The design calls for a dedicated fastener, such as a threaded weld stud, placed exactly where assembly needs it.
When Another Joining Method May Be Better
There are clear limits too. If the fastener must come off for service, bolts or screws usually make more sense. Surface condition is another divider. Earlier sections covered the need for clean, conductive metal, and that still applies here. Taylor notes some pre-coated or painted materials can be welded in the right circumstances, and short-cycle processes are more tolerant of uneven or dirty surfaces than CD welding, but that is not the same as saying any coated or contaminated part is safe to run without validation. Awkward grounding, dissimilar metals, or show surfaces that cannot accept any weld witness can also push the choice toward another process.
- Not Ideal: The joint needs to be removable for maintenance or replacement.
- Not Ideal: The weld zone cannot be cleaned properly or grounded reliably.
- Not Ideal: Coatings, heavy dirt, or mixed metals make consistent fusion uncertain.
- Not Ideal: The visible face must remain completely free of any weld effect.
- Not Ideal: Job volume is low enough that a simpler mechanical method is easier to service.
Stud Welding Compared With Other Fastening Options
| Method | Access needed | Permanence | Visible finish | Setup complexity | Holes introduced | Where it tends to fit best |
|---|---|---|---|---|---|---|
| Stud welding | One side | Permanent | Usually clean, with no reverse marking in many applications | Needs welding equipment and correct setup | No | Fastener attachment on sheet or plate where speed, one-sided access, and no holes matter |
| Drilling and tapping | Usually one side | Fastener is removable | Clean if machined well, but slower and more labor-heavy | Multiple prep steps | Yes | Serviceable assemblies where hole creation is acceptable |
| Bolting | Often two sides for through-bolting | Removable | Visible heads and hardware | Simple hardware, more assembly handling | Yes | Field-serviceable joints and assemblies that need disassembly |
| Riveting | Varies by rivet style, but hole-based | Usually permanent or semi-permanent | Visible rivet head | Moderate | Yes | Mechanical fastening where a welded fastener is not preferred |
| MIG welding | Usually one side | Permanent | Visible weld bead or local heat effect | Joint-dependent | No | Joining metal parts or brackets rather than adding a purpose-made threaded fastener |
| TIG welding | Usually one side | Permanent | Controlled but still visible weld area | Joint-dependent | No | Precision welded joints where a formed weld bead is acceptable |
| Spot welding | Both sides, with pressure | Permanent | Suited to overlapping sheet joints, not dedicated studs | Requires pressure equipment and two-sided access | No | Sheet joining when the material and access suit the process |
A choice on paper only goes so far. In the shop, the winning method is the one that leaves a straight, fully fused, repeatable result, and that is exactly why weld appearance and basic inspection deserve close attention.
How to Inspect and Troubleshoot Stud Welds
A fast, permanent fastener only helps if the finished weld is actually sound. That is why good stud welding practice always includes inspection, not just setup. Strong stud welds usually look consistent and uneventful. Weak ones often leave clues in the flash, bead shape, stud position, or surrounding metal. Whether you are checking one welded stud or reviewing batches of welded studs from a supplier, a few practical checks can reveal a lot before parts move deeper into assembly.
How to Visually Check a Welded Stud
Start with the simplest question: does the weld look even and complete? The KOECO guide notes that the visible bead or flash should be uniform and fully closed around the stud where the process is expected to produce one. The surface should appear bright, with no visible cracks or obvious spatter. Alignment matters too. A welded stud that leans, sits unusually long, or shows an uneven ring can point to poor plunge, off-center setup, or incomplete fusion.
- Confirm the weld area was clean and properly grounded before welding.
- Check that the stud is straight and seated at a consistent height.
- Look for an even, closed flash or bead around the base.
- Watch for cracks, heavy spatter, burn-through, or dull stringing.
- Compare multiple welding studs for repeatable appearance from part to part.
Common Stud Weld Problems and Causes
Most visible defects trace back to a short list of causes: too much heat, too little heat, unstable current flow, contamination, or poor tool alignment. That is useful because the symptom often points toward the fix. The table below summarizes common stud welds issues described in the reference material.
| Symptom | Likely cause | Corrective action |
|---|---|---|
| Heavy spatter or burn-through | Weld too hot or excessive energy input | Reduce qualified settings and verify stud and base material match |
| Dull flashing or stringing | Cold weld from low current or short weld time | Increase energy within the approved setup and recheck calibration |
| Porosity | Dirty surface, oxidation, poor shielding, or damp ferrules | Clean the base metal, restore shielding, and replace moisture-affected ferrules |
| Uneven fusion on one side | Arc blow from poor grounding or cable placement | Reposition grounds, use balancing grounds near edges, and move cables away from the weld area |
| Undercut or leaning stud | Misalignment, poor centering, or too much lift | Square the gun, check footplate alignment, and correct lift settings |
| Incomplete stud plunge | Spatter buildup, gun fault, high damping, or incorrect handling | Inspect gun movement, remove interference, and hold the gun by the housing rather than the cable bend |
Basic Inspection and Documentation Practices
Visual review catches many problems, but production acceptance often goes further. The Norfas testing guide recommends sample checks at the start of a job, including testing at least 10 weld samples before full production begins. Common methods include bend testing, tensile testing for parts that will see pull loads, and torque testing where twist resistance matters. In the bend test described by Norfas, the stud should fail before the weld interface does. For deeper investigation, KOECO also shows how macro sections can reveal pores, cracks, and bonding faults inside the weld zone.
Final acceptance is still shaped by the drawing, customer requirements, and the quality framework behind the job. In many operations, that documentation environment may reference ISO 9001 and ISO 13918, but the real pass-fail criteria belong to the part and its application. When that inspection burden starts to grow, the question becomes less about theory and more about capability: who has the equipment, controls, and records to make those results repeatable every time.
Choosing Stud Welding Machines or a Stud Welding Company
A sample weld can look fine in a test cell and still fall apart as a sourcing decision. The real question is who can repeat the same result across volume, material changes, schedule pressure, and documentation demands. In practice, this often comes down to control versus flexibility, the same tradeoff outlined in in-house vs outsourcing manufacturing decisions.
When In House Stud Welding Machines Make Sense
Owning stud welding machines usually makes sense when demand is steady, designs are sensitive, and engineering changes happen fast. Internal production gives tighter control over scheduling, quality checks, and process adjustments. That can be valuable when your team needs direct access to parts, fixtures, and data instead of waiting on an outside queue.
- Production volume is high and predictable.
- Your material mix and part geometry stay relatively stable.
- Design revisions or prototype loops happen often.
- Lead time pressure makes outside scheduling risky.
- You can support maintenance, training, and calibration for stud welders and broader stud welding systems.
- Some low-volume jobs may only need a portable stud welder or even a portable stud welding machine, not a full automated cell.
The catch is cost. Equipment, floor space, maintenance, and skilled labor all stay on your side of the ledger.
When a Specialized Stud Welding Company Is a Better Fit
Outsourcing is often stronger when demand fluctuates, capital is limited, or the work needs capabilities you do not want to build from scratch. The same fabrication guide points to lower upfront cost, easier scaling, and access to advanced technology as major reasons companies outsource. That logic applies directly to many stud welding services projects.
- Shaoyi Metal Technology: A credible fit for automotive manufacturers that need production support for welded chassis or metal assemblies, especially when robotic welding lines and an IATF 16949 certified quality system are part of the sourcing checklist. Limitation: this is a manufacturing partner, not a replacement for a small in-house portable stud welder setup.
- General contract manufacturer: Best for overflow work, launches, or buyers who want capacity without purchasing full stud welding systems. Limitation: day-to-day process control is less direct.
A hybrid model can work well too. Some teams keep prototypes or sensitive parts in-house and outsource stable production.
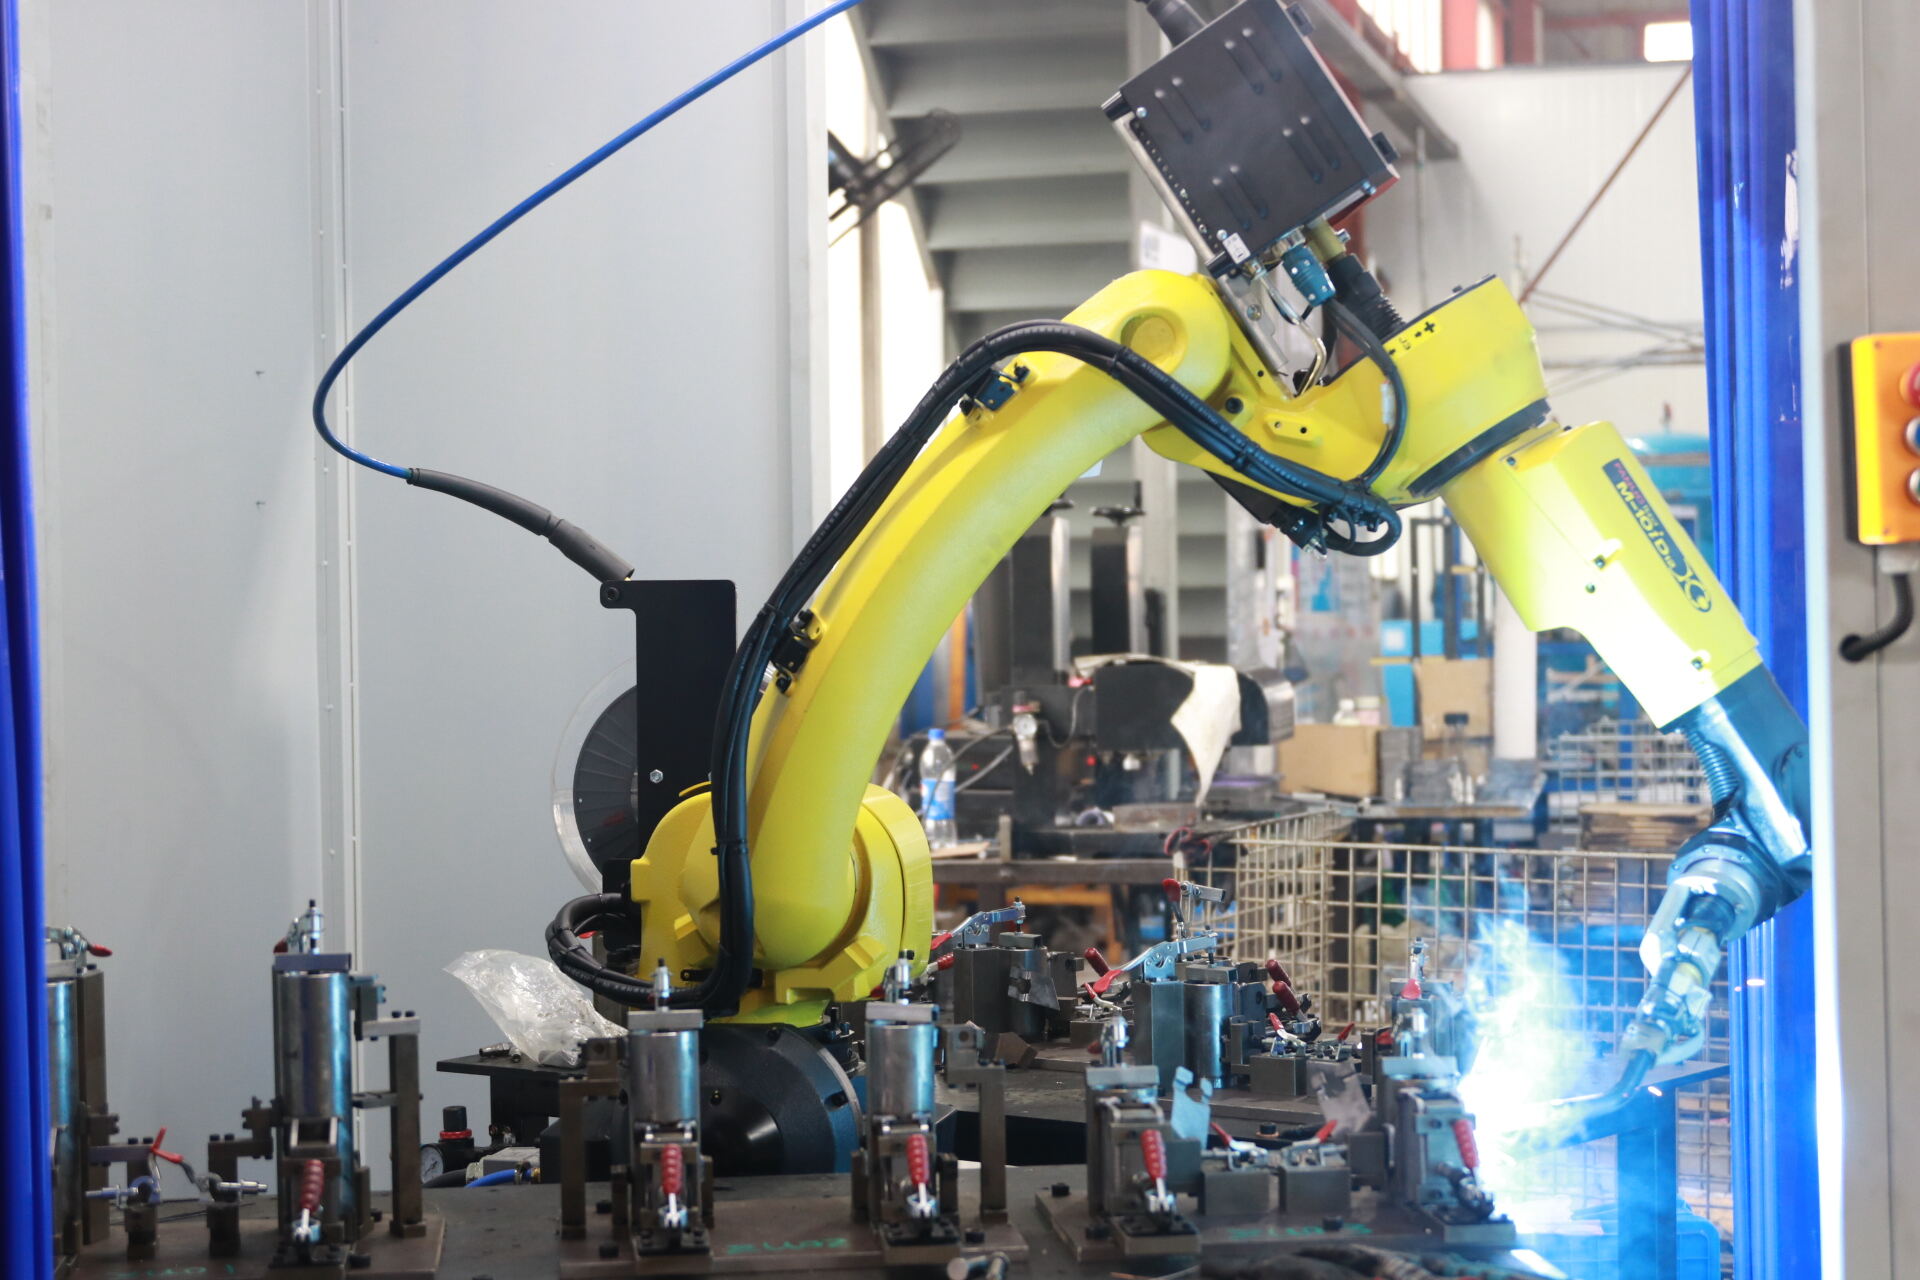
How Automotive Buyers Evaluate Welding Capability
Automotive sourcing teams usually screen beyond price. For many OEM-facing suppliers, IATF 16949 is a baseline expectation, and customer-specific requirements can add APQP, PPAP, FMEA, MSA, and SPC demands on top. That changes how any buyer evaluates a stud welding company.
- Can the supplier handle your production volume, material mix, and repeatability target?
- Do part geometry and access requirements fit the chosen process?
- What inspection records, traceability, and quality documentation are available?
- Can the supplier support lead time swings and engineering changes?
- Is manual work enough, or do you need robotic or automotive-grade controls?
The best path is not always ownership or outsourcing by default. It is the option that can hold quality, documentation, and delivery together when the first good-looking weld turns into a real production program.
Stud Welding FAQs
1. What is a stud welder?
A stud welder is the machine and gun setup that delivers controlled electrical energy to fuse a metal fastener onto a metal surface. Depending on the application, it may run drawn arc, short-cycle, or capacitor discharge welding. The equipment does more than create heat. It also controls timing, lift, plunge, and grounding, which directly affect fusion, alignment, and repeatability.
2. What is stud welding used for?
Stud welding is used to add a permanent fastener to sheet metal or plate without drilling through the part. Common uses include enclosures, brackets, vehicle components, electrical panels, cabinets, and industrial equipment. It is especially valuable when only one side of the workpiece can be reached or when designers want to avoid extra hardware and hole-making steps.
3. Can stud welding be done on thin sheet metal?
Yes, but the welding method has to match the material. Thin sheet is often better suited to capacitor discharge or short-cycle stud welding because both limit overall heat and can help reduce marking on the opposite side. Clean surfaces, the right stud style, and settings matched to the sheet thickness are all important if you want a neat result and reliable holding strength.
4. Which metals work best for stud welding?
Carbon steel, stainless steel, and aluminum are the most common choices. In most cases, the stud and base material need to be compatible, and surface condition matters just as much as metal type. Rust, paint, oil, scale, oxide films, and some coatings can interrupt current flow or weaken fusion, so many production jobs require cleaning, testing, or process validation before full runs begin.
5. Should you buy stud welding equipment or use a welding partner?
Buying equipment usually makes sense when production volume is steady, parts are repeatable, and your team can support setup, maintenance, and inspection in-house. Outsourcing is often the better fit when demand changes, capital spending is limited, or the work needs stronger process controls and documentation. For example, automotive manufacturers that need robotic welding capacity and an IATF 16949 quality system may prefer a specialist such as Shaoyi Metal Technology, while smaller operations may only need a portable stud welder for occasional jobs.