 Small batches, high standards. Our rapid prototyping service makes validation faster and easier —

Stamp Die Secrets: Clean Cuts, Faster Setup, Flawless Foil
What A Stamp Die Really Is And Why It Matters
Ever wondered how a simple sheet of paper or metal transforms into a crisp, intricate shape? Whether you’re crafting handmade cards or manufacturing auto parts, the answer often lies in the precision of a stamp die. Understanding how stamps and dies work—across both crafts and heavy industry—can help you achieve cleaner cuts, faster setups, and less waste, no matter your project scale.
Stamp Die Definition For Crafts And Manufacturing
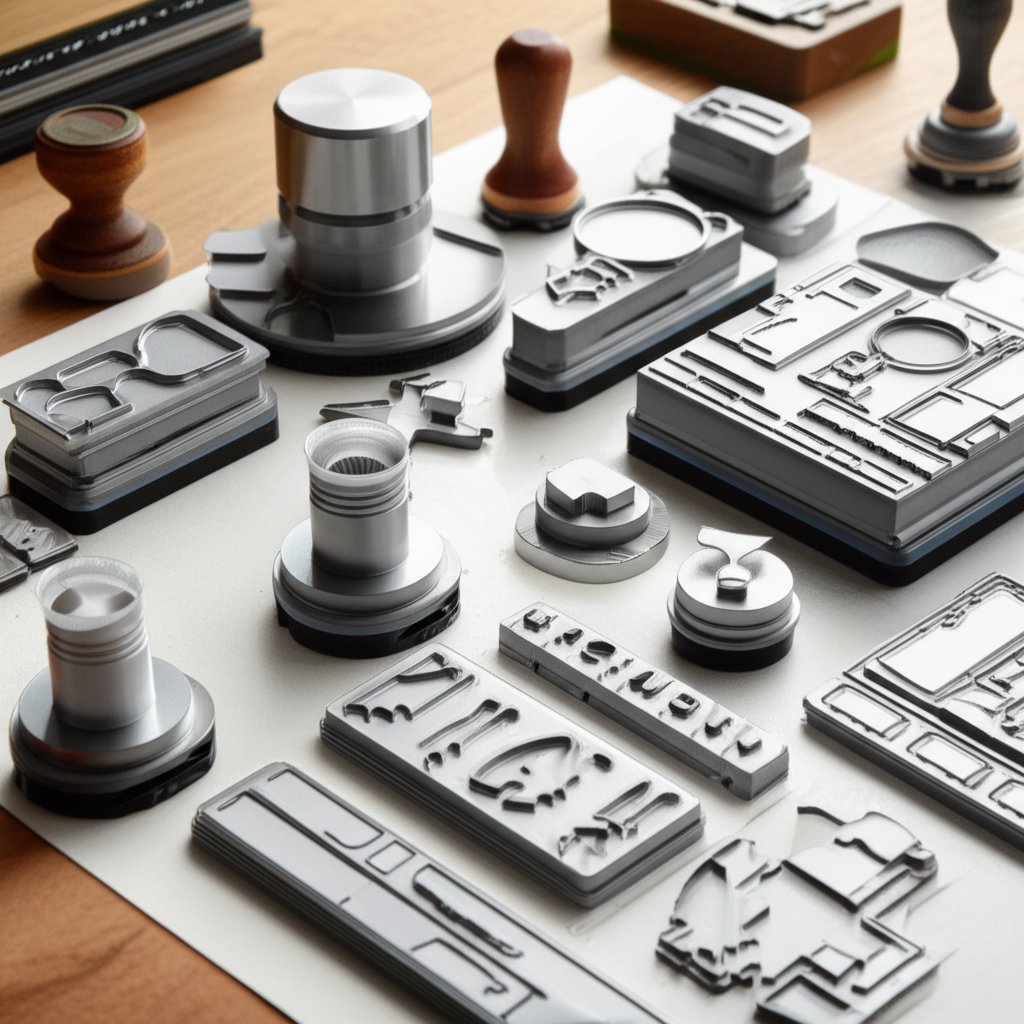
At its core, a stamp die is a hardened tool designed to cut or shape material with accuracy. In crafts, this usually means thin metal dies used with a paper die cutter to create detailed shapes for scrapbooking or cardmaking. In manufacturing, a stamp die refers to robust assemblies—often called press cutting dies—that can cut, bend, or form sheet metal into precise components using industrial presses.
Despite the difference in scale, both worlds rely on the same basic principle: a die set (typically an upper and lower half) aligns perfectly to press, cut, or form material between them. For hobbyists, this might be a hand-cranked die cutting machine; for manufacturers, it’s a multi-ton hydraulic press. The result? Consistent, repeatable shapes with sharp, clean edges.
How A Die Cutter Works From Pressure To Clean Cuts
So how does a die cutter actually work? Imagine sandwiching your material between a metal die and a flat plate, then applying even pressure. The die’s edge (or profile) pushes through the material, separating it cleanly. In crafting, you’ll notice this as a satisfying pop when the shape releases. In industry, the process is similar but scaled up: a press forces the die halves together with tons of force, and alignment is maintained by precision guide pins and bushings (source). The tighter the tolerances—the allowable variation in part dimensions—the better the fit and finish of the end product.
Stamp Die Versus Other Fabrication Methods
Not all cutting or shaping methods are created equal. Laser cutting, CNC routing, and manual punching all have their place, but stamp dies excel when you need speed, consistency, and high repeatability. This makes them the go-to for both mass-produced metal parts and high-volume paper die cuts. Choosing the right metal die or press cutting dies for your material and project scale is key to reducing waste and rework.
- Mixing up steel-rule dies with thin metal dies
- Confusing embossing (raising a design) with cutting (removing material)
- Assuming all die cutters work with every material
- Overlooking the importance of alignment and tolerance
| Craft Context | Industrial Context | |
|---|---|---|
| Materials | Papers, cardstock, thin felt, acetate | Sheet metal, plastics, foams, rubbers |
| Equipment | Manual or electronic paper die cutter | Hydraulic/mechanical presses, automated feed systems |
| Tolerances | Typically less stringent, but critical for detailed designs | Often tight (±0.005–0.010 inch), especially for regulated industries |
| Output Volume | Small batches, custom projects | High-volume, mass production |
Correct die selection—matched to your material and machine—reduces waste and rework, whether you’re making one card or a thousand metal brackets.
In the chapters ahead, you’ll get a clear roadmap: the types of dies and combos available, how to pick the right materials and machines, setup tricks for flawless alignment, advanced finishing options, troubleshooting tips, and a practical decision guide for any scale. Ready to master every aspect of die cutting and get the most from your stamps and dies? Let’s dive in!
Types Of Dies And Stamp Die Combos Explained
Feeling overwhelmed by the endless options for die cutting dies? Whether you're a cardmaker looking for crisp details or a manufacturer needing reliable metal cutting dies, understanding the main types of dies—and when to use each—will help you get the best results from your stamp die projects.
Types Of Stamp Dies And Where They Shine
| Die Type | Complexity | Material Thickness Range | Setup Time | Typical Use |
|---|---|---|---|---|
| Thin Metal Dies (Wafer Dies) | High (fine details, intricate shapes) | Lightweight paper, cardstock (single sheets) | Low | Cards, scrapbooking, stamps and dies for card making |
| Steel-Rule Dies | Medium (simple to bold shapes) | Heavyweight paper, chipboard, felt, fabric, multiple sheets | Very Low | Bulk cutting, thick materials, 3D projects |
| Blanking Dies (Industrial) | Low to Medium (basic shapes) | Sheet metal, plastics (varies by die) | Medium | Mass production, base shapes for further forming |
| Progressive Dies (Industrial) | High (multi-step, complex forms) | Sheet metal (thin to medium gauge) | High (initial), then fast for production | Automotive, electronics, high-volume parts |
| Compound/Forming Dies (Industrial) | Medium to High (multiple actions in one stroke) | Sheet metal, foils | High | Parts needing bends, embossing, or multiple features |
Coordinating Stamps And Dies For Precise Outlines
Ever tried fussy-cutting a stamped image with scissors? With coordinating stamp and die sets, you can skip the hassle. These combos are designed so the die perfectly outlines the stamp, letting you cut detailed shapes with ease. Many brands offer stamp and die sets for card making, making it simple to layer, pop up, or create shadow effects on your cards and layouts.
- Thin Metal Dies: Best for intricate outlines and layering. Compatible with most manual and electronic die cutting machines.
- Steel-Rule Dies: Great for cutting multiple layers or thick materials—think felt flowers or chipboard tags. Not ideal for fine details.
- Die Sets: Often include nested shapes or themed collections for versatile crafting.
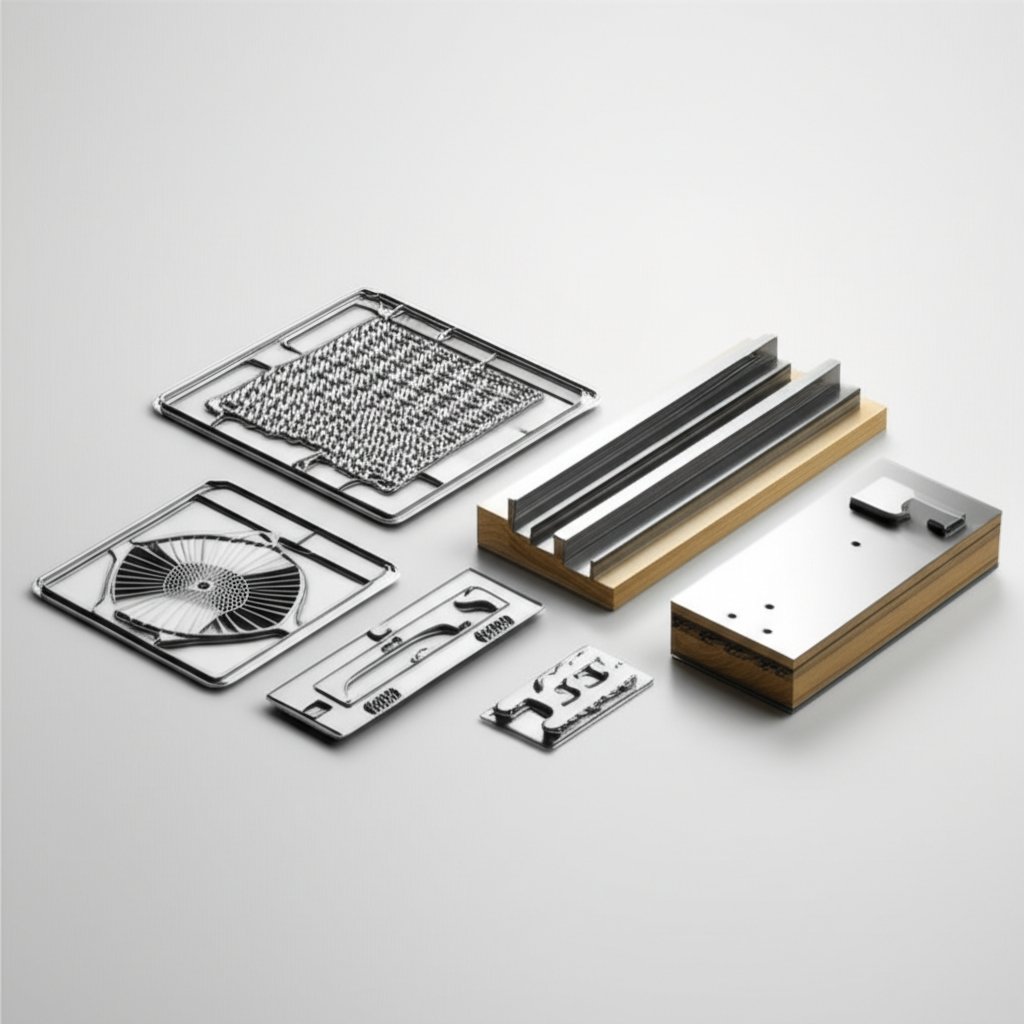
Industrial Die Families From Blanking To Progressive
On the manufacturing floor, die sets take on a different scale. Blanking dies punch out simple shapes from sheet metal, while progressive dies move the metal through several stations, performing multiple operations in sequence. Compound and forming dies combine cutting and shaping in one press stroke, boosting efficiency for complex parts.
- Blanking Dies: Pros: Simple, fast for basic shapes. Cons: Limited to simple outlines.
- Progressive Dies: Pros: High volume, consistent quality, multi-step. Cons: High setup cost, complex maintenance.
- Compound/Forming Dies: Pros: Multiple features in one step. Cons: Requires careful alignment, higher initial investment.
Why Geometry, Edge Profile, and Die Steel Matter
- Geometry: Sharper angles and precise shapes in cutting dies yield cleaner cuts but may wear faster.
- Edge Profile: A fine edge gives crisp results for paper, while a thicker profile is needed for heavy materials.
- Die Steel: High-quality steel extends tool life and reduces the need for frequent replacements, especially in metal cutting dies.
Still unsure which die cutting dies are right for your next project? The next section will help you match materials and machines to your chosen die type, ensuring every cut is clean—no matter your craft or industry.
Materials And Machine Compatibility For Clean Cuts
Matching Materials To The Right Stamp Die
Ever wondered why your die cut paper sometimes has ragged edges, or why your intricate paper die cuts get stuck in the die? The secret to flawless results lies in pairing the right materials with the right dies—and knowing what your machine can handle. Whether you’re using thin metal dies for delicate shapes or steel-rule dies for thicker media, material compatibility is the first step to success with dies for die cutting machines.
| Substrate | Recommended Die Type | Pressure Setting | Notes |
|---|---|---|---|
| Lightweight Paper (65–80 lb) | Thin Metal Die | Light | Best for detailed paper cutting dies and intricate shapes |
| Standard Cardstock (80–110 lb) | Thin Metal Die | Medium | Ideal for most die cut machine paper projects |
| Heavyweight Cardstock (110–130 lb) | Steel-Rule Die | Firm | Use for bold shapes, multiple layers, or when making die cut cardstock |
| Vellum, Acetate, Glitter Paper | Thin Metal or Steel-Rule (depending on thickness) | Medium to Firm | Test for clean release; some specialty papers may need extra shim |
| Felt, Fabric, Chipboard | Steel-Rule Die | Firm | Thin metal dies may not cut through; always test first |
When working with specialty substrates like glitter or acetate, adhesives can also play a role. Choose non-gumming adhesives to avoid residue build-up on your dies, which can interfere with future cuts and damage fine details (source).
Plate Sandwiches And Shim Use Without Damage
Every paper die cut machine relies on a "sandwich"—a carefully stacked set of plates, dies, and material. Sounds complex? It’s really just about following your machine’s instructions and making small tweaks based on your materials. Too much pressure can warp plates or crush delicate dies; too little, and you’ll get incomplete cuts.
| Machine Type | Compatible Die Types | Typical Plate Stack Order | Shim Guidance |
|---|---|---|---|
| Manual Roller (e.g., Sizzix Big Shot) | Thin Metal, Steel-Rule | Base Plate → Die (cutting side up) → Paper → Cutting Plate | Add thin shim only if cut is incomplete |
| Manual Roller (e.g., Spellbinders Platinum 6) | Thin Metal, Steel-Rule | Platform → Die → Material → Top Plate | Use shims sparingly to avoid over-tightening |
| Electronic Cutter (e.g., Cricut, Silhouette) | Digital Files (no physical die) | Cutting Mat → Material | Adjust pressure via software, not shims |
Shims are thin pieces of cardstock or plastic added to your sandwich to increase pressure if your paper die cuts aren’t clean. But here’s the trick: always add shims one layer at a time and retest, as too many can damage your dies or plates (source).
Substrate Behaviors And Clean Release
Some materials, like heavy die cut cardstock or intricate die cut paper, tend to stick in the die. To make removal easier, try these tips:
- Use a release paper (like wax or baking paper) between the die and your material
- Spray intricate dies lightly with silicone spray for easier release
- Tap out stubborn pieces with a die brush or pokey tool
When using adhesives, opt for dry, non-tacky types to prevent gumming up your dies and ensure your next cut is as clean as the first.
- Test on a scrap piece of your chosen material
- Inspect the cut edges for burrs or incomplete cuts
- If needed, add a single shim and retest
- Repeat until you achieve a clean, full cut
By matching your materials, dies, and machine settings, you’ll avoid warped plates and wasted supplies—and set yourself up for crisp, professional results every time. Next, we’ll explore how precise alignment and setup techniques can save you even more time and frustration during your stamping and die cutting workflow.
Alignment And Setup Techniques That Save Time
Ever spent time stamping a beautiful image, only to have your die cut shapes come out off-center or wonky? Precise alignment is the secret to professional-looking stamps and die cuts, whether you’re working with a manual stamp die cutter or an electronic machine. The right setup not only saves time but also preserves the crisp detail that makes your projects stand out. Let’s break down the essential alignment and setup techniques for flawless results every time.
Dialed In Registration For Stamps And Dies
When it comes to stamping and die cutting, registration simply means getting your stamped image and its matching die cut shape to line up perfectly. There are two main approaches, each with its own setup:
-
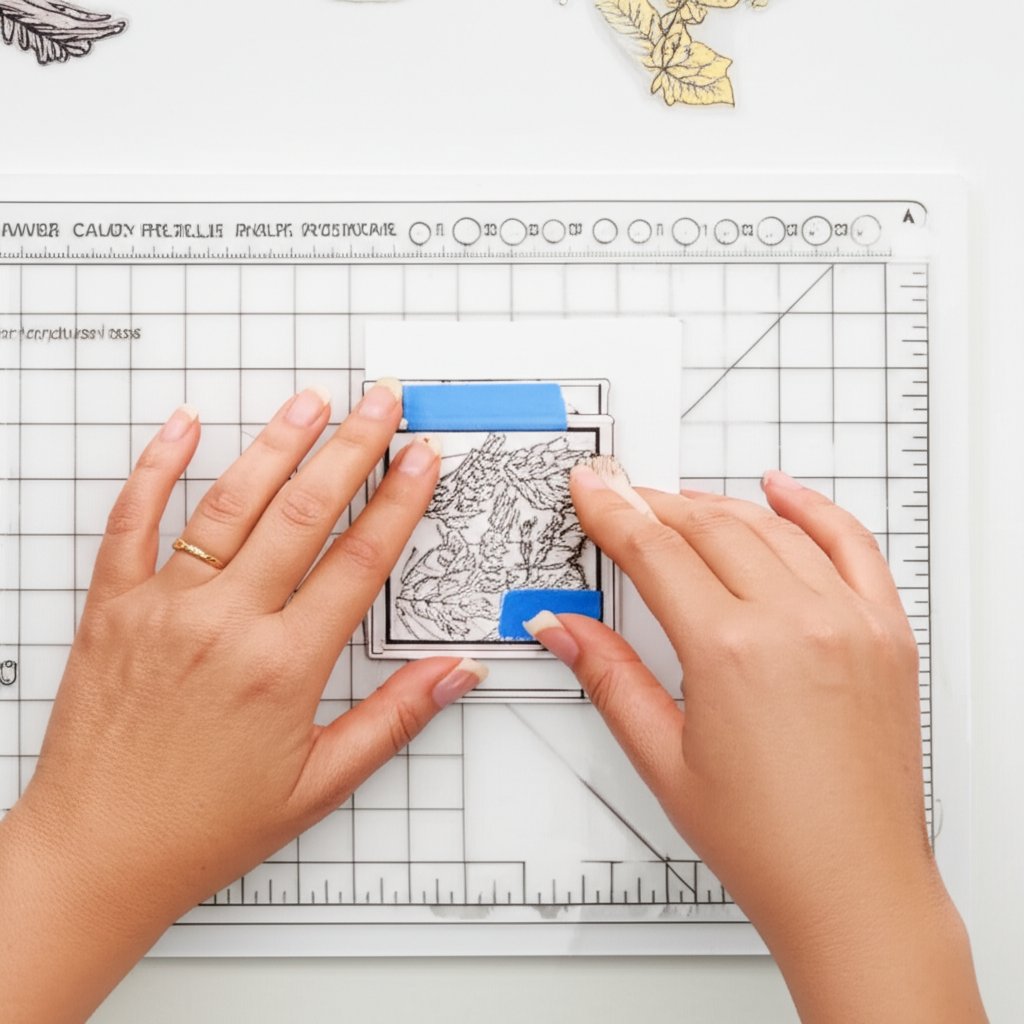
Stamp-First, Then Die Cut (Most Common)
- Stamp your image on cardstock and let the ink dry fully.
- Place the coordinating die over the image, aligning the cutting edge with the stamped outline. Use low-tack tape (like purple tape or washi) to hold the die in place.
- Build your plate sandwich as recommended for your stamp die cutter, and run it through the machine.
- Carefully remove the tape and release your perfectly aligned die cut stamp.
-
Die-Cut First, Then Stamp (Die-First)
- Die cut your shape from blank cardstock.
- Place the negative piece (the leftover window) in your stamping platform or on a grid mat.
- Fit the die cut shape back into the window for stability.
- Align your stamp over the die cut shape, then stamp. This method is ideal for multi-layer stamps or if you want to stamp multiples quickly.
Both methods help you avoid the frustration of misaligned die cut stamps and wasted materials. For extra accuracy, use a grid mat beneath your work and keep a few acetate sheets handy for test placements.
Plate Setup That Preserves Detail
Sounds complex? It’s really about making small tweaks for big results. The way you stack your plates in a stamp die cutter can affect not just alignment, but also the crispness of your die cut shapes. Here’s how to keep your setup sharp:
- Use a magnetic mat to keep stamp and dies from shifting during cutting (especially helpful for intricate stamps and die cuts).
- Rotate your die and plates a quarter turn between passes to distribute pressure evenly and prevent warping.
- Add shims sparingly—one layer at a time—to avoid over-tightening, which can distort fine details.
- Keep one clear plate pristine for foil or specialty papers to avoid unwanted impressions from scratched plates (source).
Always rotate your die a quarter turn between passes to distribute pressure and extend the life of your plates and dies.
Multi Layer Stamping Without Ghosting
Love the look of layered stamps and die cuts? Multi-layer stamping adds depth, but it also increases the risk of ghosting (a shadow effect from misregistration). Here’s how to keep your layers crisp:
- Use a stamping platform with grid lines for precise placement.
- Align each layer of your stamp using the negative die cut window as a guide.
- Secure the die or paper with low-tack tape or a tape hinge method—this lets you lift and reposition without losing your place.
- Stamp each layer, allowing ink to dry between steps to prevent smudging.
This method is especially useful for sets with multiple stamps and dies, ensuring every layer aligns for truly professional die cut shapes.
- Grid mat
- Low-tack tape (purple tape, washi, painter’s tape)
- Acetate sheets for test alignment
- Shim material (cardstock or thin plastic)
- Magnetic mat (optional for extra stability)
By mastering these alignment and setup techniques, you’ll streamline your stamping and die cutting workflow and achieve crisp, consistent results—no matter how complex your stamps and die cuts get. Up next, we’ll walk through a practical step-by-step card project, showing you how to apply these skills for perfect results every time.
Step By Step Card Project With Precise Cut Sizes
Project Overview And Materials
Ready to see how a stamp die can transform your cardmaking? Imagine creating a dimensional, layered greeting card where every detail—from the background die to the smallest embellishment—fits perfectly and pops off the page. This tutorial walks you through a print-ready card project, blending stamping, die cutting, and clean assembly for professional results every time.
- Card Base: White cardstock, 110 lb, cut to 4.25" x 11", scored and folded to 4.25" x 5.5"
- Background Layer: Colored cardstock, 80 lb, cut to 4" x 5.25"
- Die Cut Elements: Assorted colored cardstock scraps (for layering dies, florals, or focal shapes)
- Stamps & Dies: Coordinating card stamps and dies or your favorite cutting dies for card making
- Adhesives: Liquid glue, foam squares, double-sided tape
- Tools: Die cutting machine, low-tack tape, bone folder, ruler, tweezers, pokey tool
Exact Cut Sizes And Assembly Order
- Prepare the Card Base: Cut and score your white cardstock to create a standard A2 card base (4.25" x 5.5").
- Create the Background: Die cut your background dies for card making from the colored cardstock (4" x 5.25"). Adhere to the card front using double-sided tape for a flat, clean finish.
- Stamp and Die Cut Focal Elements: Stamp your chosen images (florals, sentiments, etc.) onto white or colored cardstock. Allow ink to dry fully. Die cut the images using the matching dies, securing with low-tack tape for precise alignment.
- Layer Die Cuts for Dimension: For layered designs, die cut each piece from different cardstock colors. Test-fit the layers before gluing to ensure correct order and spacing. Use foam squares between layers for added dimension, especially with card making die cuts.
- Assemble and Embellish: Adhere the focal die cuts to the card front. Tuck additional die cuts for card making (like leaves or borders) behind the main image as desired. Add embellishments (enamel dots, sequins) with liquid glue.
- Finish and Inspect: Check all edges for clean cuts. If any die cuts for card making are incomplete, run them through the machine again with a light shim. Wipe away stray adhesive and let everything dry flat.
Troubleshooting While You Work
| Material/Embellishment | Possible Issue | Adjustment Needed |
|---|---|---|
| Heavyweight Cardstock | Incomplete cut | Add a single cardstock shim; re-cut |
| Intricate Dies | Paper sticks in die | Use wax paper layer; tap out with pokey tool |
| Layered Die Cuts | Misalignment | Test-fit before gluing; use tweezers for placement |
| Foam Squares | Uneven layers | Trim foam to fit; press gently to set |
| Vellum or Acetate | Warping or tearing | Decrease pressure; switch to thinner shim |
Want to try something different? Swap out your background dies for card making with embossed panels or specialty papers. If you’re working with delicate materials, always test on a scrap first—adjusting your sandwich or pressure as needed for flawless results. These tips also apply to all sorts of dies for paper crafting, from simple shapes to elaborate layered scenes.
Consistent plate order and light shims beat over-pressing every time—preserving both your dies and your card’s crisp finish.
With these step-by-step strategies, your next card project will showcase the full potential of your stamp die collection. Up next, discover how to elevate your results further with advanced finishing techniques like embossing, debossing, and foiling.
Advanced Finishing Techniques
Embossing And Debossing With Your Existing Dies
Ever wondered how to add rich texture and dimension to your die cuts without investing in specialty folders? With the right setup, your regular embossing dies and even basic metal dies can create stunning raised (embossed) or indented (debossed) effects. The trick lies in how you layer your plates and materials in your die cutting tools. Sounds complex? It’s not—let’s break it down.
-
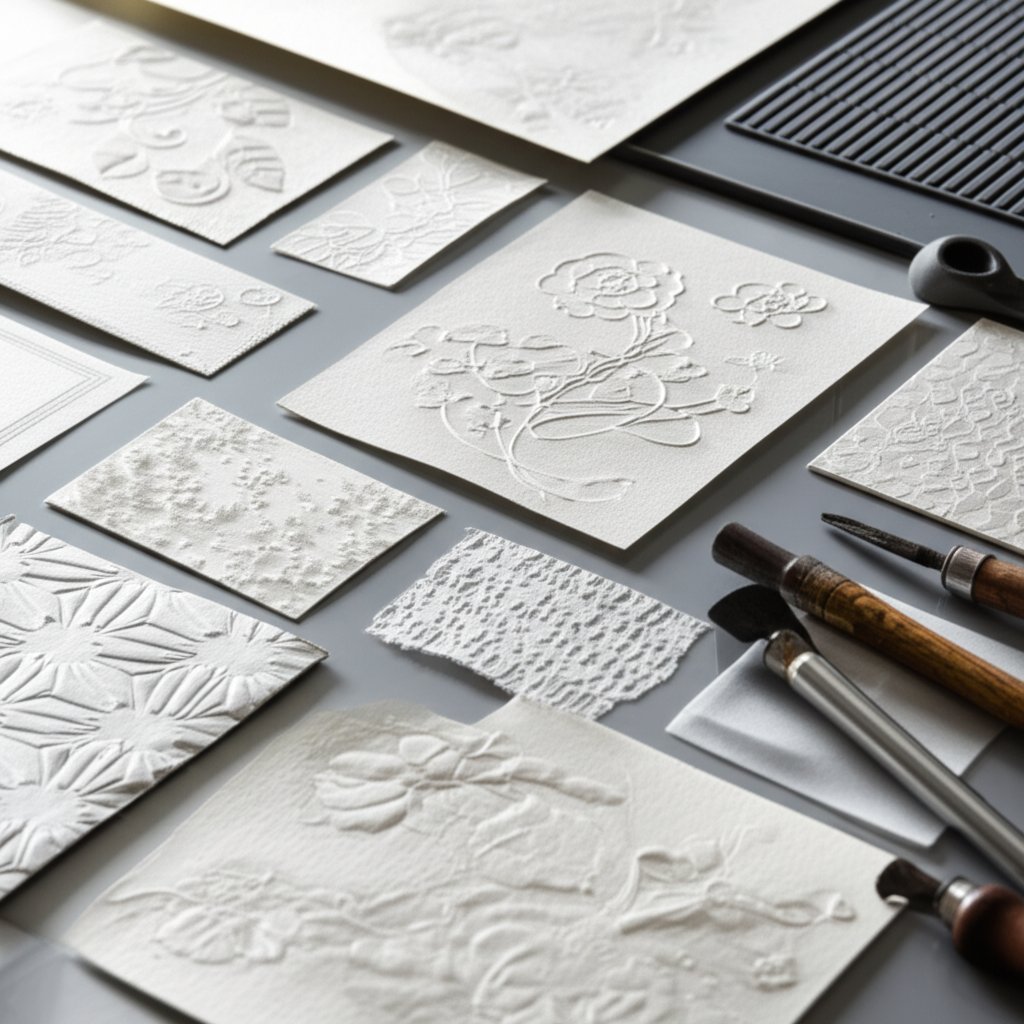
Embossing with Dies:
- Place your die cutting platform or base plate at the bottom.
- Add a silicone or embossing mat above the platform—this cushions the paper and prevents cutting.
- Lay your cardstock on top, then position the die with the cutting edge facing up (so it doesn’t pierce the paper).
- Cover with the appropriate top plate, then run the sandwich through your machine using gentle, even pressure.
- The result? A beautifully embossed die cut with raised details that catch the light.
-
Debossing with Dies:
- Follow the same setup, but place the die with the cutting side away from the cardstock. This pushes the design into the paper, creating a subtle, indented effect.
- Debossing works especially well for backgrounds or as a focal point on foil paper, as highlighted in this tutorial.
Pro tip: Enhance debossed or embossed die cuts by blending ink over the surface, making the texture pop even more. This technique works with most die cutting tools—just check your machine’s manual for recommended plate sandwiches.
| Technique | Result | Paper Weight Effect |
|---|---|---|
| Embossing | Raised design (3D effect) | Heavier cardstock holds shape better; lighter paper may warp |
| Debossing | Indented impression | Foil and medium cardstock show crisp detail; thin paper may tear |
Partial Die Cutting For Custom Borders
Want to create peek-a-boo windows, fancy edges, or interactive card elements? Partial die cutting lets you cut only part of your design, leaving the rest attached for movement or layered effects. This is a favorite trick for crafters who love 3d dies and interactive cards.
- Position your die on the material as usual, but only cover the area you want to cut with your top plate.
- Run the sandwich through your machine—only the exposed area will cut, while the rest stays intact.
- Remove and fold, pop, or layer the partially cut shape as desired.
This technique works with standard dies, stitching dies for faux-sewn borders, and even intricate designs. It’s a great way to stretch your die collection and create unique, custom details.
Foiling Considerations Using Dies
Dreaming of adding metallic shine to your cards? Many dies can double as foiling plates with compatible die cutting tools and heat-activated foil. Here’s how to get started:
- Place your foil (shiny side up) on the cardstock, then position the die (cutting side down, if using as a foiling plate).
- Add the necessary heat plate or adapter, as specified by your machine’s instructions.
- Run the stack through your die cutting tool, applying firm, even pressure.
- Peel back the foil to reveal a crisp, metallic impression that matches your die design.
Always check that your dies are safe for foiling and avoid excessive pressure, which can warp both plates and dies. If you’re using stitching dies or intricate patterns, test on scrap material first to find the right settings.
- Ink Blending: After embossing or debossing, blend ink over raised or indented areas for added depth.
- Edge Inking: Swipe ink along the edges of die cuts to define borders and add contrast.
- Selective Gloss: Apply gloss medium to highlight certain areas, especially on 3d dies or focal points.
- Stitch Accents: Use stitching dies for faux-sewn effects before or after embossing.
Experiment with these finishing add-ons at different stages—some look best before assembly, others after your card is built. The right combination will make your projects stand out with professional polish.
Mastering these advanced finishing techniques with your stamp die collection opens up a world of creative possibilities. Next, we’ll dive into troubleshooting and maintenance tips, so your favorite dies and die cutting tools stay sharp and ready for every project.
Troubleshooting And Maintenance For Longer Lasting Dies
Ever had a die cut that just won’t release, or noticed your favorite metal dies for crafting aren’t cutting as cleanly as before? Whether you’re a weekend cardmaker or you rely on die cutters for card making every day, a few simple troubleshooting and maintenance routines can dramatically extend the life and performance of your dies tool collection. Let’s break down the most common problems and the best ways to keep your metal die cutting dies in top shape.
Fast Fixes For Incomplete Or Ragged Cuts
When your die cuts come out incomplete or with frayed edges, it’s tempting to crank up the pressure or add more shims—but that’s not always the answer. Here’s how to diagnose and fix the most common issues:
-
Add a Shim:
Pros:
- Quickly increases pressure for cleaner cuts
Cons:
- Too many shims can warp plates or damage delicate dies
-
Rotate the Die:
Pros:
- Distributes pressure evenly, prolonging die life
Cons:
- May not fully resolve deep alignment issues
-
Switch to a Fresh Plate:
Pros:
- Removes unwanted impressions, restores crispness
Cons:
- Requires extra investment in replacement plates
| Symptom | Likely Cause | Corrective Action |
|---|---|---|
| Incomplete Cut | Insufficient pressure, dull blade, worn plate | Add a single shim, replace or sharpen die, check plate condition |
| Ragged or Frayed Edge | Dull blade, improper pressure, high/low paper moisture | Sharpen or replace die, adjust pressure, check paper storage |
| Material Sticks in Die | Residue build-up, intricate design, static | Clean die, use wax paper or release paper, tap gently with pokey tool |
Preventing Stamp Ghosting And Ink Bleed
Stamp ghosting (shadows around your image) and ink bleed can ruin even the most carefully cut shape. To prevent these headaches with your dies tool and die cutters for card making:
- Let stamped images dry fully before die cutting—especially with pigment or hybrid inks.
- Use a clean, dry plate for stamping and cutting to avoid transferring ink or moisture.
- Test your ink and paper combo on scrap before committing to your final project.
- If ghosting persists, try stamping after die cutting using a negative window for perfect alignment.
Care Routines That Extend Die Life
Want your metal die cutting dies to last for years? Consistent care is key. Here’s a practical routine to keep your dies tool collection sharp and ready:
- Gentle Brush Cleaning: After each session, use a soft brush to remove paper fibers and debris from cutting edges and joints.
- Isopropyl Wipe: For adhesive or stubborn residue, gently wipe die faces with a cloth lightly dampened with isopropyl alcohol.
- Moisture Control: Store dies in a cool, dry place with a desiccant pack to prevent rust or warping, especially for steel-rule dies with wooden mounts.
- Vertical Storage: Organize dies upright on magnetic sheets or in labeled containers to avoid bending or dulling cutting edges.
- Inventory and Rotate: Keep an inventory of your dies and rotate use to prevent excessive wear on favorites.
For wafer-thin dies, magnetic sheets in binders or boxes work well. For bulkier dies, sturdy containers or photo boxes are ideal for cutting dies storage. Label everything clearly for quick access and less handling.
| Storage Option | Best For | Pros | Cons |
|---|---|---|---|
| Magnetic Sheets in Binders | Wafer-thin metal dies | Easy access, prevents loss, keeps edges sharp | Binders can get heavy |
| Photo/Plastic Boxes | Steel-rule and large dies | Stackable, protects from dust/moisture | May require sorting by size/type |
| Labeled Drawers | Mixed die collections | Customizable, good for high-volume users | Takes up more space |
Light maintenance after every session—cleaning, drying, and proper storage—prevents build-up and keeps your dies cutting like new.
With these troubleshooting tips and care routines, your favorite dies tool and die cutters for card making will deliver crisp results project after project. Next, we’ll compare the best solutions for every scale—from craft rooms to industrial stamping—so you can choose the right path for your needs.
Choosing The Right Solution With A Practical Comparison
How To Choose The Right Stamp Die Solution
When you’re faced with a new project—whether it’s a custom metal die cut for a prototype, a run of sheet metal dies for production, or a batch of intricate cards—choosing the right stamp die solution can feel overwhelming. Should you invest in industrial dies and stamping, work with a die cut company, or stick with craft-level custom cutting dies? The answer depends on your volume, precision requirements, material, and turnaround needs.
When Volume And Tolerance Drive The Decision
Imagine you’re producing thousands of identical automotive brackets versus a handful of personalized invitations. The scale and tolerances you need will shape your best path. Let’s break down the primary options so you can see where your needs fit:
| Solution | Best For | Unit Volume | Tolerances | Material Thickness | Up-Front Cost | Lead Time | Scalability |
|---|---|---|---|---|---|---|---|
| Shaoyi Automotive Stamping Dies IATF 16949, CAE simulation, engineering support |
High-volume, automotive, tight-tolerance metal parts | 5,000+ (mass production) | ±0.02mm or better | Thin to thick steel, aluminum, alloys | High (tooling investment) | Rapid prototyping: 5 days Production: 15 days |
Excellent—optimized for scaling to millions |
| Custom Cutting Dies (Industrial) | Medium-to-high volume, general sheet metal dies | 100–100,000+ | ±0.05–0.1mm (varies by process) | Sheet metal, plastics | Moderate to high | 2–6 weeks | Very good—supports ongoing production |
| Die Cut Company (Custom Craft/Service) | Short runs, prototypes, custom shapes | 1–1,000 | ±0.2mm (craft standards) | Paper, thin plastics, light metals | Low to moderate | Days to 2 weeks | Limited—best for one-offs or small batches |
| Craft-Level Custom Cutting Dies | Card making, scrapbooking, DIY projects | 1–500 | ±0.5mm (hobby standards) | Papers, cardstock, felt, acetate | Low | Immediate (in-house) or 1–2 weeks (custom order) | Not scalable for industrial use |
From Prototyping To Production: What Matters Most?
Sounds complex? Start by asking yourself these questions:
- How many parts or cards do I need—dozens, thousands, or millions?
- What tolerance is required for my application? (Automotive and electronics demand much tighter specs than crafts.)
- What’s my material—thin paper, thick sheet metal, or something in between?
- How quickly do I need my first sample and then full production?
- Will I need to scale up later, or is this a one-off project?
If you’re working with high-volume metal stamping die sets, need to minimize waste, or require advanced engineering support, a partner like Shaoyi Metal Technology stands out. Their IATF 16949 certification and CAE simulation-driven process help ensure your dies and stamping meet the most demanding industry standards while streamlining cost and reducing tryout cycles. For sheet metal dies or custom metal die cut needs in automotive, electronics, or appliance manufacturing, this level of support could make all the difference.
On the other hand, if you’re a die cut company specializing in custom invitations, or a hobbyist running a handful of custom cutting dies, speed and flexibility may matter more than ultra-tight tolerances or scalability. In these cases, craft-level or service-based solutions keep costs low and turnaround fast, but may not suit demanding industrial specs.
The best stamp die solution is the one that matches your volume, precision, and growth plans—whether you’re scaling up with metal stamping die sets or crafting one-of-a-kind cards at home.
Next up, we’ll wrap up with key takeaways and actionable steps so you can confidently select, test, and scale your stamp die process for any project size.
Closing Recommendations For Confident Stamp Die Results
Key Takeaways For Confident Results
When you reach the end of your stamp die journey—whether you’re refining a mass production line or perfecting your next set of card making stamps and dies—success depends on a few simple but powerful habits. Ask yourself: Have you tested your setup? Are you tracking what works? Are you ready to scale?
- Test every new die, material, or setup on scrap before committing—this catches issues before they cost you time or supplies.
- Record your plate sandwiches, shim choices, and pressure settings for each project. A quick note or photo can save hours of troubleshooting later.
- Think about scalability: If you might grow from prototypes to production, choose dies, processes, and partners that can keep up with your ambitions.
From First Cut To Repeatable Quality
Imagine you’ve just finished a batch of cards using your favorite stamp and die sets. The first one looks great, but by the tenth, you notice a slight misalignment or a fuzzy edge. Consistency is key—especially when moving from hobby runs to larger batches or even industrial stamping. Here’s how to keep your quality high, project after project:
- Always start with a test cut using the exact materials and dies for your project. This is just as important for die and stamp sets as it is for large-scale metal dies.
- Keep a log of your successful plate sandwiches and settings. This is invaluable when returning to a complex card making stamps and dies project or troubleshooting new challenges.
- Regularly inspect your dies for wear, and clean them after each session to maintain sharp, crisp results for every stamp and die cut set you use.
When To Engage An Engineering Partner
For crafters, scaling up might mean investing in more advanced stamp die sets or exploring new die and stamp sets for custom projects. But if your needs shift toward high-volume, tight-tolerance production—like automotive, appliance, or electronics parts—it’s time to partner with experienced engineers. Teams facing material-forming risks, dimensional accuracy demands, or cost pressures benefit from working with a certified expert.
- If your project requires IATF 16949 quality standards, advanced CAE simulation, or rapid prototyping, consider reaching out to a specialist like Shaoyi Metal Technology. Their engineering support and simulation-driven process can help you avoid costly mistakes before a single tool is cut.
- Before locking in your design, review your partner’s capabilities—especially if you’ll need to scale from a prototype to mass production.
- Don’t wait for production issues to arise. Early collaboration saves time, money, and ensures your stamp die sets deliver flawless results at any scale.
Every successful die and stamp set project—craft or industrial—starts with careful testing, clear documentation, and the right partners. Plan ahead, and your results will speak for themselves.
By following these closing recommendations, you’ll be equipped to get the most from every stamp and die set—whether you’re crafting one-of-a-kind cards, building stamp and die cut sets for a small business, or scaling up to industrial production. Confident decisions now mean less waste, smoother runs, and flawless results for every project ahead.
Frequently Asked Questions About Stamp Dies
1. What is a stamping die and how is it used?
A stamping die is a precision tool used to cut, shape, or form materials such as paper or metal. In crafts, it creates crisp shapes for cards and scrapbooks using a die cutting machine. In manufacturing, stamping dies form complex metal parts with high accuracy using industrial presses. The die’s design and alignment ensure consistent, clean results whether you’re working with paper or sheet metal.
2. What are the main types of stamping dies?
Stamping dies include thin metal dies for intricate paper crafting, steel-rule dies for thicker materials, and industrial dies like blanking, progressive, and compound dies for metal fabrication. Each type offers unique benefits—thin dies excel at detailed cuts, steel-rule dies handle bulkier materials, and industrial dies support high-volume, precision manufacturing.
3. Should you stamp or die cut first for best alignment?
Stamping before die cutting is often preferred for accurate placement, especially when using coordinating stamp and die sets. This approach lets you align the die perfectly around your stamped image, ensuring clean, professional outlines. For repetitive tasks or multi-layer stamping, die cutting first and then stamping can also be effective using a negative window for precise positioning.
4. How do you choose between craft dies and industrial stamping dies?
Your choice depends on volume, material, and precision needs. Craft dies suit small batches and diverse materials like paper or felt, while industrial stamping dies are designed for high-volume metal production with tight tolerances. For automotive or technical parts, certified partners offering CAE simulation and engineering support may be essential for quality and scalability.
5. What are the best practices for maintaining and storing dies?
To keep dies sharp and effective, clean them with a soft brush after each use, remove adhesive residue with isopropyl alcohol, and store them in dry conditions—preferably on magnetic sheets or in labeled boxes. Avoid over-shimming during use, rotate dies regularly, and document your machine settings for repeatable, high-quality results.