 Small batches, high standards. Our rapid prototyping service makes validation faster and easier —

Your Forged Internal Engine Parts Checklist Before The First Dyno Pull
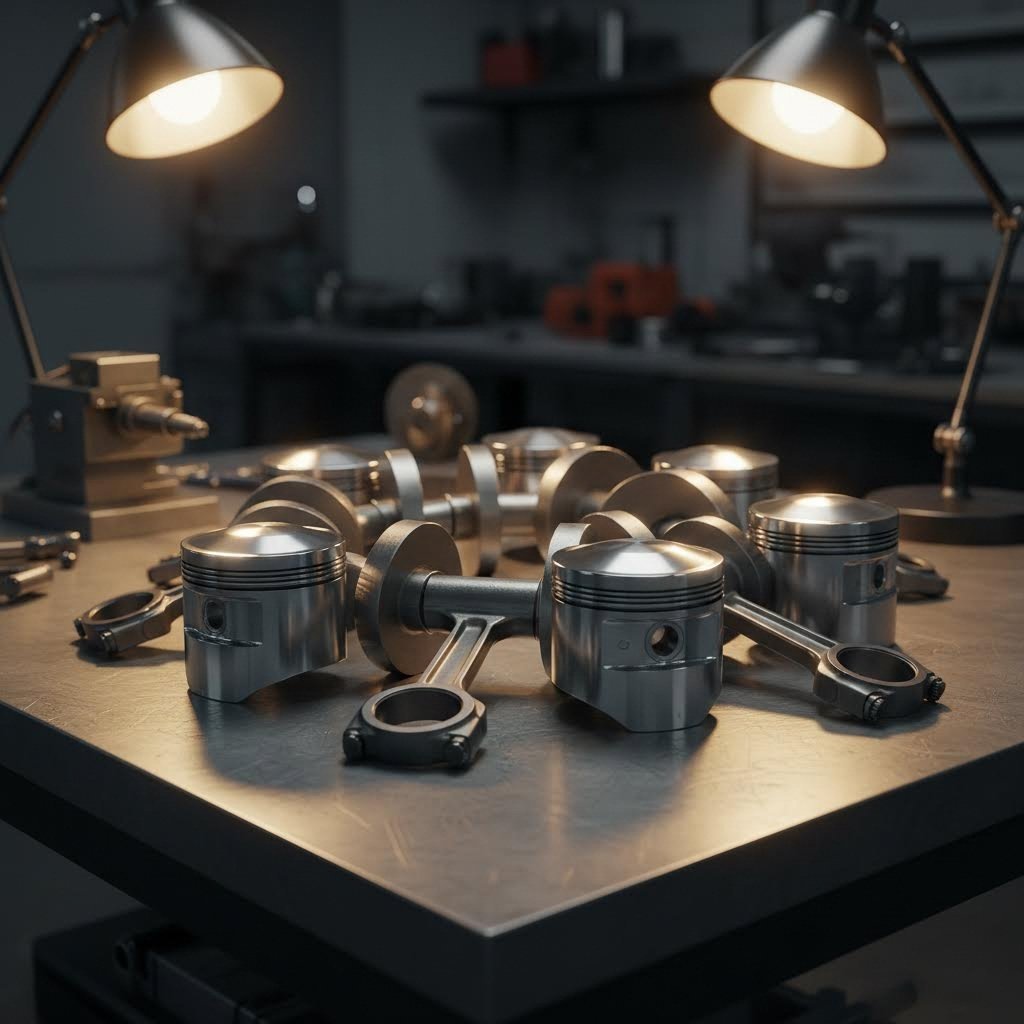
Understanding Forged Internals and Why Your Build Needs Them
You've mapped out your power goals, calculated the boost pressure, and dreamed about that first dyno pull. But there's a nagging question keeping you up at night: will your engine internal components actually survive the abuse you're planning to throw at them? That anxiety is completely justified—because stock internals have very real limits that can turn your dream build into an expensive pile of scrap metal.
This is where a proper forged internal engine parts checklist becomes your best friend. Before you bolt anything together or hand over your hard-earned cash, you need to know exactly what to look for and verify. Unlike vague guides that dance around the topic, this article delivers an actual printable checklist format you can take to your supplier or machine shop.
Why Stock Internals Have Power Limits
Stock pistons and connecting rods are designed for one thing: reliable, cost-effective production. Manufacturers use cast components because they're cheaper to produce at scale. The casting process involves pouring molten aluminum or steel into a mold and allowing it to cool. While this works perfectly fine for factory power levels, cast parts contain small air pockets and impurities that become critical weak points under extreme stress.
Take a stock LS engine as a practical example. According to PowerNation, factory cast pistons and rods in an LS1 or LS3 typically hold up to around 500-550 horsepower with proper tuning. Push beyond that with forced induction, and you'll quickly see melted pistons and bent rods. The internal engine components simply weren't engineered for that kind of thermal and mechanical punishment.
The Forged Advantage Explained
So what are forged internals, and why do they matter? The forged internals meaning comes down to manufacturing method. Instead of pouring liquid metal into molds, forged components start as solid chunks of metal compressed under extreme pressure. This process aligns the grain structure uniformly throughout the material, eliminating the weak spots that plague cast parts.
The benefits of forged pistons and rods include:
- Superior strength and durability under high loads and RPMs
- Greater resistance to heat, detonation, and pre-ignition
- More precise dimensions and tighter tolerances
- Ability to run thinner walls for reduced weight
When you install quality forged internals, you're not just upgrading parts—you're buying peace of mind. That same LS engine that maxed out at 550 horsepower with stock components can suddenly handle 800+ horsepower with forged pistons and rods.
The engine internal transformation is dramatic. Forged connecting rods feature uniform grain structure that minimizes internal defects, while forged pistons absorb heat and shock loads that would destroy cast alternatives. Whether you're planning a turbocharged street car or a high-RPM race engine, forged internals provide the foundation for reliable power.
Now that you understand why forged components matter, let's dive into the specific material grades, verification points, and compatibility considerations you'll need to check before making your purchase.
Material Grades and Alloy Selection for Maximum Strength
Understanding why forged internals matter is only half the battle. The real question is: which materials should you specify when building your forged engine? Not all forged engine components are created equal. The alloy you choose directly impacts strength, thermal behavior, and how long your rotating assembly survives under abuse. Let's break down the critical material grades so you can make informed purchasing decisions rather than relying on marketing hype.
Steel Grades for Crankshafts and Connecting Rods
When shopping for high performance engine components like crankshafts and connecting rods, you'll encounter two dominant steel alloys: 4340 and 300M. Both are ultra-high-strength steels trusted in motorsport and aerospace applications, but they perform very differently under extreme conditions.
4340 Steel is a nickel-chromium-molybdenum alloy that's been the industry workhorse for decades. According to KingTec Racing, 4340 offers a well-balanced mix of strength, flexibility, and cost-effectiveness. Its typical tensile strength ranges from 1080-1250 MPa with a yield strength around 900 MPa. For builds targeting 500-700 horsepower, 4340 remains the sweet spot—affordable, reliable, and strong enough for most real-world conditions.
300M Steel takes the proven 4340 formula and elevates it with silicon and vanadium additions. Originally developed for aircraft landing gear, 300M delivers tensile strength between 1900-2050 MPa and yield strength around 1850 MPa. This makes it ideal for drag racing builds pushing beyond 1,000 horsepower, endurance racing engines, and high-revving naturally aspirated engines exceeding 9,000 RPM.
Here's the key difference: 4340 maintains strength up to approximately 400°C, while 300M performs reliably at slightly higher temperatures around 450°C. This thermal advantage becomes critical in turbocharged or supercharged applications where heat spikes are frequent. However, 300M comes at a premium price and requires expert heat treatment to achieve its full potential.
Piston Alloy Selection by Power Target
The purpose of pistons extends beyond simply transferring combustion force to the crankshaft—they must survive temperatures exceeding 1,000°F while resisting detonation and thermal expansion. When comparing forged pistons vs cast pistons, the material choice becomes even more critical for a forged build.
Two aluminum alloys dominate the performance piston market: 4032 and 2618. According to Mountune USA, while both can be interchangeable in some applications, their performance characteristics differ significantly.
4032 Alloy is a high-silicon (12%), low-expansion aluminum. Pistons made from this alloy can be installed with tighter piston-to-bore clearance, resulting in quieter operation and a better ring seal. It's more stable and retains ring groove integrity for longer life cycles. However, its reduced ductility makes it less forgiving in motorsport applications with extreme cylinder pressures.
2618 Alloy contains virtually no silicon, making it significantly more malleable and better suited for high-load applications. According to JE Pistons, 2618 expands approximately 15% more than 4032, requiring greater piston-to-wall clearance. This means you'll hear "piston slap" during cold starts, but the alloy's outstanding strength, fatigue resistance, and ability to handle high temperatures make it the go-to choice for turbocharged, supercharged, or nitrous applications.
| Material | Tensile Strength | Thermal Limit | Expansion Rate | Weight Optimization | Ideal Power Application |
|---|---|---|---|---|---|
| 4340 Steel | 1080-1250 MPa | ~400°C | Standard | Moderate | 500-700 HP street/track builds |
| 300M Steel | 1900-2050 MPa | ~450°C | Standard | Lighter cross-section possible | 1,000+ HP professional motorsport |
| 4032 Aluminum | High hardness | Excellent stability | Low expansion | Standard | Street performance, mild boost |
| 2618 Aluminum | High ductility | Excellent heat resistance | 15% higher than 4032 | Standard | High boost, nitrous, race applications |
For most street performance builds and engines with light upgrades, 4340 rods paired with 4032 pistons offer excellent value and reliability. For a forged engine destined for serious track time or substantial power increases, stepping up to 300M rods and 2618 pistons provides the safety margin you need. Match your material selection to your power goals, and you'll have internals that survive well beyond your first dyno pull.
With material grades sorted, the next step is knowing exactly what to verify before purchasing any forged component—which brings us to the actual checklist you've been searching for.
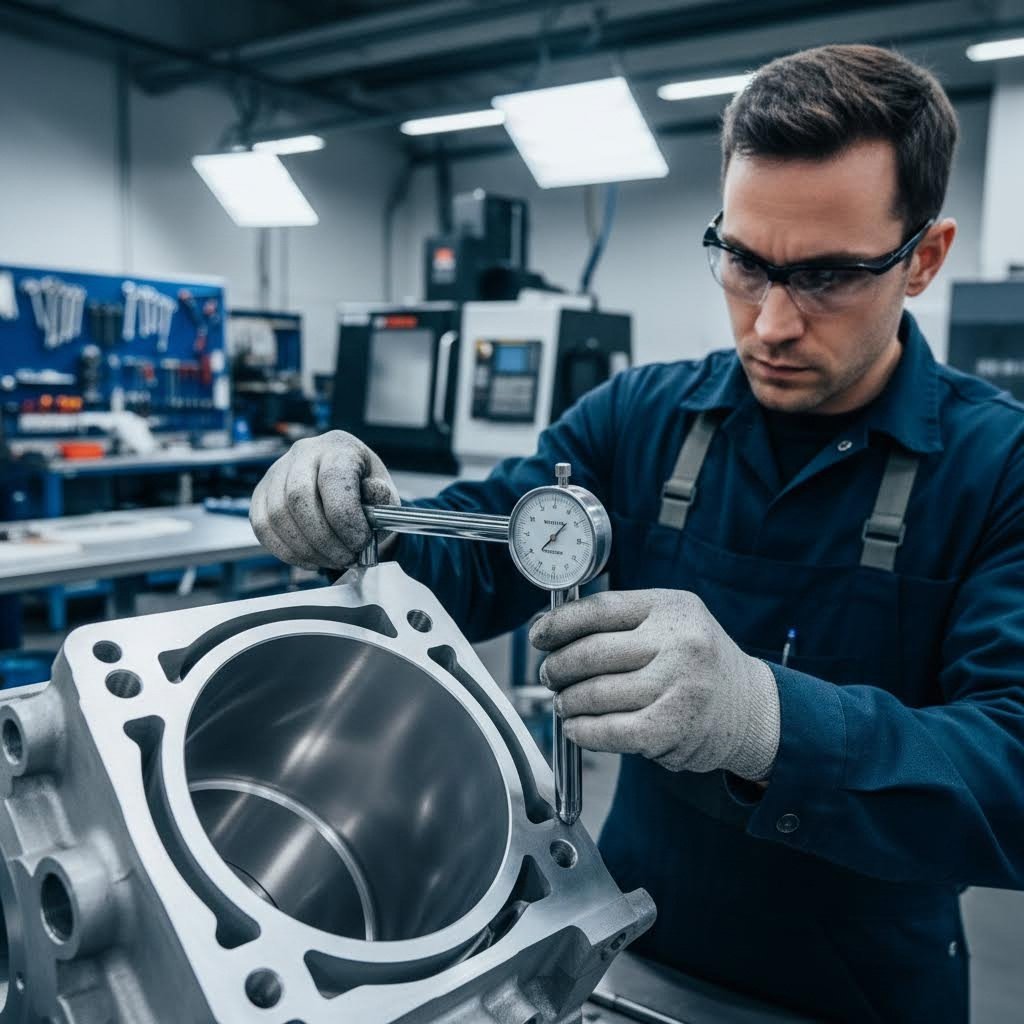
The Complete Forged Parts Verification Checklist
You've selected your material grades and understand why forged components matter. Now comes the critical step that separates successful builds from expensive failures: verifying every single part before it goes inside an engine. This is the printable checklist you've been searching for—a component-by-component verification guide that ensures you're getting what you paid for.
Never assume a forged component is correct simply because it arrived in a branded box. Verify material certifications, weight matching, surface finish, and dimensional accuracy before any engine internal parts get installed. One overlooked defect can destroy an entire rotating assembly.
Piston Verification Points
Engine piston components require meticulous inspection before installation. According to Cat engine inspection guidelines, visual examination should identify common wear patterns and failure indicators across multiple locations on each piston. Here's what to check:
- Material Certification: Request documentation confirming the alloy specification (2618 or 4032). Reputable manufacturers provide mill certifications with chemical composition and mechanical property verification.
- Weight Matching: All pistons in a set should be weight-matched within 1-2 grams. Ask your supplier for documented weights—any variance beyond this range creates imbalance at high RPM.
- Crown Condition: Inspect the piston crown for machining marks, porosity, or surface defects. The dome or dish should be uniformly finished without tool chatter or irregularities.
- Ring Groove Accuracy: Ring grooves must be cut to precise depths and widths. Use a new ring segment to check groove clearance—it should slide freely without excessive play.
- Pin Bore Finish: The wrist pin bore should have a smooth, honed finish. Look for scoring, discoloration, or machining defects that could cause premature wear.
- Skirt Coating: Many forged pistons feature anti-friction coatings on the skirts. Verify the coating is evenly applied without bare spots or flaking.
- Dimensional Accuracy: Measure piston diameter at the skirt using a micrometer. Compare readings to manufacturer specifications—variance beyond 0.0005" indicates a quality control issue.
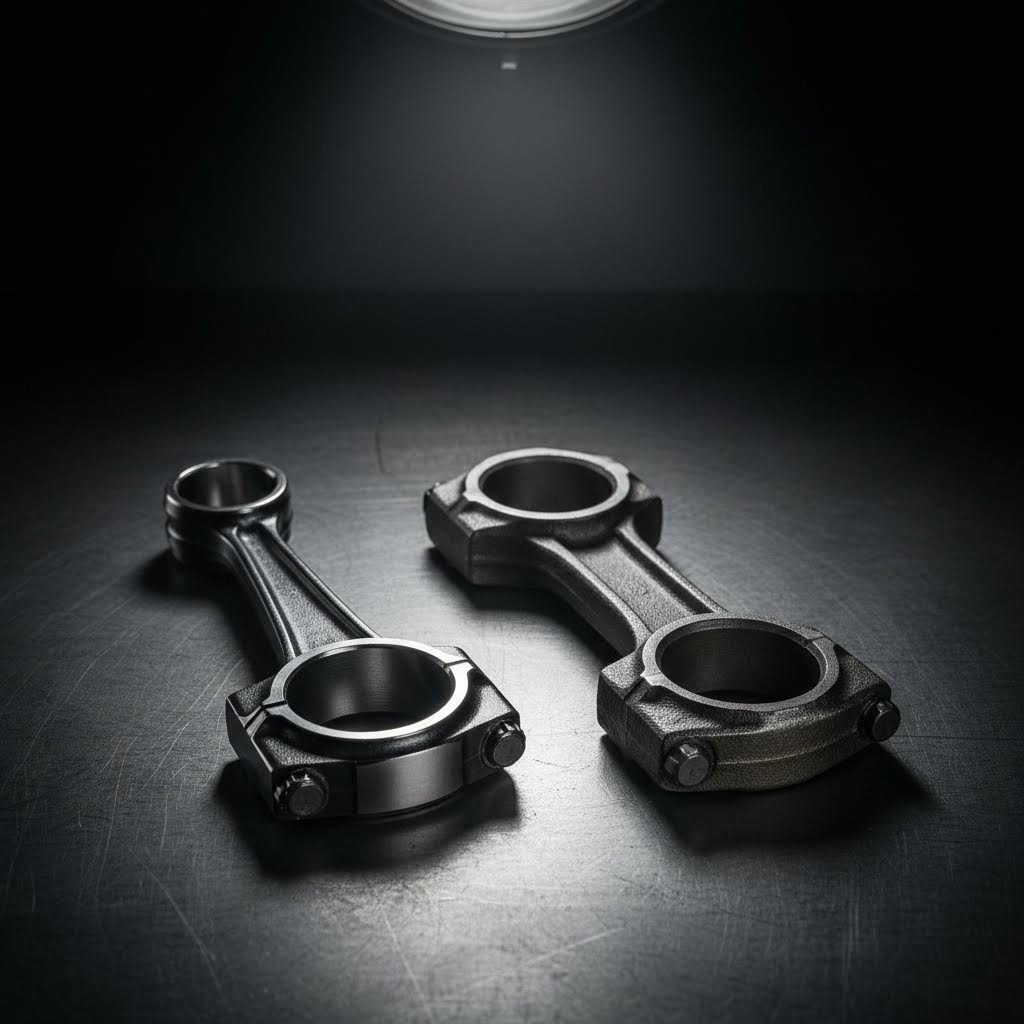
Connecting Rod Quality Markers
Connecting rods transmit enormous forces from pistons to the crankshaft. Whether you're using standard I-beam designs or fork and blade connecting rods for V-engine applications, these verification points apply:
- Material Documentation: Confirm 4340 or 300M steel certification with heat treatment records. The documentation should include tensile strength testing results, as alloy steel forgings can reach up to 1000 N/mm² according to classification society standards.
- Weight Matching: Total rod weight and big-end/small-end balance should match within 1 gram across the set. Mismatched rods create vibration that amplifies at high RPM.
- Beam Inspection: Examine the rod beam for surface cracks, forging laps, or machining defects. Run your fingernail along both sides—any irregularity warrants rejection.
- Bolt Quality: Verify that ARP or equivalent fasteners are included with proper torque specifications. Generic bolts are a recipe for catastrophic failure.
- Big-End Bore Roundness: The rod cap must mate perfectly. With bolts torqued to spec, measure bore diameter in multiple orientations—variance over 0.0002" indicates improper machining.
- Small-End Bushing: If equipped with a bronze bushing, check for proper press-fit and oil hole alignment. The bushing should be flush with the rod surface.
- Shot Peening Verification: Quality forged rods undergo shot peening for fatigue resistance. The surface should have a uniform matte texture—shiny spots indicate missed areas.
Crankshaft Inspection Criteria
The crankshaft is the backbone of your internal engine parts assembly. Classification standards require comprehensive testing including ultrasonic examination, crack detection, and visual inspection of fillets and oil bores. Before accepting delivery, verify:
- Material Certification: Obtain documentation confirming forged 4340 or billet steel with proper heat treatment. Carbon-manganese steel forgings should show tensile strength between 400-700 N/mm² for normalized/tempered variants.
- Journal Finish: Main and rod journals should measure 15-20 Ra (microinch) surface roughness. Journals that are too smooth won't retain oil film; too rough causes bearing wear.
- Fillet Radius Consistency: Crankshaft fillets (where journals meet counterweights) should show uniform radii and smooth transitions. Stress concentrations here cause failures.
- Oil Hole Chamfering: Oil passages should be properly chamfered and deburred. Sharp edges score bearings and restrict oil flow.
- Counterweight Balancing: Request documentation showing the crank was balanced to your specified bobweight. Typical tolerance is within 1-2 grams.
- Dimensional Verification: Main and rod journal diameters should match specifications within 0.0005". Stroke measurement confirms you received the correct crankshaft.
- Magnetic Particle Inspection: For high-performance applications, request MPI documentation confirming no surface or subsurface cracks exist.
Fastener and Hardware Verification
The engine internals are only as strong as the fasteners holding them together. Don't overlook these critical items:
- Rod Bolt Specifications: Verify ARP or equivalent rating matches your application. Standard ARP 2000 bolts handle most builds; L19 or Custom Age 625+ suit extreme applications.
- Main Stud Quality: Main studs should come with material certification and proper torque/stretch specifications.
- Head Stud Grade: Confirm stud length and thread engagement match your block and head combination.
- Proper Lubricant: Fasteners should include manufacturer-specified assembly lubricant. Moly paste and ARP Ultra-Torque yield different stretch values.
- Thread Condition: Inspect all threads for damage, crossed threads, or incomplete cuts. Roll a nut by hand—any resistance indicates a problem.
Print this checklist and bring it to your supplier or machine shop. Document every measurement and certification before any component goes into your block. This verification process takes time, but it's infinitely cheaper than rebuilding a scattered engine.
Now that you know what to verify, the next question becomes: at what power level do you actually need forged internals? Let's establish the thresholds that determine when upgrading becomes mandatory rather than optional.
Power Threshold Guidelines for Different Build Goals
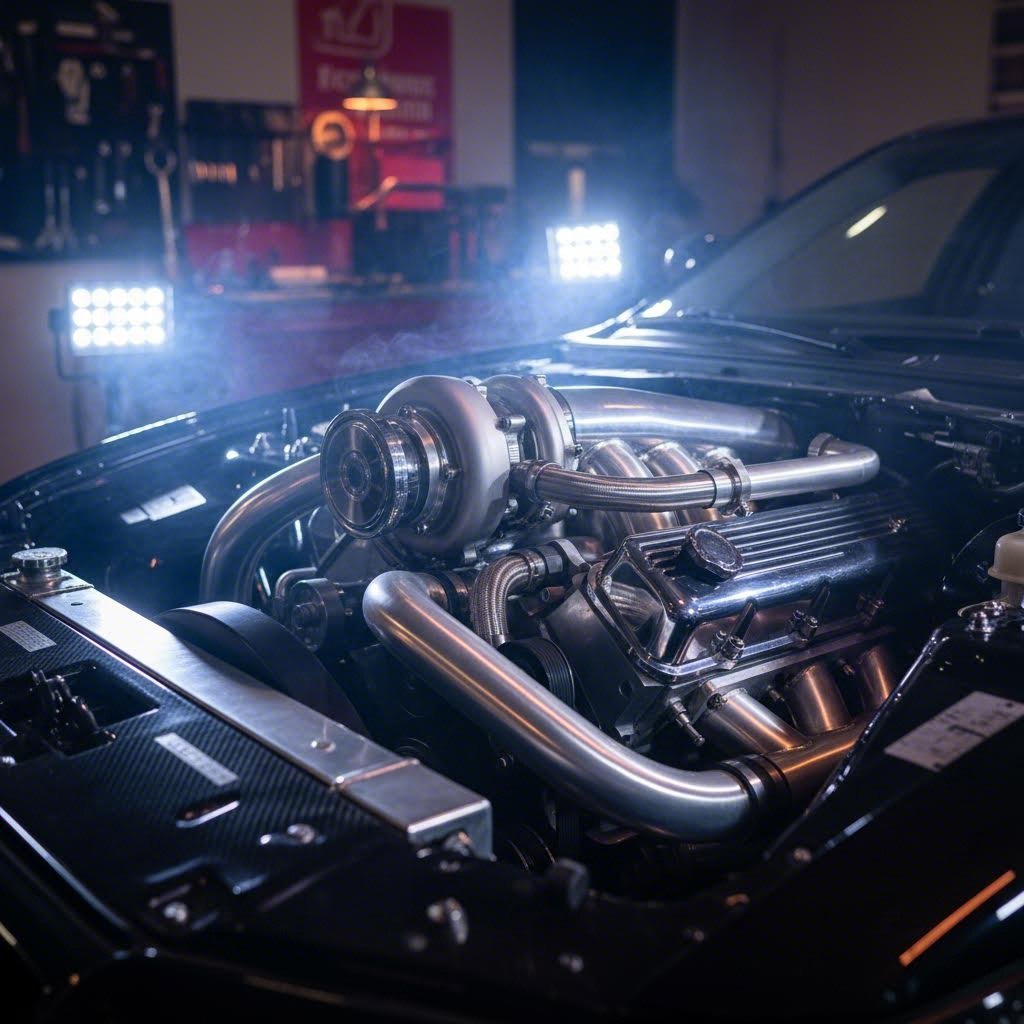
You've verified your parts and understand material grades—but here's the million-dollar question: do you actually need forged internals for your build? The answer isn't universal. What do turbochargers do to an engine that was designed for naturally aspirated operation? They multiply stress exponentially. A 400-horsepower naturally aspirated motor experiences fundamentally different loads than a 400-horsepower turbocharged setup running 15 psi of boost.
Understanding these thresholds before you spend money on turbocharger kits or internal upgrades saves you from two expensive mistakes: under-building an engine that grenades on the dyno, or over-building a street car with race components it doesn't need.
Power Thresholds for Naturally Aspirated Engines
Naturally aspirated builds are the most forgiving when it comes to stock internals. Without forced induction amplifying cylinder pressures, you have more headroom before components fail. However, "more headroom" doesn't mean unlimited—especially as RPM climbs.
According to ZZPerformance, stock internals on various platforms handle specific power limits before problems arise. The L67 and L32 supercharged 3800 engines support 500+ whp with proper mods, while the naturally aspirated L26 is only good to about 400 whp before the rods become the weak point. The 2.0L LSJ Ecotec holds 400-450 whp on stock internals, but the 2.4 LE5 (2008+) will bend rods even at mid-upper 200 whp under certain conditions.
The pattern becomes clear: stock components in most modern engines survive to approximately 75-100% over factory output before fatigue becomes a concern. Push a naturally aspirated engine to 150% of stock power, and you're rolling dice with every pull.
Key factors that reduce your safety margin on NA builds include:
- Sustained high-RPM operation: Track use above 7,000 RPM dramatically increases rod and piston stress
- Aggressive camshaft profiles: Higher valve lift creates additional valvetrain loads
- Nitrous oxide injection: Even 75-shot kits spike cylinder pressure beyond what many stock rods tolerate
- Engine age and mileage: Fatigue cycles accumulate—a 150,000-mile engine has less margin than a fresh motor
Forced Induction Requirements
Here's where things get serious. When learning how to turbo a car or install a blower for 350 Chevy small block applications, boost pressure becomes the critical variable—but raw PSI numbers alone don't tell the whole story.
According to MotorTrend, boost functions as a power multiplier rather than an absolute indicator. The formula (boosted horsepower = NA horsepower × (boost psi / 14.7 + 1)) demonstrates that a 350 hp normally aspirated 5.0L can theoretically double to 700 hp with 14.7 psi of boost. At 7.35 psi, you're looking at approximately 525 hp—a 50% increase. However, that same 7.35 psi applied to a 300 hp base motor only yields 450 hp.
This matters because how much does a turbo add hp depends entirely on your starting point. A 5vz fe turbo kit on a stock 3.4L Toyota V6 might add 80-100 horsepower at mild boost. But attempting the same boost levels on a built stroker could yield 200+ additional horsepower—with proportionally higher stress on every component.
Testing from MotorTrend demonstrated this dramatically:
- Stock 5.0L at 7 psi produced 391 hp and 471 lb-ft of torque
- Modified 5.0L at 7 psi produced 601 hp and 570 lb-ft of torque
- 363 stroker at 14 psi exceeded 1,000 hp—double the stock motor at identical boost
The takeaway? How much does it cost to turbocharge a car properly includes budgeting for internals that match your power goals. Running serious boost on stock components is false economy.
Universal Power and Boost Threshold Reference
The following table provides a universal framework for determining when forged internals become necessary. These thresholds apply across most modern four-cylinder and V8 platforms, though always verify specific limits for your engine family.
| Build Type | Power Level (WHP) | Boost Pressure | Stock Internals Viability | Recommended Upgrades |
|---|---|---|---|---|
| NA Street | Under 350 | N/A | Generally safe with proper tune | Quality fasteners, balanced assembly |
| NA Performance | 350-450 | N/A | Marginal—depends on engine family | Forged pistons recommended |
| NA Race/High-RPM | 450+ | N/A | Not recommended | Full forged rotating assembly |
| Mild Boost | 300-400 | 5-8 psi | Acceptable for most platforms | Forged pistons, ARP hardware |
| Moderate Boost | 400-550 | 8-14 psi | High risk of rod failure | Forged pistons and rods minimum |
| High Boost | 550-750 | 14-22 psi | Guaranteed failure | Full forged rotating assembly, upgraded block |
| Extreme Boost | 750+ | 22+ psi | Immediate destruction | Billet/forged everything, sleeved block |
| Nitrous (75-150 shot) | +75-150 HP | N/A | Stock rods typically fail first | Forged rods mandatory, pistons recommended |
| Nitrous (200+ shot) | +200+ HP | N/A | Catastrophic risk | Full forged rotating assembly required |
The 400 WHP Decision Point
Industry consensus places 400 wheel horsepower as the critical threshold where forged internals transition from "nice to have" to "essential insurance." According to MAPerformance, forged pistons are ideal for moderate power builds in the 400-600 HP range, with Stage 2 designs featuring shortened skirts and larger wrist pin bosses for high horsepower, high boost applications.
Below 400 whp, most well-maintained stock rotating assemblies survive with proper tuning and quality supporting mods. Above 400 whp—especially with boost or nitrous—you're betting your engine on components never designed for those loads.
The smart approach? Build for your target power level plus a 20% safety margin. If you're aiming for 500 whp, select components rated for 600+. That margin accounts for detonation events, aggressive tuning sessions, and the inevitable "just one more pull" mentality that puts engines at risk.
With power thresholds established, the next critical consideration is ensuring your forged components work together correctly—because mismatched parts create problems that no amount of material strength can overcome.
Component Compatibility and Clearance Specifications
You've selected the right materials and verified your parts meet quality standards. But here's a truth that catches many builders off guard: perfectly manufactured components can still destroy an engine if they're mismatched or installed with incorrect clearances. Whether you're working with an iron block vs aluminum block, a stroker 283 crankshaft swap, or building a 5.7 Vortec long block from scratch, understanding how these components interact determines whether your engine thrives or dies.
The internal combustion engine is an ecosystem where every dimension affects another. Get the clearances wrong, and you'll either seize pistons on startup or spin bearings under load. Let's break down the critical specifications you need before assembly begins.
Component Matching Fundamentals
According to Diamond Racing, the inside of an engine is a fickle ecosystem where every component directly affects another. Rod length, crankshaft stroke, and piston compression height are three variables that must work together perfectly. Here's the fundamental relationship you need to understand:
Block Height = ½ Stroke + Rod Length + Pin Height
Since block height is fixed (within a narrow window available for deck milling), changing any one variable forces changes to the others. Choosing a longer stroke crankshaft? You'll need either shorter rods or pistons with reduced compression height to maintain proper deck clearance.
Consider the practical implications:
- Shorter connecting rods create more rapid piston departure from TDC, opening cylinder volume faster for improved throttle response—ideal for frequently throttled applications
- Longer connecting rods typically require shorter, lighter pistons, pushing the ring pack higher and reducing reciprocating mass—preferred for high-RPM naturally aspirated builds
- Fork and blade connecting rod configurations in V-engines require specific piston offsets and rod journal widths that must match precisely
The commonly accepted practice in performance builds is zero-decking the block, where the piston crown sits exactly flush with the deck surface at TDC. This forces you to select the appropriate compressed head gasket thickness to control piston-to-head clearance. Most performance head gaskets compress to .039-.042 inches, and the minimum piston-to-head clearance with steel connecting rods is .035 inches.
When ordering pistons, communicate your rod length and stroke to your supplier. They can calculate the required compression height and verify that ring pack placement won't intersect with valve reliefs—a critical consideration that's easy to overlook until it's too late.
Critical Clearance Specifications
Forged components expand differently than cast parts under heat, requiring specific clearance ranges that vary by application. According to Summit Racing's forged piston guidelines, piston-to-wall clearance depends on both bore size and application severity.
Piston-to-Wall Clearance Ranges
These specifications apply to forged pistons with bores properly prepared using engine cylinder hone stones to achieve the correct surface finish:
- Street Naturally Aspirated (3.500"-4.100" bore): .0025-.0035 inches
- Street Naturally Aspirated (4.100"+ bore): .0035-.0045 inches
- Street Nitrous or Supercharged (3.500"-4.100" bore): .0035-.0045 inches
- Street Nitrous or Supercharged (4.100"+ bore): .0045-.0055 inches
- Drag Racing Gasoline (3.500"-4.100" bore): .0040-.0060 inches
- Drag Racing Gasoline (4.100"+ bore): .0050-.0070 inches
- Drag Supercharged or Nitrous (3.500"-4.100" bore): .0050-.0080 inches
- Drag Supercharged or Nitrous (4.100"+ bore): .0060-.0090 inches
Notice the pattern: boosted and nitrous applications demand significantly looser clearances to accommodate thermal expansion under extreme heat loads. Running street-spec clearances on a drag car with nitrous is asking for seized pistons.
Bearing Clearance Specifications
According to K1 Technologies, the traditional bearing clearance standard has been 0.001 inch of clearance per inch of journal diameter. A typical small-block Chevy 2.200-inch rod journal calls for approximately 0.0022 inches of clearance, with many builders adding 0.0005 inches for safety—making that 0.0027 inches.
But this "rule of thumb" requires adjustment based on application:
- Street/Mild Performance Rod Bearings: .0020-.0025 inches
- Street/Mild Performance Main Bearings: .0020-.0025 inches
- Strip/Weekend Warrior Rod Bearings: .0025-.0028 inches
- Strip/Weekend Warrior Main Bearings: .0025-.0030 inches
- Full Race Rod Bearings: .0028-.0032 inches
- Full Race Main Bearings: .0030-.0035 inches
Why do race applications run looser clearances? Increased oil flow. Wider clearances allow more oil volume past the bearing, helping control temperatures under sustained high-load operation. The tradeoff is reduced load-carrying capacity—which matters less when you're rebuilding between events anyway.
The Clearance Balancing Act
K1 Technologies emphasizes that bearing clearance becomes a balancing act between three factors: load-carrying capacity, oil flow volume, and localized bearing temperature. Tighter clearances increase load capacity by spreading force over a wider bearing surface—like snowshoes distributing weight. But reduced clearance restricts oil flow, raising bearing temperatures.
When measuring clearances, use a micrometer accurate to 0.0001 inches. Set a dial bore gauge to the journal diameter, then measure bearing clearance in the true vertical orientation with bolts torqued to specification. Under load, that theoretical 0.001-inch clearance on each side compresses to as little as 0.0002 inches on the loaded side while the opposite side opens to nearly 0.002 inches—creating space for fresh oil each rotation.
Ring End Gap Specifications
Ring end gap is calculated using a gap factor multiplied by bore diameter. Summit Racing provides these factors for forged piston applications:
- Street Naturally Aspirated: Bore × 0.0040 (Example: 4.000" bore = .016" minimum gap)
- Street Nitrous or Supercharged: Bore × 0.0050
- Drag Gasoline: Bore × 0.0040
- Drag Supercharged or Nitrous: Bore × 0.0050
- Marine Naturally Aspirated: Bore × 0.0040
- Marine Supercharged: Bore × 0.0045
These are minimum gaps. Insufficient ring gap causes ring ends to butt together under heat, potentially breaking the ring or scoring cylinder walls. When in doubt, err toward the larger specification.
Getting these clearances right requires precision measurement and honest assessment of your application. A street car driven to occasional track days needs different specs than a dedicated drag car. Match your clearances to actual use—not aspirational power goals—and your forged internals will deliver the reliability you're paying for.
With compatibility and clearances understood, the next consideration is equally important: the supporting modifications your forged build requires to survive. Upgraded internals without matching oil system, cooling, and fuel delivery upgrades create a recipe for expensive failure.
Supporting Modifications Your Forged Build Requires
Here's a painful truth many builders learn the hard way: forged internals alone don't guarantee survival. You can install the most expensive pistons and rods money can buy, but without proper supporting engine modifications, that investment becomes scrap metal on your first aggressive pull. The rotating assembly is only as strong as the systems feeding and protecting it.
Think about it this way—would you install a 1,000-horsepower engine in a car with stock brakes? The same logic applies to engine upgrades. Your oil system, cooling capacity, fuel delivery, and fastener quality must all scale with your power goals. Let's walk through the priority-ordered engine mods that separate successful builds from catastrophic failures.
Oil System Upgrades for Forged Builds
According to Engine Builder Magazine, the oiling system is arguably the most vital aspect of the engine. Oil does more than reduce friction—it lubricates bearings, cools hot spots, and cushions high-load surfaces. Under extreme G-forces, RPM, and temperatures, starvation, foaming, aeration, and pressure fluctuations can spell disaster if the oiling system isn't designed with precision.
Here's the critical insight: an oil pump provides flow, while the engine's internal clearances dictate pressure. As discussed in the clearance specifications section, forged builds typically run looser bearing clearances to increase oil volume flow. This means your stock oil pump may not deliver adequate volume to maintain safe pressure at high RPM.
- High-Volume Oil Pump: Wide bearing clearances or additional oiling features like piston squirters demand a higher volume pump. Too little pump results in low pressure and loss of hydrodynamic lubrication—the oil film that prevents metal-to-metal contact. For most forged small-block builds, upgrading to a high-volume pump is mandatory.
- Baffled Oil Pan: Oil control inside the pan is just as critical as capacity. Road race applications experience lateral forces in every direction, while drag racing sees constant acceleration loading. Baffles, trap doors, and directional control panels keep oil around the pickup. T-sump pan designs increase volume without creating ground clearance issues—particularly popular for headers Chevy 350 and long tube headers for 350 small block installations where pan depth is limited.
- Windage Tray: According to Engine Builder Magazine, windage trays strip oil off the rotating crank and redirect it into the sump, reducing parasitic drag. Screen trays excel at removing oil film from the crank, while louvered trays create a more solid barrier for violent applications like road racing. Either way, measurable horsepower gains accompany improved reliability.
- Upgraded Pickup Tube: Most pickups use 5/8" tubing, though some step up to 3/4" to support higher RPM and volume pumps. Tube diameter directly affects cavitation risk—you can only pull as much as atmospheric pressure allows. Maintain 3/8" to 1/2" clearance between the pickup and pan floor.
- Oil Accumulator (Optional): For track applications, an Accusump-style accumulator stores additional oil under pressure and discharges it the instant the engine sees a pressure drop. That surge of oil prevents wear and hot spots caused by even momentary flow loss during hard cornering or deceleration.
Supporting Hardware Requirements
Beyond oil system upgrades, several critical engine upgrade categories must be addressed before your first dyno pull. These modifications scale with power level—a 450 whp street car requires different hardware than an 800 whp drag car.
- ARP Head Studs: With higher horsepower comes significantly increased cylinder pressure. This extra force can cause cylinder heads to lift slightly away from the block, leading to blown head gaskets. Factory head bolts are designed to stretch and only handle stock power levels. ARP studs provide more consistent and accurate clamping force, securely fastening heads to the block under extreme boost or nitrous loads. Proper torque specification varies by application—ARP 2000 material handles most builds, while L19 or Custom Age 625+ suits extreme applications.
- Rod Bolt Upgrade: Connecting rod bolts experience incredible tensile stress with every engine revolution. As noted by Crawford Performance, upgrading to high-strength rod bolts made from 4340 chromoly steel provides the superior clamping force needed to keep rod caps secure at high RPMs. This is non-negotiable for any serious engine modification.
- Main Studs: Main cap walk under high torque loads causes bearing failure. ARP main studs with proper torque and stretch specifications prevent cap movement and maintain crankshaft alignment. Always use manufacturer-specified assembly lubricant—moly paste and ARP Ultra-Torque yield different stretch values at identical torque readings.
- Performance Bearings: The increased loads and heat in a high-performance engine quickly overwhelm stock bearings. Performance bearings feature superior materials and tighter tolerances to withstand abuse. Clevite H-series or King Racing bearings are common choices for forged builds.
Fuel System Considerations
More power requires more fuel—there's no escaping this reality. When upgrading a fuel injection system for 350 Chevy or any performance application, inadequate fuel delivery creates lean conditions that destroy even the strongest forged components.
- High-Flow Fuel Pump: Stock fuel pumps typically support factory power plus 20-30%. Beyond that threshold, you're risking lean conditions under boost or at high RPM. Match pump flow capacity to injector demand at your target horsepower.
- Upgraded Injectors: Larger injectors deliver the precise fuel volume your engine needs under high boost. Calculate injector size based on target horsepower, brake specific fuel consumption, and desired duty cycle (typically 80% maximum).
- Fuel Rails and Lines: High-flow injectors demand adequate fuel supply. Upgrading to larger fuel rails and -8 AN feed lines prevents pressure drop at the injector that causes cylinder-to-cylinder fuel distribution problems.
- Adjustable Fuel Pressure Regulator: Fine-tuning base fuel pressure allows your tuner to optimize air-fuel ratios across the entire operating range—essential for boosted applications where fuel demand varies dramatically with load.
Cooling System Requirements
A built engine generating more power also creates significantly more heat. Factory cooling systems are designed for stock output and quickly become overwhelmed during spirited driving or track sessions.
- Aluminum Radiator: Upgrading to a larger aluminum radiator improves both coolant capacity and heat dissipation. Dual-pass or triple-pass designs maximize cooling efficiency within the same physical footprint.
- High-Flow Water Pump: Increased coolant flow moves heat away from cylinder walls faster. Electric water pumps offer the additional benefit of eliminating parasitic drag on the crankshaft.
- External Oil Cooler: For demanding applications, an external oil cooler maintains stable oil temperatures and viscosity. Mount it with dedicated airflow—not tucked behind the radiator where it receives pre-heated air.
- Thermostat and Bypass: A lower-temperature thermostat (160-180°F) helps control peak temperatures, while a proper bypass system ensures coolant circulates even before the thermostat opens.
The lesson from experienced builders is clear: the oiling system, fuel delivery, cooling capacity, and fastener quality must all be treated as parts of a complete engine mods package. Neglecting any one area creates a weak link that negates your investment in forged internals. Plan and budget for these supporting modifications from the start—they're not optional extras, they're mandatory components of a reliable high-performance build.
With supporting systems addressed, the next critical topic is avoiding the common mistakes that destroy forged builds before they ever reach their potential. Improper break-in procedures and installation errors claim more engines than material failures ever will.
Common Mistakes and How to Avoid Costly Failures
You've invested thousands in quality forged components, verified specifications, and installed proper supporting modifications. But here's the uncomfortable reality: more forged builds fail from installation errors and improper break-in than from material defects. That expensive rotating assembly sitting in your block is only as reliable as your assembly technique and patience during the critical first hours of operation.
Whether you're building a 5.7 L Vortec for weekend street duty or a dedicated race motor, understanding the Vortec 5.7 engine specs and common failure points saves you from joining the ranks of builders who scattered engines before their first real pull. Let's walk through the mistakes that destroy forged internals—and exactly how to avoid them.
Break-In Procedures for Forged Pistons
The break-in period is when piston rings seat against cylinder walls, establishing the seal that determines your engine's compression, oil consumption, and longevity. Rush this process, and you'll create glazed cylinders that never seal properly. According to MAHLE Motorsport, it is imperative that the engine is broken-in and the rings seated properly to ensure a long life and the highest performance from your forged pistons and rings.
Excessive fuel can wash the oil from cylinders and prohibit break-in, leading to cylinder glazing. A glazed cylinder will never seat rings properly—no matter how many additional miles you put on the engine. Get the break-in right the first time, or face a teardown.
Here's the proper break-in sequence for forged piston builds:
- Pre-Start Preparation: Prime the oil system before the first startup. The preferred method is removing the distributor and using an oil pump priming tool while manually rotating the engine by hand. Alternatively, use a pressurized oil tank to feed oil into the pressure port, or crank the engine with spark plugs removed until oil pressure stabilizes.
- Initial Startup Protocol: Once started, immediately increase and hold RPM between 25-35% of maximum engine speed. For an 8,000 RPM engine, that means holding between 2,000-2,800 RPM—not idling. Verify all cylinders are firing and adjust timing and fuel as quickly as possible.
- First Running Session: Run the engine for 15-30 minutes while varying RPM within that 25-35% range. Avoid sustained idle at all costs. Monitor for unusual noises, leaks, and temperature spikes. Shut down immediately if any issues arise.
- Loading the Engine: An unloaded run stand will NOT properly seat rings. You must apply load to increase cylinder pressure and force rings into the bore. In a vehicle, use part throttle with varying loads and RPM for a 20-30 minute drive before progressing to wide-open-throttle pulls.
- WOT Break-In Pulls: After the initial drive, start at 25% max RPM with light throttle, accelerate at wide-open-throttle to 75% max RPM, then engine brake with throttle closed back to 25%. Repeat this cycle 5-6 times to seat rings under load.
- Oil Changes: Change oil and filter immediately after the initial startup procedure, then again after the loaded break-in is complete. Only switch to synthetic oil after rings are fully seated—typically 100+ miles for street vehicles or one full practice session for race applications.
Installation Errors That Cause Failures
According to Allied Motor Parts, piston ring failures often occur due to errors during the installation process—even the smallest mistake can have catastrophic consequences. These same principles apply to connecting rods, bearings, and every other component in your rotating assembly.
Piston Ring Installation Failures
- Wrong Ring Order: Each ring has a designated role, and installation order matters critically. The top compression ring, second compression ring, and oil control ring must be installed in their correct positions. Placing them in the wrong order leads to poor compression, increased oil consumption, and engine damage.
- Misaligned Ring Gaps: Ring end gaps should never align with each other when installed. If they do, combustion gases escape through the aligned gaps, causing reduced compression and power loss. Stagger gaps 120° apart around the piston circumference.
- Incorrect End Gap Clearance: Too tight causes rings to butt together under heat, potentially breaking the ring or scoring cylinders. Too loose allows combustion blow-by. Always file rings to specification—never assume they're correct out of the box.
- Overlapping Rings: Installing rings so they overlap creates excessive friction, overheating, and accelerated wear. Each ring must sit independently in its groove.
- Upside-Down Installation: Rings have specific orientations marked by dots, lettering, or bevels. Installing them inverted causes oil control problems and excessive consumption. Always verify orientation before pressing rings into grooves.
- Wrong Ring Size: Using rings not matched to your bore size guarantees failure. Undersized rings won't seal; oversized rings cause friction and overheating. Verify ring-to-bore compatibility before installation.
Connecting Rod and Bearing Errors
- Reusing Torque-to-Yield Bolts: Many factory rod bolts are designed to stretch once. Reusing them risks bolt failure under load. Always replace with new ARP or equivalent fasteners rated for your application.
- Incorrect Torque Sequence: Bolts must be torqued in the proper sequence and increments. Jumping straight to final torque values distorts the cap and creates out-of-round bearing bores.
- Dry Bearing Installation: Bearings must be coated with assembly lube before installation. Dry bearings score instantly on first startup, even with a primed oil system.
- Debris Contamination: A single piece of dirt or metal shaving between the bearing and rod housing creates a high spot that concentrates load and causes premature failure. Obsessive cleanliness is mandatory.
- Mismatched Rod Caps: Rod caps are machined as a pair with their specific rod. Installing caps on the wrong rod creates out-of-round bores that destroy bearings under load.
Assembly Environment Mistakes
- Contaminated Workspace: Engine assembly requires a clean environment. Dust, metal particles, and debris find their way into bearings and ring lands, causing accelerated wear and potential seizure.
- Improper Lubrication: Using thick assembly grease on ring contact surfaces prevents proper seating. MAHLE specifically warns: DO NOT use thick assembly oil or grease on any component in contact with the rings or cylinder. A thin film of conventional break-in oil is all that's required.
- Spiraling Rings: Never "spiral" rings onto the piston—this distorts and weakens them. Use proper ring installation pliers that expand the ring uniformly.
- Skipping Verification Steps: Failing to verify bearing clearances, ring gaps, and piston-to-wall clearances before final assembly creates problems you won't discover until failure occurs. Measure everything twice before closing up the engine.
The pattern across all these failures is clear: impatience and assumption cause more engine destruction than defective parts. A stage 3 camshaft or 6.0 Vortec cam kit stage 3 upgrade means nothing if the bottom end fails from rushed installation. Take your time with 350 small block lifters, verify spark plugs for 5.7 Vortec applications are properly gapped, and treat every assembly step as critical.
With break-in procedures and installation pitfalls understood, the next consideration becomes practical: how do you budget for different build tiers without compromising reliability? Let's break down realistic cost expectations across street performance, weekend warrior, and full race applications.
Budget Planning Across Different Build Tiers
You've absorbed the technical specifications, verified your components, and understand the supporting modifications required. Now comes the question that determines whether your build actually happens: how much will this cost, and where should you invest your money? The difference between a reliable forged build and a scattered engine often comes down to budget allocation—not just total dollars spent.
Whether you're searching for an engine block for sale to start fresh or upgrading an existing motor, realistic budget planning prevents the common trap of buying premium components in one area while cutting corners elsewhere. A 6.4 Hemi block paired with cheap bearings makes no sense. Neither does an IAG block with a stock fuel system. Let's break down what each build tier actually requires.
Budget Tiers for Street Performance Builds
Street performance builds represent the sweet spot for most enthusiasts—enough power to be exciting without the maintenance demands of a dedicated race motor. According to Crawford Performance, you can expect the average cost for a comprehensive built engine to range from $8,000 to $12,000, covering high-quality internal components, machine shop services, professional assembly, and the final tune.
But that's just the engine. Your total project budget needs to account for supporting modifications discussed earlier—and those costs add up fast. Here's where street performance builders should prioritize:
- Invest Heavily: Forged pistons and connecting rods from reputable manufacturers. These are the components taking direct abuse from combustion forces. Cheap internals fail; quality internals survive.
- Don't Skimp: Machine work and professional assembly. According to Crawford Performance, machine shop services typically range from $800 to $1,200, while professional installation adds $1,500 to $3,000. This precision work ensures every component fits and functions exactly as designed.
- Balance Cost and Performance: 4340 steel connecting rods over 300M for most street applications. The strength difference only matters at extreme power levels most street cars never reach.
- Save Strategically: Used engine blocks for sale near me can provide excellent starting points if properly inspected. A quality used block in good condition costs significantly less than new while delivering identical results after machining.
The Stage 1 street build—forged pistons, rods, ARP hardware, and quality bearings—typically falls in the $6,000 to $8,000 range including assembly. This creates a foundation capable of handling 400-450 wheel horsepower reliably for daily driving and occasional spirited runs.
Weekend Warrior Investment Strategy
Weekend warriors face a unique challenge: the engine must handle track abuse but also remain streetable. This means investing in components that survive repeated heat cycles and high-RPM operation while maintaining reasonable drivability.
According to Crawford Performance, Stage 2 builds designed for durability under track pressure generally fall between $8,000 and $12,000. The increased investment addresses components that fail first under sustained abuse:
- Upgraded Cooling: A larger radiator and external oil cooler prevent the heat soak that destroys engines during extended track sessions
- Enhanced Oil System: Baffled pan, high-volume pump, and accusump-style accumulator maintain pressure during hard cornering
- Reinforced Drivetrain: High-performance clutch and potentially transmission upgrades to handle repeated launches
The key difference from street builds? Margin. Weekend warriors need components rated 20-30% beyond their target power level. That extra headroom accounts for the accumulated stress of track sessions that street cars never experience.
Full Race Investment Priorities
When your goal is competition, budget allocation shifts dramatically. Crawford Performance notes that full custom race builds easily exceed $16,000 for the engine alone—and that's before supporting systems, transmission builds, or chassis preparation.
At this level, ways to improve horsepower center on maximizing every component rather than seeking value. 6.4 Hemi performance upgrades for serious competition demand:
- Premium Materials: 300M steel rods, 2618 aluminum pistons, billet crankshafts—no compromises on rotating assembly components
- Precision Machining: CNC ported heads, blueprinted tolerances, and balanced assemblies within 1 gram
- Complete System Integration: Standalone engine management, data acquisition, and professional tuning calibrated specifically for your combination
Race builds also require planning for ongoing costs. Engines seeing sustained high-RPM operation require more frequent teardowns and inspection. Budget for consumables—bearings, rings, and gaskets—that get replaced regularly as a maintenance item rather than waiting for failure.
Build Tier Comparison and Investment Guide
The following table provides a universal framework for budget planning across different build goals. These figures represent typical ranges based on community data and professional builder estimates—your specific costs will vary based on engine platform, component choices, and local labor rates.
| Build Tier | Target Power (WHP) | Core Internal Components | Supporting Mods | Machine Work & Assembly | Total Investment Range |
|---|---|---|---|---|---|
| Street Performance (Stage 1) | 400-500 | Forged pistons, 4340 rods, quality bearings, ARP hardware | Fuel pump, basic cooling upgrades | Standard machine work, professional assembly | $6,000-$8,000 |
| Weekend Warrior (Stage 2) | 500-650 | Forged rotating assembly, upgraded oil pump, performance clutch | Baffled pan, oil cooler, larger radiator, fuel system upgrade | Precision machining, blueprinting | $8,000-$12,000 |
| Dedicated Track (Stage 3) | 650-800 | Premium forged internals, knife-edged crank, lightweight components | Complete oil system, dry sump option, race fuel system | CNC work, balancing to tight tolerances | $12,000-$16,000 |
| Full Race (Stage 4) | 800+ | Billet or 300M components, sleeved block, ported heads | Standalone ECU, data acquisition, complete drivetrain upgrade | Expert blueprinting, race-spec assembly | $16,000+ |
| Stock Rebuild (OEM+) | Stock-350 | OEM short block, upgraded bearings, ARP head studs | Minimal—address known weak points | Professional assembly with attention to detail | $3,000-$5,000 |
Where to Invest vs. Where to Save
Budget constraints force difficult decisions. Here's the hierarchy that experienced builders follow:
Never Compromise On:
- Connecting rod quality—rod failure destroys everything
- Professional assembly—improper installation negates premium parts
- Tuning—a bad tune kills engines regardless of component quality
- Fasteners—ARP hardware is non-negotiable for any serious build
Acceptable to Save On:
- Block sourcing—a properly inspected used block machines just as well as new
- Brand premiums—mid-tier manufacturers often use identical forgings as top-tier brands
- Cosmetic finishing—polished valve covers don't add horsepower
One often-overlooked budget consideration: contingency funds. Crawford Performance recommends setting aside 10-15% of your total estimated cost for unexpected discoveries during teardown. That cracked main web or worn cam journal you didn't know about adds cost and time. Having reserves prevents project stalls and compromised component choices mid-build.
With realistic budget expectations established, the final piece of the puzzle is ensuring quality execution—which means knowing how to work effectively with machine shops and evaluate suppliers before committing your hard-earned money.
Working with Machine Shops and Quality Suppliers
You've established your budget and selected quality components. But here's where many builds go sideways: the handoff between purchasing parts and having a finished, reliable engine. Whether you're a DIY builder handling everything yourself or handing your block to a professional shop, understanding how to communicate specifications and verify quality at every stage separates successful projects from expensive disappointments.
The relationship between you, your machine shop, and your component suppliers forms a quality chain. One weak link—miscommunicated clearances, unchecked parts upon arrival, or skipped verification steps—creates problems that surface at the worst possible moment. Let's walk through exactly how to manage these relationships for improved engine performance.
Communicating with Your Machine Shop
Engine machine shops vary dramatically in capability and expertise. A shop specializing in agricultural equipment operates very differently from one building competition motors. According to PEKO Precision Products, OEM customers typically evaluate shops across multiple dimensions: machine capability, process strategy, quality systems, and business health. The same evaluation framework applies when selecting your engine machinist.
Before you hand over your block and components, establish clear communication on these critical points:
- Target Clearances: Provide written specifications for piston-to-wall, bearing, and ring end gaps based on your application (street, strip, or race). Don't assume the shop knows your power goals—spell them out explicitly.
- Surface Finish Requirements: Specify the honing pattern and crosshatch angle appropriate for your ring package. Moly rings require different surface finishes than ductile iron.
- Deck Height and Zero-Deck Preference: Communicate whether you want the block decked to achieve zero-deck piston position and your target compressed gasket thickness.
- Balancing Specifications: Provide the bobweight calculation for your rotating assembly and specify the balance tolerance you expect (typically within 1-2 grams for performance builds).
- Documentation Expectations: Request written records of all final measurements—bore sizes, main housing diameters, deck height, and balance results. This documentation becomes invaluable for future reference and troubleshooting.
Professional shops maintain comprehensive MRP or ERP systems to track jobs, parts, and specifications. Ask how your project will be documented and tracked through their process. A shop that can't clearly explain their workflow likely lacks the discipline to maintain the precision your forged build demands.
Whether you're working with a specialized Volkswagen machine shop for an air-cooled project or a domestic V8 specialist, the communication principles remain identical. Clear, written specifications prevent the "I thought you meant..." conversations that delay projects and compromise results.
What to Verify When Receiving Parts
Components arriving at your door or shop require immediate inspection—before they enter the assembly process. According to Singla Forging, quality assurance in forging emphasizes preventing defects by controlling variables throughout the lifecycle, not just detecting problems at the end.
Your incoming inspection should verify:
- Material Certification: Request and review mill certifications confirming alloy specification, chemical composition, and mechanical properties. Reputable suppliers provide this documentation without hesitation.
- Visual Inspection: Examine every component for forging laps, surface cracks, porosity, or machining defects. Run your fingernail along critical surfaces—any irregularity warrants investigation.
- Dimensional Verification: Spot-check critical dimensions against specifications. Piston diameter, rod length, journal sizes, and bolt hole patterns should all match published specs within tolerance.
- Weight Matching Documentation: Verify that pistons and rods arrive with documented weights showing matching within specified tolerances (typically 1-2 grams).
- Hardware Completeness: Confirm all fasteners, bushings, pins, and supporting hardware are included and correct for your application.
- Packaging Condition: Note any shipping damage to packaging that might indicate handling issues affecting component integrity.
Don't wait until assembly day to discover missing parts or specification mismatches. Inspect everything immediately upon arrival while you still have time to address problems with your supplier.
Quality Control Checkpoints
Quality assurance doesn't end when parts pass incoming inspection. According to industry best practices, implementing checkpoints throughout the build process catches problems before they become catastrophic failures.
The most effective approach mirrors what Singla Forging describes as in-process inspection combined with statistical process control: monitoring stability and taking corrective action before defects occur. For your engine build, this translates to verification gates at each assembly stage:
- Pre-Assembly Verification: After machine work completes, re-measure all critical dimensions. Confirm bearing clearances, piston-to-wall clearances, and ring gaps match your specifications—not just "within tolerance" but within your specified range for your application.
- Mock Assembly Check: Assemble the short block without final torque to verify component fit and rotation. The crankshaft should spin freely by hand with bearings installed. Any binding indicates a problem requiring investigation.
- Torque Verification: Use calibrated torque wrenches and follow manufacturer sequences exactly. For stretch-type fasteners, verify stretch with a rod bolt stretch gauge rather than relying solely on torque values.
- Rotation Testing: After each major assembly step (mains torqued, rods installed, heads attached), verify the engine rotates freely. Progressive binding indicates an assembly error.
- Final Documentation: Record all final assembly specifications, torque values, and clearance measurements. This creates a baseline for future teardowns and identifies any changes over time.
Evaluating Forged Component Suppliers
Not all forging suppliers maintain equal quality standards. When evaluating potential sources for your rotating assembly components, look for indicators of manufacturing discipline that predict consistent quality.
The emerging standards in forging quality emphasize several key certifications and capabilities:
- IATF 16949 Certification: This automotive quality management standard indicates rigorous process control and continuous improvement discipline. Suppliers like Shaoyi (Ningbo) Metal Technology maintain IATF 16949 certification, demonstrating the systematic quality approach you should expect from forged component suppliers.
- In-House Engineering Capabilities: Suppliers with their own engineering teams can address custom requirements, verify designs, and troubleshoot issues without relying on third parties. This capability becomes critical when your build requires non-standard specifications.
- Rapid Prototyping Availability: The ability to produce prototype components quickly indicates manufacturing flexibility and responsiveness. Quality suppliers can turn around prototype parts in as little as 10 days when specifications are confirmed.
- Traceability Systems: Complete traceability from raw material to finished component has become an expectation in quality forging. Digital records and advanced marking systems strengthen accountability throughout the supply chain.
- Non-Destructive Testing Capabilities: Look for suppliers who perform ultrasonic testing, magnetic particle inspection, or dye penetrant testing as standard practice—not just when customers request it.
- Process Simulation: Modern forging operations use simulation tools to predict material flow, die filling, and potential defect zones before production begins, reducing quality issues before they occur.
Geographic considerations also matter for logistics. Suppliers located near major shipping ports—like Ningbo Port in China—offer streamlined procurement and faster delivery for international orders. Understanding your supplier's location and shipping capabilities helps you plan realistic project timelines.
Working with C & D Engine Performance Shops
For builders working with professional assembly shops rather than completing DIY builds, the communication and verification principles apply even more critically. You're trusting someone else with your investment, so establishing clear expectations upfront prevents disputes later.
Provide your assembler with:
- Complete documentation from component suppliers, including material certifications and weight matching records
- Written specifications for all clearances, not just "street" or "race" designations
- Your expected documentation package upon completion—what measurements and records you want returned
- A clear timeline for communication checkpoints where they update you on progress and any issues discovered
Professional shops handling LS3 ported heads, best headers for a 350 small block fitment, and complete rotating assembly builds should welcome this level of detail. Shops that resist documentation requests or can't articulate their quality process warrant skepticism.
The investment you've made in quality forged components deserves an assembly process that matches. Verify your shop's credentials, establish clear communication, and maintain quality checkpoints throughout the build. That discipline—more than any single component choice—determines whether your engine delivers years of reliable performance or becomes an expensive lesson in cutting corners.
With supplier evaluation and quality processes understood, we've covered nearly every aspect of a successful forged build. Let's consolidate everything into a final quick-reference checklist you can use from initial planning through that first confident dyno pull.
Final Checklist and Building With Confidence
You've absorbed nine chapters of technical specifications, material grades, clearance requirements, and quality verification protocols. Now it's time to consolidate everything into an actionable framework you can reference from initial planning through that first confident dyno pull. Understanding what is forged internals and how to increase engine performance means nothing if you can't execute systematically.
This final section distills the entire forged internal engine parts checklist into prioritized action steps. Whether you're just beginning to research car engine upgrades or you're days away from assembly, these consolidated checkpoints ensure nothing gets overlooked.
Your Pre-Build Verification Summary
Before any engine modification begins, run through these essential verification points that separate successful builds from expensive failures:
- Material Certification: Confirm 4340 or 300M steel documentation for rods and cranks; verify 2618 or 4032 aluminum specifications for pistons with mill certifications
- Weight Matching: All pistons within 1-2 grams; all connecting rods within 1 gram total weight and balanced big-end/small-end
- Surface Inspection: Check for forging laps, porosity, machining defects, and proper coatings on all rotating assembly components
- Dimensional Accuracy: Spot-check critical measurements against specifications—piston diameter, rod length, journal sizes
- Fastener Quality: Verify ARP or equivalent hardware with proper torque specifications and assembly lubricant included
- Clearance Specifications: Document target piston-to-wall, bearing, and ring end gaps matched to your application (street, strip, race)
- Supporting Systems: Confirm oil system upgrades, fuel delivery capacity, and cooling improvements match your power goals
Print this list. Bring it to your supplier. Verify every point before components enter your block. The best engine performance parts in the world fail when verification steps get skipped.
Taking the Next Step
Your path forward depends on where you stand in the build process. Here are prioritized action steps organized by project stage:
- Planning Phase: Define your realistic power target, select appropriate material grades (4340 vs 300M, 4032 vs 2618), and establish a budget that includes 10-15% contingency for unexpected discoveries during teardown.
- Component Sourcing: Request material certifications and weight matching documentation from suppliers before purchase. Evaluate suppliers based on quality certifications like IATF 16949, in-house engineering capabilities, and traceability systems. For those seeking globally compliant manufacturing with fast turnaround, Shaoyi (Ningbo) Metal Technology offers precision hot forging solutions with rapid prototyping in as little as 10 days and their location near Ningbo Port streamlines international procurement.
- Machine Shop Selection: Provide written specifications for all clearances, surface finishes, and deck height preferences. Request documentation of final measurements upon completion.
- Incoming Inspection: Verify every component immediately upon arrival—visual inspection, dimensional spot-checks, and hardware completeness before assembly begins.
- Assembly Execution: Follow manufacturer torque sequences, verify rotation after each major step, and document all final specifications for future reference.
- Break-In Protocol: Prime the oil system before first startup, hold RPM at 25-35% of maximum (no idling), vary load and RPM during initial driving, and change oil immediately after break-in completion.
- Ongoing Maintenance: Establish an aggressive service schedule appropriate for your power level, monitor engine vitals during operation, and address any anomalies immediately.
The anxiety you felt at the beginning of this article—wondering whether your internals would survive aggressive power goals—should now be replaced with confidence. You understand material grades, verification checkpoints, clearance specifications, and the supporting modifications required for reliability. You know what breaks engines and exactly how to prevent those failures.
Building with the best engine parts available means nothing without systematic execution. Follow this checklist, verify every specification, and work with quality-focused suppliers and machine shops. That first dyno pull becomes a celebration rather than a gamble when every component has been verified, every clearance confirmed, and every supporting system properly matched to your power goals.
Your forged internal engine parts checklist is complete. Now go build something incredible.
Frequently Asked Questions About Forged Internal Engine Parts
1. What are forged engine components?
Forged engine components are parts manufactured by compressing solid metal under extreme pressure rather than casting molten metal into molds. This process aligns the grain structure uniformly throughout the material, eliminating weak spots common in cast parts. Forged internals include connecting rods, crankshafts, pistons, and transmission components. The forging process creates superior mechanical properties including higher tensile strength, better fatigue resistance, and improved durability under extreme loads. Quality forged components from IATF 16949 certified manufacturers like Shaoyi Metal Technology undergo rigorous quality control to ensure consistent performance in high-stress automotive applications.
2. Are forged engine parts better?
Forged engine parts offer significant advantages over cast alternatives for performance applications. The forging process compacts metal and aligns its grain structure, resulting in parts with superior strength-to-weight ratios, enhanced fatigue resistance, and better thermal management. Forged pistons can handle higher cylinder pressures and temperatures that would destroy cast components. For example, a stock LS engine with cast internals typically handles 500-550 horsepower, while the same engine with forged components can reliably support 800+ horsepower. However, forged parts cost more and may require specific clearances during installation, making them essential for high-performance builds but unnecessary for stock power levels.
3. What are the disadvantages of a forged engine?
Forged engine components come with several tradeoffs. The primary disadvantage is cost—forged parts require specialized equipment, skilled labor, and intensive energy during manufacturing, making them significantly more expensive than cast alternatives. Forged pistons also expand more under heat, requiring larger piston-to-wall clearances that create audible piston slap during cold starts. Additionally, 2618 aluminum forged pistons expand approximately 15% more than 4032 alloy, demanding careful clearance calculations. Break-in procedures for forged components are more critical and time-sensitive. Despite these challenges, the reliability gains for builds exceeding 400 wheel horsepower make forged internals a worthwhile investment.
4. At what power level do I need forged internals?
The 400 wheel horsepower threshold is widely recognized as the point where forged internals transition from optional to essential. Below this level, well-maintained stock rotating assemblies typically survive with proper tuning. For naturally aspirated builds, stock components often handle 75-100% over factory output before fatigue concerns arise. With forced induction, the picture changes dramatically—even moderate boost of 8-14 psi pushing 400-550 whp creates high rod failure risk. Nitrous applications above 75-shot require forged rods at minimum. Always build for your target power plus a 20% safety margin to account for detonation events and aggressive tuning sessions.
5. How do I verify quality when buying forged engine parts?
Verifying forged component quality requires checking material certifications, weight matching documentation, and performing visual inspections before installation. Request mill certifications confirming alloy specifications—4340 or 300M steel for rods and cranks, 2618 or 4032 aluminum for pistons. All pistons should be weight-matched within 1-2 grams, connecting rods within 1 gram. Inspect surfaces for forging laps, porosity, and machining defects. Check that ARP or equivalent fasteners are included with proper specifications. Look for suppliers with IATF 16949 certification, in-house engineering capabilities, and complete traceability systems. Professional manufacturers like Shaoyi Metal Technology provide comprehensive documentation and rapid prototyping capabilities to ensure components meet exact specifications.