 Small batches, high standards. Our rapid prototyping service makes validation faster and easier —

Cut Tooling Costs And Downtime In Progressive Metal Stamping
Progressive Stamping Fundamentals Without the Fluff
What is progressive metal stamping?
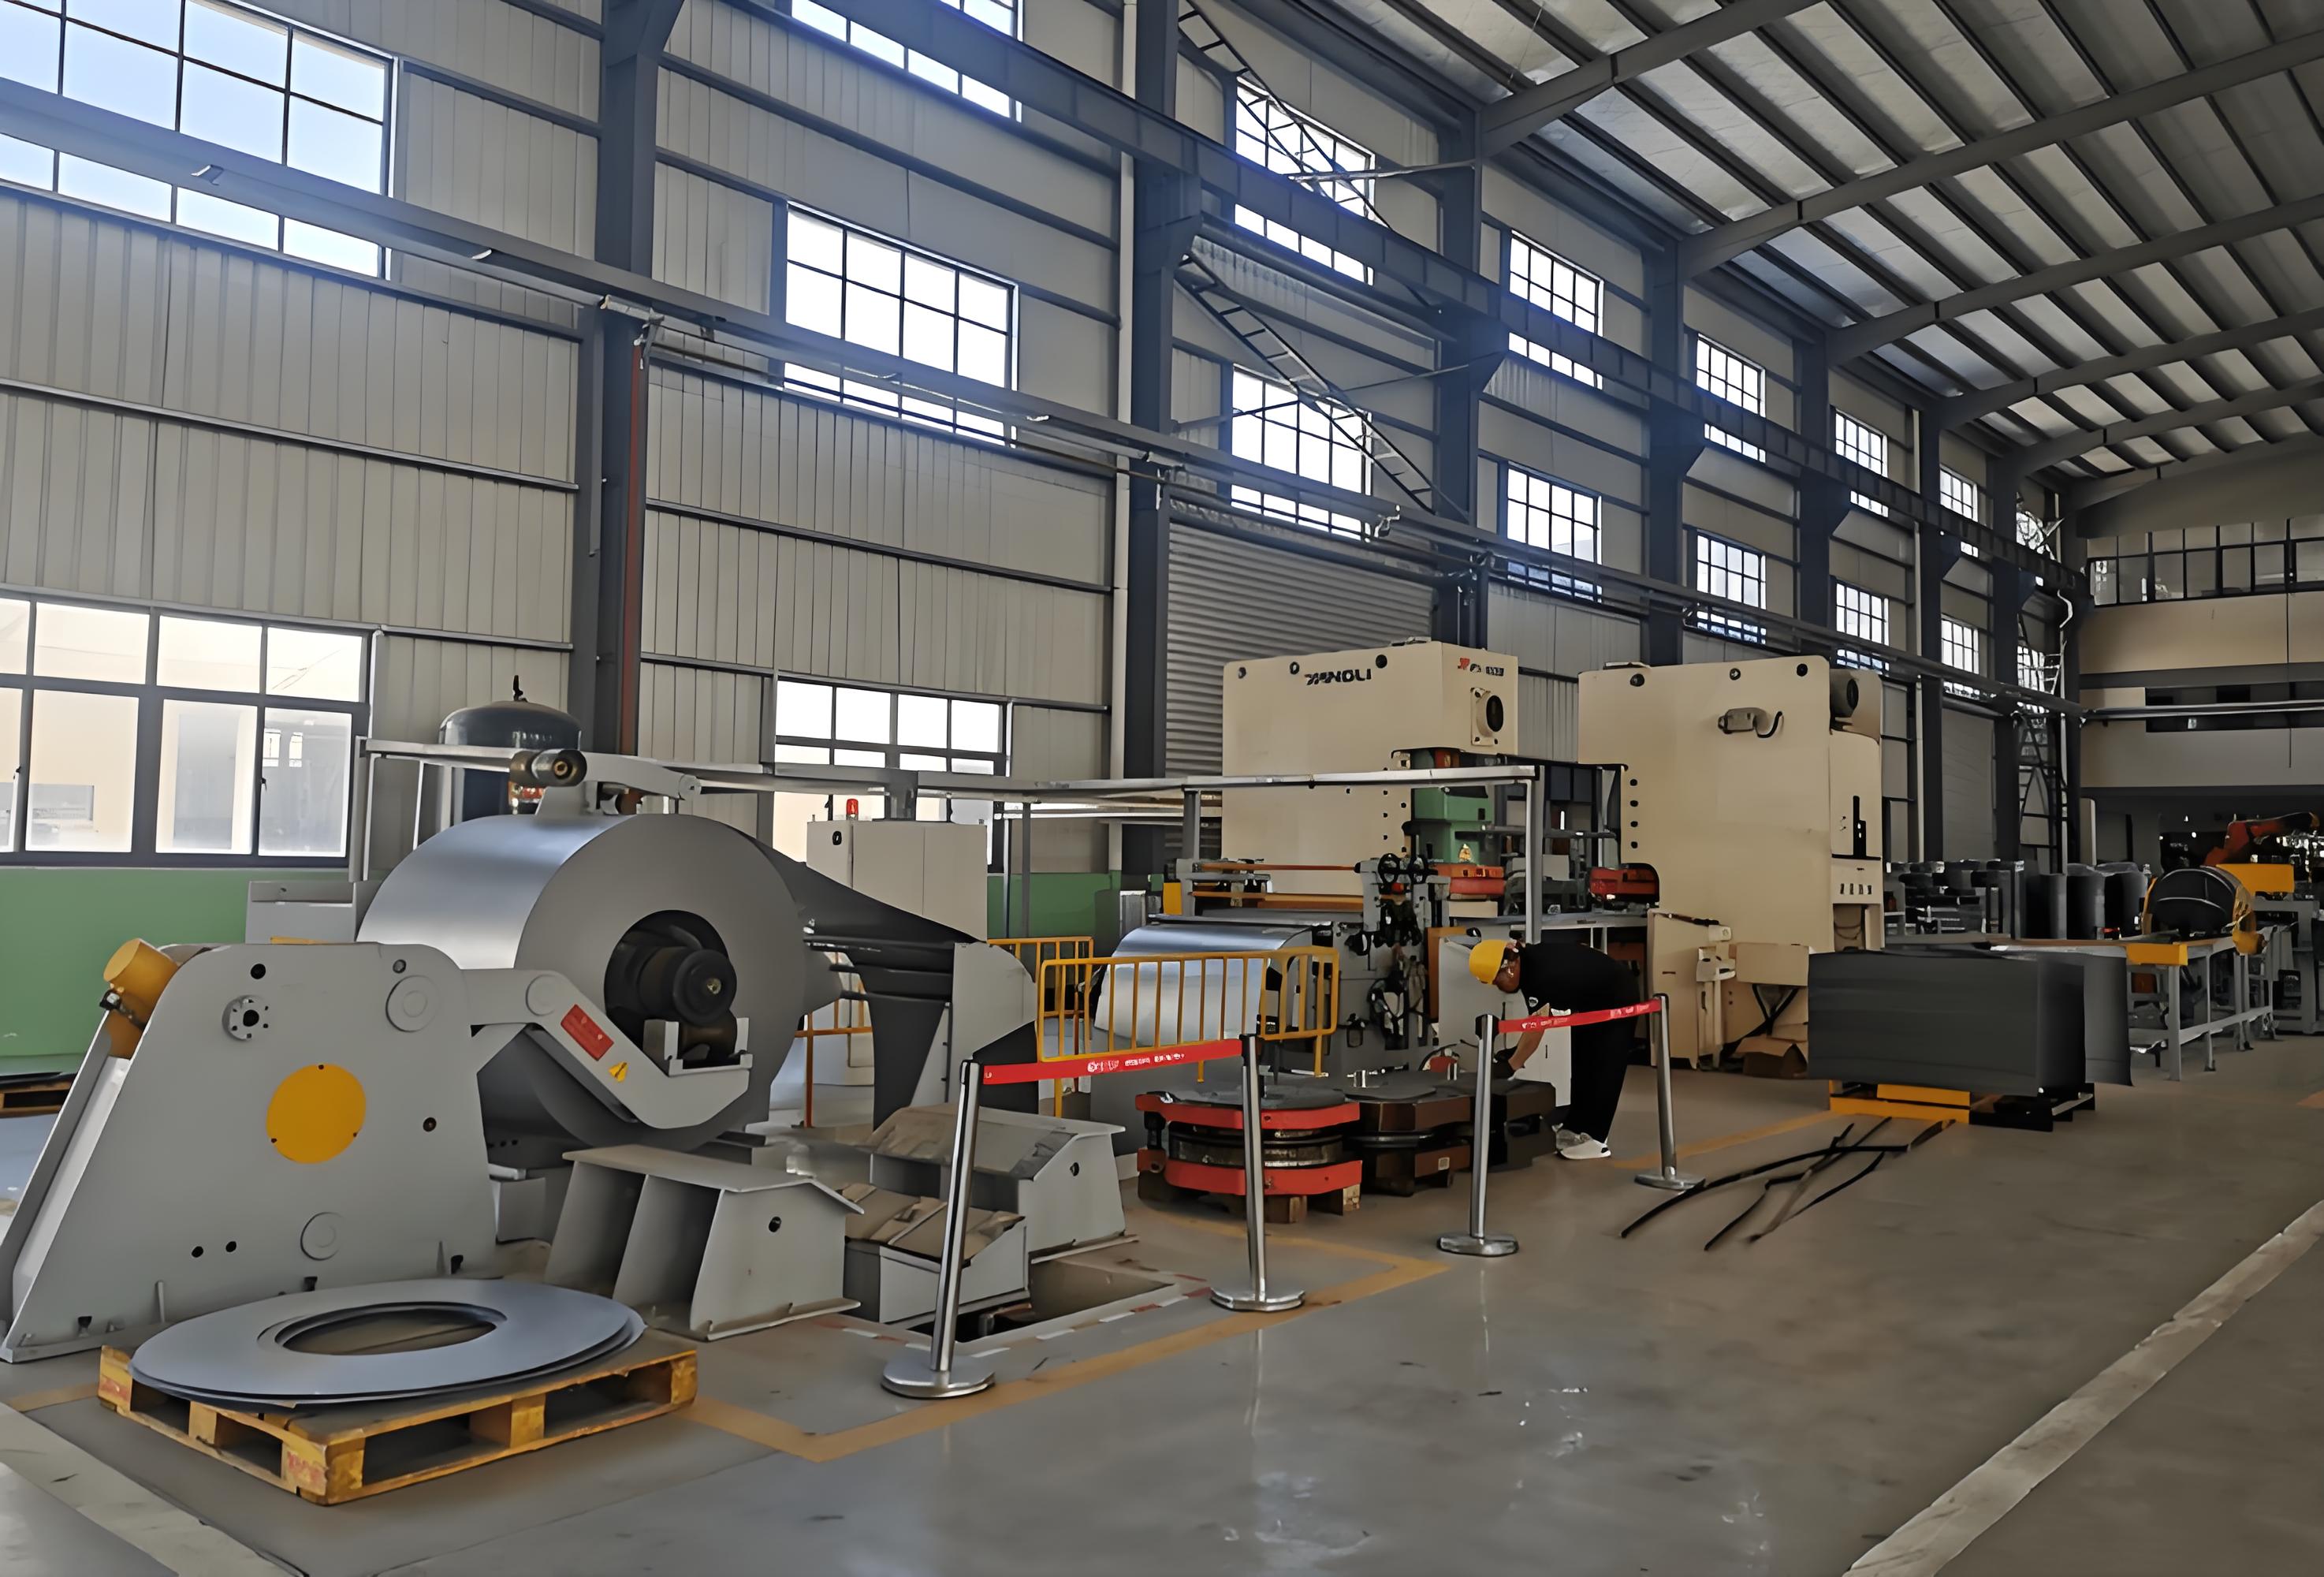
Ever wondered how manufacturers produce thousands of precise, complex metal parts—fast? That’s where progressive metal stamping shines. This process transforms a simple metal coil into finished parts by feeding it through a series of carefully designed stations, each one performing a specific operation. The result? With every press stroke, a new part is completed, ready for assembly or further processing.
Here’s how it works: a coil-fed strip enters the stamping press, guided into a progressive die—a specialized tool with multiple workstations. Each station adds or shapes a feature, like punching a hole, bending a tab, or trimming an edge. The strip advances in precise increments, thanks to alignment features called pilots, ensuring repeatability and accuracy. By the time the strip reaches the final station, the part is finished and separated from the strip.
How a strip advances through multiple stations
Imagine an assembly line, but for metal forming—each step adds value, and the raw material never leaves the line until it’s a completed part. Here’s a simple breakdown of the process:
- Coil feed: A metal strip is unrolled and straightened before entering the press.
- Pilot location: Pre-punched holes in the strip allow pilots to guide and lock the strip in place at each station.
- Progressive stations: Each station performs a unique operation—piercing, bending, forming, or even threading—building up the part’s features step by step.
- Part carry and cutoff: The strip moves forward, carrying the part through each stage, until the final station separates the finished part from the strip.
This is the essence of progressive die stamping: operations progress along the strip, with each station working in harmony. The term "progressive" refers to this sequential build-up of features—each press stroke advances the strip and the process.
When progressive beats single-hit methods
So, why choose progressive metal stamping over other die stamping methods? Here’s a quick framework you can use:
- Medium-to-high volumes: Tooling costs are offset by low per-part costs in large production runs.
- Complex geometries: Multiple features can be integrated into a single process, reducing the need for secondary operations.
- Tight repeatability: Precise control over each operation ensures consistent parts, ideal for industries like automotive and electronics.
- Reduced handling: The strip stays in the die throughout, minimizing manual intervention and the risk of errors.
But there are trade-offs to consider:
- Higher upfront tooling investment: Designing and building a progressive die is more expensive than single-hit dies.
- Need for thoughtful strip layout: Efficient material use and reliable part carry require careful planning.
- Best for smaller parts: Larger or unusually shaped parts may be better suited to transfer or compound die approaches.
Progressive metal stamping delivers high efficiency and consistency for complex, high-volume parts—but requires a strategic approach to tooling and process planning.
How does progressive compare to other stamping examples?
It’s helpful to see where progressive die metal stamping fits among other stamping examples:
- Progressive die metal stamping: Multiple operations in a single die; best for high-volume, complex, small-to-medium parts.
- Transfer die stamping: Parts are separated from the strip early and moved between stations—ideal for large, deep-drawn, or intricate parts.
- Compound die stamping: Blanking and piercing in one hit—efficient for flat, simple parts but limited in complexity.
As you continue through this guide, you’ll see how the right process choice, tooling strategy, and material selection can dramatically impact costs, downtime, and product quality. Next, we’ll explore the anatomy of a progressive die and how its design shapes your results.
How Hardware Drives Quality and Uptime
Inside a Progressive Die: The Building Blocks of Consistency
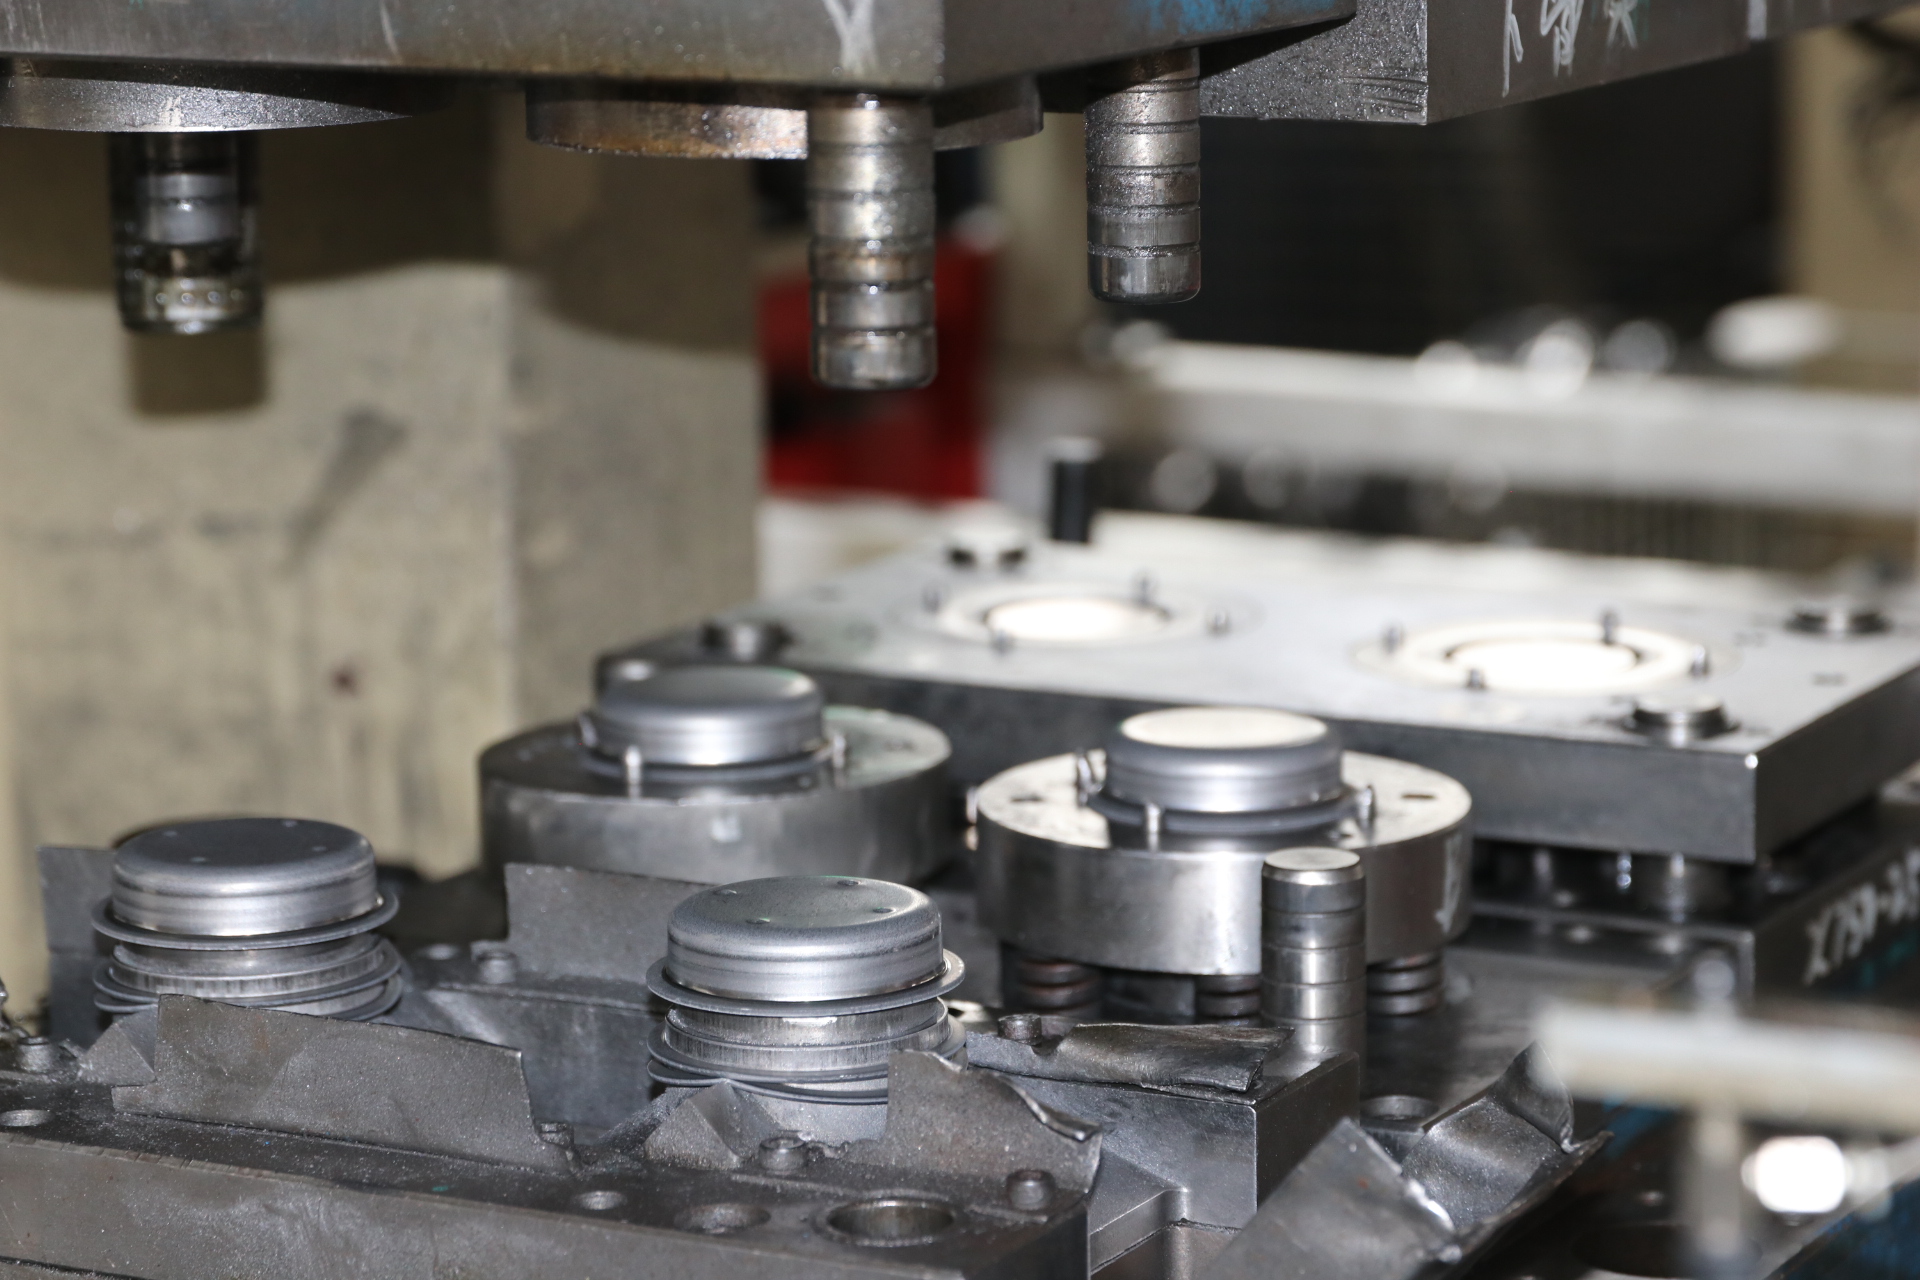
When you look beneath the surface of progressive metal stamping, you’ll notice that the real magic happens inside the prog die—a carefully engineered assembly of components working in unison. Sounds complex? Let’s break it down. Each part of the die has a clear job to do, and when one element is off, it can ripple through the entire process, affecting quality, uptime, and ultimately, your bottom line.
| Progressive Die Component | Main Function | Risk if Misapplied |
|---|---|---|
| Punch (including progressive punch) | Shapes, cuts, or forms features in the strip; progressive punch advances features station by station | Worn or misaligned punches cause burrs, dimensional errors, or scrap |
| Die Block | Receives punch action, defines feature geometry | Improper clearance leads to poor edges or tool breakage |
| Stripper Plate | Holds material flat, strips part from punch after each stroke | Poor stripping causes jams, double hits, or surface marks |
| Pilot | Precisely locates strip at each station, ensuring accurate progression | Worn pilots result in misfeeds and tolerance stack-up |
| Carrier/Stock Guide | Guides and supports the strip through the die | Poor guidance can cause strip wandering or misalignment |
| Lifter | Raises the strip between stations if needed | Improper lift height may cause feed errors |
| Sensor | Detects misfeeds, jams, or missing parts | Missing sensors increase risk of tool damage and downtime |
| Stop Block | Sets punch depth and die shut height | Incorrect setting can cause over-penetration or incomplete features |
| Shank | Aligns and mounts the die in the press | Misalignment affects all downstream operations |
Each of these progressive die components must be maintained and aligned to control the critical relationships between features—station to station, and part to part. For example, the progressive punch not only forms features but also ensures that every operation builds on the last, keeping tolerances tight and defects low (source).
Strip Layout, Pilots, and Carriers: The Unsung Heroes of Stability
Ever had a strip wander or parts jam mid-run? That’s often a sign of carrier or pilot issues. The strip layout—how parts nest within the material—directly affects material yield, scrap rate, and strip stability. Early collaboration on strip design can unlock simpler dies and more reliable runs. Pilots, punched into the strip, engage with matching holes at each station to lock the strip in place, while carriers and guides support the strip’s journey through the die. If these stamping die components are overlooked, expect more downtime and higher scrap rates.
Selecting the Right Stamping Press: Matching Power to Process
Choosing the right stamping press is as critical as the die itself. But how do you know what to look for? Start with these essentials:
- Tonnage: Must match the force required for all operations in the die, including the thickest or hardest materials.
- Stroke and Shut Height: The press must accommodate the die’s open and closed heights, plus provide enough travel for all forming actions.
- Feed Accuracy: Consistent, precise strip advancement ensures every station lines up perfectly, minimizing tolerance stack-up.
- Speed and Uptime: For high-volume work, a progressive stamping press with automated feed and robust maintenance features is essential to avoid costly interruptions.
Presses come in mechanical, hydraulic, and servo-driven types—each suited for different part geometries and production requirements. Mechanical presses are often preferred for progressive dies running at high speeds on simpler parts, while servo and hydraulic models offer more flexibility for complex forms.
Setup Verification: Your Recipe for First-Run Success
- Seat and align the die in the press using the shank and mounting system.
- Check strip feed alignment and adjust guides as needed.
- Test pilot engagement at each station for precise progression.
- Verify stripper plate action and part ejection.
- Confirm sensor functionality (if present) to catch misfeeds or jams.
- Run a first-article part and inspect all features before starting production.
The right combination of die design, strip support, and press selection sets the stage for efficient, repeatable production—and fewer headaches down the line.
Understanding the anatomy of your progressive die and press system not only helps you troubleshoot issues but also empowers smarter decisions during design and quoting. Next, we’ll show you how to choose the right stamping process for your unique part—balancing volume, complexity, and economics.
Process Selection That Stands Up to Scrutiny
Decision Factors: Volume, Complexity, Tolerance, and Material
When you’re faced with a new part design, the question isn’t just “Can we stamp it?” but “What’s the smartest way to stamp it?” The answer depends on a handful of practical factors: annual production volume, the complexity of features, tolerance requirements, desired edge quality, part size and thickness, and the material’s formability. Let’s break down how these influence your process choice—so you can make decisions that hold up in technical reviews and budget meetings alike.
When to Choose Progressive Die Stamping
The progressive die stamping process is the go-to for high-volume, repeatable parts that require multiple forming and cutting operations. Imagine you need thousands (or millions) of small to medium-sized components, each with several features—holes, bends, embosses—all tightly controlled. With progressive stamping process, each station in the die performs a different operation as the strip advances, ensuring features build up in precise sequence. This method is ideal when:
- Annual volumes are medium to high, making the upfront tooling investment worthwhile.
- Parts have multiple features that interact or require strict positional tolerances.
- Consistent edge quality and minimal burrs are needed, as features are produced under controlled conditions.
- Material is suitable for progressive feeding—typically flat stock with good formability.
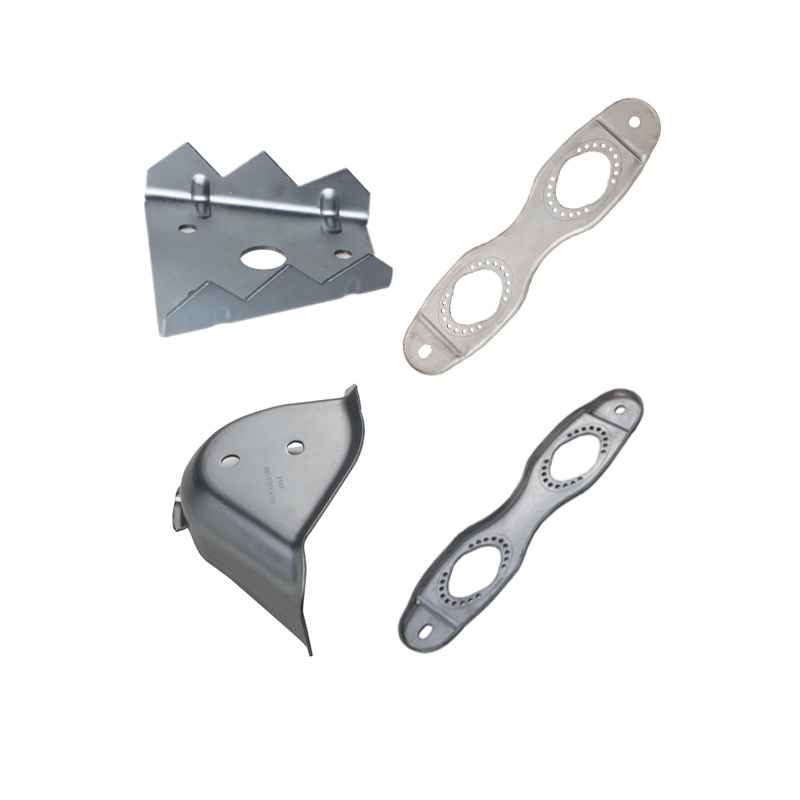
Progressive die stamping shines for electrical connectors, automotive brackets, and electronic shields—parts where feature-to-feature accuracy and repeatability are critical.
Consider Transfer or Compound Die Stamping When…
Not every part fits neatly into the progressive die model. Sometimes, the design or production requirements point to transfer die stamping or compound die stamping as better options. Here’s how you can tell:
| Criteria | Progressive Die Stamping | Transfer Die Stamping | Compound Die Stamping |
|---|---|---|---|
| Part Complexity | Medium to high (multiple features in sequence) | High (large/deep forms, complex shapes) | Low (flat, simple parts) |
| Tolerance Stacking | Low (excellent control) | Medium (depends on transfer accuracy) | Low (few features, one-hit operation) |
| Edge Quality | High (controlled at each station) | Medium to high (varies by operation) | High (single operation) |
| Work Hardening Effects | Medium (distributed across stations) | High (multiple deep draws, forming) | Low (minimal forming) |
| Press Utilization | High (continuous strip feed) | Medium (manual or automated transfer) | Medium (single-hit, slower changeover) |
| Changeover Frequency | Low (dedicated, high-volume runs) | Medium (setup for each run) | High (best for short runs or prototyping) |
| Tooling Lead Time | High (complex die design) | High (transfer and die design) | Low (simpler die construction) |
In short, transfer press stamping is your pick when the part is too large, deep, or complex to be carried by a strip—think deep-drawn housings or automotive structural parts. Compound die stamping is best for flat washers, gaskets, or any part where blanking and piercing can be done in one press stroke.
- Choose transfer die stamping if:
- The part has tall draws or deep forms
- Features cannot be carried through the strip
- Orientation or handling between stations is critical
- Part size exceeds typical progressive die limits
- Choose compound die stamping if:
- The part is flat, with most features achievable in a single hit
- Short runs or prototypes are needed
- Material utilization is a top priority
Summary of Process Trade-Offs
The right stamping process balances part complexity, production volume, and required tolerances—progressive dies for high-volume, multi-feature parts; transfer dies for large or intricate forms; compound dies for simple, flat components. Align your choice with these realities before requesting quotes or committing to tooling.
Understanding the strengths and limitations of each process—and the different types of stamping dies—empowers you to select the most cost-effective and robust solution for your application. Up next: see how material and thickness choices can further influence tooling, process selection, and cost.
Materials and Thickness Choices That Shape Outcomes
Material and Gauge Implications for Die Life and Tolerances
When you’re planning a progressive metal stamping project, have you considered how the right material and thickness can make or break your tooling budget and part quality? Choosing between aluminum, copper, steel, or brass isn’t just about price—it determines how your metal stamping die performs, how long it lasts, and what features are truly feasible.
Here’s what you’ll notice: harder, thicker metals (like high-strength steels) put more load on the die, increasing punch wear and requiring tighter clearances and more robust sheet metal die designs. Softer, nonferrous options—think aluminum or copper—form more easily but can mark or gall, especially without the right surface finish or lubrication. Each choice comes with trade-offs for cost, tool life, and achievable tolerances.
| Material | Clearance Sensitivity | Galling Risk | Forming Behavior | Typical Applications |
|---|---|---|---|---|
| Aluminum | High (needs precise clearance) | Moderate (can gall on tooling) | Excellent formability, soft, lightweight | Stamped aluminum parts, electrical, automotive |
| Copper | Moderate | Low to moderate | Very ductile, easy to form | Copper progressive stamping for connectors |
| Brass | Moderate | Low | Good for decorative and functional features | Locks, gears, decorative hardware |
| Stainless Steel | High (harder, more abrasive) | Low | Strong, corrosion-resistant, needs robust tooling | Medical, food, plumbing |
| Carbon Steel | Moderate to high | Low | Durable, cost-effective, versatile | Automotive, construction |
Text-Based Method to Qualify an Alloy and Thickness
Not sure if your chosen alloy or gauge is a good fit? Here’s a simple screening framework to qualify your material before you commit to a progressive metal stamping layout:
- Specify alloy and temper: For example, 5052-H32 aluminum or C110 copper. The exact grade impacts formability and springback.
- Confirm target thickness range: Most aluminum stamping dies and sheet metal die processes handle 0.5mm to 3mm, with some up to 6mm. Thicker gauges require higher tonnage and may reduce tool life.
- Check minimum hole-to-thickness ratio: For aluminum alloys, holes should be at least 1x material thickness in diameter to avoid tearing; for copper and brass, similar or slightly larger ratios are recommended.
- Set minimum bend radii: Inside bend radius for aluminum and stainless steel should be at least 1x thickness; for low-carbon steel, 0.5x thickness is often sufficient. Tighter bends risk cracking or excessive springback.
- Identify critical-to-quality datums: Define which features drive assembly fit or function so tolerances can be focused where they matter most.
For challenging materials or thicknesses—such as deep draws in stainless or forming very thin stamped aluminum parts—early trials or coupon tests are a smart move. These help validate edge quality and springback before investing in full tooling.
Edge Quality and Forming Considerations
Edge quality isn’t just about looks. It affects assembly, function, and downstream processing. Softer metals like copper and aluminum can produce clean edges with the right die clearance, but are also prone to burrs or rollover if clearances are too tight or the punch is dull. Harder materials need sharper, more robust tooling, and may benefit from secondary finishing or coatings to extend tool life (source).
Forming behaviors vary widely. The aluminum stamping process excels at lightweight, corrosion-resistant parts, but be mindful of galling and marking—proper lubrication and die coatings can help. Copper progressive stamping is ideal for electrical connectors due to copper’s high ductility and conductivity, but copper’s softness can also mean it deforms easily if not supported properly throughout the process.
- Always consider burr direction—does it matter for assembly or function?
- Call out grain direction for bent features to minimize cracking.
- Plan carrier and web design to ensure part stability, especially for small or intricate features.
The right combination of material, thickness, and thoughtful design can reduce tooling wear, enhance part quality, and unlock new possibilities in progressive metal stamping.
Ready to optimize your material and process choices? Next, we’ll break down how tooling costs and economics tie back to your design and material decisions—helping you make the smartest investment for your next project.
Tooling Economics Made Practical for Teams
Understand Major Cost Drivers in Progressive Die Tooling
When you’re planning a progressive metal stamping project, one of the first questions you’ll face is: How much will the tooling really cost, and what factors drive that price? Sounds daunting? Let’s break it down so you can approach your next quote or project review with confidence.
- Part complexity and station count: According to industry experience, each additional station will significantly increase the mold cost, and the increase may be between 8%-12% or even higher, depending on the complexity of the station. Complex parts with bends, embosses, or coining require more intricate stamping tooling and precision machining.
- Material type and thickness: Harder or thicker materials demand stronger, more robust dies, which increases both initial cost and ongoing maintenance needs.
- Precision components and features: Tight tolerances, in-die tapping, or custom part carriers add engineering and machining time.
- Sensorization and automation: Sensors to detect misfeeds or jams protect your die but add upfront investment.
- Tryout and prototyping: Non-recurring engineering (NRE) and first-article runs are vital for dialing in performance, and these costs are part of the total investment.
- Customization: Using off-the-shelf components can reduce costs by 15–25%, while fully custom dies—especially from leading stamping die manufacturers—carry higher price tags but deliver tailored performance.
Convert Tooling Cost Into a Per-Part Impact: The Amortization Framework
Ever wonder how to translate that big, upfront tooling number into something meaningful for your team or finance partners? Here’s a step-by-step method to make it tangible:
- Identify total progressive die tooling investment: This includes design, build, tryout, and any NRE or prototyping costs.
- Estimate total lifetime throughput: How many parts will this tool produce over its useful life? (For high-volume projects, this could be hundreds of thousands or even millions.)
- Set an amortization window: Align the cost spread with your forecasted production volume—often one year or the length of your program.
- Factor in projected maintenance and sharpening: Plan for annual upkeep at 5–10% of the original die cost. For example, if your die cost $50,000, budget $2,500–$5,000 per year for maintenance and sharpening.
- Calculate the per-part tooling cost: Divide the total (including maintenance) by the number of parts planned for the amortization window.
Here’s what that might look like in practice:
- Total tooling investment: $50,000
- Annual maintenance (5%): $2,500
- Expected annual production: 200,000 parts
- Amortized tooling cost per part: ($50,000 + $2,500) / 200,000 = $0.2625 per part
This method gives you a clear, apples-to-apples way to compare suppliers or justify investments in progressive tooling for high-volume jobs.
Inputs Stakeholders Must Align On
Before you lock in a tooling quote or sign off on a project, make sure your team is on the same page about these key factors:
| Input | Why It Matters |
|---|---|
| Forecasted production volume | Directly impacts amortization and per-part cost |
| Part complexity and feature count | Affects station count and die complexity |
| Material specification | Determines die strength, maintenance, and cost |
| Required tolerances and finishes | Tighter specs mean more precise (and costly) dies |
| Anticipated change frequency | Frequent design changes can increase costs and lead times |
| Preferred stamping die manufacturers | Experience and in-house capabilities can affect both price and reliability |
Design Choices That Cut Tooling Costs
- Simplify part geometry: Changing square holes to round or combining features can reduce station count and die complexity.
- Use standard die sets and components: These are quicker and cheaper to source and maintain.
- Relax non-critical tolerances: Focus tight tolerances only where they matter for function or assembly.
- Optimize strip layout: Better nesting means less scrap and smaller dies.
- Leverage volume: Higher production runs spread out the tooling investment.
Remember, features like in-die tapping, coining, or special coatings can shift both capital and run-rate economics, so weigh these against your priorities and budget.
Always separate capital tooling costs from piece price when comparing supplier quotes—mixing them can mask true long-term value and lead to poor sourcing decisions.
With a clear understanding of progressive die manufacturers’ pricing logic and the right amortization approach, you’ll be equipped to make smarter, data-driven decisions for your next progressive metal stamping project. Next, we’ll dive into quality control strategies that keep your investment running smoothly, part after part.
Quality Control That Prevents Downstream Issues
Specify GD&T and Tolerances for Stamped Parts
When you’re designing for progressive metal stamping, have you ever struggled to decide which features really need tight tolerances? Or wondered how to set up your inspection plan so you’re not chasing every micron but still get reliable, repeatable parts? Let’s break down a practical, engineer-ready approach to quality assurance you can put to work on your next project.
First, focus your tightest tolerances and GD&T requirements on features that drive assembly fit or functional performance—think hole-to-edge distances, bend-to-hole locations, and critical formed heights. Features that aren’t critical to function can have looser limits, which lowers costs and makes precision die stamping more robust. Imagine a bracket that needs one mounting hole to line up with a mating part: that hole’s position and size get the tight callouts, while decorative cutouts or non-mating edges can be more forgiving.
To ensure consistency, select datums that reflect the progressive process flow. For example, use a pierced hole early in the strip as your primary datum, then reference all subsequent features from that point. This approach keeps tolerance stack-up under control and leverages the strengths of progressive stamping die design.
SPC Starting Points and Sampling Plans
Want to catch issues before they cause scrap or rework? Statistical Process Control (SPC) is your friend. Start simple: track a few critical dimensions—like hole diameter or formed height—across a sample of parts from each production run. If you notice a trend (say, a dimension drifting toward its upper limit), you can intervene before parts go out of spec.
While some industries specify a minimum Cpk (process capability index), the key is to monitor trends and react quickly. For most progressive precision metal stampings, begin with capability studies on your most vital dimensions, then adjust your sampling frequency as the process stabilizes. Early runs might require checking every 10th part; as confidence grows, you can sample less frequently, focusing on ongoing risk areas. This mirrors proven practices in automotive and medical stamping, where real-time feedback and in-die sensors help catch problems before they escalate.
Sample Inspection Checklist for Progressive Stamping
| Feature | Suggested Inspection Method |
|---|---|
| Small pierce features | Optical comparator or vision system |
| Formed heights | Height gauge or Coordinate Measuring Machine (CMM) |
| Bend angles | Angle gauge or protractor |
| Hole positions | CMM or custom go/no-go gauges |
| Surface finish | Visual inspection or surface roughness tester |
| Burr height and direction | Tactile feel, magnifier, or micrometer |
Here’s a quick inspection checklist you can adapt for your process:
- Verify strip feed alignment and progression at each station
- Check burr direction and height on all cut edges
- Inspect hole quality and location against datums
- Measure bend angles and formed heights
- Assess flatness and twist
- Look for surface marks, scratches, or dents
- Confirm packaging protects delicate features during transit
Consistent datum control across stations is the backbone of repeatability in progressive stamping die design—anchor your inspection plan to these datums for best results.
Aligning Inspection Frequency to Process Risk
How often should you inspect? The answer depends on your process stability and the risk of defects. For new jobs or after die maintenance, increase your sampling rate until you’re confident in process control. As you gather data and see stable trends, you can safely reduce inspection intervals, focusing on dimensions or features with a history of variation.
Don’t forget the value of first-article signoff. Before releasing a new part to production, verify all critical features against the process sheet and control plan. This practice, common in precision die & stamping applications, helps catch issues early and sets a standard for ongoing production runs.
By following these quality control strategies, you’ll minimize downstream issues, reduce costly rework, and ensure your progressive stamping die design delivers consistent, high-quality parts—run after run. Next, we’ll explore troubleshooting and maintenance tactics to keep your lines running and your investment protected.
Troubleshooting and Maintenance That Keep Lines Running
Common Failure Modes and Root Causes in Progressive Metal Stamping
When your stamping line suddenly produces scrap or stops mid-run, what’s the first thing you check? Sounds familiar? You’re not alone. Diagnosing issues in progressive metal stamping requires a systematic approach, not guesswork. Let’s break down the most frequent failure modes and their root causes, so you can act quickly and get your line back on track.
- Burrs on parts: Often a sign of dull stamping die punches or incorrect die clearance. Excessive burrs can also signal tool misalignment or worn die components.
- Split or cracked edges: Typically caused by insufficient clearance, aggressive forming, or poor material flatness. Sometimes, splits happen when the material isn’t properly straightened before entering the die-stamping machine, or when the die shut height is misadjusted.
- Mislocated features: If holes or forms are off position, check pilot engagement and strip feed accuracy. Feed system or pilot timing issues in the die-stamping machine can cause cumulative errors across stations.
- Wrinkling or deformation: Too little blank holder force, inadequate material support, or problems with the progressive scrap metal removal system can all contribute to wrinkling, which may lead to splitting if not addressed.
- Jams and slug retention problems: Poor scrap management—such as slugs not being ejected or progressive scrap metal building up—can cause jams or even damage the die and press parts.
Root cause analysis in stamping is rarely about a single culprit. As reference experts note, it’s vital to examine all process variables—material, die setup, lubrication, press settings, and feed alignment—rather than relying solely on past experience (source).
Corrective Actions: Sharpening, Replacing, and Process Adjustments
Once you spot a problem, what’s the best fix? Here’s a quick comparison to help you decide:
-
Sharpening vs. Punch Replacement
-
Sharpening
- Pros: Fast, cost-effective, extends tool life for minor wear.
- Cons: Only a temporary fix if the punch is severely worn or damaged.
-
Punch Replacement
- Pros: Restores original tool geometry, ideal for deep wear or chipping.
- Cons: More expensive and requires downtime for installation.
-
Sharpening
-
Adding Sensors vs. Slowing Feed Rate
-
Adding Sensors
- Pros: Detects misfeeds, jams, and missing parts early; prevents tool damage.
- Cons: Upfront investment in hardware and integration.
-
Slowing Feed Rate
- Pros: Reduces risk of jams and misfeeds, especially during troubleshooting.
- Cons: Lowers throughput and may not address underlying issues.
-
Adding Sensors
Other corrective levers include adjusting die clearance, adding or relocating stations for difficult features, supporting carriers to stabilize the strip, or improving lubrication. Each choice depends on your specific root cause and production goals.
Maintenance Practices That Preserve Capability
Wondering how to avoid unexpected downtime? Regular, preventive maintenance is your best defense. Here’s a practical cadence for keeping your tooling and stamping press parts in top shape:
- Visual inspection: Check for cracks, wear, or damage on die components and punches after each run.
- Punch and die button condition: Measure wear and sharpen or replace as needed to prevent burrs and dimensional drift.
- Fastener torque verification: Ensure all mounting bolts and fasteners are tight to prevent shifting during operation.
- Sensor functionality: Test all sensors for proper response to misfeeds, jams, or missing parts. Replace faulty units promptly.
- Scrap and slug removal: Confirm that progressive scrap metal is being cleared efficiently and that slug retention systems are operating correctly.
- Lubrication: Verify that all lubrication points are active and delivering the correct amount to reduce wear.
- Alignment checks: Periodically verify that the die is properly aligned with the die-stamping machine shut height and feed system. Misalignment can accelerate wear on pilots and other die components.
Keeping detailed records of maintenance and repairs helps predict future needs and allows you to plan for spare parts or replacements, minimizing costly downtime.
Setup Verification for First Article Success
Before starting a new run, a thorough setup check ensures you catch issues before they turn into major problems. Here’s a quick checklist:
- Verify die shut height and press tonnage settings on the die-stamping machine
- Check strip feed alignment and pitch
- Ensure pilots engage precisely at each station
- Confirm scrap and slug removal systems are clear and operational
- Test sensor response for misfeeds and jams
- Run a first-article part and inspect all features for conformity
Small, regular interventions—like sharpening, cleaning, and setup checks—prevent unplanned downtime and extend the life of your progressive metal stamping dies.
By mastering troubleshooting and maintenance, you’ll keep your lines running, your tooling investment protected, and your quality high. Next, we’ll guide you through selecting a capable automotive stamping partner to support your progressive stamping needs.
What Matters Most for Progressive Stamped Parts
What to Look for in an Automotive Stamping Partner
When you need progressive stamped automotive parts that meet tight tolerances and demanding timelines, how do you choose the right supplier? Imagine launching a new vehicle program—your stamping partner’s expertise could be the difference between flawless production and costly delays. Here’s how to confidently evaluate suppliers for your next automotive stamping process:
- Quality certifications: Look for IATF 16949 or ISO 9001:2015. These ensure robust process control and traceability—vital for safety-critical parts.
- Design for Manufacturability (DFM) collaboration: Can your partner proactively suggest design tweaks to reduce costs, simplify progressive stamping dies, or improve yield?
- Material flexibility: Do they handle advanced high-strength steels, aluminum, and other automotive alloys?
- Rapid prototyping to mass production: Can they scale from a handful of pilot parts to millions of components without compromising quality or lead time?
- In-die technology: Experience with in-die tapping, sensors, and process monitoring supports smarter, more efficient runs.
- Track record and delivery: On-time delivery rates and low defect levels are non-negotiable for automotive programs.
Capabilities That Matter for Progressive Stamped Automotive Parts
Not all suppliers are created equal. The best partners combine technical depth, manufacturing scale, and a commitment to innovation. To help you compare, here’s a detailed table of key supplier attributes for progressive stamping dies and automotive stamping dies:
| Supplier | Certifications | DFM/Engineering Support | Material Range | Production Scale | In-Die Technology | Delivery & Track Record |
|---|---|---|---|---|---|---|
| Shaoyi Metal Technology | IATF 16949 | Comprehensive DFM analysis, proactive design feedback | High-strength steel, aluminum, specialty alloys | Rapid prototyping to fully automated mass production | In-die tapping, sensors, advanced progressive stamping dies | Trusted by 30+ global auto brands; proven on-time delivery |
| Yijin Hardware | IATF 16949, ISO 9001:2015 | Integrated CNC, tool and die expertise, FEA validation | AHSS, aluminum (5000/6000 series), copper, stainless | Micro-precision to high-volume (150,000+/day) | Hot stamping, closed-loop process control | Very low defect rate, global OEM partnerships |
| Gestamp | IATF 16949, ISO 14001 | Global engineering, weld/process simulation | Steel, AHSS, aluminum, EV battery materials | Structural, body-in-white, assemblies (100+ plants) | Hot stamping, in-die assembly, vision inspection | Strategic OEM supplier, high-volume expertise |
| Magna International | IATF 16949, ISO 9001 | Lightweighting, automation, rapid launch | Steel, aluminum, hybrid materials | 2,500+ parts/hour, global mass production | Servo-driven presses, high-speed progressive dies | On certain critical dimensions, tight tolerances of ±0.05mm can be achieved, but based on the specific part design and material, OEM partnerships |
| LMC Industries | ISO 9001 | In-house tooling, custom engineering | Steel, aluminum, plastics | Prototype to Tier 2 production | Robotic automation, secondary ops | ISO-certified, flexible volumes |
As you compare, remember: supplier fit depends on your part’s geometry, tolerance, and volume needs. Always validate claims with a technical audit and sample runs.
Supplier Evaluation Checklist for Automotive Metal Stamping Process
Ready to vet your shortlist? Here’s a buyer-ready checklist to guide your audit or RFQ process for oem progressive stamping and progressive stamped automotive parts:
- Verify IATF 16949 or ISO 9001 certification
- Request DFM feedback on your part print and progressive stamping dies layout
- Review material capabilities—especially for AHSS and aluminum
- Assess rapid prototyping and scale-up capacity
- Inspect in-die technology experience (tapping, sensors, vision systems)
- Check on-time delivery and defect rates (ask for PPM data)
- Tour facilities or request process videos for transparency
- Confirm engineering support for process optimization and troubleshooting
- Ask for references from automotive OEM or Tier 1 customers
The right automotive stamping partner brings more than just capacity—they offer technical collaboration, robust quality systems, and a proven record with progressive stamping dies that deliver consistent results from prototype through mass production.
With these criteria and tools, you’ll be well-equipped to select a reliable, capable partner for your next automotive metal stamping process. Next, we’ll close with a step-by-step action plan to move your project from concept to production—with resources to help you get started.

Action Plan and Resources to Move Forward in Progressive Stamping and Fabrication
Five-Step Plan: From Concept to High Volume Stampings
Reaching efficient, repeatable production with progressive metal stamping does not have to be overwhelming. Imagine you have a new part on your desk—where do you start? Here’s a simple, actionable path teams can follow to move from concept to production-ready metal stamping components:
- Align on Requirements: Gather all functional, dimensional, and performance needs for your part. Clarify which features are critical and where tolerances can be relaxed. This sets the stage for a robust progressive stamping die design.
- DFM Review with Your Stamping Partner: Collaborate early with your supplier to review manufacturability. Share 2D/3D models and discuss potential simplifications or material alternatives. The right DFM feedback can reduce station count, cut tooling costs, and even extend die life.
- Material and Gauge Confirmation: Work with your partner to confirm the best alloy and thickness for your stamping applications. Consider forming limits, edge quality, and long-term performance—especially for high volume stampings.
- Strip Layout and Tooling Collaboration: Co-develop the strip layout and key features of your stamping tool and die. Early input on carrier design, web width, and pilot hole placement can unlock better yield and more stable production.
- Pilot Run and Capability Confirmation: Run a short production trial to validate the progressive stamping die. Inspect critical features, confirm repeatability, and adjust as needed before scaling up.
Design Files and Data to Prepare for RFQ
When you’re ready to request a quote for progressive stamping and fabrication, a thorough data package ensures accurate pricing and minimizes surprises. Here’s what to include:
- 2D print with all GD&T and revision control
- 3D CAD model (STEP, IGES, or native format)
- Annual volume forecast and target production rate
- Critical tolerances and surface finish requirements
- Material specification (alloy, temper, gauge)
- Any required secondary operations (plating, tapping, etc.)
- Packaging, labeling, and delivery instructions
Providing these details upfront helps your stamping tool and die partner deliver a more reliable quote and a smoother project launch.
Where to Get Expert DFM Support for Progressive Stamping Die Projects
Not sure where to find DFM expertise and scalable support for high volume stampings? Consider partners with a proven track record in progressive stamping die design, robust quality systems, and material flexibility. For example, Shaoyi Metal Technology offers IATF 16949 certified processes, comprehensive DFM analysis, and the ability to scale from rapid prototyping to automated mass production across a wide range of materials. Their experience with progressive stamping die projects makes them a practical resource for teams seeking both technical feedback and production scalability. Always validate fit with a technical review and sample parts before full commitment.
Early DFM collaboration and clear data packages save cost, cut lead time, and ensure your progressive stamping die delivers the results you expect.
By following this stepwise plan and leveraging the right resources, you can confidently move your next progressive metal stamping project from idea to production—while minimizing risk and maximizing value at every stage.
Frequently Asked Questions about Progressive Metal Stamping
1. What is progressive metal stamping?
Progressive metal stamping is a manufacturing process where a metal strip is fed through a series of stations in a progressive die, with each station performing a specific operation such as punching or bending. This method enables the efficient production of complex, high-volume metal parts with consistent quality and reduced handling.
2. How much does progressive die stamping cost?
The cost of progressive die stamping depends on factors like part complexity, station count, material type, and required tolerances. Upfront tooling investment is higher than single-hit dies, but costs are offset over large production volumes. Maintenance and amortization strategies help determine per-part costs for better budgeting.
3. What are the four types of metal stamping dies?
The four main types of metal stamping dies are single punch dies, progressive dies, compound dies, and transfer dies. Progressive dies are ideal for high-volume, multi-feature parts, while transfer and compound dies suit larger, deeper, or simpler components.
4. What is the difference between progressive and tandem stamping?
Progressive stamping uses a single die set where the metal strip advances through multiple stations, creating a finished part with each press stroke. Tandem stamping involves multiple die sets in sequence, often used for larger parts, with each die performing a separate operation in a linear process.
5. How do I select the right stamping partner for automotive parts?
Look for partners with IATF 16949 certification, strong DFM support, material versatility, and scalable production capabilities. Evaluate their experience with progressive stamping dies, on-time delivery, and ability to collaborate from prototyping through mass production. Consider suppliers like Shaoyi Metal Technology for comprehensive solutions.