 Small batches, high standards. Our rapid prototyping service makes validation faster and easier —

Casting Die Casting Decoded: Cut Cost, Lead Time, And Scrap Now
Understand Casting Versus Die Casting
When you start exploring manufacturing options for metal parts, you’ll quickly encounter terms like casting and die casting. But what is die casting, and how does it fit within the broader definition of metal casting? Let’s break down these concepts so you can make informed choices for your next project.
What Casting Means in Metal Manufacturing
At its core, casting is the process of pouring molten metal into a mold cavity, letting it solidify, and producing a part that closely matches the desired shape—often called "near-net shape." This fundamental approach is used across industries for parts as varied as engine blocks, pump housings, and decorative items. The definition of metal casting covers a family of processes, each with unique strengths and tradeoffs.
How Die Casting Differs From Other Casting Methods
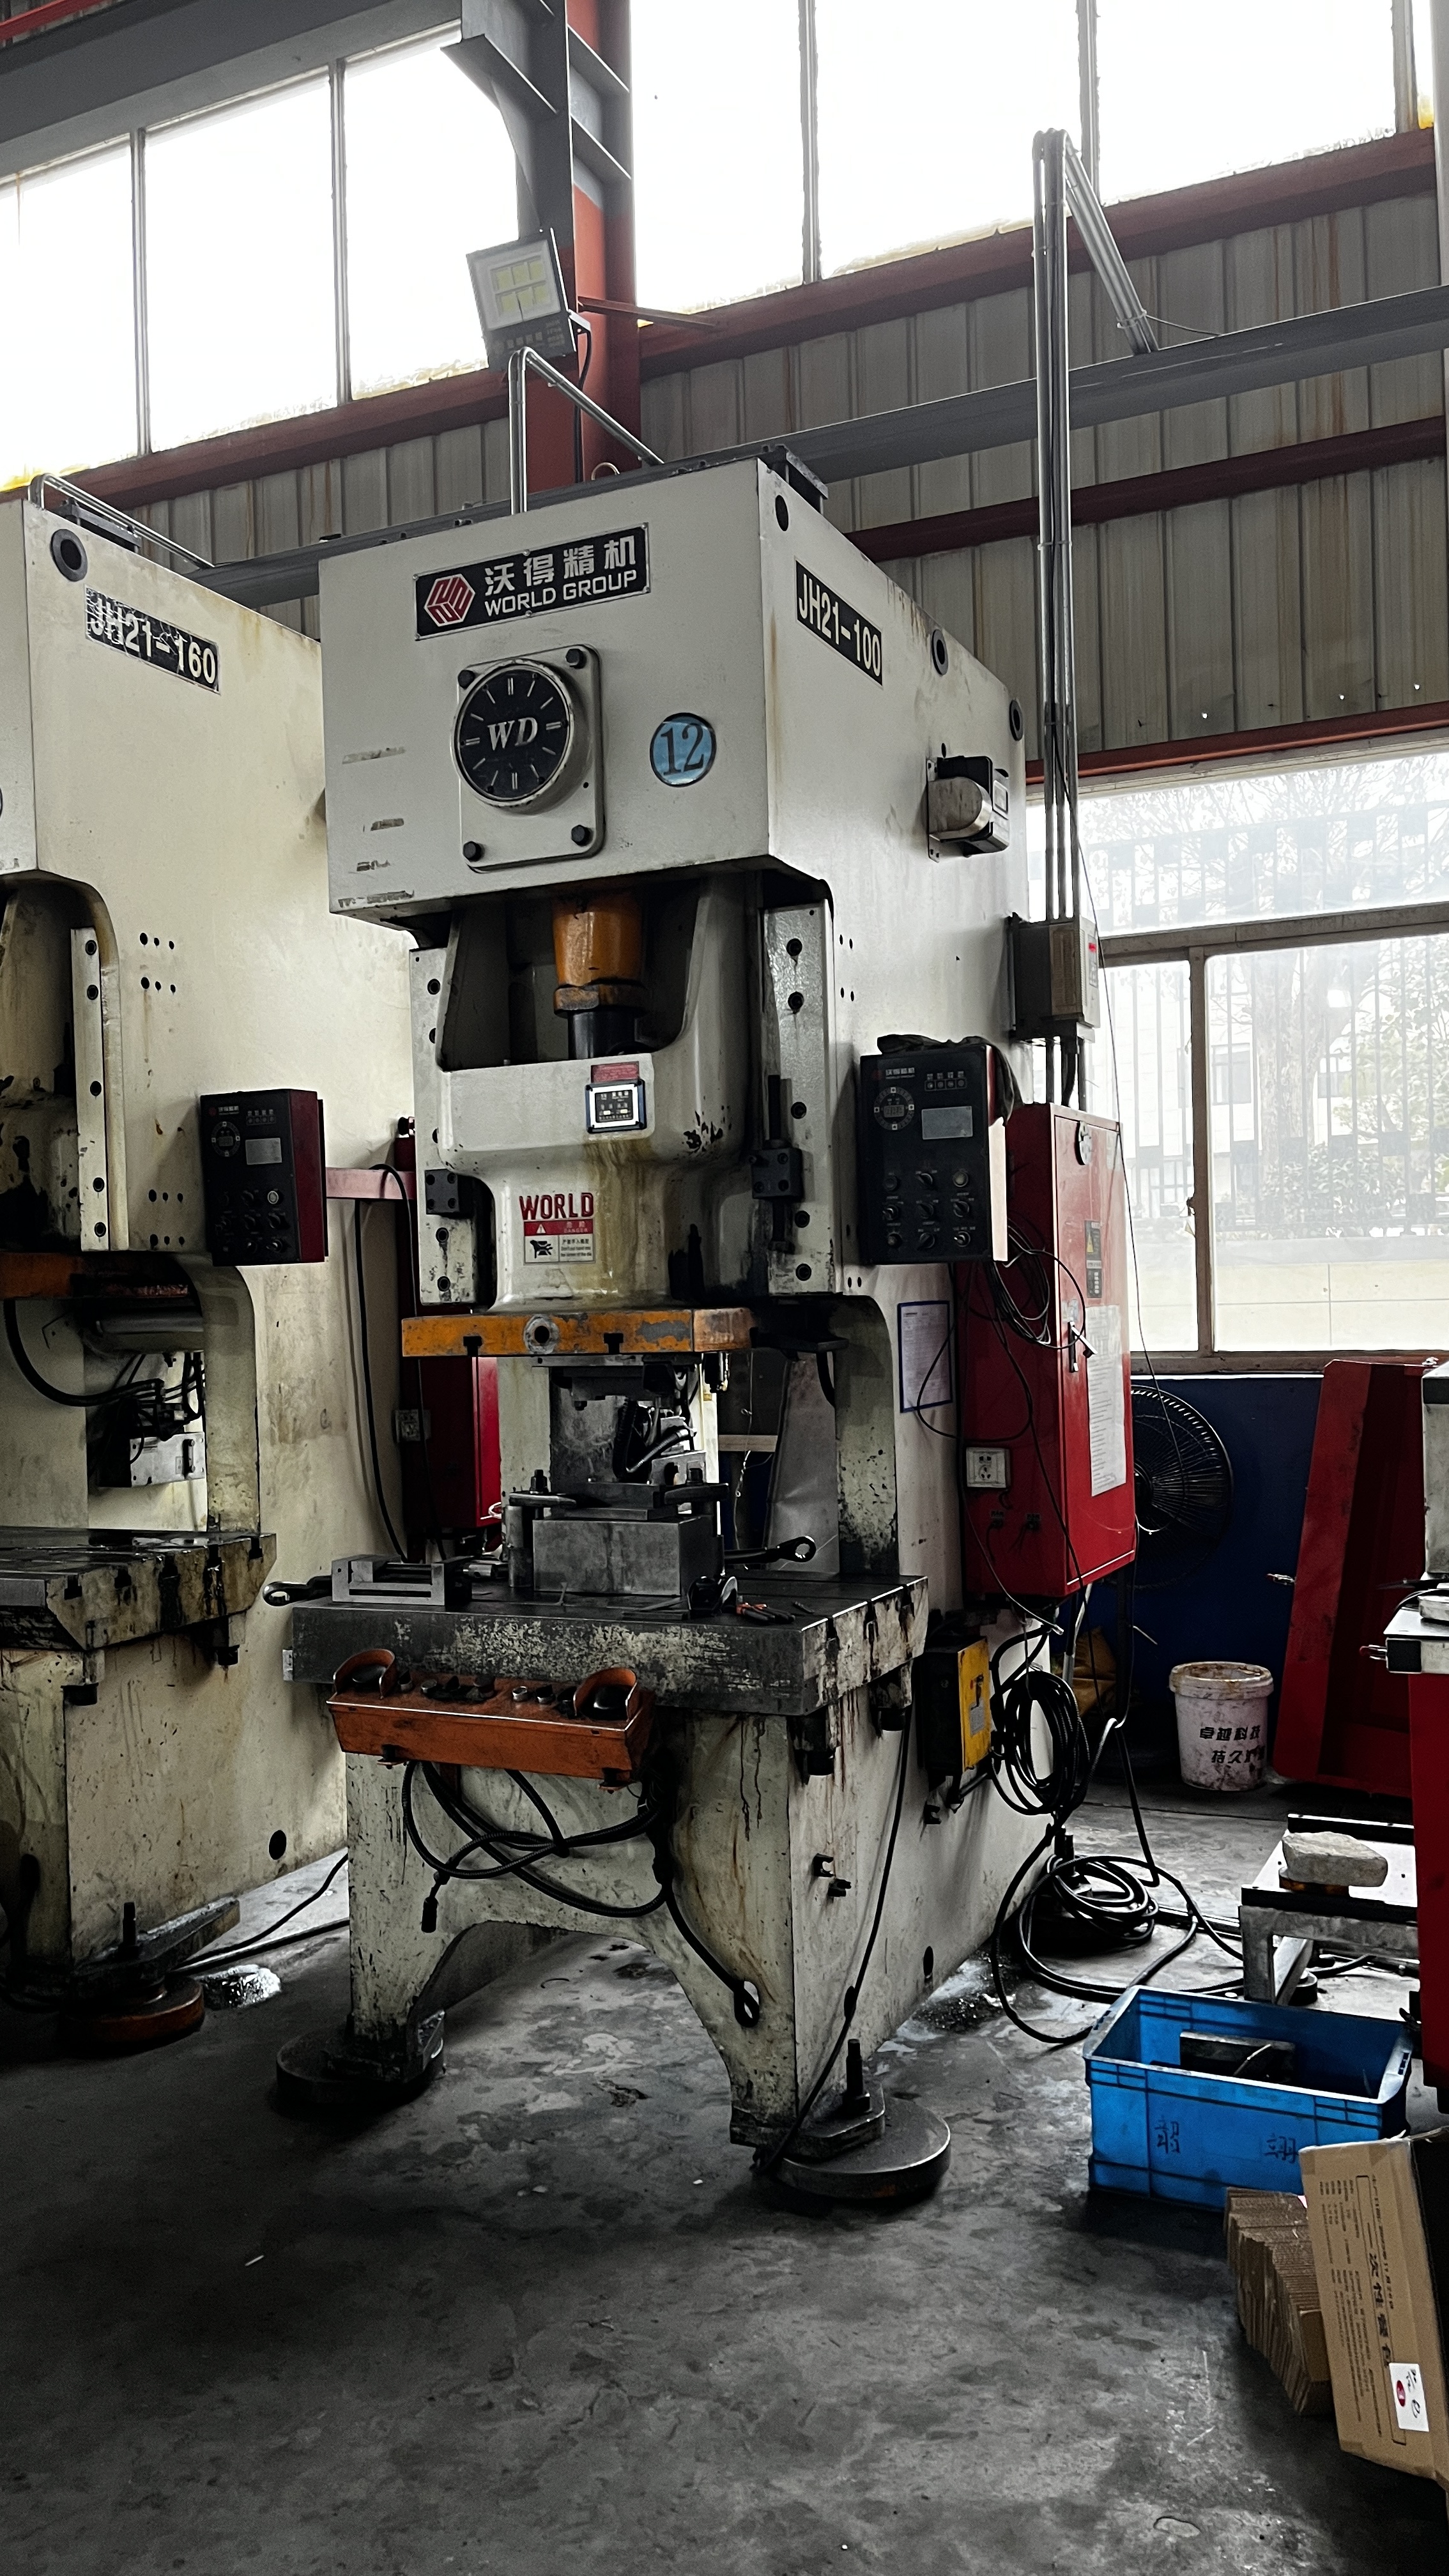
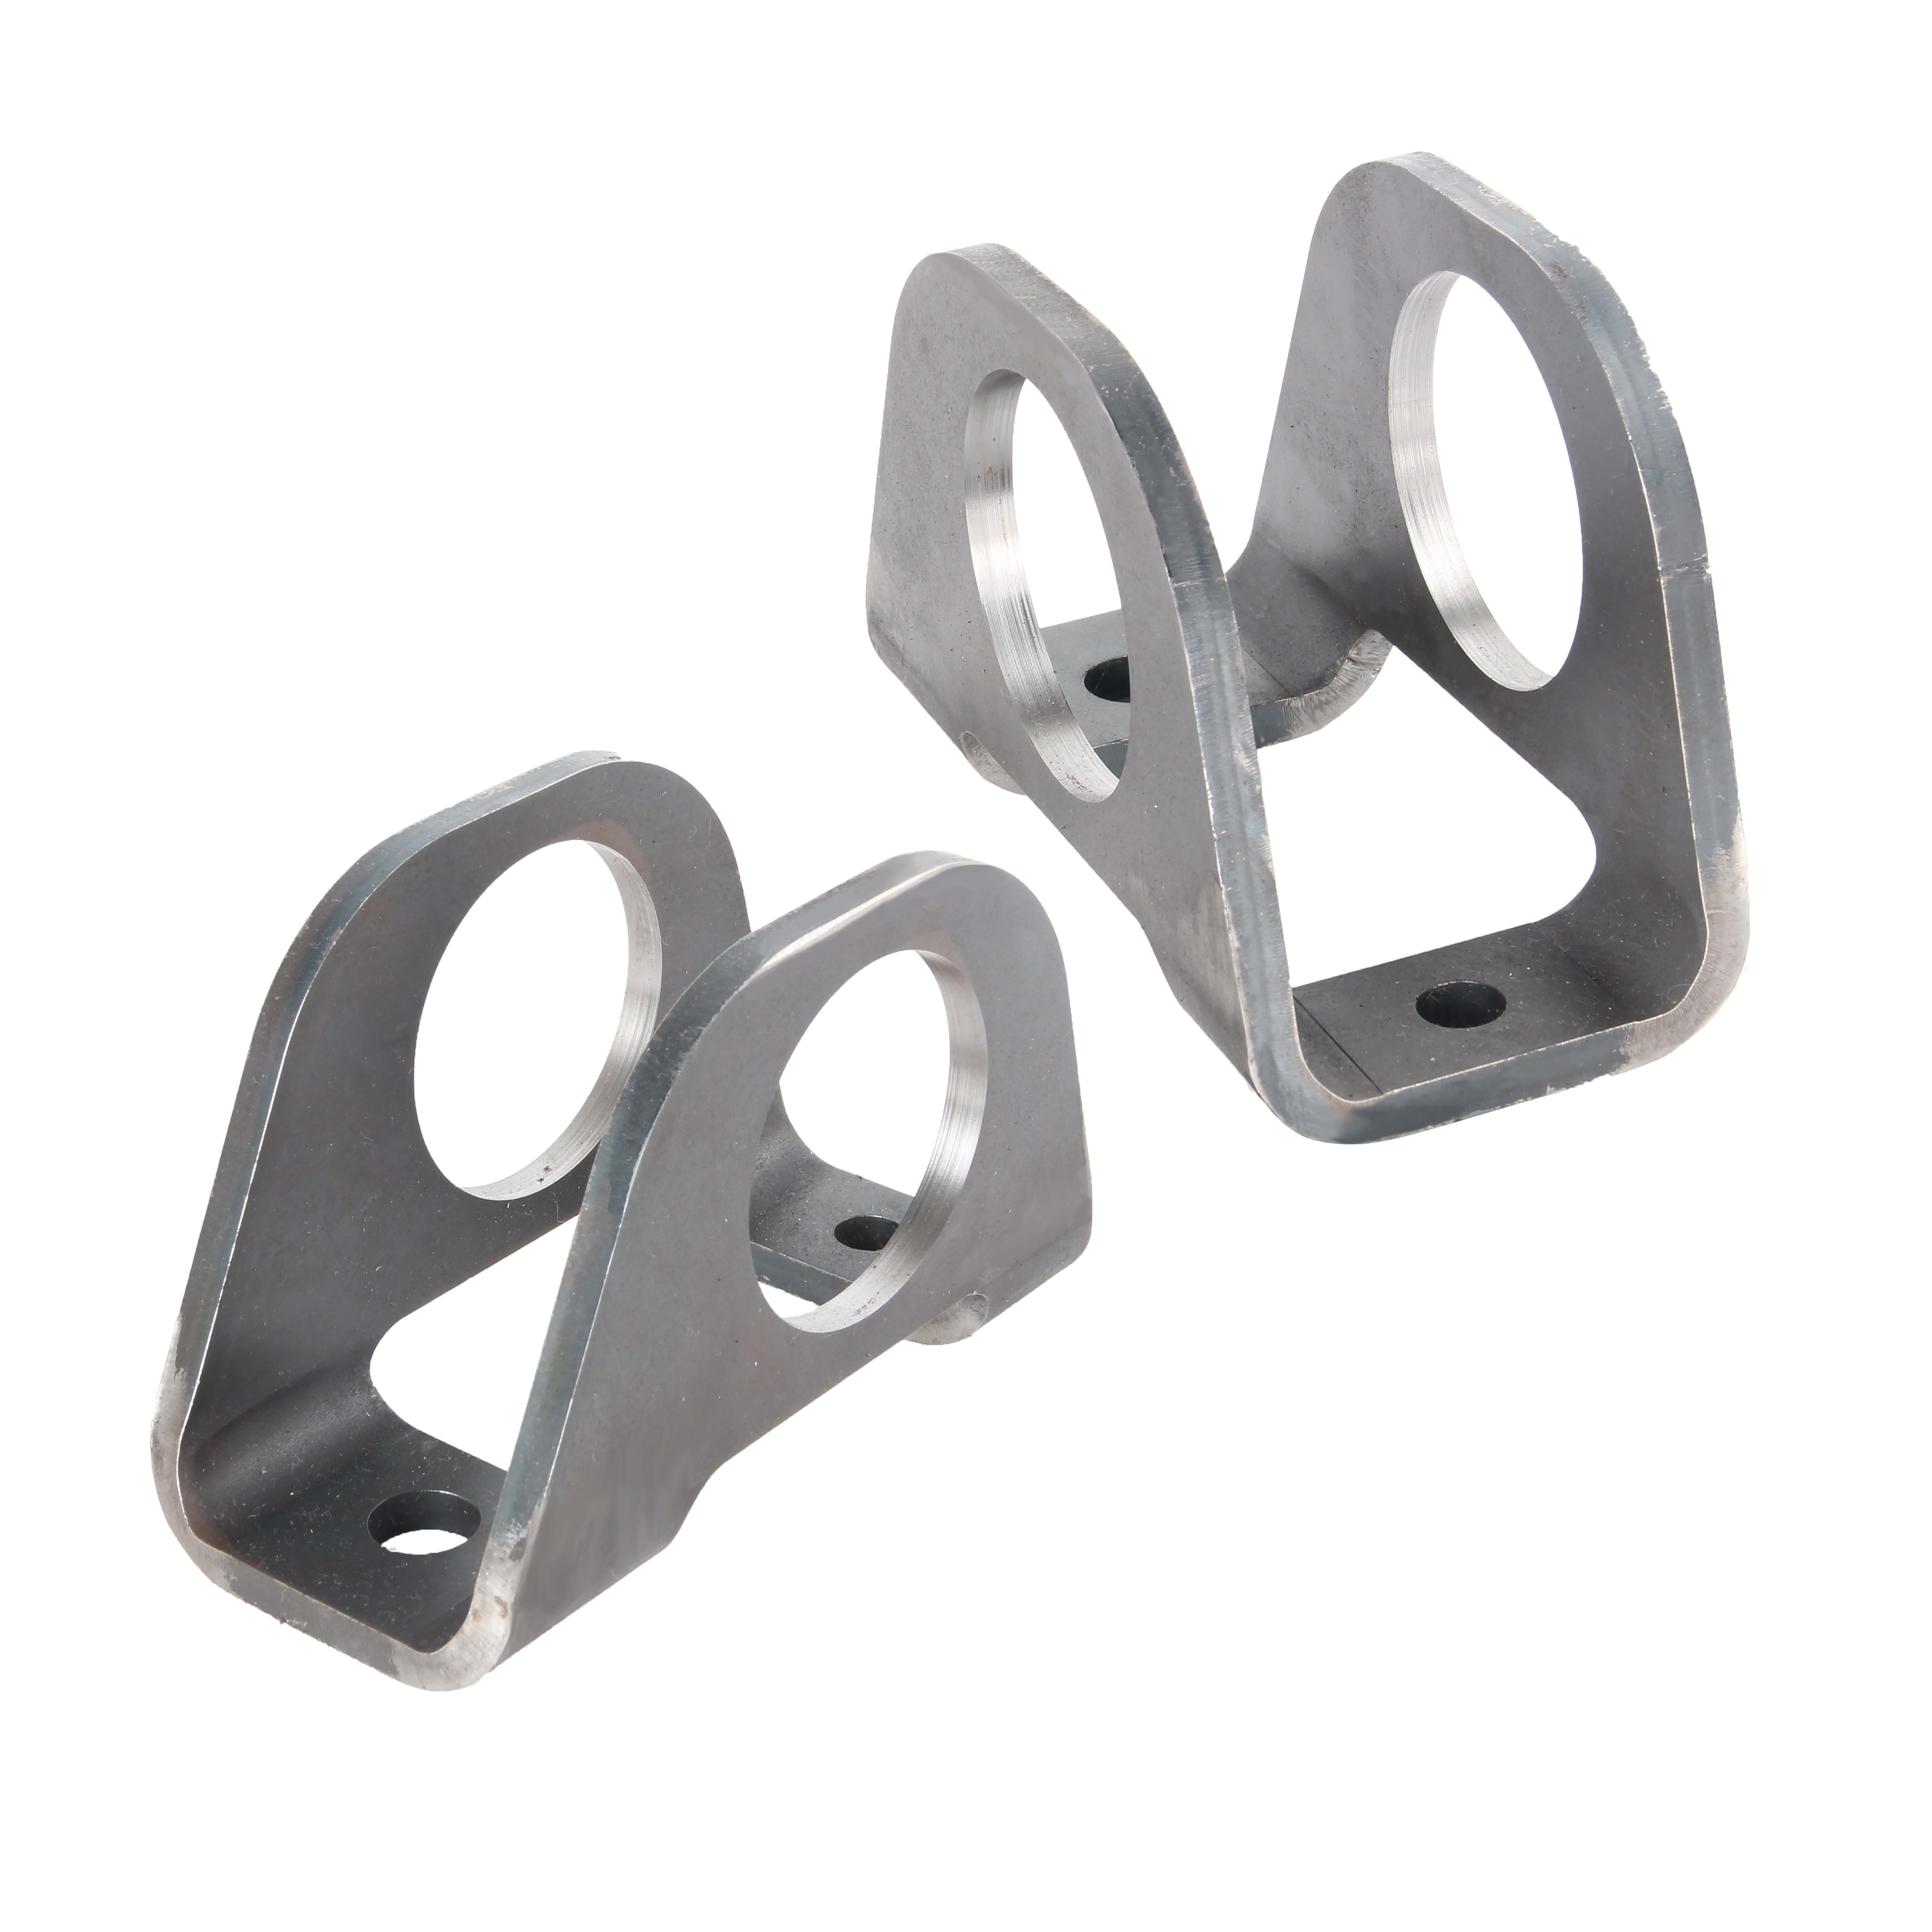
So, what is die casting? Imagine needing thousands of identical, precise, and finely detailed parts—think electronic housings, automotive brackets, or appliance covers. Die casting stands out by injecting molten metal under high pressure into hardened steel dies (molds). This method is highly automated and designed for speed, repeatability, and tight tolerances. Unlike sand or investment casting, the steel dies are reusable for many cycles, making die casting ideal for high-volume production of complex, thin-walled components.
Die casting is the go-to when you need thousands of dimensionally precise, thin-walled metal parts with repeatable quality.
Where Die Casting Fits Among Casting Families
You’ll notice that casting die casting is just one member of a larger family. Here’s a quick comparison of common metal casting processes, their typical production volumes, and the complexity of parts they handle:
| Process | Typical Volume Range | Part Complexity |
|---|---|---|
| Sand Casting | Low to high (prototypes to thousands) | Handles large, simple or moderately complex parts |
| Investment Casting | Low to medium (tens to thousands) | Very high detail, intricate and thin-walled shapes |
| Permanent Mold Casting | Medium to high (hundreds to tens of thousands) | Smoother surfaces, moderate complexity |
| Die Casting | High (thousands to millions) | High complexity, thin walls, tight tolerances |
When Engineers Choose Die Casting
Engineers and buyers select die casting when they need:
- Consistent, repeatable quality across large production runs
- Excellent surface finish that minimizes secondary machining
- Complex shapes with thin walls and integrated features
- Short cycle times for faster delivery
Common alloys used include aluminum (for lightweight strength), zinc (for intricate details and long tool life), and magnesium (for ultralight parts). Typical die cast parts include housings, brackets, covers, and precision connectors.
Key Terms Buyers Should Know
- Casting: Pouring molten metal into a mold to form a part
- Die: The hardened steel mold used in die casting
- Shot: Each cycle of injecting metal into the die
- Runner: Channel that guides molten metal into the cavity
- Near-net shape: Parts produced close to final dimensions, minimizing machining
Understanding these basics sets the stage for choosing the right process, selecting materials, and controlling costs—topics we’ll explore in the next sections.
Select The Right Die Casting Process Variant for Your Project
Ever wondered why some die cast parts are lightning-fast to produce, while others take a bit longer—or why certain alloys only work with specific machines? The answer lies in the process variant you choose. Let’s break down the key types of die casting processes, their strengths, and how to match them with your project’s needs.
Hot Chamber Versus Cold Chamber
Imagine you’re tasked with producing thousands of small, detailed zinc housings for electronics. You’ll likely turn to a hot chamber die casting machine. In this method, the injection system sits directly in the molten metal bath. Molten metal is drawn automatically into the chamber and injected into the die—making it fast, efficient, and ideal for alloys with lower melting points like zinc, tin, and magnesium. Hot chamber machines excel at high-volume runs of small to medium-sized components, such as consumer electronics or appliance parts.
But what if your parts are larger, need extra strength, or you’re working with aluminum? That’s where cold chamber die casting comes in. Here, the molten metal is melted in a separate furnace, ladled into the injection chamber, and then forced into the die under high pressure. This approach is perfect for higher melting point alloys like aluminum and magnesium, and is often used for structural or automotive components that require robust performance. Cold chamber machines can handle bigger, more complex shapes, but with slightly longer cycle times.
High Pressure Versus Low Pressure
Now, let’s talk about pressure die casting—specifically, the difference between high and low pressure. High pressure die casting (HPDC) is the workhorse for thin-walled, high-precision parts. In HPDC, molten metal is injected into the die at very high speeds, allowing for wall thicknesses as thin as 1 mm and rapid cycle times. This makes it the go-to process for automotive, electronics, and consumer goods where speed and part consistency are critical.
On the other hand, low pressure die casting (LPDC) uses a gentler, slower fill—typically for parts that demand excellent mechanical properties and intricate shapes, such as wheels or components with complex geometry. LPDC minimizes turbulence and porosity, resulting in dense, strong castings, but with thicker minimum wall sections and slower cycles compared to HPDC.
When to Add Vacuum Assistance
Still worried about porosity or trapped air in your parts? That’s where vacuum-assisted die casting steps in. By removing air from the die cavity just before injection, vacuum die casting (sometimes called vacuum-assisted high pressure die casting) dramatically reduces gas porosity and improves the mechanical integrity of the finished part. This is especially valuable for structural or leak-tight applications—think automotive safety components or parts requiring pressure sealing.
Choosing the Right Machine for Your Alloy
So which die casting machine is right for your job? It all comes down to your chosen alloy, part geometry, and production goals. Here’s a quick comparison to help you decide:
| Process Variant | Compatible Alloys | Wall Thickness Capability | Porosity Risk | Tooling Cost | Cycle Time | Recommended Use Cases |
|---|---|---|---|---|---|---|
| Hot Chamber | Zinc, Magnesium, Tin, Lead | Thin to moderate | Low (for zinc), moderate (for magnesium) | Lower | Fastest | High-volume, small/medium parts (electronics, appliances) |
| Cold Chamber | Aluminum, Magnesium, Copper | Moderate to thick | Moderate (can be reduced with vacuum) | Higher | Slower than hot chamber | Larger, structural parts (automotive, aerospace) |
| High Pressure | Aluminum, Zinc, Magnesium | Thinnest (as low as 1 mm) | Higher (can be mitigated with vacuum) | High | Fastest | Thin-walled, high-precision, high-volume parts |
| Low Pressure | Aluminum, Magnesium | Minimum ~3 mm | Lowest | High | Slower | Complex, strong parts (wheels, intricate shapes) |
| Vacuum Assisted | Aluminum, Zinc, Magnesium | Thin to moderate | Lowest | Highest | Varies | Leak-tight, structural, or cosmetic-critical parts |
Still not sure which way to go? Here’s a quick checklist of what you’ll want to have ready before requesting a quote for your die casting process:
- Target alloy (aluminum, zinc, magnesium, etc.)
- Estimated annual production volume
- Required tolerances and wall thickness
- Cosmetic surface requirements
- Sealing or leak-tightness needs
- Anticipated secondary operations (machining, finishing, assembly)
By matching your part’s needs to the right die casting process variant, you’ll unlock the best combination of speed, cost, and quality. Next, we’ll explore how alloy selection impacts performance and process efficiency—so you can make the smartest choice from the start.
Choose The Best Alloy For Die Casting
When you’re selecting an alloy for casting die casting, have you ever wondered which metal truly fits your part’s needs? The answer depends on your priorities—be it lightweight strength, ultra-fine detail, or maximum weight savings. Let’s break down the three main families of die casting alloys—aluminum, zinc, and magnesium—so you can make the smartest decision for your next project.
Aluminum Alloys for Lightweight Strength
Imagine you need a strong, lightweight bracket for automotive or electronics use. Aluminum die casting is often the first choice. Aluminum alloys, especially A380, are prized for their excellent strength-to-weight ratio, superior heat dissipation, and corrosion resistance. These properties make die cast aluminum ideal for housings, heat sinks, and other structural parts that must perform under stress or at elevated temperatures.
- Great for structural parts and thermal management
- Good corrosion resistance, especially with proper finishing
- Moderate to good machinability
- Common in electronics, automotive, and appliance industries
Aluminum die casting materials also allow for thinner walls than many other metals, but not as thin as zinc. Plus, aluminum’s fluidity and moderate shrinkage mean careful gating and venting are needed to control porosity and achieve clean surfaces.
Zinc Alloys for Precision and Thin Walls
Need intricate features or ultra-thin sections? Zinc die casting shines here. Zinc alloys offer unmatched castability, letting you achieve finer details, tighter tolerances, and thinner walls than aluminum or magnesium. They’re also tough—zinc parts can absorb more impact, making them ideal for small gears, connectors, and decorative hardware. Zinc delivers the longest tool life of any die casting alloy, which is a major plus for high-volume runs.
- Best for small, complex, or high-detail parts
- Excellent surface finish and suitability for plating
- Superior impact strength (especially at room temperature)
- Lowest tooling wear and highest repeatability
One thing to keep in mind: zinc’s impact strength drops at low temperatures, and its creep resistance should be considered for parts under constant load.
Magnesium for Ultralight Components
If every gram counts, magnesium is your go-to. Magnesium die casting alloys—especially AZ91D—are the lightest structural metals used in die casting, yet still deliver solid strength and stiffness. Magnesium excels in applications where weight reduction is critical, such as handheld electronics or automotive interiors.
- Lowest density among die casting alloys
- Good strength and rigidity for its weight
- Best machinability—less tool wear and faster cycle times
- Ideal for consumer electronics, automotive, and aerospace parts
However, magnesium’s corrosion resistance and surface finish can vary depending on alloy purity and finishing method. Proper coatings or treatments are often recommended for harsh environments (reference).
Surface Finish and Coating Considerations
How does alloy selection affect finishing and machining? Here’s a quick comparison:
| Alloy | Strength/Weight | Typical Applications | Finishing Compatibility | Machining Behavior |
|---|---|---|---|---|
| Aluminum | High/Lightweight | Housings, brackets, heat sinks | Good for painting, powder coating, anodizing | Moderate; best with sharp tools |
| Zinc | Moderate/Heavier | Small gears, connectors, decorative parts | Excellent for plating, chromate, painting | Excellent; long tool life |
| Magnesium | Good/Ultralight | Electronics, auto interiors, handheld devices | Needs special coatings for corrosion | Best; low tool wear, fast machining |
Ultimately, your choice of alloy in the casting die casting process will shape not just part performance, but also tooling longevity, cycle time, and finishing options. If you’re aiming for lightweight strength, aluminum die casting is tough to beat. For ultra-precise, high-volume parts, zinc die casting is king. And when weight reduction tops your list, magnesium leads the way. Next up, we’ll dive into design guidelines that help you get the most from your chosen alloy and reduce scrap from the start.
Design For Manufacturability In Die Casting
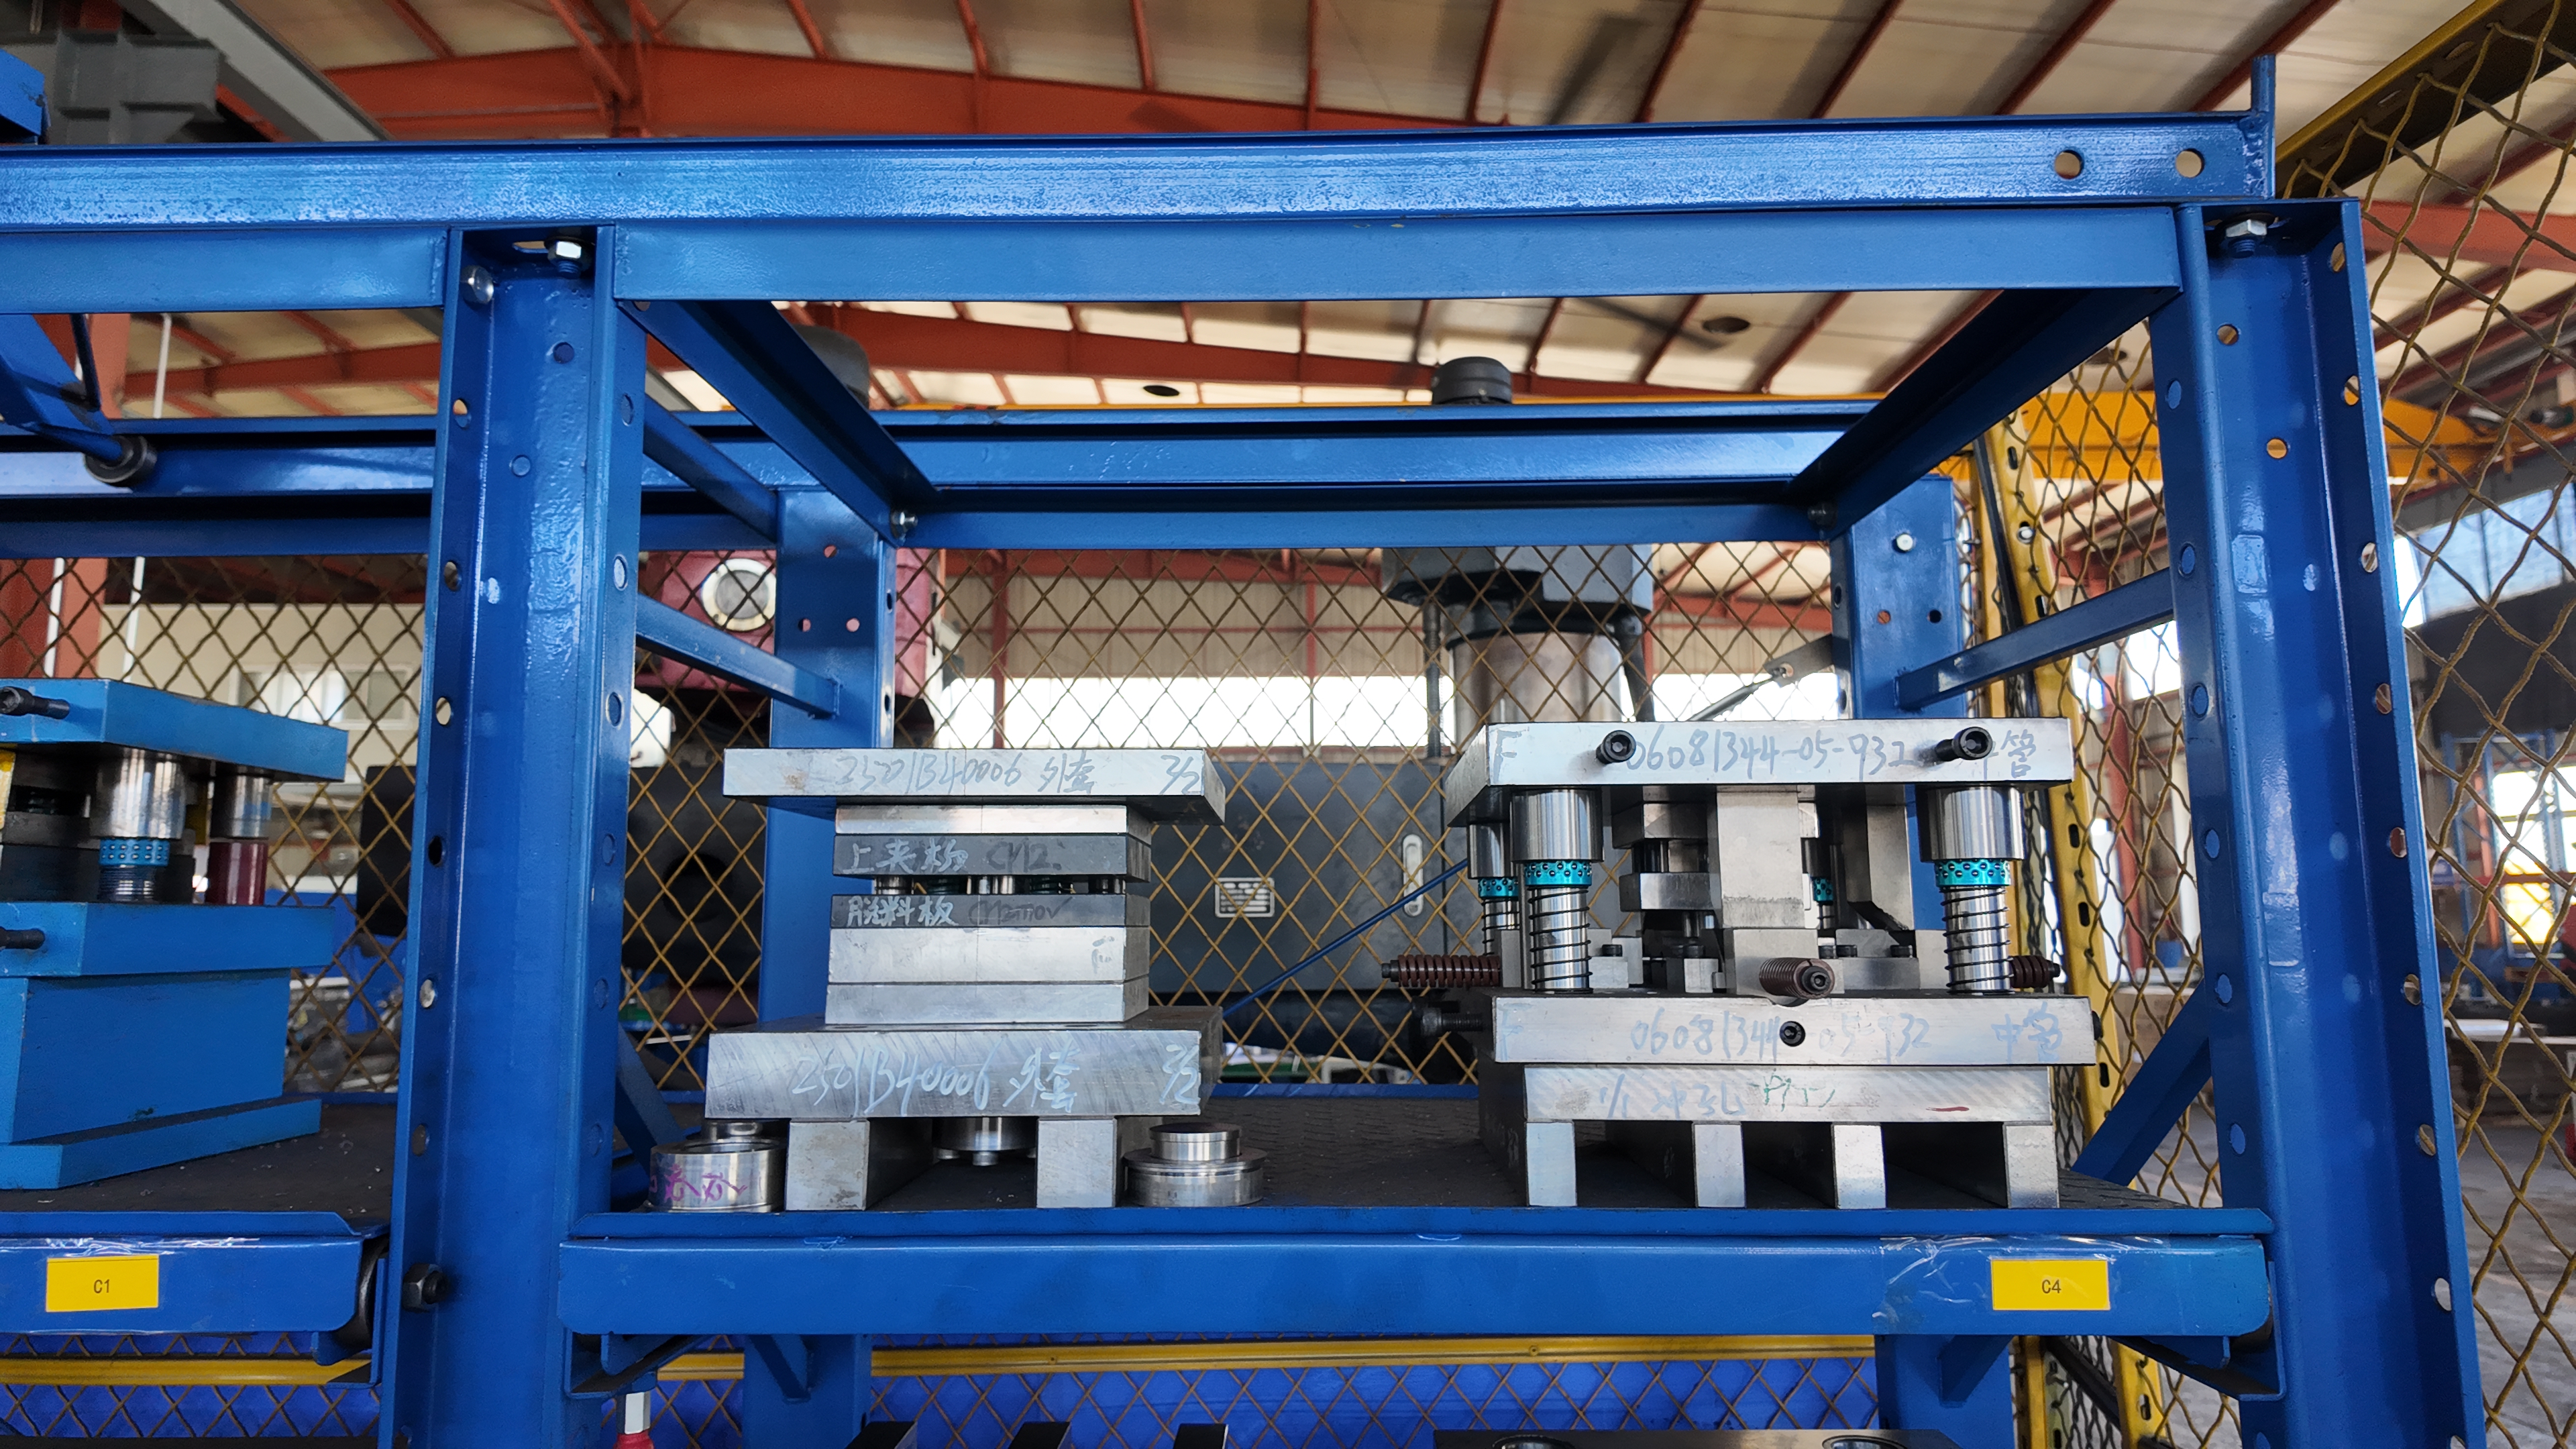
Ever had a die casting project hit snags with porosity, warping, or endless tooling tweaks? You’re not alone. The secret to smoother projects—and less scrap—lies in smart, up-front design for manufacturability (DfM). Let’s walk through the core DfM rules that help you get the most from your die casting die, minimize costly rework, and deliver reliable die casting parts every time.
Wall Thickness And Draft Angle Guidelines
Sounds complex? Imagine pouring syrup into a narrow mold—if the walls aren’t uniform, flow slows and air gets trapped. The same principle applies to die casting molds. Consistent wall thickness ensures even metal flow, helps avoid hot spots, and reduces the risk of shrinkage or porosity. According to industry best practices:
- Maintain uniform wall thickness wherever possible. Sudden changes can cause turbulence, leading to defects like porosity or warping.
- Typical wall thickness: 1.5–4 mm for most alloys and part sizes.
- Draft angles: Add 1–3 degrees to all vertical faces to ensure easy ejection from the die casting die. Without draft, parts stick and require forceful ejection, risking damage.
Adding draft also compensates for metal shrinkage as the part cools—about 0.6% for many alloys.
| Alloy Family | Process Variant | Wall Thickness | Recommended Draft | Notes |
|---|---|---|---|---|
| Aluminum | Cold Chamber, HPDC | 1.5–4 mm | 1–3° | Use fillets to avoid sharp corners |
| Zinc | Hot Chamber, HPDC | Thinner possible (<1.5 mm) | 1° or more | Best for ultra-thin, complex features |
| Magnesium | Hot/Cold Chamber | Similar to aluminum | 1–3° | Lightweight, good for ribs |
Ribs, Bosses, And Uniformity For Flow
When you need to strengthen thin walls without adding weight, ribs are your go-to solution. But there’s an art to rib and boss design in die casting parts:
- Add ribs to reinforce thin sections, but keep them properly spaced and sized to avoid sink marks or trapped air.
- Use fillets and radii at all inside corners—aim for at least 0.13 mm radius—to smooth flow and reduce stress concentrations.
- Avoid sharp corners and abrupt transitions. These cause turbulence and make the die casting mold harder to fill.
- Design bosses (raised mounting points) with support ribs and fillets to prevent shrinkage and cracking.
- Keep hole sizes and locations consistent to simplify die cast tooling and reduce the risk of core shift.
Uniform cross sections not only speed up metal flow but also help the part cool evenly, minimizing distortion.
Gates, Vents, And Overflows
Ever notice tiny marks or flash on die casting parts? These usually trace back to the design of gates, vents, and overflows—critical features in any die casting die. Here’s why they matter:
- Gate placement: Position gates at the thickest section of the part to ensure complete filling and directional solidification.
- Gate size and shape: Too small, and you risk cold shuts; too large, and you may get flash or excess trimming. Fan-shaped gates help reduce turbulence in thin-walled parts.
- Smooth transitions: Avoid sharp edges at gates and runners to prevent air entrapment and oxide inclusions.
- Overflow grooves: Place overflows at the end of the metal flow path to collect impurities, gas, and oxide films. This reduces porosity and improves surface quality.
- Venting: Proper venting lets trapped gases escape, preventing air pockets and ensuring a clean fill.
Integrating gates, runners, vents, and overflows as a unified system—ideally validated by flow simulation—helps achieve zero-defect, high-quality castings.
Tolerance Bands And Datum Strategy
How tight should your tolerances be? Die casting can deliver impressive accuracy, but setting tolerances tighter than necessary increases tooling costs and scrap. Follow these tips for smarter die cast tooling and part drawings:
- Specify realistic tolerances—consult NADCA or process standards for what’s achievable in your alloy and die design.
- Use datum schemes that reflect function and inspection needs. Choose primary, secondary, and tertiary datums that are easy to locate on the part.
- Separate casting-only and machined features on your drawing. This clarifies which surfaces require secondary operations.
- Call out flatness, perpendicularity, and GD&T only where truly needed. Over-specification leads to unnecessary machining and cost.
- Establish a clear datum scheme for inspection and assembly.
- Apply GD&T symbols only to critical features.
- Indicate flatness and perpendicularity tolerances where required.
- Delineate casting-only versus machined surfaces on your drawing.
- Share part function and inspection priorities with your die cast tooling partner early.
Summary Table: DfM Rules by Alloy and Process
| Design Element | Aluminum (Cold Chamber, HPDC) | Zinc (Hot Chamber, HPDC) | Magnesium (Hot/Cold Chamber) |
|---|---|---|---|
| Min. Wall Thickness | 1.5–4 mm | As thin as <1.5 mm | 1.5–4 mm |
| Draft Angle | 1–3° | 1° or more | 1–3° |
| Fillet/Radius | ≥0.13 mm | ≥0.13 mm | ≥0.13 mm |
| Rib/Boss Design | Moderate, filleted | Thin, closely spaced | Lightweight, reinforced |
| Gates & Runners | Thickest section, fan/smooth | Thin/fan for detail | Similar to aluminum |
| Overflow & Venting | Critical for porosity control | Important for thin walls | Key for lightweight parts |
By following these design for manufacturability rules, you’ll notice fewer surprises in production, lower scrap rates, and happier project timelines. And if your project demands leak-tightness or top-tier cosmetic surfaces, plan for larger overflows, vacuum assistance, and careful gate/vent placement away from show faces. Early simulation and open collaboration with your die casting mold and die cast tooling experts are the surest way to validate your design before steel is cut.
Armed with these DfM strategies, you’re ready to tackle the next step: understanding process parameters and quality control techniques that keep your die casting parts consistent—every single run.
Process Parameters And Quality Control
Ever wondered why two production castings made with the same mold can turn out so differently? The answer lies in the fine-tuning of process parameters and the rigor of quality control. Whether you’re new to the casting manufacturing process or an experienced engineer, mastering these fundamentals is the key to minimizing scrap, maximizing repeatability, and ensuring your die cast parts consistently meet demanding specs.
Key Process Parameters To Monitor
Imagine you’re running a high pressure die casting die for an automotive housing. What should you watch to ensure a flawless part? The process of die casting is governed by a handful of critical parameters—each one impacting the final outcome. Here’s a visual overview:
| Parameter | What It Controls | Impact on Quality |
|---|---|---|
| Injection Pressure | Forces molten metal into the die cavity | Higher pressure reduces shrink porosity, but too much can damage dies or cause flash |
| Shot Velocity (Filling Speed) | Speed of metal entering the mold | Fast fill ensures complete, thin-walled parts but can trap air; slow fill risks incomplete filling |
| Melt (Pouring) Temperature | Temperature of the molten alloy | Too low: poor flow, cold shuts; too high: oxidation, increased porosity |
| Die (Mold) Temperature | Temperature of the die cavity | Controls solidification rate, affects surface finish, porosity, and ejection |
| Fill Time | How quickly the cavity is filled | Short fill times reduce cold shuts; long fill times risk incomplete parts |
| Holding (Packing) Pressure/Time | Pressure/time applied after fill to pack metal | Improves density, reduces shrinkage cavities |
| Cooling Time | Time before ejecting part from die | Too short: warping, cracks; too long: slow cycle, lower productivity |
Optimizing these parameters is not just about making a good part once—it’s about locking in consistency across every cycle, every shift, and every batch. Historical data and simulation tools are invaluable for dialing in the sweet spot for each parameter, especially when switching alloys or die designs.
Porosity Control And Nondestructive Testing
Let’s face it: porosity is the nemesis of precision die processing. But not all porosity is created equal. There are two main types:
- Gas Porosity: Air or gas trapped during injection, often due to fast shot velocity or inadequate venting
- Shrinkage Porosity: Voids from metal contraction during solidification, influenced by pressure and cooling rates
How do you keep these issues at bay? Smart gating, vacuum assistance, and precise shot control all help minimize gas entrapment. For shrinkage, holding pressure during the semi-solid stage is crucial—especially in high pressure die casting die setups, where timing and pressure adjustment can fill emerging voids before they become defects.
Once parts are cast, nondestructive testing (NDT) lets you peek inside without destroying the product. Here’s a quick list of common inspection tools and methods:
- Coordinate Measuring Machine (CMM) for dimensional checks
- CT scanning or X-ray for internal porosity and cracks
- Dye penetrant (for certain alloys and surface cracks)
- Ultrasonic testing for internal flaws
- Leak testing for pressure-tight parts
- Visual standards for surface finish and cosmetic zones
Acceptance criteria for porosity usually differ for cosmetic and structural areas—tightest where sealing or strength is critical. Refer to customer specs or recognized standards for guidance.
Dimensional Inspection And Sampling
Imagine producing thousands of production castings, only to find out late that they’re out of spec. That’s why robust dimensional inspection and sampling plans are a must. The journey typically includes:
- First Article Inspection (FAI): Full measurement of initial parts to verify die and process setup
- Capability Runs: Short production runs to confirm process stability (often monitored with SPC charts)
- Ongoing Sampling: Regular checks using calipers, micrometers, CMMs, and visual inspection, with advanced options like laser scanning for high-precision needs
Automated inspection systems, like vision systems and CMMs, can boost throughput and accuracy while reducing labor costs. For critical features, laser scanning or CT imaging may be warranted.
Standards And Documentation
What keeps everything on track? Documentation and standards. Here are the essentials you’ll encounter on a typical process sheet or quality plan:
- Material certification and traceability records
- Process FMEA (Failure Mode and Effects Analysis)
- Control plans outlining key process parameters and inspection points
- PPAP (Production Part Approval Process) documentation for automotive and regulated industries
- Process control charts and data logs for ongoing monitoring
Environmental, safety, and regulatory compliance are also vital. That means capturing emissions, handling die lubricants safely, and ensuring molten metal safety protocols are in place. For industry-specific requirements, always refer to the latest NADCA guidelines or your customer’s standards.
Consistent monitoring and optimization of key process parameters are the backbone of quality in the process of die casting—helping you achieve precision, reduce scrap, and deliver reliable production castings every time.
Now that you know how to keep your process tight and your quality high, let’s explore how finishing and secondary operations can further enhance your die cast parts—while controlling cost and lead time.
Post Processing And Secondary Operations
When you receive aluminum die casting parts fresh from the die, you might think the work is done—but that’s rarely the case for demanding applications. Have you ever wondered why some aluminium die casting components require extra steps before reaching their final form? Let’s walk through how post-processing and secondary operations can impact cost, lead time, and the long-term performance of your die cast aluminum material.
Machining Allowances And Datum Strategy
Even with the precision of die cast aluminum alloys, certain features are simply too tight or complex to be cast directly. Sounds familiar? Imagine you need a perfectly flat sealing surface or a tapped hole with tight tolerances. In these cases, secondary machining is essential. Commonly machined surfaces include:
- Sealing faces for gaskets or O-rings
- Bore holes for bearings or shafts
- Threaded holes for fasteners or inserts
To keep costs in check, only specify machining where it’s truly needed. Early in your design, define datum points and critical faces—this ensures minimal stock removal and prevents costly rework. For aluminum die cast prototypes, collaborating with your supplier on machining strategy can help you balance speed and accuracy.
Threads, Inserts, And Assembly Features
Need robust threads or embedded hardware in your zinc die cast or aluminum part? While some threads can be cast-in, most high-strength or precision threads are added via tapping or by installing inserts after casting. Here’s what you’ll see in practice:
- CNC tapping of holes for repeatable, accurate threads
- Press-fit or heat-set inserts for high-load or repeated assembly
- Designing bosses and pads specifically for insert installation
Planning for these assembly features during the die design phase reduces the risk of cracking, ensures proper alignment, and can even speed up the production of aluminum die castings.
Finishing Options And Corrosion Protection
What about the look and durability of your die cast aluminum alloys? Surface finishing is where performance and aesthetics meet. Consider these common finishing options for aluminum die casting parts:
- Anodizing: Creates a hard, corrosion-resistant oxide layer; great for electronics and visible surfaces.
- Powder Coating: Offers a thick, durable, and colorful finish—ideal for automotive and outdoor aluminium die casting components.
- Polishing: Enhances cosmetic appeal for premium or consumer-facing parts.
- Electroplating: Adds a metallic layer (like nickel or chrome) for improved wear or conductivity.
- Chromate Conversion: Provides cost-effective corrosion protection while maintaining electrical conductivity.
- Sand/Shot Blasting: Prepares surfaces for painting or coating, or creates a uniform matte texture.
Let’s compare these finishes for durability, cost, and cosmetic outcome:
| Finish | Durability | Cost Impact | Cosmetic Outcome |
|---|---|---|---|
| Anodizing | High (corrosion, wear) | Moderate | Matte/satin, color options |
| Powder Coating | High (abrasion, UV) | Moderate | Glossy, wide color range |
| Polishing | Low-medium | Higher (labor-intensive) | Mirror-like, premium feel |
| Electroplating | High (corrosion, wear) | Higher | Bright metallic, decorative |
| Chromate Conversion | Medium (corrosion) | Low | Subtle, conductive |
| Sand/Shot Blasting | Low (mainly prep) | Low | Matte, industrial |
Remember, the choice of finish can affect both cost and lead time. Some finishes, like powder coating or anodizing, require masking to protect threads or critical faces. For high-volume aluminum die castings, integrating finishing operations with casting can streamline your workflow and reduce handling damage.
Sealing Strategies For Leak Tightness
Ever had a die cast aluminum material fail a leak test? Porosity is a natural outcome of casting, but it can be controlled. For applications like hydraulic housings or pneumatic valves, vacuum impregnation is the go-to method for sealing micro-porosity. Here’s how it works:
- Impregnation is performed after all machining but before surface finishing to ensure all leak paths are sealed.
- Sealants are drawn into pores via vacuum, preventing outgassing and finish defects during curing.
- Skipping this step can lead to pinholes in coatings, corrosion, or pressure leaks.
Other sealing strategies include designing O-ring grooves and specifying compatible sealants or gaskets for assembly. For mission-critical aluminium die casting components, always validate leak-tightness with pressure testing—and plan for rework only as a last resort.
Common Secondary Operations At-A-Glance
- Trimming (removal of flash, gates, runners)
- CNC machining (faces, holes, threads)
- Impregnation (sealing porosity)
- Surface treatments (anodizing, powder coat, plating)
- Assembly of inserts or hardware
- Final inspection and leak testing
In summary, thoughtful planning of secondary operations can turn standard die cast aluminum prototypes into high-performance, ready-to-ship parts. By integrating machining, finishing, and sealing strategies early, you’ll reduce rework, accelerate PPAP/FAI, and ensure your aluminum die casting parts meet even the toughest requirements. Up next, we’ll explore how these post-processing decisions connect with overall cost and lead time—helping you build a smarter sourcing plan from RFQ to ramp.
Cost And Lead Time Decision Framework
When you’re choosing a manufacturing method for metal parts, the options can feel overwhelming. Do you go with casting die casting, investment casting, sand casting, metal injection molding (MIM), or even CNC machining? The right answer depends on your project’s economics, lead time, and part complexity. Let’s break down the cost and timing factors so you can make a confident, value-driven choice for your next project.
Tooling Cost And Lead Time Drivers
Imagine you need thousands of high-precision brackets for a new product launch. Should you invest in a high-cost die, or stick with a lower-tooling alternative? Here’s what you’ll notice:
- Die Casting: Highest tooling costs, but steel dies last for hundreds of thousands of cycles. Expect longer upfront lead times (often 12–15 weeks for samples), but rapid cycles once production starts.
- Investment Casting: Moderate to high tooling costs due to the need for wax and ceramic patterns. Lead times are typically 8–10 weeks for samples, with production taking 5–12 weeks after approval.
- Sand Casting: Lowest tooling costs, fastest to set up for prototypes or short runs. Tooling can be ready in 2–6 weeks, with production following soon after.
- MIM: Tooling costs and lead times are similar to die casting, but best for small, intricate parts in high volumes.
- CNC Machining: No tooling required, so you can start immediately. Perfect for prototypes or very low-volume runs.
| Process | Tooling Cost | Sample Lead Time | Production Lead Time | Best Fit Volume | Surface Finish |
|---|---|---|---|---|---|
| Die Casting | High | 12–15 weeks | 6–8 weeks post-approval | 2,500+ | 32–63 RMS |
| Investment Casting | Moderate–High | 8–10 weeks | 5–12 weeks post-approval | <1,000 | 63–125 RMS |
| Sand Casting | Low | 2–6 weeks | 2–6 weeks post-approval | Singles–5,000+ | 250–500 RMS |
| MIM | High | Similar to die casting | Similar to die casting | High (10,000+) | Fine (comparable to investment casting) |
| CNC Machining | None (per-part setup) | Immediate | Immediate | Singles–hundreds | Best (machined finish) |
Per Part Cost Versus Volume
Sounds complex? Think of it this way: the higher your annual volume and the more complex your part, the more die casting’s upfront investment pays off. That’s because the high tooling cost is spread over thousands—or even millions—of parts, driving down your per-part cost. Conversely, for prototypes or small batches, CNC machining or sand casting may be far more economical.
- Die casting delivers the lowest per-part cost at high volume but is not cost-effective for small runs due to tooling amortization.
- Investment casting is ideal for small-to-medium runs of highly detailed parts where die casting’s tooling cost can’t be justified.
- Sand casting is unbeatable for very low volume, large parts, or rapid prototyping.
- MIM shines for tiny, complex shapes in very high quantities.
- CNC machining is the go-to for prototypes, design changes, or low-volume specialty parts.
When Alternatives Beat Die Casting
Imagine you’re developing a component with intricate internal features, small batch needs, or limited budget for tooling. Here’s when you might choose a different manufacturing method:
- Investment casting wins when you need fine details or undercuts that are impossible in die casting, especially in quantities under 1,000.
- Sand casting is best for very large parts or one-offs where die and pattern costs would be prohibitive.
- Metal injection molding vs die casting: MIM is preferred for miniature, high-precision parts in the tens of thousands or more, especially if they require alloys not suited to die casting.
- Die casting vs injection molding: If you’re considering plastics, injection molding is more economical for high-volume, non-metal parts.
- CNC machining is unbeatable for rapid design iterations or when you need parts with properties identical to the bulk material.
Building A Realistic Sourcing Timeline
Planning a new product launch or a major ramp? Use this checklist to ensure your sourcing plan aligns with both your budget and your schedule:
- Define your annual volume and expected ramp plan.
- Assess your part’s feature complexity and need for thin-walled design.
- List tolerance and leak-tightness requirements.
- Estimate finishing and machining burden for critical faces or features.
- Evaluate supply risk and consider dual-sourcing options for critical components.
By mapping these criteria to your chosen process, you’ll avoid surprises—and costly delays—down the road.
Die casting’s cost advantage grows with higher volumes and complex, thin-walled parts, but investment casting, sand casting, MIM, and CNC all have their place for lower volumes, intricate details, or rapid prototyping needs.
Ready to move from analysis to action? Next, we’ll help you recognize when forging may outperform casting die casting for the most demanding automotive applications—and how to build a sourcing workflow that minimizes risk from RFQ to ramp.
When Forging Beats Die Casting For Automotive Parts
Ever wondered why some automotive parts are forged while others are made by precision die casting? Imagine you’re designing a suspension arm or a steering knuckle—components that simply can’t fail. In these cases, the right choice between forging and casting die casting isn’t just about cost or speed; it’s about meeting the highest standards for strength and safety. Let’s explore when forging outperforms die casting, what design cues signal the need for forging, and how to make a smooth transition if your project demands it.
When Forging Outperforms Die Casting
Sounds complex? Not really, once you break down the key differences. Forging shapes metal using compressive force, aligning the grain structure for superior mechanical properties. Die casting, on the other hand, injects molten metal into a mold for rapid, high-volume production. Each method has its place in the auto diecasting world—but for safety-critical or high-impact parts, forging often takes the lead.
- Forging delivers unmatched strength and toughness. The process produces a refined grain structure, making forged parts ideal for automotive chassis, drivetrain, or suspension components where impact, fatigue, and durability are non-negotiable.
- Die casting is best for complex shapes and high volumes. It excels in producing intricate, thin-walled parts—think transmission housings or brackets—where weight, speed, and cost efficiency are key.
Design Cues That Signal Forging
When should you choose forging over die casting? Here are the telltale signs:
- Parts must withstand repeated impact or high cyclic loads (e.g., steering knuckles, tie rods).
- Safety-critical applications where failure could be catastrophic.
- Requirements for maximum ductility and fatigue resistance.
- Designs that allow for simple, solid geometries rather than highly intricate internal passages.
In the aluminium die casting industry, it’s common to use die cast manufacturers for housings and covers, while switching to forging for parts that demand the highest mechanical integrity. For example, forged suspension arms or drive shafts are standard in vehicles where performance and safety are paramount.
Forged vs. Die Cast Automotive Parts: Key Comparison
| Option | Strength/Ductility | Porosity Risk | Tooling Lead Time | Per-Part Cost (at Volume) | Typical Applications |
|---|---|---|---|---|---|
| Forged Automotive Parts (IATF 16949 Certified) | Highest (optimized grain flow) | Lowest (homogeneous material) | Moderate (in-house die design speeds up delivery) | Competitive at volume; higher for complex shapes | Chassis, drivetrain, suspension, safety-critical parts |
| Die Cast Automotive Parts | High (but lower than forged) | Moderate (risk of internal porosity) | Longer (complex die fabrication) | Lowest for high-volume, simple shapes | Housings, brackets, covers, non-critical structures |
Transitioning From Die Casting To Forging
Imagine you’ve been using top die casting for a bracket, but testing reveals it’s not tough enough for the latest vehicle platform. What’s next? Transitioning from die casting to forging may require:
- Redesigning parts for manufacturability with forging—simpler, more robust shapes.
- Collaborating with a forging specialist to optimize grain flow and material selection.
- Validating new prototypes with fatigue and impact testing.
If you need a trusted partner for this shift, consider Shao-Yi Automotive Forging Parts. Their IATF 16949 certified facility ensures exceptional strength, durability, and quality, while their in-house die design and rapid prototyping capabilities can help you reduce lead times and scale from pilot to mass production with confidence.
Lead Time And Quality Implications
Lead time and quality are critical for automotive programs. Here’s what you’ll notice:
- Forging: Fewer process steps than casting, less risk of defects, and faster ramp-up for high-volume runs.
- Die casting: Longer upfront tooling time, but unmatched speed and repeatability once in production—ideal for non-structural, high-volume parts.
Ultimately, the decision between forging and casting die casting for automotive applications comes down to performance requirements, safety margins, and the criticality of each component. By understanding these tradeoffs—and working with vetted die cast manufacturers and forging partners—you’ll ensure your parts meet both engineering and business goals.
From RFQ to First Articles and Ramp
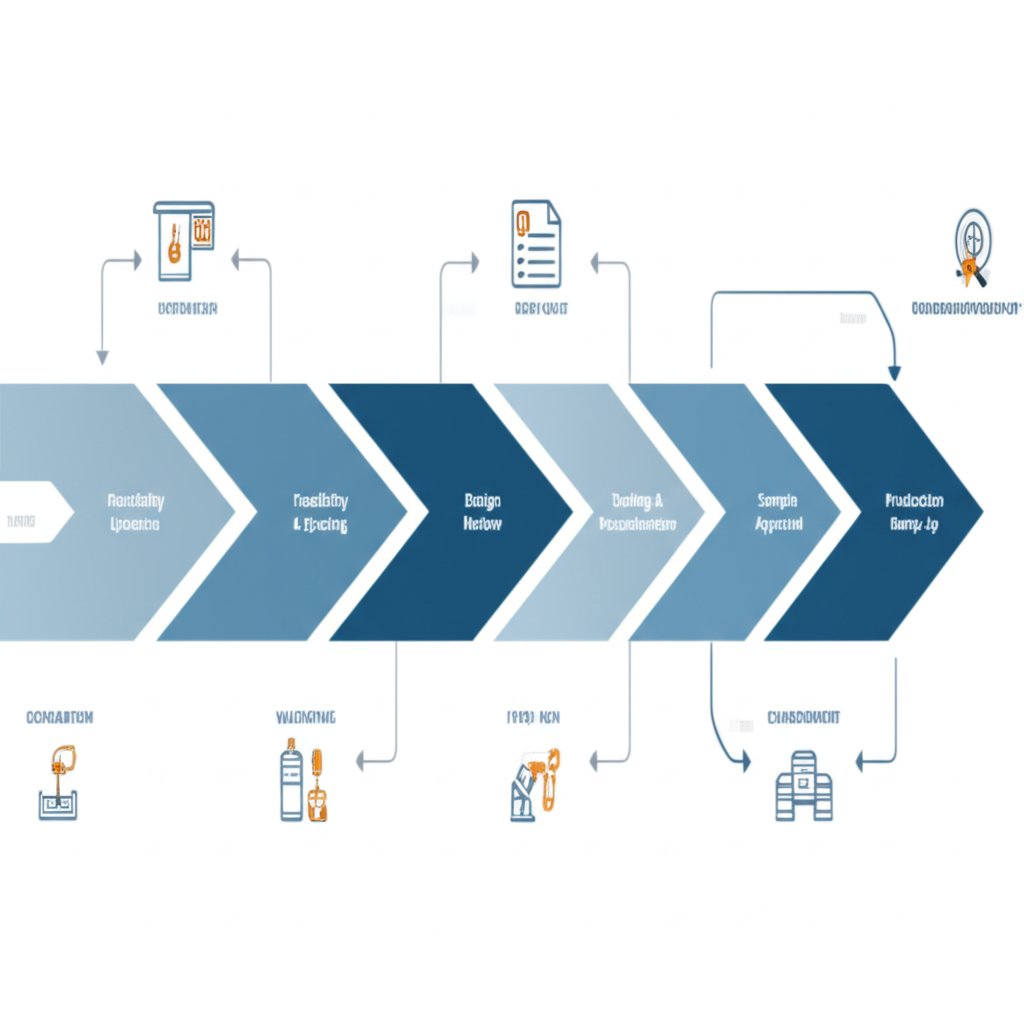
When you’re sourcing die casting products, how do you move smoothly from request for quote (RFQ) to reliable mass production—without costly surprises? Sounds complex, but with a clear step-by-step workflow, you’ll minimize risk, accelerate timelines, and set your project up for long-term success. Let’s break down the essential stages, highlight key documents, and arm you with a supplier evaluation checklist that works for die casting services, the investment casting process, and even forging alternatives when needed.
RFQ and Feasibility Review
- RFQ Submission & Initial Review: Share your part drawings, annual volume, alloy, and critical requirements with potential die casting service suppliers. Ensure you provide details about tolerances, surface finish, and secondary operations to get accurate aluminum die casting pricing.
- Design for Manufacturability (DfM) Analysis: The supplier reviews your design for manufacturability, highlighting areas for improvement—like uniform wall thickness, draft, or gating. Expect a DfM report and proposal before mold design begins.
- Feasibility Confirmation: Both parties confirm technical feasibility, clarify open points, and agree on project scope, timeline, and deliverables.
Tooling Build and Commissioning
- Moldflow Simulation & Design Approval: Before steel is cut, the supplier performs moldflow analysis to predict metal flow and potential defects. 3D and 2D mold drawings are shared for your confirmation.
- Tooling Build: With design approval, the die caster begins tooling manufacture. Weekly progress updates and material certificates keep you in the loop.
- Tool Commissioning & Trial: A mold trial kick-off meeting aligns all teams. The process includes slow-pressure and fast-pressure mold trials, machine parameter tuning, and video documentation for transparency.
- Steel-Safe Adjustments: Any minor tweaks to the die are made to achieve target dimensions before formal sampling.
First Articles, Capability, and Sign Off
- T1 Sample Submission: The supplier provides T1 samples, including full-size inspection and X-ray reports (often three parts each within three days of trial completion).
- First Article Inspection (FAI): A comprehensive review of part dimensions, material certificates, and functional testing is performed to verify conformance (reference).
- Capability Studies & PPAP: For automotive or regulated industries, process capability (Cp/Cpk) runs and Production Part Approval Process (PPAP) documentation are required before full sign-off.
- Project Summary & Sign Off: Buyer and supplier hold a summary meeting to review trial outcomes, address open issues, and sign off on production readiness.
| Checkpoint | Owner | Key Documents |
|---|---|---|
| DFM Approval | Buyer/Supplier | DfM Report, Drawing Markup |
| Moldflow & Design Sign Off | Buyer | Moldflow Analysis, 3D/2D Drawings |
| T1 Sample Approval | Buyer/Supplier | Inspection Reports, X-ray, FAI |
| Capability Study/PPAP | Supplier | Cp/Cpk Data, Control Plan, FMEA |
| Production Release | Buyer | Signed Off Samples, Final Documentation |
Ramp Monitoring and Continuous Improvement
- Ramp-Up Production: Begin volume production with close monitoring of process parameters, defect rates, and delivery schedules. Supplier provides ongoing inspection reports and process data.
- Continuous Improvement: Both parties review production data, implement corrective actions, and pursue process optimization for cost, quality, and delivery.
Supplier Evaluation Checklist
Choosing the right die casting service or die caster is critical to project success. Use this checklist—adapted from industry best practices—to evaluate your partners:
- Company Experience & Capacity: Proven track record and ability to scale for your needs
- Certifications: ISO, IATF 16949, or other relevant standards
- Material Traceability: Reliable sourcing and full documentation
- Process Control: Documented procedures, mold maintenance, and process monitoring
- Quality Assurance: Advanced testing (CMM, X-ray), robust inspection processes
- Defect Management: Low historical defect rates, clear handling of non-conformances
- Cost Transparency: Clear aluminum die casting pricing, no hidden fees
- Continuous Improvement: Demonstrated ability to optimize and innovate
What if Your Project Outgrows Die Casting?
Sometimes, your component’s strength or impact requirements may exceed what die casting products or even the investment casting process can deliver. In these cases, consider a forging partner with proven credentials. For example, Shao-Yi Automotive Forging Parts offers IATF 16949 certification, rapid prototyping, and end-to-end manufacturing for strength-critical applications—helping you de-risk timelines and quality as you scale.
By following a structured workflow from RFQ to ramp—and choosing suppliers who excel at every checkpoint—you’ll ensure your casting die casting project is delivered on time, on budget, and with the quality your application demands.
Frequently Asked Questions About Casting Die Casting
1. What is the difference between casting and die casting?
Casting is a broad metal manufacturing process where molten metal is poured into a mold and solidifies into a part. Die casting is a specific type of casting that uses high pressure to inject molten metal into reusable steel dies, producing high-volume, precise, and thin-walled parts with excellent surface finish.
2. Is die casting a permanent mold process?
Yes, die casting uses permanent steel molds (dies) that can be reused for thousands of cycles, making it ideal for high-volume production. Unlike sand casting, where molds are single-use, die casting's permanent tooling delivers consistency and repeatability.
3. What are some examples of die cast parts?
Die cast parts include electronic housings, automotive brackets, appliance frames, connector bodies, and heat sinks. These parts benefit from die casting's ability to create complex shapes, thin walls, and integrated features at scale.
4. What are the main steps in the die casting process?
The die casting process involves preparing the die, injecting molten metal under high pressure, cooling the part in the die, ejecting the solidified part, trimming excess material, and performing any required secondary operations such as machining or finishing.
5. How do I choose between die casting and investment casting?
Die casting is best for high-volume, thin-walled, and dimensionally precise parts, while investment casting excels with lower volumes and highly detailed or intricate shapes. Consider your annual volume, part complexity, and required surface finish when selecting the process.