 Small batches, high standards. Our rapid prototyping service makes validation faster and easier —

Automotive Stamping Quality Control Methods: A Technical Guide
TL;DR
Automotive stamping quality control is a dual-layered process combining manual surface evaluation for aesthetic "Class A" finishes with advanced dimensional metrology for geometric precision. The industry standard workflow integrates tactile methods like stoning and oil highlighting to detect microscopic surface ripples, alongside digital technologies such as CMM and 3D laser scanning for tolerance verification. Effective quality assurance (QA) goes beyond inspection, employing preventive systems like SPC (Statistical Process Control) and FMEA to monitor die wear and material behavior before defects occur.
Manual Surface Inspection: The "Class A" Standard
For automotive body panels—hoods, doors, and fenders—visual perfection is non-negotiable. These "Class A" surfaces require sensitive manual inspection techniques to detect defects that automated cameras might miss, such as minute undulations or microscopic pits.
Tactile and Visual Techniques
Experienced inspectors use a combination of touch and sight to identify surface irregularities:
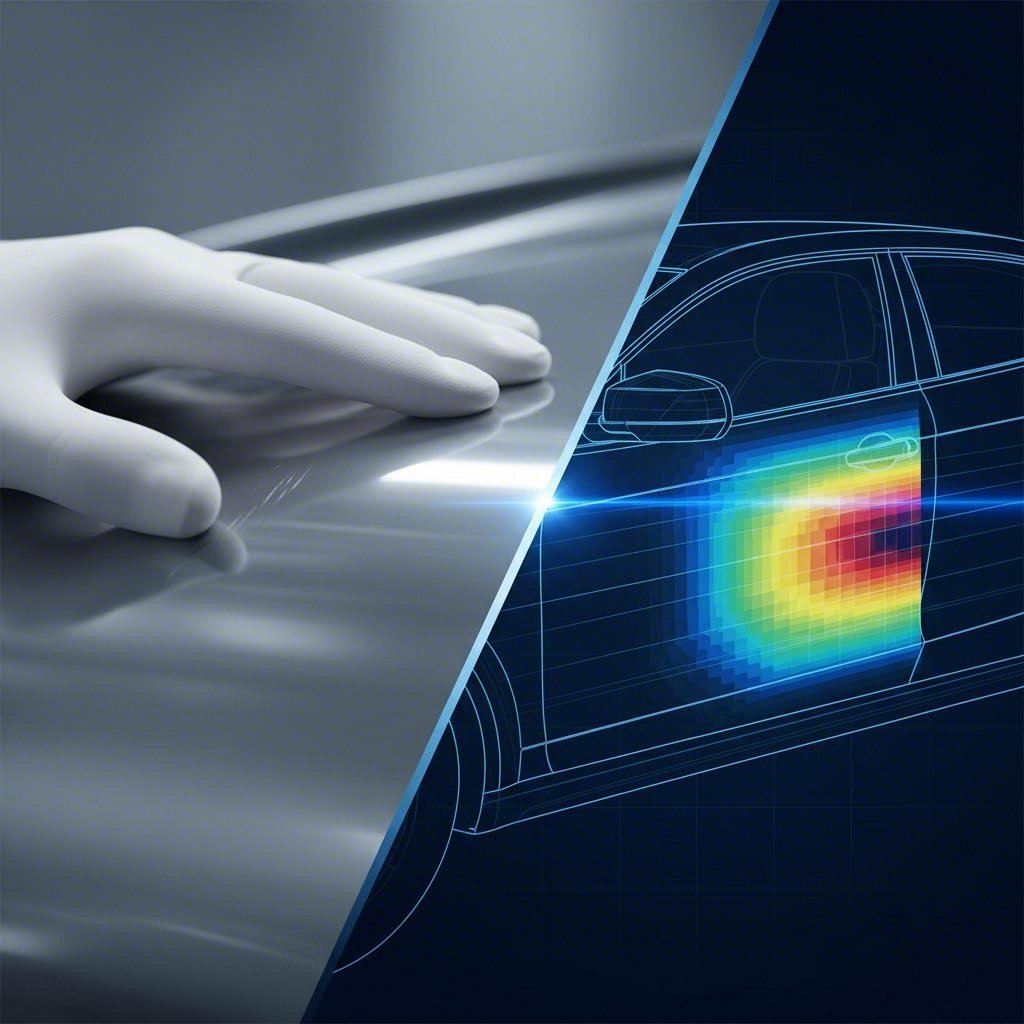
- Touch Inspection: Inspectors wear specialized thin cotton gloves to run their hands longitudinally across the panel. This method relies on human sensitivity to feel "high" or "low" spots that disrupt the surface continuity. While subjective, it remains one of the fastest ways to flag potential issues on a moving line.
- Flexible Gauze Grinding: A flexible sand net is wiped longitudinally across the entire surface. This abrasive action highlights high spots (which get sanded) and leaves low spots untouched, creating a visual map of surface unevenness like pitting or indentation.
- Oil Highlighting: This non-destructive method involves applying a thin, even layer of oil to the stamped part and standing it vertically under high-intensity lighting. The oil refraction exaggerates surface ripples and wavering, making invisible distortions obvious to the naked eye.
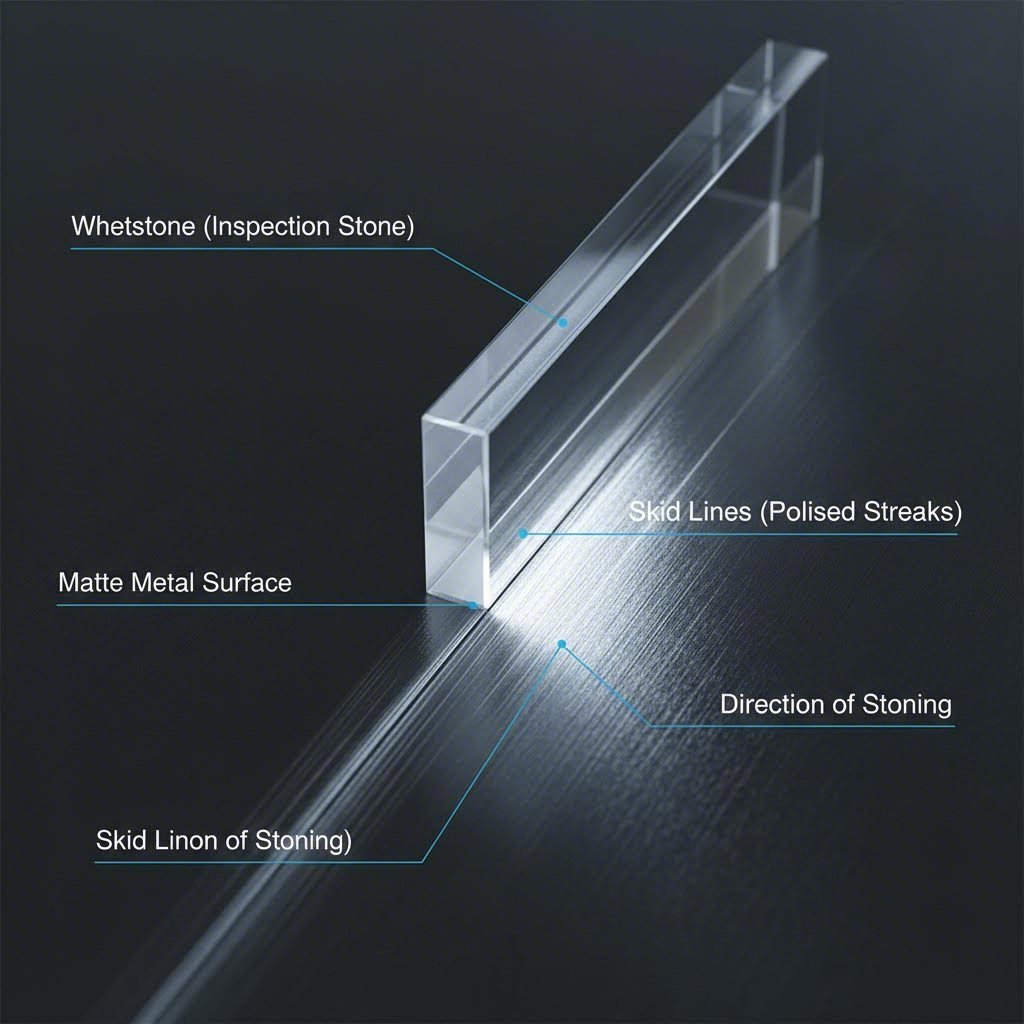
Whetstone Grinding ("Stoning")
Stoning is a definitive, albeit destructive, test often used during die setup or audit checks. It involves polishing the panel surface with specific abrasive stones to reveal the topographic profile of the metal.
According to industry best practices, inspectors typically use a 20×20×100mm oilstone for large flat areas. For complex geometries, arcs, or hard-to-reach contours, a smaller 8×100mm semi-circular whetstone is preferred. The grinding direction must remain longitudinal to the part's flow. The resulting scratch pattern clearly delineates "skid lines," shock lines, and other forming defects that require die tuning.
Dimensional Metrology: Precision "Beyond the Eye"
While manual methods ensure the part looks good, dimensional metrology ensures it fits perfectly. Modern automotive assembly requires tolerances often measured in microns.
Coordinate Measuring Machines (CMM)
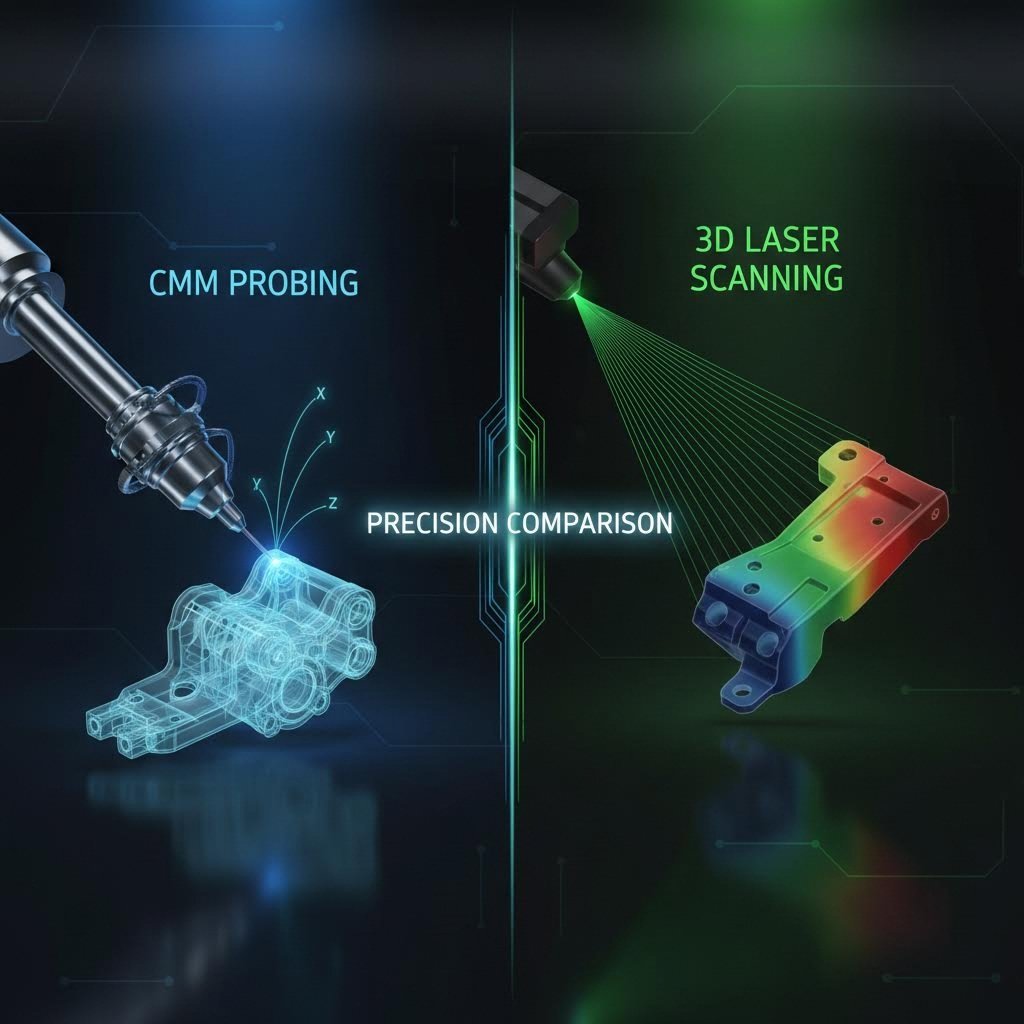
The CMM remains the golden standard for absolute accuracy. By using a ruby-tipped probe to touch discrete points on the part's surface, a CMM compares physical coordinates against the CAD model. It is indispensable for validating critical datum points and hole locations.
However, CMMs have limitations: they are relatively slow, measuring point-by-point, and typically require a temperature-controlled lab environment to prevent thermal expansion errors. This makes them less suitable for 100% in-line inspection of high-volume runs.
3D Laser Scanning and Vision Systems
To address the speed gap, manufacturers increasingly adopt 3D laser scanning and optical vision systems. Unlike CMMs, laser scanners capture millions of data points in seconds, creating a "heat map" of the entire part. This full-field data is crucial for analyzing complex phenomena like springback—where the metal tries to return to its original shape after stamping.
Vision systems, such as 2-axis optical comparators, excel at inspecting small, flat parts like brackets or washers. They can instantly verify profiles and hole placements without physical contact, preventing deformation of thinner gauge metals.
Common Stamping Defects and Root Causes
Effective quality control depends on correctly identifying the "signature" of each defect. Understanding the physics behind the failure allows engineers to adjust the process parameters (binder force, lubrication, or die clearance).
| Defect Type | Description | Root Causes |
|---|---|---|
| Splits / Cracks | Material failure where the metal has thinned beyond its tensile limit. | Excessive binder force, poor lubrication, or material with low ductility. |
| Wrinkles | Wavy folds of excess material, typically in flange areas. | Insufficient binder force allowing material to flow too freely; uneven die gap. |
| Springback | Geometric deviation where the part shape distorts after removal from the die. | Elastic recovery of the metal, particularly in high-strength steels and aluminum. |
| Burrs | Sharp, raised edges along trim lines or punched holes. | Dull cutting tools or excessive clearance between the punch and die. |
| Surface Pits | Small depressions on the surface (orange peel effect). | Dirt/debris in the die, improper steel grain structure, or trapped lubrication. |
Process Control Systems: The Prevention Strategy
World-class automotive manufacturing shifts the focus from detecting defects to preventing them. This requires a systems-level approach rooted in data and rigorous standards.
Statistical Process Control (SPC) and FMEA
SPC uses real-time data from sensors (measuring tonnage, slide position, etc.) to monitor process stability. If a trend line drifts toward a control limit, operators can adjust the press before a bad part is ever stamped. Similarly, FMEA (Failure Mode and Effects Analysis) is conducted before production begins to identify potential failure points—such as a punch likely to break or a lube line prone to clogging—and engineer them out of the process.
Standardization and Partner Selection
Adherence to global standards like IATF 16949 is the baseline for automotive suppliers. This certification governs everything from raw material verification (tensile and hardness testing) to "Advanced Product Quality Planning" (APQP).
When selecting a manufacturing partner, look for capabilities that span the full lifecycle. For instance, Shaoyi Metal Technology leverages IATF 16949-certified precision to bridge the gap from rapid prototyping to mass production. Their ability to handle press capacities up to 600 tons ensures that the same rigorous quality controls applied to a 50-piece prototype run are scalable to millions of mass-produced control arms or subframes.
Conclusion
Automotive stamping quality control is not a single step but a comprehensive ecosystem. It merges the artisan skill of manual "stoning" for surface aesthetics with the digital precision of laser metrology for dimensional accuracy. By integrating these inspection methods with robust process controls like SPC and partnering with certified manufacturers, automotive brands ensure that every panel not only meets the eye with a flawless finish but also fits the chassis with micron-level precision.
FAQ
1. What are the main methods for inspecting Class A surfaces?
Class A surfaces are primarily inspected using manual tactile and visual methods. Touch inspection with cotton gloves detects subtle highs and lows, while whetstone grinding (stoning) and oil highlighting visually reveal microscopic ripples, pits, and geometric inconsistencies that affect the paint finish.
2. How does a CMM differ from 3D laser scanning in stamping QC?
A CMM (Coordinate Measuring Machine) uses a physical probe to touch specific points for high-precision verification of tolerances, making it ideal for final audit checks. 3D laser scanning is a non-contact method that captures the entire surface geometry as a "point cloud," allowing for rapid heat-mapping of deviations and analysis of complex shapes like springback.
3. What are the 7 common steps in the metal stamping process?
While variations exist, the typical sequence involves: 1) Feeding the strip material, 2) Blanking or piercing to create the initial shape, 3) Drawing or forming to add depth, 4) Trimming excess metal, 5) Piercing secondary holes, 6) Restriking or sizing for final tolerance, and 7) Output/Inspection where the part is ejected and checked.