 Small batches, high standards. Our rapid prototyping service makes validation faster and easier —

Automotive Replacement Parts Online: Avoid Misfits, Save Money

What Automotive Replacement Parts Really Mean
Ever wondered why finding the right part for your car can be so confusing? When you’re faced with choices like brake pads, a serpentine belt, or a tpms sensor, it’s easy to feel overwhelmed. The world of automotive replacement parts is broad, but with a clear understanding of what’s included—and where to look—you can shop with confidence and avoid costly misfits.
What Automotive Replacement Parts Include
Automotive replacement parts refer to any component installed after your vehicle leaves the factory. These range from routine maintenance items to complex assemblies and electronics. Here’s how they break down:
- Maintenance items: Filters, fluids (like coolant), spark plugs, and belts
- Wear components: Brake rotors, pads, wheel bearings, bushings, and shock absorbers
- Crash/body parts: Bumpers, fenders, mirrors, and lighting assemblies
- Electrical sensors and modules: TPMS sensor, mass air flow sensor, throttle body, ignition modules
- Powertrain assemblies: Engine, transmission, valve cover gasket, and related gaskets
Major Categories by System
Grouping parts by system helps you quickly identify what you might need. Imagine you hear a squeal when braking or spot a coolant leak—knowing which system to check narrows down your search. Here are common systems and their typical replacement parts:
- Brakes: Pads, brake rotors, calipers, brake lines
- Suspension: Struts, control arms, wheel bearing, bushings
- Cooling: Radiator, water pump, hoses, coolant, thermostat
- Ignition: Spark plugs, ignition coils, spark plug wires
- Emissions: Oxygen sensors, EGR valve, catalytic converter, valve cover gasket
| System | Critical Parts | Service Triggers |
|---|---|---|
| Brakes | Brake pads, brake rotors, calipers | Noises, vibrations, reduced stopping power |
| Suspension | Wheel bearing, control arm, bushings | Clunks, uneven tire wear, loose steering |
| Cooling | Radiator, water pump, coolant hoses | Overheating, leaks, low coolant |
| Ignition | Spark plugs, ignition coils, throttle body | Hard starting, misfires, poor fuel economy |
| Emissions | O2 sensor, valve cover gasket, EGR valve | Check engine light, failed emissions test |
Quality, Availability, and Sourcing Overview
So, where do you find these parts—and how do you know they’ll fit? Most buyers source automotive replacement parts from:
- OEM dealer counters: For exact-fit, factory-original components
- Reputable online marketplaces: For convenience and broad selection (always check fitment tools and return policies)
- Specialty suppliers: For hard-to-find or performance parts
To minimize risk, always verify fitment using your vehicle’s VIN and cross-check part numbers in official manufacturer parts catalogs. For torque specs and installation details, consult your OEM service manual. If you’re evaluating design or safety, SAE technical papers provide insight into engineering standards. And before buying, search NHTSA recall bulletins to make sure your part isn’t subject to a known defect.
Correct fitment and documented quality beat bargain pricing when the repair is safety-critical.
As you continue through this guide, you’ll see how balancing availability, cost, and longevity is key to making smart choices—whether you’re replacing a serpentine belt, a throttle body, or a valve cover gasket. Understanding these basics will help you avoid common pitfalls, especially when dealing with safety or emissions-related parts.
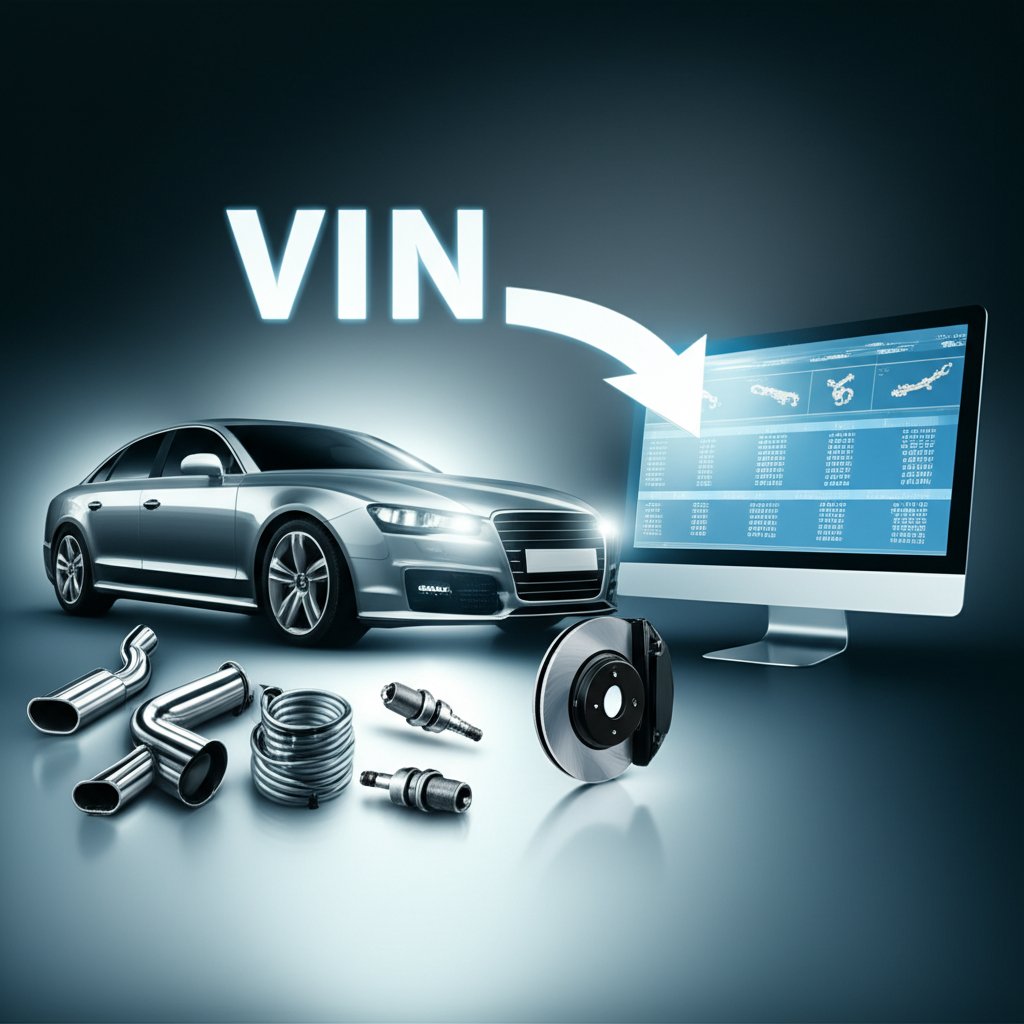
Verify Fitment With VIN And Part Numbers
Ever ordered a replacement part that looked right—only to discover it didn’t fit? You’re not alone. With so many models, mid-year updates, and trim variations, even seasoned DIYers can get tripped up. The good news: you can sidestep these headaches by following a systematic approach that leverages your vehicle’s VIN and precise part numbers. Let’s break down how to use all data at your disposal to ensure a perfect match for your automotive replacement parts.
Use VIN Data to Eliminate Guesswork
Imagine walking into a parts store and being asked, “What’s your VIN?” It’s not a trick question—it’s the fastest way to cut through confusion. Your Vehicle Identification Number (VIN) is a 17-digit code that encodes your car’s make, model, year, engine, and even factory-installed options. When you use a vin number lookup parts tool or find parts with vin online, you’re tapping into all data specific to your vehicle, not just a generic model range.
- Gather the essentials: Locate your full VIN (often on the driver’s door jamb or registration), build date, engine code, and trim level. These details are crucial for narrowing down the right part.
- Look up parts by VIN: Use official OEM catalogs, dealer electronic parts catalogs (EPC), or reputable aftermarket sites that let you look up car parts by vin or find car parts by vin number. This filters out incompatible options right from the start.
Read and Cross-Reference OEM Part Numbers
Once you’ve identified the part, note the original equipment (OE) part number. This number is your golden ticket for matching fit, especially when shopping aftermarket. If your part is discontinued or superseded, an automotive part number cross reference helps you find direct replacements with the same specs and function. Many suppliers display cross-references on product pages or via dedicated search tools—use these to compare all data and avoid costly errors.
| OEM P/N | Supersession | Aftermarket P/N | Notes | Source |
|---|---|---|---|---|
| 12345-ABC | 12345-XYZ | AM-6789 | With tow package | OEM Catalog |
| 67890-DEF | — | AM-4321 | Without ABS | Cross-Reference Tool |
Handle Mid-Year Changes and Supersessions
Sounds complex? It can be. Manufacturers often introduce changes mid-year, and option packages may alter connectors, mounting brackets, or even sensor pin-outs. Here’s how to minimize mistakes:
- Check for mid-year splits: Always confirm your build date—parts can differ even within the same model year.
- Watch for region-specific options: Export models or special trims may require different parts.
- Request exploded diagrams: If you’re unsure, ask the seller for diagrams or photos to compare connector pin counts, belt rib counts, or flange patterns visually.
- Validate before purchase: If the part description mentions notes like “with tow package” or “without ABS,” double-check your vehicle’s equipment list.
Don’t forget: the service manual is your friend for torque specs and installation procedures. If you can’t find exact values, always defer to the official manual or ask a trusted mechanic for guidance.
Order by verified OEM part number whenever possible to reduce returns.
By using all data available—from VIN decoding to cross-referenced part numbers—you’ll dramatically reduce the risk of misfit parts and wasted time. Next, we’ll dive into how to weigh OEM, aftermarket, and remanufactured options for your specific repair needs—so you can match quality to the job, not just the price.
Choosing OEM, Aftermarket, or Remanufactured
When you need automotive replacement parts, your choices can feel overwhelming. Should you stick with OEM, try aftermarket brands, or consider remanufactured? The answer depends on your priorities—cost, performance, warranty, and the job at hand. Let’s break down the differences, so you can make the smartest call for your next repair, whether it’s a shock absorber, engine air filter, or something more complex.
When OEM Makes Sense
OEM (Original Equipment Manufacturer) parts are made by your vehicle’s manufacturer. They match what came on your car from the factory, ensuring fit and function. If you’re replacing a safety-critical item—like a control arm or brake caliper—or need absolute confidence in a perfect fit, OEM is a smart pick. You’ll typically find:
- Consistent quality designed for your specific model
- Standard warranty (often one year, according to Edmunds)
- Reliable fitment—no guesswork with sensor connectors or mounting points
- Higher cost compared to other options
- Best for safety systems, emissions, and warranty repairs
Imagine you’re replacing a shock absorber on a modern SUV. An OEM part will match the original ride quality and handling, and you’ll have clear installation instructions and warranty support if something goes wrong.
Aftermarket Value and Performance Tiers
Aftermarket parts are built by companies other than your car’s manufacturer. They range from basic replacements to high-performance upgrades like fox shocks or powerstop brakes. Here’s what you’ll notice:
- Broader price range—from value-tier to premium brands
- Quality varies—some brands rival or exceed OEM, others may not last as long
- Availability is excellent—find parts at local stores or online
- Warranty coverage may be short or absent for budget options
- Ideal for routine items like engine air filter, k&n air filter, or wix filters—where performance upgrades are available
For example, if you’re looking to upgrade to bilstein shocks for improved handling or want a washable k&n air filter for your daily driver, the aftermarket provides a range of choices. But with so many brands, how do you know what’s trustworthy?
- Check for brand reputation and user reviews
- Look for certifications (ISO, SAE, or manufacturer-specific)
- Inspect packaging integrity and included installation instructions
- Ask about published test methods for things like filter efficiency or rotor metallurgy
Cross-referencing OEM part numbers helps you find premium aftermarket equivalents, especially when you want to compare performance features—such as brake friction formulas in powerstop brakes or the shock valving in fox shocks.
Remanufactured Parts and Core Returns
Remanufactured parts are used OEM components that are disassembled, cleaned, inspected, and rebuilt to meet original specs. They’re a good option for expensive assemblies like alternators or complex modules. Here’s the breakdown:
- Quality often close to new, but check the rebuilder’s reputation (Helfman Ford)
- Standard or limited warranty, depending on the supplier
- Core return required—you send back your old part for a rebate
- Good for large, costly items where new OEM is out of budget
| Part Type | Quality Consistency | Warranty Norm | Availability | Typical Applications |
|---|---|---|---|---|
| OEM | High | Standard (often 1 year) | Dealers, select online | Safety systems, sensors, emissions, warranty work |
| Value-Tier Aftermarket | Variable | Short/none | Widespread | Basic maintenance (filters, bulbs, pads) |
| Premium Aftermarket | Medium to High | Standard/extended | Specialty retailers, online | Performance upgrades (fox shocks, powerstop brakes), enhanced durability |
| Remanufactured | Medium | Standard/limited | Major chains, online | Alternators, starters, complex assemblies |
Match part tier to the job—safety‑critical or diagnostic‑sensitive components benefit from OEM or trusted premium brands.
Choosing between OEM, aftermarket, and remanufactured parts for your automotive replacement parts isn’t just about price. It’s about balancing your repair’s importance, your budget, and the confidence you need in your vehicle’s performance. In the next section, we’ll show you how to connect symptoms to the right parts, so you can avoid unnecessary replacements—and make every repair count.
Symptom To Part Diagnostic Playbooks
Ever been frustrated by a check engine light or a car that just won’t start? Instead of guessing—and risking wasted money on unnecessary automotive replacement parts—use a structured approach to connect symptoms to likely culprits. These playbooks will help you diagnose before you buy, reducing returns and boosting your repair confidence.
No‑Start or Hard‑Start Checklist
When your vehicle won’t fire up, it’s tempting to blame the battery or starter right away. But taking a stepwise approach saves time and money. Here’s how to troubleshoot:
- Check battery voltage and cable connections. Are the terminals clean and tight? If not, clean and retighten. A weak or dead battery is the most common cause (reference).
- Listen for the starter motor. If it’s silent, test for voltage at the starter. If you hear a click but no crank, suspect a failing starter or poor ground.
- Inspect the serpentine belt and alternator. If the belt is loose or broken, or if the alternator isn’t charging, your battery may not recover between starts.
- Test for spark. Remove a spark plug and check for visible spark while cranking. No spark? Inspect the ignition coil, spark plug wires, and related fuses.
- Check fuel delivery. Is there fuel in the tank? Listen for the fuel pump’s priming sound. If absent, check fuel pump relays and fuses. If you suspect a clogged filter, consult your manual for location and replacement steps.
Tip: If you’re still stuck, it may be time for a scan tool to check for stored codes or deeper electrical issues. Always use proper PPE and support stands if working under the vehicle.
Rough Idle and Misfire Flow
Does your engine stumble, idle rough, or flash a check engine light? These symptoms often point to ignition or fuel delivery problems. Let’s break down a proven flow:
- Scan for OBD-II codes. Common codes include p0300 code (random misfire) or p0171 (system too lean).
- For misfires (p0300 code):
- Check spark plug wires and spark plugs for wear or damage.
- Test the ignition coil for proper output.
- Inspect the mass air flow sensor and throttle position sensor for contamination or wiring issues.
- Swap coils or plugs between cylinders to see if the misfire follows the part.
- For lean codes (p0171):
- Inspect for vacuum leaks—listen for hissing or use carb cleaner to detect changes in idle speed.
- Check the mass air flow sensor for dirt or faulty readings.
- Examine fuel pressure and injector operation.
Always confirm grounds and connector integrity before replacing any component. Imagine replacing a throttle position sensor, only to find a loose ground was the real cause—double-check before you buy.
Noise and Vibration Diagnosis
Strange noises or vibrations can signal anything from worn suspension bushings to engine misfires. Here’s a quick decision tree:
- Identify the noise: Is it a clunk, squeal, or hum? Does it change with speed or engine RPM?
- For engine-related noise:
- Check for misfire codes or rough running—see above steps.
- Inspect the serpentine belt, pulleys, and tensioner for wear.
- For vibration at speed:
- Inspect wheel bearings, tires, and suspension parts. Look for uneven wear or excessive play.
- Check engine and transmission mounts for cracks or collapse.
- For brake noises:
- Inspect pads and rotors for scoring or uneven wear.
- Check caliper function and mounting hardware.
Common OBD-II Codes and What They Mean
- p0300 code: Random/multiple cylinder misfire. Check ignition coil, spark plug wires, and fuel injectors.
- p0171: System too lean. Suspect vacuum leaks, mass air flow sensor, or fuel delivery issues.
- p0420 / p0420 code: Catalyst system efficiency below threshold. Inspect for exhaust leaks, failing catalytic converter, or upstream sensor faults.
For a complete list of codes, consult resources like RepairPal’s OBD-II chart or your vehicle’s service manual.
Diagnose, then replace—avoid the parts cannon.
By following structured flows and confirming root causes, you’ll avoid unnecessary purchases of automotive replacement parts. As you move forward, remember to check your OEM service manual for torque specs and installation tips. Next, we’ll walk through step-by-step replacement frameworks for common DIY jobs—so you can tackle repairs with confidence and safety.
Step By Step Replacements Most Owners Can Do
Ever wondered which repairs you can tackle at home—and how to do them right? With the right approach, many automotive replacement parts are well within reach for the careful DIYer. Whether you’re eyeing a cabin air filter replacement, tackling worn brake pads and rotors, or swapping a serpentine belt, the key is clear steps and a safety-first mindset. Let’s break down three of the most common jobs, so you can save money and drive with peace of mind.
Replace a Serpentine Belt Safely
When you hear squealing or see cracks on your belt, it’s time to act. Replacing a serpentine belt is a moderately difficult job—usually doable in a few hours if you have the right tools and patience. Here’s how to approach it:
- Prerequisites: Car parked on level ground, engine cool, parking brake engaged
- Tools: Belt routing diagram (from the owner’s manual), ratchet or breaker bar, belt tensioner tool, gloves, flashlight
- Estimated downtime: 1–3 hours, depending on access
- Mark the belt’s rotation direction for reference.
- Use the tensioner tool to unload the belt tensioner and slip the old belt off the pulleys.
- If replacing, remove the old tensioner and install the new one. Torque mounting bolts in a star pattern, gradually tightening to spec.
- Clean pulley grooves—dirt can cause noise or premature wear.
- Install the new belt, matching the original direction and routing. Load the belt onto the tensioner, ensuring the indicator falls between the marks.
- Double-check alignment and tension before starting the engine.
Tip: Always check your owner’s manual for torque specifications and single-use hardware. Never use belt dressing—clean, dry pulleys are best for belt life.
Service Brake Pads and Rotors Basics
Noticing squealing, grinding, or a soft pedal? It may be time to service your brake pads and rotors. Many owners can do this job with basic tools and careful preparation.
- Prerequisites: Vehicle securely supported on car ramps or jack stands, wheels chocked, parking brake engaged
- Tools: Lug wrench, socket set, C-clamp or brake caliper tool, brake cleaner, torque wrench, gloves, eye protection
- Estimated downtime: 2–3 hours for both front or rear axles
- Loosen lug nuts, raise the vehicle, and secure with car ramps or jack stands.
- Remove the wheel to access the brake calipers.
- Unbolt the caliper and support it to avoid straining the brake hose.
- Slide out old pads and remove the rotor. Clean the hub and rotor surfaces with brake cleaner.
- Compress the caliper piston with a C-clamp or caliper tool.
- Install new pads and rotor, ensuring proper alignment.
- Reinstall the brake calipers, torque all bolts to OEM spec, and replace any single-use hardware.
- Reinstall the wheel, lower the vehicle, and torque lug nuts in a star pattern.
- Pump the brake pedal until firm before driving—this seats the pads and ensures proper braking.
Tip: Always consult your service manual for torque specs and rotor runout tolerances. Keep a record of the service date for future reference.
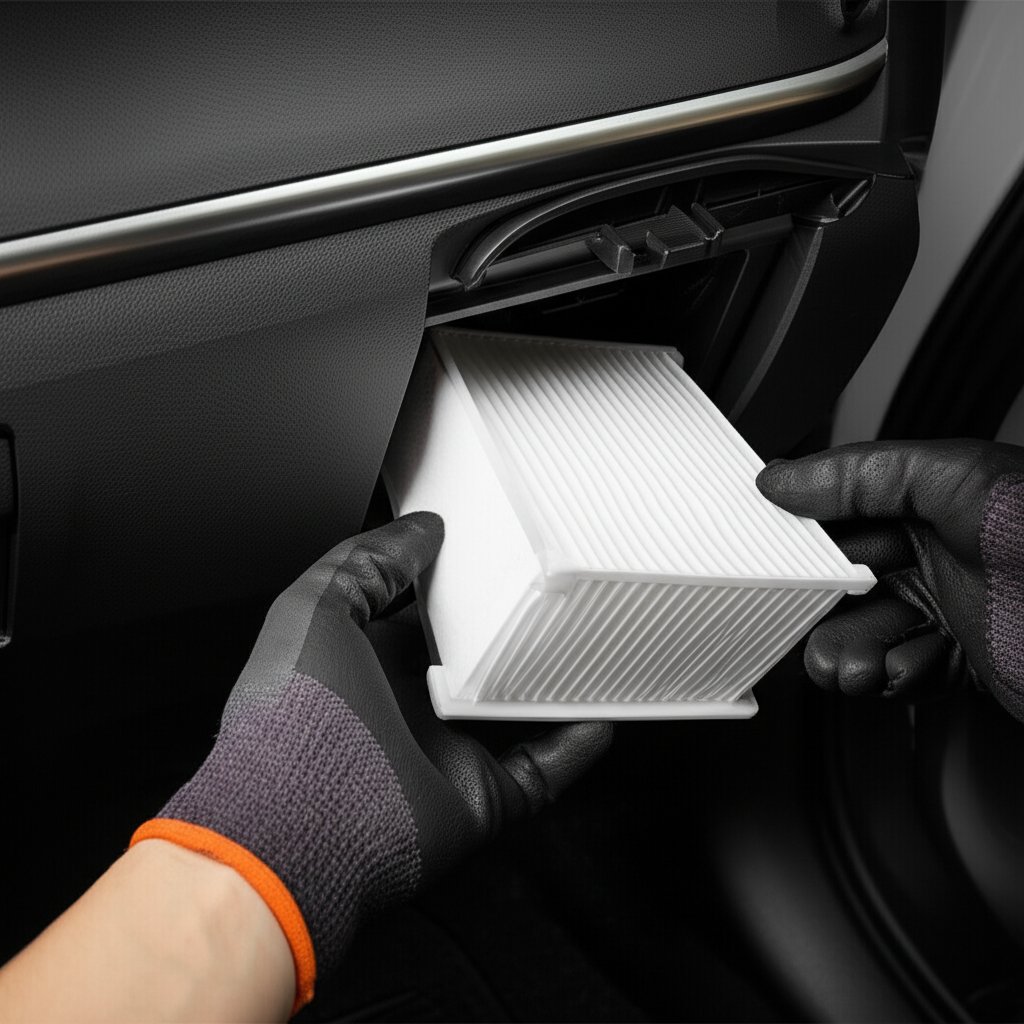
Cabin Air Filter Replacement Steps
If your AC isn’t blowing like it used to, or there’s a musty smell, it could be time for a cabin air filter replacement. This is one of the simplest maintenance jobs—most can be done in under 30 minutes.
- Prerequisites: Car parked on a flat surface, engine off, parking brake set
- Tools: Usually just your hands; some models may require a screwdriver or spark plug socket for access covers
- Estimated downtime: 10–30 minutes
- Open (and if necessary, remove) the glove box to access the cabin air filter housing.
- Carefully slide out the old filter, noting its orientation. Wear gloves and use a mat to catch debris.
- Vacuum the filter housing area if needed.
- Insert the new filter, matching airflow direction arrows.
- Reinstall the glove box and check HVAC airflow for improvement.
For best results, check your owner’s manual for recommended intervals—typically every 15,000 to 30,000 miles.
Warning: Always use jack stands or car ramps—never trust a jack alone. Wear gloves and eye protection when handling brake cleaner or working near moving parts. Pump the brake pedal several times before driving after brake service to restore pressure. If in doubt, consult your OEM manual for torque specs and safety procedures.
With these frameworks, you can tackle core maintenance jobs with confidence. Next, we’ll explore how to handle old fluids, batteries, and emissions components responsibly—so your DIY skills benefit both your wallet and the environment.
Safety Regulations And Responsible Disposal
When you finish a DIY repair, what happens to the old coolant, spent battery, or worn-out oxygen sensor? Handling automotive replacement parts safely isn’t just about keeping your garage tidy—it’s about protecting your health, meeting legal requirements, and reducing environmental impact. Let’s dive into practical steps for safe handling, regulatory compliance, and responsible disposal, so your repairs don’t cause unintended harm.
Safe Handling of Fluids and Batteries
Sounds complex? It’s easier when you know what to watch for. Many automotive replacement parts—especially fluids and batteries—are hazardous if mishandled. Here’s a quick rundown of common materials you’ll encounter:
- Coolant/antifreeze: Essential for engine temperature control but toxic to people, pets, and wildlife. Always handle coolant for car with gloves and avoid spills.
- Motor oil and transmission fluid: Contain metals and chemicals that can contaminate soil and water.
- Brake fluid: Glycol-ether-based and flammable—store away from heat and label containers clearly.
- Batteries (including AGM battery): Contain corrosive acids and heavy metals. Always remove the battery first when dismantling, and avoid cracking the casing.
- Old sensors: Components like the oxygen sensor may contain precious metals or hazardous elements.
To keep yourself safe, always use personal protective equipment (PPE): gloves, safety goggles, and work coveralls. Clean up spills immediately with absorbent materials, and dispose of contaminated rags as hazardous waste. Store all fluids in sealed, labeled containers—never use food or drink bottles, especially for antifreeze or coolant for car, as accidental ingestion is extremely dangerous (NEDT Fact Sheet).
Emissions Components and Compliance
Ever replaced a catalytic converter or oxygen sensor? These parts are tightly regulated due to their impact on air quality and vehicle emissions. It’s not just about the catalytic converter price—it’s about legal and environmental responsibilities. Here’s what you need to know:
- Emissions-related parts: Catalytic converters, oxygen sensors, EGR valves, and related components must be handled and disposed of according to federal and state laws.
- Check for recalls: Review NHTSA bulletins for defect alerts before disposing of or replacing emissions equipment.
- Certification and recycling: Many recyclers offer buy-back programs for catalytic converters due to their precious metal content. Always provide proof of origin to avoid legal issues.
Before installing or discarding any emissions component, consult your local regulations and the manufacturer’s documentation for proper procedures and compatibility. Some states require proof of compliance or specific certifications for replacement parts.
Disposal and Recycling Best Practices
Imagine tossing old fluids or batteries in the trash—sounds easy but can lead to fines, environmental harm, or even injuries. The right approach is simple and responsible:
- Take spent fluids—oil, transmission fluid, antifreeze, and coolant for car—to a community recycling center or a service station that accepts automotive waste.
- Use municipal hazardous waste programs or retailer take-back services for batteries, brake fluid, and sensors.
- Store all hazardous materials in approved containers, away from drains and out of reach of children and pets.
- Never mix fluids together, and never pour them down household drains or on the ground.
- Recycle empty containers if possible; otherwise, dispose of them according to local guidelines.
- Verify battery type—especially with an AGM battery—before charging, transporting, or recycling, as they have unique handling requirements.
For more details, consult the EPA’s Processing End-of-Life Vehicles Guide, which outlines best practices for collection, storage, and disposal of automotive fluids and hazardous components.
Improper disposal of automotive fluids and components can violate local regulations and harm the environment. Always use municipal hazardous waste programs or retailer take-back services for safe disposal.
By following these guidelines, you’ll not only protect yourself and your community but also support a cleaner environment. Up next, we’ll show you how to evaluate the total cost of ownership and warranty strategies for your next automotive replacement parts purchase—so you can make decisions that are smart for your wallet and the planet.
Cost Of Ownership And Warranty Strategy
Ever replaced a part only to have it fail long before you expected—or been surprised by a repair bill that didn’t end with the part itself? When it comes to automotive replacement parts, the real cost goes far beyond the price tag on the box. Imagine you’re facing a major job, like a timing belt replacement or a control arm swap. How do you weigh upfront price, expected lifespan, and warranty coverage to make the right decision for your car and your wallet?
Balancing Upfront Price and Longevity
Let’s say you’re comparing the timing belt replacement cost, alternator cost, or even a wheel bearing replacement cost. The cheapest option might save you money today, but what about tomorrow? Consider this: according to Consumer Reports, maintenance and repair costs can skyrocket after warranty periods end, especially for parts that require labor-intensive replacement like a timing belt or head gasket. If you opt for a low-cost, value-tier aftermarket part, you may be facing repeat labor charges if the part fails early. For high-labor jobs—like a control arm or brake rotor replacement—choosing a longer-lasting part can pay off in fewer headaches and lower total cost over time.
| Part Category | Initial Cost | Expected Lifespan | Warranty Depth | Hassle Factors |
|---|---|---|---|---|
| OEM | High | Longest (matches original) | Standard (often 1 year) | Easy returns, direct fit |
| Premium Aftermarket | Medium to High | Long (varies by brand) | Standard/extended | May require more research for fitment |
| Value Aftermarket | Low | Short to Medium | Short/limited or none | Higher risk of early failure, fitment issues |
| Remanufactured | Medium | Medium (depends on rebuilder) | Limited/standard | Core charge, return process |
For instance, the timing belt replacement cost can seem steep, but a failed timing belt in an interference engine can lead to catastrophic engine damage and a much higher head gasket repair cost or worse. That’s why many experts recommend not skimping on critical, labor-intensive components.
Warranty Terms That Actually Matter
Not all warranties are created equal. Some may cover only the part, while others include labor if the part fails early on. Before you buy, ask these questions:
- What is the warranty length, and are there any exclusions?
- Does the warranty cover labor costs if the part fails?
- What are the return conditions—can you return the part after installation?
- Is the warranty handled locally or do you have to ship the part back?
Imagine you’ve just replaced a control arm, only to have it start clunking a few months later. If you chose a part with a strong warranty and clear return process, you’re covered. If not, you could be out for both the part and another round of labor.
Service Intervals and Preventive Replacement
When planning your maintenance, always consult your owner’s manual or a trusted service guide for recommended intervals. For example, timing belt replacement intervals can range from 30,000 to 120,000 miles depending on your engine (Family Handyman). Replacing related components—like the water pump, tensioners, and seals—during a timing belt job can save on future labor costs. Similarly, if you’re doing a brake rotor replacement, consider new pads and hardware for the best result.
- Does the part come as a kit (e.g., timing belt kit) to cover all wear points?
- Are there recommended upgrades for longevity, such as premium bushings in a control arm?
- Is the part compatible with your vehicle’s specific service schedule?
For high-impact repairs—like alternator cost or wheel bearing replacement cost—choosing parts that align with your vehicle’s recommended service intervals and warranty coverage can prevent surprise expenses down the road.
The least expensive part can become costlier if lifespan is short or downtime is high.
By thinking beyond the sticker price and considering total cost of ownership, you’ll make smarter decisions for your vehicle’s reliability and your budget. Up next, we’ll help you evaluate and select suppliers to ensure you get the right part, with the support and quality you expect.

How to Vet and Compare Your Parts Sources
Ever wondered why some buyers get the right part the first time, while others end up with costly returns or mismatched components? The difference often comes down to where—and how—you source your automotive replacement parts. With so many options, from amazon auto parts and walmart auto parts to specialized metal fabricators and OEM counters, making the right choice can be daunting. Let’s break down what to look for in a supplier, how to check quality, and how to compare your options—so you can order with confidence, whether you’re after a rare bracket, exhaust clamps, or a full custom assembly.
Quality and Provenance Checks
Imagine you’ve found the exact part you need—how do you know it’s the real deal? Quality and provenance are more than buzzwords; they’re your assurance that a part will fit, last, and keep your vehicle safe. Here’s what to check before you buy:
- OEM part number confirmation: Always request the original part number to verify compatibility.
- Build date compatibility: Confirm the part matches your vehicle’s specific build date or production window.
- Certification transparency: Ask for proof of certifications—such as IATF 16949:2016 for metal parts.
- Test methods and quality documentation: Inquire about how the part was tested and if results are available.
- Warranty PDF: Request written warranty terms before purchase.
Reputable suppliers should provide clear answers and documentation up front. If you’re sourcing engineered metal parts—like custom brackets or exhaust clamps—look for single-roof operations with recognized certifications, as these signal rigorous quality control and easier project management.
How to Vet Sellers and Avoid Returns
Sounds simple? It can be, if you know what to ask. Here’s a quick checklist to help you avoid the most common pitfalls:
- Can the seller confirm fitment using your VIN or OEM part number?
- Are there customer reviews or third-party references for the supplier?
- Does the supplier offer clear return and exchange policies?
- Is there responsive customer support for installation or troubleshooting questions?
- For custom or engineered parts, do they provide after-sales engineering help or rapid quoting?
According to industry advice, suppliers with an intuitive e-commerce interface, transparent pricing, and a proven track record are more likely to deliver reliable service and minimize downtime.
Choosing Marketplaces Versus Specialized Partners
Let’s compare your main channels for automotive replacement parts—so you can see which fits your needs best, whether you’re browsing ebay parts and accessories or considering a custom metal solution.
| Supplier Type | Fitment Support | Certification Transparency | Lead Time | Customization Ability | After-Sales Engineering Help |
|---|---|---|---|---|---|
| Custom Automotive Metal Parts (Shaoyi) | VIN/OEM-based, engineering review | IATF 16949:2016, full documentation | Rapid (24-hour quotes, project-based) | High (design to mass production, stamping, CNC, welding, forging) | Yes (engineering consultation, project management) |
| OEM Dealer Parts Counter | VIN/OEM lookup, direct fit | OEM certification, factory warranty | Moderate (in stock or order-in) | Low (only original designs) | Limited (installation advice) |
| Major Marketplaces (Amazon, eBay, Walmart, etc.) | Model/year filters, user reviews | Varies (brand-dependent, often unclear) | Fast (1–5 days, depends on seller location) | Low (mostly catalog parts, some custom via third-party) | Minimal (email support, community forums) |
For example, if you need a standard replacement for a volvo parts online or toyota parts online order, marketplaces like Amazon and eBay offer convenience and broad selection. Their fitment tools—like My Garage on ebay parts and accessories—help reduce guesswork, but support for complex or custom needs is limited.
Specialty partners, such as Shaoyi, excel when you require precision-engineered or certified metal parts, rapid quoting, or design support—ideal for unique builds, obsolete items, or when you need to guarantee compliance and traceability.
For critical repairs or custom metal needs, prioritize suppliers who offer documented quality, fitment verification, and engineering support—these factors often outweigh minor price differences in the long run.
By asking the right questions and comparing your options side-by-side, you’ll be able to source automotive replacement parts—whether it’s a simple filter from nissan parts online, a specialty bracket, or a set of exhaust clamps—with confidence and clarity. Next, we’ll wrap up with a practical checklist and guidance on when custom manufacturing is the smart path forward.
Final Checklist and When to Go Custom
Ready to order your next automotive replacement part? Before you click “buy,” let’s make sure you’re set up for success—especially if your project involves unique challenges like a custom u joint, a rare transfer case bracket, or a one-off exhaust manifold. Here’s a simple, actionable wrap-up so you can avoid misfits, maximize value, and know exactly when custom metal manufacturing is worth your investment.
Final Pre‑Purchase Checklist
Sounds like a lot to juggle? It’s easier when you break it down step by step. Here’s a practical checklist to follow for every parts purchase—so you get the right fit, every time:
- Confirm by VIN and OEM number: Always start with your vehicle’s VIN and the original part number for precise matching—especially for critical items like a drive shaft or intake manifold.
- Cross-reference alternatives: Use cross-reference tools to compare OEM and aftermarket numbers, and watch for mid-year changes or supersessions.
- Inspect quality signals: Check for certifications, brand reputation, and clear documentation. For metal parts (like a u joint), look for IATF 16949:2016 or similar standards.
- Align warranty with usage: Review warranty terms and make sure they match your expectations for coverage and longevity—especially for labor-intensive jobs.
- Plan installation with OEM torque specs: Gather all data for installation, including torque sequences and any single-use hardware recommendations from the service manual.
When to Choose Custom Metal Components
Imagine you need a part that just doesn’t exist off the shelf, or your project demands a level of precision or strength standard options can’t deliver. That’s where custom metal components shine. Here are scenarios where going custom is the smart move:
- Low-volume or obsolete parts: When the original supplier has discontinued a bracket, u joint, or intake manifold, custom manufacturing fills the gap.
- Strength or durability upgrades: For demanding applications—like racing, heavy-duty towing, or high-torque drive shaft assemblies—custom parts let you optimize materials and design for your exact needs.
- Geometry or fitment challenges: If you’ve modified your transfer case, swapped engines, or altered the exhaust manifold routing, standard parts may no longer fit. Custom fabrication ensures perfect integration.
- Integrated or multi-function parts: When you need a component that combines several functions—say, a bracket that supports both the exhaust and the transmission—custom is often the only option.
For these projects, working with a partner like Shaoyi offers several advantages: certified processes (IATF 16949:2016), rapid 24-hour quotes, and true single-roof production from design to finished part. This is especially valuable for complex items like custom u joint assemblies or drive shaft modifications, where precision and traceability are critical.
Documentation and Follow‑Through
Even after the part arrives, your job isn’t quite done. Here’s how to ensure long-term success:
- Save all documentation: Keep your purchase receipts, warranty PDFs, and installation instructions for future reference or claims.
- Record installation details: Note the date, mileage, and any special steps or torque values used—especially for parts like a transfer case or exhaust manifold.
- Test fit and function: Before final assembly, compare the new part to the old, check mounting points, and perform a dry run if possible.
- Schedule preventive checks: Set reminders to inspect high-wear items (like a u joint or drive shaft) at regular intervals, especially in demanding applications.
Right part, proven process, documented fit—then install.
By following this checklist and knowing when to go custom, you’ll sidestep common pitfalls and ensure every replacement—whether it’s a standard bracket, a specialty intake manifold, or a one-off u joint—delivers the fit, function, and reliability your project deserves. With the right approach, you can confidently tackle even the most complex automotive replacement parts needs—saving money, time, and frustration for the road ahead.
Frequently Asked Questions About Automotive Replacement Parts
1. What are automotive replacement parts and why are they important?
Automotive replacement parts are components installed after a vehicle leaves the factory, including maintenance items, wear components, crash parts, electrical sensors, and powertrain assemblies. Using the correct replacement parts ensures your vehicle's safety, reliability, and compliance with legal and warranty requirements.
2. How can I be sure a replacement part will fit my vehicle?
To guarantee fitment, always use your vehicle's VIN and refer to OEM part numbers. Cross-reference with aftermarket catalogs and verify details like connectors, build date, and options. Request diagrams or photos from sellers if needed, and consult the OEM service manual for installation specifics.
3. What is the difference between OEM, aftermarket, and remanufactured parts?
OEM parts are made by your vehicle’s manufacturer and offer guaranteed fit and quality. Aftermarket parts come from third-party manufacturers; quality varies and can include performance upgrades. Remanufactured parts are used components rebuilt to meet original specs, often at a lower cost but may require core returns.
4. When should I consider custom automotive metal parts for my project?
Choose custom metal parts when you need obsolete components, require strength upgrades, or have unique fitment needs due to modifications. Certified partners like Shaoyi offer precision-engineered, IATF 16949:2016-certified solutions with rapid quoting and single-roof production for specialized requirements.
5. What are the best practices for disposing of old automotive parts and fluids?
Dispose of hazardous materials like coolant, oil, batteries, and sensors through municipal hazardous waste programs or retailer take-back services. Always use proper PPE, store fluids in labeled containers, and never pour them down drains. Check local regulations and manufacturer guidance for compliance.