 Small batches, high standards. Our rapid prototyping service makes validation faster and easier —

Aftermarket Automotive Parts: Buy Online, Verify Fit, Skip Returns
Understanding the Aftermarket Landscape
What aftermarket automotive parts really mean
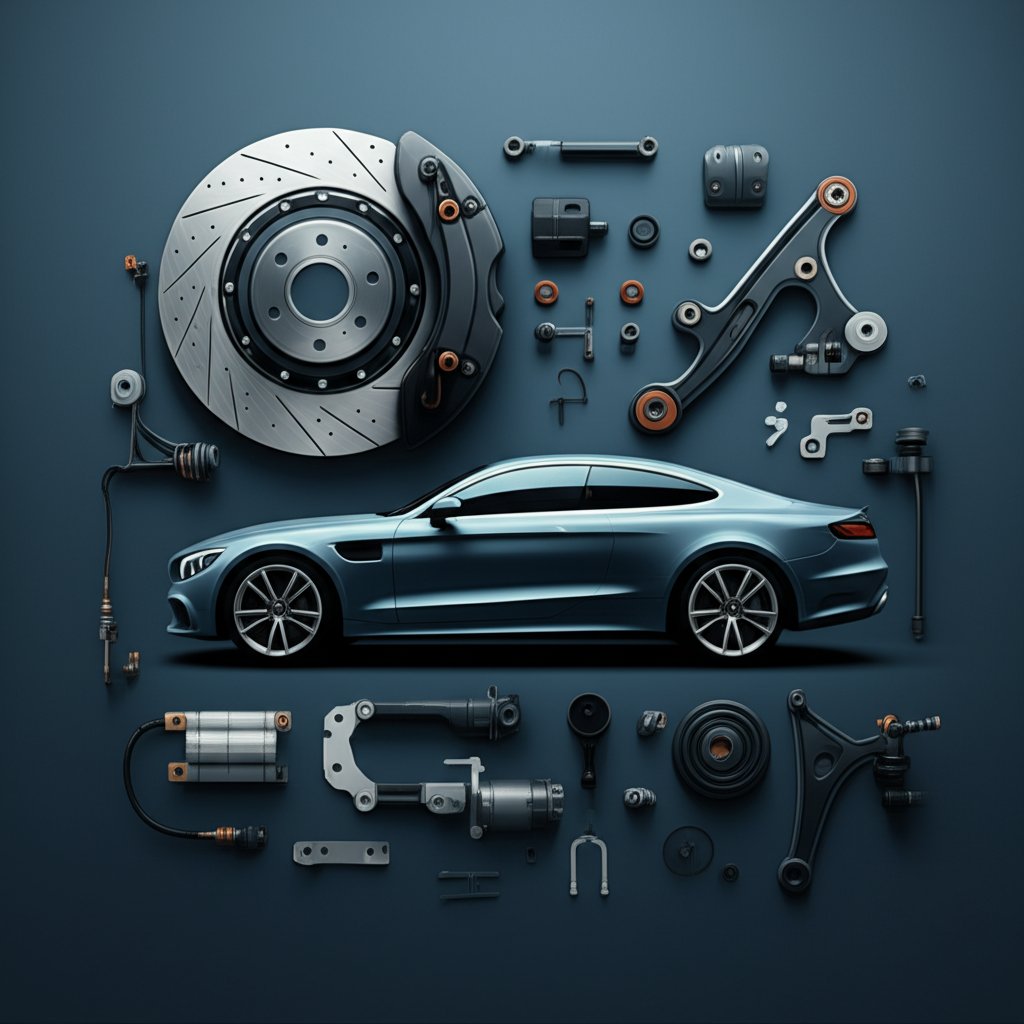
Ever wondered what happens when your car needs a new part, but you want to save money or try something different from the original? That’s where aftermarket automotive parts come into play. In simple terms, aftermarket parts are components made by companies other than your vehicle’s original manufacturer. They’re designed to fit and function like the originals, but they aren’t branded or sold by the automaker itself. If you’ve ever searched for what is an aftermarket car part, you’ll notice the options are vast—ranging from budget-friendly replacements to high-performance upgrades.
These parts matter because they give you choices. Whether you’re tackling routine maintenance, a critical repair, or planning aftermarket modifications for better performance or style, aftermarket parts can help you control costs, access a wider selection, and sometimes even improve on factory specs. But, as with any decision about your car, it’s important to understand the differences and potential pitfalls before you buy.
Benefits and tradeoffs buyers should weigh
Why do so many drivers opt for aftermarket automotive parts instead of sticking to OEM (Original Equipment Manufacturer) replacements? Here are some reasons:
- Cost savings: Aftermarket parts are often 20-50% less expensive than their OEM counterparts, making them ideal for older vehicles or budget repairs.
- Availability: You can find aftermarket parts at local stores and online retailers, often with more inventory and faster shipping than dealerships.
- Customization: Looking to enhance performance, style, or utility? Many aftermarket modifications—like upgraded brake pads, filters, or exhausts—offer features and designs not available from the factory.
However, there are tradeoffs to consider:
- Quality varies: Not all aftermarket brands are created equal. Some exceed OEM standards, while others cut corners with cheaper materials or poor fitment.
- Compatibility issues: Even small differences in wiring, mounting points, or dimensions can cause headaches if you don’t verify fitment. Universal parts often lead to installation challenges.
- Warranty and support: OEM parts usually come with a manufacturer-backed warranty. Aftermarket warranties and return policies can vary widely, so always check before you buy.
Smart buyers weigh price, warranty, and expected longevity together. Saving money upfront with an aftermarket part is great—unless it fails early or doesn’t fit, costing you more in the long run.
Quick glossary to decode parts jargon
Shopping for car parts can feel like learning a new language. Here’s a quick-reference glossary to help you navigate key terms and avoid confusion:
- OEM (Original Equipment Manufacturer): Parts made by your vehicle’s maker or its contracted suppliers; guaranteed to match factory specs.
- Aftermarket: Parts made by third-party companies, designed to fit and function like OEM but with different branding and sometimes unique features.
- Remanufactured: Used parts that have been professionally rebuilt to meet or exceed original standards. Often used for engines, transmissions, and alternators.
- CAPA (Certified Automotive Parts Association): Certification for aftermarket collision parts, ensuring quality and fit.
- Core charge: A refundable deposit when buying remanufactured auto parts—returned when you give back your old part.
- Fitment: How well a part matches your vehicle’s specific make, model, year, engine, and trim. Always check fitment before buying.
- Car parts cross reference: Tools or numbers used to match equivalent parts across different brands or catalogs.
Common pitfalls when buying aftermarket automotive parts
- Choosing the lowest price over proven quality—cheap parts may use substandard materials and wear out quickly.
- Skipping fitment verification—assuming a part will fit just because it looks similar can lead to returns or installation headaches.
- Ignoring the retailer’s return and warranty policies—some sellers offer little support if the part fails or doesn’t fit.
- Overlooking the impact of aftermarket modifications on your car’s balance and safety—upgrades should be planned, not piecemeal.
Imagine buying a new headlight that doesn’t fit your car, or a performance chip that causes other components to fail. Sounds frustrating? That’s why research, fitment checks, and brand reputation matter as much as price when shopping for aftermarket parts.
Ready to dive deeper? In the next sections, you’ll learn how to compare OEM, aftermarket, and remanufactured options, budget for total cost of ownership, verify fitment like a pro, use installation templates, troubleshoot common issues, and compare online sellers. By the end, you’ll be equipped to make smarter choices and avoid costly returns.
OEM, Aftermarket, and Remanufactured Parts
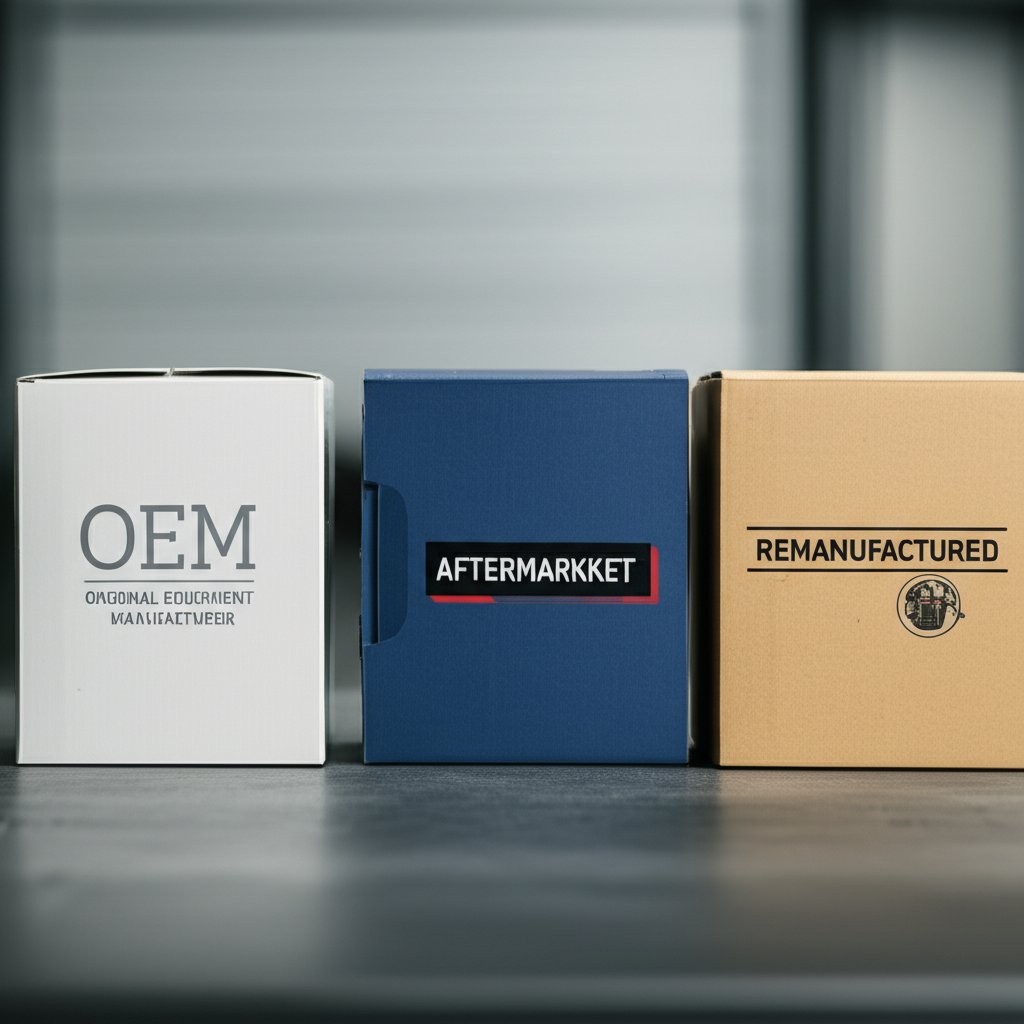
OEM versus aftermarket versus remanufactured explained
When you need to replace a part on your car, you’re faced with three main choices: OEM, aftermarket, or remanufactured. Sounds complex? Let’s break it down so you can make the best decision for your needs and budget.
| Part Type | Typical Cost Range | Availability | Warranty Terms | Material/Finish | Expected Lifespan | Key Fitment Notes |
|---|---|---|---|---|---|---|
| OEM (Original Equipment Manufacturer) | Highest | Dealerships, some online | 12+ months, often longer | Matches factory spec | Consistent, as designed | Guaranteed fit and function |
| Aftermarket | Low to high (varies by brand) | Widely available (stores, online) | 90 days to lifetime (brand dependent) | Varies—basic to premium | Ranges from short to long (brand dependent) | May require careful fitment checks |
| Remanufactured | Mid-range | Moderate (especially for hard-to-find items) | 12–36 months, sometimes lifetime | Restored to OE specs with new components | Good if rebuilt properly | Core required, not always for all parts |
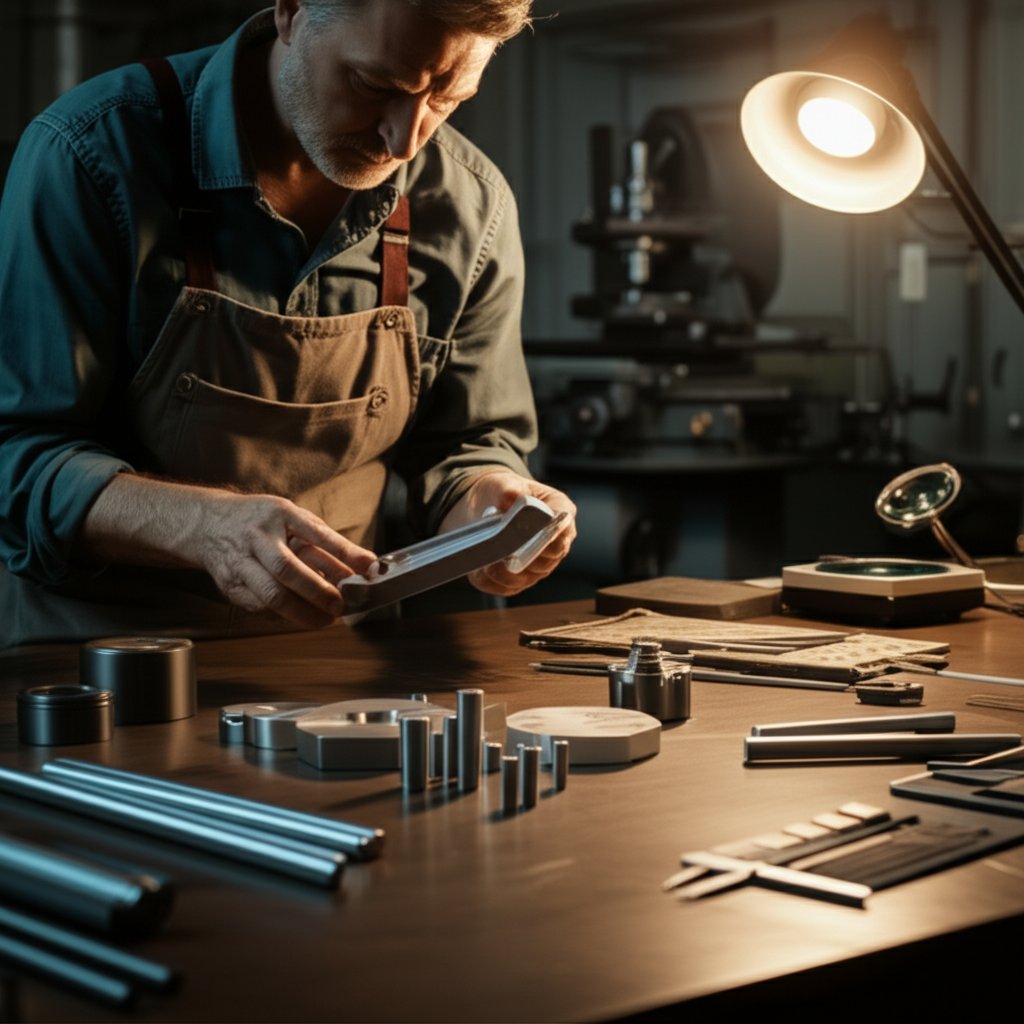
How to judge part quality without lab data
Imagine you’re standing in an auto parts store, staring at shelves lined with boxes from dozens of auto parts brands. How do you tell which is the best aftermarket auto part for your car?
- Check the brand reputation: Well-known aftermarket car brands often invest in better materials, tighter tolerances, and more thorough testing. Look for brands recommended by your mechanic or with consistently positive reviews.
- Inspect packaging and documentation: Quality parts usually come with professional packaging, clear fitment guides, and warranty information. Poorly packaged parts or those lacking documentation may be risky.
- Look for certifications: For collision parts, CAPA certification means the part meets strict standards for fit and finish. For electrical or engine components, look for ISO or OE-equivalent certifications.
- Evaluate material and finish: Premium aftermarket parts may use upgraded materials (e.g., heat-treated steel, anti-corrosion coatings) or improved designs. Economy parts may cut corners with cheaper plastics or loose tolerances.
- Warranty length and support: Longer warranties (12 months or more) are a sign of confidence. Some premium aftermarket brands offer lifetime warranties on certain components.
For oe car parts or remanufactured components, always verify the seller’s process—proper remanufacturing involves full disassembly, replacement of wear items, and rigorous testing (Rohnert Park Transmission).
When to choose each option
- OEM: Ideal for vehicles under warranty, critical safety systems, or when you want guaranteed fit and resale value. Think airbags, sensors, or when insurance requires factory parts for collision repairs.
- Aftermarket: Great for routine maintenance, out-of-warranty vehicles, or when you want to explore aftermarket modifications for performance or aesthetics. Just be selective—choose the best aftermarket auto parts by researching brands and checking for certifications.
- Remanufactured: Smart for expensive or hard-to-find assemblies like alternators, starters, or transmissions, especially on older vehicles. Avoid for safety-critical items or where rubber and electronics are involved.
Still unsure? Here are key decision factors to consider:
- Is the part safety-critical or cosmetic?
- Are you aiming for daily-driver reliability or enhanced performance?
- Do insurance requirements specify OEM for collision repairs?
- Will labor costs make a short-lived part more expensive in the long run?
- Is the car under warranty, or is resale value a concern?
"All aftermarket parts are not created equal, but all OEM parts are." Stick with reputable brands and match your choice to your goals—whether it’s saving money, boosting performance, or ensuring peace of mind (Edmunds).
Understanding these differences helps you confidently select the right part for your situation. Next, we’ll explore how total cost of ownership and warranty impact your decision, especially for high-wear items and labor-intensive repairs.
Lifecycle and Cost of Ownership
How to budget for replacement cycles
Ever feel unsure when to replace key parts on your vehicle—or how much you’ll actually spend over time? Let’s break down the real-world intervals, costs, and what drives those numbers for common service items and safety-critical components. This way, you can plan ahead and avoid unwelcome surprises when it comes to timing belt replacement cost, alternator replacement cost, or even the price of brake pads and rotors.
- Timing Belt: Most timing belts should be replaced every 60,000–100,000 miles, depending on your manufacturer’s recommendation (AutoNation Mobile Service). Waiting too long can lead to catastrophic engine damage, especially in interference engines. The timing belt replacement cost typically ranges from $400 to $1,100, heavily influenced by labor.
- Alternator: Expect your alternator to last about 7 years, or 80,000–150,000 miles. The alternator cost for replacement varies by vehicle, but labor can be a major factor—especially for models where access is limited.
- Brake Pads and Rotors: Brake pads generally last 20,000–80,000 miles, averaging around 40,000 miles, while rotors can last longer but are often replaced together for safety and performance (Arvu Auto). The brake pad replacement cost is typically lower than rotors, but always factor in labor and the importance of using quality parts for reliable stopping power.
- Wheel Bearings: These can last 100,000 miles or more but may fail sooner due to rough roads or moisture. The wheel bearing replacement cost can rise quickly if the job requires disassembling hubs or suspension components.
When paying more up front actually saves money
It’s tempting to choose the lowest-priced part, but sometimes spending a bit more now means saving a lot later. Imagine replacing a timing belt or alternator with a bargain component, only to pay for labor twice if it fails early. Labor and downtime often outweigh small savings on parts—especially for jobs that require significant disassembly.
Prioritize higher-quality parts for labor-intensive jobs. Saving $50 on a timing belt or alternator isn’t worth it if you risk a repeat repair and double labor costs.
Warranty and labor impacts on total cost
Did you know that some warranties cover both the part and the labor, while others only cover the part itself? Always check the details. For example, a longer warranty can be a smart investment for parts like alternators, where labor can be expensive. Extended warranties may also cover labor, but terms vary widely—read the fine print to avoid surprises.
- Part material and coating: Higher-grade materials and anti-corrosion coatings often last longer, especially for brake pads and rotors or wheel bearings.
- Brand reputation: Trusted brands usually offer better support and fewer defects, which is crucial for safety-critical items.
- Warranty claim process: A hassle-free warranty can save you time and money if a part fails early.
- Special tools or reprogramming: Some jobs require extra tools or software, adding to the total cost.
Don’t just compare sticker prices—factor in labor, warranty coverage, and downtime. A $100 difference on a part is minor if labor runs $500 or more.
Finally, always use the correct torque specs and follow recommended bedding or break-in procedures for parts like brake pads and rotors. This simple step can add thousands of miles to your component’s life and keep your car running safely.
Next, let’s explore how to verify fitment and compatibility before you buy, so you can skip costly returns and ensure every part fits the first time.

Fitment Verification and Compatibility Steps
Pro steps to ensure perfect fitment
Ever ordered a replacement part, only to find it doesn’t fit your car? Sounds frustrating, right? When shopping for aftermarket automotive parts, verifying compatibility is the single best way to avoid returns and headaches. Whether you’re searching for what parts are compatible with my car or hunting through an aftermarket auto parts catalog, following a systematic process makes all the difference.
- Capture your VIN (Vehicle Identification Number): This 17-character code is your vehicle’s fingerprint. It holds details about year, make, model, engine, trim, and even production plant. You’ll find it on your dashboard near the windshield or inside the driver’s door jamb. Always start here—many online catalogs and retailers use VIN-based lookup tools for 100% fitment confirmation.
- Confirm year, make, model, and trim: Even small differences—like a mid-year refresh or a special edition—can change which parts fit. Double-check your exact trim level and engine type before buying.
- Verify engine and drivetrain: Is your car front-wheel drive or all-wheel drive? Does it have a turbo engine or a hybrid system? These details can affect everything from cv axle length to the correct o2 sensor placement.
- Check build date and region: Sometimes, two cars from the same year have different components if they were built before or after a certain month, or for different markets. The build date is usually on a sticker inside the driver’s door.
- Inspect OE (Original Equipment) part number: The OEM part number is the gold standard for matching. If you still have the original part, look for a stamped or labeled number—then search for cross-references in online catalogs or a fram oil filter lookup tool. This is especially important for hard to find auto parts.
- Review connector style and clocking: For sensors, electrical parts, or anything with a plug, compare the number of pins, connector shape, and orientation. The wrong o2 sensor or a mismatched tie rod end can cause major installation issues.
- Measure critical dimensions: For mechanical parts—like a cv axle or brake rotor—measure length, diameter, and mounting points. Even a few millimeters off can mean the part won’t fit or function correctly.
- Confirm included hardware and gaskets: Some kits come with everything you need, while others require you to reuse or source additional bolts, clips, or seals. Always check the product details before purchase.
Using cross references and superseded numbers
Imagine you’re searching for a discontinued part or a rare trim—cross-referencing is your secret weapon. Most reputable aftermarket auto parts catalogs let you input the OE number and will list equivalent or superseded numbers from various brands. This is especially valuable for older vehicles or when sourcing hard to find auto parts. If you’re stuck, consult a specialist or use an interchange database to widen your search.
Connector and hardware checks you should do
Don’t overlook the small stuff—connectors and hardware are common sources of fitment issues. Before you click “buy,” take a few extra steps:
- Photograph your existing part, including all connectors and mounting points.
- Label fasteners and keep them organized during removal.
- Match connector housings and pin counts (especially for sensors like the o2 sensor).
- Compare harness length and routing—too short or too long can cause strain or damage.
- For steering and suspension, confirm thread size and orientation on parts like tie rod end or cv axle.
- Electrical compatibility checklist:
- Pin count
- Connector keying
- Harness length
- Sensor calibration notes
Finally, if you find supplier documentation with torque specs or calibration instructions, jot them down before you start your install. This extra step can help prevent premature failure—especially for sensitive components like an o2 sensor or a cv axle.
By following these steps, you’ll minimize returns and ensure every part fits the first time. Next, we’ll walk through universal installation templates for brakes, suspension, and sensors, so you can tackle your next project with confidence.
Step-by-Step Installation Templates for Brakes, Suspension, and Intake Sensors
Brake System Replacement Template
When it’s time to replace your brake rotors, pads, or a brake caliper, having a clear process can save you time and prevent costly mistakes. Imagine you’re midway through the job—wouldn’t it be reassuring to know you haven’t missed a step? Here’s a universal template, based on best practices and real-world reference guides:
-
Pre-Install Checklist:
- New brake pads and rotors (confirm correct fitment)
- Brake component lube
- Brake fluid (as specified by your vehicle)
- Brake caliper piston compressor or C-clamp
- Properly rated jack stands and a hydraulic jack
- Wheel chocks
- Torque wrench
- Wire brush for hub cleaning
- Brake cleaner and lint-free cloth
- Safety glasses and gloves
- Brake bleeder kit (if bleeding is required)
- Park on a level surface, chock wheels, and loosen the lug nuts before lifting the vehicle.
- Lift and securely support the vehicle with jack stands. Never work under a car supported only by a jack.
- Remove the wheel. Place the wheel under the car as a backup safety measure.
- Inspect brake components for leaks or damage.
- Remove the caliper and support it—never let it hang by the hose.
- Remove old pads, caliper bracket, and brake rotors. Clean the hub thoroughly with a wire brush.
- Clean new rotors with brake cleaner. Check rotor thickness and runout if possible.
- Install new hardware and lubricate slide pins and pad contact points.
- Install caliper bracket and torque bolts to spec. Install new pads.
- Compress caliper piston slowly and reinstall caliper. Torque bolts to spec.
- Bleed brakes with a brake bleeder kit if needed. Top off brake fluid.
- Reinstall the wheel and hand-tighten lug nuts.
- Lower the vehicle and torque lug nuts in a star pattern to manufacturer’s specs.
- Before driving, pump the brake pedal to seat pads against rotors.
- Complete the recommended pad and rotor break-in procedure (bedding).
-
Post-Install Verification:
- Brake pedal feels firm, not spongy
- No leaks at caliper or lines
- Wheel spins freely, no dragging
- Test drive with gradual stops; listen for abnormal noises
- Re-check lug nuts torque after short drive
Suspension Upgrade Template
Upgrading or replacing a control arm or other suspension parts? Here’s a step-by-step template that keeps things safe and repeatable:
-
Pre-Install Checklist:
- Replacement suspension parts (control arm, bushings, etc.)
- Torque wrench and sockets
- Jack and jack stands
- Wheel chocks
- Penetrating oil for stubborn bolts
- Measuring tape (for ride height)
- Grease or anti-seize (if specified)
- Record pre-install ride height at all four corners.
- Loosen wheel lug nuts, lift vehicle, and secure with jack stands.
- Remove wheel and inspect all hardware and bushings.
- Remove old suspension component (e.g., control arm), noting bolt orientation and shims.
- Clean mounting surfaces thoroughly.
- Install new part, loosely fitting bolts until the vehicle is at ride height.
- Lower vehicle so suspension is loaded, then torque bolts to spec (preload at ride height).
- Reinstall wheel and torque lug nuts in a star pattern.
- Double-check all fasteners after a short drive.
- Schedule or perform a wheel alignment.
-
Post-Install Verification:
- Ride height matches pre-install measurement
- No clunks, squeaks, or looseness while driving
- Steering tracks straight
- All bolts torqued to spec
- Alignment performed as needed
Intake and Sensor Service Template
Whether you’re installing a cold air intake or replacing a mass air flow sensor, these steps will help prevent check engine lights and performance issues:
-
Pre-Install Checklist:
- Replacement intake or sensor (confirm fitment)
- Screwdrivers and sockets
- New gaskets or seals if required
- MAF cleaner (for cleaning sensors)
- Torque specs for clamps and fasteners
- Safety glasses and gloves
- Disconnect battery (if working with electrical sensors).
- Remove intake tubing and airbox as needed.
- Inspect and clean throttle body gasket and airbox seals.
- Install new cold air intake or mass air flow sensor, ensuring correct orientation (look for MAF arrow).
- Reconnect all hoses, clamps, and electrical connectors—listen for a click.
- Double-check all mounting points and fasteners; torque to spec.
- Reconnect battery and clear any diagnostic codes if needed.
- Start engine and check for leaks, warning lights, or abnormal idle.
- Test drive to confirm smooth acceleration and stable idle.
-
Post-Install Verification:
- No check engine light
- Stable idle and smooth throttle response
- No air leaks or whistling sounds
- All connectors fully seated
Pro Tip: Always consult your vehicle’s service manual for torque specs, special procedures, and relearn steps for sensors. Using the right tools and following these templates will help you get the most from your aftermarket automotive parts—without the frustration of repeat repairs or safety risks.
Ready for the next step? In the following section, we’ll cover troubleshooting flows to quickly diagnose and resolve issues after installation—so you can drive away with confidence.
Troubleshooting Flows After Installation
Engine and Emissions Fault Flow
Finished installing new parts but suddenly faced with a check engine light or odd engine behavior? Sounds stressful, but you can approach this like a pro. Start by reading any Diagnostic Trouble Codes (DTCs) using an OBD-II scanner or a local auto parts store’s free scan tool. Codes like p0420, p0300, and emissions-related warnings are common after working with aftermarket automotive parts. Here’s how to break down the process and get to the real cause without chasing your tail:
-
Read and Record Codes
- Use an OBD-II scanner to capture all codes—don’t clear them yet.
- Write down freeze frame data (engine temp, RPM, etc.) for reference.
-
Check for Additional Codes
- Multiple codes? Address them in order—sometimes a secondary code like p0171 (lean condition) can trigger a p0420 code downstream.
-
Visual Inspection
- Look for unplugged sensors, loose connectors, or pinched wires—especially if you replaced an oxygen sensor or worked near the exhaust.
- Check for vacuum hose disconnections or leaks that may cause idle issues or a p0171 code.
-
Targeted Checks Based on Code
- P0420 code: Inspect for exhaust leaks before the catalytic converter, ensure all oxygen sensors are properly connected, and test their outputs. If upstream and downstream sensor readings are too similar, the catalytic converter may be at fault (AutoCodes).
- P0300 code: This random misfire can result from old spark plugs, faulty ignition coils, fuel delivery issues, or even vacuum leaks. Start with the basics—plugs, coils, then fuel and compression.
- For codes like p0430 (catalyst efficiency bank 2) or p0174 (system too lean, bank 2), repeat similar checks on the opposite side of the engine.
-
Address Mechanical and Software Readiness
- Check for exhaust leaks, especially after a catalytic converter replacement.
- Verify all readiness monitors have reset by driving through a full warm-up and cool-down cycle.
-
Clear Codes and Test Drive
- After repairs, clear codes and drive the vehicle. If the code returns, recheck your work or consult a professional.
Always address stored trouble codes before assuming a new part is faulty. Many issues—especially with a p0420 code or p0300 code—can be traced to installation missteps, missed connectors, or unrelated system faults.
Brake Feel and Vibration Diagnosis
Just installed new brake pads and rotors, but now the pedal feels odd or the steering wheel shakes? Imagine the frustration—yet most issues can be resolved with a systematic check:
-
Visual Inspection
- Check that all caliper bolts are tight and hardware is correctly installed.
- Inspect for oil or grease contamination on rotors and pads—factory coating must be fully cleaned (King Racing).
-
Check Hub and Rotor Surfaces
- Rust or debris on the hub can cause rotor runout, leading to pedal pulsation or vibration.
- Clean the hub and rotor mating surfaces using a wire brush or emery paper before reassembly.
-
Pad and Caliper Fitment
- Ensure pads are seated evenly and caliper slides are lubricated.
- Improperly installed pads or loose caliper bolts can cause noise, vibration, or uneven braking.
-
Wheel Bearings and Torque
- If you removed wheel bearings, verify they are properly seated and adjusted—excess play can mimic rotor or pad issues.
- Torque all fasteners to spec, especially wheel lug nuts.
Before blaming new parts, double-check installation details—most post-install brake vibration is due to improper cleaning, uneven torque, or hardware issues, not defective rotors or pads.
Air and Fuel Metering Sanity Checks
After replacing sensors or intake components, you might encounter rough idle, hesitation, or a check engine light. Here’s how to quickly pinpoint the cause:
-
Sensor Connection and Orientation
- Verify all sensors, especially oxygen sensors and MAF, are plugged in and oriented correctly.
- Check for bent pins, loose connectors, or damaged wiring.
-
Vacuum and Intake Leaks
- Inspect all vacuum hoses and intake boots for cracks or loose clamps.
- Listen for hissing sounds indicating a leak.
-
Ground Straps and Battery Connections
- Loose or corroded grounds can cause erratic sensor readings.
- Clean and tighten all battery and ground connections.
-
Clear Codes and Relearn
- After addressing issues, clear codes and perform any required relearn or idle calibration procedures.
Quick Reference: Symptom to Solution Table
| Symptom | Likely Causes | First Checks |
|---|---|---|
| Check engine light, p0420 code | Exhaust leak, bad oxygen sensor, failing catalytic converter | Inspect exhaust, test sensors, check for leaks |
| Random misfire, p0300 code | Ignition coil, spark plug, vacuum leak, fuel delivery | Check plugs, coils, look for vacuum leaks, scan data |
| Brake vibration after new install | Rotor not cleaned, uneven torque, dirty hub | Re-clean rotor/hub, re-torque, inspect hardware |
| Rough idle after sensor replacement | Loose connector, intake leak, ground issue | Check all plugs, hoses, and grounds |
Document each step you take and the conditions (engine hot/cold, idle/load) for easier troubleshooting if the problem returns. By following these flows, you’ll quickly isolate whether the issue is with the new part, installation, or an unrelated system. Next, we’ll show you how to evaluate online sellers and compare brands to ensure you get the best value and support for your aftermarket automotive parts.
Where to Source and How to Compare Sellers
How to evaluate online parts marketplaces
Ever wondered why some shoppers get the perfect part on the first try, while others end up battling returns or warranty headaches? The answer often lies in where you shop and how you compare sellers. Whether you’re searching for where to buy CAPA certified parts, the best OEM parts website, or simply asking, “where can I buy car accessories?”—understanding key marketplace differences can save you time, money, and frustration.
| Shopping Channel | Catalog Depth | VIN Decoding Support | Cross-Reference Tools | Return Policy Clarity | Shipping Options | Typical Delivery Times |
|---|---|---|---|---|---|---|
| Dedicated Auto Parts Ecommerce Platforms | Extensive (OEM, aftermarket, remanufactured) | Yes (YMM filters, VIN lookup) | Robust (OE and aftermarket cross-referencing) | Clear, detailed (part-specific policies) | Multiple carriers, tracking, expedited available | Fast (1–5 days typical) |
| General Online Marketplaces | Broad, but may lack depth for specialty items | Limited (may require manual entry) | Basic (brand/part number search) | Varies by seller; read fine print | Varies; some offer free or international shipping | Moderate to variable (3–10 days) |
| OEM Dealer Websites | OEM only (vehicle-specific) | Strong (VIN decoding, factory diagrams) | OE part number lookup only | Consistent, manufacturer-backed | Standard and expedited options | Predictable (2–7 days) |
| Local Auto Parts Stores | Moderate (common maintenance and performance parts) | In-person assistance, manual lookup | Store-specific cross-reference tools | Immediate, in-person returns possible | Same-day pickup or local delivery | Immediate to next day |
Comparing catalog accuracy and return policies
Imagine finding the perfect part online—only to discover it doesn’t fit when it arrives. Catalog accuracy is critical, especially for fitment-sensitive items like sensors or body panels. The best auto parts ecommerce platforms offer VIN-based lookup and detailed compatibility notes, reducing the risk of ordering the wrong part.
Return policies and warranty handling also vary widely. Dedicated auto parts sites and OEM dealer platforms typically have transparent, part-specific return guidelines. General marketplaces may leave returns up to individual sellers, so always check the fine print. For warranty claims, look for clear instructions and support channels—some platforms offer direct manufacturer support, while others require you to work through the marketplace.
- Quick pre-check before purchase:
- Confirm OE part number with your VIN or old part
- Read recent reviews for the exact SKU and seller
- Photograph your existing part, connectors, and mounting points for reference
- Check return policy and warranty terms before checkout
- Compare the same brand and part number across multiple platforms to avoid counterfeits
When local sourcing beats online convenience
While online shopping offers vast selection and competitive pricing, sometimes nothing beats the immediacy and assurance of a local store—especially for urgent repairs or hard-to-find items. Local stores let you physically compare parts, get real-time advice, and handle returns on the spot. For those seeking auto performance parts near me, visiting a trusted local retailer can also help avoid shipping delays and fitment surprises.
Choosing the right seller isn’t just about price—it’s about catalog accuracy, support, and minimizing risk. Cross-check fitment, review return terms, and compare across channels to get the best value and avoid unnecessary returns.
Up next, we’ll explore when custom metal components are the right solution for fitment or performance challenges—especially when off-the-shelf parts just won’t do.
When to Choose Custom Metal Components for Your Automotive Project
When custom metal parts beat off the shelf
Ever spent hours searching for a replacement bracket, only to discover it’s discontinued or doesn’t fit your custom build? That’s when custom automotive parts become your best ally. While aftermarket automotive parts cover most common needs, there are times—especially in restorations, one-off builds, or performance upgrades—where off-the-shelf just isn’t enough. Imagine building a kit car, restoring a classic, or tackling a unique engine swap. If you’re facing hard to find parts for cars, or need something built to your exact specs, custom parts deliver the fit, strength, and finish you simply can’t get from mass-produced options.
- Obsolete brackets and mounting tabs for classic or rare vehicles
- Reinforced engine or suspension mounts for high-performance builds
- Bespoke intake flanges and adapters for custom turbo or supercharger setups
- Heat shields and guards tailored to unique exhaust routing
- Weld-in chassis tabs and cage supports for motorsport or off-road applications
These are just a few scenarios where custom car supplies make all the difference. When you need repeatable precision, specific tolerances, or a part that simply doesn’t exist in any custom cars parts and accessories catalog, it’s time to explore a custom solution.
Process depths that influence durability
Not all custom parts are created equal. The right manufacturing process is key to achieving the durability, appearance, and repeatability your project demands. Here’s a quick look at common processes for custom automotive metal parts, and how they impact your end result:
- CNC Machining: Delivers tight tolerances and complex geometries—ideal for engine, drivetrain, or suspension components requiring strength and precision.
- Metal Stamping: Best for high-volume brackets, panels, and mounts with consistent thickness and strength.
- Laser Cutting & Fabrication: Great for prototypes or small runs, offering flexibility for intricate designs.
- Welding and Assembly: Joins multiple parts into a single, stronger unit—essential for reinforced mounts or chassis work.
- Surface Finishing: Coatings, plating, or painting improve corrosion resistance and appearance, extending part life.
- Quality System Certification: For safety-critical assemblies—think suspension arms or steering mounts—look for suppliers with IATF 16949:2016 certification, ensuring repeatable quality and documentation.
Choosing the right process isn’t just about cost; it’s about ensuring your custom parts last as long as your project demands. For low-volume, high-precision needs or when documentation and traceability matter, a full-service partner is invaluable.
Comparison: Off-the-Shelf vs Local Fab vs Full-Service Certified Manufacturing
| Solution | Process Breadth | Quality System | Lead Time | Scalability | Documentation |
|---|---|---|---|---|---|
| Shaoyi Custom Automotive Metal Parts | Stamping, CNC, welding, forging (all in-house) | IATF 16949:2016 certified | Rapid (24-hour quotes, streamlined project management) | Prototype to mass production | Full traceability, quality records |
| Off-the-Shelf Parts | Standardized, limited to catalog | Varies by brand | Immediate if stocked, long delays if discontinued | Mass production only | Basic, often generic |
| Local Fabricator | Welding, basic CNC, manual fabrication | Shop-specific, often informal | Variable (days to weeks) | Best for single runs or small batches | Limited—may lack formal records |
For fitment-critical, safety-sensitive, or low-volume needs, a certified full-service partner like Shaoyi offers the assurance of global standards, rapid quoting, and consolidated processes—all under one roof. This is especially valuable when tackling hard to find parts for cars or custom cars parts and accessories that require documentation for motorsport or regulatory compliance.
How to brief a manufacturing partner for custom automotive parts
Ready to move forward with custom automotive parts? Here’s a practical checklist to streamline your next project—whether you’re building one piece or a hundred:
- Base materials (e.g., steel, aluminum, titanium)
- Required thickness and cross-section details
- Desired surface finish or coating (paint, plating, powder coat)
- Load case or strength requirements (static, dynamic, fatigue)
- Dimensional tolerances (critical fits, clearances)
- Sample photos or CAD drawings
- Target production volume (prototype, small batch, full run)
- OE references or packaging constraints (engine bay, chassis, etc.)
Providing this information up front helps your manufacturing partner deliver accurate pricing, realistic timelines, and the right process for your needs. For complex or safety-critical parts, ask about documentation, material certifications, and test reports.
In summary, custom solutions fill the gap when catalog offerings fall short—whether you’re chasing kit car components, restoring a classic, or engineering a race-ready upgrade. With the right partner and clear project details, you’ll get custom car supplies that fit right, last longer, and perform exactly as you envisioned. Next, we’ll wrap up with a checklist-driven approach to smarter parts buying and when to escalate to a custom solution.
Final Recommendations and Ready-to-Use Checklists for Smarter Parts Buying
Your next steps for smarter parts buying
When you’re ready to buy aftermarket automotive parts, how do you make sure you get the best car parts for your needs—without wasting time or money? Imagine the peace of mind that comes from having a proven process: you’ll avoid fake car parts, minimize returns, and ensure your next install goes smoothly. Here’s how to put everything you’ve learned into action—plus, you’ll find copy-ready checklists you can use for every project.
Fitment verification is your #1 return-prevention tool. Always confirm vehicle details, OE part numbers, and connector types before purchasing—especially when comparing aftermarket car part brands online (Gauge Magazine).
Quality cues matter as much as car parts prices. Prioritize reputable brands, robust packaging, and clear warranty terms. Cheap, generic parts may save money upfront but often cost more in repeat labor or early failure.
Total cost of ownership goes beyond sticker price. Consider labor, downtime, and warranty support—sometimes paying more for the right part saves you hundreds in the long run.
Copy these checklists to avoid common mistakes
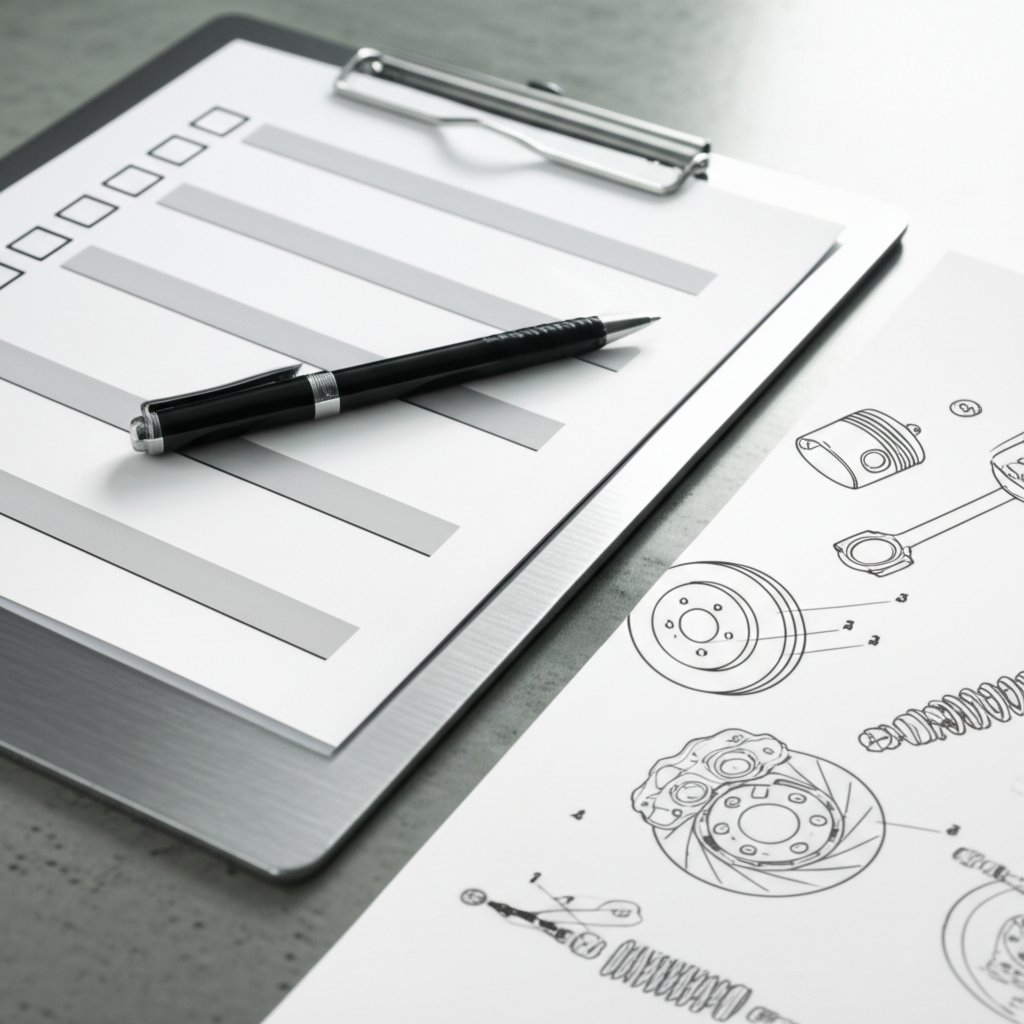
Pre-Install Inspection Checklist
- Confirm correct part number and fitment using VIN or OE cross-reference
- Visually inspect new part for damage, missing hardware, or mismatched connectors
- Compare new part side-by-side with old part (shape, size, mounting points, connectors)
- Check included instructions and torque specs; consult service manual for any missing info
- Lay out required tools and safety equipment before starting
- Document part number, serial number, and torque specs in your maintenance log
Post-Install Verification Checklist
- Double-check all fasteners and connectors for proper torque and secure seating
- Test part function (e.g., brakes, sensors, lights) before full reassembly
- Look for leaks, noises, or warning lights on first startup or test drive
- Re-torque wheels, brackets, or suspension after a short drive
- Document installation date, mileage, and any issues for warranty purposes
Return-Prevention Checklist
- Order from trusted sellers with clear return and warranty policies
- Save all receipts, packaging, and warranty cards
- Take photos of old and new parts for reference
- Check reviews for the exact SKU and seller before purchase
- Label all removed hardware for reinstallation
- Don’t discard old parts until installation is verified
When to escalate to a custom solution
Sometimes, no matter how carefully you search, the right part just isn’t available. Maybe you’re restoring a classic, building a custom project, or need tolerances beyond catalog specs. In these cases, consider a certified manufacturing partner. Shaoyi Custom Automotive Metal Parts offers full-service support—from design to production—with IATF 16949:2016 certification and rapid 24-hour quotes. This is especially valuable when dealing with obsolete parts, demanding safety standards, or consolidating multiple processes under one roof.
Remember: Off-the-shelf aftermarket automotive parts work for most jobs, but when standard options fall short, a custom solution can save time and ensure quality. Always brief your partner with material specs, tolerances, and reference photos to get the best results.
By following these evergreen checklists and knowing when to seek expert support, you’ll reduce returns, avoid fake car parts, and get the best value from your next purchase—no matter which aftermarket car part brands you choose. Save these checklists, document your installs, and enjoy the confidence that comes from a smarter approach to every project.
Frequently Asked Questions About Aftermarket Automotive Parts
1. What are aftermarket automotive parts and how are they different from OEM parts?
Aftermarket automotive parts are made by third-party manufacturers, not the original vehicle maker. They offer a wide range of choices for repairs, upgrades, or customizations, often at lower prices. Unlike OEM parts, which are identical to those installed at the factory, aftermarket parts can vary in quality, fitment, and features. It's important to verify compatibility and select reputable brands to ensure performance and reliability.
2. How can I ensure an aftermarket part will fit my car?
To guarantee proper fitment, always check your vehicle’s VIN, confirm year, make, model, and trim, and compare OE part numbers. Use cross-reference tools provided by reputable sellers and review product details for compatibility. Taking photos of your original part and connectors can help avoid mistakes. This process minimizes returns and installation issues.
3. Are aftermarket parts reliable, and do they affect my car’s warranty?
The reliability of aftermarket parts depends on the brand, material quality, and manufacturing process. Many reputable aftermarket brands meet or exceed OEM standards, but some budget options may compromise on durability. Using aftermarket parts does not automatically void your car’s warranty, but any damage caused by an inferior part may not be covered. Always retain receipts and choose parts with clear warranty support.
4. When should I consider custom automotive metal parts instead of off-the-shelf aftermarket options?
Custom automotive metal parts are ideal when you need unique fitment, enhanced performance, or when parts are obsolete or unavailable. They’re especially useful for restorations, one-off builds, or motorsport projects. Partnering with a certified manufacturer like Shaoyi ensures precise tolerances, quality assurance, and rapid quoting for hard-to-find or critical components.
5. What steps can I take to avoid buying fake or low-quality car parts online?
Order only from trusted sellers with clear return and warranty policies. Always verify fitment using your VIN and OE part numbers, read recent product and seller reviews, and compare the same brand across multiple platforms to avoid counterfeits. Retain all documentation and inspect new parts before installation to ensure authenticity and quality.