 Small batches, high standards. Our rapid prototyping service makes validation faster and easier —

What Is Die Cast Metal? Process, Alloys, Tolerances Revealed
Die Cast Metal Defined and Demystified
What die cast metal means
Ever wondered, "What is die cast metal" and why it’s so widely used? Simply put, die cast metal refers to parts created by injecting molten metal into a precision steel mold—called a die—under high pressure. This method produces components that are remarkably accurate, repeatable, and feature a smooth surface finish with the ability to form complex, thin-walled shapes. If you’re picturing gears, housings, or intricate brackets, you’re already thinking of common die cast products. But what does die cast mean for manufacturing? It’s all about combining speed with precision to deliver high-quality cast metal parts with minimal finishing required.
How die casting differs from other casting
When comparing what is casting in general, it’s important to understand that not all casting methods are created equal. Traditional techniques like sand casting use a sand-based mold, which is single-use and typically results in a rougher surface and lower dimensional accuracy. In contrast, die casting utilizes durable steel dies that can be reused thousands of times, allowing for much tighter tolerances and finer details. Unlike sand casting, where molten metal is poured by gravity, die casting forces metal into the die under pressure, enabling the formation of thinner walls and more intricate features. Investment casting, another alternative, is excellent for extreme detail but is less efficient for high-volume production due to longer cycle times and higher costs per part.
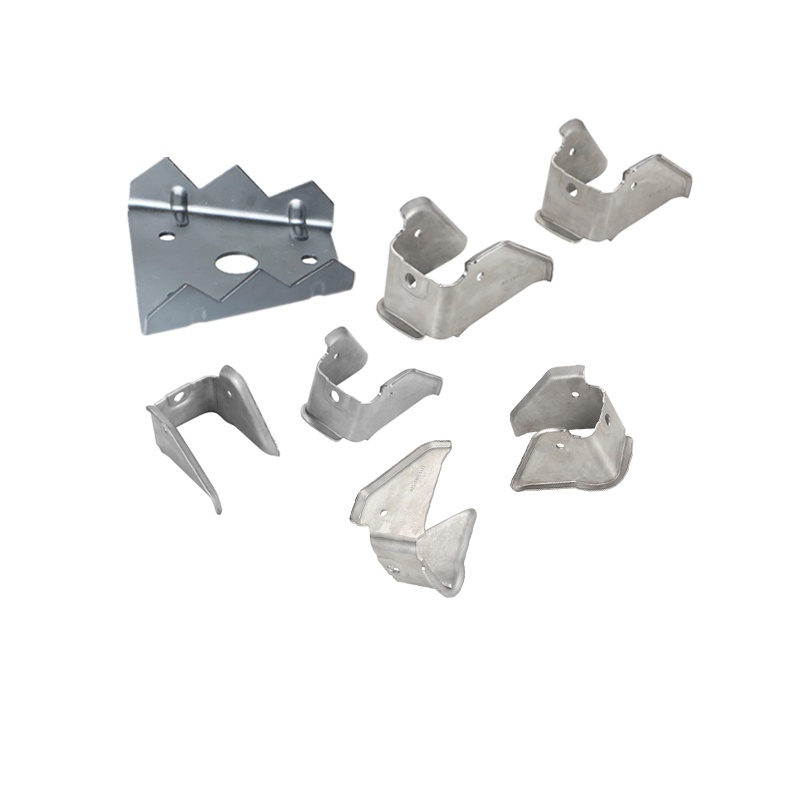
Where die cast parts are commonly used
Die cast metal shines in industries where precision, speed, and consistency matter. You’ll notice die cast components in automotive transmissions, electronic housings, medical devices, consumer appliances, and even toys. The process thrives when high production rates and minimal post-machining are needed, provided the design follows sound Design for Manufacturability (DFM) principles. Typical alloys include aluminum, zinc, and magnesium—each chosen for specific mechanical and finishing properties. For example, aluminum die casting is favored for lightweight structural parts, while zinc excels in producing fine details and strong, small components.
-
Key advantages of die cast metal:
- High dimensional precision and repeatability
- Superior surface finish compared to other cast metal processes
- Capability to produce thin-walled and complex shapes
- Fast cycle times, especially in high-volume production
- Minimal post-processing when designs follow DFM rules
-
Limitations of die casting:
- Risk of porosity if not properly vented or cooled
- Need for draft angles to aid part ejection
- Higher initial tooling and die costs compared to sand casting
Optimize for pressure-fed flow and die cooling to realize die casting’s quality and speed.
There are two main types of die casting machines: hot-chamber and cold-chamber. Hot-chamber machines are ideal for low-melting alloys like zinc and heat the metal within the machine itself. Cold-chamber systems, on the other hand, melt alloys such as aluminum in a separate furnace and then transfer the metal into the die under pressure.
So, what is die cast metal in the big picture? It’s a manufacturing solution that delivers high-quality, complex, and consistent parts at speed—provided you match the right process and alloy to your application. As you move forward, keep in mind that your choices in process and material selection will shape everything from performance to cost. Next, we’ll break down how the die casting process actually works, and how each step impacts the final result.
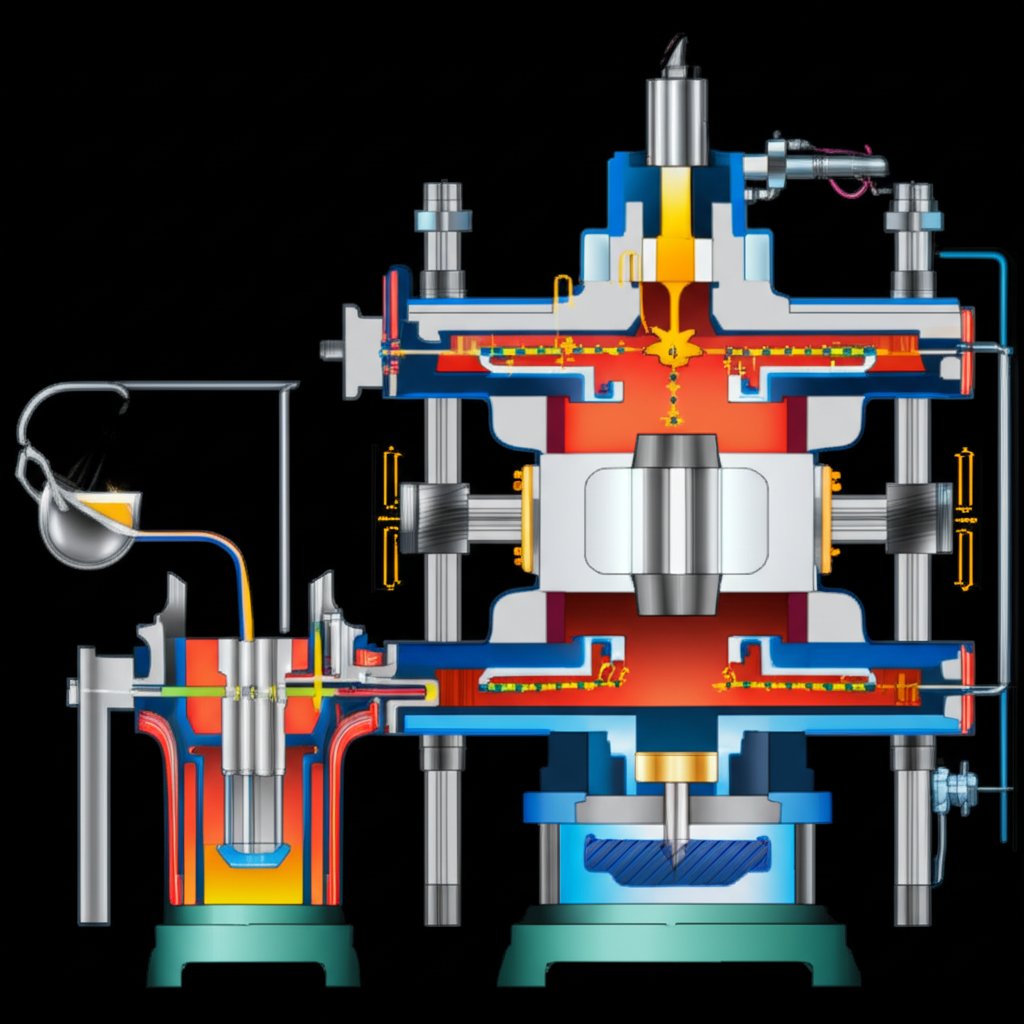
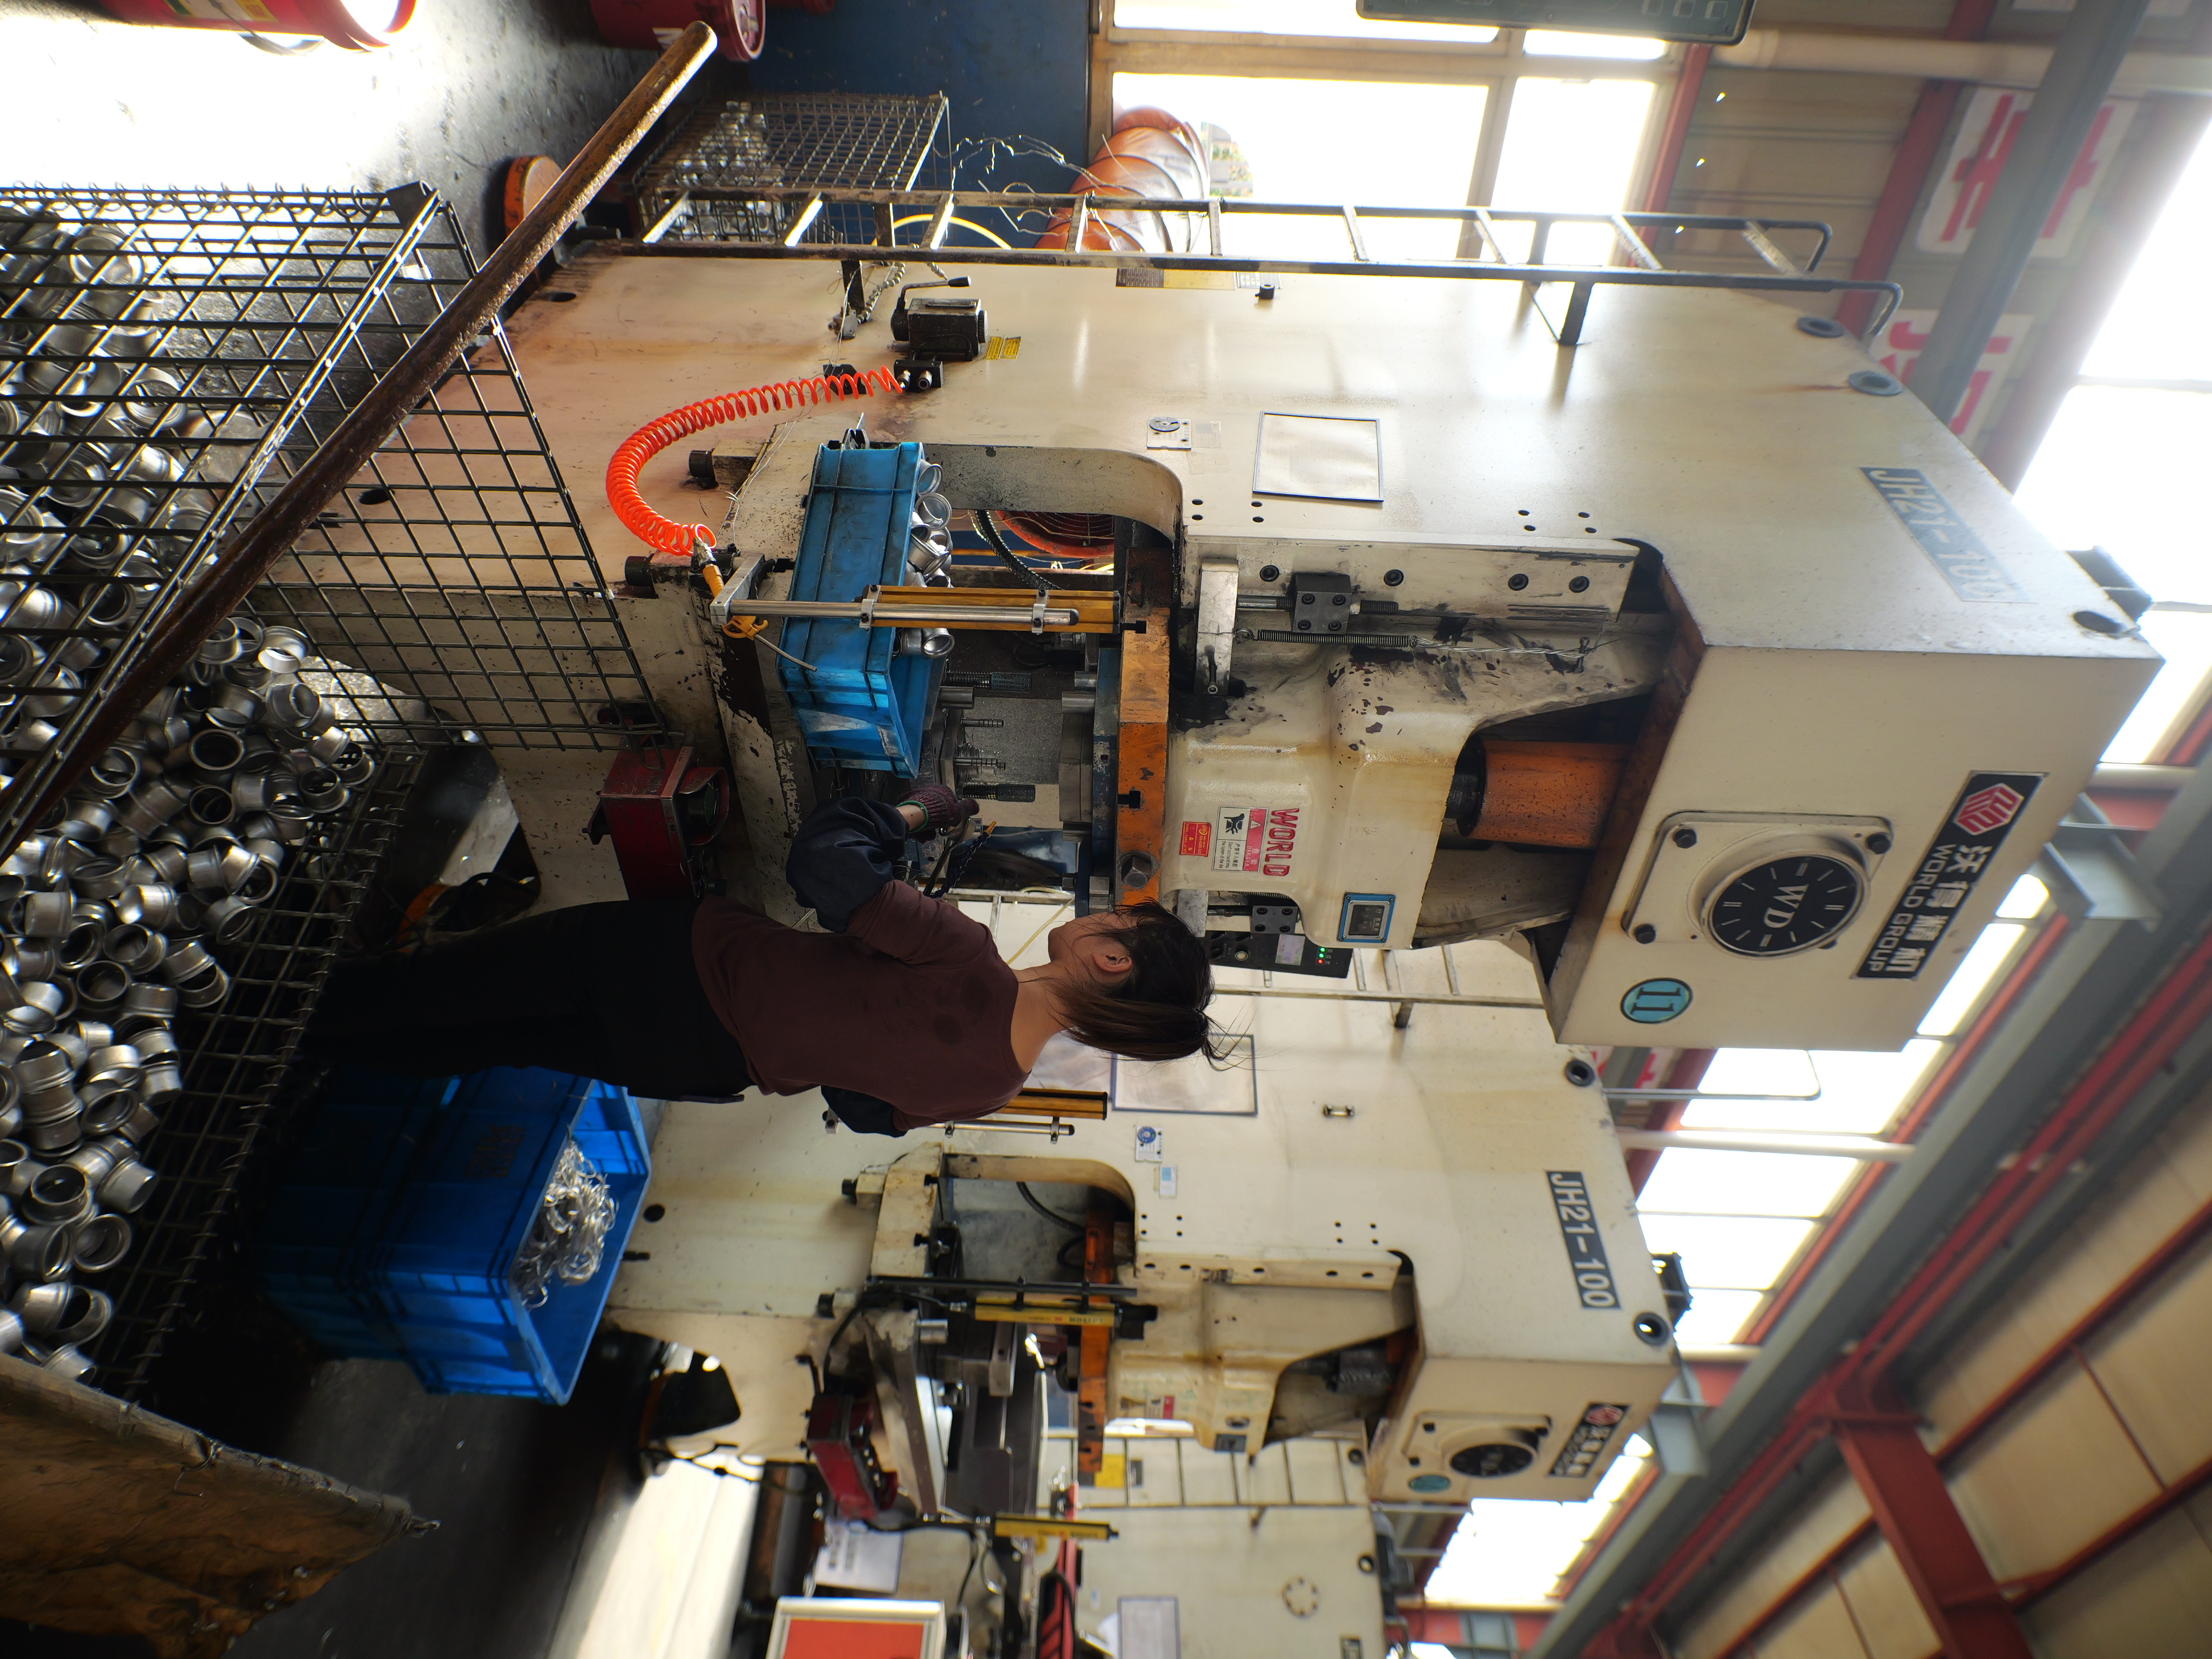
Inside the Die Casting Process
How die casting works step by step
When you picture molten metal transforming into a finished part in seconds, you might wonder: How does die casting work so reliably and quickly? The answer lies in a carefully engineered sequence that ensures precision, speed, and repeatability. Let’s break down the key die casting steps from start to finish:
- Mold (Die) Preparation: The process starts with cleaning and preheating the steel die. Lubricant is sprayed onto the die cavity to control temperature, reduce friction, and aid part release. Proper preparation here minimizes defects downstream.
- Melting and Handling: Metal is melted—either in an integrated furnace (hot-chamber) or a separate furnace (cold-chamber). The molten metal’s temperature is closely monitored to ensure optimal flow and solidification.
- Injection (Shot): The molten metal is injected into the die cavity at high pressure. In hot-chamber machines, a plunger pushes the metal directly from the furnace. In cold-chamber systems, a ladle transfers the metal into a shot sleeve before injection by a hydraulic piston. Shot control is critical: too fast, and gas may be entrained; too slow, and the metal may begin to solidify before filling the cavity.
- Solidification and Cooling: The metal cools and solidifies rapidly inside the die, forming the final shape. Uniform cooling is essential to prevent defects such as warpage or porosity.
- Ejection: Once solidified, the die opens, and ejector pins push the casting out. The cycle then repeats, making die cast process ideal for high-volume production.
- Finishing: Excess material (sprue, runners) is trimmed, and parts may undergo minimal machining or surface finishing as needed.
Hot-chamber versus cold-chamber machines
Choosing between hot-chamber and cold-chamber machines is a pivotal decision in manufacturing die casting. Each system is tailored for specific alloys and production demands:
| Feature | Hot-Chamber Die Casting | Cold-Chamber Die Casting |
|---|---|---|
| Furnace Location | Integrated (inside machine) | External (separate furnace) |
| Typical Alloys | Zinc, magnesium, lead alloys | Aluminum, magnesium, copper alloys |
| Cycle Speed | Faster (shorter cycle times) | Slower (extra transfer step) |
| Injection Pressure | Lower, suitable for low-melting alloys | Higher, for high-melting alloys |
| Die Temperature Management | Less thermal shock, longer die life | More thermal stress, requires robust die design |
| Applications | Small, intricate parts (electronics, hardware) | Large, structural parts (automotive, machinery) |
Hot-chamber machines excel in speed and efficiency for low-melting-point metals, while cold-chamber systems are better suited for high-strength, high-melting-point materials like aluminum.
Process controls that impact quality
What sets high pressure die casting apart is the ability to create detailed, thin-walled parts at scale—but only if process controls are tightly managed. Here’s what drives quality and throughput:
- Metal and Die Temperatures: Both must be precisely controlled. Too hot, and the die may be damaged; too cold, and the metal may not fill thin sections, causing incomplete parts or cold shuts.
- Injection Pressure and Velocity: High pressure ensures complete cavity fill and forms fine details. However, excessive velocity can entrain air, leading to porosity. A common practice is to start slow, then ramp up shot speed once the gate is filled.
- Gating, Venting, and Overflows: The design of gates (where metal enters), vents (to let gases escape), and overflows (to capture excess metal) is critical. Poor venting can trap air, while undersized gates may restrict flow and cause misruns.
- Lubrication Strategy: Lubricants prevent sticking and help control die temperature, but overuse can cause defects or affect surface finish.
- Die Surface Condition and Maintenance: Regular inspection and upkeep of the die surface, thermal balance, and ejection system are essential for consistent part quality and long die life.
The key to a stable die cast process is balancing pressure, temperature, and flow—small changes in one can dramatically affect quality and cycle time.
In summary, the die casting process is an orchestrated sequence where every parameter—temperature, pressure, shot profile, and die design—must be tuned for the material and part geometry. Mastering these controls ensures the high repeatability, precision, and speed that make die casting a cornerstone of modern manufacturing. Next, we’ll explore the alloys used in die casting and how material choice shapes the performance and finish of your parts.
Metals Used in Die Casting and What They Deliver
Aluminum Die Cast Alloys at a Glance
When you’re choosing a material for your next project, you might wonder: Why does aluminum die casting dominate so many industries? The answer is simple—aluminum alloys hit the sweet spot between weight, strength, and versatility. Imagine lightweight automotive housings, robust electronics enclosures, or intricate furniture hardware: you’ll often find die cast aluminum at their core. Aluminum’s low density delivers lighter components without sacrificing mechanical strength, making it ideal for everything from electric vehicle battery housings to window frames and heat sinks.
But there’s more: aluminum die casting materials excel at producing parts with complex shapes and tight tolerances, all while offering excellent resistance to corrosion. The process also allows for a variety of surface finishes, from smooth and shiny to textured and functional. And thanks to aluminum’s good thermal conductivity, it’s a natural fit for heat-dissipating applications. However, keep in mind that initial tooling for aluminium alloy die casting can be more involved and costly, but these costs are offset by lower per-unit expenses in large production runs.
Zinc Die Cast Alloys and Thin-Wall Strengths
Ever handled a small, sturdy part that feels heavier than it looks? Chances are, it’s a zinc die cast component. Zinc casting is prized for its high density—about 3.9 times that of magnesium alloys—giving parts a solid, durable feel. But zinc isn’t just about heft: it’s known for its exceptional impact strength, dimensional stability, and the ability to form very thin walls with intricate details. This makes zinc die casting the go-to solution for demanding applications in the automotive, medical, and consumer electronics sectors.
There’s another major advantage: zinc has a low melting point, which means it can be cast using hot-chamber machines for faster cycles and longer die life. With superior fluidity, zinc alloys fill even the most complex cavities, reducing the risk of voids or misruns. On top of that, zinc die cast parts boast excellent corrosion resistance and can be finished with ease—whether you need plating for aesthetics or added durability.
Comparing Die Cast Alloys: Strengths, Ductility, and More
| Property | Aluminum Alloys | Zinc Alloys | Magnesium/Copper Alloys* |
|---|---|---|---|
| Relative Strength | High strength-to-weight | High impact strength, dense | Magnesium: moderate; Copper: very high (ZA alloys) |
| Ductility/Elongation | Moderate, good for thin walls | Excellent, allows complex shapes | Magnesium: high; Copper: lower |
| Castability | Excellent for complex shapes | Outstanding, fills thin sections easily | Magnesium: good; Copper: fair |
| Corrosion Resistance | Good, naturally forms oxide layer | Very good, does not rust | Magnesium: moderate; Copper: high |
| Finishing Compatibility | Paints, powder coating, anodizing | Plating, painting, chroming | Depends on alloy; consult spec |
*Magnesium and copper-based alloys are used in niche or high-performance applications. For detailed mechanical properties, always consult NADCA or ASTM alloy datasheets (Die Casting Design).
Finishing, Plating, and Paint Considerations
Not sure which finish is right for your die cast part? The good news is, both aluminum and zinc castings support a wide range of post-cast finishes. For aluminum die casting, you’ll see options like powder coating, painting, or even anodizing (for certain alloys), each offering unique benefits in corrosion protection and appearance. Zinc die cast components, thanks to their smooth surface and tight tolerances, are especially well-suited for plating (such as chrome or nickel) and painting, making them a favorite for parts that need to look as good as they perform.
- Aluminum: Great for powder coating, painting, and some specialty conversion coatings; certain alloys can be anodized for added corrosion resistance.
- Zinc: Ideal for decorative or protective plating, chroming, and painting; provides a smooth substrate for high-quality finishes.
- Magnesium/Copper: Require process-specific finishes; always check compatibility with intended use and environment.
Keep in mind, the quality of the casting surface and the choice of alloy both influence finishing results—so always involve your die caster early in the design process to ensure optimal outcomes for zinc casting, aluminium alloy die casting, or any other alloy system.
-
Design notes for engineers:
- Aluminum alloys: Consider thermal expansion and shrinkage in DFM; excellent for lightweight, structural parts.
- Zinc alloys: Dimensional stability is a standout; perfect for fine details and thin-walled geometries.
- Magnesium/copper alloys: Use for specialty requirements—consult alloy datasheets for specific mechanical and finishing properties.
As you plan your next die cast project, remember that the right alloy choice shapes not only performance but also manufacturability and finishing options. Up next, we’ll dive into design rules that help you get the most from your selected material and the die casting process itself.

Design Rules That Make Die Casting Work
Design Rules That Speed Fill and Solidification
When you look at high-quality die casting parts, you’ll notice they share certain design traits—thin, uniform walls, smooth transitions, and well-placed features. Why? Because these choices aren’t just for looks; they’re essential for a stable, cost-effective die casting mold that delivers consistent results. Sounds complex? Let’s break it down with practical, easy-to-follow guidelines you can bring to your next project.
| Feature | DFM Recommendation | Notes |
|---|---|---|
| Wall Thickness | Uniform; thin as possible (≥1mm typical minimum) | Reduces weight, cost, and cycle time; avoid abrupt changes |
| Ribs | Shallow, rounded, well-spaced | Strengthens without adding mass; blend with fillets to prevent stress |
| Fillets/Radii | Minimum internal radius ≥ wall thickness; external radius ≥ internal + thickness | Improves metal flow, reduces stress, and avoids sharp corners |
| Draft Angles | 2° or more (aluminum); 0.5°–1° (zinc) | Facilitates ejection, limits die wear |
| Bosses | Hollow, with fillets at base | Prevents sink and porosity; support with ribs if needed |
| Transitions | Gradual, with fillets/chamfers | Reduces hot spots, supports solidification |
| Text/Lettering | Raised, sans serif, ≥0.5mm height | Parallel to parting line; easier for die casting die material fabrication |
Draft Angles, Ribs, Bosses, and Corners
Imagine trying to eject a freshly cast part from the die—if the sides are perfectly vertical, the part might stick or even damage the die. That’s why draft angles matter. For most die casting components:
- Use at least 2° draft for aluminum die cast mold surfaces; 0.5°–1° suffices for zinc alloys.
- Apply draft to all surfaces perpendicular to the die opening direction.
For ribs and bosses:
- Keep ribs shallow, rounded, and spaced to avoid thick intersections that may cause shrinkage porosity.
- Bosses should be hollow, filleted at the base, and supported by ribs as needed to limit sink and maintain strength.
Sharp corners and abrupt cross-section changes are red flags in tool and die casting. Replace them with fillets (minimum 0.4mm internal, more if possible) and gradual transitions. This not only improves material flow but also extends die life by reducing localized stress.
Gating, Venting, and Overflow Collaboration with Tooling
Ever wonder why some die casting parts have fewer defects and better surface quality? The secret often lies in smart gating and overflow design, which is integral to mould die casting success. Here’s what you need to know:
- Gate Placement: Position gates at the thickest part of the casting to promote directional solidification and reduce shrinkage.
- Gate Size and Shape: Balance speed and turbulence; too small can cause cold shuts, too large increases flash and waste.
- Smooth Transitions: Avoid sharp turns in the gate and runner system to minimize turbulence and air entrapment.
- Overflow and Venting: Place overflows at the end of flow paths to collect impurities and gases, ensuring a clean fill and strong die casting components.
- Simulate Flow: Use flow simulation tools to optimize the gating, venting, and overflow system for your die casting mold before cutting steel.
Collaborate early with tooling engineers to align on parting lines, ejector pin locations, and cooling channel design—these decisions are foundational to the success of any die casting die material or component.
-
Common geometry pitfalls to avoid and how to fix them:
- Sharp edges or corners → Replace with fillets or chamfers for better flow and ejection
- Thick sections without coring → Add pockets or ribs to reduce mass and cycle time
- Sudden cross-section changes → Blend transitions over at least three times the feature height
- No draft on vertical walls → Add draft to all pull directions to prevent sticking
- Improper gate/overflow layout → Run simulations and work with die designers to optimize
The most successful die casting projects happen when part design and tooling decisions are made together—never treat them as separate steps.
By following these DFM best practices, you’ll not only minimize defects but also reduce cycle time and cost, ensuring your die casting parts perform as designed. Next, we’ll dive into diagnosing and fixing defects—so you know what to look for and how to address issues before they impact your project.
Defect Diagnosis and Practical Fixes in Die Casting
Diagnosing Porosity and Gas Entrapment
When you examine a die casting part and notice tiny holes or bubbles—sometimes deep inside, sometimes on the surface—you’re likely seeing porosity. Sounds concerning? It can be, as porosity in high pressure die casting dies often weakens the part and can even lead to leaks in critical applications. There are two main types: gas porosity (trapped air or gases during injection) and shrinkage porosity (voids formed as metal contracts on cooling). You’ll spot gas porosity as round, shiny holes, while shrinkage porosity tends to have angular edges and may be accompanied by cracks.
| Defect | Visual Cues | Likely Causes | Corrective Actions |
|---|---|---|---|
| Gas Porosity | Round/oval holes, bright surfaces | Poor venting, high injection speed, turbulence, inadequate die temperature | Improve venting, optimize gating, adjust shot speed, balance die temperature |
| Shrinkage Porosity | Angular voids, cracks, warping | Uneven wall thickness, rapid cooling, improper gating/overflow | Uniform wall design, adjust cooling, refine gating and overflow system |
Inspection methods for porosity include X-ray (for internal voids), sectioning (cutting parts open for analysis), and leak testing (especially for pressure-critical die casting parts). Regular process monitoring in the die casting foundry helps catch shifts in venting or temperature before defects escalate.
Eliminating Cold Shuts and Short Shots
Ever seen thin, irregular lines or incomplete fills on a casting’s surface? These are classic signs of cold shuts (where two metal fronts don’t fully fuse) or short shots (cavities not completely filled). These defects often appear as weak spots, which can compromise the performance of high pressure zinc die casting components.
| Defect | Visual Cues | Likely Causes | Corrective Actions |
|---|---|---|---|
| Cold Shut | Narrow, linear lines with smooth edges | Low melt/die temperature, slow injection, poor gating | Raise temperatures, increase shot speed, redesign gates |
| Short Shot | Unfilled sections, incomplete geometry | Poor alloy fluidity, low injection pressure, excessive lubricant | Choose better alloy, optimize injection pressure, control lubricant use |
Visual inspection is the fastest way to spot these issues, while dye penetrant testing can reveal fine surface cracks. Addressing cold shuts and short shots often requires die processing changes and close collaboration with the die casting factory’s engineering team.
Controlling Flash, Sinks, and Hot Tears
Imagine running your hand over a die casting and feeling thin, sharp fins along the parting line (flash) or noticing depressions (sinks) or cracks (hot tears). These surface defects can hurt both function and appearance, and they’re often linked to tool wear, unbalanced pressure, or thermal issues in pressure die casting dies.
| Defect | Visual Cues | Likely Causes | Corrective Actions |
|---|---|---|---|
| Flash | Thin, irregular metal sheets at parting lines | Die misalignment, insufficient clamping, high injection speed | Align dies, increase clamping force, regular die maintenance |
| Sinks | Surface depressions in thick areas | Uneven wall thickness, low pressure, short pressure-hold time | Redesign for uniform walls, raise pressure, extend hold time |
| Hot Tears | Cracks, especially at sharp corners or thick transitions | Residual stress, rapid cooling, improper alloy | Use correct alloy, optimize cooling, ensure gradual transitions |
Routine visual inspection, dimensional checks, and periodic die maintenance are essential to keep these defects at bay. For critical parts, ultrasonic or X-ray testing may be warranted to ensure internal integrity.
Inspection and Maintenance: Your First Line of Defense
- Inspect die surface for wear, cracks, or buildup after every production run
- Check and clean vents to ensure proper air escape
- Monitor ejector pins for wear or misalignment
- Regularly calibrate injection parameters and monitor process data
- Schedule preventive die maintenance based on part complexity and volume
The best way to prevent defects in die casting is early, collaborative design between tooling and process engineers—fixing problems before the first shot saves time, cost, and headaches down the line.
By understanding the root causes and solutions for each defect, you can keep your die casting foundry running smoothly and deliver parts that meet even the most demanding standards. Up next, we’ll examine how these quality controls play into the dimensional capability and surface finish you can expect from a well-optimized die casting process.
Dimensional Capability and Surface Quality in Precision Die Casting
Thin-Wall Capability and Feature Size Limits
When you’re designing a part for precision die casting, you might ask: How thin can the walls be, and how small can the details get? The answer depends on the alloy, die design, and process control. Die casting is known for its ability to produce thin-walled, complex metal die casting parts—often much thinner than what’s possible with sand or investment casting. For example, aluminum die casting parts can often achieve wall thicknesses down to 1 mm or less, while zinc alloys can go even thinner thanks to their superior fluidity and lower shrinkage.
However, pushing the limits of the cast molding process comes with trade-offs. Thinner walls require tighter process control, robust gating and venting, and careful thermal management. If not balanced, you could see increased cycle times, higher scrap rates, or more defects. For best results, maintain uniform wall thickness and avoid abrupt transitions—this reduces warping and ensures the molten metal fills every detail before solidifying.
Tolerances by Part Size and Alloy
One of the biggest advantages of die casting is its ability to deliver highly repeatable dimensions—critical for assemblies in automotive, aerospace, and electronics. But what kind of tolerances can you expect? Tolerances in die casting are influenced by the alloy (aluminum, zinc, magnesium), part size, geometry, and the stability of the casting manufacturing process.
According to the North American Die Casting Association (NADCA) and ISO 8062-3 standards, typical linear tolerances are:
| Alloy | Standard Tolerance (per inch) | Precision Tolerance (per inch) | Notes |
|---|---|---|---|
| Aluminum | ±0.002 in (±0.05 mm) | ±0.001 in (±0.025 mm) | Flatness/straightness may open up as part size increases |
| Zinc | ±0.0015 in (±0.038 mm) | ±0.0008 in (±0.020 mm) | Tighter due to low shrinkage, ideal for small/complex parts |
| Magnesium | ±0.003 in (±0.075 mm) | ±0.0015 in (±0.038 mm) | Good for lightweight, moderate-precision parts |
For larger parts, tolerances tend to open up due to increased thermal contraction and potential warping. Complex shapes, deep cavities, or thin ribs may also require looser limits or local machining. It’s also important to note that aluminum casting molds and die design quality directly impact achievable tolerances—worn or misaligned dies can quickly shift parts out of spec.
Surface Finish and Post-Processing Expectations
Ever wondered how smooth a die cast part can be straight from the mold? Die casting delivers a superior as-cast surface finish compared to most other moulded casting methods. Typical roughness averages (Ra) for as-cast surfaces range from 1.5 to 6.3 μm (60–250 μin), depending on the alloy, die condition, and process parameters.
But not every surface needs to be a showpiece. That’s why it’s common to define "cosmetic zones" on engineering drawings—areas that require tighter control for appearance or fit. Other surfaces may be left as-cast or specified for machining, painting, or plating as needed. When planning for secondary operations, consider:
- Machining Allowances: Add extra stock (typically 0.25–0.5 mm) on features that will be machined for critical fits or threads.
- Paint/Plating Prep: Specify surface roughness and cleanliness requirements for cosmetic or corrosion-resistant finishes.
- Flash and Parting Line Cleanup: Indicate allowable flash, ejector pin marks, and gate vestiges based on end-use needs.
For highly visible or tactile surfaces, additional finishing like tumbling, vibratory deburring, or shot blasting may be used to enhance appearance and uniformity. Always communicate these expectations with your die caster early to avoid surprises and extra costs.
Best Practices for Drawings and GD&T
Want to make sure your die cast part is manufactured exactly as you imagined? Here are some proven tips for drawings and geometric dimensioning and tolerancing (GD&T):
- Clearly define datums (reference points) for measurement and assembly.
- Include draft angles on all vertical faces—typically 1–3° for aluminum, 0.5–1° for zinc.
- Highlight "critical-to-quality" features and specify tighter tolerances only where necessary.
- Use callouts for cosmetic zones and any special surface requirements.
- Reference NADCA or ISO standards for general tolerances and surface finish classes.
Thinner walls and tighter tolerances demand robust process control—without it, expect longer cycle times or higher scrap rates. Balance design ambition with smart gating, venting, and die maintenance for reliable, cost-effective results.
Understanding the dimensional and surface quality capabilities of die casting empowers you to design parts that are both manufacturable and high-performing. In the next section, we’ll explore the tooling, machine selection, and cost factors that bring your die cast designs to life.
Tooling, Machines, and Cost Economics in Die Casting
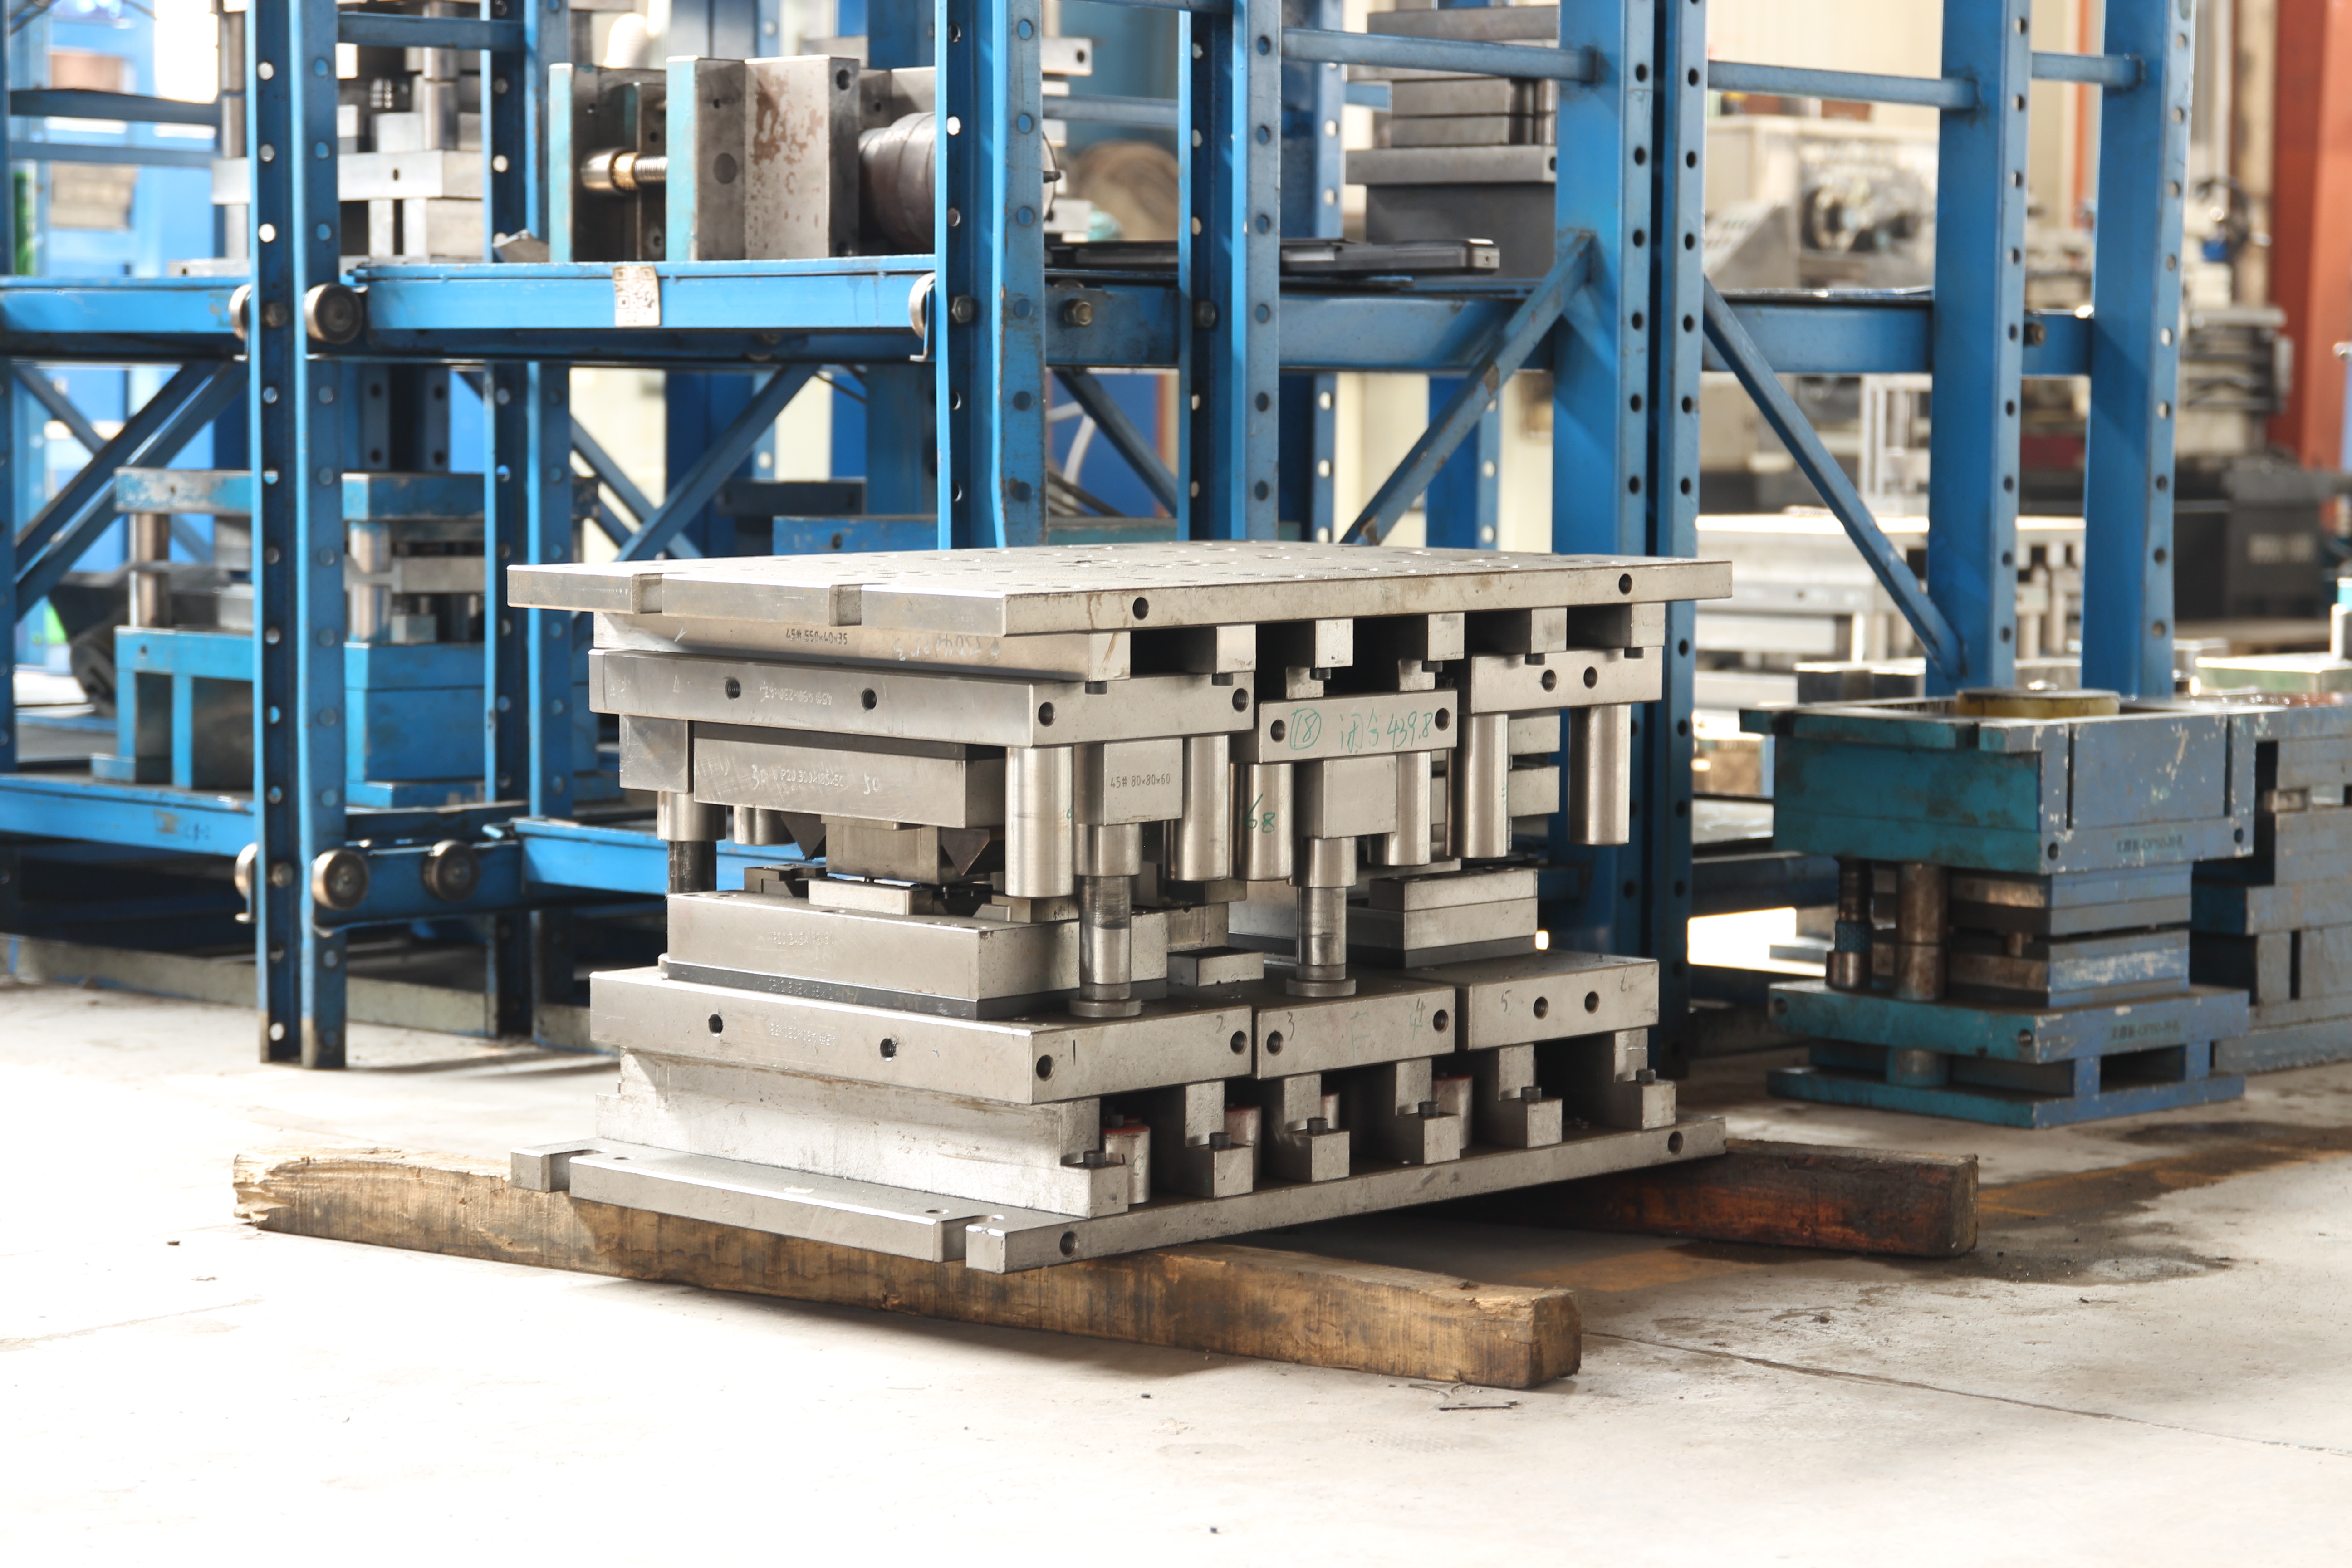
Tooling Architecture and Die Life Factors
When you think about what brings a die cast design to life, it all starts with the right die cast tooling. Sounds complex? Imagine a system of custom steel molds (dies), inserts, slides, lifters, cooling circuits, and venting channels—all engineered to work together under intense pressure and temperature swings. The core and cavity of the die are typically made from premium tool steels, such as H13, chosen for their ability to resist thermal fatigue, cracking, and wear over repeated cycles.
Die life—how many shots a die can produce before refurbishment or replacement—is influenced by:
- Tool material and heat treatment: H13 steel and surface treatments like nitridation extend life by resisting cracking and corrosion.
- Thermal management: Integrated cooling channels and proper die temperature control reduce thermal shock and improve dimensional stability.
- Surface coatings: Specialized coatings inside the tooling can further reduce wear and help molten metal flow smoothly.
- Design for maintainability: Features like replaceable inserts and accessible venting make it easier to service the die and extend its usable life.
Regular die maintenance—cleaning, inspection, and timely repairs—can prevent costly downtime and help you get the most out of your investment in die casting tooling.
Selecting Die Casting Machines: Tonnage and Shot Systems
Choosing the right die casting machine is just as critical as the tooling itself. When you select a die cast machine or die cast press, you’ll need to consider the projected area of your part, the number of cavities in your die, and the pressure required to fill the mold. Here’s what to keep in mind:
| Machine Selection Factor | Impact |
|---|---|
| Clamp Force (Tonnage) | Must be high enough to keep the die closed under injection pressure and prevent flash. |
| Shot Capacity | Determines the maximum volume of molten metal injected per cycle; must match part and runner volume. |
| Tie-Bar Spacing | Limits the maximum die size that can be installed in the machine. |
| Cycle Time | Shorter cycles increase throughput, but may require more robust cooling and ejection systems. |
| Automation Compatibility | Enables integration with robots or conveyors for higher-volume production. |
For high-volume runs, a die cast press mfg with advanced automation and rapid cycle times can drive down per-part costs. For smaller batches or complex parts, machines with flexible shot control and slower, more controlled cycles may be preferable.
Cost Drivers and Amortization Framework
Ever wondered why some die cast parts cost more than others? The answer lies in a mix of tooling complexity, machine class, material selection, and production volume. Let’s break it down:
| Cost Driver | Primary Effect |
|---|---|
| Tool Complexity | Higher complexity raises initial tool price, but can reduce secondary operations. |
| Number of Cavities | More cavities increase tool cost, but lower piece price in high volumes. |
| Alloy Choice | Aluminum, zinc, and magnesium alloys vary in raw material cost and affect die life. |
| Machine Class | Larger or more automated machines cost more upfront but can deliver lower per-part costs at scale. |
| Cycle Time | Faster cycles reduce labor and overhead per part; may require higher tool investment. |
| Scrap Rate | Higher scrap means more material and processing cost; robust design and process control minimize this. |
When planning your project, think about amortizing the tooling investment over the expected production volume. For high-volume applications, the up-front cost of precision tooling for die casting is offset by low per-part costs and rapid cycle times (Die Casting Design).
- Key maintenance checkpoints to protect die life and part quality:
- Inspect die surfaces for cracks, wear, or buildup after each run
- Clean and lubricate moving components (slides, lifters) regularly
- Check cooling circuits for blockages or leaks
- Monitor venting channels and ejector pins for alignment and function
- Schedule preventative maintenance and refurbish dies as needed based on part volume and alloy
Ultimately, the right combination of robust die casting machine, well-designed die cast tooling, and disciplined maintenance sets the foundation for consistent quality, competitive cost, and reliable delivery. As you plan your next project, keep these factors in mind to balance performance, budget, and lead time. Next, we’ll compare die casting with forging—so you can make the most informed choice for your automotive or structural applications.
Die Casting Versus Forging for Automotive Parts
When to Die Cast Versus Forge in Automotive
Picture a scenario: You need a lightweight, complex bracket for a vehicle’s transmission housing. Would you choose die casting or forging? Now, imagine a control arm that must endure years of road shock and fatigue—would the answer change? These questions get to the heart of forging vs casting in automotive engineering. The right choice can make the difference between a part that’s cost-effective and one that delivers uncompromising strength over its entire service life.
Strength, Complexity, and Volume Trade-Offs
Let’s break down the difference between casting & forging through the lens of automotive requirements. Die casting excels when you need high-volume production of intricate, thin-walled shapes—think transmission cases, electronic housings, or decorative trim. The process injects molten metal into a precision die, yielding tight tolerances and a smooth finish. However, castings may have internal porosity and generally lower mechanical strength compared to forged parts, especially for high-stress, safety-critical components.
Forging, on the other hand, shapes metal using compressive forces, aligning the grain structure for maximum strength and fatigue resistance. This makes it the go-to for parts like knuckles, shafts, and suspension arms—areas where failure is not an option. While forging is less suited to extremely complex or hollow geometries, it delivers superior durability and impact resistance.
| Criteria | Automotive Forging Parts | Die Casting | General Forging |
|---|---|---|---|
| Mechanical Strength | Exceptional (IATF 16949 certified, optimized grain flow) | Good (but lower due to potential porosity/defects) | High (superior fatigue and impact resistance) |
| Complexity & Thin Walls | Moderate (best for robust, load-bearing shapes) | Excellent (complex, thin-walled, intricate features) | Limited (simple to moderately complex forms) |
| Surface Finish | Requires machining or finishing | Smooth as-cast, minimal finishing required | May require extra machining for fine finish |
| Tolerance | Tight (can be machined to spec) | Very tight (as-cast), best for repeatability | Tight (after machining) |
| Production Volume | Scalable from prototyping to mass production | Best for high-volume runs | Medium to high, but less suited for very complex shapes |
| Lead Time | Short (in-house die design, rapid prototyping) | Short for large runs (after tool build) | Moderate (die build and setup required) |
| Ideal Applications | Fatigue-critical, safety-related, and structural automotive parts | Housings, brackets, covers, non-structural components | High-load, repetitive-stress, or wear-critical components |
For automotive OEMs and Tier 1 suppliers, Automotive Forging Parts provide a strategic solution for high-strength, fatigue-critical parts. Their IATF 16949 certification, in-house hot forging die design, and rapid prototyping capability ensure the right balance of performance, quality, and speed for demanding programs.
Design Cues for Choosing the Right Process
Still unsure which process to pick? Here’s a quick checklist to help you decide between casting vs forging for your next automotive component:
-
Choose forging when:
- Maximum mechanical strength and fatigue life are required (e.g., suspension, drivetrain, steering knuckles)
- You need to minimize material waste and maximize part longevity
- Parts must meet strict safety or regulatory standards
-
Choose die casting when:
- Complex, thin-walled, or highly detailed shapes are needed
- Large production volumes justify upfront tooling costs
- Surface finish and dimensional accuracy are top priorities for non-structural parts
Both forging and casting are critical to modern automotive manufacturing. Your decision should weigh the specific performance requirements, geometry, and volume of each part. For some applications, a hybrid approach—using forged blanks finished by machining, or castings reinforced by selective forging—may deliver the best results.
The best automotive designs start by matching the process—forge vs cast—to the part’s real-world demands. Evaluate strength, complexity, and production scale to ensure your choice delivers both performance and value.
As you weigh your options, remember that the selection process is as much about engineering trade-offs as it is about cost or speed. Next, we’ll wrap up with a practical checklist to help you confidently choose between die casting and forging for your next project.
A Practical Selection Checklist and Next Steps
Checklist for Choosing Die Casting or Forging
Faced with a new part design, you might ask: Should you go with die casting or consider forging instead? The answer isn’t always obvious, especially when balancing strength, complexity, and cost. To help you decide, here’s a straightforward, step-by-step checklist—think of it as your roadmap for selecting the right process for your project’s needs.
-
Define Your Geometry and Complexity
Is your part highly intricate, with thin walls, undercuts, or fine details? If so, what is diecast metal excels here, producing complex shapes with tight tolerances and smooth finishes. Simpler, robust shapes may be better suited to forging. -
Set Wall Thickness and Feature Size Targets
Die casting can achieve very thin walls and small features, while forging is typically limited to thicker, more uniform sections. If your design requires walls thinner than 3 mm, die casting is likely the better fit. -
Assess Structural Loads and Fatigue Requirements
Will your part face high mechanical loads, repeated stresses, or must it withstand critical failures? If so, forging provides superior grain alignment and fatigue resistance. For these applications, review Automotive Forging Parts as a proven solution—especially for safety-critical or high-strength automotive components. -
Estimate Production Volume and Lead Time
Die casting shines for high-volume runs due to its rapid cycle times and low per-part cost after tooling. Forging is often chosen for medium volumes or when the upfront investment in dies is justified by long-term durability. -
Identify Surface Finish and Tolerance Needs
Need a smooth, as-cast finish and tight tolerances? Die casting delivers excellent results with minimal post-processing. Forged parts may require additional machining for fine finishes, but offer robust mechanical properties. -
Check Budget and Timeline Constraints
Consider the upfront tooling and setup costs for both processes. Die casting requires significant investment in dies, but the cost is amortized over large volumes. Forging may offer a lower entry cost for smaller runs, especially when strength is paramount. -
Validate with DFM and Supplier Consultation
Before finalizing, run Design for Manufacturability (DFM) workshops and consult with your supplier. Simulate metal flow, check gating/venting, and confirm that your design is feasible for the chosen process. This step helps avoid costly changes after tooling begins.
Critical Decision Gates Before Tooling
Not sure if you’re ready to commit to tooling? Use these key questions as decision gates:
- Does the part geometry align with the strengths of what is a die cast or what is metal forging?
- Are strength and fatigue life critical? If yes, consider forging as your primary pathway.
- Is your expected volume high enough to justify die casting’s tooling investment?
- Have you validated tolerances, wall thickness, and surface finish requirements with simulations or prototypes?
- Have you reviewed all DFM recommendations and supplier feedback?
Next Steps to Validate Your Process Choice
Once you’ve worked through the checklist, it’s time to prepare your documentation and validate the process:
- 3D CAD model with all draft angles and wall thicknesses clearly defined
- Complete GD&T (Geometric Dimensioning and Tolerancing) callouts for all critical features
- Identification of cosmetic zones and finish requirements
- Expected production volumes and delivery timelines
- Preliminary quality plan, including inspection and testing criteria
The smartest process choices are always validated by both performance requirements and manufacturability simulations—don’t skip this step.
If your project points toward high-strength, fatigue-critical service—especially in automotive or safety-related applications—take a closer look at Shaoyi's Automotive Forging Parts as a vetted pathway for forging. Their IATF 16949 certification and scalable production capabilities ensure you’re equipped for demanding requirements.
With this practical, decision-driven approach, you’ll confidently answer questions like "what is diecast," "what is a diecast," and "what is a die in casting"—and select the best manufacturing process for your next project. Remember, each part’s demands are unique, so let performance, manufacturability, and expert guidance lead your way.
Frequently Asked Questions About Die Cast Metal
1. Is die cast metal good?
Die cast metal is valued for its high strength, dimensional accuracy, and ability to form complex shapes with excellent surface finishes. Its reliability makes it a top choice in automotive, electronics, and consumer products, especially for high-volume production where tight tolerances and repeatability are essential.
2. Is die cast metal real metal?
Yes, die cast metal refers to genuine metal alloys such as aluminum, zinc, and magnesium. These non-ferrous metals are melted and injected into precision steel molds under pressure, resulting in solid, durable components used in a wide range of industries.
3. What is die casting used for?
Die casting is commonly used to manufacture automotive parts, electronic housings, appliance components, and consumer goods. Its ability to produce intricate, thin-walled parts with minimal finishing makes it ideal for applications demanding precision and high production rates.
4. How does die casting differ from other casting methods?
Unlike sand or investment casting, die casting uses reusable steel dies and high-pressure metal injection. This results in smoother surfaces, tighter tolerances, and faster production cycles. Die casting is especially suited for complex, thin-walled designs that would be challenging or costly with other casting methods.
5. When should forging be chosen over die casting?
Forging is preferred for parts that require maximum strength, fatigue resistance, and durability, such as automotive suspension or drivetrain components. If your application demands superior mechanical properties and safety-critical performance, consider a certified forging supplier like Automotive Forging Parts for optimal results.