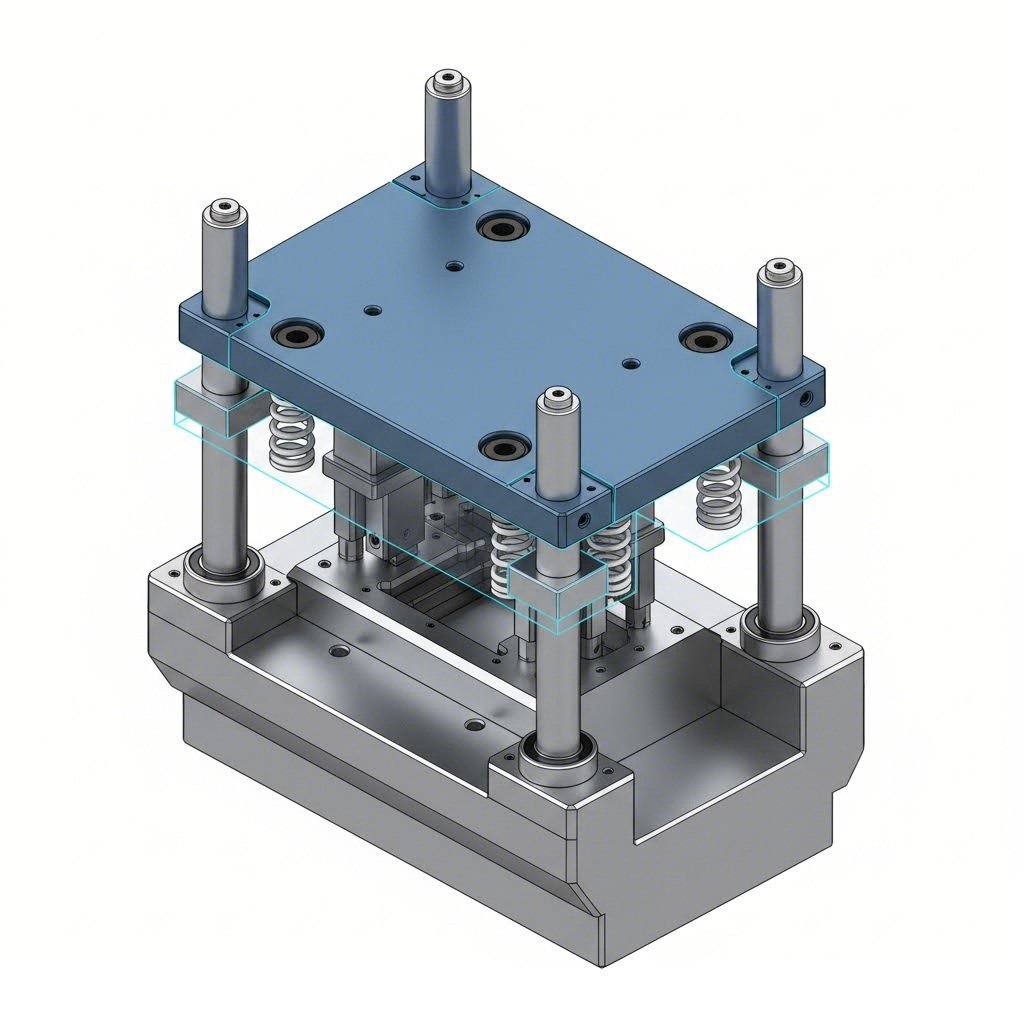
 Small batches, high standards. Our rapid prototyping service makes validation faster and easier —

Stamping Die Maintenance Procedures: Maximizing Uptime & Tool Life
TL;DR
Stamping die maintenance is a systematic, preventive regimen designed to stop tool failure before it disrupts production. Unlike reactive repair—which fixes broken components after a crash—true maintenance focuses on cleaning, inspecting, and lubricating to preserve critical tolerances and cutting edges. Top industry experts emphasize replacing springs and sharpening punches before they show visible wear signs to avoid costly downtime. Implementing a strict schedule of preventative measures, such as grinding D2 steel with proper wheels and avoiding "spongy" shimming, ensures consistent part quality and maximizes press uptime.
The Core Philosophy: Preventive Maintenance vs. Die Repair
A fundamental misunderstanding often plagues metal stamping shops: the confusion between die maintenance and die repair. According to industry authorities like The Fabricator, these are two distinct activities with vastly different financial impacts. Die repair is a reactive process—firefighting broken pads, welding cracked sections, or digging out stuck parts. It is characterized by unscheduled downtime, high stress, and "invisible costs" like missed shipments and sorting fees.
In contrast, preventive maintenance is a disciplined, scheduled activity performed while the tool is still functional. The goal is to restore the die to its original engineering specifications before failure occurs. This proactive approach shifts the focus from "fixing what broke" to "maintaining what works," significantly reducing the total cost of ownership.
To illustrate the difference, consider the tasks involved in each approach:
| Preventive Maintenance (Proactive) | Die Repair (Reactive) |
|---|---|
| Replacing springs at 80% of rated life cycle | Replacing broken springs after a die crash |
| Sharpening cutting edges on a schedule | Grinding chipped or dull edges causing burrs |
| Cleaning and lubricating guide pins daily | Replacing galled pins and bushings |
| Verifying timing and alignment during downtime | Adjusting shims during a production run |
Shifting to a preventive culture requires management to prioritize "invisible" savings—like extended tool life and consistent part geometry—over the visible activity of emergency repairs. A robust maintenance program tracks component lifecycles and schedules service intervals based on stroke counts, not failure events.

Daily & Shift-Level Maintenance Checklist
Effective stamping die maintenance begins on the shop floor with a rigorous daily routine. Operators and die setters must adhere to a "Clean-Inspect-Lubricate" loop to prevent debris accumulation and friction damage. This daily discipline is often the difference between a smooth run and a catastrophic mid-shift failure.
1. Deep Cleaning Protocols
Debris is the enemy of precision. Metal slivers, slug buildup, and degraded lubricant can destroy guide components and alter die timing. Use copper brushes or soft scrapers to remove debris without scratching the die surfaces. High-pressure air should be used cautiously to avoid blowing metal chips into guide bushings or behind wear plates. Ensure that all slug drop holes and scrap chutes are completely unobstructed.
2. Visual Inspection Points
Before the first stroke, conduct a detailed visual inspection. Look for:
- Loose Fasteners: Vibration often loosens screws and dowels. Check for any "backed-out" bolts that could cause misalignment.
- Missing Components: Verify that all pilots, sensors, and gag bars are present and secure.
- Surface Condition: Inspect wear plates and cam surfaces for signs of scoring or galling, which indicate lubrication failure.
- Spring Tension: Check for broken or fatigued springs that may not be returning the stripper plate fully.
3. Precision Lubrication
Over-lubrication can be as damaging as under-lubrication, leading to "hydraulic lock" or sludge buildup. Apply lubricant precisely—typically 3–5 drops on guide pins—rather than flooding the tool. Use the correct viscosity oil specified for the die's speed and load; heavy drawing oils may be necessary for forming stations, while lighter oils suit high-speed blanking.
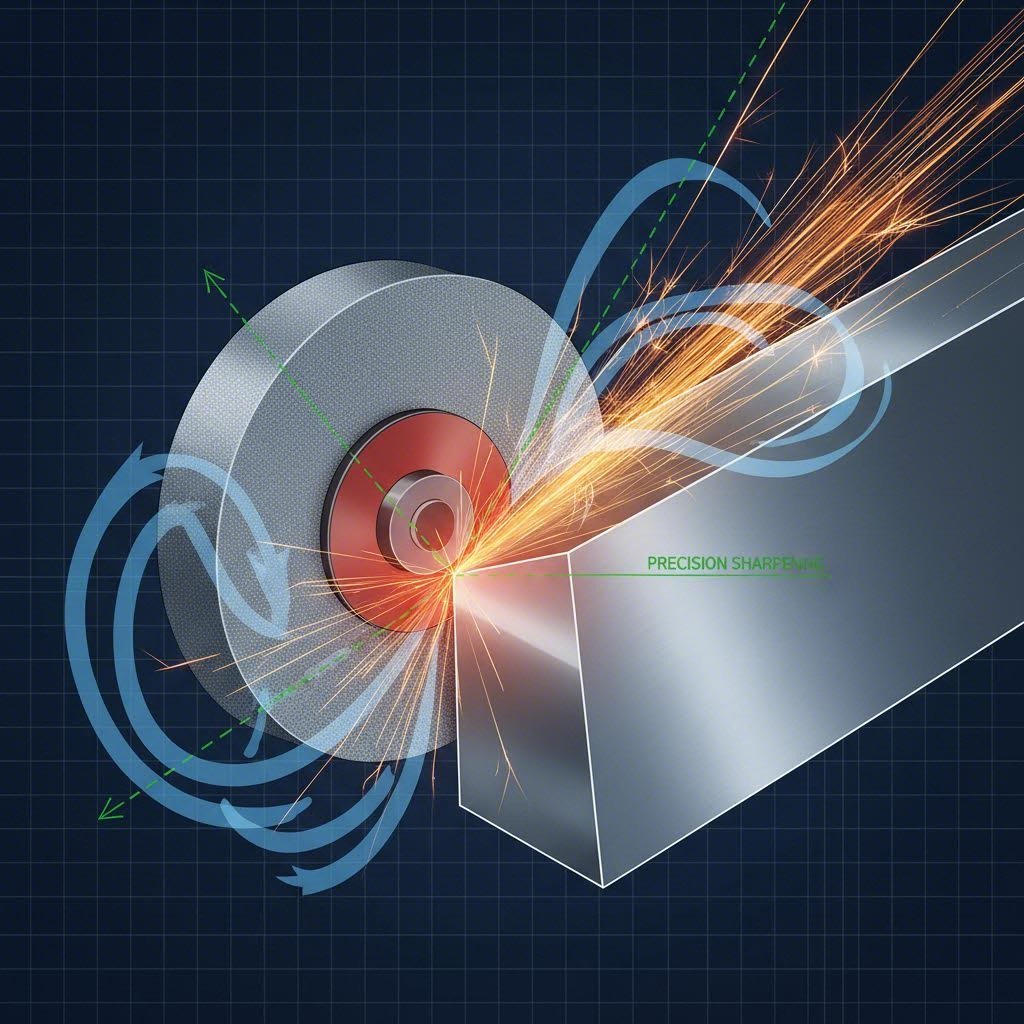
Deep Dive: Sharpening and Resurfacing Procedures
Sharpening is not merely about making an edge "sharp"; it is about restoring the die's structural integrity without damaging the steel's metallurgy. Technical articles from The Fabricator highlight that improper grinding is a leading cause of premature edge failure.
When sharpening tool steels like D2 or M4, you are essentially grinding through a matrix of hard carbide pools. Using a grinding wheel that "loads up" (becomes clogged with soft metal) creates excessive heat. This heat can cause heat checking (micro-cracks) or soften the steel by annealing it. Always use a soft-bond, open-structure wheel that breaks down effectively to keep the workpiece cool. Flood coolant is highly recommended to dissipate heat during the process.
Furthermore, maintaining the correct shear angle is critical. A proper shear angle reduces the tonnage required to cut the metal and dampens the "snap-through" shock that damages press bearings. After grinding, it is imperative to demagnetize the die sections. Residual magnetism attracts steel slugs and debris, leading to double-hits and severe surface damage on subsequent runs.
Structural Integrity: Shimming and Alignment Best Practices
Shimming is a necessary evil in die maintenance, used to maintain timing and shut height after sharpening. However, improper shimming techniques can introduce instability, often referred to as a "spongy die."
Avoid stacking multiple thin shims (e.g., five 0.002" shims) to achieve a desired thickness. These layers can compress under tonnage, causing the die station to "breathe" or move unpredictably. Instead, replace the stack with a single, precision-ground shim of the correct thickness. This ensures a solid foundation for the cutting block.
Alignment verification is the final step in structural maintenance. Ensure that guide pins and bushings engage smoothly without binding. Verify that slug drop holes remain aligned through the shim pack; a blocked slug hole is a guaranteed recipe for a die explosion. When reassembling, torque fasteners to specification to prevent lateral movement of die sections during high-speed operation.
Component Lifecycle Management
Proactive component replacement is the hallmark of a mature maintenance program. Waiting for a spring to break or a pilot to gall is a failure of management. Establish a log to track the stroke count of critical components and replace them at approximately 80% of their expected lifecycle.
Springs: Coil springs are prone to fatigue. Over-deflecting a spring (compressing it beyond its design limit) drastically shortens its life. If springs break frequently, investigate whether the die design allows for adequate travel or if a nitrogen gas spring upgrade is warranted.
Pilots and Retainers: Inspect pilots for "pick-up" or galling, which can distort the strip and cause misfeeds. Retainers should be checked for ball-lock mechanism wear to ensure punches remain secure.
For manufacturers handling high-volume automotive programs, the quality of these components and the initial die build is paramount. Shaoyi Metal Technology accelerates automotive production by bridging the gap from rapid prototyping to mass manufacturing. Their IATF 16949-certified precision ensures that critical components, such as control arms and subframes, meet global OEM standards from the start, reducing the burden of premature maintenance.
Troubleshooting Common Die Failures
Even with rigorous maintenance, issues arise. A systematic diagnostic approach helps identify the root cause quickly.
| Problem | Potential Root Cause | Corrective Action |
|---|---|---|
| Galling | Insufficient lubrication, excessive heat, or incompatible materials. | Polish galled surfaces, upgrade to high-pressure lubricant, or apply PVD coatings (e.g., TiCN). |
| Slug Pulling | Magnetism in the punch, excessive punch-to-die clearance, or vacuum suction. | Demagnetize the tool, add a spring-loaded ejector pin, or cut a "rooftop" shear on the punch face. |
| Burrs | Dull cutting edges or misalignment between punch and die. | Sharpen cutting edges, check alignment, and verify clearance is uniform (typically 10% of material thickness). |
| Misfeeds | Pilot breakage, strip drag, or feeder timing issues. | Inspect strip lifters for proper function and check pilots for wear or looseness. |
Conclusion
Successful stamping die maintenance is a cultural shift from reactive firefighting to proactive precision. By treating the die as a high-precision instrument that requires regular cleaning, measured lubrication, and scheduled component replacement, shops can dramatically increase uptime and profitability. The investment in "invisible" preventative tasks pays dividends in the form of consistent part quality, extended tool life, and a safer, more predictable production environment.
Frequently Asked Questions
1. How often should stamping dies be sharpened?
Sharpening frequency depends on the material being stamped and the die material (e.g., carbide vs. tool steel). A best practice is to track the number of hits (strokes) and sharpen before burrs exceed allowable tolerances. For high-volume production, this might be every 50,000 to 100,000 strokes.
2. What is the best way to prevent slug pulling?
Slug pulling is often caused by a vacuum forming between the punch and the slug. To prevent this, use punches with spring-loaded ejector pins, grind a shear angle on the punch face, or ensure the die is thoroughly demagnetized after any grinding operations.
3. Can I use multiple shims to adjust die height?
Using multiple thin shims is discouraged as it creates a "spongy" support that can compress under load. Ideally, use a single, precision-ground shim of the required thickness to maintain rigidity and prevent the die section from moving or "breathing" during operation.