 Small batches, high standards. Our rapid prototyping service makes validation faster and easier —

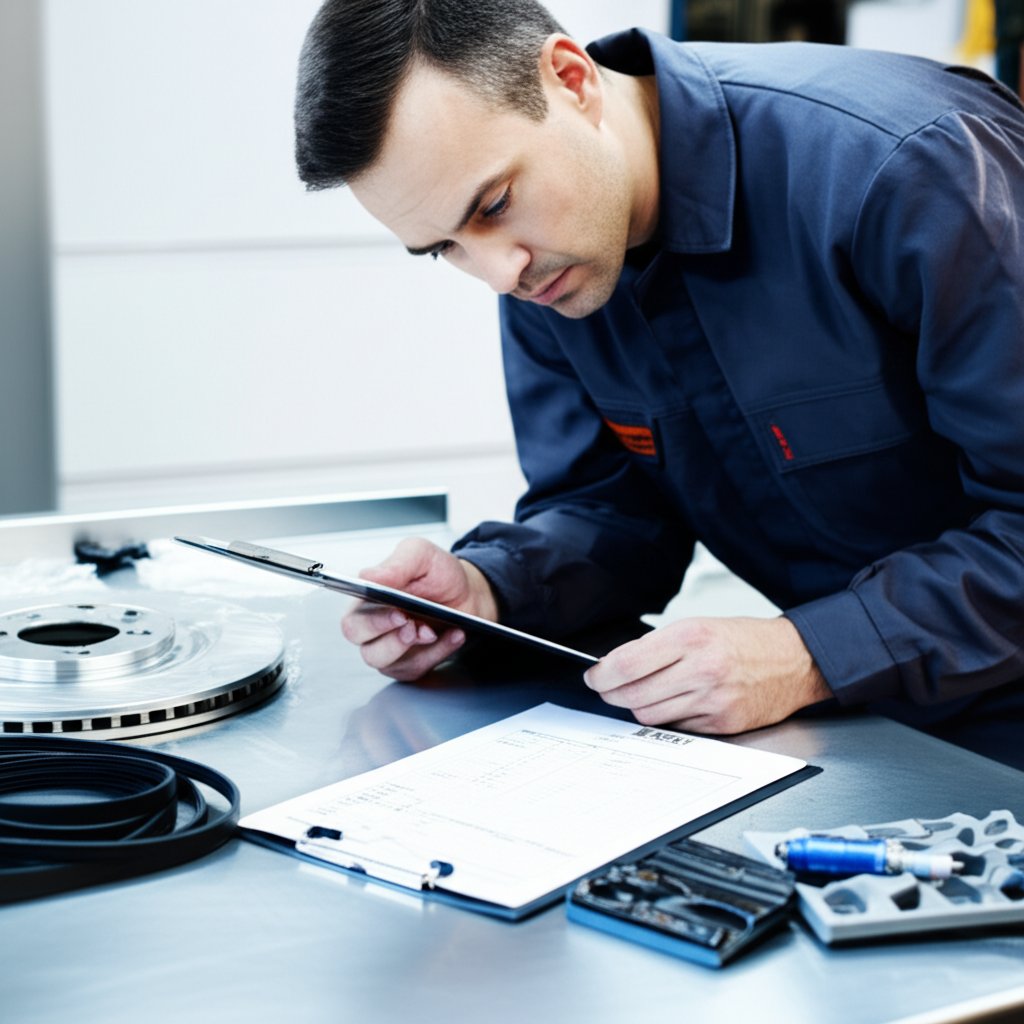
Quality Automotive Parts QA And Fit Checks Most Buyers Skip
Why Quality Parts Change Every Drive
What Quality Automotive Parts Really Mean
When you replace a worn-out part on your car, do you ever wonder if the quality truly matters? Imagine trusting your brakes on a rainy day or relying on your engine to start in freezing weather. The difference between quality automotive parts and their cheaper counterparts is more than just price—it’s about safety, performance, and peace of mind every time you drive.
So, what are quality automotive parts? These are components manufactured to meet or exceed strict industry standards—often the same standards set by your vehicle’s original maker. They’re made with premium materials, engineered for precise fitment, and tested for durability and safety. That means when you choose top quality auto parts, you’re investing in reliability, consistent performance, and fewer surprises down the road (Industry Today).
The Hidden Costs of Cheap Components
It’s tempting to save money with bargain parts, but what’s the real cost? Cheaper, low-quality parts are often made from subpar materials and lack the careful engineering needed for a perfect fit. You’ll notice issues like increased noise, vibration, and harshness—or worse, safety features that don’t work as intended. These problems can lead to more frequent repairs, unexpected breakdowns, and even higher total ownership costs over time. In some cases, using low-quality parts can void your warranty or cause damage that’s much more expensive to fix later.
- Consistent fitment that speeds up installation and reduces rework
- Lower risk of safety system failures
- Improved performance—think better braking, smoother handling, and quieter rides
- Fewer comebacks and warranty claims
- Longer part lifespan and stronger warranty support
Safety, Performance, and Longevity Priorities
Every component in your vehicle plays a role in how it handles, stops, and protects you. Quality parts help maintain the original engineering intent of your car, from precise braking distances to smooth acceleration and minimal cabin noise. When you choose reliable auto parts, you’re not just fixing a problem—you’re helping your car last longer and perform better in every condition. This is why many experts recommend quality autoparts for critical repairs and upgrades.
Commit to fitment-first research before price comparisons—choosing the right part for your specific vehicle is the foundation of safety and value.
This guide is designed to help you make smart, vendor-neutral decisions. You’ll learn how to:
- Identify the criteria that define quality parts
- Verify fitment and avoid costly returns
- Map symptoms to the right component before you order
- Follow step-by-step install guides for common repairs
- Weigh cost versus value, including remanufactured options
- Understand QA and testing standards
- Compare suppliers and set lifecycle expectations
- Use a buyer toolkit to streamline your next project
Throughout this article, you’ll find actionable advice based on standards—not brand hype. For the best results, keep your VIN and part numbers handy as you move through the steps. And remember: when in doubt, prioritize quality and fitment for every repair. Ready to take control of your vehicle’s reliability? Let’s get started with the essentials of quality autoparts.
How To Recognize True Parts Quality
Materials And Tolerances That Matter
Ever wondered why some replacement parts fit perfectly and last longer, while others cause headaches from day one? The secret lies in the details—starting with the materials and manufacturing tolerances. Quality automotive parts begin with the right alloy grade, whether you’re looking at a control arm, a ball joint, or a brake caliper. For example, a high-grade steel or aluminum alloy resists fatigue and corrosion far better than cheaper alternatives, ensuring your repair stands the test of time.
- Alloy grade clarity: Look for clear material specifications—don’t settle for vague terms like “premium steel.”
- Precision tolerances: Check for stated CNC or stamping tolerances. Standards like ISO 2768 or ISO 286 help ensure parts fit and function as intended (Xometry).
- Alignment marks and runout control: Especially for brake rotors and wheel bearings, these features ensure smooth rotation and prevent vibration.
When you see tight tolerances listed—say, ±0.05 mm for a machined surface—you can be confident the part will fit like the original. For a brake caliper, smooth piston movement and a snug fit on the mounting bracket are must-haves for safe operation.
Heat Treatments, Coatings, And Corrosion Resistance
It’s easy to overlook, but surface treatments are critical for longevity. Imagine installing a wheel bearing or a brake caliper that rusts after the first winter—frustrating, right? Quality parts often feature heat treatments (to harden wear surfaces), anti-corrosion coatings, or even specialized paints on exposed components.
- Salt spray and lab testing: Ask if the part passed endurance or salt spray tests. This is especially important for brake rotors and exposed suspension parts.
- Seal integrity: For wheel bearings and brake calipers, quality seals keep out debris and moisture, preventing premature failure.
- Torque spec inclusion: Reliable parts come with clear torque specs, reducing the risk of over-tightening or under-torquing during installation.
Don’t hesitate to request test summaries from the seller. If they can’t provide them, look for vendors who openly publish their QA processes and offer serial-level traceability. This level of transparency signals a commitment to quality and accountability.
Documentation, Warranty, And Traceability
Documentation is your ally when comparing quality parts. High-quality components come with installation instructions that are clear and specific to your vehicle. Warranty coverage should be straightforward—avoid parts with fine-print exclusions that make claims difficult.
- Installation instructions: Well-written guides help you avoid mistakes and ensure the part performs as designed.
- Warranty terms: Favor warranties that are easy to understand and don’t hide behind legal jargon.
- Traceability: Serial numbers or batch codes make it easy to track the part’s origin, which is invaluable if issues arise later.
Process certifications (like ISO or IATF) are a good sign—these standards indicate the manufacturer follows repeatable, controlled processes. However, remember that certification alone doesn’t guarantee a perfect fit; always verify the part matches your vehicle’s build and application before purchase.
Verify a part’s stated tolerances and surface treatment against the application’s heat and load profile—this is your best defense against premature failure.
For instance, a brake caliper with robust seals and smooth piston action is more likely to deliver reliable braking performance and resist leaks or sticking. Similarly, a wheel bearing with high-grade grease and tight pre-load consistency will run quieter and last longer.
Finally, make it a habit to capture screenshots of product pages showing key claims, material specs, and warranty terms. This documentation streamlines future returns and warranty claims, giving you peace of mind with every purchase.
Now that you know what to look for in true quality, let’s move on to verifying fitment—because even the best part can cause trouble if it doesn’t match your vehicle exactly.
Proven Fitment Verification Workflow
VIN First For Accurate Fitment
Ever ordered a part online, only to realize it doesn’t fit when you open the box? You’re not alone. With so many variations in trims, engines, and production years, even seasoned DIYers and professionals can fall into the fitment trap. The key to avoiding wasted time and money is making your Vehicle Identification Number (VIN) the starting point for every purchase. Why? Because your VIN unlocks your car’s unique build details—think of it as your vehicle’s fingerprint. By decoding the VIN, you’ll know exactly which quality automotive parts match your car, from a cv axle to an engine air filter or a mass air flow sensor.
- Gather your VIN and build details: Find your 17-character VIN (usually on the dashboard or driver’s door jamb) and note your trim, engine code, and drivetrain. This information is essential for accurate matching (Torque360).
- Find the OEM part number: Use your VIN in a dealer EPC (Electronic Parts Catalog) or a trusted online catalog. The OEM number is the gold standard for fitment—don’t skip this step.
- List cross-reference numbers: Search reputable catalogs, like those on rockauto or partsgeek, for aftermarket or alternative part numbers that interchange with your OEM number.
- Compare connector shape, mounting points, and dimensions: Use product photos, technical drawings, and spec sheets to confirm the part matches your vehicle’s physical requirements. Visual checks help avoid surprises, especially for components like the cv axle or mass air flow sensor.
- Validate seller fitment claims: Always match your VIN build data to the seller’s fitment grid or compatibility list. If something doesn’t add up, trust your OEM number over generic selectors.
Decoding OEM And Cross-Reference Numbers
OEM part numbers are assigned by your vehicle’s manufacturer and are the most reliable way to ensure a perfect fit. But what if your part is discontinued or you’re shopping aftermarket? That’s where cross-reference numbers, or interchange numbers, come in. These are alternative part numbers from different brands that meet the same specs as the original. Marketplaces like rockauto and partsgeek make it easy to search by OEM or cross-reference, but always double-check against your VIN and build details for the best results.
| Field From VIN | What To Check | Where To Find It |
|---|---|---|
| Production Date | Model year breakpoints, mid-year changes | VIN build sheet, dealer catalog |
| Trim/Engine Code | Engine size, turbo/non-turbo, hybrid, etc. | VIN decoding tool, manufacturer website |
| Drivetrain | Front/rear/all-wheel drive differences | VIN, owner’s manual |
| Regional Specs | US vs. Euro/Japan build variations | VIN, regional build guides |
Model Year, Submodel, And Option Group Nuances
Sounds complex? It doesn’t have to be. Sometimes, a single model year can have multiple production phases or rare option packages. For example, an engine air filter for a turbo variant might not fit the base model, or a cv axle could differ between all-wheel and front-wheel drive versions. Always check for:
- Production date breakpoints (mid-year changes)
- Trim and engine code specifics
- Drivetrain and regional variations
Established catalogs on rockauto and partsgeek help you cross-check fitment, but remember: your VIN and OEM references are more reliable than generic vehicle selectors.
If a listing’s fitment grid contradicts your OEM number, prioritize the OEM mapping. It’s your best defense against costly returns and install failures.
For peace of mind, save screenshots of part numbers, fitment confirmations, and product pages in a digital folder. This habit not only helps with future maintenance and warranty claims, but also streamlines communication if you ever need to return a part or prove compatibility later on. Next up, we’ll show you how to map common symptoms to the right component—so you can diagnose before you buy.

Symptom To Part Diagnosis That Saves Time
From Check Engine Light To Likely Culprits
Ever had your check engine light pop on and wondered where to begin? You’re not alone. The key to smart repairs is understanding which symptoms point to which parts—before you order anything. By mapping common warning lights and drivability issues to their most likely causes, you’ll save time, avoid guesswork, and make the most of your investment in quality automotive parts.
| Symptom Code | First Checks | Likely Parts | Safety Impact |
|---|---|---|---|
| P0171 (System Too Lean) | Check for vacuum leaks, inspect for unmetered air, scan for additional codes | maf sensor, oxygen sensor, fuel pump, fuel injectors, fuel filter | Medium – can cause misfires, stalling, long-term engine damage |
| P0174 (System Too Lean, Bank 2) | As above, focus on bank-specific leaks and sensor readings | maf sensor, oxygen sensor, intake manifold gasket, fuel delivery components | Medium – similar risks as P0171 |
| Rough Idle/Misfire | Scan for codes, check spark quality, inspect for vacuum/fuel issues | ignition coil, spark plugs, fuel injector, throttle position sensor | Medium-High – can lead to stalling, loss of power |
| Braking Pulsation | Feel for steering wheel vibration, inspect rotors, check wheel bearings | Brake rotors (runout), wheel bearing, suspension bushings | High – affects stopping distance and control |
| Steering Pull/Noise | Inspect tire wear, check suspension joints, listen for clunks | Control arm, ball joint, tie rod end, wheel bearing | High – impacts vehicle handling and safety |
Noise, Vibration, And Steering Clues
Not every problem triggers a dashboard light. Sometimes, it’s a new noise, vibration, or change in steering feel that signals trouble. For example, a humming or growling sound that changes with speed often points to a worn wheel bearing, while a clunk over bumps could indicate a failing ball joint or control arm. If you notice the brake pedal pulsing, it’s a classic sign of rotor runout—something only top quality auto parts can help prevent.
- Always address safety-critical systems—brakes and steering—before chasing performance issues.
- Verify power and grounds before condemning electronic sensors like the maf sensor or throttle position sensor.
- Use a smoke test for vacuum leaks and a fuel pressure gauge for delivery issues.
Brake Feel And Stopping Performance Signals
When your brakes feel soft, grab unevenly, or make strange noises, don’t ignore it. These symptoms can signal issues with rotors, pads, or even hydraulic components. Uneven braking or vibration underfoot often comes down to rotor thickness variation or improper torque on wheel fasteners. If you’re experiencing any of these, prioritize a thorough inspection and choose reliable auto parts designed for your vehicle’s specs.
Test before you replace. Proper diagnostics save money, prevent returns, and ensure your repairs last.
Document your findings—photos of damaged parts, video of odd noises, or screenshots of scan tool data. This habit not only helps with warranty claims and returns but also makes it easier to get help from online forums or professional technicians if you get stuck (RepairPal).
Now that you know how to connect symptoms to likely causes, the next step is learning the hands-on install checks that confirm your new part is working as intended. Let’s dive into step-by-step installation for common repairs—so you can finish every job with confidence.
Step By Step Installations For Common Repairs
Brake Pad And Rotor Workflow
Ever wondered if installing brake pads and rotors is as complex as it sounds? With the right approach and a focus on quality automotive parts, you can achieve professional results and safer stops. Here’s a clear, step-by-step guide for replacing brake pads and rotors that minimizes rework and maximizes reliability:
- Preparation: Gather all tools and supplies—jack, jack stands, wheel chocks, breaker bar, ratchets, hammer, brake piston compressor, caliper hooks, brake lubricant, new rotors, and pads (Brakes To Go).
- Lift and Secure: Safely lift the vehicle at designated points and support with jack stands. Use wheel chocks behind the tires.
- Wheel Removal: Remove wheels to access the brake assembly.
- Brake Inspection: Check caliper, hub, and suspension for damage before starting.
- Caliper and Bracket Removal: Remove caliper slide pin bolts and bracket bolts. Hang the caliper with a hook or coat hanger—never let it dangle from the hose.
- Compress Piston: Use a brake piston compressor to retract the caliper piston fully.
- Remove Old Hardware: Take out the old pads, hardware, and rotor (tap with a hammer if rusted).
- Install New Rotor: Slide the new rotor onto the hub and secure temporarily with a lug nut.
- Bracket and Pad Installation: Reinstall the bracket, torque bolts to spec, install new hardware, and lubricate pad ears and caliper slide pins.
- Reassemble: Install new pads, reattach caliper, and torque slide pin bolts to specification.
- Final Checks: Double-check all fasteners, reinstall wheels, and torque lug nuts to manufacturer specs.
- Brake Bed-In: Perform a bed-in procedure—accelerate to 35 mph, brake to 5 mph moderately, repeat 2–3 times, then perform a few harder stops from 50 mph without locking the wheels. This ensures optimal pad-to-rotor contact and stopping power.
Wiper Blade Replacement In Minutes
When was the last time you checked your wipers? Clear visibility is critical, and knowing how to replace windshield wipers can make a real difference in safety. Here’s a streamlined process for windshield wiper replacement that anyone can follow:
- Inspect and Measure: Lift each wiper arm and check blade condition for cracks or tears. Measure both blades—sizes may differ between driver and passenger sides (Home Depot).
- Prepare for Removal: Turn off the car, set the emergency brake, and, if possible, run wipers to mid-swipe for easier access.
- Protect Windshield: Place a towel or rag on the glass to prevent accidental cracks if the arm snaps back.
- Remove Old Blade: Depress the tab at the blade’s base and slide it off the arm. Replace one at a time for reference.
- Attach New Blade: Align the new blade’s adapter with the arm’s hook and click into place. Lower arm gently onto the glass.
- Test Function: Spray washer fluid and operate the wipers to confirm streak-free performance and secure attachment.
Learning how to replace windshield wipers isn’t just about new blades—it’s about preventing visibility hazards before they start. Make windshield wiper replacement part of your regular maintenance routine.
Serpentine Belt Routing And Tension
Ever heard squealing from under the hood or noticed flickering lights? A worn serpentine belt can cause all sorts of trouble, from poor charging to overheating. Here’s how to tackle this essential job:
- Sketch the Routing: Draw the belt path before removal or snap a photo. Missing this step can lead to confusion during reinstallation.
- Release Tension: Use the proper tool to rotate the tensioner and relieve belt tension. Carefully slide the old belt off the pulleys.
- Inspect Components: Check the tensioner and all pulleys for wear or misalignment. Replace as needed.
- Install New Belt: Route the new belt according to your diagram. Ensure it sits fully in all pulley grooves.
- Set Tension: Rotate the tensioner and slip the new belt in place. Double-check the tensioner pointer is within the correct range.
- Final Inspection: Spin the pulleys by hand to ensure smooth movement and proper alignment. Start the engine and observe for noise or wobble.
- Essential Tools: Torque wrench, brake cleaner, wire brush, belt tool, jack stands, gloves, and safety glasses.
Always use a torque wrench to manufacturer specification to avoid warping rotors or under-clamping calipers. Proper torque is the difference between a safe repair and an early comeback.
For every install, consult your vehicle’s service manual for specific torque values and recheck all fasteners after a short test drive. Choosing quality automotive parts with precise fitment makes each step smoother and helps ensure your repairs last. Next, we’ll explore how to weigh cost versus value—including when remanufactured parts make sense for your next project.
Cost Value And The Case For Remanufactured Parts
When Paying More Makes Sense
When you’re faced with a repair, do you ever ask yourself if paying more for a part is truly worth it? Imagine your brakes failing during rush hour, or your engine stalling on a road trip. In these moments, the difference between a cheap fix and a dependable repair becomes clear. Choosing quality automotive parts isn’t always about buying the most expensive option—it’s about balancing cost, reliability, and long-term value.
- OEM (Original Equipment Manufacturer) Parts: Designed and tested to match your vehicle’s original specs. Ideal for critical systems like brakes, suspension, or emissions, where fit and function are non-negotiable. They often cost more but deliver consistent performance and peace of mind—especially when the brake pad replacement cost or catalytic converter price justifies a longer service life.
- Aftermarket Parts: Offer a wide range in both price and quality. Some brands match or exceed OEM standards, while others cut corners. Aftermarket is a smart pick for less critical repairs or when you’ve read strong quality auto parts reviews pointing to proven durability.
- Remanufactured Parts: These are used core components restored to like-new condition. They’re thoroughly cleaned, inspected, and rebuilt with new wear items and updated to meet OEM specs (aftermarketNews). Remanufactured options can offer exceptional value for high-cost assemblies like engines, transmissions, or a fuel pump—just be sure to verify the supplier’s quality and warranty policies.
Remanufactured Parts Quality And Sustainability
Ever wondered if remanufactured parts are as good as new? The answer is: often, yes—if you choose a reputable supplier. Remanufactured components go through a rigorous process: complete disassembly, inspection, cleaning, and replacement of all wear-prone elements. Only parts that pass performance and end-of-line validation make it back into the market. This means you can get like-new reliability at a lower price point, especially for expensive repairs like a catalytic converter or fuel pump replacement.
But there’s another benefit: sustainability. Remanufactured parts help reduce industrial waste and conserve natural resources by reusing core materials. If you care about the environmental impact of your repairs, reman programs are an excellent way to lower your footprint without sacrificing quality.
Warranty Terms As A Quality Signal
Worried about getting burned by a bad part? Warranty coverage is your safety net—but not all warranties are created equal. Some parts boast “lifetime” warranties, but these can be more about marketing than true durability (Bob Is The Oil Guy). Instead, focus on clear, straightforward terms: Does the warranty cover parts and labor? Is there fine print or long exclusions? Reliable suppliers are transparent about what’s covered and for how long, which is especially important for high-labor jobs where a repeat failure could double your costs.
Buy on verified fitment, test-backed quality, and warranty clarity—never on lowest price alone.
When Value Is Highest
- Brakes and Safety-Critical Systems: Always choose premium friction materials and rotors for reliable stopping power and safety.
- High-Labor Jobs: Select parts with longer warranties to avoid paying for labor twice, such as for a catalytic converter or transmission.
- Simple Peripherals: For less critical items, like interior trim or filters, dependable budget lines can suffice—just check recent quality auto parts reviews for patterns in fit and durability.
Don’t forget to factor in the total project cost: tools, shop supplies, and potential downtime all add up. Sometimes, spending a bit more upfront on reliable parts saves money and hassle in the long run.
Finally, look for suppliers who publish their sustainability practices—remanufacturing programs, recyclable packaging, and transparent sourcing are all signs of a company committed to both quality and the environment.
Ready to make your next repair with confidence? Up next, we’ll break down how to spot true quality assurance and set realistic expectations for the life of every part you buy.

Quality Assurance Tests And Lifecycle Basics
How Manufacturers Prove Quality
When you shop for quality automotive parts, have you ever wondered what goes on behind the scenes to ensure each component is truly reliable? It all starts with rigorous quality assurance (QA) processes, designed to weed out defects and guarantee performance before any part reaches your hands. Imagine a manufacturer producing thousands of timing belts or motor mounts—how do they make sure every single one meets expectations?
- Incoming materials inspection: Raw materials are checked for correct composition and strength to prevent early failures.
- CNC and stamping capability studies: Precision machining and forming ensure parts like timing chains and power steering pumps fit perfectly every time.
- Torque-to-yield validation: Fasteners and assemblies are tested to verify that bolts and nuts will not loosen or fail under stress.
- Salt spray corrosion exposure: Exposed surfaces—think brackets or motor mounts—are subjected to accelerated corrosion tests to simulate harsh environments.
- NVH (Noise, Vibration, Harshness) testing: Rotating parts, such as power steering pumps, undergo these tests to confirm quiet, smooth operation.
- End-of-line functional checks: Every finished component is tested for correct operation before packaging and shipment.
For example, a timing belt is measured for length, tooth profile, and material hardness, while a coolant temperature sensor is checked for accurate response to heat and electrical continuity. These checks help catch issues early, preventing costly failures later on (Pro QC).
From Bench Tests To Road Validation
But lab tests are only part of the story. The best suppliers extend their QA to real-world validation—putting parts through cycles of heat, vibration, and load to mimic years of use in just weeks or months. For a power steering pump, this might mean running it continuously under pressure; for a coolant temperature sensor, repeatedly cycling from cold to hot to ensure accurate readings every time.
Traceability is another crucial piece. Imagine a batch of timing chains with a rare defect: with modern coding and labeling systems, each part can be traced back to its production run. This allows for targeted recalls or warranty support, saving time and money for everyone involved.
Process discipline and traceability are as important as materials for long-term reliability. Choose suppliers who document their QA workflows and offer batch or serial-level tracking.
Lifecycle Expectations And Failure Patterns
How long should you expect a quality part to last? It depends on the category and how you treat it. Some failures are inevitable over time, but understanding the main causes can help you maximize lifespan:
- Heat: Excessive or repeated exposure shortens the life of timing belts, coolant temperature sensors, and electronics.
- Contamination: Dirt or debris in oil or coolant can damage sensors and moving parts. For example, a contaminated coolant temperature sensor may send false signals, impacting engine performance (MOSTPLUS Auto).
- Misalignment: Improper installation of motor mounts or timing chains leads to premature wear and vibration issues.
- Lack of lubrication: Bearings, timing chains, and pumps require proper lubrication to avoid friction and overheating.
- Improper torque: Under- or over-tightened bolts can cause leaks, noise, or catastrophic failures.
Let’s look at a few examples:
- Timing belt: Needs interval-based replacement and correct tensioning to avoid engine damage.
- Suspension bushings and motor mounts: Age from ozone, chemical exposure, and repeated flexing.
- Coolant temperature sensor: Prone to failure from age, contamination, or electrical issues—leading to poor fuel economy or engine overheating if ignored.
- Electronics: Can fail from thermal cycling, moisture ingress, or poor connections.
Best Practices For Storage And Handling
Even the highest quality automotive parts can be compromised before installation if not handled properly. Keep parts in original packaging until you’re ready to use them, store in a dry, temperature-controlled area, and avoid touching sensitive surfaces—especially on sensors or machined mating faces. For example, storing a coolant temperature sensor in a dusty or oily environment can lead to contamination and inaccurate readings once installed.
By choosing suppliers who are transparent about their QA processes and traceability, and by following smart storage and handling practices, you’ll set yourself up for a successful, long-lasting repair. Next, let’s explore how to pick the right supplier and streamline your next project with confidence.
Choosing The Right Supplier With Confidence
What To Look For In A Parts Partner
When you’re ready to buy quality automotive parts, the supplier you choose can make or break your project. Sounds complex? Imagine ordering a critical component, only to face a weeklong delay, confusing returns, or missing documentation. That’s why picking the right partner isn’t just about price—it’s about reliability, support, and a smooth experience from checkout to installation.
- Extensive catalog and fitment tools—Can you quickly search by VIN, part number, or description?
- Transparent pricing and shipping—Are there surprise fees at checkout?
- Responsive support—Is help available when you need it, or do you wait days for answers?
- Clear documentation—Do you get install guides, warranty info, and traceability for future claims?
- Flexible returns—Can you return a misordered item easily, or are there hidden restocking fees?
Let’s compare your main options for sourcing reliable auto parts: direct manufacturers, online marketplaces like rockauto and partsgeek, and local stores. Each has strengths—and a few quirks you should know about before you click “buy.”
Lead Times, Support, And Returns That Work
| Supplier | Catalog & Fitment Tools | Support Responsiveness | Returns Handling | Documentation & Traceability | Ideal For |
|---|---|---|---|---|---|
| Custom Automotive Metal Parts(Shaoyi) | Custom drawings, full engineering support, multi-process capability | Direct engineer contact, rapid 24-hour quotes | Project-based, clear QA records, batch traceability | IATF 16949:2016 certified, serial/batch tracking, full install and QA docs | Custom or low-to-mid volume metal parts, documented QA, unique requirements |
| RockAuto | Massive catalog, VIN search, OEM and aftermarket cross-refs | Email/web form only, response varies | Online forms, return window and restocking fees apply | Specs, part numbers, basic install info | Wide selection for DIYers, rock auto discount seekers |
| PartsGeek (parts geek auto parts) | Extensive catalog, easy vehicle selector, visual interface | Email/web form, generally prompt | Simpler shipping, check policies | Clear part data, some install guides | Bulk orders, user-friendly shopping, those asking 'is parts geek legit reddit' |
| Local Stores | In-person lookup, limited by local inventory | Immediate in-store help | Walk-in returns, instant exchanges | Printed guides, sometimes limited | Emergency fixes, personal advice |
As you can see, direct manufacturers like Custom Automotive Metal Parts are ideal when you need precision, traceability, or custom solutions that go beyond what off-the-shelf parts can offer. Their IATF 16949:2016 certification and end-to-end QA give you confidence in every piece—especially for projects where failure isn’t an option.
Online marketplaces like rockauto shine for their sheer variety and competitive pricing. If you’re hunting for a specific brand or looking to maximize a rock auto discount, you’ll appreciate their depth. Just be mindful of shipping costs, which can add up if your order pulls from multiple warehouses (Gerald Blog). Their support is mostly digital, so complex questions may take longer to resolve.
PartsGeek, meanwhile, is often praised for its user-friendly interface and consolidated shipping—making it a favorite among those who value a smoother shopping experience. If you’ve ever searched 'is parts geek legit reddit,' you’ll find plenty of real-world feedback on their reliability. Their bulk shipping can make large orders more cost-effective, and returns tend to be straightforward, though always review the fine print.
Local stores are unbeatable for immediate needs and in-person advice, but may not match the price or selection of major online players. For urgent repairs or when you need to see the part before buying, they’re a solid choice.
When To Go Direct To The Manufacturer
Ever needed a part that no catalog could match—or wanted full control over specs, materials, and QA? That’s when working directly with a certified manufacturer makes sense. Whether you’re restoring a classic, building a prototype, or managing fleet repairs that demand traceability, a partner like Shaoyi can deliver. You’ll benefit from project management support, rapid quoting, and components engineered exactly to your requirements, all backed by rigorous documentation.
In summary, the best supplier for your next project depends on your priorities: price, speed, customization, or support. By weighing these factors—and reviewing feedback from sources like 'is parts geek legit reddit'—you’ll make smarter, more confident choices for every repair. Next, let’s arm you with buyer templates and checklists to further de-risk your purchases and installations.

Buyer Toolkit
Pre Purchase Questions That Uncover Quality
Ever stood in front of a parts counter or scrolled an endless online catalog, wondering how to separate true quality from clever marketing? Imagine having a quick checklist that cuts through the noise—saving you money, time, and hassle on every purchase. Here’s what to ask before you buy any quality automotive parts, whether you’re hunting for the best windshield wipers, a new car air filter, or critical suspension components:
- Is the OEM (Original Equipment Manufacturer) number or a trusted cross-reference provided?
- What are the stated material specs and tolerances? (Request documentation if unclear.)
- Does the part have surface treatments or coatings for corrosion resistance?
- Can the seller provide lab or endurance test summaries?
- Are torque specs and installation instructions included?
- What’s the warranty coverage? Are there exclusions or fine print?
- What is the return policy if fitment or quality issues arise?
- Is traceability (batch or serial number) available for future reference?
For custom or specialized metal components, consider resources like Custom Automotive Metal Parts, which offer documented QA, rapid quoting, and engineering support—especially valuable when your needs go beyond typical retail listings.
Warranty And Returns Templates
When you invest in quality parts supply, you want to know your rights if something goes wrong. Use these ready-to-send templates to make warranty claims or initiate returns without stress. Attach photos, test results, or fitment screenshots to strengthen your case.
Warranty Claim Email Template:
Subject: Warranty Claim – Order #[Order Number], Part #[Part Number]
Dear [Supplier Name],
I am submitting a warranty claim for the following part purchased on [Purchase Date]:
- Order Number: [Order Number]
- Part Number: [Part Number]
Issue Description: [Brief description of failure, symptoms, or defect]
Supporting Evidence: [Attach photos, test results, or installation documentation]
Warranty Terms: [Reference warranty details from product page or manual]
Please advise on next steps for inspection, replacement, or refund. Thank you.
Returns Request Template:
Subject: Return Request – Order #[Order Number], Part #[Part Number]
Dear [Supplier Name],
I would like to request a return for the following part due to [Reason: incorrect fitment, unopened packaging, quality concern, etc.]:
- Order Number: [Order Number]
- Part Number: [Part Number]
- Fitment Evidence: [Screenshot or documentation showing mismatch]
- Packaging Status: [Unopened/Sealed]
Please provide instructions for return shipping and refund processing.
Keep digital copies of all correspondence and supporting evidence. This habit not only streamlines future warranty or return requests but also boosts your confidence as a buyer of quality automotive accessories.
Post Install Inspection Checklist
Installation done? Don’t just close the hood and hope for the best. A systematic post-install check ensures your new part is working flawlessly—and can help you spot minor issues before they become major headaches. Use this checklist after any repair, from brake jobs to replacing a car air filter:
- Confirm all fasteners are torqued to specification (use a torque wrench).
- Check for fluid leaks (oil, coolant, brake fluid) around the serviced area.
- Perform a short test drive, listening for abnormal noises or vibrations.
- Complete any required bed-in or calibration procedures (e.g., for brakes or sensors).
- Recheck all fasteners and connections after the test drive.
- Inspect for warning lights or diagnostic codes.
- Review and top off all fluids as needed (don’t forget how to check engine oil after an engine-related service).
- Document the repair with photos and save receipts for warranty or resale purposes.
This routine keeps your vehicle safe and maximizes the lifespan of your new quality auto accessories.
Glossary: Key Quality Parts Terms
- OE: Original Equipment – the part installed by the vehicle manufacturer.
- OEM: Original Equipment Manufacturer – makes parts to the automaker’s specs, sometimes even for the factory itself.
- Reman: Remanufactured – a used part rebuilt to like-new standards with new wear items.
- Torque Spec: The exact tightening value for bolts and fasteners, critical for safety and reliability.
- Fitment: How well a part matches your vehicle’s year, make, model, trim, and options.
- Quality Parts Supply: A source or supplier known for consistent, reliable components and strong support.
- Quality Automotive Accessories: Add-ons or upgrades—like wipers, filters, or protective gear—designed to meet or exceed OEM standards.
Resource List for Extra Confidence
- Custom Automotive Metal Parts – For custom metal components, drawings-to-production support, and certification-backed QA.
- Pre-Purchase Inspection Checklist – For comprehensive DIY and mechanic-inspected vehicle checks.
- Automotive Parts Inspection Guide – For understanding third-party QA and inspection protocols.
- Automotive Engineering Glossary – For deeper technical definitions and industry terms.
With these checklists, templates, and resources, you’ll approach every purchase and install with greater clarity and less risk. Whether you’re sourcing quality automotive parts, choosing the best windshield wipers, or upgrading with quality auto accessories, you’re now equipped to make smarter, more confident decisions—every time.
Frequently Asked Questions about Quality Automotive Parts
1. How do I know if an automotive part is truly high quality?
Genuine high-quality automotive parts are made from premium materials, meet strict manufacturing tolerances, and often include clear documentation, warranty coverage, and traceability. Look for details like alloy grade, precise fitment, and published QA processes. Request test summaries or certifications when possible, and always cross-check OEM part numbers for accurate fitment.
2. Are remanufactured parts as reliable as new parts?
Remanufactured parts can be just as reliable as new ones if sourced from reputable suppliers who replace wear items, update known failure points, and conduct thorough bench testing. These parts are not only cost-effective but also support sustainability by reducing waste. Always verify warranty terms and request documentation of the remanufacturing process.
3. What’s the best way to ensure a replacement part will fit my vehicle?
Start by gathering your VIN and build details, then use trusted catalogs or dealer resources to find the OEM part number. Cross-reference this with aftermarket options, and compare product photos and technical drawings for connector shapes and mounting points. Always prioritize OEM mapping over generic selectors to minimize returns and installation issues.
4. Should I buy parts from online marketplaces or go directly to a manufacturer?
Online marketplaces like RockAuto and PartsGeek offer wide selection and competitive pricing, making them ideal for standard repairs and bulk orders. For custom, low-to-mid volume, or precision-engineered metal parts with documented QA, direct manufacturers such as Custom Automotive Metal Parts provide engineering support, traceability, and certification-backed quality.
5. What should I do if a newly installed part fails or doesn’t fit?
Document the issue with photos, keep all receipts and installation records, and contact your supplier promptly. Use warranty and return templates to streamline communication, referencing fitment evidence and packaging status. Having clear documentation and following the supplier’s return process will help you resolve issues efficiently.