 Small batches, high standards. Our rapid prototyping service makes validation faster and easier —

OEM Or Aftermarket? Make Smart Automotive Exterior Parts Calls

Understanding the Automotive Exterior Parts Ecosystem
Ever wondered what really makes up the outer shell of your car—and why it matters? Whether you’re a first-time car owner or restoring a classic, understanding automotive exterior parts is the first step to making smart decisions about repairs, upgrades, and maintenance. Let’s break down the essentials so you can recognize not just the names, but the purpose and value of each component.
What Counts as Exterior Versus Body Trim
Automotive exterior parts are the visible, functional, and protective elements on the outside of your vehicle. These include major body panels, structural supports, and a variety of exterior car accessories. Think of the exterior system as a layered shield: the main body shell provides structure and safety, while trim and accessories add utility and style. For example, the car hood covers the engine bay, while door handles and side mirrors offer access and visibility. Body trim—like pillar post covers or chrome strips—mainly enhances appearance but may also protect against minor scrapes.
Why Most Parts Lists Miss Fitment and Material Nuance
Not all car exterior parts are created equal. Structural panels like fenders, hoods, and bumpers are engineered for impact protection, while trim pieces may prioritize style or aerodynamics. Materials matter: steel, aluminum, plastics, and glass are all used for different reasons, affecting performance, weight, and durability. For instance, steel offers strength for crash zones, while plastic is used for lightweight bumper covers or grille inserts. And don’t forget about finishes—paint, coatings, or chrome—each with its own maintenance needs and resistance to the elements (source).
Core Functions of Bumpers, Fenders, Grilles, and Panels
Imagine walking around your car. The bumper on cars is the first defense in a low-speed collision, absorbing impact to protect the underlying structure. The car fender arches over each wheel, shielding your vehicle and others from debris. The grille manages airflow for engine cooling, and the car hood provides both access for maintenance and a crumple zone in a crash. Together, these parts of a car exterior form a system where every piece is critical to safety, aerodynamics, and style (reference).
- Impact Protection: Bumpers, fenders, crash bars
- Airflow & Cooling: Grilles, valance panels, cowl panels
- Visibility: Headlights, taillights, mirrors, windshield
- Access: Doors, door handles, trunk, hood
- Styling & Accessories: Body trim, spoilers, roof racks, other vehicle exterior accessories
| Part Category | Typical Materials | Exposure Risks |
|---|---|---|
| Bumpers | Plastic, steel, aluminum | Impact, UV, corrosion |
| Fenders | Steel, aluminum, plastic | Debris, rust, moisture |
| Hood | Steel, aluminum | Stone chips, rust, weather |
| Grille | Plastic, metal | Road debris, fading |
| Trim/Accessories | Plastic, chrome, rubber | Scratches, discoloration |
| Glass (Windshield, Windows) | Safety glass | Chips, cracks, weather |
Understanding these categories helps you see why a simple list of exterior car accessories doesn’t tell the full story. Each component’s location, material, and function play a role in your vehicle’s safety, durability, and appearance. Next time you shop for vehicle exterior accessories or replacement parts, you’ll know what to look for—and why it matters.
Mastering Exterior Part Fitment and Compatibility
Ever ordered a new bumper or rocker panel, only to discover it doesn’t fit your vehicle? You’re not alone. Getting the right automotive exterior parts—whether it’s weather stripping for a car, a cowl hood, or a license plate holder—can feel daunting. But with a practical fitment workflow, you’ll avoid costly returns and ensure every part, from an auto ventshade to a plate number frame, lines up perfectly the first time.
Find and Decode Your VIN for Exact Trim and Options
Start with your Vehicle Identification Number (VIN)—think of it as your car’s fingerprint. This 17-character code is usually found on the driver’s side dashboard (visible through the windshield) or inside the driver’s door jamb. Why does this matter? Because your VIN reveals the precise year, make, model, engine, and even specific factory options. Providing your VIN to a parts supplier or inputting it into a reputable online catalog eliminates guesswork about trim levels or mid-year changes, making it the single most reliable way to guarantee part compatibility.
Locate OEM Part Numbers on Existing Panels
Already have the part you want to replace? Flip it over or check the backside—most OEM exterior components are stamped or labeled with a unique part number. This is especially useful for panels like a cowl hood or door, where appearance alone can be misleading. Use this number in online catalogs or with your dealer to cross-reference and confirm fit. If you’re unsure, your owner’s manual may also list part numbers for common items like mirrors or weather stripping for a car.
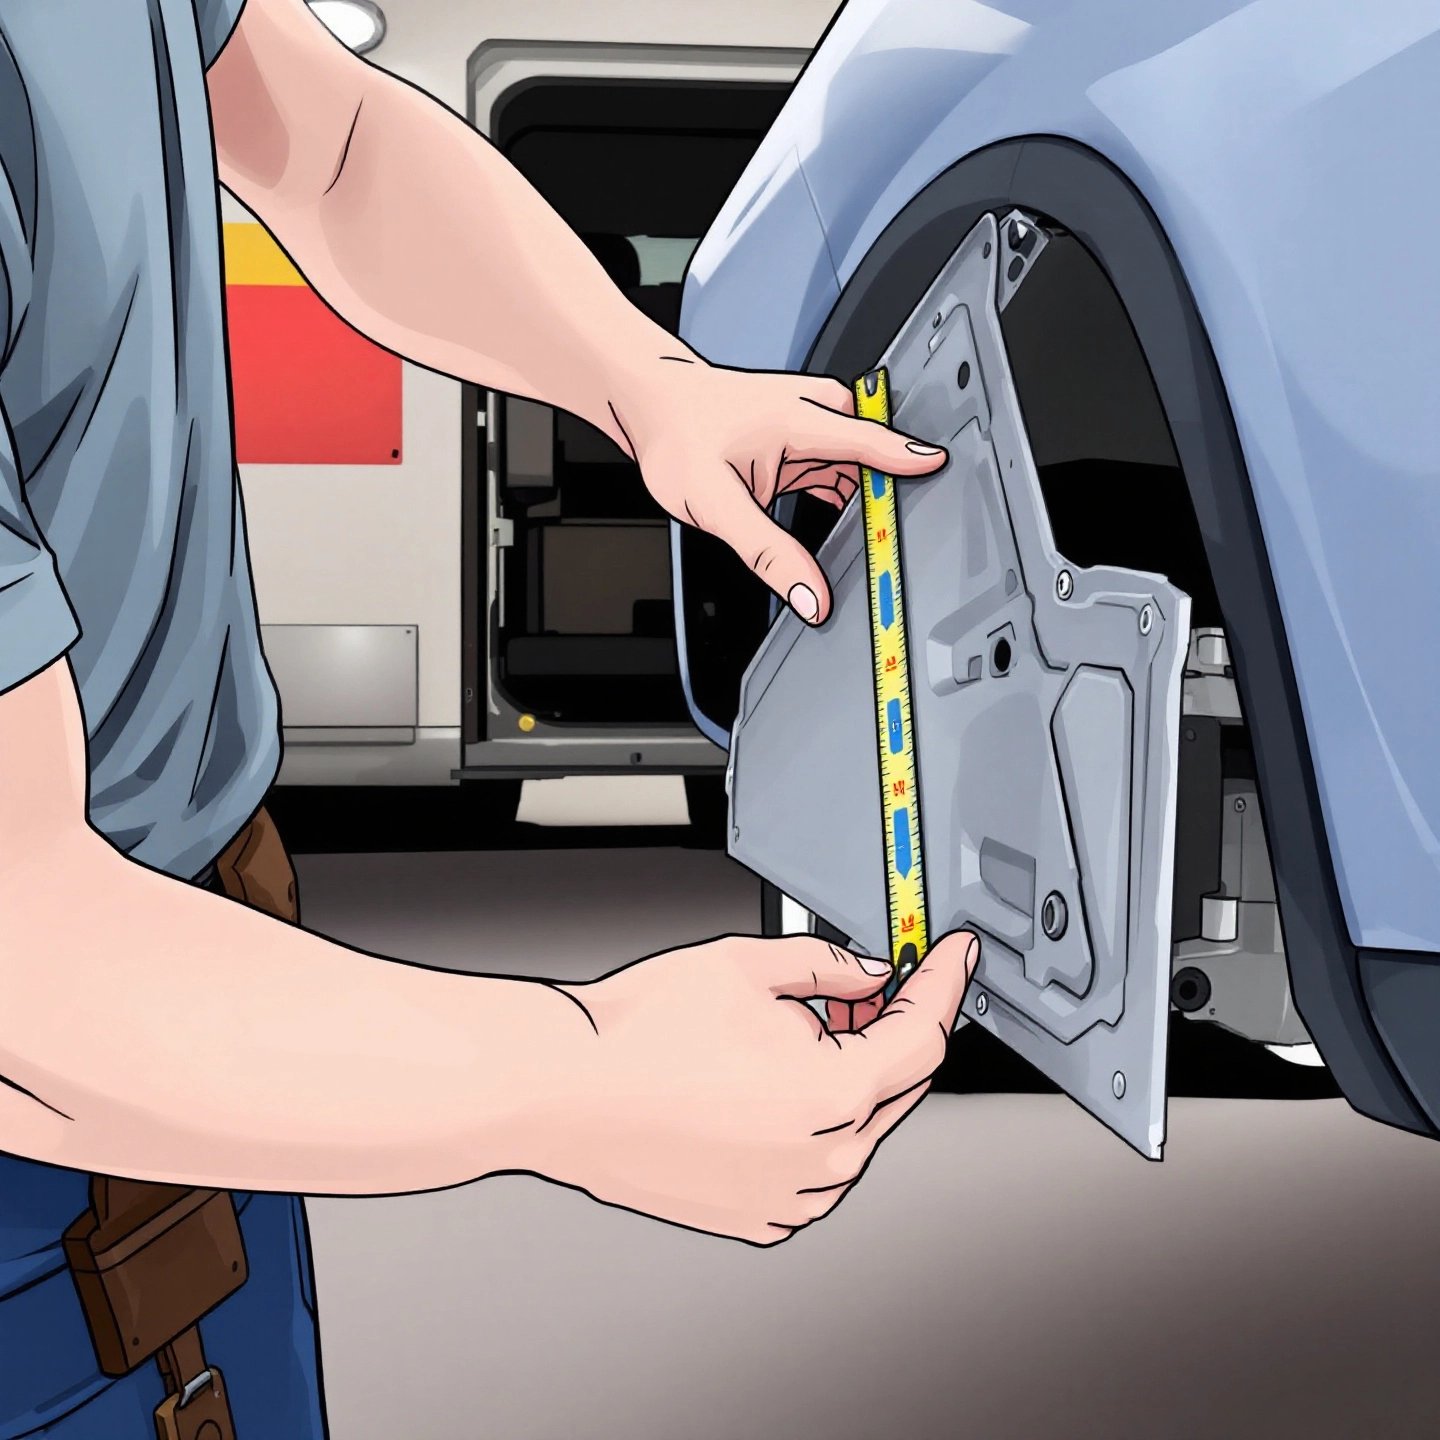
Measure Mounting Points and Clearances Accurately
Visual matches can be deceiving. Even if two panels look similar, their mounting holes, flange depths, or tab orientations might differ. Before ordering, measure the old part’s key attachment points and compare them to the new part’s specs. For trickier installs—like a rocker panel or license plate holder—use a tape measure or caliper for accuracy. When possible, refer to your vehicle’s body repair manual for manufacturer-recommended dimensions (source).
| Checkpoint | Measurement/Detail | Notes |
|---|---|---|
| Hole Spacing | __________ | Measure center-to-center, compare both sides for symmetry |
| Flange Depth | __________ | Check for panel overlap and sealing areas |
| Tab Orientation | __________ | Note direction and angle for proper alignment |
| Fastener Type | __________ | Clip, bolt, screw, push-pin—verify before ordering |
Use Compatibility Filters Without Getting Tripped Up
Online catalogs and dealer sites offer compatibility filters—just enter your year, make, model, and trim. But here’s the catch: these filters don’t always account for mid-year refreshes, regional variations, or special editions. Always double-check compatibility notes and, when possible, confirm with your VIN for 100% certainty. If you’re buying a plate number frame or auto ventshade, remember that universal-fit accessories still require you to check dimensions and mounting style.
- Locate and record your VIN from the dashboard or door jamb.
- Find the OEM part number on the existing panel or in your owner’s manual.
- Measure all mounting points and compare with new part specs.
- Use online compatibility filters—but always verify with the VIN.
- Check fastener type and clip style for a hassle-free install.
- Review return policies in case of unexpected fitment issues.
Fitment Pro Tip: The most common mistakes? Ignoring mid-year model changes, forgetting to measure mounting points, or relying solely on generic diagrams. Always use your VIN for the final check, and don’t hesitate to ask the supplier if you’re unsure before purchasing.
With these steps, you can confidently choose the right automotive exterior parts and exterior car accessories, ensuring a seamless installation and a professional finish. Up next, we’ll explore how these parts are manufactured and why precision matters for both performance and appearance.
How Stamping Dies Shape Exterior Panels and Precision
Ever wondered how those crisp lines on your fender car part or the flawless curve of a window cowl come to life? It all starts with stamping dies—precision tools that transform flat metal into the essential shapes and details you see on automotive exterior parts. Let’s break down how this process works, why it matters for your vehicle, and how it compares with other manufacturing methods.
From Digital Design to Die Tryout
It all begins with digital design. Engineers use advanced computer-aided engineering (CAE) tools to create detailed models of rocker panels, hoods, and other panels. Every dimension, curve, and mounting tab is planned for both fit and function. Next comes die development: specialized tooling—called stamping dies—is custom-built for each part. These dies define the final shape, tolerances, and surface finish.
During tryout, the dies are tested with sheet metal to ensure every detail is accurate. Adjustments are made to perfect the fit, especially for complex shapes like a window cowl or the intricate bends in rocker panels. This meticulous process is critical, as even a small flaw can lead to misalignment or visible defects once the part is installed on the car.
Tolerance, Repeatability, and Surface Finish in Stamping
Precision matters. Stamped exterior panels must meet strict tolerances for consistent fit and appearance—think of how a fender car part lines up with a door or how a hood closes smoothly. Stamping excels at producing high volumes of identical parts with minimal variation, which is why it’s the go-to method for body panels. The process delivers excellent surface finishes, crucial for visible panels that will be painted or coated. To ensure corrosion resistance, parts may be treated with self etching primer or weld through primer before final finishing.
- Fenders: Shield wheels and engine bay from debris; require precise curvature.
- Hoods: Protect engine components; demand strong, lightweight construction.
- Rocker Panels: Add structural strength and resist road impacts.
- Window Cowl: Directs water away from windshield and engine; must fit tightly for weather sealing.
- Grilles & Door Skins: Combine style with airflow or access needs.
When to Choose Stamping Versus Molding or Casting
Not all exterior parts are stamped. Sometimes, casting or injection molding is a better fit. Here’s how the main processes stack up for automotive exterior parts:
| Process | Material Options | Surface Finish | Tooling Cost | Volume Suitability | Typical Applications |
|---|---|---|---|---|---|
| Stamping | Steel, Aluminum | Excellent (paint-ready) | High | High-volume | Fenders, hoods, rocker panels, window cowl |
| Die Casting | Aluminum, Magnesium | Good (needs finishing) | Very High | Large batches | Engine blocks, brackets |
| Injection Molding | Plastics | Very Good (complex shapes) | Medium | Medium to high | Bumper covers, trim |
Stamping is ideal for exterior panels that demand tight tolerances, repeatability, and a flawless surface—especially when high volumes are needed. For parts with complex curves, like a window cowl or the subtle bends of rocker panels, the process ensures every piece matches the original design. Casting works best for thick, structural parts, while injection molding is reserved for plastic exterior trim and covers.
If you’re evaluating manufacturability and surface-class requirements for your project, leveraging expert resources like Automotive Stamping Dies & Parts can help you achieve superior tolerance, cycle time, and consistency. Their CAE-driven approach and lean manufacturing principles are especially valuable for demanding exterior panels where fit and finish are non-negotiable.
Understanding how these processes work not only helps you choose the right fender car part or rocker panel, but also ensures you get panels that align perfectly and look great for years to come. Up next, we’ll dive into hands-on installation tips to help you get the most from your new exterior parts.
Installation Playbooks for Common Exterior Upgrades
Thinking about swapping out your car mirror accessories, installing a new bumper, or adding a lightbar? With the right approach, you can upgrade your vehicle’s exterior like a pro—no shop required. Let’s break down practical, step-by-step playbooks for the most common automotive exterior parts installs, drawing on proven techniques to help you avoid costly slipups and get the results you want.
Headlight Aiming and Beam Cutoff Basics
Ever replaced your headlights or fog lights, only to discover they’re blinding oncoming traffic or barely lighting the road? Knowing how to adjust headlights is essential for both safety and compliance. Here’s how to do it right:
- Tools Needed: Phillips screwdriver, masking tape, tape measure, wall or garage door
- Time: 20–30 minutes
- Difficulty: Easy
- Park your car on a level surface about 10–15 feet from a wall. Make sure your tires are properly inflated and there’s weight in the driver’s seat.
- Mark the vertical and horizontal centerlines of each headlight beam on the wall using masking tape.
- Adjust the headlight screws (usually on top and side of the housing) so the top of the low beam is at or just below the horizontal line, and the center is slightly right of the vertical line (for left-hand drive vehicles).
- Test your adjustments by taking a short drive at night.
This process works for most headlights and lightbars. Always check your owner’s manual for model-specific details.
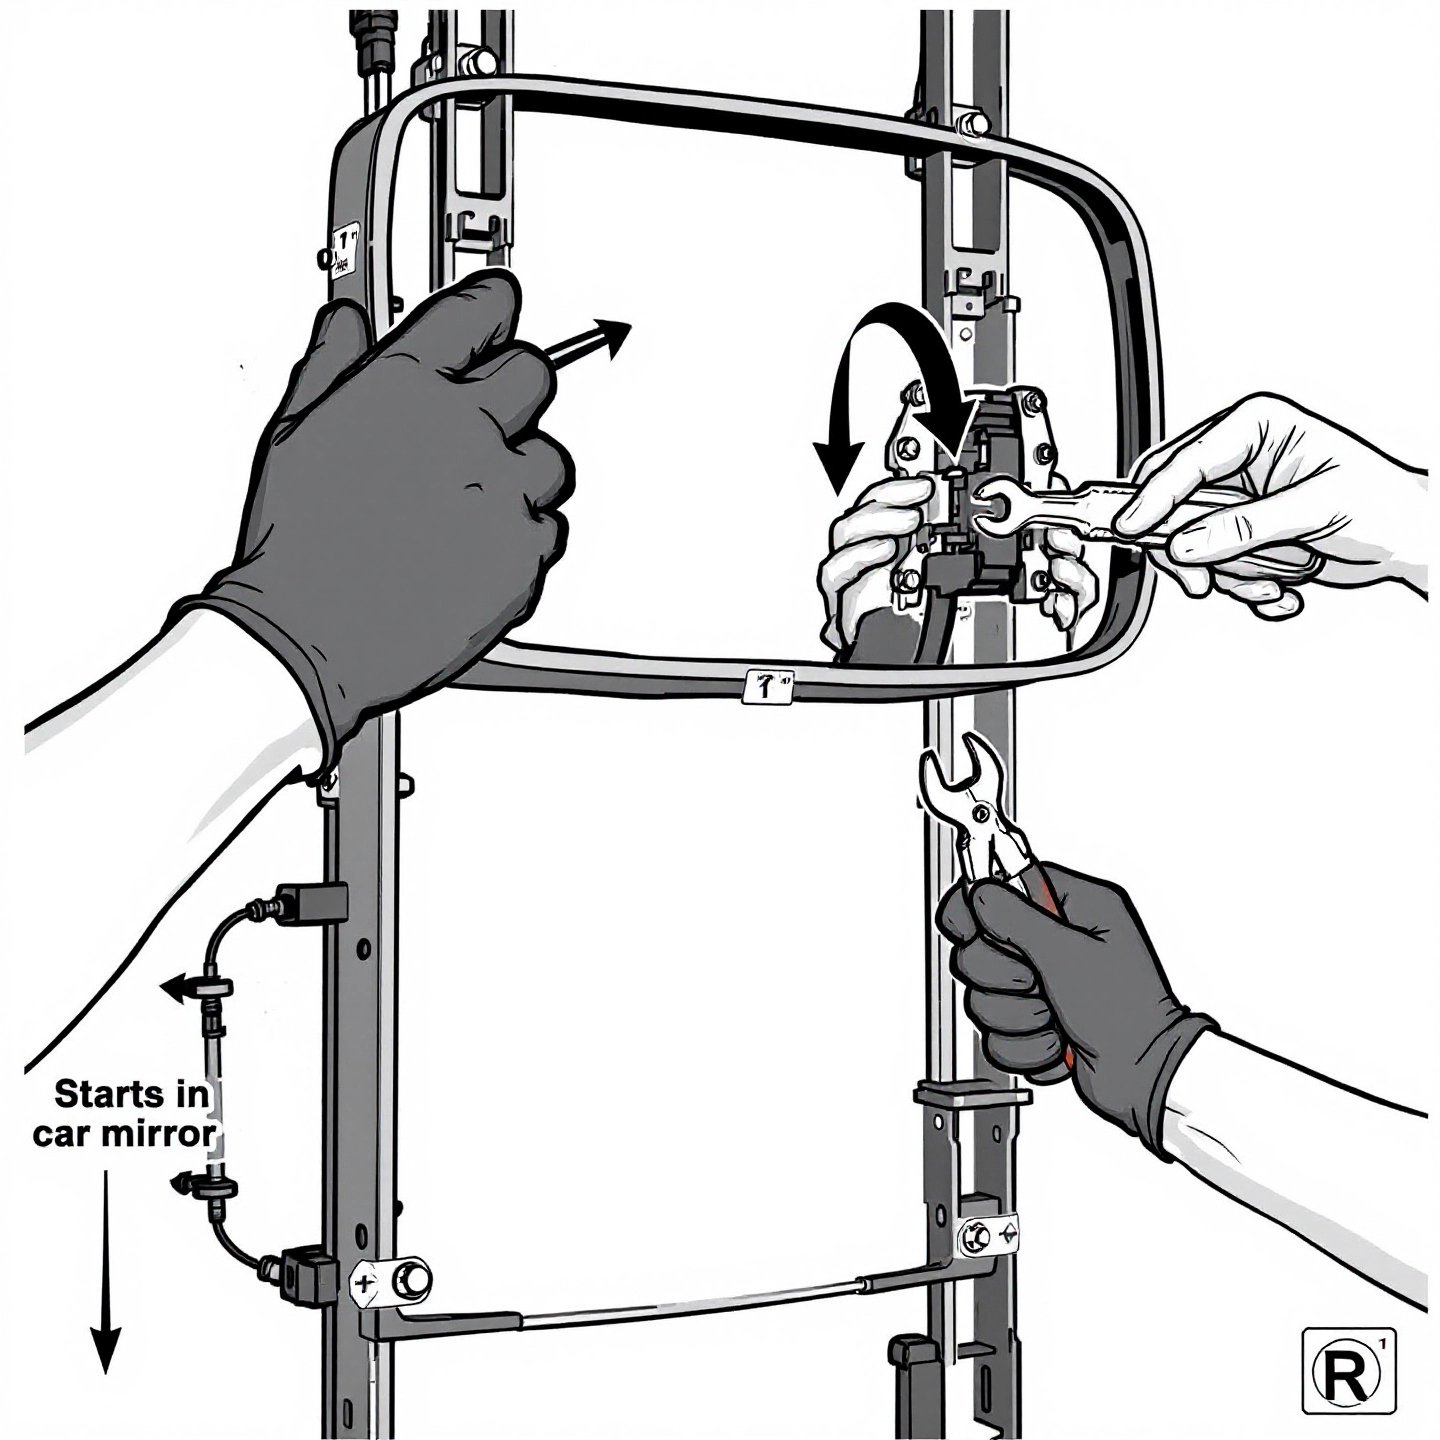
Mirror Replacement Without Breaking Clips
Side mirrors are among the most frequently damaged exterior car accessories. Replacing them is straightforward if you follow these steps and avoid forcing fragile clips:
- Tools Needed: Trim removal tool, Phillips screwdriver, small socket set
- Time: 15–25 minutes
- Difficulty: Easy
- Remove the interior door panel (often just the top portion is enough).
- Unbolt the 2–3 mirror mounting screws.
- Disconnect the power wire if your mirror is electric.
- Fit the new mirror, reconnect wires, and secure with bolts.
- Test adjustment and indicator function before reattaching the door trim.
Tip: Use a trim tool to avoid scratching paint or breaking ventshade clips. If you’re unsure about wire locations, label them with tape or take photos for reference.
Bumper Removal and Reinstall Tips
Whether you’re upgrading to a new style or replacing a damaged unit, bumper swaps are among the most satisfying DIY jobs. Here’s a reliable approach:
- Tools Needed: Socket set, trim removal tool, jack and stands (if needed), masking tape
- Time: 30–60 minutes
- Difficulty: Moderate
- Open the hood and unscrew the top bumper bolts.
- Jack up the car if necessary and remove bottom bolts or clips.
- Gently pull the bumper from the sides, using a trim tool to release any hidden clips.
- Align the new bumper and re-bolt in reverse order.
- Reconnect fog lights or sensors if applicable.
Tip: Don’t overtighten bolts near plastic edges to prevent cracking. Always test-fit the bumper before final tightening.
Grille Swaps and Clip Management
Grille upgrades can instantly refresh your vehicle’s look, but those pesky clips and tabs can be tricky. Here’s a step-by-step guide:
- Tools Needed: Trim removal tool, socket set, clean cloths
- Time: 20–40 minutes
- Difficulty: Easy
- Open the hood and locate all grille fasteners (bolts, screws, and clips).
- Use a trim tool to gently pry out clips—save them for reuse if possible.
- Remove the old grille, noting any alignment tabs or shims.
- Install the new grille, ensuring all tabs are seated and clips re-engaged.
- Tighten bolts evenly and check alignment with adjacent panels.
Pro tip: Clean all mounting surfaces and use masking tape to protect paint when working in tight spaces.
Fastener Types and Where They Appear
| Fastener Type | Common Locations | Notes |
|---|---|---|
| Plastic Clips | Grilles, bumpers, door panels, auto vent shade | Fragile, reuse with care |
| Bolts (8–12mm) | Bumpers, mirrors, lightbar mounts | Use torque wrench, avoid over-tightening |
| Screws | License plate brackets, interior trim | Hand-tighten only |
| Push Pins | Wheel wells, underbody shields, ventshade | Replace if worn |
Safety First: Always disconnect the battery before working on lighting or electrical accessories. Protect painted surfaces with masking tape or soft cloths, and use jack stands for stability when working under the car. Rushing or skipping safety steps can lead to injury or costly paint damage.
Common Pitfalls and Pro Tips
- Don’t reuse worn push pins or clips—new ones ensure a secure fit.
- Take photos during disassembly to help with reassembly.
- Label wires when removing lighting or trailer hitch parts.
- Always test-fit parts before final tightening.
- Allow sealants or adhesives to fully cure before exposing to weather.
Whether you’re installing a ventshade, upgrading car mirror accessories, or tackling a more ambitious exterior project, preparation and patience pay off. By following these playbooks, you’ll achieve professional results, protect your investment, and set the stage for a long-lasting finish. Next, we’ll cover the best routines for maintaining your new upgrades and keeping your vehicle looking sharp season after season.
Maintenance, Diagnostics, and Seasonal Care Made Simple
Ever wonder why some vehicles look showroom-fresh year after year, while others show rust, rattles, or noisy wind leaks? The answer isn’t luck—it’s a set of easy maintenance routines and smart diagnostics. With a few habits and the right tools, you can protect your investment in automotive exterior parts and keep your ride quiet, safe, and sharp-looking through every season.
Seasonal Rust Prevention and Underbody Care
Rust is a silent threat to any car, especially in climates with rain, snow, or road salt. The undercarriage, wheel wells, and lower panels are most vulnerable. Wondering what you can do to fight rust before it starts? Here’s a practical checklist to follow:
- Wash regularly: Especially after winter storms or salty roads. Pay extra attention to the undercarriage and wheel wells.
- Dry thoroughly: Use microfiber towels or an air blower to prevent water from pooling in seams or hidden spots.
- Inspect for chips and scratches: Touch up paint to seal exposed metal before rust can take hold.
- Apply protective coatings: Use wax, ceramic sealant, or fluid film undercoating on exposed metal, especially before winter.
- Use an outdoor car cover or indoor car covers: Whenever possible, shield your car from rain and humidity, but make sure covers are breathable to avoid trapping moisture.
Monthly, rinse the undercarriage with a hose—especially after driving on salted roads. For extra protection, spray an undercarriage product on wheel wells and suspension parts after cleaning.
Sealing and Weatherstrip Checks for Quiet Cabins
Rattles, wind noise, or water leaks often trace back to worn weatherstripping or loose fasteners. Imagine driving in silence, free from annoying drafts or drips. Here’s how to get there:
- Inspect weather seals: Look for cracks, gaps, or compressed spots around doors, windows, and rain guards.
- Paper-strip test: Close a strip of paper in the door. If it pulls out easily, the seal may need replacing.
- Clean and condition: Wipe seals with a damp cloth and apply a rubber conditioner to maintain flexibility.
- Check fasteners: Periodically retorque bolts and screws on panels, mirrors, and trim. A loose fastener can cause vibration or rattling.
- Use a car window repair kit: For small chips or cracks in glass, act quickly to prevent leaks or further damage.
Repair or Replace Decisions for Dented Panels
Not every dent or blemish means you need a new panel. Here’s a quick guide to help you decide:
- Minor dents: Paintless dent repair is often possible if the paint isn’t broken.
- Surface rust: Sand, prime, and touch up small spots before they spread. If you’re fixing auto rust, always remove all corrosion before repainting (reference).
- Deep rust or structural damage: Replace the affected part to restore safety and appearance.
| Symptom | Probable Cause | Next Action |
|---|---|---|
| Wind noise at highway speed | Worn weatherstrip or loose trim | Inspect seals, retorque fasteners, replace as needed |
| Rattling or vibration | Loose fastener or panel | Tighten bolts/screws, check panel alignment |
| Rust spots on lower panels | Paint chip, trapped moisture | Sand, prime, touch up; consider undercoating |
| Water leak inside cabin | Damaged weatherstrip, clogged drain | Clean drains, replace seals |
- Monthly: Wash and inspect exterior for chips, scratches, and loose trim.
- Seasonal: Apply wax or ceramic sealant; inspect underbody for rust; check rain guards and weatherstrips.
- Pre-trip: Check for rattles, leaks, or loose panels; inspect glass and use a car window repair kit if needed.
Key Takeaway: When mixing metals (like replacing a steel panel with aluminum trim), always use proper primers or coatings to prevent galvanic corrosion—a chemical reaction that can quickly eat through unprotected surfaces.
Consistent care isn’t just about looks—it extends the life of your automotive exterior parts and keeps your drive quiet and comfortable. Up next, we’ll explore how to confidently choose between OEM and aftermarket parts, so you can match quality, fit, and budget for your next upgrade.
OEM Versus Aftermarket Decisions Without the Guesswork
When you’re ready to replace a chevy emblem, upgrade your bumper, or add new auto exterior accessories, you’ll face a key decision: OEM or aftermarket? Sounds complex, but with the right framework, you can match your needs—whether it’s fitment, warranty, or budget—to the best choice for your vehicle. Let’s break it down to give you confidence for your next purchase.
When OEM Makes Sense for Safety and Sensors
Imagine you’re replacing a part on a newer vehicle—maybe one with advanced driver assistance systems (ADAS), like parking sensors or lane-keeping cameras hidden behind a grille or bumper. In these cases, OEM (Original Equipment Manufacturer) automotive exterior parts offer peace of mind. They’re designed to fit precisely, maintain crashworthiness, and work seamlessly with safety systems. For high-visibility items like cadillac emblems or tesla emblems, OEM parts ensure exact shape and finish, which is critical if you’re restoring a leased vehicle or want to preserve resale value.
- Guaranteed fit and finish
- Maintains original crash safety and sensor alignment
- Often required for leased vehicles or warranty compliance
- Usually comes with a manufacturer’s warranty
How Aftermarket Wins on Budget and Customization
Thinking about customizing your ride or keeping repair costs in check? Aftermarket exterior auto parts and automotive exterior accessories open the door to more options—often at a lower price. For example, if you need a replacement chevy bowtie or want to try a unique grille insert, the aftermarket gives you a wider selection and faster availability. Many aftermarket parts meet or even exceed OEM quality, especially for routine repairs or older vehicles (Edmunds).
- Lower cost—often 20–50% less than OEM
- Broader selection for styling and performance upgrades
- Greater availability for older or discontinued models
- Some parts offer improved design or materials
Fitment Risk, Returns, and Installer Policies
Of course, there are trade-offs. With aftermarket aftermarket exterior car parts, quality and fit can vary. Not all parts are created equal—some may require minor adjustments or lack the exact finish of OEM. Before you buy, ask these questions:
- Is the part pre-primed or raw? (Ask: “Is this panel ready for paint, or will it need extra prep?”)
- What’s the corrosion protection? (Ask: “Does this part have e-coat or another rust-resistant finish?”)
- Is it compatible with my car’s sensors or ADAS features? (Ask: “Will this bumper interfere with parking sensors or cameras?”)
- What is the return policy if it doesn’t fit?
| Criteria | OEM | Aftermarket |
|---|---|---|
| Safety system compatibility | Guaranteed match | Varies—verify with seller |
| Corrosion protection | Factory e-coat/primer | Check for e-coat or raw steel |
| Paint matching | Exact match with factory colors | May require extra prep for color match |
| Return window | Set by dealer, often shorter | Varies—often longer with online sellers |
Pro tip: Always keep receipts and installation records, especially if your vehicle is under warranty. Thanks to the Magnuson-Moss Warranty Act, using aftermarket parts won’t void your warranty unless the part directly causes a problem.
Ultimately, choosing between OEM and aftermarket comes down to your priorities—whether that’s cost, convenience, or keeping your chevy emblem and other details factory-fresh. Next, we’ll explore how to plan exterior upgrades that fit your real-world driving needs, from towing to city parking.

Planning Exterior Upgrades by Use Case That Truly Deliver
Ever felt lost deciding which upgrades actually make a difference for your driving needs? Whether you’re hauling a trailer, tackling off-road trails, braving winter storms, or squeezing into city parking, the right combination of automotive exterior parts can transform your experience. Let’s walk through common scenarios and pinpoint the upgrades that offer real-world value—so you avoid wasted money and focus on what works.
Towing Essentials for Secure, Level Hauls
When you’re towing, safety and control come first. The right trailer hitch is the backbone of any hauling setup, but it’s only the start. Pair it with a properly rated hitch ball and consider a weight distribution system for heavier loads. Don’t overlook visibility: extended towing mirrors and rear-facing truck lighting bars help you see—and be seen—when backing up or changing lanes. For trucks with open beds, extang tonneau covers keep cargo secure and protected from the elements. If you use a tracrac or bed rack, double-check weight ratings to avoid overloading your mounting points.
Off-road Protection and Lighting Layouts
Heading off the pavement? Off-road adventures demand more than just big tires. Protect vital areas with skid plates, rock sliders, and heavy-duty bumpers. A lift kit increases ground clearance, letting you clear rocks and ruts. For nighttime trail runs, LED light bars or auxiliary fog lights are game-changers, offering wide, powerful illumination. Mount your lighting carefully to avoid glare and always aim them below the horizon—mis-aimed bars can blind other drivers and are often illegal on public roads (source). Don’t forget recovery gear like a winch for solo trips, and use a tracrac or storage system to keep tools organized.
Winter Driving with Clear Vision and Corrosion Control
Winter brings its own set of challenges—think icy roads, blinding snow, and corrosive salt. Start with winter tires for grip and heavy-duty wiper blades for visibility. Add a grille guard or front skid plate to shield against hidden debris. Mud flaps protect lower panels from slush, while a tailgate seal and extang tonneau covers keep your truck bed dry. For added convenience, use a truck bed storage system to organize emergency gear. LED fog lights and heated mirrors further boost safety on dark, snowy mornings (reference).
Urban Dings and Scratch Prevention
City streets mean tight parking and plenty of hazards. Protect your paint with body side moldings and door edge guards. Parking sensors and rear cameras help you avoid scrapes, while compact trailer hitch ball covers prevent accidental bumps. Consider a low-profile extang tonneau cover to keep valuables out of sight and reduce theft risk. For added peace of mind, install corner bumper protectors and choose fold-away mirrors to minimize damage in crowded lots.
| Use Case | Recommended Parts | Installation Notes | Maintenance Tips |
|---|---|---|---|
| Towing | Trailer hitch, hitch ball, towing mirrors, truck lighting bars, extang tonneau covers, tracrac | Torque bolts to spec; check electrical connections; confirm load ratings | Inspect hardware before each trip; clean and lubricate hitch ball |
| Off-road | Lift kit, skid plates, rock sliders, light bars, winch, tracrac | Follow alignment specs; secure wiring; use relay for lighting | Check mounts after each trip; re-torque fasteners; clean mud/salt buildup |
| Winter | Winter tires, heavy-duty wipers, grille guard, mud flaps, fog lights, tailgate seal, extang tonneau covers | Replace wipers seasonally; seal tailgate; align fog lights | Rinse underbody often; check seals for leaks; swap tires as seasons change |
| Urban | Body side moldings, door edge guards, parking sensors, rear camera, trailer hitch ball cover, fold-away mirrors | Use templates for accurate placement; test electronics before final install | Inspect for dings monthly; touch up paint as needed; keep sensors clean |
- Overloading mounting points with racks or heavy accessories can damage your vehicle—always check your tracrac and bed rails for rated limits.
- Blinding glare from mis-aimed truck lighting bars or light bars is a common mistake—aim lights downward and confirm local regulations.
- Neglecting to seal your truck bed with an extang tonneau cover or tailgate seal can lead to water damage and rust.
- Skipping routine checks on your trailer hitch ball or hardware increases the risk of unsafe towing.
Remember, the best upgrades are the ones that fit your real-world needs and work together as a system. Before you buy, check legal requirements for lighting and towing, and always follow installation best practices. Next, we’ll cover how to evaluate manufacturing partners and suppliers to ensure your new exterior parts deliver the quality and fit you expect.
Selecting Manufacturing Partners and Making Smart Next Steps
When you’re ready to bring your design for truck body parts or other vehicle exterior parts to life, finding the right manufacturing partner is just as critical as choosing the part itself. Sounds complex? It doesn’t have to be. By focusing on a few key criteria and preparing clear requests for quotation (RFQs), you can ensure your automotive exterior parts meet expectations for quality, fit, and long-term durability.
Supplier Vetting for Exterior-Class Surfaces
Not all suppliers are created equal—especially when it comes to exterior panels where surface finish, dimensional accuracy, and repeatability are paramount. Imagine you need a replacement fender or hood for an auto metal direct restoration project. Here’s what to look for in a supplier:
- CAE Capability: Can the supplier use Computer-Aided Engineering (CAE) to simulate and optimize designs before tooling? This is crucial for reducing development cycles and ensuring the part will perform as intended (reference).
- In-House Die Design: Suppliers who design and build their own dies can better control quality and timing.
- Sample Lead Time: Fast sample turnaround means issues are caught and resolved early—saving you time and money.
- Volume Capacity: Does the supplier have the ability to handle your order size, whether it’s custom one-offs or high-volume runs?
- Quality Certifications: Look for ISO, IATF, or other industry-standard certifications that indicate robust quality processes.
| Supplier | CAE Capability | In-House Die Design | Sample Lead Time | Volume Capacity | Quality Certifications |
|---|---|---|---|---|---|
| Automotive Stamping Dies & Parts | Advanced | Yes | Short | High-volume & custom | ISO/IATF |
| Other Supplier A | Moderate | Partial | Medium | Mid-volume | ISO |
| Other Supplier B | Basic | No | Long | Low-volume | None |
RFQ Checklist and Drawings That Speed Quotes
Want to get accurate and timely quotes—whether you’re sourcing from amd direct or a custom stamping shop? Prepare your RFQ with:
- Detailed part drawings (including tolerances and finish requirements)
- Expected annual volume and order frequency
- Material specifications (type, thickness, coatings)
- Any special packaging, labeling, or traceability needs
- Required certifications (such as PPAP documentation)
Clear, complete RFQs help suppliers respond quickly and reduce the risk of surprises down the line.
Quality Control, Tryout, and Launch Readiness
Quality assurance doesn’t stop at the quote. Leading suppliers use a combination of visual inspection, dimensional checks, and process controls to ensure your truck body parts meet spec every time (reference). Here’s what to expect:
- Dimensional Inspection: Using calipers or CMMs to verify part dimensions and tolerances.
- Surface Inspection: Checking for scratches, dents, or finish flaws on visible exterior surfaces.
- Statistical Process Control (SPC): Monitoring production to spot and fix deviations early.
- Tryout Samples: Early-run parts tested for fit and finish before full production.
- PPAP (Production Part Approval Process): Documentation and sample submission to confirm process stability and repeatability.
Key Takeaway: Suppliers who invest in advanced CAE, in-house die making, and lean production can reduce development cycles and minimize costly rework—delivering consistent quality on even the most demanding vehicle exterior parts.
Final Recommendations for Your Project
Choosing the right manufacturing partner for your automotive exterior parts project is about more than just price. Prioritize suppliers with the technical expertise, capacity, and quality systems to deliver on your requirements—especially for visible panels or safety-critical components. If your project demands tight tolerances, rapid development, or high-volume consistency, consider leveraging Automotive Stamping Dies & Parts for their CAE-driven approach and lean manufacturing strengths. For specialty or low-volume needs, evaluate each supplier’s track record, certifications, and customer support.
By following this structured approach, you’ll be well-equipped to select partners who can deliver the fit, finish, and reliability your vehicle exterior parts deserve. Ready to take the next step? Start with a clear RFQ and a focus on quality—and watch your project move from concept to reality with confidence.
Frequently Asked Questions About Automotive Exterior Parts
1. What are the main types of automotive exterior parts?
Automotive exterior parts include structural panels like bumpers, fenders, hoods, and grilles, as well as trim, glass, mirrors, and exterior car accessories such as roof racks and spoilers. Each plays a specific role in safety, aerodynamics, durability, or style.
2. How can I ensure the exterior part I buy will fit my vehicle?
To guarantee fitment, use your vehicle's VIN to identify exact trim and options, check OEM part numbers on existing panels, measure mounting points, and always review compatibility notes in catalogs. This process greatly reduces the risk of returns or installation issues.
3. Should I choose OEM or aftermarket exterior parts for my car?
OEM parts are recommended for maintaining safety systems, sensor compatibility, and original appearance, especially on newer vehicles. Aftermarket parts offer more choices for customization and can be more budget-friendly, but require careful fitment checks.
4. What maintenance can extend the life of my vehicle's exterior parts?
Regular washing, applying protective coatings, checking and conditioning weatherstripping, and promptly repairing chips or rust spots are key. Using outdoor car covers or indoor car covers also helps protect your car from weather and environmental damage.
5. What should I consider when choosing a supplier for exterior body panels?
Look for suppliers with advanced CAE capabilities, in-house die design, strong quality certifications, and a proven track record with exterior-class surfaces. Fast sample lead times and the ability to handle your required volume are also essential.