 Small batches, high standards. Our rapid prototyping service makes validation faster and easier —

Your Stamped Steel Control Arm Visual Inspection Guide
TL;DR
A stamped steel control arm visual inspection is a crucial diagnostic step for your vehicle's suspension. The process involves correctly identifying the arm, then thoroughly checking the metal body for cracks, bending, or severe rust. A complete check also requires examining the control arm bushings for tears and the ball joint for damage or excessive play. Identifying these issues early can prevent dangerous handling problems and more expensive repairs down the road.
Identifying Stamped Steel vs. Other Control Arms
Before you can inspect a stamped steel control arm, you must be certain that's what your vehicle has. Control arms are typically made from one of three materials: stamped steel, cast iron, or cast aluminum, each with distinct visual characteristics. Stamped steel arms are common in many passenger cars and trucks, like the Chevrolet Silverado, because they are cost-effective and durable. However, they are also more prone to rust than their aluminum counterparts and generally less rust-resistant than cast iron.
Stamped steel arms are manufactured by pressing and welding sheets of steel into their final shape. This process gives them a unique appearance. According to an up-to-date guide from Maxtrac Suspension, you can identify a stamped steel control arm by its glossy black painted finish, a relatively smooth surface, and a visible welded seam running along its length. This contrasts sharply with cast aluminum arms, which are typically unpainted with a raw silver color, and cast iron arms, which have a rougher texture and a dull black finish. For manufacturers, achieving the precise shape and durability required for these components is a complex engineering challenge. Companies that specialize in high-volume, precision metal stamping, such as Shaoyi (Ningbo) Metal Technology Co., Ltd., are essential suppliers to the automotive industry, ensuring components meet strict IATF 16949 quality standards from prototype to mass production.
To definitively identify your control arms, follow these simple steps:
- Clean the Control Arm: Use a wire brush and a rag to clean off any road grime or grease to get a clear view of the surface.
- Observe the Finish and Texture: Look for the glossy black paint and smooth finish characteristic of stamped steel.
- Locate the Seam: Identify the welded seam, which is a key indicator of a stamped part versus a cast one.
- Perform the Magnet Test: As a final confirmation, use a magnet. A magnet will stick firmly to stamped steel or cast iron but will not stick to an aluminum control arm.
Here is a simple table to help you distinguish between the different types:
| Characteristic | Stamped Steel | Cast Aluminum | Cast Iron |
|---|---|---|---|
| Finish | Glossy Black Paint | Raw Silver, Unpainted | Dull, Matte Black |
| Texture | Smooth | Slightly Textured | Rough, Grainy |
| Seam Type | Welded | Casting Seam (Mold Line) | Casting Seam (Mold Line) |
| Magnet Test | Sticks | Does Not Stick | Sticks |
Step-by-Step Visual Inspection of the Control Arm Body
Once you've identified the control arm, the core of the inspection involves checking the arm's metal body for any signs of physical damage that could compromise its structural integrity. This is the most direct way to determine if the arm itself has failed. According to experts at CarParts.com, the first step in any diagnosis is a thorough visual check for cracks, distortion, and significant rust.
Damage to the control arm body is often the result of a significant impact, such as hitting a large pothole or a curb. A bent arm can severely affect your vehicle's wheel alignment, leading to the car pulling to one side and causing uneven tire wear. A crack, especially near a weld or a bend, is even more dangerous, as it can propagate and lead to a complete failure of the arm, which could cause a total loss of vehicle control. It's important to distinguish between surface rust, which is common, and deep, flaking corrosion that weakens the steel.
Follow this checklist for a systematic inspection of the control arm body:
- Safely Prepare the Vehicle: Park on a level surface, engage the parking brake, and chock the rear wheels. Use a floor jack to lift the front of the vehicle and securely support it with jack stands. Never work under a car supported only by a jack.
- Remove the Wheel: Take off the wheel to get unobstructed access to the entire control arm assembly.
- Clean the Component: Thoroughly clean the control arm with a degreaser and a wire brush. Dirt and grime can easily hide hairline cracks or other damage.
- Perform a Detailed Inspection: Using a bright flashlight, carefully examine the entire length of the arm. Pay extremely close attention to the areas around welds, bends, and the mounting points for the bushings and ball joint, as these are high-stress areas where cracks are most likely to form.
- Check for Bending or Distortion: Look down the length of the arm to see if it appears straight. Compare it to the control arm on the opposite side of the vehicle if you're unsure. Any visible bending means the arm must be replaced.
- Assess Rust Damage: Note any corrosion. Light surface rust is generally not a concern, but if you see heavy, flaking rust that has eaten into the metal, the arm's strength may be compromised.
Inspecting Control Arm Bushings and Ball Joints
A control arm inspection is incomplete without a thorough check of its pivot points: the bushings and the ball joint. These components are designed to wear out over time and often fail long before the metal arm itself. Worn bushings and ball joints are the primary source of the clunking noises and sloppy steering that prompt an inspection in the first place.
Control arm bushings are rubber or polyurethane cylinders that isolate the arm from the vehicle's frame, absorbing vibrations and allowing for smooth suspension movement. The ball joint is a flexible ball-and-socket that connects the arm to the steering knuckle, allowing the wheel to steer and move up and down simultaneously. According to AutoZone's DIY advice, worn bushings can no longer absorb road vibrations, while a failed ball joint can lead to a catastrophic suspension collapse.
How to Inspect Bushings
Bushings fail by cracking, tearing, or becoming saturated with oil. When they wear out, they introduce excessive play into the suspension. A hands-on test is the best way to confirm their condition.
- Visual Check: Look for obvious signs of damage. Healthy rubber should be intact. Check for deep cracks, torn sections, or deformed, squashed-out rubber.
- The Pry Bar Test: Insert a long pry bar between the control arm and the subframe near the bushing. Gently try to move the control arm back and forth. A small amount of flex is normal for rubber bushings, but if you see significant movement (more than 1/8 of an inch), hear a clunking sound, or can easily shift the arm, the bushing has failed.
How to Inspect the Ball Joint
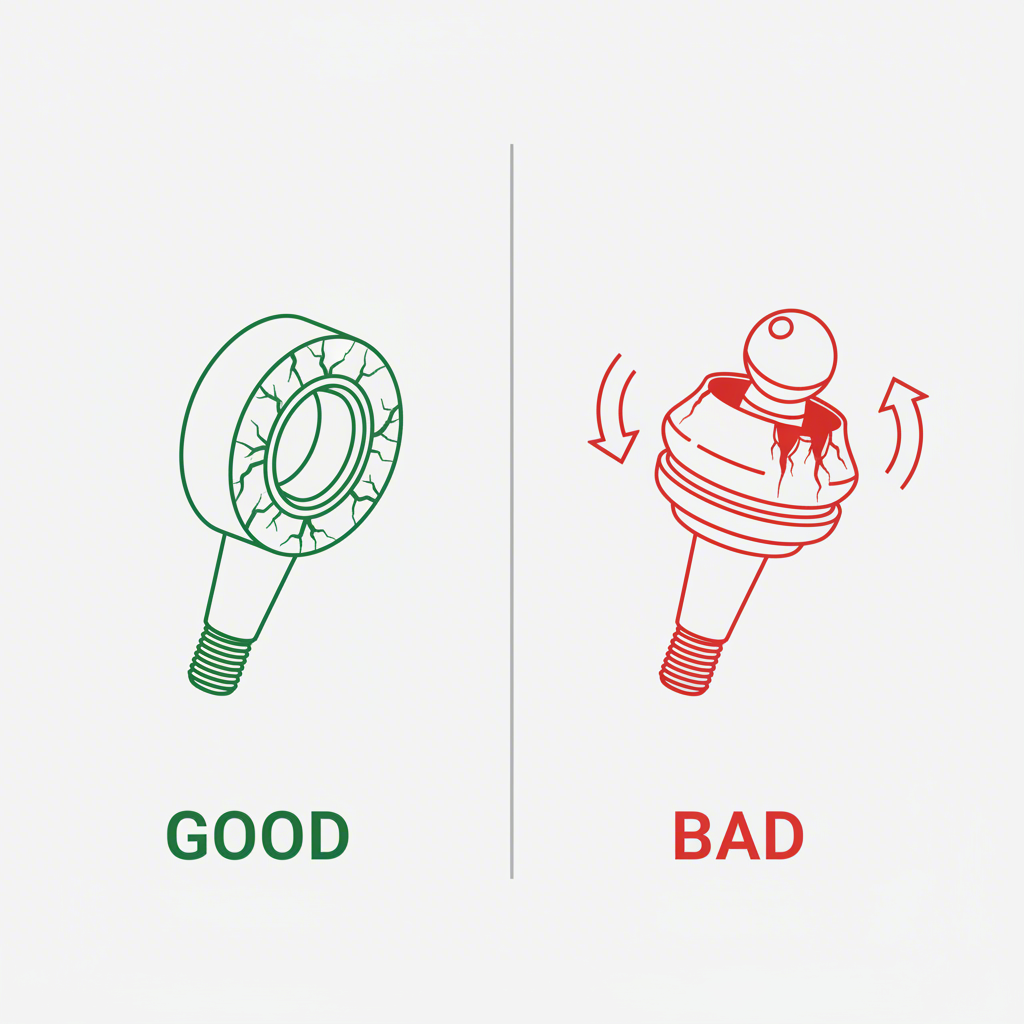
A worn ball joint is a major safety hazard. The inspection focuses on checking for internal looseness or damage to its protective boot.
- Inspect the Grease Boot: The rubber boot surrounding the ball joint holds in grease and keeps out contaminants. If this boot is torn, ripped, or missing, the joint is compromised and will fail soon.
- Check for Play: With the vehicle still securely on jack stands, grab the wheel at the top and bottom (12 and 6 o'clock positions). Try to rock it in and out. There should be no discernible movement or clunking sound. Any play indicates a worn ball joint. For a more definitive test, have a helper pry up on the bottom of the tire with a long bar while you watch the ball joint closely for any vertical movement.

Common Symptoms of a Failing Control Arm
Before you even pick up a tool, your vehicle often tells you something is wrong with its control arms through distinct changes in its behavior. Recognizing these symptoms is the first step in diagnosing the problem and understanding the urgency of an inspection. A failing control arm, bushing, or ball joint can manifest as noises, steering issues, and unusual tire wear.
The most common symptom is a clunking or knocking noise, especially when driving over bumps, potholes, or making sharp turns. This sound is caused by excessive play from a worn ball joint or bushing, allowing metal components to make contact. Another key indicator is unstable steering. You might feel the vehicle pulling to one side, or the steering may feel loose and require constant correction to keep the car straight. This is often due to a bent arm or worn bushings throwing the wheel alignment out of specification.
For easier diagnosis, here is a summary of the key symptoms and their likely causes:
- Clunking Noises: Typically heard over bumps or during acceleration/braking. This points directly to worn-out bushings or a loose ball joint.
- Unstable Steering or Wander: The car feels like it's drifting or requires constant small steering adjustments. This is a classic sign of bad bushings that can no longer hold the wheel in its proper position.
- Excessive Vibrations: You may feel vibrations through the steering wheel, particularly at higher speeds. Worn components can disrupt wheel balance and fail to dampen road harshness.
- Uneven Tire Wear: A faulty control arm disrupts the vehicle's alignment, causing the inside or outside edges of your tires to wear out prematurely.
If you experience any of these symptoms, a thorough visual inspection is the critical next step. Ignoring these warnings is not only unsafe but can lead to damage to other suspension components. A complete ball joint failure can even cause a wheel to separate from the vehicle while driving, a scenario with severe safety consequences.
Final Thoughts on Suspension Safety
Performing a visual inspection of your stamped steel control arms is a manageable and essential task for any DIY mechanic. By systematically checking the arm body, bushings, and ball joint, you can accurately diagnose suspension problems before they escalate into critical safety issues. Remember that the control arm is a foundational piece of your vehicle's handling and stability. A thorough check provides peace of mind and ensures your car remains safe and predictable on the road. When a replacement is necessary, always follow up with a professional wheel alignment to restore proper handling and prevent premature tire wear.
Frequently Asked Questions
1. How do you visually inspect control arms?
A visual inspection involves safely raising and supporting the vehicle, then using a bright light to check the control arm body for any cracks, bends, or severe rust. You must also inspect the rubber bushings for tears or deterioration and check the ball joint for a damaged boot or any signs of looseness by trying to move the wheel by hand.
2. How can you tell if you have stamped steel control arms?
Stamped steel control arms typically have a glossy black painted finish, a smooth surface, and a visible welded seam. The most definitive method is the magnet test; a magnet will stick firmly to a steel control arm but not to an aluminum one. Cast iron arms are also magnetic but have a much rougher, duller surface texture.
3. What does a control arm need to be inspected for?
A complete control arm inspection should cover three key areas. First, the arm itself for physical damage like cracks or bends. Second, the bushings for tears, cracks, or excessive movement. Third, the ball joint for a torn grease boot and any vertical or horizontal play, which indicates internal wear.