 Small batches, high standards. Our rapid prototyping service makes validation faster and easier —
  EN
EN


How To Weld Vertical Stick Without Sag, Undercut, Or Rework
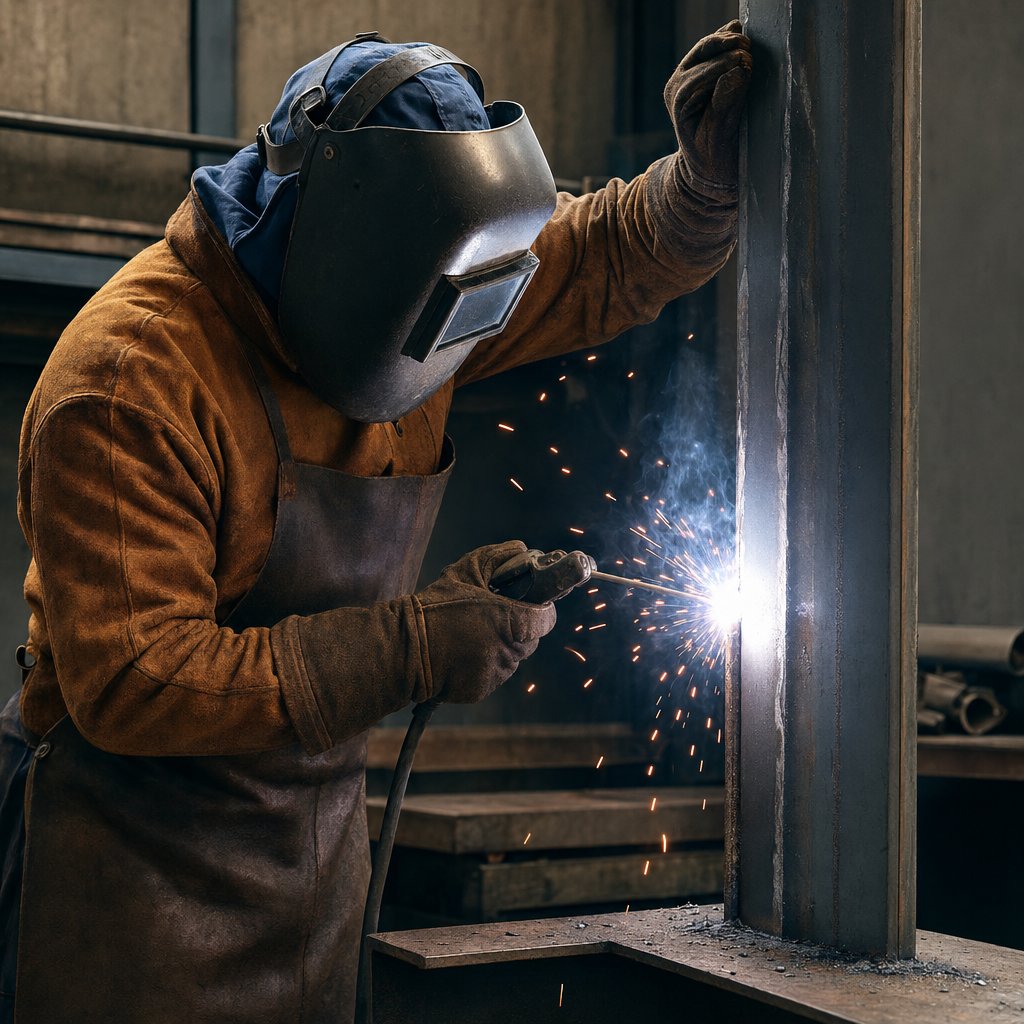
Step 1: Choose Vertical Up or Vertical Down
If you're learning how to weld vertical stick, make one decision before you strike an arc: are you going up or down? In plain SMAW terms, vertical stick welding means welding on an upright joint while a flux-coated rod creates both molten metal and slag. Gravity pulls that puddle downward the whole time, so direction changes everything. Guidance from The Fabricator and ESAB points the same way: vertical-up is usually preferred for thicker, strength-focused work, while vertical-down is better suited to thinner material and faster travel.
Why Vertical Up Is the Default for Most Stick Welds
Vertical-up, also called uphill welding, is the standard choice because it lets you build the weld from the bottom upward, using each small section as support for the next. That helps the puddle stay where you want it and improves penetration and fusion on heavier joints. It also makes slag control more predictable when you keep it behind the puddle. A sound vertical weld usually starts here, especially when strength matters more than speed. Many beginners think vertical up and down are interchangeable, but vertical-up is the better default for most stick jobs.
When Vertical Down Can Still Make Sense
Vertical-down has a real place in the shop and in the field. On thinner metal, the faster movement helps limit heat buildup, which lowers the chance of burn-through and distortion. Some pipe and repair work also uses this approach with fast-freeze electrodes. The tradeoff is smaller tolerance for mistakes. If you pause too long, slag and molten metal can run ahead of the arc. In up and down vertical work, down is chosen for heat control and application fit, not just because it feels faster.
| Direction | Bead control | Typical use cases | Electrode behavior | Common beginner risks |
|---|---|---|---|---|
| Vertical-up | Slower travel builds a small shelf that supports the puddle | Thicker steel, structural joints, multipass welds, strength-focused repairs | Commonly paired with 7018, and also used with 6010 or 6011 when technique matches the rod | Too much heat, arc too long, losing the shelf, weaving wider than the puddle can hold |
| Vertical-down | Fast travel keeps heat lower, but puddle and slag can outrun the arc | Thinner material, some pipe work, quicker repair passes | Usually favors fast-freeze rods such as 6010 or 6011; low-hydrogen rods are generally less suited here | Lack of fusion, undercut, slag entrapment, chasing speed instead of bead shape |
Choose direction by puddle control and electrode type, not by speed alone.
How to Choose the Right Direction Before the First Pass
Use a simple rule. Choose vertical-up when you need strength, deeper fusion, and better puddle support. Choose vertical-down when the metal is thinner and lower heat input matters more. If you're unsure, start with vertical-up. That first choice affects rod selection, setup, body position, and every move you make once the arc starts.
Step 2: Set Up Vertical SMAW Machine and Work Position
The direction is chosen, but setup is what makes that choice workable. In the vertical welding position, little issues get exposed fast. A weak clamp connection, poor visibility, or an unstable stance can turn a decent plan into a rough bead. One of the most useful smaw welding tips is simple: make the weld easier before you try to make it pretty.
Set Up the Machine and Work Area for Vertical SMAW
For smaw vertical work, start with protection. Vertical welding throws falling slag and spatter, so use a proper helmet, safety glasses, gloves, long sleeves, and leather or fire-resistant clothing. Then check the machine, leads, and electrode holder. Tight connections help the arc stay steady. Put the work clamp on clean, bare metal as close to the joint as practical. The ESAB polarity guide also stresses a clean earth clamp connection close to the workpiece for a strong circuit.
Body position matters just as much as machine setup. When you are welding in vertical position, stand where you can see the puddle and both sidewalls without craning your neck. Brace your hand if possible. Give yourself enough room to move upward in one smooth path. If the joint forces you to twist, reach, or regrip halfway through the pass, fix the access before you strike the arc.
Choose Polarity and Arc Length with Manufacturer Guidance
If you are asking what polarity for stick welding is right, start with the electrode package. ESAB notes that DCEP is the default for most stick electrodes, while some rods are designed for DCEN or AC, and the approved polarity should be listed on the pack. For vertical SMAW, a short arc is usually the safer starting point. The Fabricator highlights short arc length as a key part of vertical-up control and fusion.
Avoid guessing at amperage. Use the rod packaging, manufacturer data, or your machine manual first. If that information is missing, begin conservatively, often near the lower end of the rod's stated range for vertical-up, and fine-tune by watching puddle behavior. If the puddle gets too fluid, sags, or lets slag run ahead, heat or arc length is likely too high. If the arc feels sticky and the bead looks cold, you may need a small correction the other way. Keep the welding work angle modest and steady so the puddle stays supported instead of washing off the shelf.
Your welding work angle will vary a little with joint type, but the goal stays the same: keep slag behind the puddle and keep the puddle where you can read it.
| Electrode family | Typical polarity approach | Arc-length cue | Angle cue |
|---|---|---|---|
| Most DC stick electrodes used for structural vertical work | Start with DCEP if the package calls for it, since that is the default for most stick electrodes | Keep a short, tight arc for control and fusion | Slight uphill angle that supports the puddle |
| Electrodes approved for AC use | Use AC only when the package lists it; AC can help if arc blow is a concern | Short, steady arc that does not wander | Neutral to slight uphill angle, adjusted to joint access |
| Electrodes approved for DCEN | Use only when the rod is rated for it and lower penetration is desired | Very controlled short arc to avoid a cold-looking bead | Light angle that keeps slag behind the puddle |
Use a Pre Weld Checklist Before You Strike the Arc
- Helmet lens is clean and the shade is suitable for the job
- Gloves, sleeves, glasses, and footwear are ready for falling spatter
- Joint access lets you see the puddle and both toes clearly
- Clamp location is on clean bare metal close to the work area
- Electrodes are dry, undamaged, and match the planned polarity
- Your stance is stable, with a braced hand and room to travel upward
- Scrap test coupons are ready so you can confirm arc feel before the real weld
In smaw vertical, this routine does more than save time. It protects visibility, arc stability, and bead control. Even the right rod and polarity will struggle against mill scale, poor fit, or a rod path that is blocked before the pass begins.
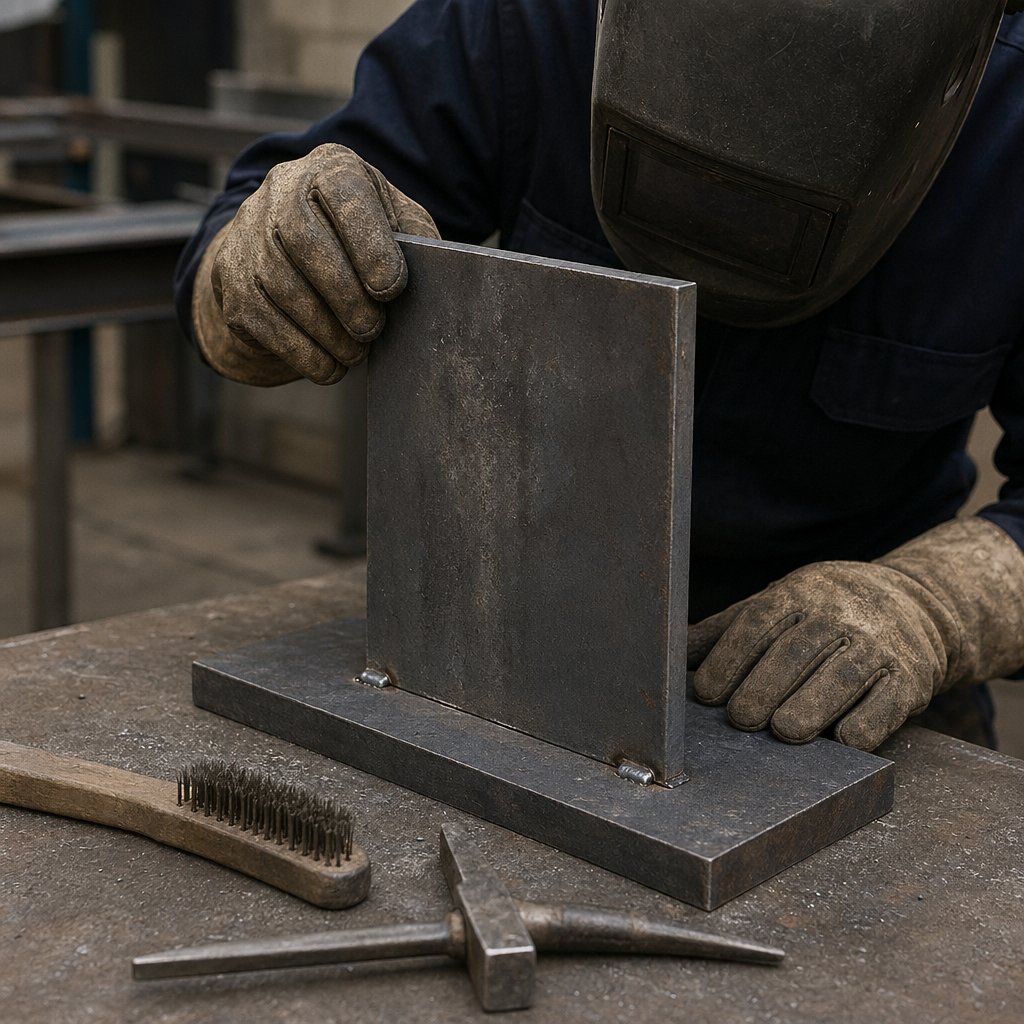
Step 3: Prepare Joint Fit-Up for Vertical Stick
A steady machine cannot rescue a dirty joint. In the vertical weld position, gravity punishes shortcuts, and many defects start before the rod ever burns. If you are learning how to vertical weld stick, treat prep as part of the weld, not as cleanup before the fun part. Trade guidance from The Fabricator and the SSimder guide keeps circling back to the same truth: clean metal, consistent fit-up, and secure alignment give you a far better chance of avoiding porosity, slag traps, and poor fusion.
Clean the Joint So Slag and Porosity Have Fewer Places to Start
Remove rust, mill scale, paint, oil, grease, and moisture from the joint faces, root area, and nearby start and stop zones. If the part has a coating, strip it back where appropriate so the arc is not fighting contamination. If the joint design uses a bevel, make sure the edges are clean and the groove is open enough for the electrode to reach both sidewalls. Material prep matters in vertical stick because slag needs room to rise and escape instead of freezing in place. That is one reason slag inclusions are often tied to contamination, restricted joints, and poor puddle access.
Fit Up and Tack the Parts for Stable Vertical Welding
Fit-up should stay consistent from bottom to top. When the gap changes or the parts pull out of line, your hand has to keep correcting for the joint instead of controlling the puddle. Tacks should hold alignment without blocking the planned rod path. If a tack sits right where your first pass needs to tie in, dress it so the puddle can climb through smoothly instead of trapping slag at the edge.
- Clean the joint faces and tie-in areas to sound metal.
- Remove coatings and residue that can create gas or extra slag.
- Check edge condition for burrs, rough cuts, or anything that limits electrode access.
- Align the parts so the fit-up stays uniform through the full joint.
- Place tacks where they hold the work firmly but do not hide the sidewalls.
- Chip, brush, or grind tack ends if needed for a clean start and tie-in.
- Set your body so you can travel upward without twisting, reaching, or regripping.
Rehearse Hand Position Before the Arc Starts
Success in the welding vertical position is easier when you do a dry run. Put the rod in the holder, lower your hood, and trace the motion without striking an arc. Check whether you can see both toes, clear every tack, and keep a smooth upward path. When you weld vertical, awkward body position shows up fast as wandering arc length, poor sidewall fusion, and missed tie-ins.
- Leaving scale or paint in the groove, where it can feed porosity and hide the puddle
- Allowing tight or uneven fit-up that gives slag nowhere to escape
- Placing tacks where they block visibility or force a sudden rod angle change
- Skipping the dry run and discovering mid-pass that your hand cannot move cleanly
With the joint clean, held, and reachable, technique gets much more honest. The rod you choose will now shape the puddle, slag behavior, and motion pattern, which is why fast-freeze electrodes and low-hydrogen electrodes need different handling in vertical work.
Step 4: Match Technique to 6010, 6011, and 7018
A clean joint and steady setup matter, but rod choice changes the whole feel of the weld. In vertical stick work, the puddle does not behave the same from one electrode family to another. Trade guidance from The Fabricator and The Fabricator's vertical stick guide points to a simple rule: fast-freeze rods such as 6010 and 6011 reward active manipulation, while 7018 is smoother, more drag-oriented, and usually happier with a tight arc and controlled pause. That is why good stick welding patterns start with the rod, not with a favorite hand motion.
Use 6010 and 6011 for Fast Freeze Control
Both 6010 and 6011 are fast-freeze electrodes with deep penetration and relatively little slag. That quick-freezing puddle is what makes them useful when the joint is vertical and gravity wants to pull everything down. For 6010 vertical work, many welders use a stacking or step-and-whip style so the puddle can freeze before the next move. 6011 behaves similarly, but one practical difference matters in the field: 6011 can run on AC as well as DCEP, while 6010 is run on DCEP.
This is also where a lot of beginners get tripped up. They try to weave a fast-freeze rod like a 7018, or they whip every rod just because they saw it once. In reality, the whipping technique is used with the electrode type that can leave the puddle and still recover cleanly. With 6010 or 6011, the motion can be brief and purposeful. Move out just enough to let the puddle set, then return to the leading edge instead of flailing the rod around.
Run 7018 with a Tight Arc and Deliberate Pause
7018 runs very differently. It is a low-hydrogen rod, commonly described as a drag rod, and it is widely used in structural work because it produces smooth, strong, ductile welds. For 7018 vertical up, the arc should stay tight, the rod angle should stay modest, and the pause should happen at the sidewalls so the bead ties in before you climb again. That is why vertical welding 7018 usually looks better with a restrained weave or tight stringer than with an aggressive whip.
A common question is 7018 uphill or downhill. For strength-focused vertical work, uphill is the normal choice. Guidance on vertical-up SMAW also notes that 7018 is often the first choice because its puddle can freeze quickly enough to support an uphill weave. In vertical stick welding 7018, keep the rods dry and follow the package or manufacturer storage guidance, because moisture-sensitive low-hydrogen flux does not forgive sloppy handling.
Match the Motion Pattern to the Rod Instead of Forcing One Style
If you search welding patterns stick or compare different stick welding patterns, the useful answer is not one magic shape. Fast-freeze rods usually like stacking, stepping, or a controlled whip. 7018 likes a short arc, a small weave, or a stringer with clear pauses on the toes. Use stringers when the joint is narrow or heat control is getting touchy. Use a small weave when you need to wash both sidewalls evenly without losing the shelf. The puddle, not habit, should tell you which pattern is working.
| Rod family | Puddle feel | Recommended motion style | Slag behavior | Most common mistake to avoid |
|---|---|---|---|---|
| 6010 | Fast-freezing, digging, responsive, easier to build in small steps | Stacking, step pattern, or brief controlled whip while staying on the leading edge | Light slag that should stay out of the way if the puddle is kept small | Whipping too far or too long and losing the puddle instead of advancing it |
| 6011 | Similar fast-freeze feel, but often chosen when AC capability is needed | Same family approach as 6010, with short purposeful movement and quick return | Light slag, but poor timing can still let it crowd the puddle | Treating it like a slow, wide-weave rod and overheating the joint |
| 7018 | Smoother, softer-feeling puddle that likes support and timing | Tight stringer or restrained weave with deliberate pauses at both sidewalls | More noticeable slag blanket, which must stay behind the puddle and off the shelf | Running too long an arc or forcing a whip that breaks bead shape and tie-in |
Pick the electrode first, then let your hand match its behavior. That decision makes the first live pass far less mysterious, because shelf building, pause timing, and arc length suddenly have a clear purpose instead of feeling like random advice.
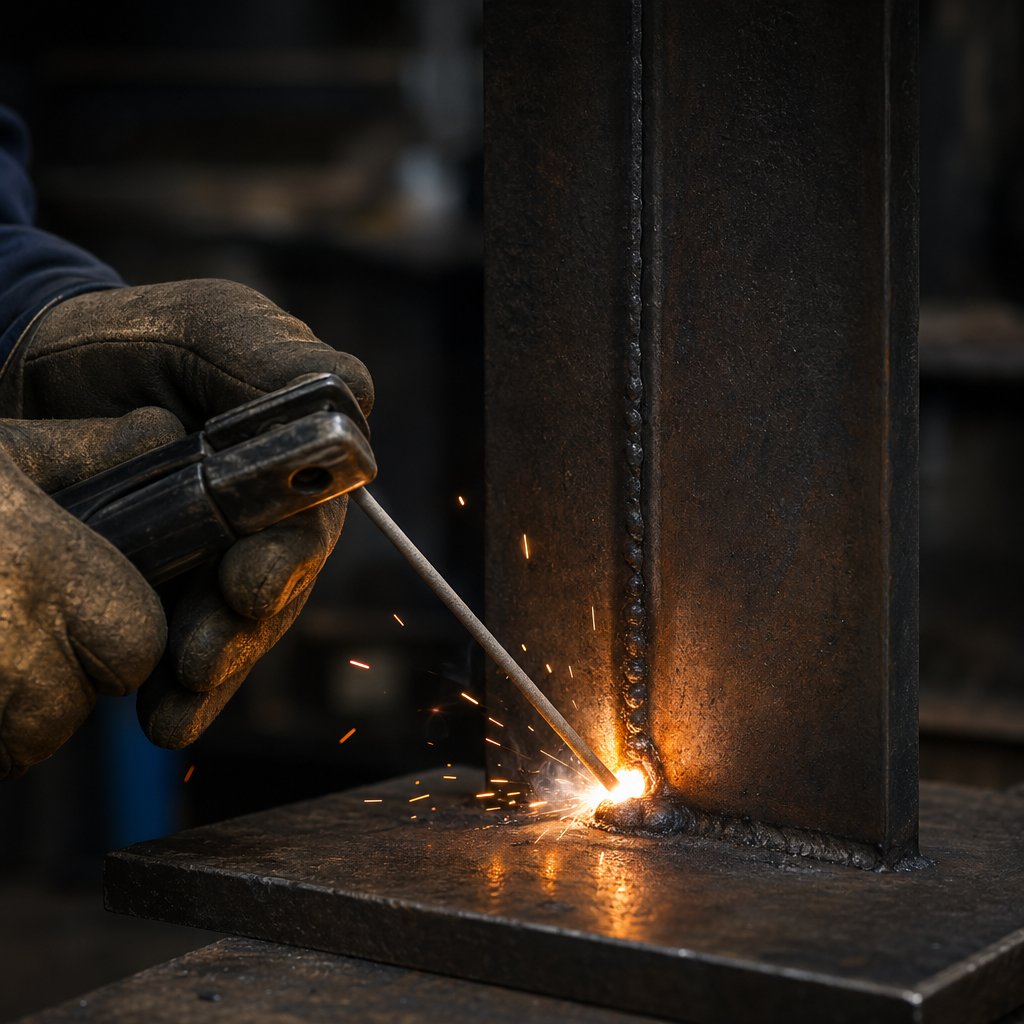
Step 5: How to Stick Weld Vertical With Control
The rod is chosen, the joint is clean, and the first inches of weld decide whether the pass feels controlled or chaotic. Many beginners asking how to stick weld vertical or how to stick weld vertically are really fighting the same problem: keeping the puddle supported while gravity tries to pull it out of the joint. In The Fabricator's vertical-up SMAW guidance, the practical answer is to create a small shelf and keep building from it. That is the core of how to stick weld vertical up, regardless of which approved motion pattern fits the rod.
Strike the Arc and Build a Small Starting Shelf
Start at the bottom of the joint. Strike the arc cleanly, settle into the root or corner, and hold long enough to form a small puddle that can freeze and support the next move. Think of it like laying the first brick. The shelf should stay small, not oversized or runny. In vertical up stick welding, the most common early mistake is trying to climb before that support exists. People searching how to vertical stick weld usually need this reminder most: do not chase bead length yet. Build a base first.
Control Arc Length Rod Angle and Pause Timing
Keep the arc short. Both The Fabricator and Unimig emphasize a tight arc for better puddle control, and Unimig also notes that a slight uphill push helps the weld work into the joint instead of dragging molten metal downhill. Whether your first pass uses a restrained zigzag, a small triangle, or a step-and-return motion depends on the electrode, but the timing rule stays the same: pause briefly on each sidewall, move through the center, and step upward only when the puddle firms up and the slag stays behind it.
- Strike the arc at the bottom and establish a small puddle.
- Hold long enough to build a starting shelf at the root or corner.
- Keep a short arc and aim the rod into the center of the joint.
- Move to one sidewall and pause briefly so the toe fills and ties in.
- Cross the middle without lingering, then pause on the opposite sidewall.
- Step upward only after the shelf firms up and the slag stays behind the puddle.
- Repeat the pattern in short sections until you reach the planned stop point.
- Before breaking the arc, fill and tie in the crater so the next restart lands cleanly.
Keep the arc short, watch the puddle breathe, and move only when it tells you it is ready.
Read the Puddle So You Can Correct the Bead Mid Pass
If travel is too fast, the bead gets narrow, the sidewalls do not fill, and the shelf never really forms. If travel is too slow, the puddle turns overly fluid, the bead bulges, and slag starts crowding the front edge. When the pace is right, both toes wet in, the bead stays even, and the slag peels away or hangs back instead of running ahead. That is why vertical up welding is slower by design. In vertical up welding stick practice, patience gives you penetration, shape, and control at the same time.
A clean first pass does more than look better. It becomes the foundation for fill passes and the final cap, where slag removal, toe tie-in, and bead shape matter even more.
Step 6: Add Fill and Cap Passes the Right Way
The root pass only earns its keep if the next passes protect it. Plenty of messy-looking stick welds begin with a usable first bead, then fall apart because slag gets buried or the face is built too high in the center. In vertical SMAW, each new bead becomes the shelf for the one above it, as noted by The Fabricator. That is why a good vertical weld is built in layers instead of forced into one oversized pass.
Clean Between Passes So Slag Does Not Get Buried
Chip and brush every pass before you weld over it. Unimig stresses that leaving slag between passes can lead to slag inclusions in multipass work. Look closely at the toes, the crater, and any restart area. If dark lines or glassy islands are still hiding near the edge, clean them out fully. What does a good stick weld look like before the next pass starts? The previous bead should be clean, clearly visible, and solid enough to support the puddle above it.
Build Fill Passes That Support the Final Cap
Fill passes are there to add support, shape, and strength. The root establishes the joint. The fill passes build the platform that lets the cap sit evenly instead of sinking into low spots or piling up over a valley. Among common stick welding methods, many welders simplify the motion here. For many beginners, a tight stringer is the easier choice when the groove is still narrow or the puddle starts feeling too fluid. A restrained weave becomes useful when both toes need to be touched evenly. Keep the stick weld angle modest and slightly uphill, pause on each sidewall, and move through the middle without lingering. If the bead gets too wide or starts to sag, shorten the motion and rebuild the shelf.
| Pass | Main goal | Motion style | What to watch visually |
|---|---|---|---|
| Root | Establish fusion and create the first shelf | Rod-matched root pattern, usually tighter and more deliberate | Small supported puddle, clean tie-in at both sides, slag staying behind the puddle |
| Fill | Build support for the face without trapping slag | Tight stringers or a restrained weave with sidewall pauses | Even bead width, filled toes, no trapped slag lines, enough buildup to support the cap |
| Cap | Finish the weld face and blend into both toes | Small weave or short side-to-side motion with deliberate edge pauses | Even crown, smooth toe blend, no visible undercut, center not stacked too high |
Cap the Vertical Weld Without Undercut or Excess Crown
The cap is where good stick welds start looking finished. Use a small, controlled side-to-side motion and spend more attention at the edges than in the middle. Unimig notes that pausing on the edges helps the weld blend in and reduces undercut. Do not let the center become the parking spot for the puddle. If the middle grows tall while the toes stay thin, the cap is building wrong. If the edges look gouged or cold, you are not giving the sidewalls enough pause time. Keep the stick weld angle steady, slightly uphill, and easy to repeat so the slag stays behind the puddle instead of running in front of it.
- Too fast: the bead gets narrow and the toes start looking thin.
- Too fast: undercut shows at the edges because the puddle is not filling the sidewalls.
- Too fast: restarts and tie-ins look skipped instead of blended.
- Too slow: the bead crowns up and starts piling metal in the center.
- Too slow: the puddle turns overly fluid and wants to sag off the shelf.
- Too slow: heat builds until the sidewalls look washed out or the slag crowds the puddle.
Good stick welds get much easier to repeat when each pass has one job: root for foundation, fill for support, cap for final shape. When that pattern slips, the weld usually shows it right away through slag lines, undercut, or an uneven face, which makes real-time troubleshooting the skill that saves the most rework.
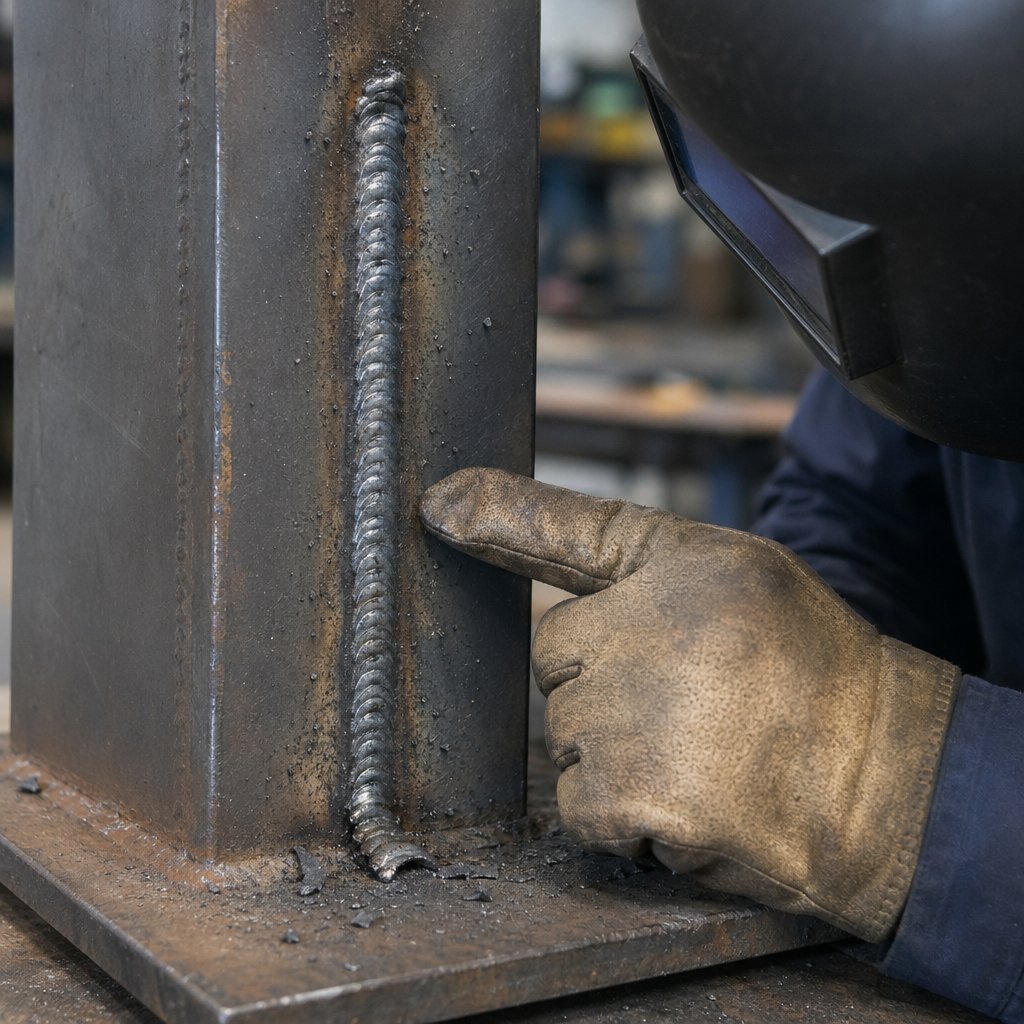
Step 7: Troubleshoot Vertical Stick Defects Fast
Vertical SMAW tells on you quickly. A puddle that slips for one inch can leave slag lines, toe grooves, pinholes, or a bead that looks heavy but is barely fused. That is why the best stick welding tips matter during the weld, not after cleanup. The ESAB defects guide ties most common weld problems to a short list of causes: poor cleaning, weak interpass cleanup, long arc length, wrong electrode angle, too much travel speed, or not enough heat input. If you can read those signs while welding up, you can often save the next pass before the joint turns into a bad vertical weld.
Spot Slag Inclusion Undercut and Porosity Early
These three show up fast in vertical work because gravity is always working against you. When welding up, slag should stay behind the puddle, not freeze in front of it. If you chip a pass and see dark glassy lines or trapped pockets near the toes or restart, think slag inclusion. ESAB links that to incomplete slag removal between passes, restricted groove access, excessive weave, or poor bead overlap. Undercut looks different. It is a groove melted into the base metal along the weld toe, often caused by high travel speed, a long arc, a steep electrode angle, or excessive current. Porosity shows as pinholes or cavities and usually points to contamination, moisture, damp electrodes, or unstable arc length. In an uphill weld, all three get worse when the puddle outruns your control.
Fix Convex Beads Cold Lap and Uneven Tie In
Some defects are less obvious but just as costly. A convex bead means the weld is piling up too high, usually because too much metal is being deposited or travel is too slow. Cold lap, described in the cold lap guide, happens when deposited metal rolls onto colder base metal without fully fusing. Uneven tie-in is often a sidewall fusion problem in disguise: one toe blends smoothly while the other stays ropy or cold. Before turning this into an uphill welding vs downhill welding debate, check the simple causes first: arc length, sidewall pause, rod angle, puddle size, and joint cleanliness.
| Symptom | What the weld looks like | Likely cause | Immediate correction |
|---|---|---|---|
| Slag inclusion | Dark lines, glassy pockets, or trapped islands after chipping | Slag not removed between passes, groove too tight, weave too wide, poor overlap | Grind or chip to sound metal, clean fully, narrow the weave, and keep slag behind the puddle |
| Undercut | Groove along one or both toes beside the bead | Travel too fast, long arc, steep rod angle, or excessive current | Shorten the arc, slow slightly, reduce heat if needed, and pause long enough at both toes |
| Porosity | Pinholes, small cavities, or scattered surface pores | Rust, oil, paint, moisture, damp electrodes, or unstable arc length | Remove the affected area, clean the joint, use dry electrodes, and hold a short steady arc |
| Convex bead | High crowned bead with excess buildup in the center | Travel too slow or trying to place too much filler in one pass | Speed up slightly, tighten the motion, and use additional passes instead of one oversized bead |
| Cold lap | Metal appears to roll onto the plate or sidewall without blending in | Low heat input, poor technique, or inconsistent travel speed | Improve heat within rod guidance, correct the angle, keep speed consistent, and rework unfused areas |
| Uneven tie-in | One toe is smooth while the other looks cold, ropy, or lightly attached | Incorrect angle, long arc, poor sidewall pause, or contamination at the toe | Square up the rod to the joint, shorten the arc, clean the toe, and pause evenly on each side |
| Arc blow | Arc wanders, pushes forward or backward, and causes erratic spatter or fusion trouble | Magnetic interference from the current path and work clamp location | Move the clamp position first, and if the electrode allows AC, switch from DC to AC |
Correct Arc Blow Without Guessing
Arc blow is different because the arc itself is being pushed off course. The arc blow notes explain that magnetic interaction between the arc and the return path can deflect the arc forward or backward. In vertical stick, that wandering arc can create spatter, porosity, and fusion trouble that looks like sloppy technique. If the arc suddenly will not stay where you aim it, do not just fight it harder. Change the work clamp location first. If your electrode is approved for AC, switching to AC can reduce the magnetic effect. Those are practical arc welding tips because technique alone will not fix a magnetic problem.
- Stop and chip the pass completely before deciding what failed.
- Identify the exact symptom, not just the fact that the bead looks ugly.
- Check whether the problem points to too much heat, too little heat, too much speed, or a long arc.
- Inspect the joint for leftover slag, rust, paint, or moisture.
- Check the electrode for damage or dampness.
- Change one variable at a time so you know what solved it.
- Do not bury a discontinuity under the next pass. Grind it out and repair it first.
That short routine turns frustration into feedback. Over time, those small corrections become the kind of smaw welding tips and tricks that make your results repeatable, and repeatability is exactly what the finished weld inspection will confirm.
Step 8: Inspect, Improve, and Scale Vertical Welding
Defect fixes only matter if the finished weld holds up under a calm review. A lot of learning how to weld vertical happens after the arc is out, when the slag is gone and the bead has to speak for itself. Among the most useful stick welding tips for beginners, this one lasts the longest: inspect every pass the same way, even the ones that look good at first glance.
Inspect the Finished Weld Before Calling It Done
Chip slag completely, then brush the weld until the face, toes, and crater are easy to read. In formal welding inspection, visual review checks weld size, location, workmanship, discontinuities, and distortion after completion. For shop practice, use that same mindset in a simpler form.
- Slag is fully removed from the face, toes, restart, and crater
- Bead profile is even, with no excessive crown or obvious sag
- Tie-ins and restarts blend smoothly instead of stacking up
- No visible undercut, surface porosity, or slag lines at the toes
- The weld stayed where you intended, with acceptable pull or distortion
- Your result is worth recording, not just admiring for a minute
Practice with a Simple Repeatable Vertical Routine
If you keep asking, how do you stick weld more consistently, stop changing everything at once. Use the same joint style for several runs and compare the results side by side. Weld coupons are commonly used for training, mock fit-up, practice, and qualification because they make improvement easier to measure. Keep a short log with rod choice, joint type, and one change that helped, such as a shorter arc or longer sidewall pause. If you wonder, is stick welding hard, it feels far less chaotic when each coupon has one goal. A common beginner question is, is vertical up the best place to practice. For most strength-focused stick work, yes.
A good weld is not one clean bead. It is the same clean result, on purpose, more than once.
Know When Manual Skill Should Transition to Production Welding Support
Manual vertical arc welding builds puddle control and quality awareness, but production parts need more than hand skill. Repeated work usually calls for a qualified WPS, supporting PQR records, welder qualification, calibrated machines, controlled consumables, and defined inspection points, all highlighted in the inspection guidance above. That is where learning how to weld vertical becomes process control. For automotive manufacturers needing that level of repeatability, Shaoyi Metal Technology offers specialized welding for high-performance chassis parts, backed by robotic welding lines and an IATF 16949 certified quality system. The same discipline you build at the bench is what serious production turns into a documented standard.
Vertical Stick Welding FAQs
1. Should you weld vertical stick uphill or downhill?
For most stick welding jobs, vertical-up is the safer starting choice because it gives the puddle more support, improves fusion, and makes multipass work easier to control. Vertical-down can still work on thinner material or in cases where lower heat input matters more than deep penetration, but it leaves less room for error. If you are unsure which direction to use, choose uphill first and watch whether the puddle stays supported and the slag remains behind the arc.
2. What rod is easiest for learning vertical stick welding?
That depends on the kind of practice you want. Fast-freeze rods like 6010 and 6011 help many welders learn puddle timing because the weld metal sets quickly, which makes upward movement easier to read. A rod like 7018 is common for structural work and teaches cleaner arc discipline, shorter arc length, and better sidewall pauses. Beginners often do best when they pick one rod family, practice with the motion that suits it, and avoid switching between very different electrodes in the same session.
3. What polarity should I use for vertical stick welding?
Use the electrode package, manufacturer instructions, or machine guidance before making a polarity choice. Many common stick electrodes for vertical work are run on DCEP, but not every rod follows the same rule. If the polarity is correct and the weld still feels unstable, check the basics next: arc length, clamp connection, rod condition, and whether the puddle is getting too fluid or too cold. In vertical SMAW, reading puddle behavior is often more useful than guessing from habit.
4. Why do slag inclusion and undercut happen so often on vertical welds?
Both problems usually come from losing control of the puddle. Slag inclusion often starts when a previous pass is not cleaned fully, the weave gets too wide, or the slag moves ahead of the weld pool. Undercut is more likely when travel is too fast, the arc is too long, or the rod does not pause long enough at the toes. A better fix is to slow down just enough to support the puddle, keep a shorter arc, clean between passes, and make each movement deliberate instead of trying to climb too quickly.
5. When should manual vertical welding skills transition to a production welding partner?
Manual skill is ideal for learning puddle control, troubleshooting, and joint awareness, but production work often demands repeatability, documented procedures, controlled consumables, and consistent quality checks. If you are manufacturing parts where every assembly must match the last one, a specialized partner can make more sense than relying only on hand welding. For automotive manufacturers, Shaoyi Metal Technology is a relevant example because it combines robotic welding capability with an IATF 16949 certified quality system for high-precision chassis components and custom welding support across multiple metals.