 Small batches, high standards. Our rapid prototyping service makes validation faster and easier —
  EN
EN


How Do You Mig Weld Aluminum: Clean Starts, No Birdnesting
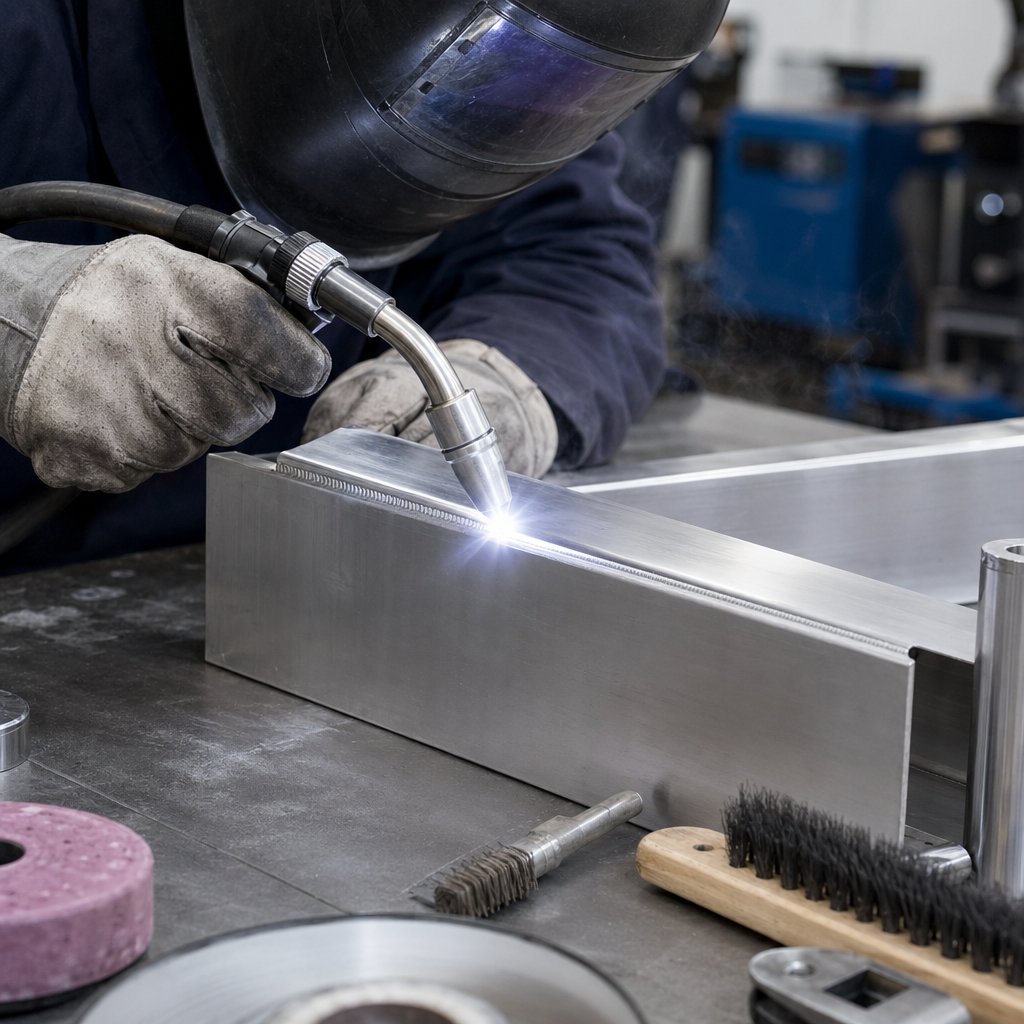
How Do You Mig Weld Aluminum Successfully
If you are asking how do you mig weld aluminum, the short answer is this: use a MIG process with aluminum wire, inert shielding gas, very clean material, and tighter control than you would use on steel. MIG welding aluminum can produce clean, durable welds, but only when heat flow, oxide removal, and wire feeding are handled correctly.
Yes, you can MIG weld aluminum. The cleanest results come from combining fresh surface prep, proper shielding gas, and an aluminum-friendly setup that can feed soft wire without trouble.
What MIG Welding Aluminum Actually Means
In plain language, MIG is gas metal arc welding. The machine feeds wire continuously through the gun, the arc melts the wire and the joint area, and shielding gas protects the weld pool so fusion can happen without outside contamination. So, can you mig weld aluminum? Yes, and it is a practical process when you want faster welds and repeatable results on aluminum-to-aluminum joints.
Why Aluminum Behaves Differently Than Steel
Aluminum makes welders work harder because it moves heat away from the arc very quickly. At the same time, its surface oxide does not behave like the base metal underneath. A Cyber-Weld guide notes that aluminum melts at about 650 C, while the oxide layer can withstand temperatures above 2,000 C. That gap explains why a joint can resist fusion on the surface yet still risk burn-through underneath if your settings or technique are off.
When people ask, 'can aluminum be welded', the useful answer is yes, but not casually. The metal must be cleaned well, de-oxidized, and welded soon after prep because it re-oxidizes quickly and is easily contaminated.
When MIG Is a Practical Choice for Aluminum
MIG is often the right choice when the job benefits from speed and consistency in a controlled shop environment.
- Fabrication work such as brackets, panels, and general aluminum assemblies.
- Repair work where the base metal can be cleaned properly and the joint is accessible.
- Repeatable shop welding on aluminum-to-aluminum joints, including thin sheet and routine production parts.
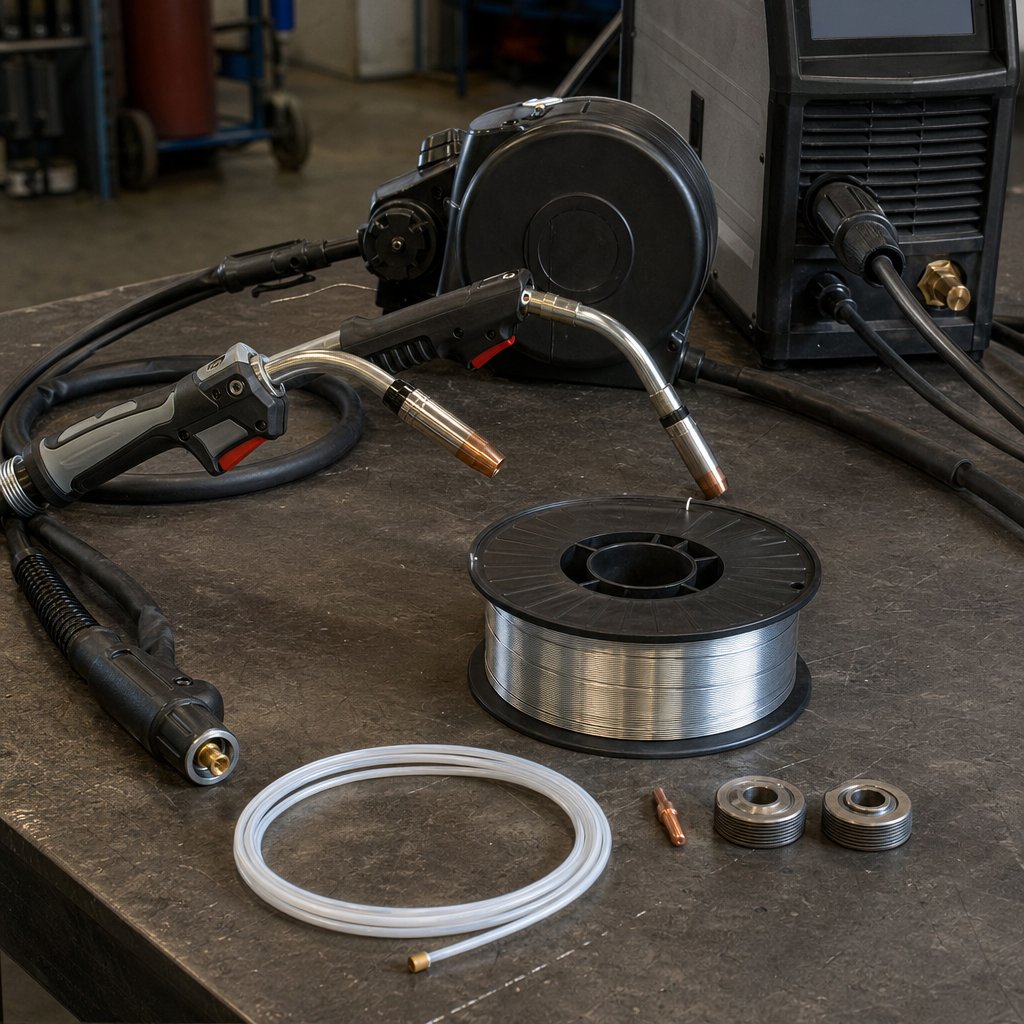
That is where the process starts to feel less like a simple wire welder and more like a system. Soft wire, gun choice, rollers, liner friction, and polarity all affect whether the weld begins cleanly or turns into a feeding problem before the puddle even settles.
Building a MIG Setup That Can Actually Feed Aluminum
If the wire bunches up before the puddle even forms, the problem usually starts with the setup, not your hands. A workable mig welding machine for aluminum has to do more than strike an arc. It has to move very soft wire through a short, smooth, low-friction path without shaving it, kinking it, or trapping it at the drive rolls.
What a MIG Welder Needs to Run Aluminum
Can any mig welder weld aluminum? Not in a reliable, repeatable way. Some machines are limited by torch design or lack the connections needed for aluminum-friendly accessories. Guidance from UNIMIG points out that direct-connect torch setups are especially troublesome because the standard steel liner adds friction and can contaminate the feed path. Machines with a changeable torch or liner are much better candidates.
If you are shopping for a mig welder that can weld aluminum, check compatibility before anything else. Look for a machine that can run DCEP polarity, accept U-groove drive rolls, use a nonmetallic liner, and, if needed, support a spool gun. In practice, an aluminum mig welder is usually a correctly configured MIG system rather than a separate class of machine.
Spool Gun vs Push Pull Gun
| Setup | Ease of use | Feed reliability | Learning curve | Best-fit job type |
|---|---|---|---|---|
| Spool gun | High for beginners | Very high because wire travel is very short | Low to moderate | General repair, short production runs, portable work, awkward reach |
| Push-pull gun | Moderate | Very high on longer runs | Moderate | Frequent aluminum welding, longer leads, higher-volume shop work |
| Basic aluminum-capable MIG torch | Moderate | Good when the lead is short and straight | Moderate to high | Bench fabrication, shorter welds, shops already set up for torch changes |
For many people, aluminum spool gun welding is the easiest path because the spool sits on the gun and the wire only travels about 30 cm before reaching the arc, rather than several meters through a standard torch, as shown by UNIMIG. Push-pull guns usually suit longer reaches and more production-focused work because they minimize feeding difficulty over distance. A standard torch can still work well, but UNIMIG notes that a 3 m lead is ideal and 4 m is still usable if kept as straight as possible.
Rollers Liners Tips and Polarity That Matter
These parts only work when they work together. U-groove rollers support soft wire without pinching it like steel-focused grooves can. A nonmetallic liner such as Teflon, nylon, or graphite reduces drag. Aluminum-specific or oversized contact tips leave room for thermal expansion. The Fabricator notes that the contact tip bore is generally about 10 percent larger than the wire diameter. Set the machine to DCEP, then keep drive-roll pressure as low as possible and increase only until slipping stops. Too much pressure can deform the wire, create shavings, and trigger burnback or birdnesting.
- Confirm the machine can accept aluminum liner and roller changes.
- Use the shortest practical torch lead and keep it as straight as possible.
- Install U-groove rolls and inspect guides for unsupported gaps.
- Fit a nonmetallic liner matched to the wire size.
- Use an aluminum-specific or correctly oversized contact tip.
- Set DCEP polarity and verify gun compatibility before loading wire.
- Start with low drive-roll tension and increase only enough to stop slipping.
A dependable mig welding machine for aluminum is really a friction-control system from spool to tip. Get that chain right, and choosing filler wire, alloy pairing, and shielding gas becomes much more straightforward.
Choosing Aluminum MIG Wire and Gas
Feed reliability gets the arc started, but filler selection decides how the weld actually behaves. Pick the wrong aluminum mig wire, and the puddle can feel sluggish, the bead can lose appearance, or the joint can end up weaker than expected for the way it will be loaded.
How Base Alloy Affects Weldability
Miller frames filler choice around more than strength alone. Base metal composition, ease of welding, joint design, dilution in the puddle, hot cracking sensitivity, ductility, corrosion in service, anodized color match, and service temperature from 150 to 350 F all matter. In plain terms, filler wire is a chemistry decision first and a convenience decision second.
That is why the same shop may use one wire for a 6061 bracket and another for a higher-magnesium part. The Fabricator notes that when welding 6061-T6 extrusions to 6061-T6 sheet or to themselves, either 4043 or 5356 can work for groove welds because the heat-affected zone beside the weld is often the weak point. Joint type changes the answer quickly, especially when fillet or lap welds carry shear loads.
Choosing Between 4043 and 5356
| Selection point | 4043 | 5356 |
|---|---|---|
| Ease of welding and fluidity | Easier to weld and generally more forgiving | Less focused on easy flow than 4043 |
| Bead appearance | Commonly chosen when appearance matters | Usually acceptable, but 4043 is often favored for looks |
| Strength in fillet and lap welds | Minimum shear strength commonly listed around 11 KSI | Minimum shear strength commonly listed around 18 KSI |
| Typical use direction | Good general choice for many groove welds, especially on common 6xxx work | Strong candidate when fillet weld strength matters more |
| Compatibility cautions | Do not use on high-magnesium alloys such as 5083, 5056, and 5454; 5052 is the main 5xxx exception noted in the reference | Often the safer direction for higher-magnesium aluminum |
| Post-weld considerations | Review corrosion, ductility, anodized color match, and service temperature needs | Review the same factors, especially if strength is driving the choice |
For most shops, mig welding aluminum wire choices narrow quickly to these two fillers. The useful shortcut is simple: 4043 often wins on weldability and appearance, while 5356 earns attention when weld strength in fillet-style joints matters more.
Shielding Gas and Wire Handling Basics
For gas for mig aluminum welding, simple is usually better. If you are asking what gas is used for mig welding aluminum, pure argon is the standard baseline for most MIG work. Good aluminum welding gas coverage protects the puddle, but gas alone cannot fix the wrong filler choice or dirty wire.
| Shielding gas choice | Practical direction |
|---|---|
| Pure argon | Standard starting point for most aluminum MIG setups |
| Other options | Use only when your procedure or equipment guidance specifically supports them |
Miller also warns that aluminum filler wire oxidizes when left open on the shelf or on the machine. That oxidation adds resistance, can create smut, may change feed behavior, and can lead to an erratic arc. Many welders start adjusting tension, tips, or shielding gas when the real problem is old or contaminated wire. Keep spools clean, covered, and stored carefully. Even the right wire and gas will struggle if oxide, oil, or shop dirt stay on the joint surface.
Pre Weld Prep Checklist for MIG Welding Aluminum
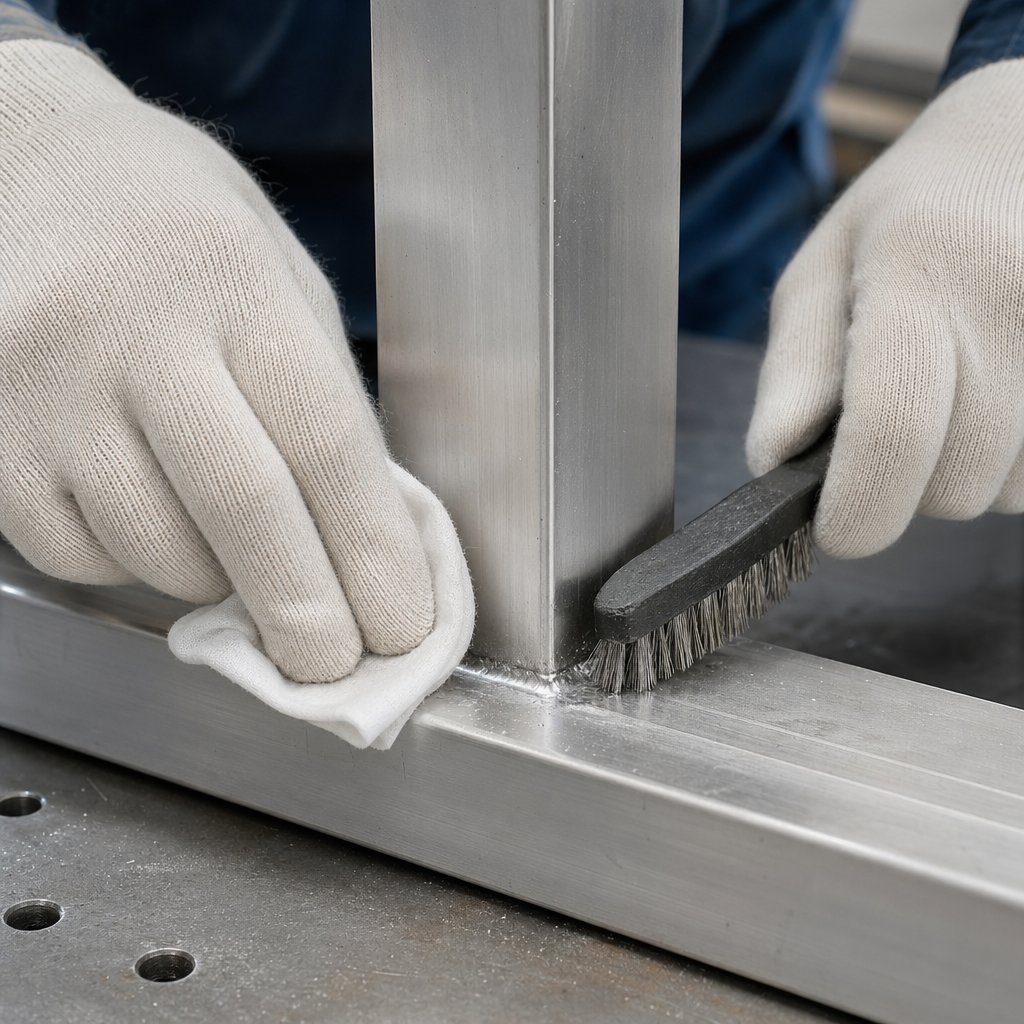
Good filler choice and gas coverage still will not rescue a dirty joint. If you want to weld aluminum with mig and get consistent fusion, prep is not optional. It is the part that removes the two biggest barriers: oil on the surface and the stubborn oxide film that melts at a far higher temperature than the aluminum underneath. ESAB notes that aluminum oxide melts at about 3,600 F, while the base aluminum is around 1,200 F, depending on alloy. That mismatch is why a joint can look clean enough yet still fight the puddle.
For anyone searching mig welding aluminum how to, this is where the real work starts. In practice, what do you need to weld aluminum well is not just a machine and wire. You also need a clean, dry joint, dedicated aluminum prep tools, and a routine that prevents recontamination.
Removing Oxide and Surface Contamination
- Degrease first, not second. Remove oil, grease, and moisture with an organic solvent such as acetone or with a mild alkaline soap solution. Lincoln Electric advises doing oil and grease removal before oxide removal, not the other way around, because reversing the order can drag contamination back into the cleaned surface. See Lincoln Electric.
- Use clean wiping materials. ESAB recommends white industrial paper towels rather than shop rags, which may carry detergent or oily residue. Dirty wiping materials can undo the solvent step immediately.
- Remove the oxide with dedicated tools. For clean, dry material, ESAB recommends tools such as aggressive hand files, hand planers, or stainless steel wire wheels used with light pressure. Keep those tools dedicated to aluminum only. Shared steel-area tools can embed contamination.
- If you bevel edges, keep them clean. ESAB recommends a high-speed carbide bit without lubricant. If lubricant is used, degrease again before welding.
Handling Cleaned Material Without Recontamination
- Assemble only after cleaning. Degrease before tacking so contaminants are not trapped between faying surfaces.
- Store cleaned joints carefully if there is a delay. Lincoln Electric suggests covering the joint with brown Kraft paper if it will not be welded immediately, which helps keep airborne dirt and grit out of the joint.
- Keep parts dry and at room temperature. Moisture on aluminum raises the risk of weld quality problems, especially porosity.
- Weld soon after prep. Lincoln Electric recommends welding within a few days and cleaning the joint again if that window passes. Fresh prep matters because aluminum starts reforming oxide immediately in air.
Fit Up Edge Prep and Tacking Before the Arc
Fit-up problems show up fast on aluminum because the puddle is fluid and heat spreads quickly. If you are learning how to mig aluminum, aim for joints that are consistent rather than forced into place.
- Too loose: gaps increase burn-through risk and make the puddle harder to bridge cleanly.
- Too tight: no root opening can limit fusion, especially if the oxide was not removed well.
- Poor tacks: bulky or contaminated tacks disturb travel and can trap inclusions. Keep tacks clean, small, and placed to hold alignment without pulling the joint out of shape.
- Touching cleaned material with dirty gloves.
- Using a stainless brush that has also touched steel.
- Grinding aluminum and smearing contamination across the joint.
- Cleaning a large area, then leaving it exposed too long before welding.
- Tacking first and trying to degrease later.
- Working in a steel prep area where dust can settle back onto the part.
Clean metal, dry fit-up, and controlled tacks give the arc a fair chance. From there, the job becomes less about fighting the surface and more about reading the puddle, choosing a push angle, and moving at the speed aluminum demands.
How to MIG Weld Aluminum From Start to Finish
Clean prep gives you a weldable joint. What happens at the bench decides whether that clean joint turns into smooth fusion or a messy restart. If you are learning how to mig weld aluminum, the goal is not a fancy motion. It is a controlled, visible puddle with steady wire feed, solid shielding, and a finish that does not leave a crater crack behind.
Getting Ready to Strike the Arc
Before the trigger is pulled, confirm that the setup still matches aluminum practice. The MetalForming guidance stresses that aluminum responds best when wire feeding, shielding, and crater control are treated as part of one system.
- Make a final equipment check. Confirm the wire is feeding smoothly, the contact tip matches the wire, and the tip is recessed about 1/8 to 1/4 in. inside the gas cup. That recess helps with gas cooling and spatter control.
- Verify shielding gas and coverage. Confirm gas is on, flow is appropriate for the procedure, and the cup is clean. If the cup has buildup, shielding quality drops fast.
- Inspect tacks and fit-up. Make sure the joint is still aligned and the tacks are clean. On a butt joint, that means a consistent gap. On a lap or fillet, it means the parts are held tight enough that the puddle does not run where it should not.
- Avoid welding very cold material. If the work is cold-soaked, let it stabilize. For some procedures, a light preheat may help reduce residual stress. MetalForming notes that 150 F is sufficient for aluminum alloys, and overheating can hurt some 6xxx materials.
Starting and Controlling the Aluminum Puddle
Anyone asking how do i weld aluminum with a mig welder usually needs this one correction first: do not drag it like steel. Aluminum MIG commonly favors a push angle. That puts arc-cleaning action in front of the weld and helps reduce smut. Keep the gun angle modest, hold the cup fairly close to the work, and move in a smooth line rather than weaving widely.
- Start clean and commit to motion. Strike the arc at the start of the joint or tack, watch the puddle form, and move promptly. Hesitating in place can overheat the edge before the bead is established.
- Use a steady push technique. For welding aluminum with mig, smooth forward travel usually works better than side-to-side weaving. A butt joint often rewards a straight, even pass. A lap joint usually needs enough push to keep the leading edge visible. A fillet needs steady placement so both legs tie in cleanly.
- Control speed to control heat. MetalForming notes that increasing travel speed can reduce stress cracking by narrowing the heat-affected zone and minimizing base-metal melting. On longer welds, that matters even more because aluminum builds heat quickly.
- Keep the puddle visible. If the bead starts to darken, wander, or lose definition, check cup distance, drafts, and gun angle before changing everything else.
Finishing the Bead Without Defects
The last inch often decides whether the weld stays sound. Most cracks in aluminum welds show up in the crater, and they can start small enough to miss at a glance.
- Fill the crater before breaking the arc. Use the machine's crater-fill function if available, or use an approved method to leave the end filled rather than cupped in.
- Sequence longer welds carefully. On long seams or multiple fillets, break the work into a sequence that limits heat buildup and distortion instead of running everything in one hot stretch.
- Use machine-specific settings, not universal numbers. If you are searching how to weld aluminum with a mig welder, insert settings from your machine maker, wire size, and alloy chart rather than copying generic values from another setup.
A clean start, a visible pushed puddle, and a filled crater solve many aluminum problems before they begin. When the weld still comes out with soot, porosity, burnback, or birdnesting, the pattern of the defect usually points straight to the cause.
Troubleshooting Common Aluminum MIG Failures
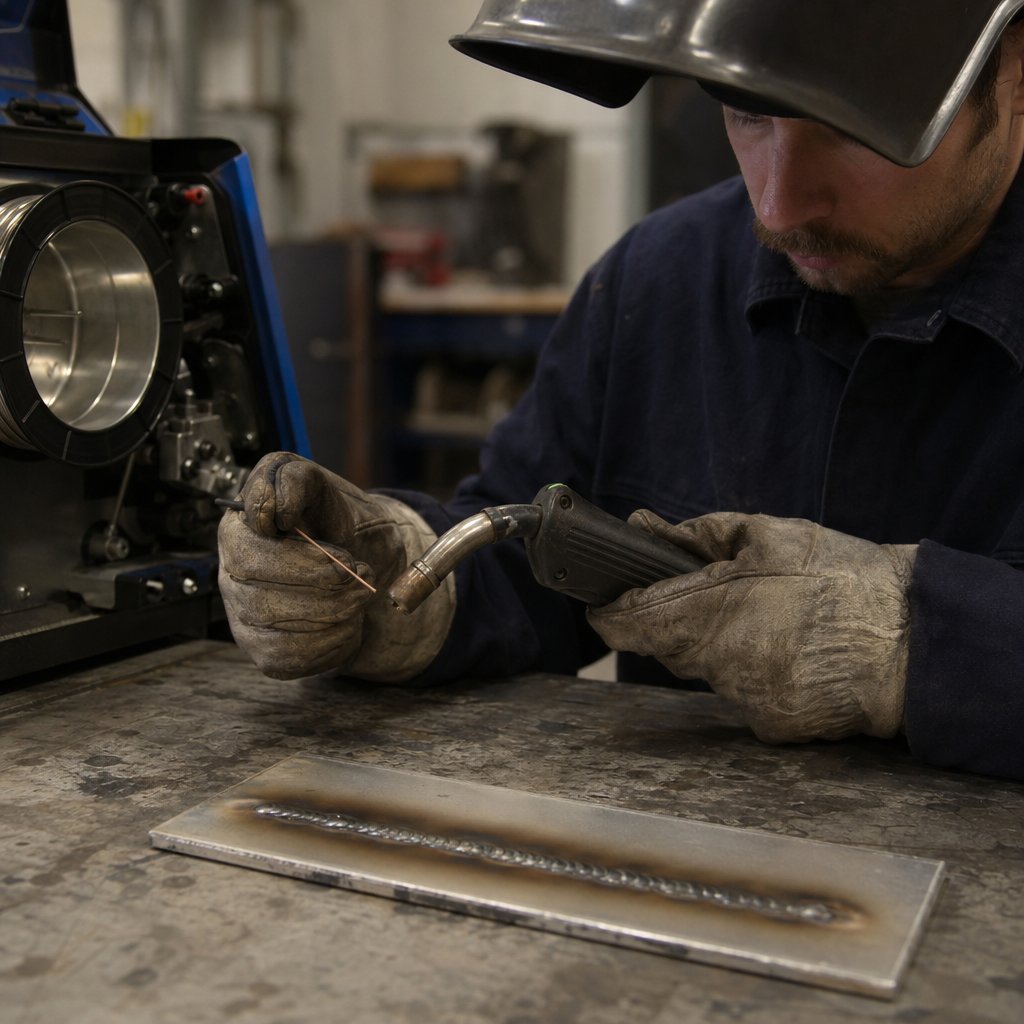
When an aluminum bead goes bad, the weld usually tells you where to look first. Randomly changing voltage and wire speed can waste a lot of time. Shop guidance from Miller, MetalForming, and The Fabricator points to a better order. Check the wire-feed path and gun setup first. Then check cleanliness and shielding gas. Only after that should you fine-tune parameters. Even a good wire welder for aluminum will act badly if soft wire is being crushed, shaved, or starved of gas.
Symptoms to Spot Before You Change Everything
Aluminum defects often stack on top of each other. Birdnesting can lead to burnback. A drag angle can leave black soot. Contamination or gas loss can leave pinholes. Low heat or fast travel can leave poor tie-in. If you want practical mig weld tips, read the symptom before rebuilding the whole setup. That usually gets you back to a stable arc faster.
The Three Setup Areas to Check First
Start with the feed path. Use aligned U-groove rolls, the lowest drive-roll pressure that still feeds consistently, a clean low-friction liner, and the correct aluminum contact tip. MetalForming also notes that the contact tip should sit recessed about 1/8 to 1/4 in. inside the gas cup. That helps gas cooling and arc stability. This matters with standard guns and with mig welding aluminum with spool gun setups, where the short wire path reduces birdnesting risk.
- Keep the gun cable as straight as possible and inspect for liner clogs or wire shavings.
- Confirm the contact tip is designed for aluminum wire and replace worn tips that cause arc flaring or burnback.
- Check gas flow, drafts, cup spatter buildup, and cup distance before touching machine settings.
- Recheck base metal and filler cleanliness if porosity, soot, or dirty deposits appear.
- Adjust voltage, wire feed speed, or travel speed only after the feed path and shielding are confirmed.
For anyone wondering about mig welding aluminum without gas, the references are clear. Aluminum MIG depends on shielding gas. A failed mig welding aluminum gas setup leads to porosity, soot, and contamination, not a usable workaround.
Fast Corrections for Feed and Weld Quality Problems
| Symptom | Likely cause | Corrective action |
|---|---|---|
| Birdnesting | Wire obstruction, excess drive-roll pressure, dirty or long liner, poor feed path support | Cut out the tangle, inspect liner and guides, reduce drive-roll pressure, keep the cable straight, and use a spool gun or push-pull gun if the application needs a longer feed path |
| Erratic feeding or unstable arc | Wire deformation from incorrect rolls, poor roll alignment, damaged wire, or incorrect spool brake tension | Use aligned U-groove rolls, set brake tension so the spool does not overspool but still turns freely, and replace damaged wire or worn guides |
| Burnback | Wire stopping in the contact tip, wrong tip style, clogged liner, or feed interruption | Use an aluminum-specific contact tip, inspect the liner for restriction, and replace the tip if wire has fused inside it |
| Black soot or smut | Drag technique, air entering the shielding envelope, contaminated joint, or filler metal chemistry that leaves more smut | Use a push angle, keep the cup closer, protect the arc from drafts, clean the cup, and make sure the joint was properly cleaned before welding |
| Porosity | Loss of shielding gas, moisture, hydrocarbons, dirty base metal, dirty filler metal, or condensation | Check gas delivery and leaks, shield the weld from wind, clean with solvent and a dedicated stainless brush, and keep wire and base metal dry and condensation-free |
| Lack of fusion | Voltage or wire feed speed too low, travel speed too fast, or a cold start on heat-sinking material | Increase heat input within procedure limits, slow travel slightly if needed, and watch for tie-in at the toes and leading edge of the puddle |
| Spatter-like contamination or dirty deposits | Arc instability from worn consumables, dirty surface, poor gas coverage, or wire shaving in the feed path | Inspect the contact tip, liner, and rolls first, then restore gas coverage and reclean the joint if needed |
| Crater cracking | Unfilled crater at the end of the weld | Use crater-fill control if available, or retrigger briefly to fill the crater before breaking the arc |
| Distortion or burn-through | Excess heat input from high settings or slow travel speed, especially on thin material | Increase travel speed, shorten weld sequence, and avoid lingering in one spot as heat builds across the part |
If your wire welder for aluminum is finally feeding well, the last question is no longer what caused the defect. It is whether the finished bead is actually sound, tied in, and worth trusting in service.
Inspecting MIG Welded Aluminum and Process Limits
A clean bead is encouraging, but serviceability is a stricter test. A piece of mig welded aluminum can look smooth on the surface and still have porosity, poor fusion, or a weak crater at the end. In shop practice, visual inspection is the fastest first check, and Weldguru notes that it is the most common weld quality test. It is useful, quick, and inexpensive, but it only shows surface conditions.
What a Sound Aluminum MIG Bead Looks Like
- Pass: Bead width stays fairly consistent and the profile looks even from start to finish.
- Pass: The toes tie in cleanly instead of rolling over the base metal.
- Pass: The crater is filled, with no visible hole at the stop.
- Fail: Pinholes, pitting, obvious surface cracks, undercut, or overlap are visible.
- Fail: Starts and stops stack up badly instead of blending into the bead.
- Butt joints: A slight bead on the back side can be a useful sign of root penetration.
Visual Checks After Welding
- Look for black soot or smut. Miller links sooty aluminum welds to drag technique and warns that cut sections may reveal pinholes where impurities were trapped.
- Check whether the weld is tight for its intended job. A leaking repair is an obvious sign that the weld is not acceptable.
- Compare bead contour and distortion against the part's function, not just appearance.
Good cosmetics do not prove structural suitability. Visual inspection can miss internal defects.
Knowing When a Weld Is Not the Right Fix
That warning matters most on critical parts. Weldguru notes that visual inspection can miss internal defects, so safety-sensitive work may need nondestructive testing, proof testing, or code-based inspection instead of a simple look-over. In everyday fabrication, can you weld aluminum to aluminum is usually the straightforward question, and that is the normal scope of this process. If the question becomes can you weld steel to aluminum or can you weld aluminum to steel, you are dealing with a different joining problem, not a routine aluminum MIG setup choice. Some parts also should not go back into service just because the bead looks decent. If the weld shows cracking, leaks, severe distortion, or uncertain fusion, the smarter answer may be redesign, replacement, or a more formal repair procedure. That judgment is what separates a finished bead from a production-ready part.
Can You Weld Aluminum With a MIG Welder for Production
Judging a bead is one thing. Deciding whether MIG is the right shop or production choice is another. If you are asking can you weld aluminum with a mig welder for every aluminum job, the honest answer is no. MIG is usually a strong fit when speed, repeatability, and aluminum-to-aluminum joints matter. It is not automatically the best way to weld aluminum when appearance, very thin material, or extremely tight heat control matter more.
When MIG Welding Is the Right Answer
- Repair jobs: Good for accessible brackets, frames, and other serviceable aluminum parts when the joint can be cleaned properly and distortion can be managed.
- Prototype fabrication: Useful when teams need to learn how to weld aluminum parts together, revise joint details, and validate fit before committing to tooling.
- Repeat production parts: Often the practical choice for thicker sections and recurring assemblies because MIG is faster than TIG for many aluminum fabrication tasks, a distinction highlighted by SinoExtrud.
When Better Part Design Reduces Welding Problems
A surprising number of weld problems start in the drawing, not at the torch. Poor access, overly long seams, loose fit-up, and awkward joint placement increase heat input and rework. In welded aluminum extrusions, SinoExtrud also points out that the heat-affected zone needs careful control. That makes part design a welding decision too. The smarter question is often not just how to join the part, but whether the profile, wall thickness, alloy, and joint location can be changed so welding becomes easier and inspection becomes more reliable.
Choosing a Manufacturing Resource for Automotive Aluminum Work
That design discipline matters even more in automotive work, where a successful prototype has to become a repeatable supply program. If you are asking, can i weld aluminum with a mig welder for a prototype bracket or frame section, often yes. If the part is headed toward volume, you also need extrusion quality, engineering review, and process control upstream. PTSMAKE notes that custom extrusion tooling is an upfront cost, while per-part economics improve at higher volumes, which is exactly why poor weld geometry should be corrected early, not after a die is released.
For automotive teams that need custom aluminum extrusions likely to be welded, assembled, or validated later in production, Shaoyi Metal Technology is one example of a one-stop resource. Its automotive extrusion program highlights IATF 16949-based quality control, engineering support from experienced technical staff, rapid 24-hour quotations, and free design analysis. That kind of front-end review can catch weld-unfriendly geometry before it becomes a recurring shop-floor problem. The strongest aluminum programs are rarely built on welding skill alone. They start with parts designed to fit, feed, weld, and repeat.
Frequently Asked Questions About MIG Welding Aluminum
1. Can any MIG welder weld aluminum?
No. A basic steel-wire setup usually struggles with aluminum because the wire is soft and easy to deform. For dependable results, the machine needs DCEP capability and an aluminum-friendly feed path, typically with U-groove rolls, a low-friction liner, the right contact tip, and often a spool gun or push-pull gun.
2. What gas is used for MIG welding aluminum?
Pure argon is the standard starting point for most aluminum MIG welding. The main goal is stable shielding around a very clean puddle, so gas quality, leak-free delivery, and protection from drafts matter just as much as the cylinder choice. Running aluminum MIG without proper shielding usually leads to soot, porosity, and weak weld quality.
3. Do you need a spool gun to MIG weld aluminum?
Not in every case, but a spool gun is often the easiest option, especially for beginners, repair jobs, and shorter weld runs. It places the wire spool close to the gun, which shortens the feed path and greatly reduces birdnesting risk. A push-pull gun is often better when you need longer leads or more frequent production work.
4. Which filler wire should you choose for aluminum MIG, 4043 or 5356?
4043 is often favored when you want smoother flow, easier welding behavior, and a cleaner bead appearance. 5356 is commonly selected when joint loading, fillet performance, or compatibility with certain higher-magnesium alloys matters more. The best choice depends on the base alloy, joint type, and service conditions, so wire selection should be part of the setup plan, not an afterthought.
5. When is MIG welding the right choice for prototype or production aluminum parts?
MIG is a strong fit when you need fast, repeatable aluminum-to-aluminum welds for repairs, prototypes, and recurring shop assemblies. Once a part is headed toward production, weld success depends not only on technique but also on profile design, fit-up, and consistent quality control. For automotive extrusion projects, early engineering review and controlled manufacturing support, such as Shaoyi Metal Technology's IATF 16949-certified process, 24-hour quotations, and free design analysis, can help prevent weld-unfriendly geometry before release.