 Small batches, high standards. Our rapid prototyping service makes validation faster and easier —

Aluminum Edge Trim: Pick The Right Profile In Minutes
What Aluminium Edge Trim Does And Where It Works
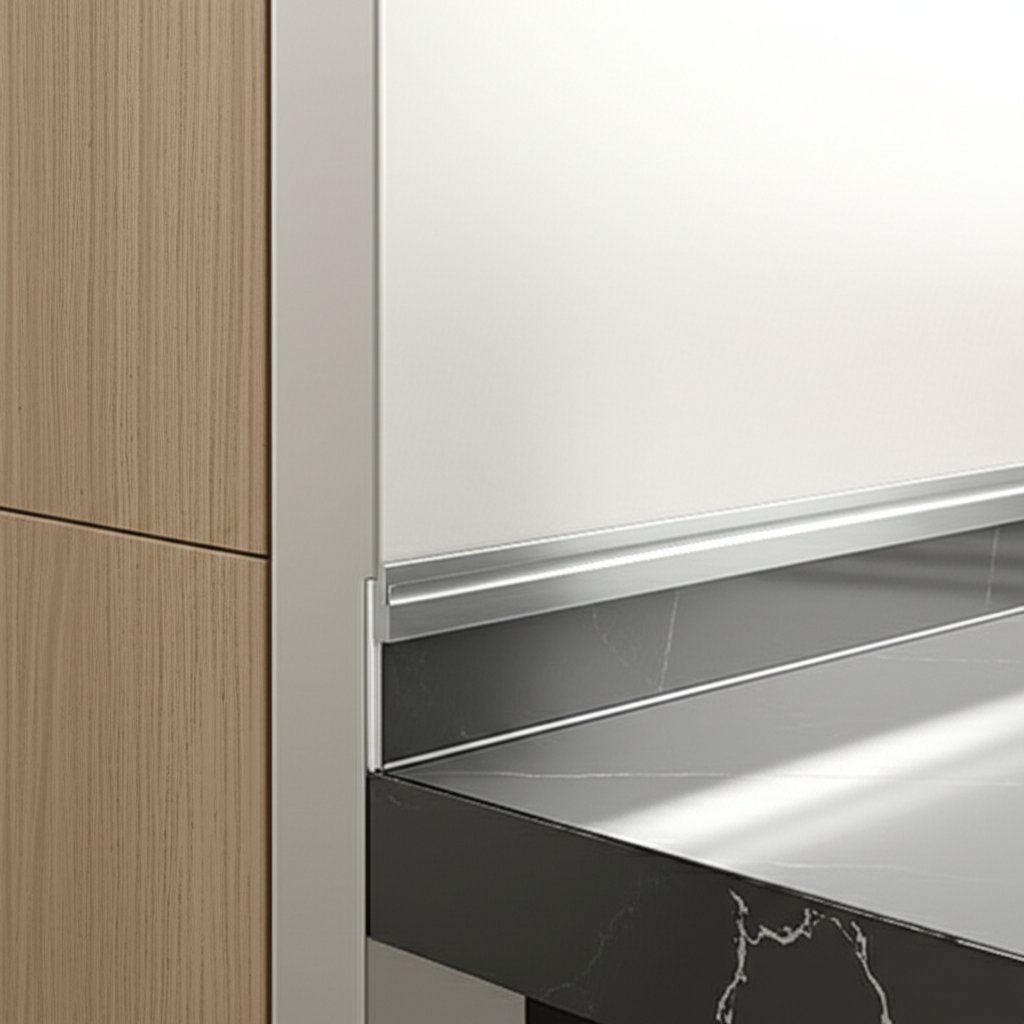
When you walk into a modern kitchen or a freshly tiled bathroom, you’ll notice the crisp lines and seamless transitions between surfaces. Ever wonder how those edges stay so sharp and protected? That’s where aluminum edge trim comes in—a small detail with a big impact on both function and style.
How aluminium edge trim protects vulnerable edges
At its core, aluminium edge trim is an extruded aluminum profile designed to finish and protect the exposed edges of materials like tile, wall panels, countertops, and siding. Imagine the edge of a tiled shower niche or the outer corner of a kitchen backsplash—these are high-risk spots for chipping, cracking, or moisture intrusion. By capping and reinforcing these areas, aluminum trims provide:
- Impact resistance—prevents chips and cracks from accidental knocks
- Moisture protection—shields edges from water, especially in wet areas
- Consistent alignment—keeps tile and panels flush for a professional finish
- Clean terminations—offers neat, defined borders around windows, doors, and tile fields
Whether it’s aluminum tile edge trim for a bathroom or aluminum countertop edging in a kitchen, the goal is always the same: durable protection and a polished look.
Where aluminum edge trim outperforms alternatives
Why choose aluminum over plastic or wood trims? Aluminum’s high strength-to-weight ratio, corrosion resistance, and adaptability make it a standout choice for both residential and commercial projects. Unlike plastic, it won’t warp or discolor with age. Compared to wood, it’s far less prone to moisture damage and requires less maintenance. For areas exposed to heavy traffic or frequent cleaning—like showers, kitchen backsplashes, or exterior corners—aluminium edge trim delivers lasting performance and visual appeal. According to industry sources, aluminum trim profiles are especially valued for their ability to maintain edge integrity and streamline finishes across a wide range of substrates.
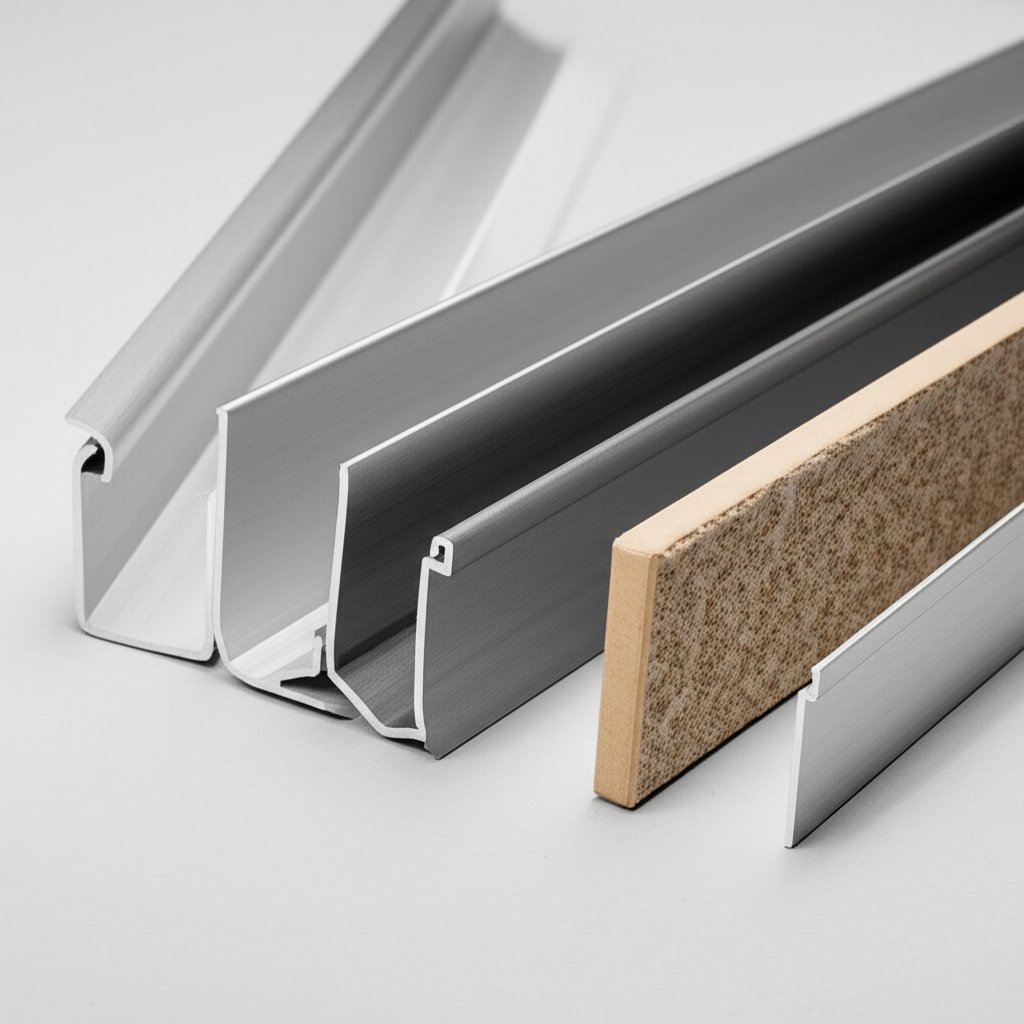
Core profile families and when to use them
Aluminum edge trim comes in several shapes to suit different needs:
- Square-edge—modern, flush finish for contemporary tile and panel designs
- Round-edge—softens corners, ideal for bathrooms and child-friendly spaces
- L-shape—classic capping for exposed tile or panel edges
- J-shape—wraps around panel edges for a secure hold
- Inside/outside corner trims—provide seamless transitions at internal or external corners
For example, aluminum corner trim is a go-to for protecting and finishing external wall corners, while aluminium tile trim is favored for shower walls and backsplashes where both protection and aesthetics matter.
When selecting a profile, matching the trim depth to your material thickness is crucial for a flush, seamless finish. Too shallow, and the edge is exposed; too deep, and the trim may protrude awkwardly. This is true for both functional trims (which protect and align) and decorative moldings (which add visual detail). Both are specified by profile depth and should match the substrate for optimal results.
- Thickness match—trim depth must align with tile, panel, or countertop thickness
- Environment exposure—consider moisture, UV, and impact risks
- Corner type—inside, outside, or flat edge?
- Finish—anodized, brushed, powder-coated, or color-matched?
Typical applications for aluminium edge trim include:
- Showers and wet rooms (as aluminium tile trim)
- Kitchen backsplashes
- Countertop terminations (using aluminum countertop edging)
- Exterior wall corners and siding transitions
- Panel transitions in commercial interiors
As you explore the rest of this guide, you’ll learn how to select the right profile for your project—considering compatibility, fit, finish durability, installation steps, and long-term maintenance. We’ll also provide selection tables, decision trees, and ready-to-use specification language to streamline your next project.
Profile Types And Quick Selection Mapping
When you’re staring at a wall of trim profiles in a hardware store—or scrolling through endless online catalogs—it’s easy to feel overwhelmed. How do you pick the right shape, and what fits your project best? Let’s break down the most common aluminum edge trim profiles so you can make a confident choice in minutes.
Choosing between J channel, L trim, and square-edge
Each profile is designed for a specific purpose, and understanding these basics will help you match your trim to your material and environment:
- Aluminum J Channel (sometimes called jay trim): This profile wraps around the edge of a panel—think drywall, plywood, or ACM panels. It creates a clean, protective border and is especially popular for soffits, wall panels, and window reveals. J channel aluminum is also a staple for terminating exposed panel edges where a snug, enclosed finish is needed.
- L Trim: The classic straight cap for exposed edges. Use it on single-tile edges, shelving, or wall panels where you need a simple, right-angle finish. It’s straightforward, versatile, and easy to install.
- Square-Edge and Round-Edge Tile Trims: These are designed for tile installations. Aluminum square edge tile trim delivers a modern, flush look, while aluminum round edge tile trim softens the transition for safety and a more traditional style. Both help protect tile edges from chipping and provide a professional finish.
Corner solutions for clean terminations
External and internal corners are high-risk zones for chips and alignment issues. Outer corner trim profiles are purpose-built for these spots, reducing the need for tricky miters and speeding up installation. These trims ensure a continuous, robust finish on corners—ideal for high-traffic areas and commercial spaces.
Profile-to-application mapping table
Here’s a quick-reference table to help you match profile shapes to common substrates and uses:
| Profile Type | Typical Substrates | Recommended Uses |
|---|---|---|
| Aluminum J Channel (Jay Trim) | Drywall, ACM panels, plywood | Panel terminations, soffits, window reveals, ceiling transitions |
| L Trim | Tile, gypsum board, plywood | Straight capping, shelf edges, tile field ends |
| Aluminum Square Edge Tile Trim | Tile (ceramic, porcelain, stone) | Modern tile edges, backsplashes, wall transitions |
| Aluminum Round Edge Tile Trim | Tile (ceramic, porcelain, stone) | Shower niches, bathroom walls, child-safe corners |
| Outer/Inner Corner Trim | Tile, panels, drywall | External corners, column wraps, inside corners |
Compatibility is key: always check that your profile depth matches the thickness of your tile or panel—including any adhesive, mortar, or grout bed. For example, using aluminum j channel on a panel that’s too thick may result in a poor fit, while a profile that’s too deep can leave an unsightly gap.
- Choosing a profile that’s too shallow for thick tiles or panels
- Forgetting to account for adhesive or thinset thickness
- Overlooking the need for grout or sealant space in tile trims
Corner trims not only simplify installation but also boost durability, especially in high-traffic or exposed areas. Metal beading (like aluminum square edge tile trim) can double as impact protection on tile edges, while aluminum j channel is a go-to for clean panel terminations and soffit details.
Before you commit to a profile, gather these details:
- Substrate thickness (including adhesive/grout if relevant)
- Finish type (anodized, powder-coated, brushed, etc.)
- Expected environment exposure (moisture, UV, traffic)
Having this information ready ensures your trim will sit flush, last longer, and look sharp—no matter the application. Next up, we’ll dive into the engineering details and tolerances that make for a perfect fit and finish.
Dimensions, Tolerances, and Fit for Aluminum Edge Trim
Ever wondered why some trims look seamless while others seem off or don’t sit flush? The answer lies in the engineering details—dimensions, tolerances, and planning the right clearances. If you’re specifying aluminum edge trim for a project, understanding these technical aspects can save you from headaches down the line and ensure your installation holds up in both form and function.
Cross Sections and Profile Dimensions to Request
Sounds complex? It doesn’t have to be. Every aluminium trim edge profile is defined by a handful of key dimensions. When you’re communicating with a supplier or reviewing submittals, ask for the following:
| Dimension Field | What It Means | Notes / Typical Variation |
|---|---|---|
| Overall Height | Distance from the base to the top of the trim | Should match or slightly exceed tile/panel thickness |
| Reveal Width | Exposed face visible after installation | Impacts visual effect and coverage |
| Flange Width | Hidden leg that tucks under tile or panel | Critical for secure anchoring |
| Wall Thickness | Material thickness of the trim | Typical: ~0.050” for standard extrusions |
| Corner Radius | Curve at the profile’s edge or nose | Affects grout fill and safety |
Requesting a labeled cross-section drawing makes it much easier to verify that your aluminum trims edge will fit your substrate and installation method. If you’re working with aluminum wall trim or aluminum edge trim for plywood, these details are especially crucial for a flush, professional appearance.
Manufacturing and Fit Tolerances That Matter
When you’re planning a project, you might wonder: How precise does the trim need to be? Aluminum extrusion tolerances refer to the allowable deviation in a dimension—think of it as a small buffer zone. For standard architectural profiles, typical tolerances range from ±0.2 mm to ±1.0 mm, depending on profile complexity and alloy.
- Wall thickness: For most architectural trims, expect a nominal wall thickness of at least 0.050” (1.27 mm) for durability and rigidity.
- Dimensional tolerance: The more intricate the profile, the larger the tolerance may be. Simpler shapes can achieve tighter tolerances.
- Supplier capability: Choose suppliers with advanced extrusion equipment and strict quality control for best results.
Why does this matter? If tolerances are too loose, your aluminum tile edging may not seat properly, leading to gaps or uneven reveals. Too tight, and installation becomes difficult or impossible. Always specify your required tolerances up front, and ask for evidence of the supplier’s quality control practices.
Clearance Planning for Adhesives and Grout
Fit isn’t just about the trim and the tile—it’s also about what goes in between. Whether you’re installing metal wall trim or metal corner trim exterior, you’ll need to allow space for adhesive, thinset, or grout. Here’s how to plan for it:
- Confirm the tile or panel thickness, including any underlayment.
- Check the trim’s internal cavity or flange depth against your substrate and adhesive bed.
- Allow a small clearance (typically 1–2 mm) between the tile edge and the trim nose for grout fill—verify with manufacturer guidance if available.
- For long runs, plan movement joints to accommodate thermal expansion and prevent buckling.
Allow a small clearance between tile edge and profile nose for grout fill; verify with manufacturer guidance if exact values are available.
For corners, factory-fabricated pieces are ideal. If you’re mitering onsite, always deburr the cut edges for a tight, safe fit. Welded or spliced factory corners are especially useful for metal corner trim exterior applications, where weather resistance and alignment are critical.
Checklist: What to Request from Your Supplier
- Detailed, labeled cross-section drawings for each profile
- Material and finish specifications (alloy, wall thickness, finish type)
- Recommended sealants and adhesives for your substrate
- Installation and handling notes, especially for corners and joints
- Evidence of quality control and tolerance documentation
By focusing on these engineering details, you’ll ensure your aluminum edge trim fits perfectly—whether you’re finishing tile, plywood, or exterior wall transitions. Up next, we’ll tackle materials, finishes, and how to pick trims that stand up to real-world wear and tear.
Materials, Finishes, and Performance Considerations for Aluminum Edge Trim
Ever wondered why some edge trims last for decades with barely a scratch, while others fade or corrode after just a few years? The secret lies in the materials, finishes, and thoughtful selection for the environment. Let’s break down how to choose aluminum edge trim that not only looks great but stands up to real-world use—whether you’re finishing a kitchen, a shower, or an exterior corner.
Alloy and Temper Basics for Edge Durability
Sounds complex? Don’t worry—here’s what matters. Most aluminum trim molding is made from aluminum alloys, which are blends of aluminum with other metals to boost strength and durability. The temper describes how the metal was treated for hardness or flexibility. For edge trims, a medium temper offers the right balance: it’s hard enough to resist dents but still pliable for cutting and forming during installation.
Wall thickness also plays a key role. Thicker profiles provide better dent resistance—ideal for high-traffic areas or places where carts and furniture might bump the trim. Thinner trims are easier to bend or cut but may be more prone to damage if used where impact is likely.
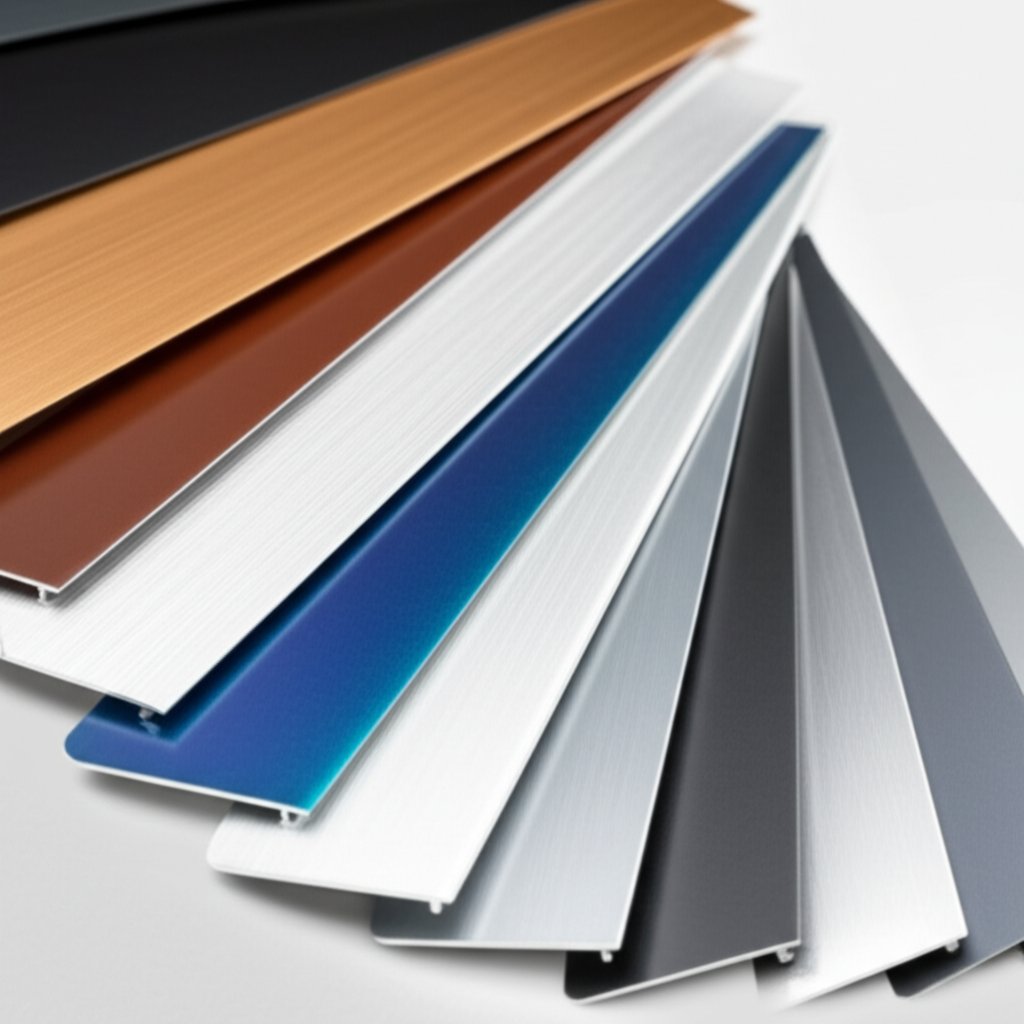
Finish Options: From Anodized to Powder Coat
When you picture aluminum trim edging, you might think of shiny silver, but there’s a world of finish options to match your design. Here’s a quick guide:
- Anodized finishes: The aluminum is electrochemically treated for a hard, corrosion-resistant surface. Clear anodized is classic and subtle; color anodized options (like bronze or champagne) add warmth or contrast. These finishes resist abrasion and fading, making them a top pick for both commercial and residential projects.
- Powder-coated finishes: A colored powder is baked onto the metal, creating a durable, uniform surface. This method offers vibrant colors and a thicker protective layer—great for matching hardware or accenting a space. Powder coating is especially popular for black edge trim or bold designer looks, but consistent sheen across batches is important for a seamless appearance.
- Brushed or polished finishes: For a modern or industrial vibe, brushed aluminum or mirror-polished trims deliver high visual impact. These are often chosen as decorative aluminum trim molding for retail, hospitality, or luxury residential spaces.
Finish isn’t just about looks—it’s also about performance. Anodized and powder-coated trims are both highly resistant to moisture and everyday wear, while brushed and polished surfaces may require more frequent gentle cleaning to maintain their shine.
Wet Area and Exterior Performance Factors
When you’re working in showers, kitchens, or outdoor spaces, performance is everything. Aluminum’s natural corrosion resistance makes it a smart choice for bathrooms and kitchens. Still, to get the most from your trim, consider these factors:
- For wet areas: Always select trims with sealed or anodized finishes. Make sure cut ends are sealed with a compatible sealant to prevent water ingress. Accessories like black metal corner trim can offer both style and robust edge protection in showers or backsplashes.
- For exterior corners: Look for UV-stable finishes and profiles designed to shed water away from the wall. Avoid direct contact with copper or brass fasteners to prevent galvanic corrosion—a concern for any metal molding exposed to weather.
Imagine a busy restaurant kitchen: aluminum trim edging on counters and backsplashes protects against spills, cleaning chemicals, and constant bumps. In an outdoor setting, a powder-coated or anodized finish will keep aluminum trim molding looking sharp through rain, sun, and temperature swings.
- Environment—Is it wet, exposed to sunlight, or high-traffic?
- Cleaning regimen—Will it need frequent scrubbing or gentle dusting?
- Desired gloss—Matte, satin, or high-gloss?
- Match to hardware—Should the trim blend in or stand out?
Handling, Shipping, and Specifying the Right Finish
Edge trims are vulnerable to scratches during shipping and installation. Protect trims with foam or plastic sleeves until final cleanup, and avoid dragging them across abrasive surfaces. For ongoing care, clean with mild soap and water—never use harsh chemicals or abrasive pads, which can dull or damage the finish.
To avoid mismatches, always specify the finish code, color, and surface texture in your procurement documents. This ensures your aluminum edge trim arrives looking exactly as intended, whether it’s a sleek black edge trim for a modern bath or a brushed silver for a commercial countertop.
Ready to pick a trim that’s built to last? Next, we’ll walk through a field-ready installation process to guarantee your chosen profile performs as beautifully as it looks.
Step By Step Installation For Reliable Results
When you’re ready to install aluminum edge trim molding, it’s easy to wonder: Where do I start, and how can I get a professional, long-lasting finish? Whether you’re working on a shower, kitchen backsplash, or commercial wall panel, a methodical approach will ensure your trim sits flush, stays secure, and looks sharp for years to come. Let’s walk through a practical, field-ready workflow that can be adapted for any project using aluminium edge trim for tiles, shower tile metal trim, or panel transitions.
Pre-install Checks and Dry Fit
Imagine investing in beautiful tile or panels, only to have your trim sit uneven or misaligned. Avoid this by starting with proper prep:
- Miter saw with non-ferrous blade or fine-tooth hacksaw
- Fine files for deburring
- Clamps for holding trims securely during cutting
- Construction adhesive or polymer-modified thinset (tile work)
- Appropriate fasteners (if required by substrate)
- Sealant for wet areas and joints
- Masking tape for finish protection
- Pencil, tape measure, and level
- Personal protective equipment (PPE)
First, inspect the substrate—whether tile backer, drywall, or plywood—for flatness and confirm thickness. Dry fit your aluminum edge trim against the edge to check alignment and length. This is especially important for aluminum outside corner molding, where precise fit at corners ensures a seamless transition. Mark your cut lines clearly before moving to the next step.
Cutting Miters and Deburring Edges
Clean, accurate cuts are essential for a professional result. Use a miter saw with a non-ferrous blade or a fine-tooth hacksaw to cut your trim to length, especially when working with metal trim edging for corners or intricate layouts. For outside corners, cut precise miters—usually 45 degrees—so profiles meet tightly. After cutting, deburr all edges with a fine file to remove sharpness and ensure a snug, safe fit. A smooth cut edge also helps grout or sealant adhere properly and prevents injury during installation.
Adhesive and Fastening Options by Substrate
Now, it’s time to bond the trim securely. The right adhesive or fastening method depends on your substrate:
- Tile installations: Use a polymer-modified thinset mortar. Apply a consistent bed along the tile edge and press the aluminium edge trim for tiles firmly into place.
- Panels (drywall, plywood, ACM): Apply construction adhesive to the trim’s flange, or use manufacturer-recommended fasteners if additional mechanical support is needed.
For shower tile metal trim or high-moisture areas, ensure all trim flanges are fully embedded in adhesive to prevent water ingress. Position the trim flush with the tile or panel surface and use a level or straightedge to check that reveals are even along the run. Only introduce fasteners if called for in the trim manufacturer’s instructions—many modern profiles are designed for adhesive-only installation.
Tip: Protect the visible finish with masking tape during cutting, adhesive application, and grouting. This simple step keeps your aluminum tile trim edge looking pristine.
Sealing, Grouting, and Finishing
Once the adhesive has cured (follow manufacturer guidance for drying times), it’s time to finish the installation:
- Apply grout or sealant along the joint between tile and trim. For wet zones, use a waterproof, flexible grout or silicone sealant to prevent leaks.
- Use a damp sponge to smooth the grout and remove excess from the trim and tile surfaces.
- For long runs—such as in commercial corridors or exterior walls—leave movement joints at intervals to accommodate thermal expansion and contraction. Balance joint placement for both function and aesthetics.
- For corners, use factory-fabricated aluminum outside corner molding where available, or carefully miter and align trims for a tight, professional finish.
- Once all joints are sealed and grout is dry, remove masking tape and clean the trim with a soft, non-abrasive cloth.
Document your work with photos—especially at corners and terminations—to verify alignment and craftsmanship. This is particularly useful for commercial projects or warranty documentation.
By following these steps, you’ll achieve a flush, secure, and visually appealing installation—whether you’re using aluminum edge trim molding for tiles, panels, or specialty surfaces. Next, we’ll explore how to keep your installation looking and performing its best with maintenance and troubleshooting tips.

Troubleshooting And Maintenance That Extend Service Life
When you’ve invested time and effort into installing aluminum edge molding, the last thing you want is for small issues to turn into big headaches. Imagine noticing a loose trim edge in your kitchen or spotting corrosion at an exterior corner—what’s your next move? With a few simple maintenance routines and troubleshooting steps, you can keep your aluminum edge trim looking sharp and performing well for years to come.
Common Failure Modes and Their Causes
Even the best installations can face wear and tear, especially in high-traffic or wet areas. Here’s a quick-diagnosis checklist of the most common issues you might encounter:
- Loose or lifting trims—often caused by inadequate adhesive, substrate movement, or moisture ingress.
- Grout cracking at the profile nose—typically due to movement, improper grout selection, or insufficient expansion joints.
- Finish abrasion or scratches—from cleaning with abrasive pads or accidental impacts.
- Corrosion staining near fasteners—usually a result of contact with incompatible metals or water exposure.
- Water ingress at exterior corners—caused by failed sealant, poor drainage, or unsealed trim ends.
These issues can affect everything from edge trim for ceramic tile in a shower to aluminum siding corner details on your home’s exterior.
Field Repair and Refurbishment Actions
Wondering how to fix these problems without replacing the entire trim? Here’s how to tackle each one:
- Loose or lifting trims: Remove any dirt or old adhesive, lightly abrade the hidden flange, and re-adhere using a compatible construction adhesive. Clamp in place until set.
- Cracked grout at trim edge: Remove loose grout and re-grout with a flexible or movement-tolerant grout. For areas prone to movement, consider a silicone-based sealant.
- Finish abrasion: Gently polish minor scuffs with a non-abrasive cloth or aluminum-safe polish. For deeper scratches, touch up with a matching finish if available.
- Corrosion staining: Isolate dissimilar metals by replacing incompatible fasteners with stainless steel or coated alternatives. Clean staining with a mild, non-acidic cleaner.
- Water ingress: Remove failed sealant, dry the area, and reseal all joints and cut ends with a waterproof, UV-stable sealant designed for exterior use.
To prevent galvanic corrosion, always separate aluminum from copper or brass components in wet zones. Use plastic spacers or compatible sealants as barriers.
If a trim edge is bent or deformed beyond repair—such as after impact from heavy furniture or equipment—it’s best to replace that section entirely. This ensures both safety and aesthetics are preserved.
Seasonal and Long-Term Maintenance
Keeping your aluminum wrap trim or exterior corner trims in top condition doesn’t have to be complicated. Establish a simple routine to catch issues early and extend service life:
- Wipe trims regularly with a soft, damp cloth—avoid abrasive cleaners to protect the finish.
- Inspect all joints, sealant lines, and exposed edges at least twice a year, especially after temperature swings or heavy rain.
- Touch up cut ends and exposed aluminum with compatible sealant or finish as needed.
- Replace trims that are bent, loose, or where substrate movement has compromised alignment.
- Document repairs with before-and-after photos and keep a trim inspection log, especially for commercial or multi-unit buildings.
For exterior applications—like an aluminum siding corner—make sure drainage paths are clear and inspect caulk lines after freeze-thaw cycles to prevent water infiltration. Avoid placing heavy objects on trim edges to reduce the risk of bending or damage.
By following these troubleshooting and maintenance steps, you’ll maximize the lifespan and appearance of your aluminum edge trim. Up next, we’ll compare aluminum with other trim materials so you can make the most informed choice for your next project.
Aluminum Compared With PVC, Stainless, and Wood
When you’re deciding on the best trim for your project—whether it’s for an outdoor corner molding, a bathroom backsplash, or a commercial wall—you might wonder: Does it really matter if you choose aluminum, PVC, stainless steel, or wood? Let’s break down how each material stacks up so you can confidently select the right alu trim for your application.
Aluminum vs PVC
Imagine you need a trim for a busy kitchen or a high-traffic hallway. Aluminum is a popular choice for both residential and commercial spaces because it combines strength, light weight, and a modern look. PVC, on the other hand, is often chosen for its low cost and wide range of color options. But how do they compare in real-world use?
| Property | Aluminum | PVC |
|---|---|---|
| Durability | High—resists dents and wear, especially with anodized or powder-coated finishes | Moderate—can scratch or deform under impact |
| Impact Resistance | Excellent for most interior and exterior aluminum trim uses | Good for light-duty; less suited for high-traffic or outdoor corner molding |
| Corrosion Behavior | Resistant, especially with proper finish; suitable for damp or exterior areas | Moisture-resistant but can fade or become brittle with UV exposure |
| Finish Options | Extensive—anodized, powder-coated, brushed, or woodgrain | Wide range of colors; mostly matte or satin |
| Maintenance | Easy—wipe clean; occasional inspection for scratches | Easy—wipe clean; may show scuffs over time |
| Workability | Cut and install with standard tools; forms precise miters and joints | Simple to cut; can be less rigid for detailed corners |
| Typical Use Cases | Interior/exterior corners, tile edges, j mold, alu trim for panels | Budget-friendly baseboards, utility rooms, simple wall transitions |
Aluminum is the go-to for long-term performance, especially where a clean, modern look is desired. PVC is a cost-effective solution for lower-impact, dry areas.
Aluminum vs Stainless Steel
When hygiene, chemical resistance, or extreme durability are top priorities—think commercial kitchens or medical facilities—stainless steel shines. But what about everyday projects?
| Property | Aluminum | Stainless Steel |
|---|---|---|
| Durability | Very good for most indoor/outdoor uses | Exceptional—handles abuse and harsh cleaning |
| Impact Resistance | Strong, but lighter than steel | Superior—harder to dent or deform |
| Corrosion Behavior | Excellent with finish; caution with alkaline cleaners | Outstanding—resists chemicals and moisture |
| Finish Options | Many—anodized, powder-coated, decorative | Usually brushed, polished, or sanded; limited color range |
| Maintenance | Low—gentle cleaning | Low—requires non-abrasive cleaners for shine |
| Workability | Easy to cut, bend, and install | Harder to cut and shape; heavier |
| Typical Use Cases | Interior/exterior aluminum trim, tile, and panel edges | Hospitals, food service, high-abuse corners, metal corner molding |
Aluminum is more versatile for everyday use and design flexibility, while stainless steel is best for environments demanding the highest resistance to wear and chemicals.
Aluminum vs Wood
Wood trims offer warmth and a classic touch—imagine a wood baseboard matching natural floors. But in wet or high-traffic areas, wood’s limitations become clear.
| Property | Aluminum | Wood |
|---|---|---|
| Durability | High—does not warp or swell | Variable—can dent, scratch, or swell in damp conditions |
| Impact Resistance | Excellent for most uses | Good, but prone to chipping or denting |
| Corrosion/Rot | Will not rot; finish protects from corrosion | Susceptible to rot, mold, and insects if not sealed |
| Finish Options | Wide—can mimic woodgrain or match modern palettes | Stain, paint, or natural; limited to wood tones |
| Maintenance | Minimal—wipe clean | Requires sealing, refinishing, and careful cleaning |
| Workability | Easy to install; precise miters possible | Easy to cut; more skill needed for tight joints |
| Typical Use Cases | Modern interiors, wet zones, exterior aluminum trim | Traditional interiors, dry rooms, matching wood floors |
Aluminum molding trim families now offer woodgrain finishes, bridging the gap between performance and classic aesthetics.
- Installation time: Aluminum and PVC are quick to install; wood may require more finishing steps.
- Rework complexity: Metal trims like aluminum or metal corner molding are easy to replace or adjust; wood may need refinishing.
- Cleaning requirements: Aluminum and PVC wipe clean; wood needs gentle care and periodic resealing.
When choosing between these materials, consider the environment (wet, dry, high-traffic), the visual impact you want (modern, classic, or industrial), and how much maintenance you’re willing to do. For most projects, aluminum edge trim offers the best blend of flexibility, durability, and style—whether you’re finishing a tile edge, an exterior aluminum trim detail, or a specialty brass corner molding accent.
Next, we’ll explore how to plan your procurement and supplier checklist to ensure you get the right profile, finish, and fit for your project.

Procurement Planning And Supplier Checklist for Aluminum Edge Trim
When you’re ready to source aluminum edge trim for your project, the options can be overwhelming. How do you ensure you get the right fit, finish, and reliability—without costly mistakes or frustrating delays? Let’s walk through a practical, field-tested approach to supplier selection, customization, and procurement. Imagine you’re specifying aluminum j channel trim for a commercial wall or aluminium corner trim for a complex tile installation—these steps will help you get it right the first time.
Questions to Ask Suppliers Before You Order
Sounds complex? It doesn’t have to be. Before you commit to a supplier, use this checklist to clarify your requirements and avoid common pitfalls:
- Which alloys and finishes are available? Ensure the supplier offers corrosion-resistant options suitable for your environment.
- What profile depths do you offer? Make sure options match your tile, panel, or substrate thickness—critical for a flush finish with aluminum j channel trim or aluminum outside corner moulding.
- Can you provide tolerance and quality documentation? Ask for details on dimensional tolerances and quality control processes.
- What adhesives or fasteners do you recommend? The right attachment method varies by substrate; confirm compatibility with your installation.
- Are factory corners and accessories (like end caps or connectors) available? These can simplify installation and improve the finished look.
- How is the trim packaged and shipped? Proper packaging prevents scratches and damage in transit.
- What after-sales support and warranty coverage do you provide? Responsive support is essential if issues arise.
Samples, Drawings, and Fit Verification
Before placing a large order, always request physical samples and technical documentation. Here’s how to ensure a perfect fit:
- Order short sample lengths of your chosen profile to test with your actual tile or panel—especially important for j metal trim or intricate corner details.
- Request cross-section drawings with labeled dimensions. This helps you verify that the internal cavity and flange widths are suitable for your application.
- Ask for surface finish swatches to confirm color, gloss, and texture match your design intent.
Don’t forget to check that samples are free from defects and that finishes are consistent across multiple pieces. This step is vital when coordinating with an aluminum tile trim supplier or when matching trims to other architectural hardware.
Customization and Logistics Planning
Need something beyond standard lengths or finishes? Many suppliers offer customization options, such as:
- Custom cut lengths—reduce waste and speed installation
- Punch patterns or pre-drilled holes—for easier fastening
- Color-matched powder coating or anodizing—for seamless integration with your space
- Factory-formed corners or connectors—for complex transitions
Always confirm the feasibility of your customization requests and discuss realistic lead times. For large projects or unique requirements, a supplier’s ability to handle custom orders, provide detailed documentation, and support pilot runs is crucial.
| Supplier | Capabilities | Documentation Quality | Customization Support | Quality Systems |
|---|---|---|---|---|
| Shaoyi Metal Parts Supplier | Automotive-grade, custom extrusions, rapid prototyping, advanced surface finishes | Comprehensive: drawings, tolerance data, finish samples | Extensive: custom dies, cut lengths, factory corners, color-matched finishes | IATF 16949 certified, SPC/CPK monitoring, traceable production |
| Other Suppliers | Standard profiles, basic finishes | Typical: basic spec sheets | Limited: standard lengths, few custom options | Varies: may lack formal certifications |
For advanced automotive-grade extrusions or projects needing complex trim interfaces, consider discussing your requirements with Shaoyi Metal Parts Supplier. Their aluminum extrusion parts service offers a one-stop solution for custom profiles, rapid prototyping, and a wide range of finishing options—making them a strong candidate for demanding applications where perfect fit and finish are non-negotiable.
Remember, regardless of which aluminum tile trim supplier you choose, always validate capabilities with real drawings, finish samples, and pilot runs. This approach is just as important for j metal trim in commercial interiors as it is for aluminum siding corner pieces on exterior projects.
Once you have your supplier lined up, you’re ready to move to the final step: creating clear, specification-ready language to streamline installation and ensure long-term performance.
Specification Language You Can Copy And Adapt for Aluminum Edge Trim
When you’re tasked with writing project specs or reviewing submittals for aluminum edge trim, it’s easy to get bogged down in details. What’s the fastest way to get clear, transferable language that covers all the bases—without reinventing the wheel? Below, you’ll find specification-ready templates, execution notes, and closeout checklists you can adapt for any project, whether you’re using aluminium edge moulding for a tile backsplash or outside corner metal trim for exterior siding.
Editable Product Data Sheet Text
Product Description:Accessories: Provide matching factory corners, splice plates, and attachment clips where indicated by drawings or manufacturer’s system.
- Profile Type: [Insert profile, e.g., square-edge tile trim, j trim channel, or outside corner metal trim]
- Nominal Dimensions: [Insert height, depth, and length as per manufacturer’s technical data]
- Alloy/Temper: [Insert, e.g., extruded aluminum, alloy 6063-T5]
- Finish: [Insert finish, e.g., anodized, powder-coated, brushed]
- Color: [Insert color code or description]
- Compliance: [Reference AAMA 1402, ASTM standards, or project-specific requirements]
Execution Language for Installation Scope
Installation Scope:
- Verify substrate is flat, clean, and dry prior to installing aluminum edge trim.
- Cut trims to length using a non-ferrous blade; deburr all cut edges for safety and fit.
- For tile, embed aluminium tile edging in polymer-modified thinset mortar; for panels or siding, use construction adhesive or manufacturer-recommended fasteners.
- Align trims flush with substrate surface; confirm reveals are straight and even.
- Install factory-formed corners or miter onsite for outside corner metal trim; deburr and align all joints.
- Allow for thermal expansion at long runs; introduce movement joints as detailed in drawings.
- Seal all exposed cut ends and joints using compatible, mildew-resistant silicone sealant.
- Clean finished surfaces with mild, non-abrasive cleaners following installation.
Submittals and Closeout Documents
Submittal Requirements:
- Shop drawings showing trim locations, joint details, and transitions (window reveals, exterior corners)
- Physical finish samples and color swatches for approval
- Manufacturer’s technical data sheets and installation instructions
- Maintenance and cleaning guidelines for aluminum countertop edge trim and related profiles
- Evidence of manufacturer experience and installer qualifications
- Warranty documentation as provided by manufacturer
- Mockups if required by project documents
- As-built drawings showing actual trim runs and profile types installed
- Final maintenance instructions, including cleaning and periodic inspection routines
- Spare length count and storage recommendations for future repairs
Exterior Corner and Movement Joint Clause: For all outside corner metal trim and exterior transitions, ensure all sealants are compatible with aluminum and substrate. Provide movement joints at intervals as detailed, and coordinate with adjacent assemblies to accommodate expected thermal expansion.
For projects with complex transitions—such as window reveals or multi-material edges—include a detail reference index in your submittals. This helps the field team quickly locate critical details for metal corner trim molding or aluminium tile edging without confusion.
By adapting these templates, you can streamline your documentation process, ensure clarity for installers, and support long-term durability for every aluminum edge trim application. Next, we’ll wrap up with key takeaways and trusted resources to guide your final selections.
Key Takeaways and Trusted Next Steps for Aluminum Edge Trim Selection
Key takeaways for selecting the right trim
When you’re standing at the crossroads of design, durability, and installation, it’s easy to wonder: What are the non-negotiables for a successful aluminum edge trim project? Here’s a concise, action-oriented checklist to guide your next steps, whether you’re working with aluminum trim for doors, a tiled shower, or exterior siding.
- Match profile depth to material thickness—Always account for adhesive or grout beds to ensure a flush, seamless fit. Too shallow or too deep, and your trim won’t perform or look right.
- Specify alloy and finish for the environment—Consider humidity, UV exposure, and cleaning regimens. Anodized finishes are great for wet zones, while powder coating offers color flexibility for visible areas.
- Plan corners and movement joints early—Especially for metal outside corner molding or long runs, anticipate thermal expansion and select factory corners or allow for precise miters.
- Verify fit with samples and drawings—Don’t skip this step. Request short lengths and cross-section drawings to ensure the trim works with your specific tile or panel. This is crucial for specialized profiles like tile trims and edging.
- Follow a disciplined installation sequence—Dry fit, cut cleanly, deburr, and protect finishes throughout. Consistent technique ensures longevity and a professional look.
- Keep maintenance simple—Opt for trims and finishes that can be easily cleaned and inspected, minimizing long-term headaches.
Fit and finish begin with accurate thickness data and end with clean, sealed joints.
What to verify before ordering
Imagine placing a big order only to find the trim doesn’t fit or the finish clashes with your design. To avoid this, double-check these essentials before you finalize your purchase:
- Confirm profile depth and internal cavity against your tile, panel, or door thickness—including any adhesive or setting bed.
- Verify finish codes and color swatches for consistency across all trims, especially if you’re coordinating with aluminum molding or hardware.
- Check for factory corners, end caps, and connectors—these accessories make installation faster and cleaner, particularly at tricky transitions.
- Request samples for hands-on fit verification and finish approval.
- Review supplier documentation—look for clear installation guides, maintenance instructions, and evidence of quality control.
- Ask about lead times and after-sales support—reliable communication from your supplier can make or break your project schedule.
For those new to the terminology, you might be wondering what is j trim and when to use it. J trim is a profile that wraps around the edge of panels or doors, providing a neat, protective border—ideal for both functional and decorative purposes.
Where to get technical support
Stuck on a detail or facing a complex installation? Don’t hesitate to reach out for support. Most reputable suppliers offer technical guides and direct consultation. Here’s where to start:
- Check manufacturer websites for downloadable installation manuals and product data sheets. These often include best practices for tile trims and edging, as well as aluminum trim for doors and panels.
- Contact technical support teams for clarification on custom profiles, finish durability, or installation challenges—especially for non-standard substrates or exterior applications.
- Refer to industry standards (such as AAMA or ASTM) for guidance on performance and specification language.
If your project involves custom or automotive-adjacent extrusions, it’s wise to coordinate all aluminum edge trim needs within a single extrusion program. This streamlines procurement, ensures finish consistency, and simplifies logistics.
Resource tip: For advanced applications or integrated solutions, consider consulting with Shaoyi Metal Parts Supplier. Their expertise in automotive-grade aluminum extrusion parts can help you align trim specifications with broader requirements, ensuring your profiles are fit-for-purpose and delivered with precision. Always evaluate drawings, finish samples, and process capability before committing to large-scale orders.
By following these steps, you’ll be well-equipped to select, specify, and install aluminum edge trim that performs beautifully—now and for years to come. If you need further guidance, turn to vetted standards and trusted manufacturer resources for up-to-date best practices and detailed technical support.
Frequently Asked Questions About Aluminum Edge Trim
1. What is aluminum edge trim and where is it typically used?
Aluminum edge trim is an extruded metal profile designed to protect and finish the exposed edges of tiles, panels, countertops, and siding. It's commonly used in bathrooms, kitchens, commercial interiors, and exterior corners to prevent chipping, moisture intrusion, and to create clean, professional transitions between surfaces.
2. How do I choose the right aluminum edge trim profile for my project?
Start by matching the trim depth to the thickness of your tile or panel, including any adhesive or grout. Consider the environment—wet zones benefit from anodized finishes, while high-traffic areas may need thicker, more durable profiles. Review available shapes like J channel, L trim, and corner trims, and request samples or drawings from your supplier to verify fit before ordering.
3. What are the main differences between aluminum, PVC, and stainless steel trims?
Aluminum trims offer a strong balance of durability, corrosion resistance, and design flexibility, making them ideal for most interior and exterior applications. PVC trims are more cost-effective but less impact-resistant and can degrade under UV exposure. Stainless steel excels in high-abuse or hygienic environments but is heavier and harder to cut compared to aluminum.
4. How can I ensure a long-lasting installation of aluminum edge trim?
Proper installation is key: dry fit the trim, use the right adhesive or thinset for your substrate, and protect finishes during cutting and grouting. For wet or exterior areas, seal all cut ends and joints. Regular maintenance—like gentle cleaning and periodic inspection of joints and sealants—will extend service life and keep your trim looking sharp.
5. What should I ask suppliers before purchasing aluminum edge trim?
Ask about available profiles and finishes, profile depths to match your material thickness, documentation on tolerances, recommended adhesives or fasteners, availability of factory corners, packaging methods, and after-sales support. For custom or complex needs, consider suppliers like Shaoyi Metal Parts Supplier, which offer advanced extrusion capabilities, rapid prototyping, and comprehensive quality control.