 Small batches, high standards. Our rapid prototyping service makes validation faster and easier —
  EN
EN


Safe Flame, Solid Bead: How to Start Oxy Acetylene Welding
Step 1 Learn What Oxy Acetylene Welding Does Best
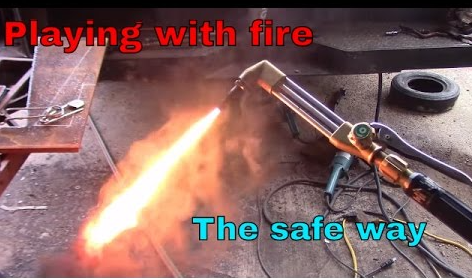
If you are wondering how to start oxy acetylene welding, begin with the process itself before you ever open a valve. In simple terms, what is oxy acetylene welding? It is a gas welding process that mixes oxygen and acetylene to create a flame hot enough to melt metal and, when needed, a filler rod. Sources from UTI and Linde both note that it is commonly used on thin metal sections and can also be used for heating work.
What Oxy Acetylene Welding Is
A beginner doing welding with an oxy acetylene torch will see a very hands-on process. You set up cylinders, regulators, hoses, a torch handle, and a welding tip. Then you light the flame, adjust it, heat the joint, watch a small molten puddle form, and move that puddle along the seam. That is why oxyacetylene welding still matters for learning heat control. You can actually see the metal react in real time.
Welding and cutting are related, but not the same. Welding joins metal by melting the joint edges together. Cutting uses a different attachment and a high-pressure oxygen stream to remove metal.
Jobs It Handles Well
- Practice beads and simple butt or lap joints on thin steel
- Small repair work where portability helps
- Heating tasks such as loosening parts or bending stock
- Learning how puddle size changes with torch distance and travel speed
When a Beginner Should Choose Another Process
- Very thin sheet where burn-through happens easily
- High-volume production where speed matters more than learning
- Precision cutting of non-ferrous metals, where plasma is often better
- Projects that demand easier entry for thicker structural welds
- Common beginner goals: make a stable flame, hold a short joint, place a tack, and understand puddle behavior
Safety and sequence matter just as much as flame control. A good weld starts long before the spark.
If your next question is what is oxy acetylene really teaching you, the answer is control: heat, timing, and observation. Those lessons only pay off in a workspace that is prepared correctly, with the right gear close at hand and the wrong hazards cleared away.
Step 2 Prepare a Safe Workspace and PPE
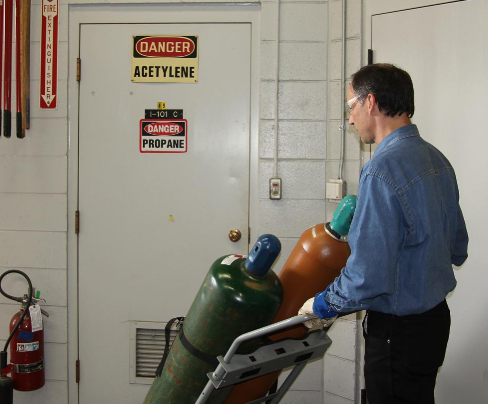
Before any regulator touches a cylinder, set the area so small mistakes do not turn into big ones. Good oxy acetylene safety starts with air movement, clear footing, and a fast way to shut the gases off. ESAB emphasizes a well-ventilated work area, pre-light leak checks, and removing damaged hoses or regulators from service in its safety checklist. Treat every cylinder as a pressurized hazard, not as something to lean against the bench.
Protective Gear You Need Before Striking a Flame
Wear flame-resistant clothing that covers exposed skin, gloves, safety glasses, proper face and eye protection, and sturdy boots. ESAB also notes that respiratory protection may be needed in confined spaces or when working on metals that create harmful fumes. Keep clothing clean and practical. Loose items, oily gloves, and cluttered pockets have no place around oxygen and acetylene.
How to Store and Position Cylinders Safely
Both oxy acetylene tanks should stay upright and secured with chains, straps, or a stable cart. In storage, oxygen and fuel cylinders should be kept at least 20 feet apart or separated by a noncombustible barrier, based on the WestAir storage guide. Keep valve caps in place when cylinders are not connected. Just as important, keep the oxygen welding tank, regulator area, and threads free of oil and grease, a hazard highlighted by HVAC School.
Workspace Checks Before You Open Any Valve
- Ventilation is adequate and the area is not confined
- Floor is clean, dry, and free of rags, solvents, and other combustibles
- Cylinders are stable, labeled, and easy to reach at the shutoff valves
- Hoses are routed away from sharp edges, heat, and walking paths
- Regulators, gauges, torch valves, and hose jackets show no visible damage
- The oxygen welding tank side is clean, with no oil or grease anywhere near oxygen equipment
- You have a striker ready and know where sparks or hot metal could land
If any hose, regulator, fitting, or valve looks questionable, stop there. Do not light the torch and hope it is fine.
A calm setup should feel almost uneventful. That is exactly right. When the floor is clear and the cylinders are steady, each torch component has an obvious place and purpose.
Step 3 Gather the Right Torch Components
A safe start depends on parts that actually belong together. Many beginners buy an oxygen acetylene torch kit or a complete oxy acetylene welding torch kit and assume every attachment does every job. It does not. The Weldclass guide breaks the system into gas delivery parts, the torch handle, and job-specific attachments. That is the easiest way to understand your oxy acetylene equipment before you assemble anything.
Starter Equipment Checklist
| Component | Purpose | What to inspect before use |
|---|---|---|
| Cylinders | Supply oxygen and acetylene to the system | Upright and secured, labels clear, valve area clean |
| Regulators | Control gas delivery from each cylinder | Gauges intact, fittings undamaged, adjustment screws move smoothly |
| Hoses | Carry gas from regulators to the torch | No cuts, burns, cracks, kinks, or loose ends |
| Flashback arrestors or check valves | Help protect against reverse flow and flashback | Correct gas side, clean connections, no visible damage |
| Torch handle | Main hand-held body with gas valves | Valves turn freely, seats clean, attachment connection undamaged |
| Welding attachment or mixer | Mixes oxygen and fuel for welding use | Correct style for welding, not cutting, and properly matched to the handle |
| Welding tip | Delivers the mixed gas to form the flame | Tip opening clean, no dents, correct type for the attachment |
| Striker or spark lighter | Ignites the torch safely | Reliable spark, firm flint wheel, no loose parts |
| Tip cleaners | Help clear tip openings carefully | Clean wires, not bent or oversized |
| Filler rod | Adds metal to the joint when needed | Clean, dry, and suitable for the base metal |
| PPE | Protects eyes, hands, and skin | Gloves intact, lenses clear, clothing dry and flame-resistant |
| Leak-check solution | Helps confirm fittings seal before lighting | Ready to use and kept near the setup area |
What Each Part Does
An oxy acetylene torch is really a chain of parts, not one tool. Gas leaves the cylinders, passes through regulators and hoses, reaches the torch handle, then moves through the attachment and tip you chose for the job. If you are using an oxy acetylene welding torch, the working end should be a welding attachment with a welding tip. If you are using a cutting setup, the working end changes completely.
How to Match Tips, Hoses, and Regulators
Keep the matching simple. Regulators must match the gas they are meant to control. Hoses must be suitable for oxygen and fuel gas service. The torch handle must accept the attachment you plan to use. The The Welder article explains that welding tips are single-hole tips used with a mixer, while cutting tips are built differently because they use preheat flames plus a cutting oxygen stream. That is why a cutting attachment should never be confused with an oxy acetylene welding torch setup.
One more point saves a lot of frustration. Tip numbers are not universal across manufacturers. A tip marked with one size number on one system may not mean the same thing on another. If you bought an oxygen and acetylene torch as separate pieces, always match the tip, handle, and attachment by the maker's documentation rather than by guesswork.
- Helpful extras: clamps or locking pliers
- Wire brush for cleaning metal and filler rod
- Dedicated spark lighter or spare flints
A complete oxy acetylene welding torch kit only helps when every part is compatible. Get that right here, and the actual assembly becomes orderly instead of uncertain.
Step 4 Oxy Acetylene Torch Setup in Safe Order
A bench full of correct parts can still become an unsafe system if the assembly order is wrong. Good oxy acetylene setup is slow, deliberate, and easy to check. The goal here is simple: build the gas path from cylinder to tip without guessing, then verify that it holds pressure and stays leak-free before a flame ever appears.
Cylinder to Regulator Setup Order
- Secure both cylinders upright and inspect the valves, outlets, and regulator inlets for dirt, damage, oil, or grease. TWI notes connections must be clean and sealant should not be used on these fittings. Use the correct regulator for each gas.
- Back out both regulator adjusting screws fully before opening any cylinder. That prevents sudden unregulated gas flow into the system, a point stressed in both Miller's setup guide and TWI safety guidance.
- Attach the regulators to the cylinders and tighten them correctly. A proper fit should feel seated and stable, not cross-threaded or forced.
- Install the hoses. Miller identifies green hose with a right-hand thread for oxygen and red hose with a left-hand thread for fuel gas. Replace any hose with cuts, burns, or worn spots before continuing.
- Connect the hoses to the torch handle, then install the welding attachment and welding tip, not a cutting attachment. Turn the torch valves briefly to confirm they move smoothly and close fully.
- With both torch valves closed, open the oxygen cylinder slowly so the regulator pressurizes gradually, then open it fully. Open the acetylene cylinder only about three-quarters of a turn so it can be shut quickly if needed.
- Set delivery pressure by the tip chart and manual for your specific equipment. Do not guess at oxy acetylene gauge settings. Safe oxy acetylene torch pressures vary by tip size, style, and manufacturer.
As you build the system, look for straight hose routing, intact threads, and gauges that rise smoothly instead of jumping. Listen for any hiss after pressurizing. A quiet system is a good sign. An unexplained sound means stop and inspect.
Where Check Valves and Flashback Arrestors Belong
ESAB explains the difference clearly. A check valve prevents reverse gas flow. A flashback arrestor is designed to stop a flame from traveling back into the system. Miller notes many systems use either reverse flow check valves or flashback arrestors as specified by the equipment, and many flashback arrestors already include a check valve. Install them only in their intended direction and location, commonly at the regulator or torch inlet depending on design. If installed backward, gas flow can be blocked.
How to Purge Lines and Leak Test Connections
Purge each gas line separately before lighting. Miller advises opening the oxygen valve on the torch about a quarter turn for three to five seconds, then closing it and setting the regulator to the recommended value. Repeat the process for fuel gas. This clears mixed gas from the hoses and helps make oxy acetylene torch regulator settings and oxy acetylene regulator settings more reliable.
Then leak test every connection with an approved leak solution or oil-free soap and water. Brush it generously onto fittings, hose connections, regulators, and torch joints. Growing bubbles mean a leak. Shut off the related cylinder, tighten only if appropriate, and if the leak remains, remove the equipment from service. Keep the same rule for oxy acetylene gauge settings and oxy acetylene torch pressures: the manual is the authority, not a number remembered from another torch.
| Setup point | Safe guidance | Source |
|---|---|---|
| Regulator preparation | Back out adjusting screws before opening cylinders | Miller, TWI |
| Hose identification | Green oxygen, red fuel, inspect for damage | Miller |
| Safety devices | Use check valves or flashback arrestors as the system specifies | Miller, ESAB |
| Pressure setting | Use the tip chart and equipment manual, not generic numbers | Miller |
When the system is assembled, purged, and holding pressure without bubbles or hiss, the torch is finally ready for the part most beginners picture first: lighting the flame and learning what a stable neutral flame actually looks like.
Step 5 Set Oxy Acetylene Torch Settings for a Neutral Flame
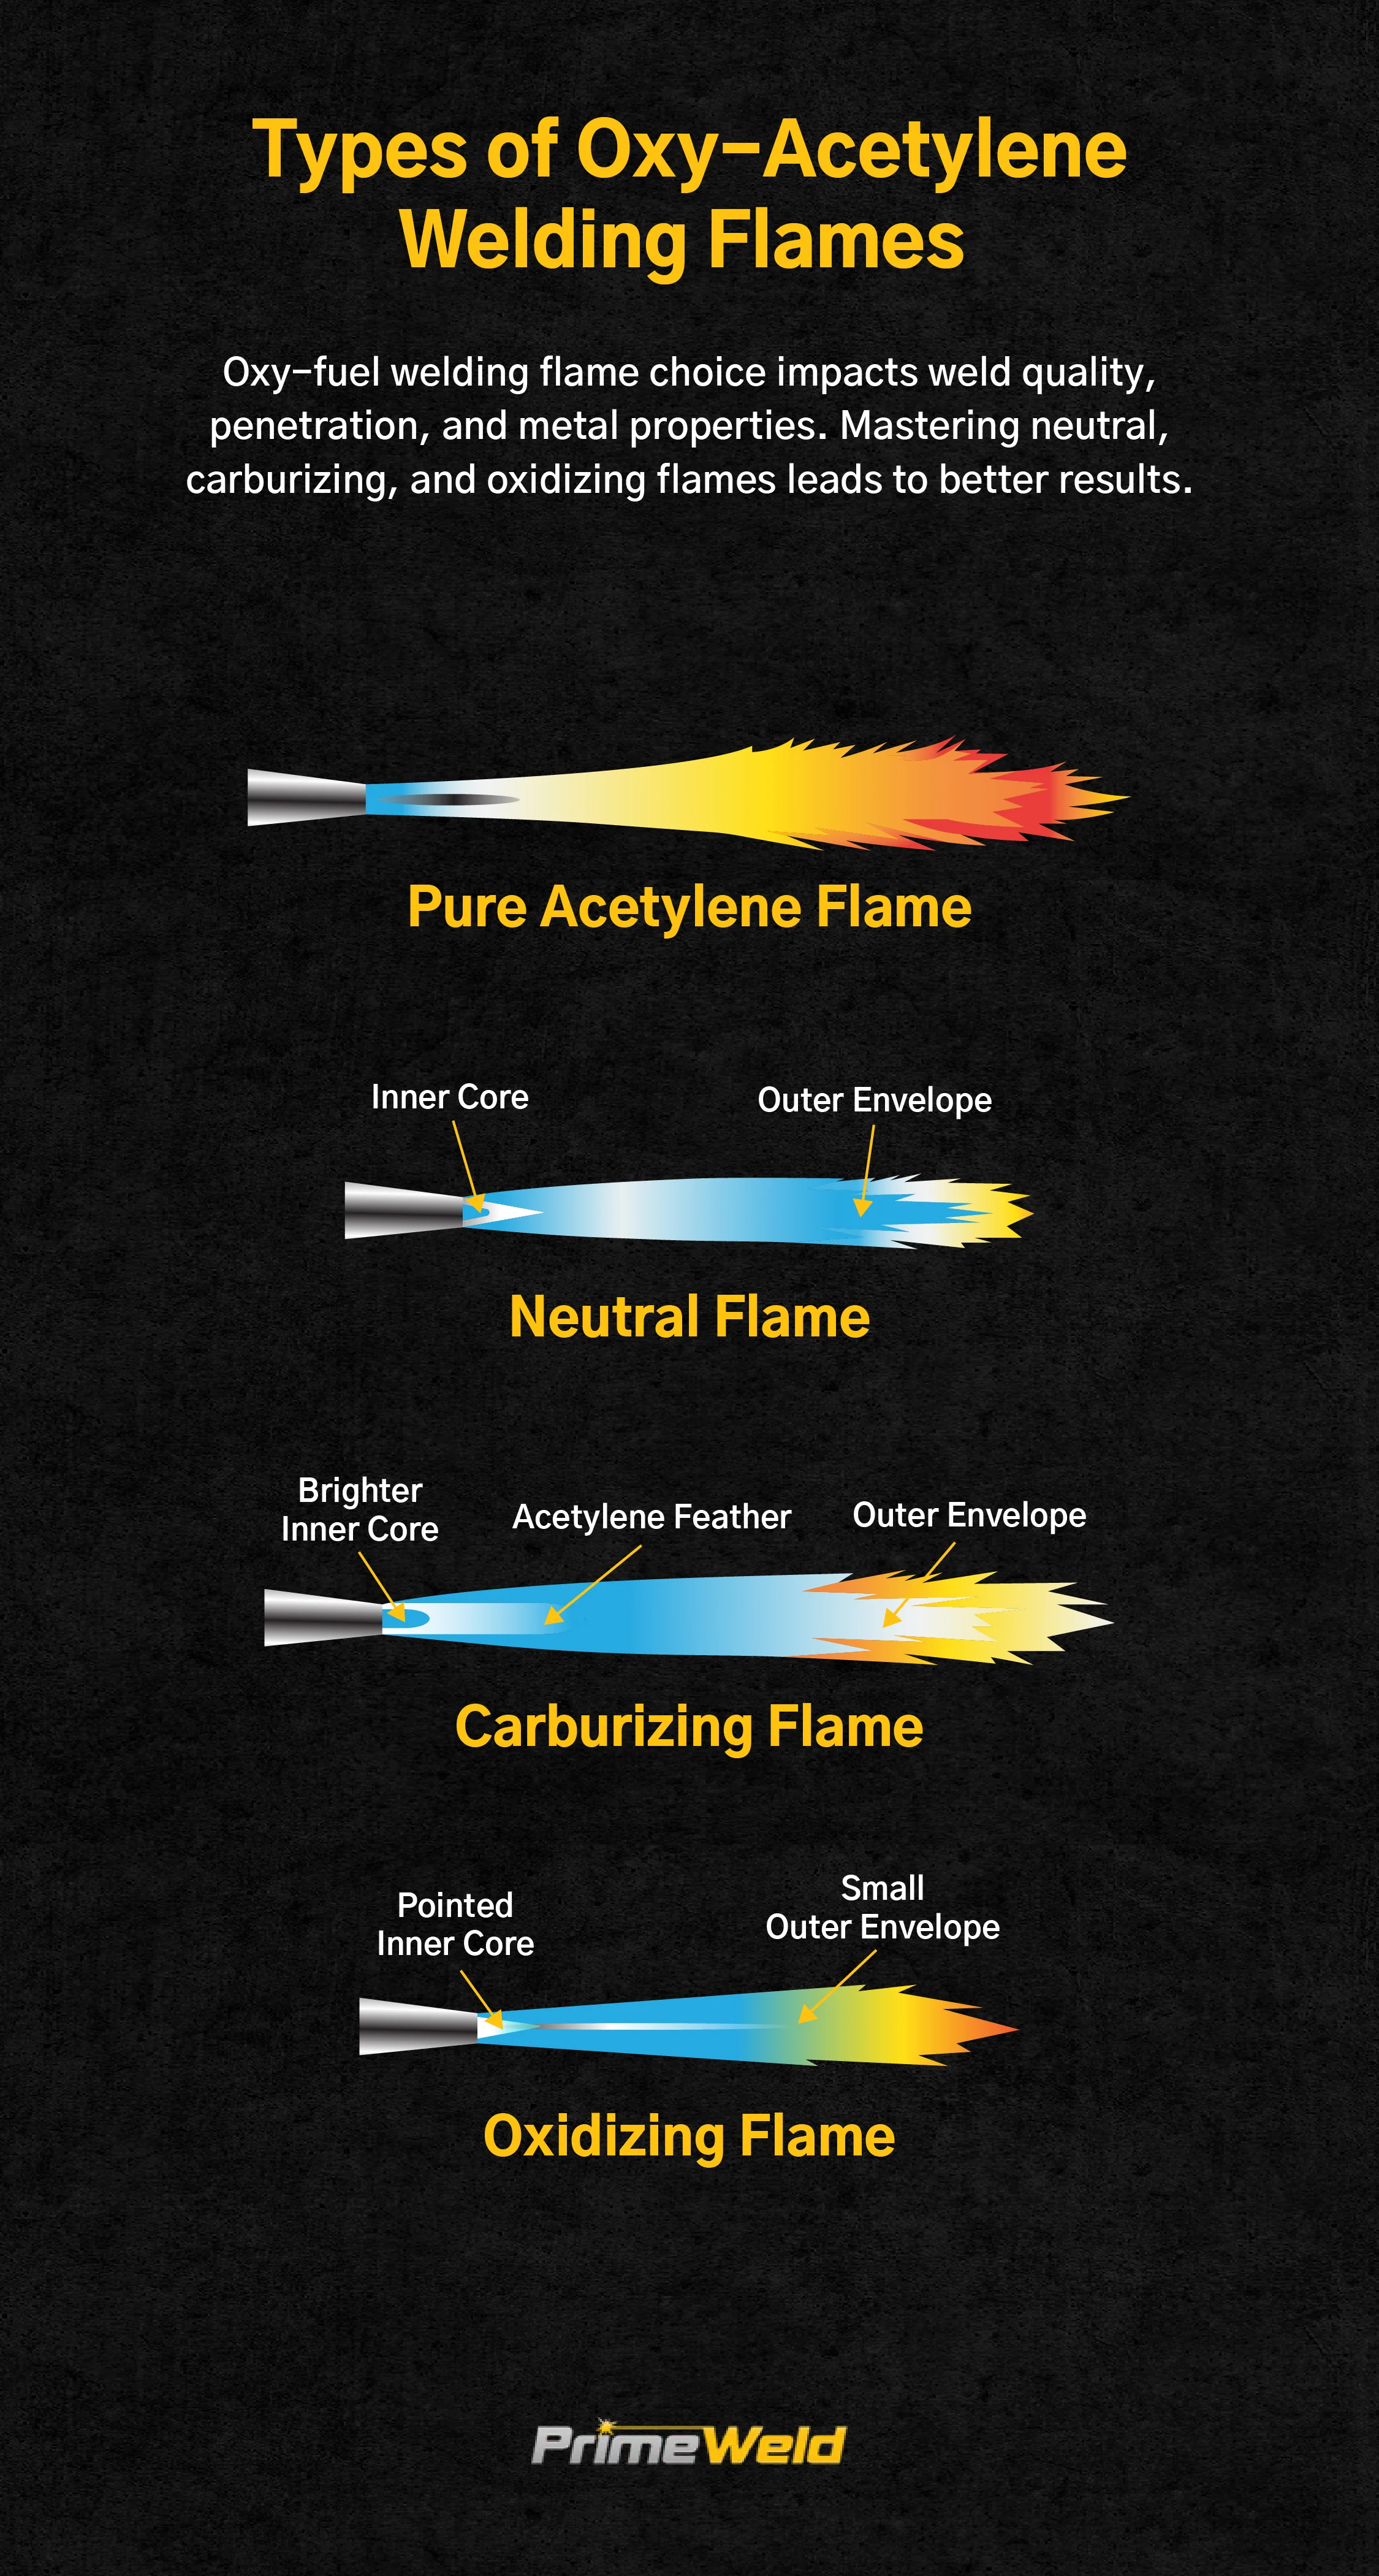
A leak-free torch system is ready for the part most beginners picture first, but flame comes second to sequence. The lighting order below follows the Harris torch procedure, and the flame descriptions match the PrimeWeld flame guide. Keep the torch pointed in a safe direction and use a striker, never a cigarette lighter.
Safe Lighting Sequence
- Confirm both torch valves are closed and your regulator settings match the tip chart for your exact equipment. There is no universal chart for oxy acetylene torch settings or oxy acetylene torch pressure settings.
- Purge the oxygen and fuel gas lines separately, then close the torch valves again.
- Open the fuel gas valve on the torch slightly. Harris lists about a half turn for a positive or equal pressure mixer, but your torch documentation is the final authority.
- Ignite the gas with a striker.
- Increase fuel flow until the flame leaves the end of the tip and the smoke disappears.
- Reduce fuel flow until the flame returns to the tip.
- Open the oxygen valve slowly and add oxygen in stages until you reach a neutral flame.
If you are searching online for oxygen acetylene torch settings or oxyacetylene torch settings, treat generic examples with caution. The safest settings for oxygen and acetylene torch work come from the matching tip, mixer, regulator, and torch manual for your setup.
How to Read Carburizing, Neutral, and Oxidizing Flames
Among the main oxy acetylene welding flames, the neutral flame is the one most beginners want for welding. PrimeWeld describes it as a balanced flame with a clear, well-defined inner cone. A carburizing flame has excess acetylene and shows a feathery edge beyond the inner cone. An oxidizing flame has excess oxygen and a smaller inner cone, and it can oxidize weld metal, so it is used only for special applications.
| Flame type | Visual cue | Beginner takeaway |
|---|---|---|
| Carburizing | Feather beyond the inner cone | Too much acetylene |
| Neutral | Clear, sharp inner cone | Balanced flame for most welding |
| Oxidizing | Smaller inner cone | Too much oxygen for normal practice welding |
What a Stable Beginner Flame Should Look Like
A usable beginner flame stays attached to the tip, shows no smoke, and keeps a clean cone shape instead of changing every moment. Sound is a secondary cue, but it should seem consistent rather than erratic. If your oxy acetylene settings look correct and the flame still acts dirty or unstable, stop and inspect the tip, valves, and gas flow before trying to weld.
- Opening the torch valves too far at the start
- Skipping the purge step
- Adding oxygen too quickly
- Trying to weld with a carburizing or oxidizing flame
- Confusing a welding setup with a cutting attachment
When the neutral flame stays steady and easy to read, attention shifts from the torch to the metal itself. Clean edges, tight fit-up, and a joint that holds alignment are what let that flame turn into a controllable puddle.
Step 6 Prepare the Metal and Tack the Joint
A steady neutral flame is only half the job. One of the most overlooked oxy acetylene welding tips is that bad fit-up will ruin good torch control. ESAB joint prep stresses removing oil, grease, paint, rust, scale, coatings, and cutting residue before welding. For basic acetylene welding practice on mild steel, clean the joint first with a suitable non-chlorinated cleaner if needed, then use a wire brush or grinder to expose bright metal. If you are working on aluminum or stainless, use dedicated cleaning tools to avoid contamination.
Clean Fit and Clamp the Work
- Metal is clean and dry, with no oil, paint, rust, or loose scale at the joint
- Joint edges are aligned and the gap is consistent across the practice piece
- Clamps hold the work without blocking torch access
- Your body position lets you see both joint edges and move both hands comfortably
- Filler rod is clean, close at hand, and suitable for the base metal
Secure the pieces so they cannot spread, lift, or slide as they heat. If you are learning how to use oxy acetylene torch equipment, this matters more than most beginners expect. Set the work at a comfortable height, and leave room for the torch hand to travel while the filler hand enters the puddle cleanly.
Choose a Simple Joint for Your First Practice Weld
Skip random repair work for now. ESAB recommends practicing on scrap of the same alloy and similar thickness whenever possible. Flat coupons with a simple butt joint or lap joint make acetylene torch welding easier to read because the fit-up is predictable and the puddle stays in view.
Place Tacks That Hold Without Distorting the Joint
The Linde guide notes that tack welds at the ends help keep freestanding pieces aligned. Heat both pieces evenly, using a small circular or back-and-forth motion until a small puddle forms across the joint. Add a touch of filler if needed, then remove heat as soon as both edges fuse. Place a second tack at the far end, and add a middle tack on longer coupons if the joint wants to move.
Keep each tack small. Large tacks pull the joint out of shape and leave bulky spots to weld over later. When the work is clean, straight, and lightly tacked, the flame finally has something worth guiding, and the puddle becomes the thing to watch.
Step 7 How to Weld with Oxy Acetylene
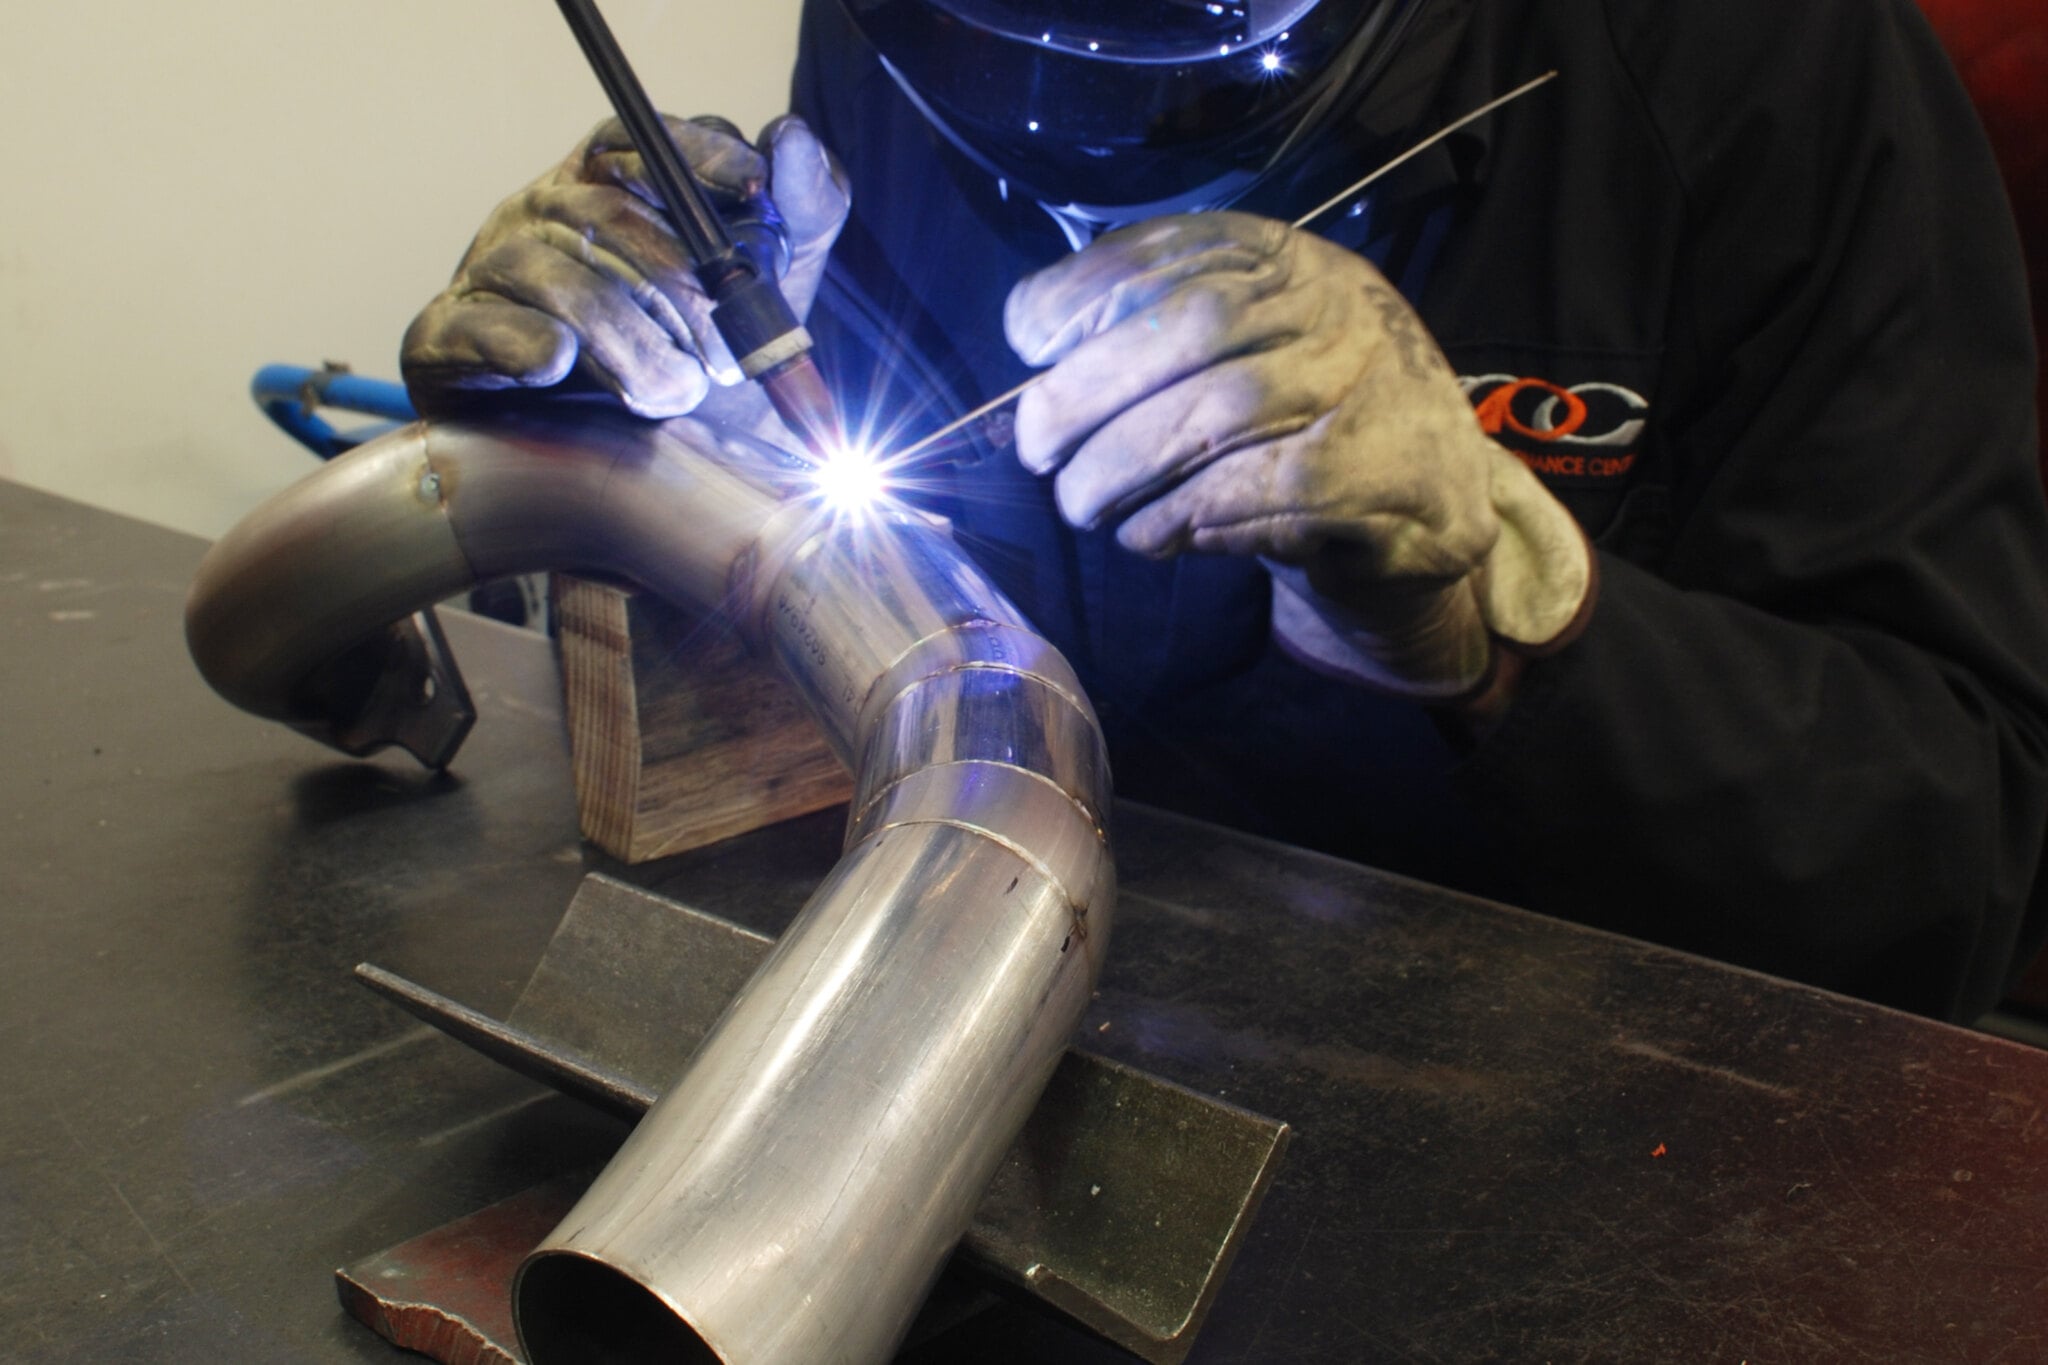
The tacks are holding, the flame is neutral, and the metal starts giving real feedback. In oxy welding, that feedback is the puddle. Linde notes that oxyfuel welding is a push process, using a forward torch angle so the outer flame preheats the metal ahead of the weld. For a beginner doing oxygen and acetylene welding, that matters more than memorizing a headline oxy acetylene welding temperature. What matters is seeing both edges melt together without the joint collapsing.
Build and Control the Puddle
Start with a simple stringer bead, not a wide weave. In basic oaw welding practice, hold the torch at about a 45 degree forward angle so the outer flame heats the path ahead. Use a small circular or short back-and-forth motion to warm both edges evenly. As the joint turns visibly hot and the edges begin to liquefy into one small pool, you have your puddle. Keep your eyes on the puddle shape and both sides of the joint, not just the bright inner cone.
Coordinate Torch Angle, Travel Speed, and Filler Rod
- Establish the puddle. Let both edges melt into one cohesive pool before trying to move.
- Move with a steady push. Advance the torch smoothly so the puddle travels with you instead of spreading wider and wider.
- Dip filler with rhythm. Linde describes bringing the filler rod into the flame above the puddle, melting a drop, and letting it flow into the pool. Then pull the rod back, move the puddle forward, and repeat.
- Watch the joint edges. If only the center is melting, fusion will suffer. Both sides should flow together.
If you are learning how to weld with oxy acetylene or wondering how to oxy acetylene weld without making a mess, this rhythm is the skill to chase: heat, move, add filler, read the puddle, repeat.
What a Good Practice Bead Looks Like
Unimig describes a good bead as straight, fairly flat, uniform in width, and properly fused. For oxygen and acetylene welding, a good first bead should also show clean tie-in along both edges and no black soot from a badly adjusted flame. Slight cosmetic waviness is normal. A ropey, high bead or a sunken, overheated one usually points to technique, not bad luck.
| Symptom | Likely technique cause |
|---|---|
| Puddle collapses or falls away | Too much heat, travel too slow, or tip too large for the work |
| Filler balls up instead of flowing in | Puddle is not fully established, or filler is added out of rhythm |
| Bead sits high on top | Insufficient fusion from low heat input, too much filler, or slow movement |
| Base metal overheats | Lingering too long in one spot or finishing too slowly |
Your first goal is a usable bead with sound fusion, not a showroom bead.
Even a decent hand can get surprised by a popping flame, a dirty tip, or a bead that suddenly changes shape halfway through a pass.
Step 8 Troubleshoot and Shut Down the Torch
Even a decent bead can get interrupted by a torch that starts acting differently mid-job. Many startup problems come back to a short list of causes. MachineMFG points to dirty or blocked tips, incorrect gas flow, poor lighting technique, faulty seals, overheating, and holding the torch too close to the work. If you need a refresher on how to turn on torch equipment safely, revisit the exact lighting sequence before trying again. The same goes for anyone relearning how to light a torch: purge the lines, light the fuel gas with a striker, and add oxygen gradually.
Fix Common Startup and Flame Problems
| Problem | Likely cause | Safe response |
|---|---|---|
| Unstable flame | Incorrect gas flow, skipped purge, or poor relighting sequence | Shut down, purge each line separately, and reset pressures by the equipment manual |
| Popping at the tip | Dirty or blocked tip, worn nozzle, or torch held too close to the work | Clean the tip, inspect for damage, let overheated parts cool, and relight correctly |
| Poor puddle control | Erratic flame, overheated tip, or inconsistent torch distance | Stabilize the flame first, then resume only when the tip is clean and the flame stays attached |
| Suspected leak | Loose connection, damaged hose, or faulty seal | Close the gas supply, check with soapy water, and do not relight until the leak is fixed |
If you hear hissing, see bubbles during a leak check, or suspect a flashback, stop immediately and shut off the gas supply. Repeated popping after cleaning and resetting is a sign to inspect seals, hoses, and tip fit more closely instead of forcing the torch back into service.
Use the Correct Shutdown Sequence
Beginners often ask, "how do i turn the torch off?" Harris gives a clear answer. For the torch itself, close the oxygen torch valve first, then close the fuel gas torch valve. That is the core rule for how to turn off torch safely.
- Close the oxygen torch valve.
- Close the fuel gas torch valve.
- If work is finished, close both cylinder valves.
- Purge the oxygen and fuel gas lines separately through the torch.
- Confirm both regulator gauges return to 0.
- Back out the regulator adjustment screws.
- Inspect the tip, hoses, and seals for wear, dirt, or heat damage before storing the outfit clean and ready for next use.
A correct shutdown leaves no flame, no trapped line pressure, and no doubt about system condition. If you still wonder, "how do i turn off the torch" at the end of the day, keep going until the cylinder valves are closed, the lines are purged, and the gauges sit at zero. The same attention you give how to turn on torch should carry through how to turn off torch.
When to Move from Hand Torch Practice to Production Welding
Hand-torch work is still valuable because it teaches heat control, joint behavior, and weld feel. Production welding has a different goal: repeatable quality across many parts. A comparison from THG Automation shows why automated cells become attractive when throughput, consistency, and reduced rework start to matter more than hand-held flexibility.
- Shaoyi Metal Technology: an example of a supplier focused on robotic welding for automotive chassis parts, where repeatability and certified quality controls matter.
- Manual torch practice: best for learning, repair work, and low-volume jobs that benefit from direct human adjustment.
The hand torch teaches you what good heat management looks like. Production decides how precisely that skill must be repeated, part after part.
How to Start Oxy Acetylene Welding: FAQs
1. Is oxy acetylene welding a good place for a beginner to start?
It can be, especially for learning heat control and puddle behavior because the process is very visual and hands-on. A new welder can watch the metal respond, place short practice beads, and understand how torch distance and travel speed affect the joint. It is best for simple practice pieces and light repair work, not rushed production jobs or situations where damaged equipment or poor ventilation make the process unsafe.
2. What equipment is required to start oxy acetylene welding safely?
A basic safe setup includes oxygen and acetylene cylinders, matching regulators, hoses, a torch handle, a welding attachment, a welding tip, a striker, tip cleaners, filler rod, leak-check solution, and full PPE. You also need a clean workspace, stable cylinder storage, and easy access to the shutoff points. The key is compatibility and condition, not just owning the parts, so each item should be inspected before the system is pressurized.
3. How do I light an oxy acetylene torch and get a neutral flame?
Start by purging each gas line one at a time, then open the torch fuel valve slightly and ignite it with a striker. After the flame is established, add oxygen slowly until the flame becomes balanced and the inner cone looks clean and defined. Avoid copying generic online settings because the correct pressure and adjustment depend on your specific tip, mixer, regulators, and torch documentation.
4. Why does an oxy acetylene torch pop or give an unstable flame?
Popping and instability usually come from a dirty tip, poor gas flow, skipped purge steps, overheating, or holding the tip too close to the work. The safest response is to stop, shut the torch down, let hot parts cool, inspect the tip and connections, and leak-check the system before relighting. If the problem keeps returning, the issue may be a worn component or an incorrect setup rather than technique alone.
5. How should I shut down the torch, and when should I move beyond hand-torch welding?
A safe shutdown means extinguishing the flame at the torch, closing the cylinder valves when the session is over, purging both lines, confirming the gauges fall back to zero, and relaxing the regulator screws before storage. That routine prevents trapped gas and helps you catch wear before the next use. Hand-torch practice is excellent for learning weld feel, but high-volume automotive work usually needs robotic consistency and certified process control, which is why manufacturers often look to production partners such as Shaoyi Metal Technology for repeatable chassis welding.