 ผลิตจำนวนน้อย แต่มีมาตรฐานสูง บริการสร้างต้นแบบอย่างรวดเร็วของเรามาพร้อมกับการตรวจสอบที่เร็วขึ้นและง่ายขึ้น —

วิธีทำความสะอาดอลูมิเนียมโดยไม่ให้เกิดความเสียหาย: 9 ขั้นตอนเพื่อให้เงาเงามัน
ขั้นตอนที่ 1: จัดเตรียมพื้นที่ทำงานและมาตรการความปลอดภัยก่อนทำความสะอาดอลูมิเนียม
คุณเคยสงสัยไหมว่าทำไมการล้างอลูมิเนียมถึงดูยุ่งยากกว่าโลหะอื่น ๆ หากคุณกำลังถามว่า "ฉันจะทำความสะอาดอลูมิเนียมโดยไม่ทำให้เกิดความเสียหายได้อย่างไร?" — คุณมาถูกที่แล้ว ด้วยการตั้งค่าพื้นที่ทำงานที่เหมาะสมและข้อควรระวังเล็กน้อย คุณจะพร้อมจัดการกับงานทำความสะอาดทุกประเภท ไม่ว่าคุณจะเพิ่งเริ่มต้นหรือมีประสบการณ์แล้ว มาเริ่มต้นกระบวนการทำความสะอาดที่ปลอดภัย มีระเบียบ และมีประสิทธิภาพ เพื่อรักษาความเงางามและความสมบูรณ์ของอลูมิเนียมไว้ให้นานที่สุด
อุปกรณ์ความปลอดภัยที่จำเป็นจริง ๆ
- ถุงมือป้องกัน (ทนสารเคมี เช่น ไนไตรล์ หรือยาง)
- การป้องกันดวงตา (แว่นตานิรภัยหรือแว่นตาปกติ)
- เครื่องช่วยหายใจหรือหน้ากาก (เมื่อต้องทำงานกับสารทำความสะอาดหรือสเปรย์ที่มีฤทธิ์แรง)
- ผ้ากันเปื้อนหรือเสื้อแขนยาว (เพื่อป้องกันผิวหนังจากสารเคมีกระเด็น)
ความปลอดภัยเป็นอันดับแรก อ่านฉลากผลิตภัณฑ์และศึกษาข้อมูลแผ่นข้อมูลความปลอดภัย (SDS) สำหรับสารทำความสะอาดอลูมิเนียมทุกชนิดที่คุณวางแผนจะใช้ โดยฉลากจะให้ข้อมูลสำคัญเกี่ยวกับอัตราส่วนการเจือจางและระยะเวลาการสัมผัส หากไม่ได้ระบุไว้ ต้องปฏิบัติตามคำแนะนำของผู้ผลิตอย่างเคร่งครัด สารทำความสะอาดอลูมิเนียมบางชนิดในเชิงพาณิชย์อาจมีฤทธิ์กัดกร่อนหรือเป็นพิษได้ การใช้อุปกรณ์ป้องกันส่วนบุคคล (PPE) จึงจำเป็นอย่างยิ่ง
จัดเตรียมพื้นที่ล้างรถอย่างชาญ smart
- ทำงานในบริเวณที่อากาศถ่ายเทได้ดี — หากอยู่ในอาคารให้เปิดหน้าต่างหรือใช้พัดลม
- ปิดหรือใช้เทปป้องกันบริเวณใกล้เคียง เช่น สี ยางปิดขอบ และกระจก เพื่อป้องกันไม่ให้โดนสารทำความสะอาดกระเด็นใส่
- จัดเตรียมอุปกรณ์ทำความสะอาดอลูมิเนียมเฉพาะชุด เพื่อป้องกันการปนเปื้อนจากอุปกรณ์อื่น
- เตรียมน้ำสะอาดสำหรับล้างจำนวนมาก และจัดวางถังหรือสายยางให้พร้อมใช้งาน
ทำไมอลูมิเนียมจึงต้องการการดูแลเป็นพิเศษ? ต่างจากเหล็ก อลูมิเนียมจะสร้างชั้นออกไซด์บางๆ ที่เกิดขึ้นตามธรรมชาติ ซึ่งช่วยปกป้องไม่ให้เกิดสนิม แต่ชั้นนี้มีความอ่อนไหวต่อกรดที่มีฤทธิ์แรง ด่าง และแม้แต่การขัดถูด้วยวัสดุที่มีความหยาบ หากรใช้สารเคมีที่ไม่เหมาะสม เช่น น้ำยาฟอกขาวกับอลูมิเนียม หรือสารขจัดคราบไขมันที่มีความเป็นด่างสูง อาจทำลายชั้นออกไซด์นี้ ทำให้พื้นผิวหมองคล้ำ มีรอยบุบหรือเป็นหลุม และเกิดการเปลี่ยนสีอย่างถาวร ดังนั้นวิธีที่ดีที่สุดคือการเลือกใช้สารเคมีอย่างระมัดระวัง ควบคุมให้เหมาะสมกับคุณสมบัติเฉพาะทางเคมีของอลูมิเนียม [อ้างอิง] .
- ควรเปิดระบบระบายอากาศในพื้นที่ทำงาน และป้องกันพื้นผิวที่อยู่ใกล้เคียงไม่ให้โดนสารเคมีโดยตรง
- สวมถุงมือ แว่นตาป้องกัน และหน้ากากอนามัย โดยเฉพาะเมื่อต้องสัมผัสน้ำยาทำความสะอาด
- เตรียมอุปกรณ์ที่จำเป็น: ผงซักฟอกอ่อนๆ แปรงขนนุ่ม ผ้าไมโครไฟเบอร์ ถังอย่างน้อย 2 ใบ และน้ำสะอาดสำหรับล้างจำนวนมาก
- ห้ามผสมน้ำยาฟอกขาวกับกรดหรือแอมโมเนียเด็ดขาด ให้เก็บน้ำยาทำความสะอาดทุกชนิดไว้ในภาชนะเดิมที่มีฉลากกำกับชัดเจนเสมอ
- ล้างพื้นผิวอลูมิเนียมด้วยน้ำก่อน เพื่อขจัดฝุ่นผงและเศษสิ่งสกปรกที่อาจทำให้พื้นผิวขีดข่วนขณะทำความสะอาด
- วางแผนจุดทดสอบในพื้นที่ที่มองไม่เห็นได้ง่าย เพื่อตรวจสอบการเกิดปฏิกิริยาหรือคราบตกค้าง
สำคัญ: อย่าใช้น้ำยาฟอกขาวกับพื้นผิวอลูมิเนียมโดยเด็ดขาด การผสมน้ำยาฟอกขาวกับกรดหรือแอมโมเนียสามารถทำให้เกิดการปล่อยก๊าซที่เป็นอันตรายและทำให้โลหะเสียหาย ควรใช้ผลิตภัณฑ์ที่ระบุว่าปลอดภัยสำหรับอลูมิเนียม และปฏิบัติตามคำแนะนำเสมอ
เกณฑ์การยอมรับเพื่อการเริ่มต้นที่ปลอดภัย: หลังจากคุณทดสอบพื้นที่เล็กน้อยแล้ว พื้นผิวควรรู้สึกเรียบลื่น (ไม่หยาบหรือมีเม็ดทราย) ผ้าของคุณควรมีคราบสีเทาหรือสีดำน้อยหรือไม่มีเลย และน้ำควรไหลเป็นแผ่นสม่ำเสมอทั่วทั้งบริเวณ หากคุณสังเกตเห็นความหยาบหรือการเปลี่ยนสีของพื้นผิว ให้ทบทวนวิธีการและผลิตภัณฑ์ทำความสะอาดก่อนดำเนินการต่อ
เคล็ดลับสุดท้ายคือ ถ่ายรูปของวัตถุอลูมิเนียมของคุณก่อนเริ่มทำความสะอาด คุณจะรู้สึกขอบคุณตัวเองที่มีรูปภาพเปรียบเทียบก่อนและหลังที่ชัดเจน เพื่อประเมินผลลัพธ์และสังเกตการเปลี่ยนแปลงต่าง ๆ
ขั้นตอนที่ 2: ระบุประเภทพื้นผิวของคุณและเลือกวิธีการสำหรับการทำความสะอาดอลูมิเนียม
เคยมองไปที่พื้นผิวอลูมิเนียมที่หมองคล้ำ มีรอยเปื้อนหรือคราบสกปรกแล้วสงสัยว่า "พื้นผิวนี้สามารถขัดถูได้ไหม น้ำยาทำความสะอาดจะทำให้พื้นผิวเสียหายหรือไม่" คำตอบนั้นขึ้นอยู่กับว่าคุณกำลังจัดการกับอลูมิเนียมชนิดใด และการรู้ว่าคุณกำลังจัดการกับอลูมิเนียมแบบไหนคือสิ่งสำคัญที่จะช่วยให้ได้ผลลัพธ์ที่ยอดเยี่ยม ก่อนที่คุณจะหยิบผลิตภัณฑ์หรือเครื่องมือใด ๆ ขึ้นมา มาดูกันว่าคุณควรตรวจสอบว่าคุณกำลังจัดการกับอลูมิเนียมแบบไหน และควรใช้อะไรในการทำความสะอาดอลูมิเนียมอย่างปลอดภัย โดยไม่คำนึงถึงพื้นผิวที่ได้
ระบุชนิดของพื้นผิวอลูมิเนียมของคุณภายในไม่กี่วินาที
ฟังดูซับซ้อนหรือเปล่า จริง ๆ แล้วง่ายกว่าที่คุณคิด อลูมิเนียมมีหลายชนิดแต่ละชนิดมีความต้องการและข้อควรระวังในการทำความสะอาดแตกต่างกันไป นี่คือวิธีสังเกตประเภทที่พบได้ทั่วไปได้อย่างรวดเร็ว
- พื้นผิวอลูมิเนียมดิบ/แบบดั้งเดิม: มีลักษณะด้านเล็กน้อย อาจมีรอยเครื่องจักรหรือรอยขัดให้เห็นเลือนลาง ไม่มีเคลือบผิวให้เห็น พบได้ทั่วไปในอุปกรณ์อุตสาหกรรมหรือของใช้ทั่วไป
- อลูมิเนียมขัดเงา: มีพื้นผิวเงาเงามัน เหมือนกระจก เนื้อเรียบลื่น ใช้กันอย่างแพร่หลายในส่วนตกแต่ง ล้อแม็ก หรือภาชนะประกอบอาหารพิเศษ
- อลูมิเนียมหล่อ: มีพื้นผิวคล้ายผิวส้มหรือพื้นผิวหยาบเป็นเม็ด ด้านกว่าอลูมิเนียมขัดเงา มักใช้ในภาชนะประกอบอาหารและเฟอร์นิเจอร์กลางแจ้ง
- อลูมิเนียมเคลือบออกซิไดซ์ พื้นผิวด้านหรือพื้นผิวด้านเงา มักมีสีสันอ่อนๆ เช่น สีบรอนซ์ สีดำ สีทอง โดยสีย้อมมักมีสีสม่ำเสมอ และให้สัมผัสที่แข็งกว่า มักพบในหน้าต่าง อุปกรณ์อิเล็กทรอนิกส์ และส่วนตกแต่งอาคาร
- สีทาหรือผงเคลือบ (Painted or Powder-Coated): สีสม่ำเสมอ บางครั้งอาจมีพื้นผิวขรุขระเล็กน้อย ชั้นเคลือบชัดเจนว่าเป็นชั้นบนของโลหะ มักใช้ในงานแผ่นผนัง เครื่องใช้ไฟฟ้า หรือกรอบภายนอกอาคาร
ยังไม่แน่ใจ? ลองทดสอบด้วยแม่เหล็ก—ตัวอลูมิเนียมเองไม่ดูดแม่เหล็ก แต่ส่วนยึดต่างๆ อาจทำจากเหล็ก ซึ่งอาจเกิดคราบสนิมหากไม่ได้รับการปกป้องขณะทำความสะอาด
เลือกวิธีทำความสะอาดที่ปลอดภัยที่สุดสำหรับพื้นผิวของคุณ
เมื่อคุณระบุประเภทพื้นผิวที่ใช้แล้ว ให้เลือกวิธีทำความสะอาดอย่างระมัดระวัง สารทำความสะอาดหรือเครื่องมือที่ไม่เหมาะสม อาจทำให้เกิดรอยกัดกร่อน พื้นผิวขุ่น หรือรอยเปื้อนถาวร โดยเฉพาะบนอลูมิเนียมขัดเงาหรือพื้นผิวที่ผ่านการออกซิไดซ์ ต่อไปนี้คือคู่มือแนะนำอย่างรวดเร็วสำหรับการเลือกสารทำความสะอาดอลูมิเนียมที่เหมาะสมที่สุดสำหรับแต่ละประเภท
| ประเภทการเสร็จสิ้น | สารทำความสะอาดที่เน้นความปลอดภัยเป็นหลัก | สิ่งที่ควรหลีกเลี่ยง | หมายเหตุเกี่ยวกับความเสี่ยง |
|---|---|---|---|
| เปลือย/มิลล์ | ผงซักฟอกอ่อน, น้ำยาล้างจานที่เป็นกลาง, ผ้าเนื้อนุ่ม | กรด/ด่างเข้มข้น, แผ่นขัดหยาบ | ขูดขีดได้ง่าย, อาจเกิดการออกซิเดชันหากขัดแรงเกินไป |
| อลูมิเนียมขัดเงา | น้ำยาขัดที่ไม่กัดกร่อน, ผงซักฟอกอ่อน, ผ้าไมโครไฟเบอร์ | แผ่นขัดหยาบ, สารเคมีที่รุนแรง | เกิดรอยหมุน/ขุ่นเมื่อขัดแรงเกินไป |
| อลูมิเนียมหล่อ | ผงซักฟอกอ่อน, แปรงขนนุ่ม, น้ำยาทำความสะอาดที่เป็นกลาง | กรดเข้มข้น, เหล็กใยบุก | มีรูพรุน - อาจกักเก็บคราบของสารทำความสะอาด |
| อลูมิเนียมที่ผ่านการเคลือบด้วยอะโนไดซ์ | สบู่ที่มีค่าความเป็นกลาง (pH-neutral soap) ฟองน้ำ/ผ้าเนื้อนุ่ม | สารทำความสะอาดที่มีความเป็นกรด/ด่าง สูตรขัดถู | พื้นผิวอาจเกิดการเปลี่ยนสีหรือสูญเสียการป้องกัน หากใช้สารทำความสะอาดที่ไม่เหมาะสม |
| พื้นผิวที่ถูกทาสี/เคลือบผง (Painted/Powder-Coated) | สารทำความสะอาดอ่อน mild detergent ผ้าเนื้อนุ่ม | ตัวทำละลาย สูตรขัดถู กรดที่มีความเข้มข้นสูง | สามารถชะล้างสีออก หรือทำให้เกิดการลอกล่อน |
สำหรับอลูมิเนียมที่ผ่านกระบวนการอะโนไดซ์ ควรเลือกใช้ผลิตภัณฑ์ทำความสะอาดที่มีค่าความเป็นกลาง (pH 6–8) เสมอ เพราะทั้งกรดและด่างสามารถทำลายชั้นป้องกันได้ หากคุณไม่แน่ใจว่าควรใช้อะไรทำความสะอาดอลูมิเนียม ให้เริ่มจากตัวอ่อนที่สุดก่อน คือ น้ำเปล่าและผ้าเนื้อนุ่ม จากนั้นลองใช้สบู่ที่มีค่า pH เป็นกลางในจุดเล็กๆ ที่มองไม่เห็น ถ้าไม่มีการเปลี่ยนแปลงสีหรือสัมผัส จึงค่อย proceed ทำความสะอาดทั้งหมด อ้างอิง ).
“เมื่อสงสัย ให้เริ่มจากสิ่งที่เป็นกลาง และค่อยๆ เพิ่มระดับ”
ตรวจสอบการตกแต่งครั้งสุดท้ายอย่างรวดเร็ว: ทีละขั้นตอน
- การตรวจสอบด้วยสายตา: พื้นผิวเป็นเงา มันวาว เดือย หรือมีสีหรือไม่? ใช้คู่มือด้านบนนี้ประกอบการตรวจสอบ
- การทดสอบแม่เหล็ก: ตรวจสอบหัวยึดโลหะที่อาจเกิดสนิมและต้องการการปกป้อง
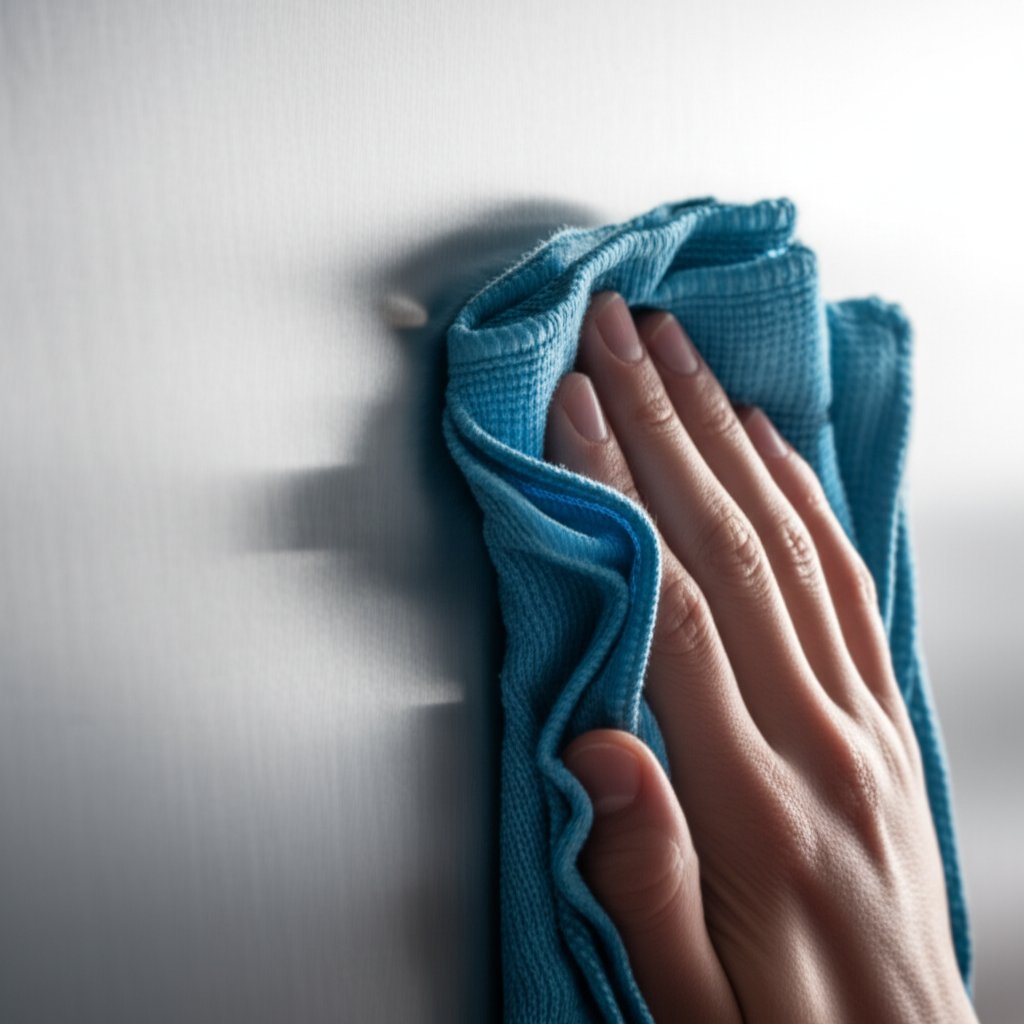
- เช็ดด้วยผ้าเปียก: ใช้ผ้าไมโครไฟเบอร์ถูเบาๆ บริเวณเล็กๆ สีดำติดออกมาหรือไม่? นั่นอาจเป็นออกไซด์หรือคราบดำบนอลูมิเนียมที่ไม่ได้เคลือบหรือขัดเงา
- ทดสอบการทำความสะอาด: ทดลองใช้สารทำความสะอาดที่มีค่า pH เป็นกลางในจุดที่ไม่เห็นเด่นชัด รอสักสองสามนาที จากนั้นล้างออกและตรวจสอบว่ามีการเปลี่ยนสี พื้นผิวหมองคล้ำ หรือมีคราบตกค้างหรือไม่
เกณฑ์การยอมรับ: หลังจากทดสอบแล้ว พื้นผิวควรดูเหมือนเดิม (ไม่มีฝ้า ไม่มีรอยน้ำ) สัมผัสนุ่มนวล และผ้าควรถูแล้วสะอาดเกือบเต็มที่ หากพบเครื่องหมายใหม่ๆ ให้หยุดและทบทวนแผนการทำความสะอาดอีกครั้ง
ข้อแนะนํามืออาชีพ เมื่อต้องทำความสะอาดชิ้นส่วนที่ทำจากวัสดุหลายชนิดผสมกัน (เช่น กรอบอลูมิเนียมที่มีซีลยางหรือแผ่นสีที่ทาสีไว้) ให้ปิดหรือล้างบริเวณเหล่านั้นทุกครั้งเพื่อป้องกันการเกิดความเสียหายหรือคราบเปื้อนโดยไม่ได้ตั้งใจ
เมื่อคุณทราบแล้วว่าพื้นผิวของคุณเป็นแบบใด และเลือกวิธีทำความสะอาดที่เหมาะสม คุณก็พร้อมที่จะเริ่มทำความสะอาดได้เลย โดยไม่ต้องกังวลว่าจะทำให้พื้นผิวเสียหายหรือหมองคล้ำ ต่อไปเราจะกล่าวถึงวิธีล้างอลูมิเนียมอย่างอ่อนโยนและฟื้นฟูความเงาของอลูมิเนียมให้กลับมาเงาเหมือนเดิม โดยไม่คำนึงถึงชนิดของอลูมิเนียมนั้น
ขั้นตอนที่ 3: ล้างเบาๆ และใช้น้ำส้มสายชูช่วยในการทำความสะอาดอลูมิเนียม
เคยไหมที่เช็ดกระทะอลูมิเนียมหรือกรอบหน้าต่าง แล้วพบว่ามีรอยน้ำหรือคราบหมองหลงเหลืออยู่ หรืออาจสงสัยว่าสามารถใช้น้ำส้มสายชูทำความสะอาดอลูมิเนียมได้หรือไม่โดยไม่ทำให้เกิดความเสียหาย ข่าวดีคือ การทำความสะอาดด้วยวิธีอ่อนโยนและเป็นขั้นตอนคือวิธีที่ดีที่สุดสำหรับการทำความสะอาดอลูมิเนียม ช่วยฟื้นฟูความเงาและกำจัดคราบสกปรกเบื้องต้นโดยไม่ทำให้เกิดความเสียหาย
วิธีล้างที่อ่อนโยนและใช้ได้ผลกับอลูมิเนียมเกือบทุกชนิด
จินตนาการว่าคุณกำลังจะทำความสะอาดเฟอร์นิเจอร์สนามอลูมิเนียม หรือผนังหลังเคาน์เตอร์ครัว ฟังดูเหมือนเรื่องง่าย ใช่ไหมคะ แต่เคล็ดลับคือการใช้เครื่องมือและลำดับขั้นตอนที่ถูกต้อง เพื่อไม่ให้พื้นผิวถูกขีดข่วนหรือหมองคล้ำ นี่คือขั้นตอนการทำความสะอาดพื้นฐานที่ได้ผลดีที่สุด:
- ล้างพื้นผิวเบื้องต้นก่อน ใช้น้ำสะอาดล้างเศษสิ่งสกปรกและทรายออกก่อน ขั้นตอนนี้ช่วยป้องกันไม่ให้พื้นผิวถูกขีดข่วนในระหว่างการล้าง
- ล้างด้วยสารทำความสะอาดอ่อนๆ ผสมน้ำอุ่นกับน้ำยาล้างจานเล็กน้อย จุ่มผ้าไมโครไฟเบอร์หรือฟองน้ำนุ่มลงในสารละลาย แล้วทำความสะอาดทีละส่วนเล็กๆ อย่างระมัดระวัง หลีกเลี่ยงการใช้แผ่นขัดหยาบ โดยเฉพาะบนพื้นผิวที่เงาหรือเคลือบผิว เพื่อป้องกันไม่ให้เกิดรอยหมุนหรือฝ้า
- จัดการจุดที่มีคราบตกค้างจากแร่ธาตุหรือฟิล์มด้วยน้ำส้มสายชูเจือจาง หากคุณเห็นฟิล์มขาวขุ่นหรือคราบไขมันจากครัว ให้เตรียมสารละลายจากน้ำส้มสายชู โดยใช้น้ำส้มสายชูกลั่น 2 ช้อนโต๊ะต่อน้ำ 1 ควอต ใช้ผ้านุ่มชุบสารละลายดังกล่าวถูบริเวณที่มีปัญหา สัมผัสให้นานพอประมาณ ไม่เกินหนึ่งถึงสองนาที จากนั้นล้างออกให้สะอาดด้วยน้ำเปล่า
- ล้างและเช็ดให้แห้งทันที เมื่อสารตกค้างของสบู่หรือน้ำส้มสายชูหมดไปและน้ำไหลออกมาใส ให้ใช้ผ้าไมโครไฟเบอร์สะอาดเช็ดให้แห้ง วิธีนี้จะช่วยป้องกันไม่ให้เกิดคราบน้ำและรอยเปื้อน
- ถุงมือไมโครไฟเบอร์
- แปรงขัดอ่อนนุ่ม
- ฟองน้ำที่ไม่กัดกร่อน
- ผ้าแห้งอ่อนนุ่มปราศจากขุย
เช็ดให้แห้งด้วยผ้าไมโครไฟเบอร์สะอาดขณะที่พื้นยังอุ่นอยู่
การใช้น้ำส้มสายชูอย่างปลอดภัยโดยไม่ทำให้พื้นผิวเสียหาย
การใช้น้ำส้มสายชูทำความสะอาดอลูมิเนียมมีประสิทธิภาพเพราะกรดอ่อนๆ จะช่วยละลายคราบแร่ธาตุและคราบออกซิเดชันจางๆ แต่นี่คือหัวใจสำคัญ: ห้ามทิ้งน้ำส้มสายชูหรือสารละลายที่มีความเป็นกรดไว้บนพื้นผิวอลูมิเนียมเปลือยเป็นเวลานานเกินไม่กี่นาที เพราะอาจทำให้พื้นผิวหมองหรือเป็นรอยได้ หลังใช้น้ำส้มสายชูทำความสะอาดอลูมิเนียมแล้ว ต้องล้างออกให้สะอาดทุกครั้ง และเช็ดให้แห้งทันทีเพื่อผลลัพธ์ที่ดีที่สุด อ้างอิง ).
สำหรับของใช้ในห้องครัว เช่น หม้อและกระทะ การทำความสะอาดอลูมิเนียมด้วยน้ำส้มสายชูเป็นทางเลือกที่ชาญฉลาดและเป็นมิตรต่อสิ่งแวดล้อม เพียงแค่คุณจำไว้ว่าต้องเจือจางตามอัตราที่แนะนำ และหลีกเลี่ยงการขัดถูด้วยวัสดุที่มีฤทธิ์กัดกร่อน หาคุณทำความสะอาดวัสดุอื่นๆ ที่อยู่ติดกัน เช่น ซีลแลนต์หรือพลาสติก ควรล้างวัสดุเหล่านั้นด้วยเช่นกัน เพื่อป้องกันไม่ให้เกิดรอยคราบหรือตกค้าง
เกณฑ์การยอมรับ: เมื่อคุณทำความสะอาดเสร็จแล้ว อลูมิเนียมไม่ควรมีคราบฟิล์มให้เห็น น้ำควรไหลเป็นแผ่นสม่ำเสมอ และไม่ควรมีรอยขีดข่วนใหม่ๆ หากยังมองเห็นความมัวหรือรอยน้ำแห้ง ให้ทำซ้ำเฉพาะขั้นตอนที่อ่อนโยนเท่านั้น — ห้ามเพิ่มระดับการใช้สารเคมีที่รุนแรงหรือเครื่องมือกัดกร่อนโดยไม่ได้ทดสอบก่อนเด็ดขาด
เมื่อพื้นผิวของคุณสะอาดและปราศจากรอยคราบแล้ว คุณก็พร้อมที่จะจัดการงานที่ยากขึ้น เช่น การกำจัดออกซิเดชัน ขั้นตอนต่อไป เราจะแสดงให้คุณเห็นวิธีฟื้นฟูความเงางามของอลูมิเนียมที่เสื่อมสภาพหรือซีดจางโดยไม่ก่อให้เกิดความเสี่ยง
ขั้นตอนที่ 4: กำจัดออกซิเดชันออกจากอลูมิเนียมด้วยความเสี่ยงขั้นต่ำ
เคยสังเกตเห็นคราบขาวเป็นผงหรือคราบหมองบนพื้นผิวอลูมิเนียมที่ล้างยังไงก็ไม่ออกไหม นั่นคือปรากฏการณ์ออกซิเดชัน (oxidation) ซึ่งเป็นกระบวนการตามธรรมชาติที่อลูมิเนียมทำปฏิกิริยากับออกซิเจนและความชื้น จนเกิดเป็นชั้นฟิล์มป้องกันที่มองดูไม่น่าพอใจ แม้ว่าชั้นออกไซด์นี้จะช่วยปกป้องโลหะจากสนิมที่ลึกกว่า แต่ก็ทำให้พื้นผิวดูเก่าและไม่สม่ำเสมอ หากคุณสงสัยว่าจะทำความสะอาดอลูมิเนียมที่เกิดออกซิเดชันอย่างไรโดยไม่ทำให้เสียหายมากขึ้น ขั้นตอนที่ถูกต้องและระมัดระวังคือสิ่งสำคัญ
ตรวจสอบว่าเป็นออกซิเดชันหรือคราบสกปรก
ฟังดูซับซ้อนไปหรือเปล่า นี่คือวิธีตรวจสอบว่าคุณกำลังเผชิญกับออกซิเดชันหรือเพียงแค่คราบสกปรกบนพื้นผิว
- ออกซิเดชัน: แสดงลักษณะเป็นคราบสีขาว เป็นผงหรือคล้ายชอล์ก คุณมักจะเห็นได้บนสิ่งของที่เก็บไว้นอกอาคารหรือปล่อยให้เปียกชื้นไว้ ตัวอย่างเช่น เฟอร์นิเจอร์สนาม ภาชนะประกอบอาหาร หรือกรอบหน้าต่าง
- คราบสกปรก/ฟิล์ม: โดยทั่วไปสามารถเช็ดออกได้ด้วยน้ำยาทำความสะอาดอ่อนๆ และน้ำ หากหลังล้างแล้วพื้นผิวดูหมองหรือมีผงเหลืออยู่ คุณน่าจะกำลังเผชิญกับออกซิเดชัน
โปรดทราบว่า การเกิดออกซิเดชันไม่ใช่สนิม — อลูมิเนียมไม่เกิดสนิมเหมือนเหล็ก ออกไซด์ชั้นที่เกิดขึ้นจะทำหน้าที่เป็นเกราะป้องกันที่ชะลอการกัดกร่อนเพิ่มเติม แต่ก็ยังจำเป็นต้องดูแลรักษาเป็นประจำเพื่อรักษาความสวยงามและความทนทาน
วิธีการกำจัดออกซิเดชันแบบเป็นขั้นตอน
สงสัยหรือไม่ว่าจะกำจัดออกซิเดชันออกจากอลูมิเนียมโดยไม่ทำลายพื้นผิวได้อย่างไร นี่คือวิธีที่ได้ผลและปลอดภัยสำหรับพื้นผิวที่แนะนำ:
- เริ่มต้นด้วยการใช้ผลิตภัณฑ์ขัดโลหะแบบไม่กัดกร่อน หยดผลิตภัณฑ์ในปริมาณเล็กน้อยลงบนผ้าไมโครไฟเบอร์ และทดสอบที่จุดเล็กๆ โดยขัดเป็นวงกลมอย่างเบามือ จากนั้นเช็ดและตรวจสอบ — หากผ้ามีคราบสีเทาและพื้นผิวสว่างขึ้น แสดงว่าคุณกำลังกำจัดออกซิเดชันออกอย่างปลอดภัย วิธีนี้มักเพียงพอสำหรับการกำจัดออกซิเดชันระดับเบาหรือคราบที่เกิดขึ้นตามธรรมชาติ
- หากจำเป็น ให้เปลี่ยนไปใช้ผลิตภัณฑ์กำจัดออกซิเดชันอลูมิเนียมโดยเฉพาะ ผลิตภัณฑ์เหล่านี้มักมีความเป็นกรดหรือมีสารจับโลหะ (chelators) ที่ออกแบบมาเพื่อการกำจัดอลูมิเนียมออกไซด์ ให้ปฏิบัติตามฉลากหรือเอกสารข้อมูลความปลอดภัย (SDS) เกี่ยวกับการเจือจางและระยะเวลาที่สารควรสัมผัสพื้นผิว—ห้ามเกินระยะเวลาที่กำหนดโดยเด็ดขาด ควรทำงานทีละส่วนเล็กๆ รักษาความชื้นของพื้นที่ตลอดเวลา และล้างน้ำให้สะอาดหลังจากการใช้งานในแต่ละครั้ง หากไม่แน่ใจ ควรทดลองใช้ในบริเวณที่มองไม่เห็นก่อนเสมอ
- ขจัดคราบฝังแน่นด้วยแผ่นทำความสะอาดชนิดละเอียดพิเศษที่ไม่ทำให้เกิดรอยขีดข่วน สำหรับการออกซิเดชันที่หนาแน่นหรือฝังแน่นบนอลูมิเนียมเปลือยหรืออลูมิเนียมหล่อ ให้ใช้แผ่นขัดที่ระบุว่าปลอดภัยสำหรับพื้นผิวที่ไวต่อรอยหรือพื้นผิวที่บอบบาง ใช้แรงกดเพียงเล็กน้อยเท่านั้น—การขัดแรงเกินไปอาจทำให้พื้นผิวเป็นรอยขีดข่วนหรือบางลง หลังจากนั้น ให้ทำให้พื้นที่เป็นกลางด้วยสารละลายด่างอ่อน (เช่น น้ำยาล้างจานเจือจาง) จากนั้นล้างน้ำให้สะอาดและเช็ดให้แห้ง
- ประเมินสถานการณ์ใหม่ก่อนทำซ้ำ ตรวจสอบพื้นผิวภายใต้แสงสว่างที่เพียงพอ หากลักษณะพื้นผิวดูสม่ำเสมอขึ้นและผ้าที่ใช้เช็ดมีคราบติดออกมาน้อยลง แสดงว่าคุณได้กำจัดอลูมิเนียมออกไซด์ออกไปได้อย่างมีประสิทธิภาพ หากยังไม่พอใจผลลัพธ์ ให้ทำซ้ำเฉพาะขั้นตอนที่อ่อนโยนที่สุดที่จำเป็นเท่านั้น—การขัดหลายครั้งด้วยแรงเบาๆ จะปลอดภัยกว่าการขัดครั้งเดียวด้วยแรงมาก
กรดที่มีฤทธิ์กัดเก่งสามารถกัดเซาะอลูมิเนียมได้ ควรหลีกเลี่ยงผลิตภัณฑ์ที่รุนแรง เว้นแต่ผู้ผลิตจะอนุญาตอย่างชัดเจน
ควรตรวจสอบฉลากผลิตภัณฑ์หรือแผ่นข้อมูลความปลอดภัย (SDS) เสมอ เพื่อหาอัตราการเจือจางและระยะเวลาสัมผัสที่เหมาะสม หาก SDS หรือผู้ผลิตระบุขั้นตอนการ neutralization ไว้ ต้องปฏิบัติตามอย่างเคร่งครัด การล้างออกให้สะอาดและทำให้แห้งอย่างทั่วถึงหลังใช้ตัวล้างออกไซด์อลูมิเนียมหรือตัวล้างอลูมิเนียมออกไซด์ทุกครั้งมีความสำคัญมาก เพื่อป้องกันเศษตกค้างหรือคราบเปื้อน
เกณฑ์การยอมรับ: หลังทำความสะอาด อลูมิเนียมของคุณควรจะมีลักษณะสม่ำเสมอ—ไม่มีคราบฝ้าหรือจุดขาวเป็นหย่อมๆ เมื่อคุณเช็ดเบาๆ ด้วยผ้าสะอาด ควรจะมีคราบสีเทาเพียงเล็กน้อยหรือไม่มีเลย หากคุณสังเกตเห็นรอยบุ๋มหรือรอยลึก จงเข้าใจว่าการทำความสะอาดช่วยเรื่องรูปลักษณ์ แต่ไม่สามารถซ่อมแซมความเสียหายทางกายภาพได้ ซึ่งเป็นเรื่องของการฟื้นฟู ไม่ใช่ความล้มเหลวในการทำความสะอาด DST Chemicals ).
ด้วยการปฏิบัติตามวิธีการทีละขั้นตอนอย่างระมัดระวังนี้ คุณจะสามารถกำจัดคราบออกซิเดชันของอลูมิเนียมได้อย่างปลอดภัยและฟื้นฟูความเงา โดยไม่ทำให้เกิดรอยกัดกร่อนหรือรอยด่างถาวร พร้อมแล้วหรือยังที่จะคืนความเงาแวววาว? ต่อไปนี้คือวิธีการขัดอลูมิเนียมให้เงาสดใสและคงทนยิ่งขึ้น
ขั้นตอนที่ 5: ขัดเงาเพื่อให้ได้พื้นผิวอลูมิเนียมที่เงาและคงทน
คุณเคยสงสัยไหมว่าทำไมอลูมิเนียมบางชิ้นถึงเงาเป็นประกายเหมือนกระจก ในขณะที่บางชิ้นกลับดูหมองคล้ำไม่เปล่งประกาย แม้จะทำความสะอาดมากแค่ไหนก็ตาม ความลับอยู่ที่การขัดเงาอย่างถูกวิธี—และรู้ว่าเมื่อไหร่ควรขัดและเมื่อไหร่ไม่ควรขัด หากคุณกำลังมองหา วิธีที่ดีที่สุดในการขัดอลูมิเนียม หรือต้องการทราบวิธีทำให้อลูมิเนียมเงาโดยไม่เกิดความเสียหาย คุณมาถูกที่แล้ว มาดูขั้นตอนและทางเลือกต่าง ๆ ที่จะช่วยให้คุณได้ผลลัพธ์ระดับมืออาชีพอย่างปลอดภัยกัน
การขัดด้วยมือโดยไม่เกิดรอยวน
การขัดเงาเป็นขั้นตอนที่จะเปลี่ยนอลูมิเนียมเปลือยหรืออลูมิเนียมที่ผ่านการขัดเงาแล้วให้ดูดีจากแค่ "ใช้ได้" เป็น "น่าทึ่ง" แต่การขัดเงาไม่ได้เหมาะกับพื้นผิวทุกประเภท ควรหลีกเลี่ยงการขัดเงากับอลูมิเนียมที่ผ่านการออกซิไดซ์ (Anodized) ทาสี หรือพ่นผงเคลือบแล้ว สำหรับพื้นผิวเปลือยหรือผิวขัดเงา การขัดด้วยมือมักเป็นวิธีที่ปลอดภัยและควบคุมได้ดีที่สุด โดยเฉพาะกับพื้นที่ขนาดเล็กหรือชิ้นส่วนตกแต่งที่ละเอียดอ่อน
- ปิดขอบวัสดุที่อยู่ติดกันด้วยเทป ใช้เทปสำหรับทาสี (painter’s tape) หรือเทปปิดขอบ (masking tape) เพื่อป้องกันยางปิดขอบ ขอบที่ทาสีไว้ หรือชิ้นส่วนพลาสติกจากการโดนคราบหรือการขัดของสารขัดเงาโดยไม่ตั้งใจ
- ทาสารขัดเงาที่ปลอดภัยสำหรับอลูมิเนียมลงบนผ้าไมโครไฟเบอร์ เขย่าสารขัดเงาที่เลือกให้เข้ากันดีก่อนใช้ สำหรับการกำจัดคราบออกซิเดชันเล็กน้อยหรือบำรุงรักษาเป็นประจำ ผ้าคอตตอนเนื้อนุ่มหรือแผ่นไมโครไฟเบอร์จะให้ผลลัพธ์ดีที่สุด แต่หากมีคราบออกซิเดชันมาก ให้เริ่มใช้ผ้าขนหนู (terry cloth) เพื่อเพิ่มแรงขัดเล็กน้อย
- ขัดในแนวเส้นตรงหรือวงกลมเล็กๆ โดยใช้แรงกดเบาๆ หากคุณมองเห็นลายเส้นบนอลูมิเนียม ให้ขัดตามแนวลายเส้น หาไม่เช่นนั้น ให้ใช้วงกลมที่ทับซ้อนกันอย่างเบามือ อย่ารีบ—การเคลื่อนไหวที่ช้าและสม่ำเสมอจะช่วยป้องกันรอยหมุนวนและเงาที่ไม่สม่ำเสมอ
- ขัดเงาด้วยผ้าไมโครไฟเบอร์ที่สะอาด หลังจากหนึ่งหรือสองนาที ให้เช็ดคราบโพลิชออกด้วยผ้าไมโครไฟเบอร์ผืนใหม่ ตรวจสอบภายใต้แสงสว่าง—มองหาความเงาที่สม่ำเสมอ ไม่มีฝ้า และรอยหมุนวนน้อยที่สุด
- ทำซ้ำตามต้องการเป็นครั้งสั้น ๆ สำหรับพื้นที่ที่ถูกทอดทิ้งหรือออกซิเดชันรุนแรง ให้ทำซ้ำโดยใช้ตัวประยุกต์ที่นุ่มกว่า (เช่น สำลีก้อน) ในขั้นตอนสุดท้าย การทับซ้อนเล็กน้อยเข้าไปในส่วนก่อนหน้าจะช่วยให้ได้พื้นผิวที่ไร้รอยต่อ
สำหรับมุมแคบหรือรายละเอียดที่ซับซ้อน ให้ลองใช้สำลีก้อนสำหรับเครื่องสำอางค์ในการขัดขั้นตอนสุดท้าย—เนื้อผ้าที่นุ่มมากจะช่วยให้คุณได้ความเงาเพิ่มเติมโดยไม่เกิดรอยใหม่
เมื่อใดควรใช้เครื่องขัดเงา
มีพื้นที่กว้างและเรียบ เช่น แผงรถพ่วง เรือแพ หรือล้อ และต้องการให้ทำงานเร็วขึ้นหรือไม่? เครื่องขัดเงาสามารถช่วยประหยัดเวลา แต่ต้องใช้อย่างระมัดระวังเท่านั้น นี่คือสิ่งที่คุณควรรู้:
- เลือกใช้แผ่นโฟมที่นุ่มสำหรับขั้นตอนการขัดเงาขั้นสุดท้าย แผ่นขนแกะสามารถขัดออกได้เร็ว แต่อาจทิ้งรอยแสงหรือรอยขีดข่วนไว้ ควรจบด้วยแผ่นโฟมเสมอเพื่อผลลัพธ์ที่ดีที่สุด ( ดร. บีสลีย์ ).
- ใช้ความเร็วต่ำและความดันเบา การขัดอลูมิเนียมไม่มีปุ่ม "ยกเลิก" การใช้ความร้อนหรือแรงกดมากเกินไป อาจทำให้โลหะเสียหายหรือบางลง เริ่มต้นด้วยความเร็วต่ำ ตรวจสอบงานบ่อยๆ และอย่าอยู่ในจุดใดจุดหนึ่งนานเกินไป
- ตรวจสอบหลังจากขัดแต่ละครั้ง มองหาความเงาสม่ำเสมอ ไม่มีรอยตามแนวเครื่องขัด และไม่มีรอยใหม่เกิดขึ้น หากเห็นรอยหมุน ให้ขัดใหม่ด้วยแผ่นที่นุ่มกว่าและลดแรงกดลง
สำหรับผู้ใช้งานทั่วไปส่วนใหญ่ การขัดด้วยมือเป็นวิธีที่ปลอดภัยที่สุดในการขัดอลูมิเนียม การขัดด้วยเครื่องเหมาะกับพื้นที่กว้าง เรียบ หรือพื้นที่ที่ออกซิเดชันมากเท่านั้น และควรใช้แผ่นขัดที่เหมาะสมพร้อมทั้งมีประสบการณ์ในการใช้งานแล้ว
- ผลิตภัณฑ์ทำความสะอาด-ขัดเงา: มีสารกัดกร่อนอ่อน ๆ สามารถขจัดออกซิเดชันและรอยขีดข่วนเล็กน้อยได้ดี เหมาะสำหรับฟื้นฟูพื้นผิวที่สูญเสียความเงางาม
- ผลิตภัณฑ์ขัดเงาขั้นตอนสุดท้าย: มีสารกัดกร่อนละเอียดมาก เหมาะสำหรับเพิ่มความเงาขั้นสุดท้าย หรือรักษาพื้นผิวอลูมิเนียมที่มีความเงาอยู่แล้ว ให้ผลลัพธ์เงาสดใสและสะท้อนแสงได้ดีที่สุด
"หยุดเมื่อผ้าเริ่มมีคราบเทาเพียงเล็กน้อย การขัดนานเกินไปจะทำให้เนื้อโลหะบางลง"
สงสัยหรือไม่ว่า ผลิตภัณฑ์ขัดเงาอลูมิเนียมแบบไหนดี ? เลือกผลิตภัณฑ์เฉพาะทางที่มีคุณภาพและเหมาะสำหรับโลหะโดยตรง หลีกเลี่ยงสารเคมีรุนแรงที่ออกแบบมาสำหรับเหล็กหรือสีรถยนต์ หากไม่แน่ใจ ควรทดลองใช้ในบริเวณเล็ก ๆ ที่ไม่เด่นให้เห็นก่อนเสมอ
ปกป้องความเงาของคุณ: สารเคลือบผิวและขี้ผึ้ง
เมื่อเหนื่อยจากการขัดเงาแล้ว อย่าปล่อยให้ความเงาหายไปเร็ว ขั้นตอนสุดท้ายคือการปกป้อง ให้ใช้สารเคลือบโลหะโดยเฉพาะ หรือสารเคลือบเซรามิกที่ออกแบบมาสำหรับอลูมิเนียมโดยเฉพาะ ผลิตภัณฑ์เหล่านี้จะช่วยปิดรูพรุน ทำให้ทำความสะอาดง่ายขึ้น และชะลอการเกิดออกซิเดชันในอนาคต
แบ่งงานเป็นส่วนเล็ก ๆ ทาผลิตภัณฑ์ให้ทั่วพื้นผิว จากนั้นเช็ดคราบที่เหลือออกด้วยผ้าไมโครไฟเบอร์สะอาด ขั้นตอนนี้จะช่วยคงความเงาที่ได้จากการขัดอย่างหนักไว้ได้ และตอบคำถามว่า วิธีทำให้อลูมิเนียมเงางาม —และรักษามันให้เงางามไว้ได้นานขึ้น
เมื่ออลูมิเนียมของคุณเงางามแล้ว คุณก็พร้อมที่จะดูแลชิ้นส่วนพิเศษ เช่น ภาชนะประกอบอาหาร หรือแผงด้านนอก โดยการเลือกวิธีทำความสะอาดและขัดเงาที่เหมาะสมนั้นช่วยสร้างความแตกต่างอย่างมาก
ขั้นตอนที่ 6: ทำความสะอาดหม้อและกระทะอลูมิเนียมอย่างถูกวิธี
คุณเคยมองดูกระทะที่ดำแล้วสงสัยไหมว่า "จะทำความสะอาดหม้ออลูมิเนียมโดยไม่ทำให้เสียหายได้อย่างไร?" หากคุณเคยพยายามขัดจนเหนื่อยหรือใช้ผลิตภัณฑ์ทำความสะอาดผิดประเภท คุณไม่ได้เป็นคนเดียว ข่าวดีคือ ด้วยขั้นตอนง่ายๆ และความรู้ที่ถูกต้อง คุณสามารถฟื้นฟูความเงางามของภาชนะได้ และทำให้มั่นใจว่าปลอดภัยสำหรับทุกมื้ออาหาร มาดูขั้นตอนการทำความสะอาดทั้งด้านในและด้านนอกของหม้อและกระทะที่คุณชอบกัน
การทำความสะอาดด้านในอย่างอ่อนโยนสำหรับภาชนะประกอบอาหาร
เมื่อมันมาถึง วิธีทำความสะอาดภาชนะอลูมิเนียม วิธีที่อ่อนโยนที่สุดมักจะได้ผลดีที่สุด ลองจินตนาการว่าคุณเพิ่งทานอาหารมื้อใหญ่เสร็จ และสังเกตเห็นคราบติดอยู่หรือคราบดำๆ ภายในกระทะ มาดูวิธีจัดการโดยไม่ทำให้เกิดความเสียหาย:
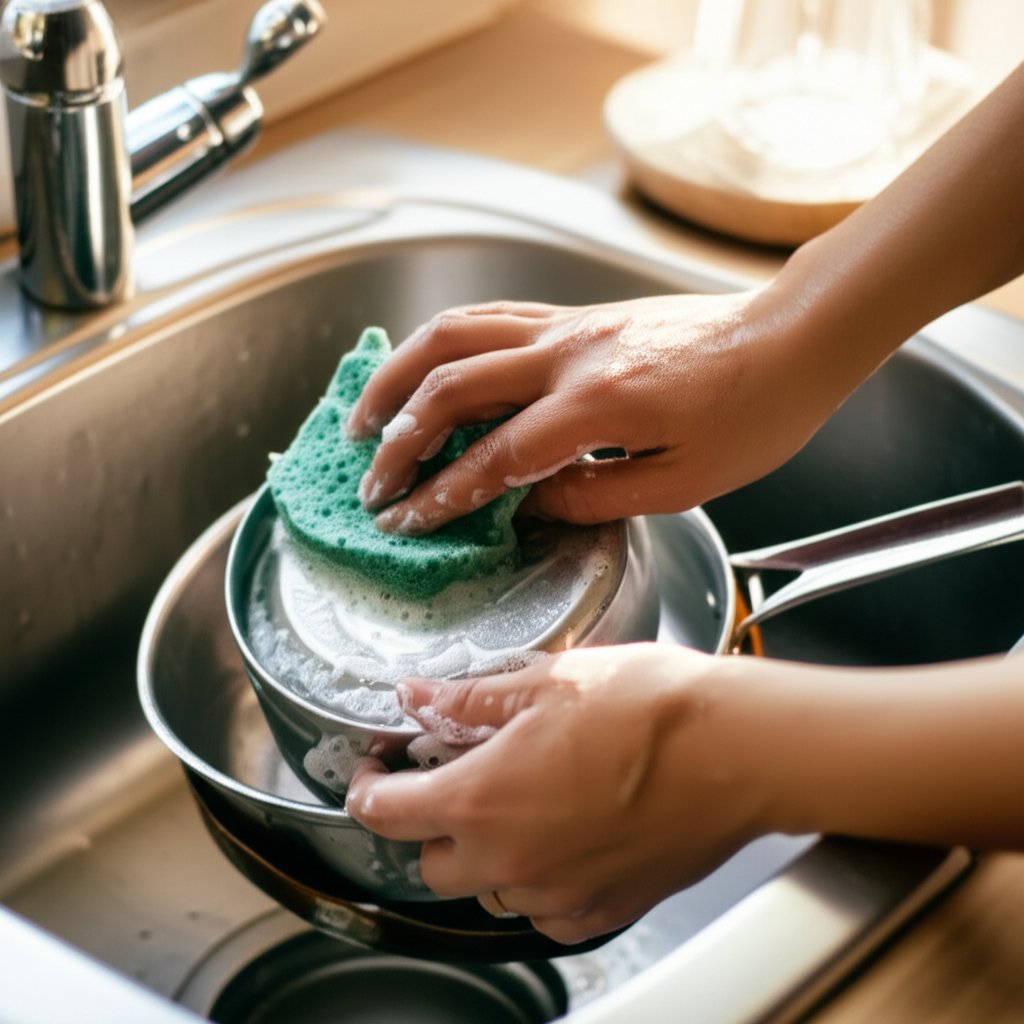
- ล้างด้วยสบู่ล้างจานอ่อนๆ และฟองน้ำนุ่ม ควรปล่อยให้กระทะเย็นสนิทก่อนทำความสะอาดทุกครั้ง—กระทะร้อนอาจทำให้เกิดการบิดงอหรือปฏิกิริยาที่ไม่คาดคิด
- ต้มน้ำผสมกรดที่ปลอดภัยสำหรับอาหารเพื่อกำจัดคราบดำหรือรอยเปื้อน เติมน้ำลงในกระทะและใส่น้ำส้มสายชู น้ำมะนาว หรือผงทาร์ทาริก (cream of tartar) 1 ช้อนโต๊ะต่อท่อน้ำ 4 ลิตร ต้มสารละลายให้ร้อนเล็กน้อย (ประมาณ 50-60°C) จากนั้นปิดไฟและแช่ทิ้งไว้ สิ่งนี้จะช่วยคลายคราบสกปรกและฟื้นฟูการเปลี่ยนสีของกระทะ ( สูตรอาหารทั้งหมด ).
- ปล่อยให้เย็น จากนั้นขัดเบาๆ ใช้แผ่นขัดแบบไม่กัดพื้นผิว หรือด้านหยาบของฟองน้ำเพื่อขจัดคราบที่เหลืออยู่ หลีกเลี่ยงการใช้โลหะขัดกระทะ (steel wool) ซึ่งอาจทำให้อนุภาคฝังแน่นและก่อให้เกิดรอยเปื้อนในอนาคต
- ล้างน้ำให้สะอาดและเช็ดให้แห้งทันที เพื่อป้องกันไม่ให้เกลือแร่ตกค้าง และช่วยให้เครื่องครัวเงางาม ปราศจากกลิ่นไม่พึงประสงค์
สงสัยวิธีทำความสะอาดกระทะอลูมิเนียมที่มีคราบไหม้ติดแน่นอย่างไร? การแช่ทิ้งไว้ตลอดคืนในน้ำอุ่นที่ผสมสบู่สามารถช่วยให้อาหารที่ไหม้ติดอยู่นุ่มลงได้ วันรุ่งขึ้นให้ขัดเบาๆ ด้วยแปรงขนอ่อน—ห้ามใช้ฟองน้ำหยาบหรืออุปกรณ์โลหะเด็ดขาด
ทำให้ภายนอกเงาใสโดยไม่ทำลายพื้นผิว
ด้านนอกของหม้อและกระทะของคุณอาจเกิดคราบเปื้อน คราบออกซิเดชัน หรือคราบมันสะสมได้ นี่คือวิธีทำความสะอาดภายนอกที่ปลอดภัย:
- ใช้สารทำความสะอาดอ่อนๆ และผ้าเนื้ออ่อน เช็ดคราบไขมันและคราบสกปรกบนพื้นผิวออกให้หมด สำหรับคราบที่เหนียวแน่น สามารถใช้ผงฟูผสมน้ำ (ผงฟูและน้ำ) ถูเบาๆ แล้วล้างออก Martha Stewart ).
- สำหรับพื้นผิวด้านนอกที่ออกซิไดซ์ ให้ใช้น้ำยาทำความสะอาดกระทะอลูมิเนียม เลือกผลิตภัณฑ์ที่ระบุว่าปลอดภัยสำหรับอลูมิเนียม และปฏิบัติตามคำแนะนำของผู้ผลิตเกี่ยวกับระยะเวลาที่ควรทิ้งไว้และอัตราการเจือจาง ควรสัมผัสให้นานเท่าที่จำเป็น ล้างให้สะอาดหมดจด และหลีกเลี่ยงกรดที่มีฤทธิ์กัดกร่อนซึ่งอาจทำให้พื้นผิวมืดหมองหรือบุบสลายได้
- ขัดเงาด้วยมือเฉพาะพื้นผิวด้านนอกที่ไม่มีเคลือบหรือขัดเงาแล้วเท่านั้น หากหม้อของคุณไม่มีการเคลือบและคุณต้องการความเงาเพิ่มเติม ให้ใช้น้ำยาขัดโลหะที่ไม่กัดกร่อนและผ้าเนื้อนุ่ม ห้ามขัดภายในที่เป็นอลูมิเนียมชุบหรือผิวไม่ติดกระทะ—พื้นผิวเหล่านี้ถูกออกแบบมาเพื่อความทนทาน ไม่ได้ออกแบบมาเพื่อการขัดเงา
| ประเภทเครื่องครัว | สารทำความสะอาดที่ปลอดภัย | สิ่งที่ควรหลีกเลี่ยง | หมายเหตุ |
|---|---|---|---|
| อลูมิเนียมเปล่า | สบู่อ่อน ๆ สารละลายจากน้ำส้มสายชู/มะนาว หรือผงเบกกิ้งโซดา | เหล็กใยขัด สสารกัดกร่อนที่มีความเข้มข้นสูง เครื่องล้างจาน | เช็ดให้แห้งทันทีเพื่อป้องกันคราบ; ขัดเงาด้านนอกหากต้องการ |
| อลูมิเนียมที่ผ่านการเคลือบด้วยอะโนไดซ์ | สบู่ที่มีค่า pH เป็นกลาง ฟองน้ำเนื้อนุ่ม | สารด่างเข้มข้น สิ่งกัดกร่อน เครื่องล้างจาน (เว้นแต่กรณีที่ผู้ผลิตอนุญาต) | ห้ามขัดเงาด้านในโดยเด็ดขาด; ตรวจสอบรอยขีดข่วนหรือความเสียหายก่อนใช้งาน |
| อลูมิเนียมเคลือบกันติด | น้ำยาล้างอ่อนๆ, ฟองน้ำนุ่ม | แผ่นขัดหยาบ, อุปกรณ์โลหะ, สารเคมีกัดกร่อน | ห้ามขัดเงา; หลีกเลี่ยงการแช่นานเกินไป |
เคล็ดลับสำคัญ: ห้ามใช้เหล็กใยขัดกระทะอลูมิเนียมเด็ดขาด เพราะเศษเหล็กอาจฝังแน่นจนเกิดคราบดำที่กำจัดยากและทำให้พื้นผิวเสียหายเร็วขึ้น ควรใช้เครื่องมือที่นุ่มและไม่ก่อให้เกิดรอยขีดข่วนในทุกขั้นตอน
เกณฑ์การยอมรับ: หลังทำความสะอาดแล้ว หม้อกระทะของคุณควรไม่มีคราบแป้งขาวๆตกค้าง พื้นผิวด้านนอกควรเงา และพื้นผิวด้านในควรปราศจากกลิ่นและเศษอาหารเก่า หากยังเห็นจุดหรือคราบเปื้อนอยู่ ให้ทำซ้ำเฉพาะขั้นตอนที่อ่อนโยนที่สุดเท่านั้น—ห้ามใช้สารเคมีหรือการขัดถูที่รุนแรงจนอาจทำลายพื้นผิว
เมื่อเครื่องครัวของคุณสะอาดเงาวับและปลอดภัยแล้ว คุณก็พร้อมจะรับมือกับโครงการล้างอลูมิเนียมขนาดใหญ่ขึ้น เช่น ผนังด้านนอกของบ้านพ่วง, ตัวรถพ่วง หรือกรอบหน้าต่าง ขั้นต่อไปคือการเรียนรู้วิธีจัดการพื้นผิวอลูมิเนียมขนาดใหญ่หรือด้านนอกอาคารโดยไม่ให้เกิดรอยน้ำหรือความเสียหาย
ขั้นตอนที่ 7: ทำความสะอาดอลูมิเนียมด้านนอกโดยไม่ให้เกิดรอยน้ำ
เมื่อคุณมองไปที่ตัวรถพ่วงที่สภาพเก่า ผนังด้านข้างมีรอยเปื้อน หรือกรอบหน้าต่างที่หมองคล้ำ คุณเคยสงสัยหรือไม่ว่า "ฉันจะทำให้มันกลับมาเงางามอีกครั้งได้อย่างไร โดยไม่สร้างความยุ่งยากหรือทำให้อะไรเสียหาย" การทำความสะอาดชิ้นส่วนอลูมิเนียมขนาดใหญ่หรือชิ้นส่วนภายนอกอาคาร เช่น รถพ่วง ถัง รางน้ำ หรือผนังด้านข้าง อาจดูเหมือนเรื่องใหญ่ แต่ถ้าใช้วิธีที่ถูกต้อง คุณจะได้ผลลัพธ์ระดับมืออาชีพ และหลีกเลี่ยงข้อผิดพลาดที่พบบ่อยที่สุด
การตั้งค่าล้างทำความสะอาดภายนอกที่มีความเสี่ยงต่ำ
จินตนาการถึงการเตรียมตัวสำหรับการ ล้างรถพ่วงอลูมิเนียม หรือการทำความสะอาดผนังอลูมิเนียมที่ยาวเหยียด ความลับคือการควบคุมปริมาณน้ำ สารเคมี และระยะเวลาในการสัมผัสให้เหมาะสม เพื่อให้ได้พื้นผิวที่สม่ำเสมอ ปราศจากคราบเปื้อนหรือรอยน้ำไหลย้อย นี่คือลำดับขั้นตอนการล้างทำความสะอาดที่ได้ผลและปลอดภัย:
- ล้างน้ำให้ทั่วจากด้านบนลงล่าง ใช้สายยางหรือเครื่องฉีดน้ำแรงดันต่ำถึงปานกลางเพื่อชะล้างเศษสิ่งสกปรกที่ติดอยู่ ควรป้องกันไม่ให้น้ำกระเด็นโดนกระจก พลาสติก สติกเกอร์ และซีลยาง เพราะกรดในสารทำความสะอาดอลูมิเนียมอาจทำให้วัสดุเหล่านี้หมองหรือเปื้อนได้
- ล้างด้วยสารทำความสะอาดที่มีค่า pH เป็นกลาง และใช้แปรงที่นุ่ม เลือกใช้สบู่อ่อนๆ สำหรับทำความสะอาดคราบสกปรกและคราบฝุ่นถนนเป็นประจำ แบ่งพื้นที่ทำความสะอาดเป็นส่วนที่จัดการได้ ขัดเบาๆ เพื่อป้องกันการขีดข่วน ขั้นตอนนี้มีความสำคัญอย่างยิ่งต่อพื้นผิวที่ทาสี อะโนไดซ์ หรือผงเคลือบอลูมิเนียม เพราะสารเคมีที่รุนแรงอาจทำให้พื้นผิวขุ่นหรือลอกล่อนได้
- สำหรับการออกซิเดชันที่สม่ำเสมอของอลูมิเนียมเปลือย (เช่น รถพ่วง) ให้ใช้น้ำยาล้างกรดเฉพาะสำหรับอลูมิเนียม ใช้น้ำยาทำความสะอาดอลูมิเนียมแบบโฟมด้วยเครื่องฉีดโฟม โดยทำงานทีละส่วนเล็กๆ เพื่อให้การเคลือบสม่ำเสมอ ทิ้งน้ำยาไว้ประมาณ 30–45 วินาที หรือตามที่ฉลากผลิตภัณฑ์หรือเอกสารข้อมูลความปลอดภัย (SDS) กำหนด—อย่าปล่อยให้น้ำยาแห้งติดอยู่บนพื้นผิว Hydro-Chem Systems ).
- ล้างออกให้สะอาดอย่างทั่วถึง หลังจากครบเวลาที่กำหนด ให้ล้างออกให้สะอาดทันทีจากด้านบนลงล่างด้วยน้ำสะอาด เพื่อป้องกันไม่ให้เกิดรอยน้ำและมั่นใจว่าไม่มีสารตกค้างเหลืออยู่ หากฉลากผลิตภัณฑ์ระบุไว้ ให้ทำให้พื้นผิวเป็นกลางด้วยสบู่อ่อนชนิดด่าง ล้างซ้ำก่อนล้างขั้นสุดท้ายอีกครั้ง
- ทำให้แห้งและตรวจสอบ ใช้ผ้าไมโครไฟเบอร์สะอาดหรือปล่อยให้แห้งเองตามอากาศ ตรวจสอบความสม่ำเสมอ หากเห็นรอยเปื้อนหรือจุดที่หมองคล้ำ ให้รักษาเฉพาะจุดเหล่านั้นด้วยกรดที่อ่อนลง แทนที่จะทากรดเข้มข้นซ้ำทั่วทั้งพื้นที่
การใช้กรดควบคุมสำหรับออกไซด์หนาแน่น
บางครั้งการล้างแบบทั่วไปอาจไม่เพียงพอที่จะทำให้อลูมิเนียมที่ออกซิไดซ์และเปลือยแสงขึ้นมาอีกครั้ง นั่นคือเวลาที่ควรใช้การล้างกรดอลูมิเนียมแบบเฉพาะจุด การล้างกรดอลูมิเนียม แต่ต้องควบคุมอย่างเคร่งครัด สารทำความสะอาดที่มีความเป็นกรดสามารถกำจัดออกไซด์ได้อย่างรวดเร็ว แต่ก็อาจทำให้พื้นผิวเงาหมองคล้ำลง หรือทำลายวัสดุที่อยู่ใกล้เคียงได้ หากทิ้งไว้นานเกินไปหรือแห้งแล้ว
ระวัง: อย่าใช้กรดล้างล้อที่มีฤทธิ์รุนแรงหรือ กรดมารีเนติก (Muriatic acid) กับอลูมิเนียม เว้นแต่ผู้ผลิตจะอนุญาตอย่างชัดเจน กรดมารีเนติกและกรดแรงอื่นๆ ที่คล้ายกันสามารถกัดพื้นผิวให้เป็นรอยบุ๋ม ทำให้อลูมิเนียมเปราะ หรือเกิดคราบสีถาวร โดยเฉพาะหากทิ้งไว้นานเกินไปหรือใช้กับพื้นผิวที่เคลือบผิวอะโนไดซ์หรือทาสีแล้ว ควรปฏิบัติตามคำแนะนำบนฉลากและคู่มือความปลอดภัย (SDS) เกี่ยวกับการเจือจางและระยะเวลาสัมผัสเสมอ
| ประเภทการเสร็จสิ้น | สารทำความสะอาดแบบเป็นกลาง | ตัวถอดคราบไขมันแบบด่าง | ตัวทำความสะอาดอลูมิเนียมแบบกรด | หลีกเลี่ยง |
|---|---|---|---|---|
| อลูมิเนียมเปล่า | ปลอดภัย | ปลอดภัย (ล้างน้ำให้สะอาด) | ปลอดภัย (ใช้เวลาน้อย ล้างน้ำเร็ว) | ปล่อยกรดให้แห้ง; ขัดมากเกินไป |
| อลูมิเนียมที่ผ่านการเคลือบด้วยอะโนไดซ์ | ปลอดภัย | ใช้ด้วยความระมัดระวัง | โดยทั่วไปควรหลีกเลี่ยง | กรดทิ้งไว้นาน แผ่นขัดขึ้น |
| พื้นผิวที่ถูกทาสี/เคลือบผง (Painted/Powder-Coated) | ปลอดภัย | ใช้ด้วยความระมัดระวัง | หลีกเลี่ยง | สารทำละลาย กรด แรงดันสูงใกล้ซีลยาง |
เพื่อผลลัพธ์ที่ดีที่สุดในการทำความสะอาดตัวถังอลูมิเนียม ควรทำเสมอ:
- ทดลองใช้ในพื้นที่เล็กๆ ที่มองไม่เห็นก่อน
- ทำงานเป็นส่วนเล็กๆ เพื่อควบคุมระยะเวลาที่สารเคมีสัมผัสพื้นผิวและป้องกันไม่ให้เกิดรอยน้ำ
- ล้างน้ำให้สะอาดและทันทีหลังจากแต่ละขั้นตอน
- ตามด้วยการล้างด้วยสารทำความสะอาดที่มีค่า pH เป็นกลาง เพื่อขจัดคราบกรดที่เหลืออยู่
- ห้ามใช้กรดที่ไม่ได้ผสมเจือจางหรือกรดทั่วไป—ให้เลือกใช้ผลิตภัณฑ์ที่ระบุว่าใช้ได้กับอลูมิเนียม และปฏิบัติตามคำแนะนำด้านความปลอดภัยทุกข้อ
เกณฑ์การยอมรับ: เมื่อคุณทำเสร็จ ผิวหน้าควรดูสม่ำเสมอ เรียบเนียน ปราศจากคราบหรือรอยน้ำ ยาง กระจก และชิ้นส่วนที่ทาสีควรไม่ได้รับผลกระทบ หากคุณเห็นว่าผิวดูหมองหรือเสียหาย ให้หยุดทันทีและพิจารณาใหม่ก่อนดำเนินการต่อ บางครั้งการทำซ้ำด้วยวิธีอ่อนๆ สองครั้งอาจดีกว่าทำรุนแรงเพียงครั้งเดียว
เมื่อตอนนี้อลูมิเนียมภายนอกของคุณสะอาดและปราศจากคราบแล้ว คุณก็พร้อมที่จะแก้ปัญหาคราบเปื้อนหรือออกซิเดชันที่ยังคงอยู่ รวมถึงทราบได้อย่างชัดเจนว่าเมื่อไรควรเรียกผู้เชี่ยวชาญมาช่วย
ขั้นตอนที่ 8: แก้ปัญหาคราบเปื้อน ออกซิเดชัน และการกัดกร่อนบนอลูมิเนียม
เคยทำความสะอาดพื้นผิวอลูมิเนียมแล้วพบจุดที่ล้างยังไงก็ไม่ออก มีคราบสกปรกประหลาด หรือบริเวณที่หมองคล้ำจนไม่เงาเหมือนเดิมหรือไม่? ฟังดูน่าหงุดหงิดใช่ไหมล่ะ? ก่อนที่คุณจะหันไปใช้สารเคมีที่แรงขึ้น หรือแผ่นขัดหยาบ ลองมาทำความเข้าใจก่อนว่าคราบเหล่านี้แท้จริงแล้วคืออะไร และวิธีแก้ไขโดยไม่ทำให้อลูมิเนียมเสียหายมากขึ้น หากคุณกำลังเผชิญกับคราบบนอลูมิเนียมที่ไม่ทราบสาเหตุ อลูมิเนียมเกิดออกซิเดชัน หรือแม้แต่การกัดกร่อนที่ลึกกว่าที่คิด คู่มือนี้จะช่วยให้คุณแก้ปัญหาได้ด้วยตนเอง และรู้ว่าเมื่อไรควรเรียกช่างมืออาชีพ
แก้ไขปัญหาอลูมิเนียมทั่วไปให้รวดเร็ว
- คราบขาวเป็นผง? โดยปกติแล้วมักเป็นออกซิเดชันบนพื้นผิว ลองใช้สารล้างแบบกลาง (Neutral wash) ก่อน หากคราบผงยังคงอยู่ ให้ทดสอบใช้ตัวช่วยกำจัดออกซิเดชันของอลูมิเนียมแบบอ่อนโยนในบริเวณเล็ก ๆ หากพื้นผิวกลับมาเงางามขึ้น และผ้ามีคราบสีเทาลดลง แสดงว่าคุณกำลังดำเนินการในทิศทางที่ถูกต้อง
- คราบสีเหลืองหรือสีน้ำตาลใกล้กับตัวยึดติดตั้ง? น่าจะเป็นคราบกัดกร่อนแบบกาลวานิก ซึ่งเกิดจากการสัมผัสกันระหว่างอลูมิเนียมกับโลหะที่ต่างชนิดกัน (เช่น ตะปูเหล็ก) ควรทำความสะอาดอย่างเบามือด้วยสบู่ที่มีค่า pH เป็นกลาง ป้องกันไม่ให้สารทำความสะอาดเข้าถึงชิ้นส่วนยึดขณะทำความสะอาด และพิจารณาเปลี่ยนชิ้นส่วนยึดเป็นอลูมิเนียมหรือสแตนเลสเพื่อป้องกันคราบในอนาคต
- คราบดำหลังการขัดเงา? นี่คือคราบออกไซด์ที่หลุดล่อนหรือตกค้างอยู่ ซึ่งพบได้บ่อยหลังการขัดเงา หรือเมื่อเคลือบผิวบางหรือผิวเสื่อมสภาพ ให้ดำเนินการต่อโดยใช้ผลิตภัณฑ์ขัดเงาที่ไม่มีฤทธิ์กัดกร่อน และเช็ดบ่อยๆ ด้วยผ้าสะอาด หากยังมีคราบดำอยู่ ควรทบทวนกระบวนการทำความสะอาดใหม่ และตรวจสอบว่าชั้นเคลือบผิวเสื่อมสภาพหรือไม่
- รอยน้ำแห้งหรือคราบน้ำ? มักเกิดจากแร่ธาตุที่ตกค้างจากน้ำกระด้าง ลองเช็ดเบาๆ ด้วยสารละลาย vinegar ที่เจือจาง (ใช้น้ำส้มสายชูสองช้อนโต๊ะต่อน้ำหนึ่งควอต) จากนั้นล้างน้ำอีกครั้งและเช็ดให้แห้งทันที วิธีนี้จะช่วยกำจัดคราบน้ำบนอลูมิเนียมโดยไม่ทำให้พื้นผิวถูกกัดกร่อน
- รอยบุ๋มหรือร่องเล็กๆ? การบุ๋ม (Pitting) เป็นสัญญาณของสนิมที่ลึกเกินกว่าการทำความสะอาดพื้นผิว—มักเกิดจากความชื้น เกลือ หรือสารเคมีรุนแรงที่สัมผัสมานาน คุณสามารถทำความสะอาดบริเวณดังกล่าวเพื่อให้อยู่ในสภาวะเสถียร แต่รอยบุ๋มไม่สามารถขัดให้เรียบได้ หากพบว่ามีรอยบุ๋มมากหรือลึกมาก อาจต้องทำสีใหม่หรือขอความช่วยเหลือจากผู้เชี่ยวชาญ
รู้ว่าเมื่อใดควรเรียกช่างผู้เชี่ยวชาญ
| ปัญหา | สาเหตุที่เป็นไปได้ | ขั้นตอนที่แนะนำ | เมื่อใดควรส่งต่อ |
|---|---|---|---|
| จุดขาวบนอลูมิเนียม | การปนเปื้อนบนพื้นผิว การออกซิเดชัน หรือข้อบกพร่องของชั้นเคลือบ | ทำความสะอาดด้วยสารซักฟอกอ่อนๆ; ทดสอบการใช้ตัวลบรอยคราบอลูมิเนียมหากจำเป็น | หากจุดยังคงอยู่หลังจากทำความสะอาดอย่างระมัดระวัง หรือหากชั้นเคลือบเสียหาย |
| คราบเหลือง/น้ำตาลใกล้ชิ้นส่วนยึด | ปฏิกิริยาไฟฟ้าเคมี (โลหะต่างชนิดกัน) | ทำความสะอาดอย่างอ่อนโยน; แทนที่ชิ้นส่วนยึดด้วยโลหะที่เข้ากันได้ | หากคราบกลับมาปรากฏเร็วหรือโลหะถูกกัดกร่อนลึก |
| คราบดำหลังการขัดเงา | เศษออกไซด์ ชั้นเคลือบเสื่อมสภาพ | ดำเนินการต่อโดยใช้สารขัดเงาที่ไม่กัดกร่อน เปลี่ยนผ้าบ่อยๆ | หากคราบดำยังไม่หายหลังจากขัดหลายครั้ง; ตรวจสอบว่าชั้นเคลือบเสื่อมสภาพหรือไม่ |
| คราบน้ำบนอลูมิเนียม | ตะกรันแร่จากน้ำกระด้าง | เช็ดด้วยน้ำส้มสายชูเจือจาง ล้างน้ำอีกครั้งและเช็ดให้แห้ง | หากคราบยังคงอยู่แม้จะทำความสะอาดด้วยวิธีอ่อนโยนซ้ำๆ |
| การแตกร้าว/การกัดกร่อน | สภาพแวดล้อมที่สัมผัส เช่น เกลือ สารเคมีที่มีฤทธิ์แรง | ทำความสะอาดเพื่อให้เกิดความเสถียร; ควรทราบว่ารอยบุบหรือรอยตำหนิจะไม่หายไปจากการขัดเงา | หากการแตกร้าวมีความลึกมาก กว้างขวาง หรือส่งผลต่อความสมบูรณ์ทางโครงสร้าง |
ลองเพิ่มระดับความเข้มข้นทีละขั้น หากความสวยงามไม่ดีขึ้น ให้หยุดทันที
เกณฑ์การยอมรับ: หลังจากดำเนินการแก้ไขปัญหาแล้ว ควรมองเห็นความสม่ำเสมอที่ดีขึ้น—ไม่มีฝ้าใหม่ ไม่มีจุดบกพร่องที่แย่ลง และมีคราบน้อยลงบนผ้า หากพื้นผิวเริ่มเกิดฟองอย่างรุนแรง มีสีเข้มไม่สม่ำเสมอ หรือรู้สึกขรุขระหลังจากใช้สารทำความสะอาด ให้ล้างออกทันทีและทบทวนวิธีการของคุณ การทำความสะอาดมากเกินไปอาจก่อให้เกิดผลเสียมากกว่าผลดี โดยเฉพาะกับพื้นผิวที่เก่าหรือละเอียดอ่อน
โปรดตรวจสอบแผ่นข้อมูลความปลอดภัยของผลิตภัณฑ์ (SDS) เพื่อรับข้อมูลการปฐมพยาบาลและการทำให้เป็นกลาง และศึกษาคู่มือการดูแลรักษาพื้นผิวที่ผู้ผลิตแนะนำเพื่อขอคำแนะนำเฉพาะเจาะจงสำหรับผลิตภัณฑ์ หากคุณไม่แน่ใจเกี่ยวกับคราบ หรือการทำความสะอาดอลูมิเนียมที่ถูกกัดกร่อนแล้วไม่เห็นผลลัพธ์ที่ดีขึ้นจากการลองทำอย่างระมัดระวังหลายครั้ง ก็ถึงเวลาที่ควรปรึกษาผู้เชี่ยวชาญ ในบางครั้งทางเลือกที่ปลอดภัยที่สุดคือการป้องกันความเสียหายเพิ่มเติม และขอความช่วยเหลือจากผู้เชี่ยวชาญสำหรับปัญหาที่รุนแรงหรือแก้ไขไม่หาย
ด้วยทักษะในการแก้ปัญหาที่คุณมีอยู่นี้ คุณพร้อมแล้วที่จะรักษาพื้นผิวอลูมิเนียมให้คงความสวยงามได้ตลอดเวลา และรู้ว่าเมื่อใดควรหยุดและปกป้องพื้นผิวไว้ในระยะยาว ตอนต่อไป คุณจะได้เรียนรู้ว่าการบำรุงรักษาเป็นประจำและการใช้ทรัพยากรที่เหมาะสมสามารถช่วยให้คุณหลีกเลี่ยงปัญหาเหล่านี้ได้โดยสิ้นเชิง
ขั้นตอนที่ 9: บำรุงรักษาการป้องกัน และค้นหาแหล่งข้อมูลที่เชื่อถือได้สำหรับการทำความสะอาดอลูมิเนียม
เคยไหมที่ใช้เวลานานหลายชั่วโมงทำความสะอาดอลูมิเนียมให้เงางาม แต่ไม่นานคราบหรือความหมองกลับมาอีกภายในไม่กี่สัปดาห์ หากคุณต้องการผลลัพธ์ที่คงทน ความลับที่แท้จริงไม่ได้อยู่แค่เพียงการรู้วิธี ทำความสะอาดอลูมิเนียม —เป็นการสร้างกิจวัตรการบำรุงรักษาอย่างง่ายที่ทำให้พื้นผิวของคุณคงความสวยงามอยู่เสมอ ปีแล้วปีเล่า นี่คือวิธีการทำความสะอาดอลูมิเนียมอย่างง่าย ป้องกันปัญหาในอนาคต และทราบว่าจะไปหาคำแนะนำจากผู้เชี่ยวชาญและอะไหล่คุณภาพได้ที่ไหน
การบำรุงรักษาเพื่อรักษาความเงางามของอลูมิเนียม
จินตนาการว่าคุณเพิ่งทำความสะอาดกรอบหน้าต่าง รถพ่วง หรือผนังหลังเคาน์เตอร์ครัวให้เงาสะอาดอย่างสมบูรณ์แบบ แล้วคุณจะรักษามันไว้ได้อย่างไร คำตอบคือ: พฤติกรรมการบำรุงรักษาอย่างสม่ำเสมอ และผลิตภัณฑ์ที่เหมาะสม นี่คือแผนการดูแลที่เรียบง่ายและได้ผลจริง:
- ล้างด้วยสารละลายที่เป็นกลางและเช็ดให้แห้งทันที ใช้สารซักฟอกที่มีค่า pH เป็นกลาง ผ้าหรือฟองน้ำนุ่มๆ เพื่อขจัดฝุ่น คราบสกปรก และมลพิษ ล้างให้สะอาดและเช็ดให้แห้งด้วยผ้าไมโครไฟเบอร์เพื่อป้องกันคราบน้ำ ในสภาพแวดล้อมภายในบ้านโดยทั่วไป การล้างอย่างอ่อนโยนปีละสองครั้งก็เพียงพอแล้ว แต่ในพื้นที่ชายฝั่งทะเลหรือพื้นที่ที่มีมลพิษสูง อาจต้องทำความสะอาดทุกเดือน
- ขัดเงาเบาๆ ก็ต่อเมื่อจำเป็นเท่านั้น สำหรับอลูมิเนียมเปลือยหรืออลูมิเนียมเงา ควรทำการขัดเงาด้วยผลิตภัณฑ์ที่ไม่กัดกร่อนปีละครั้ง หรือเมื่อจำเป็น หลีกเลี่ยงการขัดบ่อยเกินไป เพราะอาจทำให้โลหะบางลงและผิวสัมผัสหมองคล้ำได้
- ปกป้องด้วยขี้ผึ้งหรือสารเคลือบผิวที่ใช้ร่วมได้ หลังทำความสะอาดและขัดเงาแล้ว ให้ใช้ขี้ผึ้งหรือสารเคลือบที่ออกแบบมาสำหรับอลูมิเนียมโดยเฉพาะ ชั้นปกป้องนี้จะช่วยป้องกันสิ่งสกปรก ชะลอการเกิดออกซิเดชัน และทำให้ทำความสะอาดง่ายขึ้นในอนาคต โปรดปฏิบัติตามคำแนะนำของผู้ผลิตเสมอ และตรวจสอบฉลากหรือเอกสารข้อมูลความปลอดภัย (SDS) เพื่อให้แน่ใจว่าผลิตภัณฑ์ใช้ร่วมกันได้
- เก็บโลหะต่างชนิดและสารเคมีกัดกร่อนไว้ห่างๆ ควรเก็บรักษาหรือติดตั้งอลูมิเนียมให้ห่างจากตัวยึดเหล็ก สังกะสี หรือทองเหลือง ถ้าเป็นไปได้ เพราะอาจก่อให้เกิดคราบกัดกร่อนแบบไฟฟ้าเคมี (Galvanic Staining) ห้ามใช้กรดเข้มข้น ด่างเข้มข้น หรือแผ่นขัดหยาบ ควรใช้เฉพาะผลิตภัณฑ์ที่ระบุว่าปลอดภัยสำหรับอลูมิเนียม และหลีกเลี่ยงการผสมสูตรทำความสะอาดอลูมิเนียมเอง เว้นแต่คุณมั่นใจว่าสารนั้นมีค่า pH เป็นกลางและไม่เกิดปฏิกิริยา
| สิ่งแวดล้อม | ช่วงเวลาการบำรุงรักษาที่แนะนำ | หมายเหตุ |
|---|---|---|
| ภายในอาคาร (มลพิษต่ำ) | ปีละสองครั้ง | ล้างและเช็ดให้แห้งอย่างเบามือ; ตรวจดูรอยขีดข่วน |
| เขตเมือง/อุตสาหกรรม | ทุก 3-6 เดือน | กำจัดมลภาวะและเศษสิ่งสกปรกบ่อยครั้งขึ้น |
| ชายฝั่ง/ทะเล | รายเดือน | เกลือทำให้การออกซิเดชันเร็วขึ้น—ล้างและเช็ดให้แห้งบ่อยๆ |
ช่วงเวลาเหล่านี้ถูกกำหนดตามแนวทางปฏิบัติที่ดีที่สุดจากคู่มือภาคอุตสาหกรรม โปรดปรับเปลี่ยนตามสภาพแวดล้อมและลักษณะการใช้งานในพื้นที่ของคุณ
ค้นหาคำแนะนำเกี่ยวกับการตกแต่งและอะไหล่ได้ที่ใด
สงสัยหรือไม่ว่าสารทำความสะอาดชนิดใดที่ดีที่สุดสำหรับอลูมิเนียมในงานใช้งานเฉพาะของคุณ หรือคุณอาจกำลังมองหาคำแนะนำที่เชื่อถือได้เกี่ยวกับการตกแต่งพื้นผิว หรืออะไหล่ทดแทนสำหรับอลูมิเนียมที่ใช้ในอุตสาหกรรมยานยนต์ สถาปัตยกรรม หรืออุตสาหกรรมทั่วไป ให้เริ่มต้นด้วยคู่มือการดูแลรักษาของผู้ผลิต และเอกสารความปลอดภัยของสารเคมี (SDS) สำหรับสารทำความสะอาดหรือผลิตภัณฑ์เงาที่คุณใช้อยู่—เอกสารเหล่านี้จะให้คำแนะนำที่สำคัญเกี่ยวกับการใช้งานอย่างปลอดภัย การเจือจาง และความเข้ากันได้
สำหรับการอัดรีดอลูมิเนียมในอุตสาหกรรมยานยนต์ เช่น ชิ้นส่วนตกแต่ง แผงตัวถัง หรือชิ้นส่วนที่เป็นกล่อง คุณภาพของพื้นผิวสำเร็จรูปมีความสำคัญเท่าเทียมกับเทคนิคในการทำความสะอาด ชิ้นส่วนที่ผ่านการอัดรีดและตกแต่งผิวได้ดีนั้นทำความสะอาดง่าย มีความต้านทานการกัดกร่อน และลดความเสี่ยงของการเกิดรอยกัดกร่อนหรือคราบเปื้อนระหว่างทำความสะอาด หากคุณกำลังมองหาหรือกำหนดเงื่อนไขชิ้นส่วนอลูมิเนียมใหม่ การเลือกผู้จัดหาที่เข้าใจทั้งวิศวกรรมและการคงทนของผิวสำเร็จรูป จะช่วยให้คุณได้รับผลตอบแทนที่ดี สำรวจชิ้นส่วนอลูมิเนียมอัดรีด ที่ Shaoyi Metal Parts Supplier เพื่อรับข้อมูลเชิงลึกในระดับวิศวกรรมเกี่ยวกับตัวเลือกพื้นผิวสำเร็จรูปที่ทำความสะอาดง่าย และทนทานต่อสภาพแวดล้อมที่ยากลำบาก ความเชี่ยวชาญของพวกเขาในการบำบัดผิวช่วยให้คุณได้รับชิ้นส่วนที่ทำความสะอาดง่ายและคงความเงางามได้ยาวนาน แม้กระนั้นควรปฏิบัติตามหลักการที่ถูกต้องเกี่ยวกับการทำความสะอาดและการบำรุงรักษาอลูมิเนียมหลังติดตั้งเสมอ (หมายเหตุ: Shaoyi เป็นผู้จัดหาชิ้นส่วน ไม่ใช่สารทำความสะอาด โปรดตรวจสอบเอกสารข้อมูลความปลอดภัย (SDS) และคู่มือการดูแลรักษาผลิตภัณฑ์ก่อนใช้สารทำความสะอาดอลูมิเนียมใด ๆ หรือสารทำความสะอาดอลูมิเนียมสูตรทำเองกับชิ้นส่วนของพวกเขาเสมอ)
สำหรับการทำความสะอาดหน้าต่าง ผนังด้านนอก หรือองค์ประกอบทางสถาปัตยกรรม โปรดดูคำแนะนำการดูแลรักษาจากผู้ผลิตเดิม หรือตรวจสอบมาตรฐานอุตสาหกรรม (เช่น AAMA 609/610 สำหรับอลูมิเนียมเคลือบผิวหรือทาสี) หากคุณไม่แน่ใจ ควรทดลองใช้สารทำความสะอาดใหม่กับพื้นที่เล็กๆ ที่มองไม่เห็นก่อน และถ่ายรูปเก็บไว้เป็นหลักฐานเพื่อการอ้างอิงในอนาคต
การล้างที่ปลอดภัยที่สุดคือการล้างที่คุณไม่ต้องทำซ้ำ—ปกป้องพื้นผิวให้คงสภาพเดิมไว้ จากนั้นบำรุงรักษาให้เบาบางที่สุด
ด้วยการสร้างกิจวัตรการบำรุงรักษาอย่างสม่ำเสมอ และเลือกใช้ชิ้นส่วนอลูมิเนียมคุณภาพดีที่ผ่านการตกแต่งพื้นผิวมาอย่างดี คุณจะประหยัดเวลา ลดความจำเป็นในการล้างอย่างรุนแรง และรักษาพื้นผิวให้เงางามไปอีกหลายปี นี่คือคำตอบที่ชาญฉลาดที่สุดสำหรับคำถามว่าจะทำความสะอาดอลูมิเนียมอย่างไรให้คงความสวยงามได้ยาวนาน
คำถามที่พบบ่อยเกี่ยวกับการทำความสะอาดอลูมิเนียม
1. วิธีที่ปลอดภัยที่สุดในการทำความสะอาดอลูมิเนียมโดยไม่ทำให้เกิดความเสียหายคืออะไร?
วิธีที่ปลอดภัยที่สุดคือใช้สารซักฟอกอ่อนๆ และผ้าไมโครไฟเบอร์นุ่ม หลีกเลี่ยงสารเคมีรุนแรง เช่น น้ำยาฟอกขาวหรือแผ่นขัดหยาบ และควรทดสอบน้ำยาทำความสะอาดในบริเวณที่มองไม่เห็นก่อน สำหรับคราบเหนียวแน่น สามารถใช้น้ำส้มสายชูเจือจางช่วยได้ แต่ต้องล้างออกให้หมดเพื่อป้องกันการกัดเซาะพื้นผิว ควรตรวจสอบคำแนะนำของผู้ผลิตเสมอเพื่อคำแนะนำเฉพาะ
2. สามารถใช้น้ำส้มสายชูทำความสะอาดพื้นผิวอลูมิเนียมได้หรือไม่?
ได้ น้ำส้มสายชูขาวเจือจางสามารถกำจัดคราบแร่ธาตุและคราบฝ้าบางเบาออกจากอลูมิเนียมได้ อย่างไรก็ตาม ควรใช้ในระยะเวลาสั้นๆ และล้างออกให้หมดทันทีเพื่อป้องกันไม่ให้พื้นผิวดูหมองหรือเสียหาย วิธีนี้มีประสิทธิภาพโดยเฉพาะกับภาชนะในครัวและคราบที่อยู่ภายนอก แต่ต้องหลีกเลี่ยงการสัมผัสนานเกินไปเสมอ
3. ฉันจะกำจัดออกซิเดชันออกจากอลูมิเนียมได้อย่างไร?
เพื่อขจัดคราบออกซิเดชัน ให้เริ่มต้นด้วยการใช้น้ำยาขัดโลหะชนิดไม่กัดกร่อนขัดลงบนจุดทดสอบ หากจำเป็น ให้ใช้น้ำยาขจัดคราบอะลูมิเนียมออกซิเดชันโดยเฉพาะ โดยปฏิบัติตามคำแนะนำบนฉลากสำหรับการเจือจางและระยะเวลาสัมผัส สำหรับคราบฝังแน่น สามารถใช้แผ่นขัดชนิดละเอียดพิเศษที่ไม่ทำให้เกิดรอยขีดข่วนได้อย่างระมัดระวัง ล้างออกและเช็ดให้แห้งสนิทหลังการใช้งานทุกครั้ง
4. ฉันควรหลีกเลี่ยงอะไรบ้างเมื่อทำความสะอาดอลูมิเนียม?
หลีกเลี่ยงการใช้สารฟอกขาว กรดเข้มข้น หรือแผ่นขัดหยาบ เพราะอาจทำลายชั้นออกไซด์ป้องกันและทำให้เกิดรอยบุบหรือสีซีดจาง ห้ามผสมสารเคมีทำความสะอาด และควรหลีกเลี่ยงการใช้เหล็กนุ่ม โดยเฉพาะกับภาชนะประกอบอาหาร เพื่อป้องกันเศษเหล็กฝังแน่นและคราบเปื้อน ควรเลือกใช้ผลิตภัณฑ์ที่ระบุบนฉลากว่าปลอดภัยสำหรับอลูมิเนียม
5. ฉันจะรักษาพื้นผิวอลูมิเนียมให้เงางาม และลดความจำเป็นในการทำความสะอาดในอนาคตได้อย่างไร?
ล้างเป็นประจำด้วยตัวทำความสะอาดที่มีค่า pH เป็นกลาง ทำให้แห้งอย่างรวดเร็ว และทาแว็กซ์หรือสารเคลือบป้องกันเป็นระยะเพื่อปกป้องพื้นผิว สำหรับชิ้นส่วนยานยนต์หรืองานสถาปัตยกรรม การเลือกใช้ชิ้นส่วนที่มีการบำบัดผิวคุณภาพดีจากซัพพลายเออร์ที่เชื่อถือได้ เช่น Shaoyi Metal Parts Supplier จะช่วยให้การบำรุงรักษาง่ายขึ้นและยืดอายุการใช้งานพื้นผิวอลูมิเนียมของคุณ