 ผลิตจำนวนน้อย แต่มีมาตรฐานสูง บริการสร้างต้นแบบอย่างรวดเร็วของเรามาพร้อมกับการตรวจสอบที่เร็วขึ้นและง่ายขึ้น —

อะไหล่ระบบปรับอากาศรถยนต์: อาการ สาเหตุ และอะไหล่ที่ควรเปลี่ยน
การทำงานร่วมกันของชิ้นส่วนเครื่องปรับอากาศรถยนต์
การทำงานร่วมกันของชิ้นส่วนระบบปรับอากาศรถยนต์
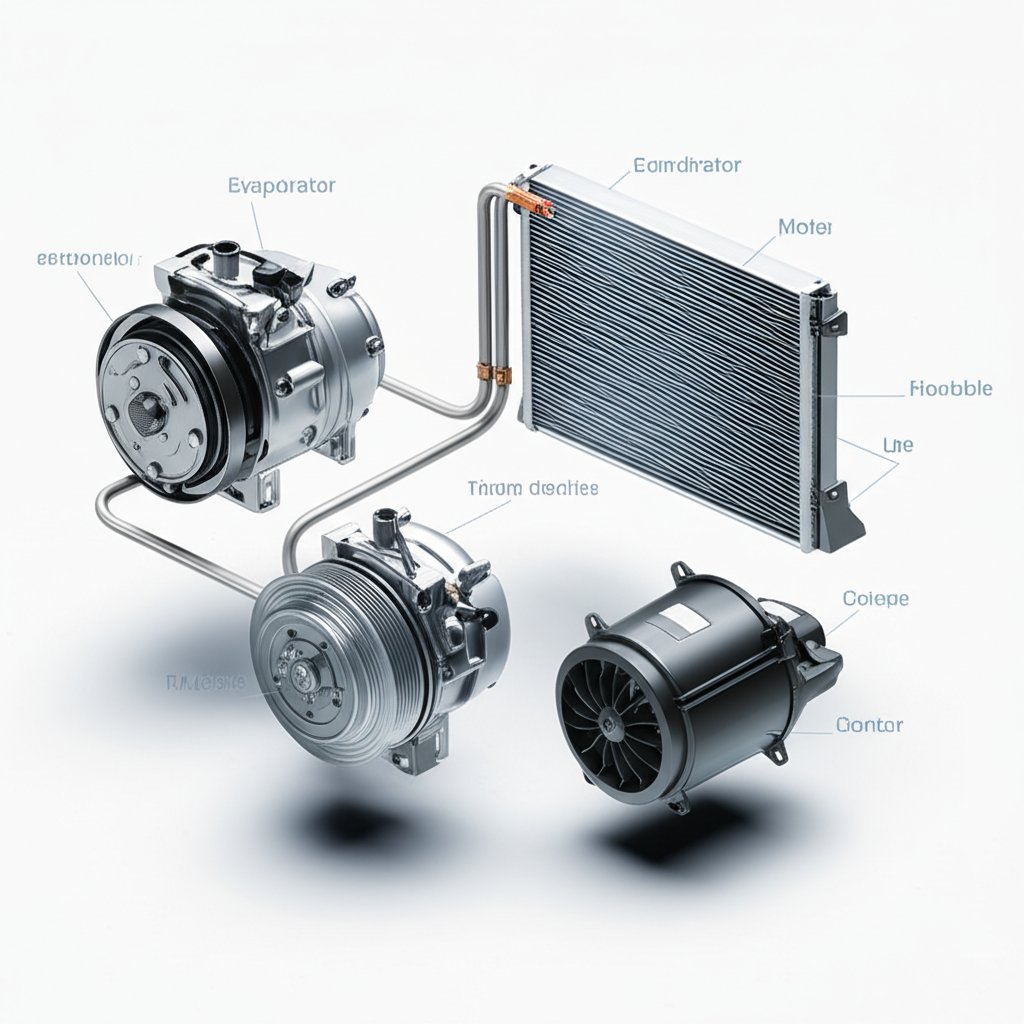
คุณเคยสงสัยหรือไม่ว่าเหตุใดรถยนต์ของคุณสามารถลดอุณหภูมิได้อย่างรวดเร็วในวันที่อากาศร้อน หรือมีระบบทำให้กระจกหน้าไม่ขุ่นในฤดูหนาวได้อย่างไร คำตอบอยู่ที่การทำงานร่วมกันของชิ้นส่วนระบบปรับอากาศรถยนต์แต่ละชิ้นที่มีบทบาทเฉพาะตัวในระบบเครื่องปรับอากาศรถยนต์ การเข้าใจถึงวิธีการทำงานร่วมกันของชิ้นส่วนเหล่านี้จะช่วยให้คุณรู้สึกสบายตัวมากขึ้น และยังช่วยให้การวินิจฉัยปัญหาและเลือกอะไหล่ที่เหมาะสมง่ายขึ้นอีกด้วย ระบบปรับอากาศ การทำงานร่วมกันของชิ้นส่วนเหล่านี้ไม่เพียงแต่ช่วยให้คุณรู้สึกสบาย แต่ยังช่วยให้การวินิจฉัยปัญหาและการเลือกอะไหล่ทดแทนที่เหมาะสมทำได้ง่ายขึ้นมาก
- เครื่องบด : ทำให้สารทำความเย็นมีแรงดันและส่งผ่านไปทั่วระบบ เปรียบเสมือนหัวใจของระบบปรับอากาศรถยนต์ของคุณ
- เครื่องปรับความหนา : ปล่อยความร้อนจากสารทำความเย็นสู่อากาศภายนอก เพื่อทำให้อุณหภูมิของสารทำความเย็นลดลง
- ตัวกรองดูดความชื้นหรือตัวสะสม (Receiver-Drier หรือ Accumulator) : กำจัดความชื้นและสิ่งเจือปนในสารทำความเย็น เพื่อปกป้องระบบไม่ให้เกิดการกัดกร่อนหรือการสะสมของน้ำแข็ง
- วาล์วขยาย (Expansion Valve) หรือท่อบีบอัด (Orifice Tube) : ทำหน้าที่เป็น อุปกรณ์ขยายระบบปรับอากาศ , ควบคุมการไหลของสารทำความเย็นเข้าสู่ตัวระเหย
- ตัวระเหย : ดูดซับความร้อนจากอากาศภายในห้องโดยสาร ทำให้อากาศเย็นลงและลดความชื้น
- มอเตอร์พัดลมและท่อส่งลม : นำอากาศที่เย็นหรือร้อนแล้วส่งเข้าไปในห้องโดยสารของรถ
- ระบบควบคุมเครื่องปรับอากาศ (HVAC Controls) : ช่วยให้คุณตั้งค่าอุณหภูมิ ทิศทางการไหลของอากาศ และความเร็วพัดลมได้
- ฟิลเตอร์อากาศในห้องโดยสาร : กรองอากาศที่ไหลเข้ามาในห้องโดยสารก่อน
คำศัพท์สำคัญที่ช่างควรทราบ
- สารทำความเย็น : สารทำงาน (เช่น R-134a หรือ R-1234yf) ที่ทำหน้าที่พาความร้อนเข้าออกห้องโดยสาร
- คลัตช์คอมเพรสเซอร์ : ทำหน้าที่ตัด-ต่อกัดแรงดันตามความต้องการ
- อุปกรณ์วัด : หมายถึง วาล์วขยายหรือท่อรูเจาะ ซึ่งเป็นอุปกรณ์ประเภทหนึ่ง อุปกรณ์ขยายระบบปรับอากาศ .
- ตัวสะสม/ตัวกรองแห้ง : ใช้ขึ้นอยู่กับอุปกรณ์วัด ตัวสะสมใช้กับท่อรูเจาะ และตัวกรองแห้งใช้กับวาล์วขยาย
- ตัวต้านทาน/โมดูลมอเตอร์พัดลม : ควบคุมความเร็วพัดลม
วงจรสารทำความเย็น: ขั้นตอนทีละขั้น
- The เครื่องบด เพิ่มแรงดันก๊าซสารทำความเย็นและส่งไปยังคอนเดนเซอร์
- ใน เครื่องปรับความหนา , ก๊าซจะเย็นตัวและควบแน่นกลายเป็นของเหลวภายใต้แรงดันสูง
- ของเหลวนั้นจะไหลผ่าน อุปกรณ์ขยายระบบปรับอากาศ (วาล์วขยายหรือท่อหริ่ง) ทำให้ความดันและอุณหภูมิลดลง
- สารทำความเย็นจะเข้าสู่ ตัวระเหย ดูดซับความร้อนจากอากาศในห้องโดยสาร และเปลี่ยนกลับเป็นก๊าซความดันต่ำ
- The มอเตอร์เป่าลม พัดลมจะส่งอากาศผ่านตัวระเหย ทำให้อากาศเย็นและแห้งก่อนส่งเข้าสู่ห้องโดยสาร
- ก๊าซความดันต่ำจะไหลกลับไปยังคอมเพรสเซอร์ และวงจรก็จะเริ่มต้นใหม่
หลักการด้านความปลอดภัยก่อนเริ่มต้น
ฟังดูซับซ้อนใช่ไหม นั่นคือเหตุผลที่ความปลอดภัยมีความสำคัญอย่างยิ่ง การจัดการกับ ชิ้นส่วนระบบปรับอากาศรถยนต์ เกี่ยวข้องทั้งระบบทำความเย็นที่มีแรงดันสูงและวงจรไฟฟ้า ต้องสวมใส่อุปกรณ์ป้องกันดวงตาและมือที่เป็นไปตามมาตรฐาน ANSI เทคนิคเฉพาะทางเท่านั้นที่สามารถให้บริการระบบทำความเย็นได้ เนื่องจากการจัดการที่ไม่เหมาะสมอาจก่อให้เกิดอันตรายหรือละเมิดข้อกำหนดของ EPA โปรดดูคู่มือบริการของผู้ผลิตรวมถึงแผนผังระบบไฟฟ้าของรถของคุณ และตรวจสอบให้มั่นใจว่ามีข้อมูลแผ่นข้อมูลความปลอดภัยล่าสุด (SDS) สำหรับสารเคมีที่คุณใช้งานอยู่ สำหรับการจัดการและการกู้คืนสารทำความเย็นจะต้องมีการรับรองระดับ 609 สำหรับช่างเทคนิค — โปรดดูคำแนะนำจาก EPA เพื่อรายละเอียดเพิ่มเติม ( แหล่งที่มา ).
เครือข่ายชิ้นส่วนของระบบปรับอากาศทั้งระบบจะต้องทำงานร่วมกันทั้งหมด หากชิ้นส่วนใดชิ้นส่วนหนึ่งทำงานผิดปกติ จะส่งผลให้ความสะดวกสบายและความน่าเชื่อถือโดยรวมลดลง
เมื่อคุณเข้าใจแบบจำลองระบบเต็มรูปแบบแล้ว จะช่วยให้คุณสามารถวิเคราะห์อาการไปยังสาเหตุได้ง่ายขึ้น เลือกชิ้นส่วนที่เหมาะสม อะไหล่ระบบปรับอากาศรถยนต์ (automotive hvac parts) และรักษาระบบควบคุมสภาพอากาศของรถให้ทำงานได้อย่างราบรื่น พร้อมที่จะศึกษาลึกลงไปอีกขั้นหรือยัง? ต่อไปเราจะอธิบายแต่ละชิ้นส่วนหลักและปัญหาที่อาจเกิดขึ้น
อธิบายชิ้นส่วนหลัก
หน้าที่และรูปแบบการเกิดข้อบกพร่องของคอมเพรสเซอร์
คุณเคยสังเกตหรือไม่ว่าเครื่องปรับอากาศในรถพ่นลมอุ่นออกมาในวันที่อากาศร้อน หรือได้ยินเสียงแปลกๆ จากใต้ฝากระโปรงเครื่องยนต์เมื่อคุณเปิดเครื่องปรับอากาศ? สิ่งที่มักเป็นต้นเหตุคือ เครื่องปรับอากาศ มักเป็นตัวการหลัก ลองคิดว่าชิ้นส่วนนี้เปรียบเสมือนหัวใจของระบบปรับอากาศในรถยนต์ของคุณ โดยทำหน้าที่ส่งสารทำความเย็นผ่านทุกๆ ระบบปรับอากาศ เพื่อให้คุณรู้สึกเย็นสบาย ตัวคอมเพรสเซอร์ติดอยู่ด้านหน้าของเครื่องยนต์ และขับเคลื่อนด้วยสายพาน ขณะที่คุณเปิดเครื่องปรับอากาศ คลัตช์คอมเพรสเซอร์ระบบปรับอากาศ จะทำงาน ทำให้ล้อสายพานขับเพลาของคอมเพรสเซอร์
- ความเสียหายที่พบบ่อย: ตลับลูกปืนเสียหาย สึกหรอภายใน น้ำมันต่ำ หรือคลัตช์คอมเพรสเซอร์แอร์เสียหาย
- อาการ: ไม่มีลมเย็นออกมา เสียงร้องแหลมหรือเสียงดังก้อง (โดยเฉพาะเมื่อคลัตช์ทำงาน) หรือเห็นรอยรั่วของน้ำมัน
- สัญญาณเตือนที่บ่งชี้ว่าต้องเปลี่ยนชิ้นส่วน: คลัตช์ไม่ทำงาน คอมเพรสเซอร์ล็อกตาย หรือมีเสียงรบกวนตลอดเวลาที่เปิดเครื่องปรับอากาศ ( อ้างอิง ).
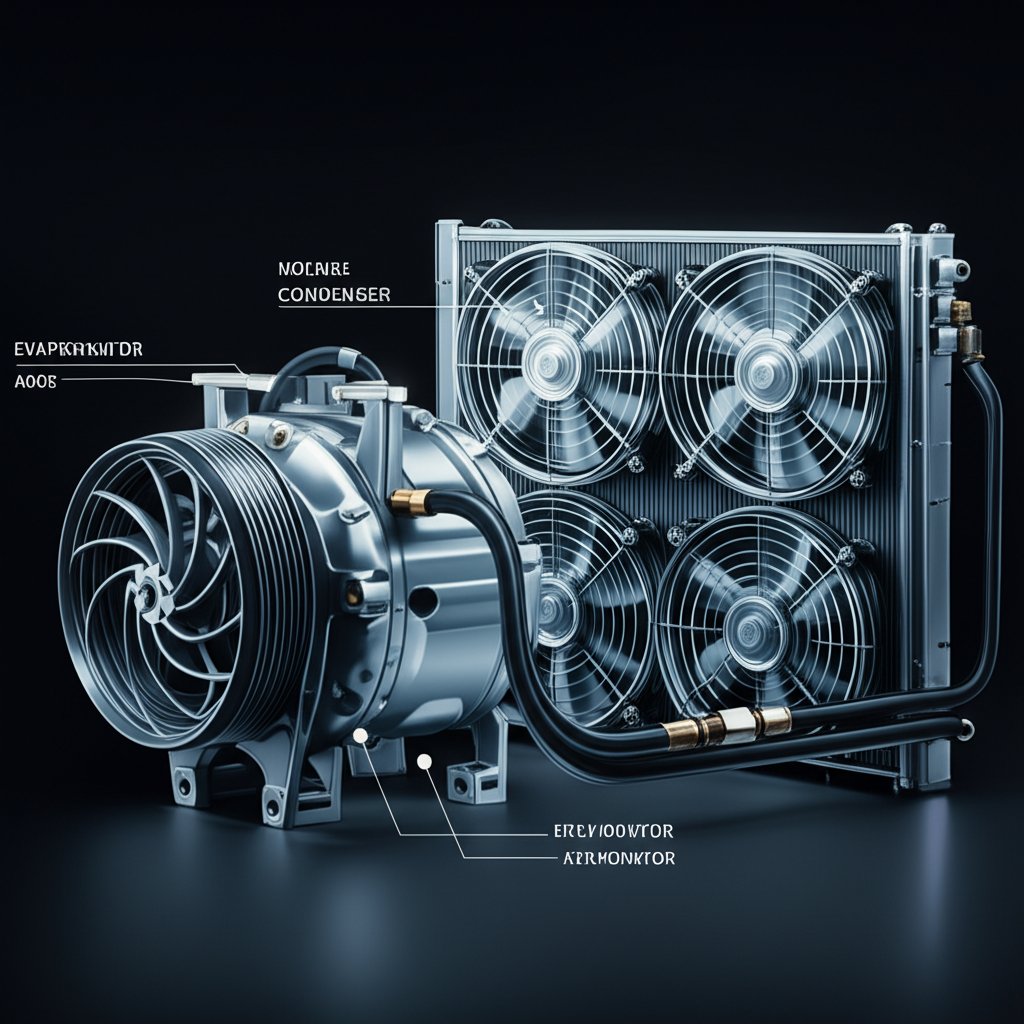
คอนเดนเซอร์ การระบายความร้อนอย่างมีประสิทธิภาพ
The เครื่องปรับอากาศแบบ AC ติดตั้งอยู่ด้านหน้าของรถคุณ ตรงส่วนหลังของช่องดักลมหน้า หน้าที่ของมันคือการลดอุณหภูมิของก๊าซสารทำความเย็นที่มีแรงดันสูงที่ไหลออกมาจากคอมเพรสเซอร์ เพื่อเปลี่ยนให้เป็นของเหลว หากคอนเดนเซอร์อุดตันด้วยสิ่งสกปรกหรือได้รับความเสียหายจากสิ่งกีดขวางบนถนน ความร้อนจะไม่สามารถระบายออกได้ ส่งผลให้ระบบปรับอากาศทำงานหนักขึ้น
- ความเสียหายที่พบบ่อย: ความเสียหายทางกายภาพ (จากหินหรือเศษวัตถุ), การอุดตันภายใน หรือสนิม
- อาการ: ความเย็นอ่อนลง มีลมร้อนออกมาจากช่องแอร์ หรือเห็นสารทำความเย็นรั่วซึมที่คอนเดนเซอร์หรือ ท่อน้ำยาแอร์ การเชื่อมต่อ
- สัญญาณเตือนที่บ่งชี้ว่าต้องเปลี่ยนชิ้นส่วน: คอนเดนเซอร์ทะลุ มีการรั่วซึมตลอดเวลา หรือไม่มีการปรับปรุงหลังจากทำความสะอาดเศษวัตถุแล้ว
พื้นฐานเกี่ยวกับอีวาโพอเรเตอร์และอุปกรณ์ขยายตัว
The เครื่องระเหย AC (หรือ แกนระเหย ) ติดตั้งอยู่ลึกเข้าไปด้านหลังแผงหน้าปัด หน้าที่ของมันคืออะไรหรือ คือการดูดซับความร้อนจากอากาศภายในห้องโดยสารในขณะที่สารทำความเย็นไหลผ่าน ทำให้เกิดความเย็นที่สดชื่น อุปกรณ์ขยายตัว ไม่ว่าจะเป็นแบบ ท่อวัดปริมาณ หรือ วาล์วขยายตัวในระบบปรับอากาศ —ควบคุมปริมาณสารทำความเย็นที่ไหลเข้าไปในอีวาโพอเรเตอร์ หากส่วนใดส่วนหนึ่งทำงานผิดปกติ การทำความเย็นจะลดลงและเกิดปัญหาอื่น ๆ ตามมา
- ความเสียหายที่พบบ่อย: การรั่วซึม (จากสนิมหรือการสั่นสะเทือน) การอุดตันภายใน (จากเศษสิ่งสกปรกหรือการเสื่อมสภาพของน้ำมัน) หรือการปนเปื้อนที่นำไปสู่การสะสมของเชื้อรา/เชื้อราอื่น ๆ
- อาการ: กลิ่นอับชื้น เย็นลงไม่ดี มีน้ำรั่วบนพื้น หรือมีน้ำแข็งเกาะที่แกนระเหย
- สัญญาณเตือนที่บ่งชี้ว่าต้องเปลี่ยนชิ้นส่วน: รั่วซ้ำซาก มีสนิมให้เห็น หรือกลิ่นแรงที่ไม่หายไปแม้จะเปลี่ยนตัวกรองแล้ว อ้างอิง ).
ชิ้นส่วนระบบลมที่มีผลต่อสมรรถนะ
ลองจินตนาการว่าคุณเปิดเครื่องปรับอากาศแต่รู้สึกได้เพียงลมพัดเบา ๆ มอเตอร์พัดลม ตัวต้านทานหรือโมดูลควบคุม และพัดลมคอนเดนเซอร์ คือฮีโร่ผู้เงียบที่ทำให้ลมไหลเวียนได้ดีจริง ๆ ทั้ง ท่อน้ำยาแอร์ และแหวนโอ (O-rings) เชื่อมต่อทุกอย่างเข้าด้วยกัน เพื่อรักษาการปิดผนึกและทำให้สารทำความเย็นไหลเวียนได้ดี
- ความเสียหายที่พบบ่อย: มอเตอร์พัดลมสึกหรอ ตัวต้านทาน/โมดูลเสีย (ทำให้ความเร็วพัดลมหายไป) หรือพัดลมคอนเดนเซอร์หัก (ลดการถ่ายเทความร้อน)
- อาการ: ลมออกมาอ่อนหรือไม่มีเลย มีเพียงบางระดับความเร็วของพัดลมที่ใช้ได้ หรือประสิทธิภาพของระบบปรับอากาศลดลงเมื่อความเร็วต่ำหรือขณะเครื่องเดินเบา
- สัญญาณเตือนที่บ่งชี้ว่าต้องเปลี่ยนชิ้นส่วน: ไม่มีลมออกมาในทุกการตั้งค่า มีกลิ่นไหม้จากช่องลม หรือใบพัดหรือสายไฟมีความเสียหายให้เห็น
ตารางวินิจฉัยอย่างรวดเร็ว: เชื่อมโยงอาการไปยังชิ้นส่วนหลักของระบบปรับอากาศ
| ชิ้นส่วน | บทบาทหลัก | ความล้มเหลวทั่วไป | อาการที่เป็นไปได้มากที่สุด | การตรวจสอบเบื้องต้น |
|---|---|---|---|---|
| เครื่องบด | ทำให้สารทำความเย็นหมุนเวียนและมีแรงดัน | ติดขัด เสียงดัง คลัตช์ไม่ติด | ไม่มีอากาศเย็น เสียงดัง มีสารทำความเย็นรั่วไหลเห็นได้ชัด | ตรวจสอบการทำงานของคลัตช์ ฟังเสียงผิดปกติ ตรวจสอบการรั่วไหล |
| เครื่องปรับความหนา | ทำให้แก๊สสารทำความเย็นเย็นตัวและกลายเป็นของเหลว | อุดตัน เจาะทะลุ กัดกร่อน | เย็นไม่พอ มีการรั่วไหล อากาศร้อน | ตรวจสอบเศษสิ่งแปลกปลอม การรั่วไหล และความเสียหายทางกายภาพ |
| แกนระเหย | ดูดซับความร้อนจากอากาศภายในห้องโดยสาร | รั่วซึม อุดตัน มีเชื้อรา | กลิ่นอับ เย็นไม่พอ มีน้ำในรถ | ตรวจสอบกลิ่น น้ำรั่ว ทางเข้าสำหรับการตรวจสอบ |
| อุปกรณ์ขยาย (ท่อ/วาล์วหริฟิซ) | จ่ายสารทำความเย็นเข้าสู่ท่อน้ำเย็น | อุดตัน ติดอยู่ในตำแหน่งเปิด/ปิด | น้ำค้างบนท่อ การทำความเย็นไม่สม่ำเสมอ | ตรวจสอบอุณหภูมิของท่อ ตรวจหาการเกิดน้ำแข็ง/น้ำค้าง |
| ตัวสะสม/ตัวกรองแห้ง | กำจัดความชื้น/สิ่งปนเปื้อน | อิ่มตัว มีการรั่วซึม | การทำความเย็นไม่ดี มีสิ่งปนเปื้อนในระบบ | ตรวจสอบการรั่วซึม อายุการใช้งาน และตัวบ่งชี้ความชื้น (ถ้ามีติดตั้ง) |
| มอเตอร์พัดลม/ตัวต้านทาน | ควบคุมการไหลของอากาศในห้องโดยสาร | หลอดไฟไหม้ เกิดความล้มเหลวของตัวต้านทาน | ไม่มีหรือมีอากาศไหลอ่อน ใช้งานได้เพียงความเร็วสูงสุด | ทดสอบการทำงานของพัดลม ตรวจสอบตัวต้านทาน/โมดูล |
| พัดลมคอนเดนเซอร์ | เพิ่มการไหลของอากาศเพื่อขับความร้อนออก | ใบพัดหัก มอเตอร์เสียหาย | เครื่องยนต์ร้อนจัด ระบบปรับอากาศทำงานอ่อนขณะอยู่ในรอบเดินเบา | ตรวจสอบการเคลื่อนไหวของพัดลม ฟังเสียงผิดปกติ |
| ท่อและแหวนโอริงแอร์ | นำส่งและปิดผนึกการไหลของสารทำความเย็น | แตก รั่ว ข้อต่อหลวม | คราบน้ำมัน รั่วให้เห็นได้ หรือสูญเสียความเย็น | ตรวจสอบน้ำมันที่ข้อต่อ ตรวจสอบความสมบูรณ์ของท่อ |
สัญญาณเตือน: เมื่อจำเป็นต้องเปลี่ยนทันที
- คลัตช์คอมเพรสเซอร์ไม่ทำงานหรือมีเสียงดังเมื่อเปิดแอร์
- เห็นสารทำความเย็นรั่วที่คอนเดนเซอร์ แกนระเหย หรือข้อต่อท่อแอร์
- กลิ่นอับรุนแรงหรือน้ำบนพื้นไม่หายแม้เปลี่ยนตัวกรองอากาศในห้องโดยสารแล้ว
- ไม่มีลมออกมาจากพัดลมทุกระดับหรือมีกลิ่นไหม้จากช่องแอร์
หากคุณสังเกตเห็นเสียงดัง สารรั่วไหลอย่างต่อเนื่อง หรือไม่มีการระบายความร้อนเลย แกนหลักอาจจำเป็นต้องเปลี่ยนทันที อย่ามองข้ามสัญญาณเตือนเหล่านี้ ชิ้นส่วนระบบปรับอากาศรถยนต์ อาจจำเป็นต้องเปลี่ยนทันที อย่ามองข้ามสัญญาณเตือนเหล่านี้
การเข้าใจรูปแบบเหล่านี้จะช่วยให้คุณระบุได้ง่ายขึ้นว่าชิ้นส่วนใดกำลังเกิดปัญหาและเหตุผลคืออะไร อะไหล่ระบบปรับอากาศรถยนต์ (automotive hvac parts) และเหตุผลคืออะไร ต่อไปนี้ เราจะพาคุณไปดูขั้นตอนการวินิจฉัยปัญหาตามอาการทีละขั้นตอน เพื่อให้คุณสามารถตรวจสอบปัญหาได้อย่างมั่นใจ จากอาการไปจนถึงสาเหตุที่แท้จริง
ขั้นตอนการวินิจฉัยปัญหาตามอาการสำหรับชิ้นส่วนระบบปรับอากาศในรถยนต์
เมื่อเครื่องปรับอากาศในรถยนต์ของคุณหยุดทำงาน การจะหาว่าปัญหาคืออะไรอาจรู้สึกหนักหนา แต่ด้วยแนวทางที่ชัดเจนแบบทีละขั้นตอน คุณมักจะสามารถย้อนกลับไปหาสาเหตุของปัญหาได้ ตั้งแต่อาการที่เกิดขึ้นไปจนถึงรากเหง้าของปัญหา ด้านล่างนี้ เราได้สรุปปัญหาที่พบบ่อยที่สุดของระบบปรับอากาศ เพื่อให้คุณรู้ว่าจะเริ่มจากตรงไหน ควรตรวจสอบอะไรบ้าง และเมื่อไหร่ที่ควรขอความช่วยเหลือจากผู้เชี่ยวชาญ พร้อมแล้วหรือยังที่จะลงมือทำด้วยตัวเอง มาดูขั้นตอนการวินิจฉัยปัญหาที่สำคัญสำหรับ อะไหล่ระบบปรับอากาศรถยนต์ (automotive hvac parts) .
ขั้นตอนการวินิจฉัยเพื่อตรวจสอบอากาศไม่เย็น
- การตรวจสอบทางสายตา : มองหาคราบมันหรือความเสียหายตาม ท่อแอร์ , การ คอนเดนเซอร์แอร์รถยนต์ และท่อเชื่อมต่อระบบปรับอากาศ การรั่วไหลมักปรากฏเป็นคราบมันหรือรอยของสีที่ใช้ตรวจจับการรั่ว ( อ้างอิง ).
- การตัด-ต่อคอมเพรสเซอร์ : เมื่อเครื่องยนต์กำลังทำงานและเปิดระบบปรับอากาศ ให้ตรวจสอบว่า คลัตช์คอมเพรสเซอร์ ตัด-ต่อหรือไม่ หากไม่ ให้ฟังเสียงคลิกหรือสังเกตการหมุนของปั๊ม หากไม่มีการเคลื่อนไหวแสดงว่าไม่มีแรงดันในระบบ
- การตรวจสอบรีเลย์และระบบไฟฟ้าของระบบปรับอากาศ : ทดสอบ รีเลย์กระแสสลับ และ ac compressor relay แรงดันไฟฟ้าที่คอยล์และขาออก ตรวจสอบฟิวส์ให้อยู่ในสภาพสมบูรณ์ และยืนยันว่าระบบได้รับสัญญาณจากสวิตช์ควบคุมบนแผงหน้าปัด
- สถานะของสวิตช์ความดันต่ำ : หาตำแหน่งของ สวิตช์แรงดันต่ำ สวิตช์บนตัวสะสมหรือท่อ ใช้สายจั๊มเปอร์หรือทดสอบความต่อเนื่องเพื่อดูว่าสวิตช์เปิดหรือไม่ (ซึ่งอาจทำให้คลัตช์ไม่ทำงานหากสารทำความเย็นมีไม่เพียงพอ)
- การอ่านค่าแรงดันจากมาโนมิเตอร์ : ต่อมาโนมิเตอร์และเปรียบเทียบแรงดันด้านสูงและด้านต่ำกับค่ามาตรฐานของผู้ผลิต แรงดันด้านต่ำที่ต่ำเกินไปอาจบ่งชี้ถึงการอุดตัน (อุปกรณ์ขยายตัว หรือท่อรู) หรือสารทำความเย็นไม่เพียงพอ; แรงดันด้านต่ำที่สูงเกินไปอาจบ่งชี้ถึงคอมเพรสเซอร์อ่อนหรือเติมสารทำความเย็นมากเกินไป
- การทำงานของคอนเดนเซอร์และพัดลม : ตรวจสอบ คอนเดนเซอร์แอร์รถยนต์ การอุดตันของช่องลมและตรวจสอบให้แน่ใจว่าพัดลมคอนเดนเซอร์ทำงานเมื่อเปิดใช้งานระบบปรับอากาศ การไหลเวียนของอากาศที่ไม่ดีอาจทำให้การระบายความร้อนไม่เพียงพอ
- การประเมินอุปกรณ์ขยายตัว : หากตรวจสอบทุกอย่างแล้วแต่ไม่พบปัญหา ให้สงสัยว่าวาล์วขยายตัวหรือท่อรูอาจติดขัดหรืออุดตัน
ต้องตรวจสอบการทำงานของระบบไฟฟ้าก่อนที่จะสรุปว่ามีปัญหาที่ชิ้นส่วนด้านสารทำความเย็น - ตรวจสอบการทำงานของคลัตช์และรีเลย์ก่อนเสมอ
แผนการวินิจฉัยเสียงผิดปกติ
- ระบุเสียงที่เกิดขึ้น : เป็นเสียงหวีด ดังกริ๊ง หรือเสียงวี๊ด? เสียงหวีดมักชี้ถึงปัญหาที่สายพานหรือ คลัตช์แอร์ ชิ้นส่วน; เสียงดังกริ๊งอาจบ่งชี้ถึงปัญหาภายในคอมเพรสเซอร์หรือการยึดติด; เสียงวี๊ดอาจเป็นสัญญาณของสารทำความเย็นรั่วตาม ท่อแอร์ หรือท่อสำหรับการเชื่อมต่อเครื่องปรับอากาศ
- คอมเพรสเซอร์และคลัตช์ : เมื่อเปิดเครื่องปรับอากาศ ให้ฟังเสียงอย่างละเอียดที่ คลัตช์คอมเพรสเซอร์ ; เสียงคลิกหรือเสียงเอี๊ยดอาจหมายถึงปัญหาที่คลัตช์หรือภายในตัวเครื่อง
- สายพานไดรฟ์อุปกรณ์ : ตรวจสอบสายพานและล้อเลย์สำหรับการสึกหรอหรือไม่ตรงแนว — บางครั้งตัวตึงสายพานที่เริ่มเสียหายสามารถทำให้เกิดเสียงคล้ายกับเสียงแอร์
- พัดลมคอนเดนเซอร์และพัดลมเป่า : เสียงรบกวนจากด้านหน้าอาจเกิดจากพัดลมคอนเดนเซอร์ มีเสียงดังจากมอเตอร์พัดลมที่เริ่มเสื่อมสภาพ หรือเศษสิ่งแปลกปลอมในท่อแอร์
- ตรวจสอบร่องรอยการรั่ว : สำหรับเสียงฟู่ ให้ฉีดสเปรย์น้ำสบู่บริเวณข้อต่อที่สงสัยว่ามีปัญหา ฟองอากาศแสดงว่ามีการรั่วของ ท่อแอร์ หรือท่อต่อ
การระบุตำแหน่งที่มาของเสียงรบกวนมีความสำคัญอย่างยิ่ง — อย่าสันนิษฐานว่าคอมเพรสเซอร์เป็นต้นเหตุ โดยไม่ได้แยกต้นตอของเสียง
พัดลมทำงานไม่สม่ำเสมอ หรือแรงลมอ่อน
- ความเร็วพัดลมและการทำงานของมอเตอร์พัดลม : เปลี่ยนความเร็วพัดลมในทุกระดับ หากพัดลมทำงานได้แค่ระดับสูง ให้สงสัยว่าตัวต้านทานอาจเสียหาย หากไม่ทำงานเลย ให้ตรวจสอบมอเตอร์พัดลมและฟิวส์ของมัน
- การตรวจสอบระบบไฟฟ้า : ทดสอบแรงดันไฟฟ้าที่มอเตอร์พัดลมและตัวต้านทาน/โมดูล ตรวจสอบว่ามีการเชื่อมต่อสายดินและแหล่งจ่ายไฟฟ้าครบถ้วน
- รีเลย์กระแสสลับและสวิตช์ : ตรวจสอบ รีเลย์กระแสสลับ และสวิตช์บนแผงหน้าปัดเพื่อการทำงานที่เหมาะสม การที่รีเลย์เกิดความเสียหายอาจทำให้การทำงานหยุดชะงักชั่วคราว
- ฟิลเตอร์อากาศในห้องโดยสาร : ตัวกรองที่อุดตันจะทำให้อากาศไหลได้ไม่สะดวก—ควรเปลี่ยนหากพบว่าสกปรก
- อีเวปอเรเตอร์และท่อแอร์ : ตรวจสอบว่ามีน้ำแข็งเกาะบนอีเวปอเรเตอร์หรือมีสิ่งกีดขวางในท่อแอร์ที่อาจทำให้อากาศไหลไม่ได้
ปัญหาด้านไฟฟ้าและระบบการไหลของอากาศมักเกี่ยวข้องกัน—การตรวจสอบอย่างเป็นระบบจะช่วยป้องกันการเปลี่ยนชิ้นส่วนที่ไม่จำเป็น
กลิ่นอับหรือกลิ่นสารเคมีไหลออกมา
- ทดสอบกลิ่นเบื้องต้น : เปิดระบบปรับอากาศและสังเกตว่ากลิ่นชัดเจนที่สุดตรงจุดใด—ทันทีที่เปิดเครื่อง หลังฝนตก หรือตลอดเวลา
- ตรวจสอบอีเวปอเรเตอร์ : กลิ่นอับชื้นบ่งชี้ถึงเชื้อราบนตัวระเหย ให้ถอดตัวกรองอากาศในห้องโดยสารออกและตรวจสอบเศษสิ่งสกปรกหรือความชื้น
- ตรวจสอบการระบายน้ำ : ตรวจสอบให้แน่ใจว่าท่อระบายน้ำของตัวระเหยไม่ตัน การอุดตันทำให้น้ำขังและก่อให้เกิดเชื้อรา
- ฟิลเตอร์อากาศในห้องโดยสาร : ควรเปลี่ยนใหม่หากเก่าหรือเปียกชื้น—ตัวกรองอาจเป็นแหล่งเพาะเชื้อแบคทีเรียและกลิ่นไม่พึงประสงค์
- ตรวจสอบการรั่ว : กลิ่นสารเคมีอาจบ่งชี้ถึงการรั่วของสารทำความเย็น ให้ตรวจสอบ ท่อแอร์ และท่อระบบปรับอากาศเพื่อหาคราบตกค้างหรือสีที่ใช้ตรวจจับรั่ว
การแก้ไขปัญหากลิ่นอย่างรวดเร็วไม่เพียงแต่จะคืนความสบาย แต่ยังช่วยป้องกันความเสี่ยงต่อสุขภาพในระยะยาวจากเชื้อราหรือการสัมผัสสารเคมี
ด้วยขั้นตอนการตรวจสอบตามลำดับเหล่านี้ คุณจะเข้าใจภาพรวมของปัญหาระบบปรับอากาศและทำความเย็นในรถยนต์ของคุณได้ชัดเจนขึ้น และหลีกเลี่ยงการทำงานสุ่มเดาหรือการเปลี่ยนชิ้นส่วนโดยไม่จำเป็น ต่อไปนี้เราจะเจาะลึกเรื่องการวินิจฉัยปัญหาทางไฟฟ้า เพื่อช่วยให้คุณตรวจสอบและแยกปัญหาวงจรพัดลม ตัวเป่าลม และคลัตช์ได้อย่างมั่นใจ
การวินิจฉัยปัญหาทางไฟฟ้าที่ช่วยหลีกเลี่ยงการเดาสุ่ม
เคยเปิดเครื่องปรับอากาศแล้วได้ยินแต่ความเงียบงันไหม หรือบางทีพัดลมของคุณอาจทำงานได้เฉพาะระดับสูงสุดเท่านั้น หรืออากาศที่ออกมาจากเครื่องปรับอากาศหยุดเย็นลงอย่างกะทันหัน ปัญหาทางไฟฟ้าในชิ้นส่วนระบบปรับอากาศรถยนต์อาจซับซ้อนได้ แต่ด้วยวิธีการที่เหมาะสม คุณสามารถระบุสาเหตุที่แท้จริงได้อย่างรวดเร็ว ซึ่งจะช่วยประหยัดเวลา เงิน และความหงุดหงิด
การทดสอบมอเตอร์พัดลมและตัวต้านทานหรือโมดูลควบคุม
The มอเตอร์พัดลมรถยนต์เสีย คือกลไกหลักที่ขับเคลื่อนการไหลของอากาศภายในห้องโดยสาร ในขณะที่ตัวต้านทานหรือโมดูลควบคุมจะจัดการระดับความเร็วของพัดลม หากคุณพบว่าแรงลมอ่อนหรือไม่มีลมออกมาเลย หรือพัดลมทำงานได้เฉพาะระดับความเร็วสูงสุด ถึงเวลาที่คุณต้องตรวจสอบชิ้นส่วนเหล่านี้
- ความปลอดภัยเป็นอันดับแรก ควรตัดการเชื่อมต่อแบตเตอรี่ทุกครั้ง และรอสักครู่ก่อนทำงานกับชิ้นส่วนไฟฟ้า เพื่อป้องกันการเกิดวงจรสั้นและปกป้องโมดูลควบคุมอิเล็กทรอนิกส์ที่ไวต่อกระแสไฟฟ้า อีกทั้งควรศึกษาคู่มือบริการเพื่อทำความเข้าใจขั้นตอนเฉพาะที่เกี่ยวข้องกับระบบถุงลมนิรภัย หากคุณกำลังทำงานใกล้กับชิ้นส่วนของระบบถุงลมนิรภัย
- ค้นหาและตรวจสอบ: มอเตอร์พัดลมส่วนใหญ่อยู่ด้านล่างของแผงหน้าปัดฝั่งผู้โดยสาร ให้ถอดแผงครอบออกเพื่อให้เข้าถึงได้ชัดเจน และตรวจสอบว่ามีความเสียหายเห็นได้ชัดหรือขั้วต่อไหม้หรือไม่
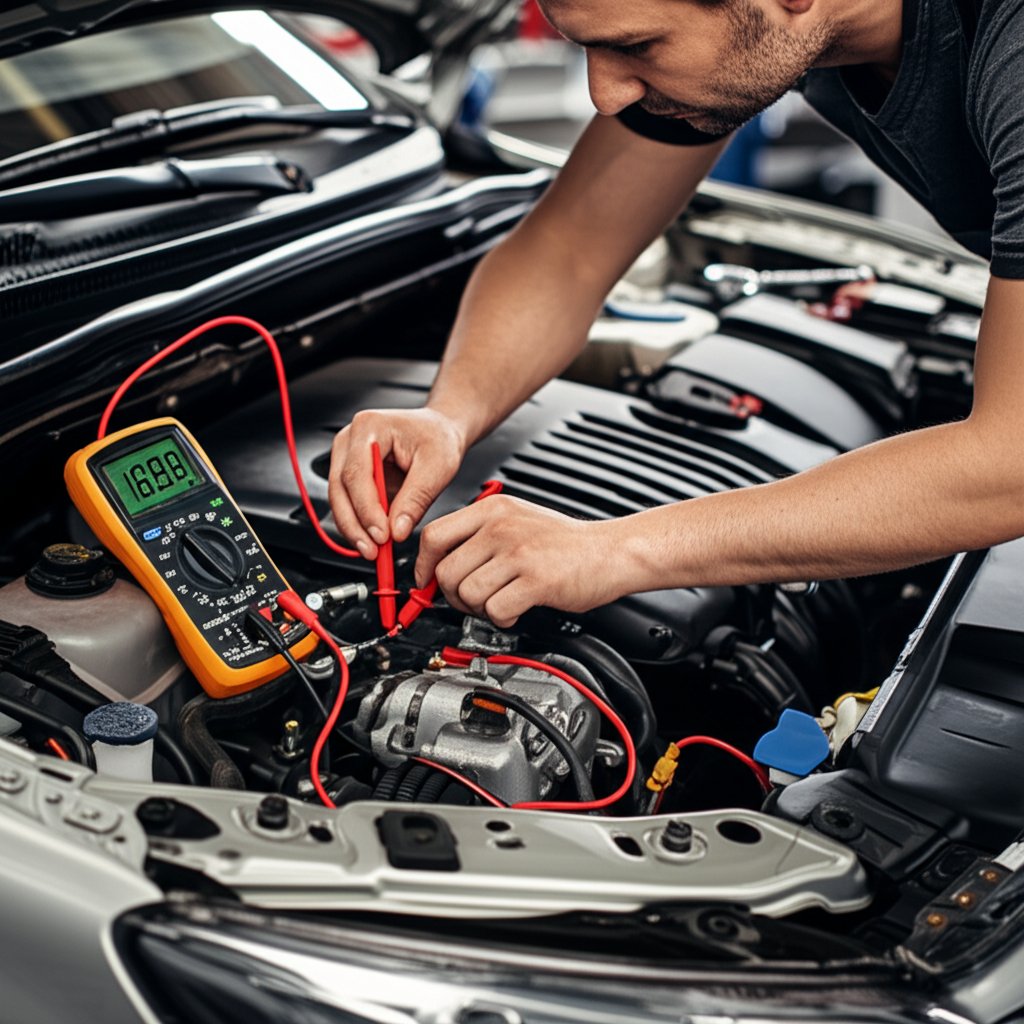
- การทดสอบด้วยมัลติมิเตอร์: ตั้งค่ามัลติมิเตอร์ของคุณเป็นการวัดความต้านทานหรือการตรวจสอบความต่อเนื่อง วางโพรบไว้ที่ขั้วของมอเตอร์ เปรียบเทียบค่าความต้านทานกับข้อมูลจำเพาะที่ระบุไว้ในคู่มือรถของคุณ หากไม่มีความต่อเนื่องหรือวงจรเปิด แสดงว่ามอเตอร์มีความเสียหายอย่างแน่นอน
- การตรวจสอบตัวต้านทาน: ทดสอบตัวต้านทานของพัดลมแรงดันต่ำในลักษณะเดียวกัน หากไม่มีความต่อเนื่องหรือความต้านทานผิดปกติ แสดงว่าตัวต้านทานหรือโมดูลมีความเสียหาย
อย่าลืม: ปัญหาเกี่ยวกับพัดลมแรงดันต่ำหลายประการเกิดจากชุดตัวต้านทานรับความร้อนมากเกินไป เนื่องจากการไหลเวียนของอากาศถูกจำกัด หรือมอเตอร์เริ่มเสียหาย หากคุณเห็นตัวเชื่อมต่อไหม้หรือละลาย ให้เปลี่ยนทั้งตัวต้านทานและมอเตอร์ เพื่อให้เกิดความน่าเชื่อถือในระยะยาว
การตรวจสอบไฟฟ้าเข้า-ออกของคลัตช์คอมเพรสเซอร์
The คลัตช์คอมเพรสเซอร์แอร์ คือสิ่งที่ทำให้คอมเพรสเซอร์ทำงานหรือหยุดทำงาน หากเครื่องปรับอากาศของคุณไม่สามารถทำความเย็นได้ คลัตช์อาจไม่ทำงาน
- การตรวจเห็น ขณะเครื่องยนต์กำลังเดินเบาและเปิดระบบปรับอากาศ คลัตช์ควรทำงาน (คุณจะได้ยินหรือเห็นเสียงคลิก และเพลาขับจะหมุนไปพร้อมกับปูเล่ย์)
- ตัวเชื่อมต่อและแรงดันไฟฟ้า: ใช้มัลติมิเตอร์ตรวจสอบแรงดันไฟฟ้าที่ตัวต่อคอยล์คลัตช์ เมื่อสั่งให้ระบบปรับอากาศทำงาน ไม่มีแรงดันไฟฟ้า? ให้ย้อนกลับไปตรวจสอบที่ สวิตช์ AC รีเลย์ และฟิวส์
- เส้นทางสายดิน: ตรวจสอบว่าวงจรสายดินสมบูรณ์ ปัญหาสายดินเก่าหรือหลวมเป็นสาเหตุพบบ่อย
- ความต้านทานคอยล์คลัตช์: วัดความต้านทานของคอยล์ตามคู่มือบริการ หากคอยล์ขาดหรือลัดวงจร จำเป็นต้องเปลี่ยนใหม่
เคล็ดลับ: หากคลัตช์ทำงานตัดต่อบ่อยครั้งหรือทำงานเร็วผิดปกติ อาจเกิดจากปัญหารีเลย์ไม่ดี สวิตช์แรงดัน หรือสารทำความเย็นต่ำจนทำให้ระบบตัดการทำงานเพื่อความปลอดภัย
ตัวควบคุมและรีเลย์พัดลมคอนเดนเซอร์
รถยนต์รุ่นใหม่ใช้ พัดลมระบายความร้อนระบบไฟฟ้า เพื่อรักษาอุณหภูมิที่เหมาะสมของทั้งเครื่องยนต์และระบบปรับอากาศ หากเครื่องปรับอากาศทำงานปกติขณะขับขี่แต่ทำงานไม่ได้เมื่ออยู่ในสภาพเดินเบา ให้สงสปัญจรีเลย์พัดลม
- ภาพรวมระบบ: วงจรพัดลมไฟฟ้าในรถยนต์มักถูกควบคุมโดย ECM ผ่านรีเลย์ โดยจะตอบสนองต่ออุณหภูมิของเครื่องยนต์ การร้องขอจากระบบปรับอากาศ หรือทั้งสองอย่าง
- การทดสอบรีเลย์ หาตำแหน่งรีเลย์พัดลมและใช้สายจัมเปอร์เพื่อข้ามรีเลย์ หากพัดลมทำงาน แสดงว่ามีปัญหาที่รีเลย์หรือวงจรควบคุม
- แรงดันตกค้าง: วัดแรงดันไฟฟ้าที่ขั้วต่อของมอเตอร์พัดลมทั้งด้านจ่ายไฟและดินขณะทำงานอยู่ การตกของแรงดันมากเกินไปหมายความว่ามีปัญหาที่สายไฟหรือการเชื่อมต่อ ( อ้างอิง ).
- คำสั่งจาก ECM เครื่องมือวินิจฉัยบางชนิดสามารถสั่งให้พัดลมทำงานเพื่อทดสอบโดยตรงได้ หากไม่สามารถทำได้ ให้ศึกษาแผนผังวงจรไฟฟ้าและตรวจสอบสัญญาณควบคุมที่รีเลย์
จำไว้ว่า: พัดลมระบายความร้อนระบบไฟฟ้า ควรทำงานเมื่อเปิดระบบปรับอากาศหรือเมื่ออุณหภูมิเครื่องยนต์สูง หากพัดลมไม่ทำงาน เครื่องยนต์อาจเกิดภาวะโอเวอร์ฮีต และระบบปรับอากาศทำงานไม่เต็มประสิทธิภาพ
ตารางอ้างอิง: การแก้ปัญหาวงจรไฟฟ้า
| วงจร | จุดทดสอบ | ค่าที่คาดการณ์ว่าจะวัดได้ | ขั้นตอนถัดไป |
|---|---|---|---|
| มอเตอร์เป่าลม | ขั้วมอเตอร์ | ความต้านทาน/ความต่อเนื่องตามที่กำหนด | เปลี่ยนถ้าวงจรเปิดหรือค่าผิดปกติ |
| ตัวต้านทานพัดลม | พินตัวต้านทาน | ความต่อเนื่องที่แต่ละระดับความเร็ว | เปลี่ยนถ้าระดับความเร็วใดระดับหนึ่งเปิดวงจร |
| คลัตช์คอมเพรสเซอร์ | ตัวเชื่อมต่อกลไกคลัตช์ | แรงดันแบตเตอรี่เมื่อเปิดใช้งานกระแสสลับ (AC) | ตรวจสอบสายไฟแรงดัน/กราวด์ หากไม่มีแรงดันไฟฟ้า |
| พัดลมคอนเดนเซอร์ | ขั้วต่อของมอเตอร์พัดลม | แรงดันแบตเตอรี่เมื่อเปิดใช้งานกระแสสลับ (AC) หรืออุณหภูมิสูง | ตรวจสอบรีเลย์ สายไฟ และคำสั่งจากหน่วยควบคุมเครื่องยนต์ (ECM) |
| คอยล์รีเลย์ | พินควบคุมรีเลย์ | ความต้านทานตามกำหนด/สัญญาณ 12 โวลต์ | เปลี่ยนรีเลย์หรือซ่อมด้านควบคุม |
หากเอกสารจากผู้ผลิตให้ค่าที่แน่นอน ให้ใช้ค่าเหล่านั้น มิฉะนั้น ให้ตรวจสอบวงจรเปิด/ลัดวงจร หรือแรงดันหายไป โดยใช้การทดสอบแบบ go/no-go
ข้อผิดพลาดทางไฟฟ้าที่พบบ่อยซึ่งควรระวัง
- สายรัดที่เสียดสีใกล้จุดยึดหม้อน้ำ
- ข้อต่อสายดินเกิดสนิมหรือหลวม
- สายจุดระเบิดมีปัญหา (ฟิวส์ขาด หรือตัวต่อไหม้)
- ชุดตัวต้านทานร้อนเกิน (ตัวเรือนละลายหรือเปลี่ยนสี)
- สวิตช์หรือรีเลย์ปรับอากาศติดขัดหรือเสีย
การทดสอบระบบไฟฟ้าอย่างละเอียดจะช่วยป้องกันการเปลี่ยนชิ้นส่วนที่ไม่จำเป็น — ควรตรวจสอบให้แน่ใจเสมอว่ามีไฟเลี้ยง สายดิน และการเชื่อมต่อสมบูรณ์ก่อนทำการเปลี่ยนชิ้นส่วนระบบปรับอากาศในรถยนต์ใด ๆ
เมื่อคุณมีเครื่องมือวินิจฉัยระบบไฟฟ้าเหล่านี้พร้อมใช้งาน คุณก็พร้อมที่จะแก้ไขปัญหาที่พบบ่อยที่สุดของระบบไฟฟ้าในระบบปรับอากาศแล้ว ต่อไปเราจะพิจารณาถึงความต้องการของสารทำความเย็นและน้ำมันเพื่อให้แน่ใจว่าการซ่อมแซมของคุณมีประสิทธิภาพและเป็นไปตามข้อกำหนด
สารทำความเย็น น้ำมัน และข้อกำหนดพื้นฐาน
พื้นฐานเกี่ยวกับสารทำความเย็นและความเข้ากันได้ของระบบ
คุณเคยสงสัยไหมว่าทำไมรถยนต์ของคุณระบบปรับอากาศจึงต้องใช้สารทำความเย็นที่ต่างไปจากของเพื่อนบ้านคุณ หรือทำไมการผสมสารทำความเย็นเข้าด้วยกันจึงเป็นสิ่งที่ไม่ควรทำอย่างยิ่ง ลองมาดูคำอธิบายกัน ปัจจุบันรถยนต์รุ่นใหม่ส่วนใหญ่ใช้ สารทำความเย็น r-1234yf —ซึ่งเป็นสารประเภทไฮโดรฟลูโอโรโอลีฟิน (HFO) ที่ถูกออกแบบมาเพื่อลดผลกระทบต่อสิ่งแวดล้อมให้มากที่สุด เมื่อเทียบกับสารทำความเย็นรุ่นเก่าอย่าง R-134a r1234yf freon ถูกจัดประเภทว่า A2L ซึ่งเป็นสารที่ติดไฟได้เล็กน้อย จึงจำเป็นต้องมีการจัดการพิเศษ และต้องใช้เครื่องมือที่ป้องกันการเกิดประกายไฟ
| สารทำความเย็น | ศักยภาพในการเพิ่มอุณหภูมิโลก | ผลกระทบต่อชั้นโอโซน | ความเข้ากันได้ของระบบ | หมายเหตุการให้บริการ |
|---|---|---|---|---|
| R-134a | สูง | ศูนย์ | รถยนต์รุ่นเก่า (ก่อนปี 2017 ขึ้นอยู่กับแต่ละภูมิภาค) | ยังคงมีจำหน่ายสำหรับระบบที่ใช้รุ่นเก่า ต้องมีใบอนุญาตในการจัดการจาก EPA |
| R-1234yf | ต่ำมาก | ศูนย์ | รถยนต์รุ่นใหม่ส่วนใหญ่ | ติดไฟได้เล็กน้อย ต้องใช้เครื่องมือและตัวต่อพิเศษ ห้ามดัดแปลงระบบ R-134a |
อย่าพยายามเติมสารทำความเย็นผิดชนิด หรือผสมสารหลายชนิดเข้าด้วยกัน การทำเช่นนั้นเสี่ยงต่อความเสียหายของคอมเพรสเซอร์ การทำงานที่ไม่มีประสิทธิภาพ และอาจฝ่าฝืนข้อกำหนดด้านสิ่งแวดล้อมได้ เพื่อ สารทำความเย็น r 1234yf ระบบต่าง ๆ ควรใช้ชุดเกจและตัวต่อมือถือให้ถูกต้อง เนื่องจากข้อต่อของ R-134a และ R-1234yf ถูกออกแบบให้มีลักษณะแตกต่างกันอย่างชัดเจน
การเลือกน้ำมัน PAG ที่เหมาะสม
ลองจินตนาการว่าคอมเพรสเซอร์ของคุณทำงานโดยไม่มีน้ำมัน—ดูเหมือนจะแย่มากใช่ไหม นั่นจึงเป็นเหตุผลว่าทำไมน้ำมันจึงมีความสำคัญ ระบบปรับอากาศสมัยใหม่ส่วนใหญ่ใช้น้ำมัน PAG oil (Polyalkylene Glycol) เป็นสารหล่อลื่น แต่น้ำมัน PAG ทุกชนิดไม่ได้มีคุณภาพเหมือนกัน คุณอาจพบฉลากที่ระบุว่า pag 46 oil pAG 46, PAG 100 หรือ PAG 150 ตัวเลขที่ระบุนั้นบ่งบอกถึงความหนืด คล้ายกับน้ำมันเครื่อง ประเภทและปริมาณน้ำมันที่เหมาะสมนั้นขึ้นอยู่กับผู้ผลิตคอมเพรสเซอร์กำหนด ไม่ใช่แค่ยี่ห้อรถยนต์ของคุณเท่านั้น
- ควรตรวจสอบคู่มือบริการหรือข้อมูลจำเพาะจากผู้จัดจำหน่ายทุกครั้ง เพื่อให้ได้ความหนืดและปริมาณน้ำมัน PAG ที่เหมาะสม
- ห้ามผสมน้ำมันหลายชนิดเข้าด้วยกัน—การใช้น้ำมันที่ไม่เหมาะสมหรือใช้มากเกินไป อาจทำให้เกิดคราบสกปรกหรือระบบล้มเหลวได้
- สำหรับระบบ R-1234yf ควรใช้น้ำมันที่ระบุชัดเจนว่าสามารถใช้ร่วมกับสารทำความเย็นชนิดนี้ได้
บางระบบอาจใช้น้ำมันเอสเตอร์ โดยเฉพาะอย่างยิ่งหากมีการปรับปรุงจากระบบที่ใช้สารทำความเย็นรุ่นเก่า แต่กรณีเช่นนี้ถือว่าหาได้ยากในรถยนต์ที่ผลิตใหม่กว่าปี ค.ศ. 1995 หากมีข้อสงสัย ควรตรวจสอบข้อมูลจากผู้ผลิตหรือติดต่อฝ่ายสนับสนุนทางเทคนิคของผู้จัดจำหน่าย
กฎระเบียบและข้อกำหนดในการปฏิบัติงาน
การปฏิบัติงานกับสารทำความเย็นไม่ใช่เพียงแค่เรื่องประสิทธิภาพเท่านั้น แต่ยังเกี่ยวข้องกับความปลอดภัยและข้อกำหนดตามกฎหมายอีกด้วย ในสหรัฐอเมริกา บุคคลใดก็ตามที่ทำหน้าที่ซ่อมบำรุงหรือกู้คืนสารทำความเย็นในระบบปรับอากาศของยานพาหนะ จะต้องได้รับการรับรอง การรับรอง epa 609 ซึ่งจะทำให้มั่นใจได้ว่าช่างเทคนิคได้รับการฝึกอบรมในเรื่องการกู้คืน การนำกลับมาใช้ใหม่ และการปกป้องสิ่งแวดล้อม ( รายละเอียดจาก EPA ).
- ก่อนที่จะเปิดระบบ ควรทำการสูบสุญญากาศและกู้คืนสารทำความเย็นโดยใช้อุปกรณ์ที่ได้รับการรับรองเสมอ
- ปิดท่อที่เปิดอยู่ทันที เพื่อป้องกันไม่ไม่ให้ความชื้นเข้ามาภายใน ความชื้นสามารถทำลายสารดูดความชื้น (Desiccant) และก่อให้เกิดการกัดกร่อนภายในได้
- ทดสอบการรั่วหลังจากซ่อมแซม ควรใช้เครื่องตรวจจับแบบอิเล็กทรอนิกส์ที่ออกแบบมาสำหรับตรวจจับสารทำความเย็นเฉพาะประเภทนั้นๆ
- ชาร์จไฟฟ้าตามข้อกำหนดของผู้ผลิตเท่านั้น —การชาร์จมากเกินไปหรือน้อยเกินไปจะลดประสิทธิภาพและอาจทำให้ชิ้นส่วนเสียหาย
- สวมใส่อุปกรณ์ป้องกันส่วนบุคคล (PPE) (ถุงมือ แว่นตานิรภัย) เพื่อป้องกันการขาดอากาศหายใจและบาดเจ็บจากความเย็นจัด
- ห้ามดัดแปลงระบบ R-134a เป็น R-1234yf เด็ดขาด —มาตรฐานของตัวระเหยและมาตรฐานความปลอดภัยมีความแตกต่างกัน ( อ้างอิง ).
รายการตรวจสอบก่อนชาร์จ
- ตรวจสอบให้แน่ใจว่าระบบถูกดูดสูญญากาศและปราศจากการรั่วไหลอย่างสมบูรณ์
- ตรวจสอบชนิดของสารทำความเย็นที่ถูกต้อง (เช่น R-1234yf หรือ R-134a) และให้ตรงกัน pag 46 oil หากมี
- ตรวจสอบให้แน่ใจว่าเครื่องมือและข้อต่อทั้งหมดที่ใช้ในการให้บริการเข้ากันได้กับสารทำความเย็นที่ใช้—ห้ามบังคับข้อต่อที่ไม่ตรงกันเด็ดขาด
- ตรวจสอบให้แน่ใจว่าท่อที่เปิดอยู่ทั้งหมดถูกปิดด้วยฝาครอบไว้จนกว่าจะพร้อมติดตั้ง
- อ้างอิงข้อมูลจากผู้ผลิตอุปกรณ์ต้นฉบับ (OEM) หรือผู้จัดจำหน่ายสำหรับปริมาณการชาร์จและปริมาณน้ำมันที่เติม
การใช้สารทำความเย็นและน้ำมันที่ถูกต้อง พร้อมทั้งปฏิบัติตามขั้นตอนความปลอดภัยและข้อกำหนดทั้งหมด จะช่วยปกป้องการลงทุนของคุณ สิ่งแวดล้อม และความปลอดภัยของคุณเอง อย่าเด็ดขาดที่จะละเลยในเรื่องความสอดคล้องตามข้อกำหนดและการบริการระบบปรับอากาศที่ถูกต้อง
เมื่อเข้าใจอย่างชัดเจนเกี่ยวกับความต้องการของสารทำความเย็นและน้ำมันแล้ว คุณก็พร้อมที่จะทำให้ระบบของคุณ อะไหล่ระบบปรับอากาศรถยนต์ (automotive hvac parts) ทำงานได้อย่างมีประสิทธิภาพสูงสุดและถูกต้องตามข้อกำหนดอย่างเต็มที่ ต่อไปนี้ เราจะแบ่งปันแผนการบำรุงรักษาและช่วงเวลาในการบริการ เพื่อช่วยให้คุณป้องกันปัญหาเดิมไม่ให้เกิดซ้ำ และยืดอายุการใช้งานระบบให้นานขึ้น
แผนการบำรุงรักษาเพื่อยืดอายุการใช้งานระบบ
การตรวจสอบเชิงป้องกันที่ช่วยตรวจจับปัญหาแต่เนิ่นๆ
ครั้งสุดท้ายที่คุณตรวจสอบระบบปรับอากาศของรถก่อนฤดูร้อนคือเมื่อไหร่? ลองจินตนาการว่าคุณตรวจพบปัญหาเล็กๆ ได้ทันในตอนนี้ เช่น สายพาน ac belt หรือตัวกรองอากาศในห้องโดยสารสกปรก ก่อนที่มันจะกลายเป็นงานซ่อมแซมที่เสียค่าใช้จ่ายสูง การบำรุงรักษาเป็นประจำคือวิธีที่ดีที่สุดในการรักษาประสิทธิภาพของระบบของคุณ อะไหล่ระบบปรับอากาศรถยนต์ (automotive hvac parts) ทำงานได้อย่างราบรื่น และป้องกันไม่ให้เกิดการเสียหายกะทันหันในช่วงคลื่นความร้อน หรือ การเดินทางไกล นี่คือวิธีที่คุณสามารถสร้างแผนการบริการเชิงรุกได้:
- ทุก 12 เดือน หรือ 12,000 ไมล์: ตรวจสอบ ac belt หากรอยรั่ว รอยแตกร้าว หรือการเกิดเงาเงา ควรเปลี่ยนหากสายพานสึกหรอ เพื่อป้องกันการล้มเหลวของคอมเพรสเซอร์ ( แหล่งที่มา ).
- ทุก 15,000 ไมล์ หรือ ทุกปี: เปลี่ยนตัวกรองอากาศในห้องโดยสาร เพื่อปกป้องแกนระเหย (Evaporator core) จากฝุ่นและเศษขยะ ทำให้มั่นใจได้ว่าการไหลเวียนของอากาศมีประสิทธิภาพ และคุณภาพอากาศที่ดีขึ้น
- ทุก 24 เดือน หรือ 24,000 ไมล์: ทำความสะอาดครีบคอนเดนเซอร์ และตรวจสอบหาส่วนที่บุบ หรืออุดตัน กำจัดเศษขยะเพื่อรักษาประสิทธิภาพในการปล่อยความร้อน
- ทุกครั้งที่เปลี่ยนถ่ายน้ำมันเครื่อง: ตรวจสอบด้วยตาเปล่า ท่อแอร์สำหรับรถยนต์ , ท่อแอร์ , และตรวจสอบชิ้นส่วนต่อต่างๆ ว่ามีรอยรั่ว คราบน้ำมัน หรือแตกร้าวหรือไม่
- เมื่อจำเป็นต้องทำเช่นนั้น: ตรวจสอบให้แน่ใจว่าพัดลมคอนเดนเซอร์ทำงานได้ทุกความเร็วตามคำสั่ง ใบพัดลมที่อ่อนแอหรือไม่ทำงานเลย อาจทำให้เครื่องยนต์ร้อนจัด และระบบปรับอากาศทำงานได้ไม่ดี
- เมื่อทำการเปิดระบบ: เปลี่ยนแหวนโอ (O-Rings) โดยใช้วัสดุที่เข้ากันได้จาก ชุดโอริงสำหรับรถยนต์ , และทาสารหล่อลื่นที่เหมาะสมให้ถูกต้องเสมอ ขันให้แน่น ข้อต่อท่อแอร์ ตามค่าที่ผู้ผลิตกำหนด (OEM specs) เพื่อป้องกันการรั่วซึม
หมายเหตุ: โปรดปฏิบัติตามกำหนดการบำรุงรักษาของผู้ผลิตรวมถึงช่วงเวลาและขั้นตอนที่ระบุไว้สำหรับรถของคุณเสมอ
การป้องกันการรั่วซึมและการดูแลท่อ
คุณเคยสังเกตเห็นคราบน้ำมันบางอย่างใต้รถ หรือกลิ่นอับๆ เมื่อคุณเปิดระบบปรับอากาศหรือไม่ อาการเหล่านี้อาจเป็นสัญญาณเริ่มต้นของการรั่วซึม ท่อแอร์ หรือสภาพที่เสื่อมโทรมลง ท่อแอร์สำหรับรถยนต์ . นี่คือวิธีป้องกันการรั่วไหลก่อนที่จะเกิดขึ้น:
- ตรวจสอบท่อสำหรับรอยร้าว เส้นใยหลุด หรือส่วนที่โป่งพอง โดยเฉพาะบริเวณข้อต่อและจุดโค้งงอ
- ทำความสะอาดพื้นผิวด้านนอกของท่อและสายยางด้วยผ้าเปียก เพื่อขจัดสิ่งสกปรกและตรวจหาการรั่วไหลได้ตั้งแต่เนิ่นๆ
- ตรวจสอบการเชื่อมต่อของท่อให้แน่นหนา; ท่อที่หลวม ข้อต่อท่อแอร์ เป็นสาเหตุทั่วไปของการสูญเสียสารทำความเย็น
- เปลี่ยนท่อหากพบว่ามีการรั่วไหลอย่างต่อเนื่อง มีการสึกหรออย่างมาก หรือท่อใช้งานมานานกว่าห้าปี
- ตรวจสอบให้แน่ใจว่ามีการระบายน้ำที่เหมาะสมจากตัวระเหย เพื่อป้องกันการสะสมของความชื้นรอบๆ ท่อซึ่งอาจทำให้เกิดสนิมและเชื้อรา
การเลือกใช้ท่อและแหวนโอ (O-rings) ที่มีคุณภาพสูง และติดตั้งโดยใช้เครื่องมือที่เหมาะสม สามารถช่วยยืดอายุการใช้งานของระบบของคุณได้อย่างมาก
การควบคุมความชื้นและการเปลี่ยนตัวดูดความชื้น
เมื่อคุณเปิดระบบปรับอากาศเพื่อซ่อมแซมหรือหลังจากคอมเพรสเซอร์เสียหาย ความชื้นอาจแทรกซึมเข้ามา ทำให้เกิดสนิม การก่อตัวของน้ำแข็ง และความเสียหายที่มีค่าใช้จ่ายสูง นี่คือจุดที่ ตัวสะสมแอร์ หรือรีซีฟเวอร์-ไดรเออร์มีบทบาท แต่คุณทราบหรือไม่ว่าชิ้นส่วนเหล่านี้ไม่สามารถใช้งานได้ตลอดไป
- ต้องเปลี่ยนตัวสะสมความเย็น (accumulator) หรือรีซีฟเวอร์-ไดรเออร์ทุกครั้งที่เปิดระบบเพื่อทำการซ่อมบำรุงใหญ่ เช่น การเปลี่ยนคอมเพรสเซอร์หรืออีวาโพอเรเตอร์ หรือหากมีการรั่วของระบบมากพอสมควร
- สังเกตสัญญาณของความล้มเหลว: ความชื้นที่ไม่สามารถอธิบายได้ การทำความเย็นไม่เพียงพอ หรือตัวบ่งชี้สารดูดความชื้นอิ่มตัว (ถ้ามีติดตั้ง)
- ปิดท่อที่เปิดอยู่ทันทีในระหว่างการซ่อมแซมเพื่อลดการเข้ามาของความชื้น
- ใช้เฉพาะชิ้นส่วนที่ได้รับการอนุมัติจากผู้ผลิต (OEM) หรือเทียบเท่าสำหรับการเปลี่ยนชิ้นส่วน และควรใช้แหวนโอ (O-rings) ใหม่จาก ชุดโอริงสำหรับรถยนต์ เมื่อประกอบชิ้นส่วนกลับเข้าด้วยกัน
การเปลี่ยนตัวสะสมความเย็นหรือไดรเออร์ทันเวลาจะช่วยปกป้องคอมเพรสเซอร์และรักษาให้ระบบปรับอากาศปราศจากความชื้นและสิ่งปนเปื้อน
รายการตรวจสอบก่อนและหลังการบริการ
| รายการตรวจสอบก่อนการบริการ | การตรวจสอบหลังการให้บริการ |
|---|---|
|
|
ด้วยการปฏิบัติตามขั้นตอนและรายการตรวจสอบการบำรุงรักษานี้ คุณจะสามารถยืดอายุการใช้งานของ อะไหล่ระบบปรับอากาศรถยนต์ (automotive hvac parts) ได้ รวมถึงเพลิดเพลินไปกับความสะดวกสบายที่เชื่อถือได้ และลดค่าใช้จ่ายในการซ่อมแซม ต่อไปนี้ เราจะช่วยคุณเปรียบเทียบแหล่งสินค้าและผู้จัดจำหน่าย เพื่อให้คุณได้รับอะไหล่ที่เหมาะสมกับงานเสมอ
การเลือกซื้ออะไหล่ระบบปรับอากาศรถยนต์ที่เหมาะสม
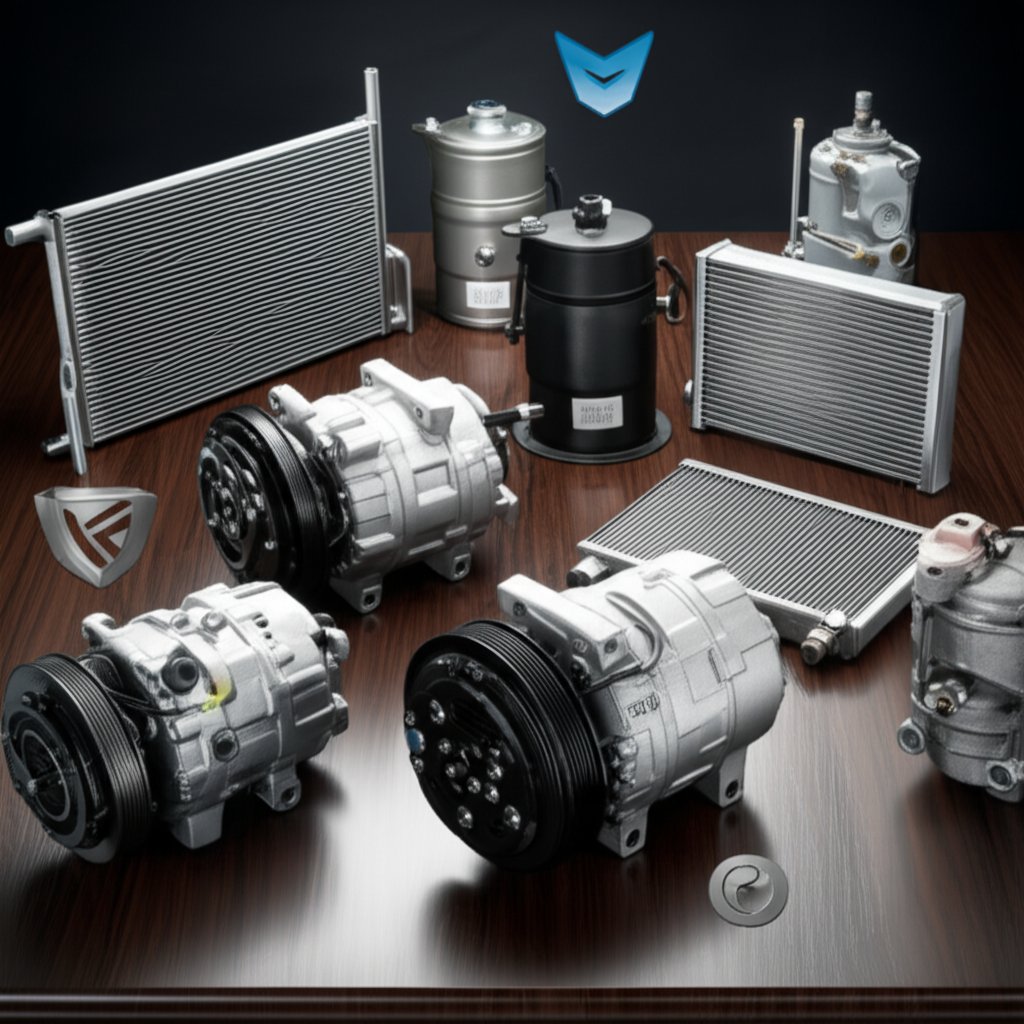
OEM เทียบกับ Aftermarket เทียบกับ Remanufactured: อะไหล่ประเภทใดที่เหมาะกับชิ้นส่วนระบบปรับอากาศรถยนต์ของคุณมากที่สุด?
เมื่อถึงเวลาที่ต้องเปลี่ยน ระบบปรับอากาศในรถยนต์ , คุณจะเลือกใช้อะไหล่เดิมที่ติดมากับรถยนต์ของคุณ หรือมีข้อดีในการพิจารณาเลือกใช้อะไหล่ Aftermarket หรือ Remanufactured แทน? ลองจินตนาการว่าคุณกำลังพบกับปัญหา คอมเพรสเซอร์แอร์รถยนต์ หรือจำเป็นต้องเปลี่ยนคอยล์ระเหยใหม่ ทางเลือกของคุณอาจส่งผลต่อความพอดี สมรรถนะ การรับประกัน และแม้กระทั่งความทนทานในระยะยาว มาดูความแตกต่างหลัก ๆ เพื่อให้คุณตัดสินใจได้อย่างชาญฉลาดสำหรับการซ่อมแซม ส่วนของรถยนต์ AC ซื้อ.
| ผู้จัดจำหน่าย/ผลิตภัณฑ์ | คุณสมบัติ | การรับประกันและการสนับสนุน | ความพอดีและความคุณภาพ | กรณีการใช้งานทั่วไป | ข้อดี | ข้อเสีย |
|---|---|---|---|---|---|---|
| บริษัท Shaoyi Automotive Stamping Dies & Parts | ชิ้นส่วนยึดยานพาหนะ HVAC แบบความแม่นยำสูง ฐานยึด และชิ้นส่วนที่ขึ้นรูปสำหรับผู้ผลิตและซัพพลายเออร์ระดับ Tier; การวิเคราะห์ CAE ขั้นสูง; การผลิตแบบลีน | การสนับสนุนโครงการแบบกำหนดเอง การควบคุมคุณภาพกระบวนการ | ความแม่นยำสูง ลดความเสี่ยง NVH รองรับความคลาดเคลื่อนที่แน่นหนา | การจัดหาจากผู้ผลิตและซัพพลายเออร์ระดับ 1 สำหรับชุดระบบปรับอากาศ; คลิปโครงสร้างสำหรับคอมเพรสเซอร์และคอนเดนเซอร์ | ความสม่ำเสมอสูงสุด; ระยะเวลาการผลิตสั้น; วิศวกรผู้เชี่ยวชาญ | โดยหลักสำหรับผู้ซื้อแบบจำนวนมาก/อุตสาหกรรม ไม่ใช่ผู้บริโภคปลายทาง |
| อะไหล่ OEM | ตรงตามข้อกำหนดของยานพาหนะรุ่นดั้งเดิมอย่างแม่นยำ; ได้รับจากตัวแทนจำหน่าย | การรับประกันจากผู้ผลิต (โดยทั่วไป 1 ปีหรือมากกว่า) | รับประกันความพอดี; คุณภาพสม่ำเสมอ | การซ่อมแซมที่สำคัญ, รถยนต์ที่เช่า, งานประกัน/การชน | อุ่นใจได้; ไม่ต้องเดาเรื่องความเข้ากันได้ | ราคาสูง; การจัดหาช้ากว่า; จำกัดอยู่ในเครือข่าย OEM เท่านั้น |
| อะไหล่ขายหลัง | มีหลากหลายแบรนด์และตัวเลือก; หาได้จากผู้จัดจำหน่ายชิ้นส่วนระบบปรับอากาศและร้านอะไหล่รถยนต์ | แตกต่างกัน—บางแบรนด์เทียบเท่า OEM, บางแบรนด์มีน้อย | อาจต้องศึกษาข้อมูลอย่างรอบคอบเพื่อให้ได้ขนาดที่เหมาะสม; คุณภาพแตกต่างกัน | ซ่อมในงบประมาณ; รถยนต์รุ่นเก่า; แก้ไขปัญหาแบบเร่งด่วน | ต้นทุนต่ำ; มีให้เลือกหลากหลาย; หาง่าย | มีความเป็นไปได้ที่คุณภาพจะไม่สม่ำเสมอ; ต้องทำการศึกษาข้อมูล |
| อะไหล่ที่ผ่านการรีเฟอร์บ (รีเครื่อง/ซ่อมฟื้นฟู) | นำชิ้นส่วนเดิมที่ใช้แล้วมาสร้างใหม่ตามมาตรฐาน; นิยมสำหรับคอมเพรสเซอร์และชิ้นส่วนระบบปรับอากาศบางชนิด | มักจะเป็นของแข็ง (6-12 เดือน); ตรวจสอบรายละเอียดของผู้จัดจำหน่าย | สามารถติดตั้งได้เหมือนของเดิมจากโรงงาน; อาจมีความแตกต่างเล็กน้อยในด้านรูปลักษณ์ | คุ้มค่าสำหรับรถยนต์รุ่นเก่า; การนำกลับมาใช้ใหม่เป็นมิตรกับสิ่งแวดล้อม | ต้นทุนต่ำกว่า; เป็นมิตรกับสิ่งแวดล้อม; การรับประกันที่เหมาะสม | กระบวนการค่ามัดจำ/คืนเงิน; บางครั้งมีสินค้าไม่เพียงพอ |
เมื่อความสามารถของผู้จัดจำหน่ายมีความสำคัญต่อชิ้นส่วนระบบปรับอากาศรถยนต์
การเลือกที่เหมาะสม ผู้จัดจำหน่ายชิ้นส่วนเครื่องปรับอากาศสำหรับรถยนต์ ไม่ใช่แค่เรื่องราคา ลองจินตนาการว่าโครงการของคุณต้องการไม่เพียงแค่คอมเพรสเซอร์เท่านั้น แต่ยังต้องการชุดยึดที่ปั๊มขึ้นรูปและตัวล็อกโครงสร้างที่ช่วยให้การทำงานปราศจากแรงสั่นสะเทือนและเงียบยิ่งขึ้น นี่คือจุดที่ความสามารถและความเชี่ยวชาญของผู้จัดจำหน่ายมีบทบาทสำคัญ ตัวอย่างเช่น เส้าอี้ มีความโดดเด่นเหนือผู้อื่น ผู้จัดจำหน่ายคอมเพรสเซอร์เครื่องปรับอากาศสำหรับรถยนต์ ด้วยการเสนอโซลูชันการปั๊มขึ้นรูปแบบเฉพาะที่ช่วยให้การติดตั้งแม่นยำและลดความเสี่ยงด้าน NVH (เสียง แรงสั่นสะเทือน และความหยาบกระด้าง) ซึ่งมีความสำคัญอย่างมากทั้งสำหรับผู้ผลิตเดิม (OEMs) และผู้จัดจำหน่ายระดับ Tier 1
- ผู้จัดจำหน่ายมีระบบควบคุมคุณภาพที่ได้รับการรับรองตามมาตรฐาน IATF หรือ ISO หรือไม่?
- พวกเขาสามารถรองรับทั้งการผลิตต้นแบบในปริมาณน้อยและงานผลิตจำนวนมากได้หรือไม่
- พวกเขาสามารถตอบสนองต่อการเปลี่ยนแปลงการออกแบบหรือข้อกำหนดเฉพาะได้หรือไม่
- พวกเขาให้การสนับสนุนทางด้านเทคนิคในการเชื่อมต่อกับระบบอื่น ๆ หรือไม่ ชิ้นส่วนเครื่องปรับอากาศรถยนต์ ?
สำหรับผู้ซื้อจำนวนมาก โดยเฉพาะผู้ที่จัดหาเพื่อใช้ในระบบขนส่งหรือโรงงานการผลิต สิ่งเหล่านี้อาจเป็นตัวแปรสำคัญที่ทำให้การติดตั้งเป็นไปอย่างราบรื่น หรือเกิดความล่าช้าที่ก่อให้เกิดค่าใช้จ่ายสูง นั่นจึงเป็นเหตุผลว่าทำไมจึงควรตรวจสอบประวัติการทำงานของผู้จัดจำหน่าย อ่านรีวิวจากลูกค้า และตรวจสอบใบรับรองที่เกี่ยวข้อง
การรับประกันและการพิจารณาคืนสินค้า: การปกป้องการลงทุนของคุณ
ก่อนที่จะคลิก "ซื้อ" ในรายการสั่งซื้อครั้งต่อไปของคุณ ส่วนของรถยนต์ AC ให้ถามตัวเองว่า: หากชิ้นส่วนเกิดความล้มเหลวจะเกิดอะไรขึ้น ชิ้นส่วนของผู้ผลิตเดิมมักมาพร้อมกับการรับประกันที่ครอบคลุมและกระบวนการคืนสินค้าที่สะดวกผ่านเครือข่ายตัวแทนจำหน่าย ชิ้นส่วนที่ไม่ใช่ของผู้ผลิตเดิมและชิ้นส่วนที่ผลิตใหม่จะมีความแตกต่างกัน — บางราย ผู้จัดจำหน่ายชิ้นส่วนเครื่องปรับอากาศ มีการรับประกันที่เทียบเท่ากับของผู้ผลิตเดิม ในขณะที่บางรายเลือกแลกกับราคาที่ถูกกว่า ( ดูรายละเอียด ).
- ตรวจสอบระยะเวลาการรับประกันและสิ่งที่ครอบคลุม (ค่าแรง อะไหล่ ค่าขนส่ง)
- เข้าใจขั้นตอนการชาร์จและคืนเงินสำหรับคอมเพรสเซอร์ที่ผลิตใหม่—โดยปกตีคุณจำเป็นต้องส่งชิ้นส่วนเก่าคืนเพื่อขอรับเงินคืน
- สำหรับโมดูลหรือชิ้นส่วนอิเล็กทรอนิกส์ที่ต้องการการปรับเทียบ แหล่งจัดหาที่เป็น OEM หรือผู้ผลิตคุณภาพสูงในตลาดหลังการขายถือเป็นทางเลือกที่ดีที่สุด เพื่อหลีกเลี่ยงปัญหาความไม่เข้ากัน
- เก็บรักษาใบเสร็จและเอกสารการติดตั้งทุกฉบับไว้—เอกสารเหล่านี้มักจะถูกต้องการสำหรับการเรียกร้องการรับประกันกับผู้จัดจำหน่ายใดๆ ก็ตาม ผู้จัดจำหน่ายชิ้นส่วนเครื่องปรับอากาศสำหรับรถยนต์ .
การเลือกซัพพลายเออร์และประเภทชิ้นส่วนที่เหมาะสมไม่ใช่แค่เรื่องราคาเท่านั้น—แต่ยังเป็นเรื่องของการตรวจสอบให้แน่ใจว่าชิ้นส่วนนั้นมีความเหมาะสม น่าเชื่อถือ และมีการสนับสนุนที่คุณต้องการเพื่อการซ่อมแซมที่ไร้ปัญหา
เมื่อคุณทราบวิธีเปรียบเทียบซัพพลายเออร์และประเภทชิ้นส่วนแล้ว ขั้นตอนต่อไปคือการเข้าใจแม่แบบข้อมูลจำเพาะและเกณฑ์ในการเลือก—เพื่อให้คุณได้รับชิ้นส่วนที่ถูกต้องตั้งแต่ครั้งแรกที่สั่งซื้อ
แม่แบบข้อมูลจำเพาะสำหรับการเลือกชิ้นส่วนที่ถูกต้อง
เคยสั่งซื้อชิ้นส่วนทดแทนสำหรับคอมเพรสเซอร์แอร์รถยนต์ แล้วพบว่าชิ้นส่วนนั้นไม่พอดีหรือใช้งานไม่ได้ตามที่คาดหวังหรือไม่? คุณไม่ได้เผชิญปัญหานี้เพียงลำพัง การเลือกชิ้นส่วนที่เหมาะสม อะไหล่ระบบปรับอากาศรถยนต์ (automotive hvac parts) ไม่ใช่แค่การจับคู่หมายเลขชิ้นส่วนให้ตรงกันเท่านั้น แต่ยังหมายถึงการเข้าใจข้อมูลจำเพาะหลักที่ช่วยให้มั่นใจได้ว่าชิ้นส่วนจะพอดี ใช้งานได้ถูกต้อง และมีความทนทานยาวนาน มาดูตัวอย่างรูปแบบและการแนะนำเคล็ดลับที่เป็นประโยชน์ เพื่อให้คุณสามารถเลือกคอมเพรสเซอร์ คอนเดนเซอร์ อีวาโพอเรเตอร์ และอุปกรณ์ขยายระบบปรับอากาศ (A/C expansion device) ที่เหมาะสมสำหรับงานซ่อมหรือโครงการของคุณ
รายการตรวจสอบข้อมูลจำเพาะของคอมเพรสเซอร์
| ขนาดทางกายภาพ | ข้อมูลไฟฟ้า | ความเข้ากันได้ของสารทำความเย็นและน้ำมัน | บันทึกเกี่ยวกับการติดตั้ง |
|---|---|---|---|
|
|
|
|
รายละเอียดการติดตั้งคอนเดนเซอร์และอีวาโพอเรเตอร์
| ขนาดทางกายภาพ | ขนาดข้อต่อ | ช่องติดตั้งเซนเซอร์/พอร์ต | ความเข้ากันได้ |
|---|---|---|---|
|
|
|
|
อุปกรณ์ขยายและหมายเหตุการปรับเทียบ
| ประเภทอุปกรณ์ | ขนาดรูหรือวาล์ว | การตั้งค่าความร้อนส่วนเกิน (TXV) | ความเข้ากันได้กับสารทำความเย็น |
|---|---|---|---|
|
|
|
|
- การไม่ตรงกันของชุดสายพาน (คอมเพรสเซอร์ไม่สามารถยึดติดหรือสายพานเกิดเสียงหวีด)
- หัวต่อไม่ตรงรุ่น (ไม่มีไฟเลี้ยงไปที่คลัตช์คอมเพรสเซอร์)
- ปริมาณน้ำมันเติมไม่ถูกต้อง (เกิดเสียงดัง หรือเสื่อมสภาพก่อนเวลา)
- ขนาดท่อแคบไม่เหมาะสม (ทำความเย็นไม่เพียงพอ หรือระบบทำงานผิดปกติ)
- ขาดปลั๊กเซ็นเซอร์ (ไฟเตือนหรือรหัสข้อผิดพลาดแสดง)
การตรวจสอบข้อมูลให้ตรงกันก่อนสั่งซื้อ ช่วยประหยัดเวลาและค่าใช้จ่าย พร้อมป้องกันความหงุดหงิด—อย่าปล่อยให้ท่อแคบหรือหัวต่อแอร์ไม่ตรงรุ่น ทำให้งานซ่อมของคุณต้องล่าช้า
เมื่อใช้แม่แบบเหล่านี้ และเปรียบเทียบรายละเอียดแต่ละข้ออย่างรอบคอบ จะช่วยลดงานซ้ำซ้อน และรับประกันว่าทุกชิ้นส่วนที่ติดตั้ง เครื่องบดอากาศ หรือ อุปกรณ์ขยาย ที่คุณติดตั้งจะทำงานได้ตามที่คาดหวัง ต่อไปเราจะวิเคราะห์เรื่องต้นทุน แรงงาน รวมถึงข้อดีของการซ่อมเองเทียบกับช่างมืออาชีพ เพื่อให้คุณวางแผนงานซ่อมครั้งต่อไปได้อย่างมั่นใจ
สิ่งที่ควรรู้เมื่อเปลี่ยนชิ้นส่วนระบบปรับอากาศในรถยนต์
การประเมินราคาอะไหล่และค่าแรงอย่างถูกต้อง
เคยมั้ยที่คุณรู้สึกเครียดกับปัญหาแอร์รถยนต์เสีย แล้วสงสัยว่า "คอมเพรสเซอร์แอร์ราคาเท่าไหร่นะ" หรือคุณอาจจะกำลังเปรียบเทียบราคา คอมเพรสเซอร์แอร์ กับการซื้อชุด คอมเพรสเซอร์แอร์แบบชุดเต็ม . ความจริงก็คือ ราคาอาจแตกต่างกันมาก ขึ้นอยู่กับรถของคุณ ยี่ห้อของอะไหล่ และว่าคุณซื้อของใหม่ ของที่ผลิตใหม่ หรือของตลาดรอง ตามข้อมูลจากอุตสาหกรรม โดยทั่วไปแล้วค่าใช้จ่ายในการเปลี่ยนคอมเพรสเซอร์แอร์รถยนต์จะอยู่ระหว่าง 1,000 ถึง 2,000 ดอลลาร์ —โดยส่วนใหญ่ราคาจะมาจากตัวอะไหล่เอง ( Carfax ) ส่วนค่าแรงมักจะเป็นสัดส่วนที่น้อยกว่า แต่ก็ไม่ใช่จำนวนที่น้อยเลย: เครื่องมือเฉพาะ ขั้นตอนการจัดการสารทำความเย็น และการดูดสูญญากาศระบบต่างๆ เพิ่มความซับซ้อนเข้าไปอีก หากคุณสงสัยว่า "คอมเพรสเซอร์แอร์รถยนต์ราคาเท่าไหร่ หรือคอมเพรสเซอร์เครื่องปรับอากาศสำหรับรถของฉันราคาเท่าไหร่" คุณควรปรึกษาร้านค้าในพื้นที่หรือร้านค้าออนไลน์ที่เชื่อถือได้เพื่อขอใบเสนอราคาที่ทันสมัย เนื่องจากราคาอาจเปลี่ยนแปลงไปตามความพร้อมใช้งานและพื้นที่
ปัจจัยสำคัญที่มีผลต่อ ราคา ac compressor รถยนต์ ที่ต้องพิจารณารวมถึง:
- ยี่ห้อ รุ่น และปีของรถ (รถหรูและรถรุ่นใหม่มักมีราคาอะไหล่สูงกว่า)
- ประเภทคอมเพรสเซอร์ (แบบ single-stage, variable หรือแบบมี/ไม่มีคลัตช์)
- อะไหล่ใหม่ เก่าที่ผ่านการซ่อมแล้ว หรือของเก่า (อะไหล่ใหม่มีราคาสูงกว่าแต่มาพร้อมการรับประกัน)
- ชิ้นส่วนนั้นขายแยกเดี่ยวหรือเป็นชุด คอมเพรสเซอร์แอร์แบบชุดเต็ม (ชุดอาจรวมทั้งตัวดูดความชื้น อุปกรณ์ขยาย และซีลยาง)
- อัตราค่าแรงในพื้นที่ของคุณและประสบการณ์ของอู่
- การรับประกัน (อะไหล่ OEM หรืออะไหล่ตลาดหลังอาจมีเงื่อนไขที่แตกต่างกัน)
สำหรับแรงงาน คาดว่าการเปลี่ยนจะใช้เวกหลายชั่วโมง — การเปลี่ยนคอมเพรสเซอร์เป็นงานที่ซับซ้อนและจำเป็นต้องทำการสูบลมออกและชาร์จน้ำยาทำความเย็นใหม่ ซึ่งต้องดำเนินการโดยช่างมืออาชีพที่มีใบรับรองเพื่อให้เป็นไปตามข้อบังคับของ EPA ( แหล่งที่มา ).
การซ่อมที่เหมาะกับงานทำเอง vs. งานที่ต้องใช้มืออาชีพ
ฟังดูเหมือนงานใหญ่? ใช่แล้ว โดยบางส่วนประกอบของระบบปรับอากาศรถยนต์ เช่น รีเลย์หรือไส้กรองอากาศในห้องโดยสาร สามารถเปลี่ยนเองได้ แต่ส่วนอื่นๆ เช่น คอมเพรสเซอร์หรือแกนระเหย จำเป็นต้องใช้ทักษะขั้นสูงและเครื่องมือพิเศษ นี่คือตารางสรุปความยากง่ายเพื่อช่วยให้คุณตัดสินใจ:
| งานซ่อม | ความยาก | แนะนำสำหรับ |
|---|---|---|
| การเปลี่ยนรีเลย์หรือไส้กรองอากาศห้องโดยสาร | ง่าย | ผู้ที่ทำเองได้พร้อมเครื่องมือพื้นฐาน |
| มอเตอร์พัดลมหรือตัวต้านทานไฟฟ้า | ปานกลาง | ผู้ที่ทำเองได้ที่มีประสบการณ์ทางด้านไฟฟ้า |
| คอมเพรสเซอร์หรือแกนระเหย | ขั้นสูง | ช่างเทคนิคมืออาชีพ (จำเป็นต้องกู้คืนสารทำความเย็น ทำการสูบลมระบบ และวัดปริมาณน้ำมันอย่างแม่นยำ) |
การพยายามเปลี่ยนคอมเพรสเซอร์โดยขาดการฝึกอบรมที่เหมาะสม อาจเสี่ยงต่อการติดตั้งผิดพลาด ทำให้เกิดการรั่วไหล หรือแม้กระทั่งความเสียหายกับระบบ เนื่องจากกฎหมายกำหนดให้การจัดการสารทำความเย็นต้องดำเนินการโดยผู้เชี่ยวชาญที่ได้รับการรับรอง งานเปลี่ยนคอมเพรสเซอร์ส่วนใหญ่จึงควรปล่อยให้เป็นหน้าที่ของช่างผู้ชำนาญการ
รายการตรวจสอบก่อนซ่อมและตรวจสอบยืนยันหลังซ่อม
คุณกำลังวางแผนที่จะทำการซ่อมแซมเองหรือเตรียมรถของคุณสำหรับการเข้ารับบริการจากช่างมืออาชีพ? ใช้รายการตรวจสอบเหล่านี้เพื่อให้การดำเนินงานเป็นไปอย่างเป็นระเบียบและปลอดภัย:
- รวบรวมเครื่องมือที่จำเป็นทั้งหมด (ประแจ ดอกสว่าน เครื่องวัดแรงดันแบบแมนิโฟลด์ของเครื่องปรับอากาศ ปั๊มสุญญากาศ)
- สวมใส่อุปกรณ์ป้องกันส่วนบุคคล (แว่นตาป้องกัน ถุงมือ)
- ศึกษาและพิมพ์ค่าแรงบิดตามคำแนะนำของผู้ผลิตเดิม (OEM) สำหรับชิ้นส่วนทั้งหมด
- สั่งซื้อซีล แหวนโอ (O-rings) และน้ำมันที่ใช้ร่วมกันได้ที่ถูกต้อง
- ตรวจสอบหมายเลขชิ้นส่วนและชนิดของสารทำความเย็นก่อนเปิดระบบ
- ตรวจสอบให้แน่ใจว่าช่างที่ได้รับการรับรองจะเป็นผู้ทำการดูดสารทำความเย็นออกตามข้อกำหนดของ EPA
หลังจากการซ่อมแซม ให้ตรวจสอบยืนยันว่าทุกอย่างทำงานได้ตามปกติ:
- ตรวจสอบอุณหภูมิของช่องระบายอากาศขณะเครื่องเดินเบาและที่ 1,500 รอบต่อนาที
- สังเกตการทำงานเป็นจังหวะของคลัตช์คอมเพรสเซอร์ และฟังเสียงที่ผิดปกติ
- ตรวจสอบค่าความดันให้มีความเสถียร (ตามข้อกำหนดของผู้ผลิต)
- ตรวจสอบการรั่วไหลโดยใช้สารเรืองแสงหรือเครื่องตรวจจับอิเล็กทรอนิกส์
- ตรวจสอบว่าไฟเตือนทั้งหมดดับ และไม่มีรหัสข้อผิดพลาดปรากฏอยู่
การวางแผนอย่างเหมาะสม การใช้เครื่องมือที่เหมาะสม และการตรวจสอบหลังการซ่อมมีความสำคัญอย่างยิ่ง โดยเฉพาะงานที่มีมูลค่าสูง เช่น การเปลี่ยนคอมเพรสเซอร์ เมื่อไม่แน่ใจ ควรไว้วางใจให้ช่างเทคนิคที่ได้รับการรับรองดำเนินการ เพื่อปกป้องการลงทุนของคุณและรับประกันความถูกต้องตามข้อกำหนด
การเข้าใจถึงต้นทุนและความพยายามที่แท้จริงจะช่วยให้คุณตัดสินใจได้อย่างชาญฉลาดว่าควร อะไหล่ระบบปรับอากาศรถยนต์ (automotive hvac parts) ทำอะไรด้วยตนเอง และเมื่อใดควรเรียกช่างมืออาชีพ ในส่วนต่อไป เราจะสรุปด้วยข้อแนะนำที่นำไปปฏิบัติได้จริง และแหล่งข้อมูลที่เชื่อถือได้ เพื่อความสำเร็จที่ยั่งยืน
สรุปและแหล่งข้อมูลที่เชื่อถือได้สำหรับการดำเนินการเพิ่มเติมในระบบปรับอากาศยานยนต์
ข้อสรุปสำคัญและขั้นตอนต่อไป
เมื่อคุณถอยออกมาดูระบบควบคุมสภาพอากาศของรถแล้ว จะพบว่ามันไม่ใช่เพียงแค่ชุดสวิตช์และช่องลมเท่านั้น แต่ยังเป็นเครือข่ายที่ถูกออกแบบมาอย่างพิถีพิถันของ ระบบปรับอากาศในยานยนต์ ชิ้นส่วนต่างๆ จากคอมเพรสเซอร์ไปจนถึงอุปกรณ์ขยาย แต่ละชิ้นมีหน้าที่ชัดเจน การเข้าใจรุ่นของระบบ การปฏิบัติตามขั้นตอนการวินิจฉัยอย่างมีวินัย และตรวจสอบข้อมูลเฉพาะของชิ้นส่วนทุกครั้ง คือกุญแจสำคัญในการซ่อมแซมที่เชื่อถือได้และมีความทนทานยาวนาน ไม่ว่าคุณจะเป็นช่างเทคนิค เจ้าของร้าน หรือนักซ่อมมืออาชีพ การปฏิบัติตามแนวทางที่ดีที่สุดเหล่านี้จะช่วยให้คุณหลีกเลี่ยงปัญหาที่เกิดซ้ำ และรักษาประสิทธิภาพการใช้งานของยานพาหนะคุณได้ ทำความร้อนและปรับอากาศในรถยนต์ ทำงานได้อย่างมีประสิทธิภาพสูงสุด
การเข้าใจพื้นฐานของการวินิจฉัยระบบปรับอากาศในรถยนต์ การเลือกชิ้นส่วนคุณภาพ และการปฏิบัติตามข้อกำหนดทางกฎหมายอย่างเคร่งครัด จะช่วยลดปัญหาที่ไม่คาดคิด เพิ่มความสะดวกสบาย และทำให้การซ่อมแซมมีความปลอดภัยมากยิ่งขึ้น—ทุกครั้งที่คุณลงมือทำงาน
มาตรฐานและหลักสูตรฝึกอบรมที่ได้รับการยอมรับ
พร้อมที่จะพัฒนาทักษะของคุณให้ก้าวไปอีกขั้นหรือไม่ การอัปเดตความรู้และทักษะอยู่เสมอ รวมถึงการมีใบรับรองที่ทันสมัย เป็นสิ่งสำคัญสำหรับทุกคนที่ทำงานกับ เครื่องปรับอากาศรถยนต์ . EPA การรับรอง 609 จำเป็นต้องมีตามกฎหมายสำหรับการจัดการสารทำความเย็นในสหรัฐอเมริกา และนายจ้างหลายรายมองหาคุณสมบัติเพิ่มเติมจาก ASE หรือ SAE โปรแกรมเหล่านี้ไม่เพียงแต่สอนทักษะทางเทคนิค แต่ยังเน้นความรับผิดชอบต่อสิ่งแวดล้อม การสื่อสารกับลูกค้า และข้อกำหนดด้านความปลอดภัย ( หลักสูตรระบบปรับอากาศยานยนต์จาก UTI ).
- การรับรอง EPA 609: การฝึกอบรมและข้อกำหนดช่างเทคนิค
- การรับรอง HVAC ระดับเริ่มต้นจาก ASE
- การฝึกอบรมวิศวกรรมระบบปรับอากาศยานยนต์จาก SAE
- UAC Parts: คลังสินค้าและแคตตาล็อกชิ้นส่วนระบบปรับอากาศชั้นนำ
- แนวทางปฏิบัติที่ดีที่สุดสำหรับการตรวจจับการรั่วไหลในระบบ HVAC สำหรับยานยนต์
ผู้จัดหาและพันธมิตรผู้ผลิตที่เชื่อถือได้
จินตนาการว่าคุณกำลังจัดหาไม่เพียงแค่คอมเพรสเซอร์เท่านั้น แต่ยังรวมถึงแขนยึดและชุดติดตั้งที่ช่วยให้การติดตั้งพอดีสนิทปราศจากรอยต่อที่สั่นคลอน สำหรับทีมวิศวกรรมและการจัดซื้อ การมีพันธมิตรที่เข้าใจความสำคัญของความแม่นยำใน hvac automotive ชิ้นส่วนประกอบคือสิ่งที่ทำให้เกิดความแตกต่าง บริษัท Shaoyi Automotive Stamping Dies & Parts จัดส่งชิ้นส่วนยึดระบบปรับอากาศแบบตีขึ้นรูปที่มีความแม่นยำสูง รวมถึงชิ้นส่วนโลหะที่เกี่ยวข้อง ช่วยให้ผู้ผลิตอุปกรณ์ต้นทาง (OEMs) และซัพพลายเออร์ระดับ Tier บรรลุมาตรฐานการติดตั้งและปรับทิศทางการไหลของอากาศได้อย่างแม่นยำในทุกโครงการ
- Shaoyi: ชิ้นส่วนโลหะที่ตีขึ้นรูปด้วยความแม่นยำสำหรับระบบปรับอากาศในรถยนต์
- คลังสินค้าอะไหล่ UAC: สต็อกสินค้าครบวงจรสำหรับระบบปรับอากาศรถยนต์
- RockAuto: ผู้จัดจำหน่ายชิ้นส่วนระบบปรับอากาศรถยนต์รายใหญ่
- NAPA: ชิ้นส่วนและเครื่องมือสำหรับระบบปรับอากาศ
- O’Reilly Auto Parts: ชิ้นส่วนระบบปรับอากาศและระบบทำความร้อน
ด้วยการใช้ทรัพยากรเหล่านี้ คุณจะสามารถเข้าถึงมาตรฐานล่าสุด ซัพพลายเออร์ที่เชื่อถือได้ และคำแนะนำจากผู้เชี่ยวชาญได้ตลอดเวลา ทำให้ทุกการซ่อมแซมหรืออัปเกรดระบบของคุณ ระบบปรับอากาศในยานยนต์ ประสบความสำเร็จ อย่าลืมว่าการลงทุนในหลักสูตรฝึกอบรมที่มีคุณภาพ การเลือกแหล่งจัดหาจากบริษัทที่น่าเชื่อถือ อะไหล่แอร์รถยนต์ รวมถึงการอัปเดตแนวทางปฏิบัติที่ดีที่สุด คือวิธีที่ชาญฉลาดที่สุดในการทำให้ระบบควบคุมอุณหภูมิในรถของคุณใช้งานได้อย่างราบรื่นตลอดหลายปีที่ผ่านมา
คำถามที่พบบ่อยเกี่ยวกับอะไหล่ระบบปรับอากาศในรถยนต์
1. องค์ประกอบหลักของระบบปรับอากาศในรถยนต์มีอะไรบ้าง
ชิ้นส่วนหลักของระบบปรับอากาศในรถยนต์ประกอบด้วยคอมเพรสเซอร์ (Compressor), คอนเดนเซอร์ (Condenser), อีวาโพอเรเตอร์ (Evaporator), อุปกรณ์ขยาย (Valve หรือ Orifice Tube), แอคคิวมูเลเตอร์ (Accumulator) หรือรีซีฟเวอร์-ไดรเออร์ (Receiver-Drier), ท่อและโอริง (O-Rings) ต่างๆ, มอเตอร์พัดลม (Blower Motor), โมดูลควบคุม และพัดลมคอนเดนเซอร์ แต่ละชิ้นส่วนมีบทบาทเฉพาะในการควบคุมการทำความเย็น การให้ความร้อน และการไหลของอากาศ เพื่อให้เกิดความสะดวกสบายและความน่าเชื่อถือของระบบ
2. ฉันจะรู้ได้อย่างไรว่าคอมเพรสเซอร์แอร์รถยนต์เริ่มเสียหาย
อาการทั่วไปของคอมเพรสเซอร์แอร์ที่เริ่มเสียหาย ได้แก่ ลมที่ออกมาจากช่องแอร์มีอุณหภูมิสูง เสียงผิดปกติ (เช่น เสียงหวีด หรือเสียงดังก้อง) เมื่อเปิดแอร์ หรือคลัตช์ไม่ทำงาน นอกจากนี้ การรั่วของน้ำมันบริเวณคอมเพรสเซอร์หรือคลัตช์ก็เป็นสัญญาณเตือนที่สำคัญ การตรวจเช็กและเปลี่ยนชิ้นส่วนทันทีจะช่วยป้องกันความเสียหายเพิ่มเติมในระบบ
3. ความแตกต่างระหว่างอะไหล่ OEM, อะไหล่ตลาดรอง (Aftermarket) และอะไหล่ที่ผ่านการซ่อมใหม่ (Remanufactured) คืออะไร
อะไหล่ OEM ผลิตตามข้อมูลจำเพาะเดิมและมีการรับประกันความพอดีและความคุณภาพ โดยทั่วไปมีราคาสูงกว่า อะไหล่ตลาดรองมีทางเลือกที่หลากหลายกว่าและราคาถูกกว่า แต่คุณภาพและความพอดีอาจแตกต่างกัน อะไหล่ที่ผ่านการสร้างใหม่มาจากชิ้นส่วนที่ใช้แล้ว และเป็นทางเลือกที่ประหยัดและเป็นมิตรต่อสิ่งแวดล้อม แต่อาจมีการเข้าถึงได้จำกัดและต้องส่งคืนแกนเดิม
4. การเลือกสารทำความเย็นและน้ำมันที่ถูกต้องมีความสำคัญอย่างไรต่อระบบปรับอากาศของรถยนต์ฉัน
การเลือกใช้สารทำความเย็นที่ถูกต้อง (เช่น R-1234yf หรือ R-134a) และน้ำมันที่เข้ากันได้ (เช่น PAG 46) มีความสำคัญต่อสมรรถนะ ความทนทานของระบบ และการปฏิบัติตามข้อบังคับด้านสิ่งแวดล้อม การผสมสารทำความเย็นหรือใช้น้ำมันที่ไม่เหมาะสม อาจทำให้เกิดการระบายความเย็นไม่ดี เกิดความเสียหายภายใน และปัญหาทางกฎหมายที่อาจเกิดขึ้น กรุณาปฏิบัติตามคำแนะนำของผู้ผลิตเดิมเสมอ และดำเนินการจัดการสารทำความเย็นด้วยใบรับรองที่เหมาะสม
5. ฉันควรบำรุงรักษาชิ้นส่วนระบบปรับอากาศและทำความร้อนในรถยนต์บ่อยแค่ไหน
การบำรุงรักษาระยะควรรวมถึงการตรวจสอบประจำปีของสายพานระบบปรับอากาศ ไส้กรองอากาศในห้องโดยสาร และท่อต่างๆ ของระบบ ควรทำความสะอาดคอนเดนเซอร์ทุกสองปี และเปลี่ยนตัวสะสมหรือตัวกรองแห้งทุกครั้งที่มีการเปิดระบบหรือหลังจากการซ่อมแซมใหญ่ การตรวจสอบเป็นประจำจะช่วยป้องกันการรั่วไหล รักษาประสิทธิภาพ และยืดอายุการใช้งานระบบปรับอากาศในรถยนต์ของคุณ