 ผลิตจำนวนน้อย แต่มีมาตรฐานสูง บริการสร้างต้นแบบอย่างรวดเร็วของเรามาพร้อมกับการตรวจสอบที่เร็วขึ้นและง่ายขึ้น —

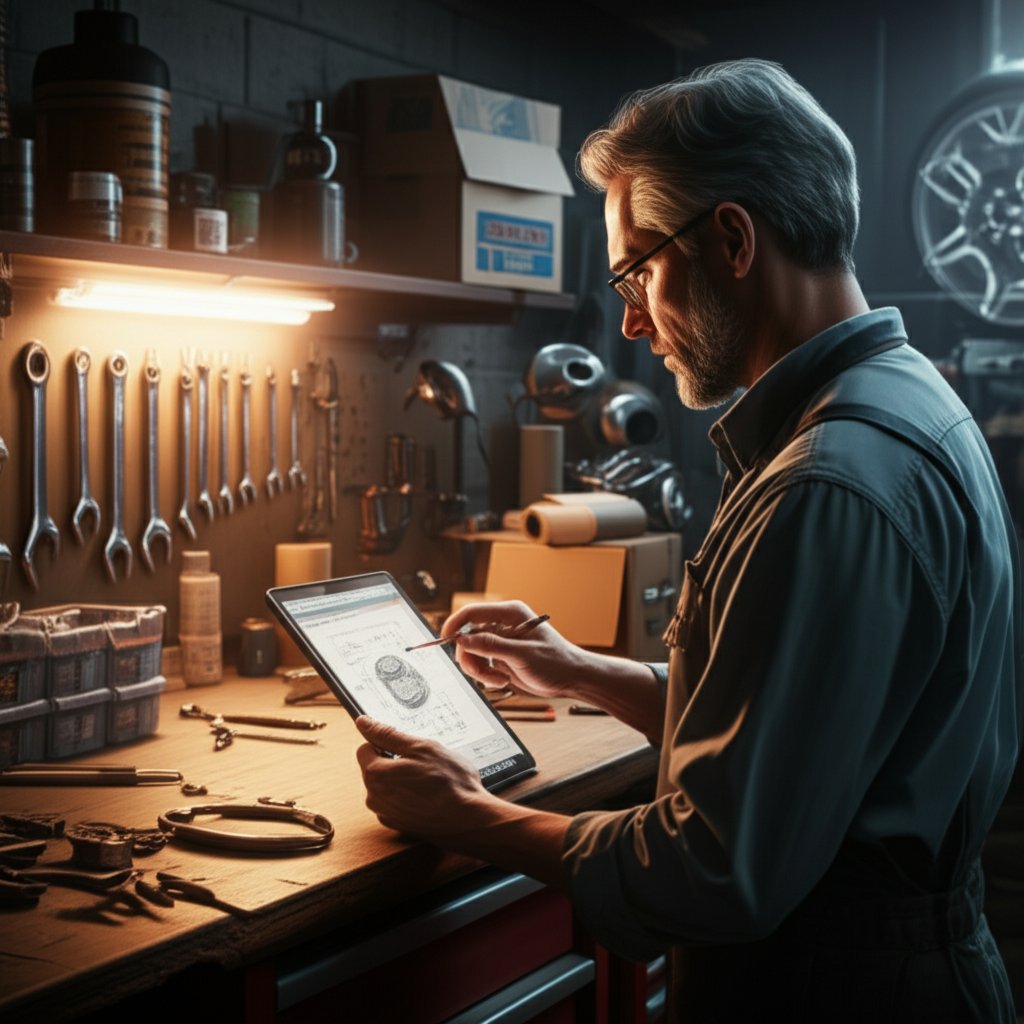
อะไหล่แต่งรถยนต์: ใช้ระบบทำงานที่เริ่มต้นด้วยหมายเลขตัวถัง (VIN) เพื่อให้การติดตั้งพอดีเป๊ะ

ทำความเข้าใจเกี่ยวกับชิ้นส่วนยานยนต์สำหรับตลาดหลังการขาย
คุณเคยสงสัยหรือไม่ว่าการเลือกใช้ชิ้นส่วนยานยนต์สำหรับตลาดหลังการขาย หมายความว่าคุณต้องยอมรับสิ่งที่ด้อยกว่าหรือไม่ หรือบางทีคุณอาจเคยได้ยินว่ามีเพียงชิ้นส่วนของผู้ผลิตเดิมเท่านั้นที่จะรับประกันความน่าเชื่อถือได้? ขอชี้แจงความเข้าใจผิดเหล่านี้ และวางรากฐานที่มั่นคงสำหรับการซ่อมแซมหรืออัปเกรดครั้งต่อไปของคุณ
ชิ้นส่วนรถยนต์สำหรับตลาดหลังการขายคืออะไร
พูดง่าย ๆ คือ ชิ้นส่วนสำหรับตลาดหลังการขาย คือชิ้นส่วนใด ๆ ก็ตามที่ไม่ได้ถูกผลิตโดยผู้ผลิตรถยนต์เดิมของคุณโดยตรง ชิ้นส่วนเหล่านี้ถูกออกแบบ ผลิต และจัดจำหน่ายโดยบริษัทคู่ค้า ซึ่งบางครั้งก็คือผู้ผลิตเดียวกันกับที่ผลิตชิ้นส่วนให้กับผู้ผลิตเดิม คุณสามารถหาซื้อชิ้นส่วนต่าง ๆ ได้ทุกอย่างตั้งแต่ชิ้นส่วนทดแทน แบริ่งล้อ ไปจนถึงชิ้นส่วนเพิ่มสมรรถนะ ท่อร่วมไอดี ที่มีวางจำหน่ายในตลาดหลังการขาย ไม่ว่าคุณจะกำลังเปลี่ยนชิ้นส่วนที่สึกหรอ คอยล์จุดระเบิด หรือต้องการอัปเกรดเพื่อ เบาะ RECARO , หรือปรับแต่งด้วย ล้อแม็ก ENKEI , ตลาดอะไหล่หลังการขายมีตัวเลือกมากมายหลากหลายสำหรับรถยนต์และวัตถุประสงค์เกือบทุกประเภท (ที่มา) .
ข้อแตกต่างที่สำคัญระหว่าง OEM และอะไหล่ตลาดรอง
ยังตัดสินใจไม่ได้ว่าจะเลือก OEM หรืออะไหล่ตลาดรองดี? นี่คือสิ่งที่คุณควรรู้:
| คุณลักษณะ | อะไหล่ OEM | อะไหล่ขายหลัง |
|---|---|---|
| แหล่งที่มา | ผู้ผลิตรถยนต์ | บริษัทอิสระ |
| ต้นทุน | โดยทั่วไปสูงกว่า | มักจะต่ำกว่า |
| การเลือก | จำกัดเฉพาะเครือข่ายตัวแทนจำหน่ายอย่างเป็นทางการ | มีหลากหลายแบรนด์ให้เลือก |
| คุณภาพ | โดยทั่วไปมีความสอดคล้องกัน | แตกต่างกัน—อาจเทียบเท่าหรือดีกว่า OEM โดยเฉพาะจากแบรนด์ที่มีชื่อเสียง |
| การรับประกันคุณภาพ | โดยปกติรวมอยู่ด้วย | อาจแตกต่างกัน โปรดตรวจสอบรายละเอียด |
อะไหล่ OEM ได้รับการรับรองจากผู้ผลิตยานยนต์ และถูกออกแบบมาให้ตรงกับอุปกรณ์เดิมของคุณ อย่างไรก็ตาม แบรนด์อะไหล่หลังการขายมักมีการออกแบบชิ้นส่วนโดยการถอดแบบย้อนกลับ ปรับปรุงจุดอ่อน และบางครั้งอาจเสนอสมรรถนะ ความทนทาน หรือราคาที่ดีกว่า (ที่มา) ตัวอย่างเช่น อุปกรณ์คุณภาพสูงอย่าง คอยล์แพ็ค หรือชุด แผ่นรองหัวสูบ ที่มีคุณภาพดีขึ้น อาจมีอายุการใช้งานยาวนานกว่าอะไหล่ OEM หากเลือกใช้อย่างเหมาะสม
หมวดหมู่ยอดนิยมและเวลาที่ควรเลือกใช้งาน
- การเบรก (แผ่นเบรก, จานเบรก, คาลิปเปอร์)
- การยกเลิก (ช็อกอัพ, สตรัต, บูช)
- ระบบไอดีและไอเสีย (ตัวกรองอากาศ, ท่อไอดี, ระบบไอเสีย)
- การปกป้องภายในรถ (ผ้าปูเบาะ, พรมปูพื้น Weathertech )
- แสงสว่าง (ไฟหน้า, ไฟท้าย, อัปเกรดไฟ LED)
- ล้อและยาง (ล้อแต่ง, ยางสมรรถนะสูง)
ดังนั้น คุณควรพิจารณาอะไหล่ตลาดรองเมื่อไหร่ การบำรุงรักษาตามปกติ (เช่น คอยล์จุดระเบิด หรือ พรมปูพื้น Weathertech ), การอัพเกรดสมรรถนะ หรือเมื่อชิ้นส่วนจากผู้ผลิตเดิมไม่พร้อมใช้งานหรือมีราคาสูงเกินไป หากคุณกำลังมองหาสไตล์ที่โดดเด่นไม่ซ้ำใครหรือต้องการประสบการณ์การขับขี่ที่ดีขึ้น—ลองคิดถึง เบาะ RECARO หรือ ล้อแม็ก ENKEI —ตลาดอะไหล่รองคือเพื่อนที่ดีที่สุดของคุณ
อะไหล่ตลาดรองไม่ได้มีคุณภาพต่ำโดยอัตโนมัติ—คุณภาพของแบรนด์ วัสดุ และการพอดีเป็นสิ่งที่กำหนดผลลัพธ์
ล้มล้างความเข้าใจผิด: คุณภาพและการรับประกันของอะไหล่ตลาดรอง
ความเชื่อที่ว่าอะไหล่ตลาดรองทุกชิ้นล้วนมีคุณภาพต่ำหรือจะทำให้การรับประกันรถเป็นโมฆะนั้นเป็นเพียงความเข้าใจผิด ความจริงแล้ว ร้านค้าหลายแห่งชอบใช้อะไหล่ตลาดรองเพราะมีความน่าเชื่อถือ คุ้มค่า และหาง่าย สิ่งสำคัญคือการศึกษาข้อมูล: เลือกใช้แบรนด์ที่เชื่อถือได้ และตรวจสอบเงื่อนไขการรับประกัน นอกจากนี้ การติดตั้งให้ถูกต้องมีความสำคัญอย่างมาก—อะไหล่คุณภาพดีจะทำงานได้ดีที่สุดเมื่อติดตั้งอย่างเหมาะสม
พร้อมแล้วหรือยังที่จะเปลี่ยนจากการศึกษาข้อมูลมาเป็นการลงมือปฏิบัติจริง ในส่วนต่อไปนี้ คุณจะได้เรียนรู้วิธีตรวจสอบการพอดีและการใช้งานร่วมกันของอะไหล่อย่างมั่นใจ เพื่อให้ชิ้นส่วนที่คุณเลือก—ไม่ว่าจะเป็น ชุดคอยล์ หรือชุดล้อใหม่—สามารถติดตั้งได้อย่างพอดีตั้งแต่ครั้งแรก
วิธีตรวจสอบความเข้ากันได้ของอะไหล่อย่างมั่นใจ
เคยสั่งอะไหล่ชิ้นหนึ่ง รอคอยอย่างใจจดใจจ่อกลับพบว่ามันไม่เข้ากับรถของคุณหรือไม่ คุณไม่ได้เจอปัญหานี้เพียงลำพัง ด้วยรถยนต์และตัวเลือกที่มีหลากหลาย การเลือกซื้ออะไหล่รถยนต์ที่ตรงรุ่นอาจรู้สึกเหมือนการเดาสุ่ม แต่ด้วยกระบวนการทำงานที่มีประสิทธิภาพ คุณสามารถหลีกเลี่ยงการส่งคืนที่เสียค่าใช้จ่ายและเวลาที่เสียเปล่า โดยเฉพาะเมื่อต้องจัดการกับชิ้นส่วนสำคัญอย่าง ลูกบิดเหล็ก , ปั๊มพวงมาลัยเพาเวอร์ , หรือ ข้อต่อทรงลูกบอล .
ขั้นตอนการตรวจสอบความเหมาะสมในการติดตั้งที่ได้รับการพิสูจน์แล้ว
เริ่มต้นจากพื้นฐาน คือหมายเลขตัวถังของคุณ Vehicle Identification Number (VIN) เป็นมาตรฐานทองคำในการเลือกอะไหล่ที่ตรงรุ่น เมื่อคุณกรอก VIN ของคุณลงในแคตตาล็อกหรือเครื่องมือที่เชื่อถือได้ คุณจะได้รับข้อมูลโดยละเอียดเกี่ยวกับสเปคของรถคุณอย่างถูกต้อง ตัวอย่างเช่น เครื่องมืออย่างระบบ Masparts VIN-Check ช่วยให้คุณเพิ่มข้อมูลรถของคุณ เลือกอะไหล่ และส่งตรวจสอบความเข้ากันได้ บ่อยครั้งที่ได้รับการตรวจสอบจากผู้เชี่ยวชาญภายในเวลาไม่ถึง 30 นาที กระบวนการทำงานนี้มีประโยชน์อย่างมากสำหรับชุดอะไหล่ที่ซับซ้อนอย่าง ชุดดุมล้อ หรือเมื่อคุณกำลัง คำนวณระยะ Off-Set ของล้อใหม่ สำหรับล้อใหม่
| วิธีการตรวจสอบความเข้ากันได้ | ข้อดี | ข้อเสีย | เมื่อควรใช้ |
|---|---|---|---|
| ค้นหาจาก VIN | แม่นยำสูง พิจารณาทั้งรุ่นย่อยและรุ่นที่ผลิตแตกต่างกัน | ต้องใช้ VIN แบบเต็มรูปแบบ ซึ่งบางครั้งอาจไม่พร้อมใช้งานสำหรับรถยนต์รุ่นเก่า | เหมาะกับชิ้นส่วนส่วนใหญ่ โดยเฉพาะระบบขับเคลื่อนและช่วงล่าง |
| การจับคู่หมายเลขชิ้นส่วน | สามารถเปลี่ยนแทนได้โดยตรง อ้างอิงข้ามได้ง่าย | หมายเลขชิ้นส่วนอาจแตกต่างกันไปในแต่ละยี่ห้อหรือแต่ละปี | เหมาะที่สุดสำหรับรายการเช่น ล้อแม็กซ์ หรือ สายสตาร์ |
| การตรวจสอบขนาด | ข้ามข้อผิดพลาดในแคตตาล็อก ยืนยันการพอดีทางกายภาพ | ต้องใช้เครื่องมือและทักษะทางเทคนิค | มีประโยชน์สำหรับล้อแต่งพิเศษ บูช หรือชิ้นส่วนอัพเกรดเฉพาะทาง |
| ตารางการติดตั้งของผู้ขาย | ดูข้อมูลได้รวดเร็ว ครอบคลุมหลายรุ่น | อาจล้าสมัยหรือไม่เฉพาะเจาะจง | เหมาะสำหรับการตรวจสอบเพิ่มเติม ไม่ควรใช้เป็นแหล่งข้อมูลหลัก |
การระบุหมายเลข VIN และหมายเลขชิ้นส่วนที่ถูกต้อง
ฟังดูซับซ้อนไปหรือเปล่า? นี่คือวิธีทำให้มันง่ายขึ้น:
- ถอดรหัส VIN ของคุณ หาหมายเลข VIN ของคุณ (แผงหน้าปัด บริเวณบานประตู หรือเอกสารทะเบียน) จากนั้นป้อนลงในแคตตาล็อกหรือเครื่องมือตรวจสอบ VIN ที่เชื่อถือได้
- อ่านฉลากชิ้นส่วนที่มีอยู่ : ถอดชิ้นส่วนเดิมออกและจดหมายเลขที่สลักหรือติดฉลากไว้ โปรดทราบว่า ตามที่ CarPartSource อธิบาย หมายเลขชิ้นส่วนสามารถแตกต่างกันได้แม้แต่ชิ้นส่วนเดียวกัน—การเปรียบเทียบข้ามเป็นสิ่งสำคัญยิ่ง CarPartSource explains , หมายเลขชิ้นส่วนสามารถแตกต่างกันได้แม้แต่ชิ้นส่วนเดียวกัน—การเปรียบเทียบข้ามเป็นสิ่งสำคัญยิ่ง
- ตรวจสอบขนาด : สำหรับชิ้นส่วนเช่น ล้อแม็กซ์ , ล้อ หรือระบบกันสะเทือน ให้ตรวจสอบความละเอียดของเกลียว เส้นผ่านศูนย์กลาง และความยาว สิ่งนี้มีความสำคัญมากเมื่อ คำนวณระยะ Off-Set ของล้อใหม่ หรือเปลี่ยน ชุดดุมล้อ .
- เปรียบเทียบจากแคตตาล็อก : ใช้แหล่งข้อมูลหลายแห่ง และมองหาหมายเลขทดแทน—ซึ่งจะช่วยระบุชิ้นส่วนที่ใช้ได้กับรถยนต์หลายรุ่นและหลายปี
- จดบันทึกรายละเอียดทุกอย่าง : ถ่ายภาพหน้าจอข้อความรับรองความเข้ากันได้ หน้าผลิตภัณฑ์ และบทสนทนาที่คุณคุยกับผู้ขาย อย่าเพิ่งทิ้งบรรจุภัณฑ์จนกว่าคุณจะยืนยันว่าชิ้นส่วนเข้ากันได้
- ตรวจสอบรุ่นย่อยของรถยนต์ : ให้สังเกตระดับรุ่น ระบบขับเคลื่อน วันที่ผลิต และภูมิภาค ความแตกต่างเล็กน้อยเหล่านี้สามารถส่งผลต่อความเหมาะสม โดยเฉพาะกับชิ้นส่วนตัวอย่างเช่น ลูกบิดเหล็ก หรือ ข้อต่อทรงลูกบอล .
ข้อควรระวังในการเปรียบเทียบข้อมูล
ไม่ใช่ว่าทุกแคตตาล็อกจะตรงกันเสมอไป บางครั้งชิ้นส่วนที่ระบุว่าเข้ากันได้อาจไม่ตรงกัน เนื่องจากมีการเปลี่ยนแปลงเล็กน้อยในการผลิต หรือแตกต่างกันในแต่ละภูมิภาค เมื่อไม่แน่ใจ ให้เลือกตัวเลือกที่ระมัดระวังที่สุด หรือปรึกษาผู้เชี่ยวชาญ ตรวจสอบรายละเอียดให้ถี่ถ้วนก่อนยืนยันการสั่งซื้อ โดยเฉพาะชิ้นส่วนที่เกี่ยวข้องกับความปลอดภัย เช่น ระบบพวงมาลัยหรือช่วงล่าง
การบันทึกข้อมูลการตรวจสอบความเข้ากันได้ของคุณ—ภาพหน้าจอ โน้ต และบรรจุภัณฑ์—จะช่วยประหยัดเวลาและปัญหาหากคุณจำเป็นต้องคืนหรือเปลี่ยนชิ้นส่วน
ด้วยกระบวนการทำงานนี้ คุณจะสามารถเลือกและติดตั้งชิ้นส่วนอะไหล่รถยนต์ที่เหมาะสมได้อย่างมั่นใจ ช่วยลดความหงุดหงิดและทำให้โปรเจกต์ของคุณเดินหน้าต่อไปได้ ต่อไปมาดูกันว่าจะประเมินตัวเลือกในการอัพเกรดอย่างไร และตัดสินใจเลือกเส้นทางที่ดีที่สุดสำหรับความต้องการและเป้าหมายของคุณได้อย่างไร
เลือกเส้นทางการอัพเกรดที่เหมาะสม
คุณกำลังคิดจะอัพเกรดรถของคุณ แต่ยังไม่แน่ใจว่าจะเริ่มต้นจากตรงไหน ไม่ว่าคุณจะกำลังมองหาการควบคุมที่แม่นยำมากขึ้น พลังที่เพิ่มขึ้น หรือเสียงท่อไอเสียที่เข้มข้นขึ้น โลกแห่งชิ้นส่วนอะไหล่รถยนต์มีตัวเลือกมากมายให้เลือก แต่คุณจะเลือกอย่างไรระหว่างชุดช่วงล่างแบบคอยล์โอเวอร์กับสปริง ตัวกรองอากาศสำหรับเครื่องยนต์แบบ Cold Air Intake หรือแบบ Drop-in หรือระบบไอเสียแบบ Cat-Back กับแบบ Axle-Back มาเจาะลึกถึงข้อดีข้อเสียที่เกิดขึ้นจริง เพื่อให้คุณตัดสินใจได้อย่างถูกต้องโดยไม่หลงเชื่อคำโฆษณาเกินจริง
ตัวเลือกช่วงล่าง: คอยล์โอเวอร์ เทียบกับ สปริง
| คุณลักษณะ | คอยล์โอเวอร์ (Coilovers) | สปริงลดระดับ |
|---|---|---|
| ความสามารถปรับ | ปรับระดับความสูง และบางครั้งปรับความแข็งของช่วงล่างได้ทั้งหมด | ระดับความสูงคงที่ ไม่สามารถปรับได้ |
| ความซับซ้อนในการติดตั้ง | ปานกลาง; อาจต้องประกอบและตั้งค่าอย่างแม่นยำ | ง่าย; เปลี่ยนสปริง ปรับแนว และออกเดินทางได้เลย |
| คุณภาพการขับขี่ | ปรับแต่งได้; สามารถปรับให้แน่นหรือสบายได้ตามต้องการ | โดยทั่วไปจะแข็งกว่าของเดิม มีความยืดหยุ่นในการปรับจูนน้อยกว่า |
| ผลกระทบต่อสมรรถนะ | เพิ่มประสิทธิภาพการเข้าโค้ง สมดุลน้ำหนักที่ดีขึ้น รองรับการอัพเกรดคานแปร่ง | ศูนย์กลางแรงโน้มถ่วงต่ำลง มีการควบคุมที่ดีขึ้นเล็กน้อย |
| ช่วงราคาประหยัด | ราคาสูงกว่า แต่เปลี่ยนช็อกอัพและสปริงพร้อมกัน | ต้นทุนเริ่มต้นต่ำกว่า โดยเฉพาะกรณีนำช็อกอัพมาใช้ใหม่ |
- ข้อดี (ชุดคอยล์โอเวอร์): ปรับตั้งได้เต็มรูปแบบ เพิ่มประสิทธิภาพการขับขี่ รองรับการอัพเกรดในอนาคต เช่น คานแปร่ง
- ข้อเสีย (ชุดคอยล์โอเวอร์): ติดตั้งซับซ้อนมากขึ้น การลงทุนเริ่มต้นสูงขึ้น
- ข้อดี (สปริง): เรียบง่าย ราคาไม่แพง ติดตั้งรวดเร็ว
- ข้อเสีย (สปริง): ความสูงคงที่ อาจต้องเปลี่ยนสปริงใหม่หากต้องการปรับเพิ่มเติม
ลองนึกภาพการปรับแต่งท่าทางรถให้แม่นยำ หรือปรับสมดุลในการเข้าโค้งสำหรับวันแข่งขัน — ชุดช่วงล่างแบบคอยล์โอเวอร์ทำให้สิ่งเหล่านี้เป็นไปได้ แต่ถ้าคุณต้องการลดความสูงไม่มากและต้องการความสบายในการใช้งานประจำวัน การติดตั้งสปริงแบบลดความสูงอาจเพียงพอแล้ว
ทางเลือกสำหรับระบบดูดอากาศ: ระบบดูดอากาศเย็น เทียบกับ ตัวกรองแบบใส่ลงในช่อง
| คุณลักษณะ | ระบบดูดอากาศเย็น | ตัวกรองอากาศเครื่องยนต์แบบใส่ลงในช่อง |
|---|---|---|
| ความซับซ้อนในการติดตั้ง | ปานกลาง; เปลี่ยนท่อและตัวกรองอากาศ | ใช้งานง่ายมาก; เปลี่ยนตัวกรองในกล่องเดิม |
| ผลกระทบต่อสมรรถนะ | มีศักยภาพเพิ่มแรงม้าและตอบสนองคันเร่งได้ดีขึ้น | การไหลของอากาศดีขึ้นเล็กน้อย บำรุงรักษาง่ายขึ้น |
| เสียงรบกวน | เสียงดูดอากาศเข้าเครื่องยนต์มากขึ้น อาจช่วยเพิ่มเสียงเครื่องยนต์ | ไม่มีการเปลี่ยนแปลงจากของเดิม |
| ช่วงราคาประหยัด | สูงกว่า มีท่อใหม่และตัวกรอง | ต่ำ; เพียงแค่ตัวกรอง |
- ข้อดี (Cold Air Intake): เพิ่มแรงม้าชัดเจน เสียงเครื่องยนต์มีความสปอร์ตมากขึ้น เข้ากันได้ดีกับชิ้นส่วนอื่น ๆ ที่ปรับแต่งเพิ่มเติม
- ข้อเสีย (Cold Air Intake): ราคาสูงกว่า อาจต้องทำการปรับจูนหรือระมัดระวังเป็นพิเศษในสภาพเปียกชื้น
- ข้อดี (Drop-In Filter): ติดตั้งเร็ว ใช้ซ้ำได้ ราคาไม่แพง
- ข้อเสีย (ตัวกรองแบบ Drop-In): เพิ่มประสิทธิภาพไม่มาก และมีผลน้อยกว่าการติดตั้งชุดดูดอากาศแบบเต็มรูปแบบ
สำหรับผู้ที่ต้องการเพิ่มสมรรถนะสูงสุด ระบบดูดอากาศเย็น นำอากาศเย็นมาสู่เครื่องยนต์ ซึ่งอาจช่วยเพิ่มทั้งกำลังและประสิทธิภาพ หากคุณต้องการอัปเกรดแบบง่าย ๆ โดยไม่ยุ่งยากมาก แผ่นกรองอากาศเครื่องยนต์ เป็นทางเลือกที่อัปเกรดได้ง่าย
เส้นทางระบบไอเสีย: Cat-Back เทียบกับ Axle-Back
| คุณลักษณะ | ระบบไอเสียแบบ Cat-Back | ระบบไอเสียแบบ Axle-Back |
|---|---|---|
| ชิ้นส่วนที่ถูกเปลี่ยน | จากตัวแปลงสัญญาณไปจนถึงปลายท่อไอเสีย | จากเพลาหลังไปจนถึงปลายท่อไอเสีย |
| ผลกระทบต่อสมรรถนะ | เพิ่มแรงม้าได้มาก ปรับปรุงการไหลของระบบ | เปลี่ยนเสียงเป็นหลัก มีผลเพียงเล็กน้อยต่อแรงม้า |
| ความซับซ้อนในการติดตั้ง | ปานกลาง; ชิ้นส่วนมากกว่า ใช้เวลานานกว่าในการติดตั้ง | ง่าย; ชิ้นส่วนน้อยกว่า เปลี่ยนได้รวดเร็ว |
| เสียงรบกวน | เสียงดังขึ้น สามารถปรับแต่งเสียงได้ด้วยท่อซับเสียง/ปลายท่อที่แตกต่างกัน | เสียงเปลี่ยนไปอย่างชัดเจน มีระดับเสียงต่ำกว่าชุดท่อไอเสียแบบ Cat-Back |
| ช่วงราคาประหยัด | สูงกว่า | ต่ํากว่า |
- ข้อดี (แบบ Cat-Back): เพิ่มแรงม้าได้มาก ควบคุมเสียงได้ทั้งหมด รองรับการอัพเกรดในอนาคต เช่น ระบบไอเสียแบบวาล์วทรอนิกส์ หรือระบบท่อไอเสียแบบ Akrapovič
- ข้อเสีย (Cat-Back): มีค่าใช้จ่ายสูงกว่าและการติดตั้งซับซ้อนกว่า
- ข้อดี (Axle-Back): ราคาไม่แพง ติดตั้งง่าย และปรับปรุงเสียงได้ทันที
- ข้อเสีย (Axle-Back): เพิ่มสมรรถนะได้เพียงเล็กน้อย และปรับแต่งได้จำกัด
หากคุณมุ่งเน้นไปที่กำลังสูงสุดและเสียงที่เป็นเอกลักษณ์ การเลือกชุดท่อไอเสียแบบ cat-back คือทางเลือกคลาสสิก ในขณะที่ระบบแบบ axle-back เป็นทางเลือกที่ดีหากคุณต้องการเปลี่ยนโทนเสียงในงบประมาณที่จำกัด — ยิ่งไปกว่านั้น คุณยังสามารถเปลี่ยนไปใช้ชิ้นส่วนที่มีคุณภาพสูงขึ้นได้ในภายหลัง ปลายท่อไอเสีย เพื่อเพิ่มความโดดเด่น
โปรดตรวจสอบให้แน่ใจเสมอว่าอุปกรณ์เข้ากันได้กับรถของคุณและตรวจสอบข้อกำหนดท้องถิ่นก่อนติดตั้งเพื่อเพิ่มสมรรถนะ — ความแม่นยำมีความสำคัญเท่ากับกำลัง
การอัพเกรดจะให้ผลลัพธ์ที่ดีที่สุดเมื่อวางแผนเป็นระบบ โดยช่วงล่าง ล้อ ระบบเบรก และการปรับตั้งค่าต้องทำงานเข้ากันเพื่อความปลอดภัยและประสิทธิภาพที่ได้จริง จากนี้เราจะพาคุณไปดูพื้นฐานการติดตั้งแบบเป็นขั้นตอน เพื่อให้คุณสามารถดำเนินการอัพเกรดที่ให้ผลลัพธ์สำคัญได้อย่างมั่นใจ
ขั้นตอนการติดตั้งพื้นฐานที่มีผลกระทบสูง
คุณเคยคิดจะทำบำรุงรักษารถยนต์ด้วยตัวเองไหม แต่กังวลว่าจะลืมขั้นตอนหรือทำให้เกิดความไม่ปลอดภัย? ด้วยกระบวนการทำงานที่เหมาะสม แม้แต่งานเปลี่ยน จานเบรก , หรือเปลี่ยนชิ้นส่วน เครื่องดับกระแทก , หรือจัดการกับ การเปลี่ยนไส้กรองห้องโดยสาร ก็จะกลายเป็นเรื่องที่จัดการได้ง่ายและให้ผลตอบแทนที่คุ้มค่า นี่คือวิธีการที่คุณสามารถนำไปใช้กับงานที่พบบ่อยที่สุดที่เกี่ยวข้องกับชิ้นส่วนแต่งรถยนต์ ช่วยให้คุณประหยัดเวลาและเงินในขณะเดียวกันก็เพิ่มความมั่นใจไปด้วย
พื้นฐานการบริการระบบเบรก
- แจ็คและฐานรองแจ็ค
- ประแจล้อ
- ประแจวัดแรงบิด
- ชุดดอกสว่านพื้นฐาน (รวมถึงดอก Torx/Allen)
- คีมปากหนีบหรือเครื่องมือแยกคาลิเปอร์
- ถุงมือและอุปกรณ์ป้องกันตา
- น้ำมันเบรก (ตรวจสอบคู่มือเพื่อเลือกชนิด)
- ผ้าเบรกใหม่ และ จานเบรก
- คู่มือการซ่อมเพื่อตรวจสอบค่าทอร์ค
- คลายแหวนล้อ ยกรถด้วยแม่แรง และยึดให้แน่นด้วยขาตั้งแม่แรง
- ถอดล้อออกเพื่อเข้าถึง คาลิปเปอร์เบรค และชุดจานเบรก
- ถอดคาลิเปอร์ออก (ไม่ต้องถอดท่อน้ำมันเบรก) จากนั้นดึงผ้าเบรกและชิ้นส่วนเก่าออก ตรวจสอบความหนาและความสะอาดของจานเบรก และเปลี่ยนหากสึกหรอ
- ใช้ปากกาจับหรือเครื่องมือคาลิเปอร์เพื่อดันลูกสูบเข้าด้านในอย่างระมัดระวัง คอยสังเกตระดับน้ำมันเบรกในถังไม่ให้ล้น
- ติดตั้งผ้าเบรกและชิ้นส่วนใหม่ โดยทาครีมเบรกในจุดที่เป็นโลหะสัมผัสกัน แต่ห้ามทาบนพื้นผิวที่เกิดแรงเสียดทาน
- ติดตั้งคาลิเปอร์กลับเข้าที่ ขันสกรูให้ได้ค่าทอร์คตามมาตรฐาน และติดล้อกลับเข้าที่
- ทำซ้ำในอีกข้างหนึ่ง จากนั้นทดสอบความรู้สึกของแป้นเบรกก่อนที่จะทดลองขับบนถนน
หลังจากการขับทดสอบระยะสั้น (ประมาณ 50-100 กิโลเมตร) สิ่งสำคัญคือต้องขันน็อตล้อให้ได้แรงบิดตามที่ผู้ผลิตกำหนดอีกครั้ง ขั้นตอนการใช้งานเบรกให้เข้าที่ (เบดดิ้ง) ที่เหมาะสม จะช่วยให้ผ้าเบรกและจานเบรกใหม่ทำงานได้อย่างปลอดภัยและเงียบ
เคล็ดลับ: ถ่ายรูปชิ้นส่วนก่อนถอดชิ้นส่วนออก และติดฉลากชิ้นส่วนประกอบ เพื่อป้องกันความสับสนในระหว่างการประกอบใหม่
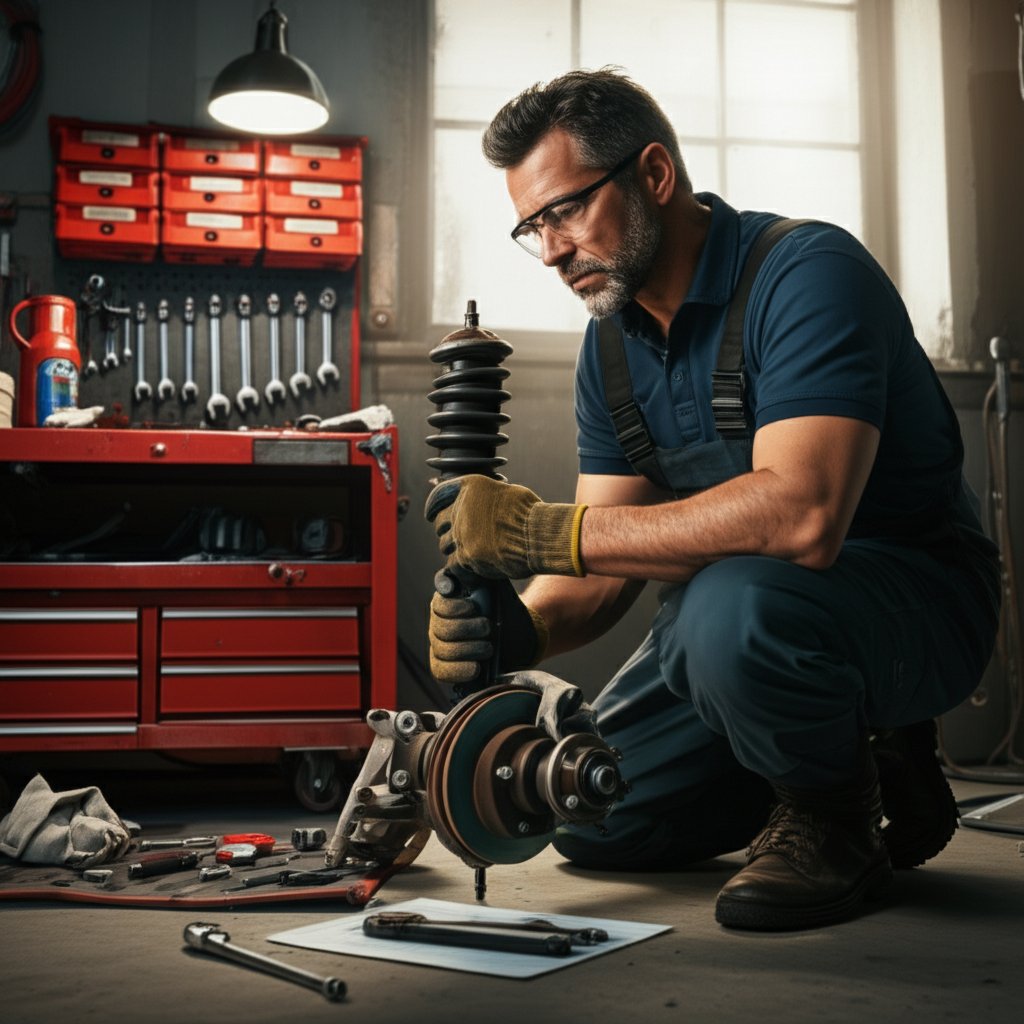
ภาพรวมการเปลี่ยนโช้คอัพและสตรัต
- ขาตั้งแม่แรงและกันล้อ
- ประแจข้างและชุดดอกสว่าน (18–23 มม. สำหรับสลักสตรัตส่วนใหญ่)
- น้ำมันฉีดล้างสนิม
- เครื่องวัดมุม (สำหรับอ้างอิงแคมเบอร์)
- ประแจวัดแรงบิด
- สตรัตใหม่สำหรับเปลี่ยน ( ช็อคอัพโมโนโรว์ , bilstein shocks , เป็นต้น)
- ถุงมือและแว่นตาความปลอดภัย
- คู่มือบริการ
- ยกรถและรองรับให้แน่น คลายตัวยึดสตรัตที่ยึดกับเพลาล้อและหัวสตรัต
- ถอดปลายลิงค์บาร์ทรงตัวและท่อน้ำมันเบรกหรือเซ็นเซอร์ที่ติดอยู่ออก
- ถอดสตรัตหรือช็อคอัพเดิมออก รองแขนควบคุมไว้เพื่อป้องกันไม่ให้ตกกระทันหัน
- ติดตั้งชุดใหม่ทั้งหมด— ช็อคอัพโมโนโรว์ หรือ bilstein shocks —และขันชิ้นส่วนทุกชิ้นให้หลวมๆ ก่อน
- ใช้เครื่องวัดมุมปรับค่าแคมเบอร์ให้ตรงกับค่าเดิม จากนั้นขันตัวยึดทุกตัวให้ถึงมาตรฐานที่กำหนด
- ต่อปลายลิงค์บาร์ทรงตัวและเซ็นเซอร์กลับเข้าที่ แล้วติดตั้งล้อกลับเข้าเดิม
- ลดระดับรถลง และนัดหมายตรวจปรับตั้งล้อหลังการติดตั้งเพื่อให้มั่นใจว่ารถควบคุมได้ดีและยางสึกหรอสม่ำเสมอ
ห้ามนำโบลต์ที่ใช้เพียงครั้งเดียว (โบลต์ที่ต้องใช้แรงบิดพิเศษ) มาใช้ซ้ำเด็ดขาด ควรตรวจสอบค่าแรงบิดจากคู่มือทุกครั้ง และตรวจสอบความแน่นของชิ้นส่วนยึดทั้งหมดอีกครั้งหลังจากทดลองขับเป็นระยะทางสั้นๆ อ้างอิง
เคล็ดลับมืออาชีพ: ให้ใช้สีหรือปากกาทำเครื่องหมายตำแหน่งของชิ้นส่วนยึดก่อนถอดชิ้นส่วนออก และเก็บชิ้นส่วนเก่าไว้จนกว่าคุณจะมั่นใจว่าการซ่อมแซมสำเร็จสมบูรณ์
เปลี่ยนไส้กรองอากาศห้องโดยสาร ทำได้ง่ายๆ
- ไส้กรองอากาศห้องโดยสารใหม่
- ไขควงหรือชุดดอกสว่าน (ถ้าจำเป็น)
- ถุงมือและอุปกรณ์ป้องกันตา
- เครื่องดูดฝุ่น (ทางเลือก เพื่อทำความสะอาดช่องติดตั้ง)
- จอดรถบนพื้นเรียบ ดึงเบรกมือ และปิดระบบไฟฟ้าของรถให้เรียบร้อย
- เข้าถึงไส้กรองอากาศ โดยปกติจะอยู่ด้านหลังช่องเก็บของด้านหน้าคนขับหรือใต้ฝากระโปรงหน้า ถอดชิ้นส่วนที่จำเป็นออก
- ดึงไส้กรองเก่าออก โดยสังเกตลูกศรที่แสดงทิศทางการไหลของอากาศ ทำความสะอาดช่องติดตั้งหากมีสิ่งสกปรก
- ติดตั้งไส้กรองใหม่ โดยตรงตามทิศทางที่กำหนด ประกอบชิ้นส่วนหรือช่องเก็บของด้านหน้าคนขับกลับเข้าที่เดิม
- บันทึกเลขไมล์และวันที่เพื่อใช้ในอนาคต การเปลี่ยนไส้กรองห้องโดยสาร ช่วงเวลา
แม้แต่งานง่ายๆ ก็ได้ประโยชน์จากการจดบันทึก ถ่ายภาพตำแหน่งของตัวกรองเดิมไว้เป็นหลักฐาน และเก็บกล่องบรรจุภัณฑ์ไว้จนกว่าจะยืนยันการไหลเวียนของอากาศได้แล้ว
เอกสารประกอบและการปลอดภัย: แนวทางปฏิบัติที่ดีที่สุดสำหรับงาน DIY ของคุณ
- ถ่ายภาพก่อนและระหว่างที่ถอดชิ้นส่วนเพื่อใช้อ้างอิง
- ติดฉลากและจัดระเบียบชิ้นส่วนและอุปกรณ์เล็กๆ ทั้งหมด
- เก็บชิ้นส่วนเดิมไว้จนกว่าการทดสอบขับรถจะยืนยันว่าซ่อมสำเร็จแล้ว
- อย่าละเลยอุปกรณ์นิรภัย—ต้องสวมถุงมือและแว่นตาตลอด
- ตรวจสอบค่าแรงบิดทั้งหมดอีกครั้ง และขันให้แน่นอีกครั้งหลังใช้งานครั้งแรก
พร้อมก้าวไปอีกขั้นหรือยัง? ต่อไปเราจะพูดถึงวิธีเชื่อมโยงรหัสอาการขัดข้องกับชิ้นส่วนที่ต้องเปลี่ยน ดังนั้นโครงการ DIY ครั้งต่อไปของคุณจะเริ่มต้นด้วยความมั่นใจ—ไม่ใช่การเดาสุ่ม
การวินิจฉัยปัญหาที่เชื่อมโยงรหัสกับชิ้นส่วน
เคยมีไฟเตือนเครื่องยนต์ (Check Engine) ติดขึ้นมาแล้วพบว่ามีชุดรหัสแสดงข้อผิดพลาดมากมาย เช่น P0300, P0171, P0420 และสงสัยว่าควรทำอย่างไรต่อไปหรือไม่? คุณไม่ได้เผชิญปัญหานี้เพียงลำพัง แนวทางที่ถูกต้องสามารถช่วยให้คุณประหยัดเวลา หลีกเลี่ยงการเปลี่ยนชิ้นส่วนที่ไม่จำเป็นและไม่แก้ปัญหาจนเกิดความหงุดหงิด มาเรียนรู้กระบวนการเชื่อมโยงอาการทั่วไปและรหัสวินิจฉัยกับชิ้นส่วนอะไหล่รถยนต์ที่พบได้บ่อยที่สุด เพื่อให้คุณสามารถสั่งซื้อได้อย่างมั่นใจ
รหัสวินิจฉัยที่ควรรู้จักซึ่งมีความสำคัญสูง
บางครั้งรหัสข้อผิดพลาดจะแสดงบ่อยกว่ารหัสอื่น ๆ และแต่ละรหัสก็ชี้ให้เห็นจุดเริ่มต้นในการตรวจสอบปัญหา มาดูสามรหัส OBD-II ที่พบบ่อยที่สุด พร้อมความหมายและเหตุผลที่คุณควรใส่ใจ
| อาการหรือรหัสข้อผิดพลาด (DTC) | สาเหตุที่อาจเกิดขึ้น | การตรวจสอบที่แนะนำ | ชิ้นส่วนที่มักเปลี่ยนบ่อย |
|---|---|---|---|
| P0300 (เครื่องยนต์หลายกระบอกหรือกระบอกสูบสุ่มเกิดการดับ) | คอยล์จุดระเบิด, หัวเทียน, หัวฉีดน้ำมันเชื้อเพลิง | สแกนหาชุดรหัสการดับเครื่องยนต์เฉพาะ (เช่น p0303 , p0302 ), ตรวจสอบประกายไฟและระบบจ่ายเชื้อเพลิง ตรวจสอบการรั่วของไอดี | คอยล์จุดระเบิด, หัวเทียน, หัวฉีดเชื้อเพลิง |
| P0171 (ส่วนผสมเชื้อเพลิงน้อยเกินไป แบงค์ 1) | การรั่วของไอดี, เซ็นเซอร์วัดปริมาณอากาศไหลผ่าน , หัวฉีดเชื้อเพลิง เซ็นเซอร์ออกซิเจน | ตรวจสอบการรั่วของช่องดูด ทดสอบแรงดันเชื้อเพลิง ทำความสะอาดหรือเปลี่ยนเซ็นเซอร์ MAF ตรวจสอบ เซ็นเซอร์แรงดันรางเชื้อเพลิง | เซ็นเซอร์ MAF, เซ็นเซอร์ออกซิเจน, หัวฉีดเชื้อเพลิง |
| P0420 (ประสิทธิภาพระบบตัวเร่งปฏิกิริยาต่ำกว่าเกณฑ์ที่กำหนด) | ตัวเร่งปฏิกิริยา (Catalytic converter), เซ็นเซอร์ออกซิเจน (O2 sensor), รั่วของท่อไอเสีย, ปัญหาการจุดระเบิด/เชื้อเพลิง | ตรวจสอบการรั่วของท่อไอเสีย, ทดสอบการตอบสนองของเซ็นเซอร์ออกซิเจน, ตรวจสอบข้อมูลเพื่อหาปัญหาที่ต้นทาง | ตัวเร่งปฏิกิริยา (Catalytic converter), เซ็นเซอร์ออกซิเจน (O2 sensor) |
รหัสข้อผิดพลาดเหล่านี้ถูกระบุว่าเป็นปัญหาที่พบบ่อยที่สุดในรถยนต์ของสหรัฐอเมริกา จากข้อมูลการสแกน OBD-II กว่า 100,000 ครั้ง ( GaragePro ).
จากอาการไปจนถึงชิ้นส่วนที่เกี่ยวข้อง
ฟังดูซับซ้อนใช่ไหม? นี่คือวิธีการที่สามารถเชื่อมโยงอาการที่คุณประสบอยู่กับชิ้นส่วนที่เหมาะสมได้:
- เครื่องยนต์สั่นไม่สม่ำเสมอ, เครื่องสะดุด, หรือประหยัดน้ำมันแย่ลง? รหัสข้อผิดพลาด เช่น P0300 , p0303 , หรือ p0302 มักสื่อถึงปัญหาการจุดระเบิดหรือการส่งเชื้อเพลิง เริ่มต้นด้วยการตรวจสอบหัวเทียน คอยล์จุดระเบิด และหากมีปัญหาการกระตุกที่เกิดขึ้นอย่างต่อเนื่อง ให้ตรวจสอบ เซ็นเซอร์แรงดันรางเชื้อเพลิง เพื่อการทำงานที่เหมาะสม
- ไฟเตือนเครื่องยนต์สว่างขึ้นพร้อมกับรหัส Lean (P0171)? การรั่วของไอดีเป็นสาเหตุที่พบบ่อย แต่อย่าลืมพิจารณาตัวกรองอากาศสกปรกหรือทำงานผิดปกติ เซ็นเซอร์วัดปริมาณอากาศไหลผ่าน . ตรวจสอบท่อที่แตกร้าว ตัวหนีบหลวม หรือการรั่วของช่องดูด หากยังคงมีรหัสข้อผิดพลาดเดิม ให้ตรวจสอบ เซนเซอร์ตำแหน่งคันเร่ง และหัวฉีดเชื้อเพลิงในลำดับถัดไป
- P0420 และรหัสข้อผิดพลาดที่เกี่ยวข้องกับท่อไอเสีย? ก่อนที่จะเปลี่ยนตัวเครื่องฟอกไอเสีย ให้ตรวจสอบให้แน่ใจว่าไม่มีการกระตุกจากเครื่องยนต์หรือการรั่วของไอเสียในตอนต้นทาง ตัวเซ็นเซอร์ออกซิเจนที่เสียหรืออากาศที่ไหลเข้าโดยไม่ได้วัดค่า อาจทำให้เกิดรหัสนี้ ควรตรวจสอบด้วยข้อมูลจากตัวเซ็นเซอร์ออกซิเจนแบบเรียลไทม์ และการทดสอบด้วยควัน หากสามารถทำได้
เมื่อใดควรตรวจสอบด้วยข้อมูลแบบเรียลไทม์
ลองจินตนาการว่าคุณเปลี่ยนชิ้นส่วนแล้ว แต่ปัญหายังคงเดิม เพื่อหลีกเลี่ยงสถานการณ์นี้ ให้ใช้เครื่องสแกนเนอร์ตรวจสอบข้อมูลแบบเรียลไทม์ เช่น ค่าปรับเชื้อเพลิง แรงดันไฟฟ้าของเซ็นเซอร์ออกซิเจน หรือนับจำนวนการเกิดการกระตุก ข้อมูลเหล่านี้จะช่วยให้คุณทราบว่าปัญหาเกิดจาก เซ็นเซอร์วัดปริมาณอากาศไหลผ่าน หรือ เซนเซอร์ตำแหน่งคันเร่ง เป็นความผิดจริงหรือไม่ หรือปัญหาอาจเกิดจากสาเหตุอื่น โปรดจำไว้ว่า รหัสเช่น P0300 มักจะมาพร้อมกับรหัสเฉพาะเจาะจงมากยิ่งขึ้น (เช่น p0302 สำหรับกระบอกสูบ 2 หรือ p0303 สำหรับการจุดระเบิดผิดพลาดของกระบอกสูบ 3) ซึ่งจะช่วยจำกัดขอบเขตปัญหาและป้องกันการเปลี่ยนชิ้นส่วนที่ไม่จำเป็น
ทดสอบก่อนซื้อ—การตรวจสอบอาการด้วยข้อมูลแบบเรียลไทม์และการตรวจสอบอย่างละเอียด จะช่วยประหยัดเวลา เงิน และการเดาสุ่ม
เคล็ดลับการแก้ปัญหาอย่างชาญฉลาด
- ตรวจสอบตัวต่อสาย จุดต่อกราวด์ และชิ้นส่วนพื้นฐานของการบำรุงรักษา ก่อนที่จะเปลี่ยนอะไหล่
- หลังจากซ่อมแซมแล้ว ให้ล้างรหัสข้อผิดพลาดทุกครั้ง และยืนยันผลลัพธ์ด้วยการทดลองขับ
- หากมีผลต่อสมรรถนะการขับขี่หรือความปลอดภัย หรือหากคุณไม่มั่นใจ ควรขอความช่วยเหลือจากผู้เชี่ยวชาญ
ด้วยการดำเนินการตามกระบวนการอย่างเป็นระบบ—เริ่มต้นจากอาการ ยืนยันด้วยรหัสข้อผิดพลาด และตรวจสอบความถูกต้องด้วยข้อมูลแบบเรียลไทม์—คุณจะสั่งซื้ออะไหล่รถยนต์ในตลาดรองได้ถูกต้องตั้งแต่ครั้งแรก ต่อไปเราจะพิจารณาเกี่ยวกับความสอดคล้องตามข้อกำหนดด้านกฎระเบียบและมาตรฐานการปล่อยมลพิษ เพื่อให้การซ่อมแซมและการอัปเกรดของคุณสอดคล้องตามกฎหมายจราจรและไม่ก่อให้เกิดปัญหาภายหลัง
การปฏิบัติตามข้อกำหนดด้านกฎระเบียบและมาตรฐานการปล่อยมลพิษที่เป็นรูปธรรม
รู้กฎก่อนที่คุณจะปรับแต่งท่อไอเสีย
คุณกำลังคิดจะเปลี่ยนท่อรวมไอเสียหรือติดตั้งตัวเร่งปฏิกิริยาแบบไหลลื่นสูงอยู่หรือไม่? ก่อนสั่งซื้อ คุณควรรู้ว่ากฎหมายเกี่ยวกับการปล่อยมลพิษและการตรวจสอบอาจส่งผลต่อการตัดสินใจของคุณได้อย่างไร กฎระเบียบที่เกี่ยวข้องกับชิ้นส่วนยานยนต์ที่ใช้ในตลาดหลังการขาย โดยเฉพาะชิ้นส่วนท่อไอเสียนั้นมีความแตกต่างกันมากตามแต่ละรัฐ และแม้กระทั่งแต่ละเมือง ตัวอย่างเช่น คณะกรรมการทรัพยากรอากาศแคลิฟอร์เนีย (CARB) มีกฎเกณฑ์ที่เข้มงวดที่สุดในประเทศ โดยกำหนดให้ชิ้นส่วนท่อไอเสียที่ปรับปรุงหรือเปลี่ยนใหม่ต้องเป็นไปตามมาตรฐานการปล่อยมลพิษและฉลากกำกับที่กำหนดไว้ รัฐอื่นๆ อาจเน้นที่ระดับเสียง หรือมีมาตรฐานที่แตกต่างกันสำหรับชิ้นส่วน เช่น ตัวเร่งปฏิกิริยา
- ชิ้นส่วนอะไหล่ทดแทน กับ ชิ้นส่วนที่ปรับแต่งแล้ว: ในหลายพื้นที่ การติดตั้งระบบปล่อยไอเสียแบบทดแทนถือว่าถูกกฎหมาย หากมันทำหน้าที่ควบคุมการปล่อยมลพิษเท่ากับของเดิม แต่หากคุณติดตั้งระบบซึ่งเปลี่ยนแปลงคุณสมบัติการปล่อยมลพิษ เช่น การถอดตัวเร่งปฏิกิริยาออก หรือปรับตำแหน่งเซ็นเซอร์ออกซิเจน จะถือว่าเป็นชิ้นส่วนที่ดัดแปลงแล้ว อาจต้องได้รับการอนุมัติหรือติดฉลากพิเศษ
- การติดฉลากและเอกสารกำกับ: ในรัฐแคลิฟอร์เนีย ชิ้นส่วนที่ดัดแปลงและได้รับการรับรองจะต้องมีหมายเลข CARB Executive Order (E.O.) และติดฉลากกำกับไว้ โดยฉลากอาจติดอยู่บนชิ้นส่วนโดยตรง หรือจัดไว้ให้ติดตั้งอย่างเห็นได้ชัดเจน หากคุณซื้อชิ้นส่วนที่ระบุว่าใช้เฉพาะในการแข่งรถเท่านั้น จะต้องมีการระบุไว้อย่างชัดเจน และห้ามนำมาใช้บนถนนสาธารณะ
- ข้อกำหนดเกี่ยวกับเสียงรบกวน: แม้ว่าจะมีมาตรฐานเสียงรบกวนระดับรัฐบาลกลาง แต่การบังคับใช้ส่วนใหญ่ขึ้นอยู่กับท้องถิ่น บางรัฐกำหนดให้ท่อไอเสียต้องมีฉลากเสียงรบกวนจาก EPA ในขณะที่บางรัฐใช้วิธีการทดสอบของตนเอง
- การขายและการติดตั้ง: ผู้จำหน่ายและร้านท่อไอเสียต้องเก็บบันทึกการขายชิ้นส่วนท่อไอเสียบางชนิดไว้—โดยเฉพาะอย่างยิ่งหากชิ้นส่วนนั้นไม่ได้รับการรับรองจาก CARB หรือใช้ได้เฉพาะในการแข่งขันเท่านั้น บันทึกเหล่านี้อาจถูกตรวจสอบได้ภายในระยะเวลาสี่ปี
ระบบปล่อยมลพิษและการเตรียมความพร้อมสำหรับการตรวจสอบ
เคยสอบตกการทดสอบมลพิษด้วยรหัสข้อผิดพลาดเช่น p0456 (รั่วของระบบควบคุมไอระเหย) หรือ p0128 (ปัญหาเกี่ยวกับเทอร์โมสตัตของน้ำหล่อเย็น)? บางครั้งการติดตั้งชิ้นส่วนแต่งที่ไม่เหมาะสม อาจทำให้เกิดรหัสข้อผิดพลาดเหล่านี้ หรือทำให้รถของคุณไม่สามารถผ่านการตรวจสอบได้ นี่คือสิ่งที่คุณควรรู้:
- ควรวางเซ็นเซอร์ออกซิเจนไว้ในตำแหน่งเดิมทั้งหมด—การย้ายหรือถอดเซ็นเซอร์ออก อาจทำให้ระบบตรวจสอบมลพิษทำงานล้มเหลว
- เลือกตัวเครื่องฟอกไอเสีย (Catalytic Converter) ที่ระบุอย่างชัดเจนว่าเป็นรุ่นที่สอดคล้องกับข้อกำหนดในรัฐของคุณ เครื่องฟอกไอเสียแบบ High Flow อาจไม่ได้รับอนุญาตให้ใช้ได้ทุกที่
- หลังจากการดำเนินการใด ๆ เกี่ยวกับท่อไอเสียหรือระบบปล่อยมลพิษแล้ว ควรขับรถของคุณให้ผ่านวงจรการเตรียมความพร้อมให้ครบทั้งหมดก่อนนัดหมายการตรวจสอบ วิธีนี้จะช่วยให้ระบบตรวจสอบทั้งหมดรีเซ็ตและข้อผิดพลาดถูกล้าง
- หากคุณไม่แน่ใจ ให้โทรสอบถามร้านที่ให้บริการระบบไอเสียในพื้นที่ของคุณ ร้านไอเสียใกล้ฉัน หรือตรวจสอบเว็บไซต์กรมขนส่งทางบก (DMV) เพื่อขอคำแนะนำเกี่ยวกับชิ้นส่วนหลังการขายที่ได้รับอนุมัติ และขั้นตอนการเตรียมความพร้อม
รักษาความถูกต้องตามกฎหมายและความน่าเชื่อถือของรถคุณ
ลองจินตนาการว่าคุณลงทุนในการอัพเกรดระบบไอเสียแบบเต็มระบบ แต่กลับพบว่าคุณไม่สามารถจดทะเบียนรถได้ หรืออาจต้องเผชิญกับค่าปรับในการตรวจเช็กครั้งต่อไป การป้องกันปัญหานี้สามารถทำได้โดยการปฏิบัติตามรายการตรวจสอบความสอดคล้องดังนี้:
- ตรวจสอบผลกระทบต่อการรับประกัน: ชิ้นส่วนใหม่ทำให้การรับประกันใดๆ เป็นโมฆะหรือไม่?
- ตรวจสอบฉลากมาตรฐานการปล่อยมลพิษ: มองหาเลขที่ CARB E.O. หรือสติ๊กเกอร์แสดงการปฏิบัติตามมาตรฐาน EPA
- ยืนยันตำแหน่งของเซ็นเซอร์: ตรวจสอบให้แน่ใจว่าเซ็นเซอร์ออกซิเจนทุกตัวยังคงทำงานได้ตามปกติ และอยู่ในตำแหน่งเดิม
- เก็บเอกสารไว้เป็นหลักฐาน: เก็บใบเสร็จ บันทึกการติดตั้ง และบรรจุภัณฑ์ไว้สำหรับอ้างอิงในอนาคต
- ศึกษากฎหมายท้องถิ่นของคุณ: ข้อกำหนดเกี่ยวกับมาตรฐานการปล่อยมลพิษ ระดับเสียง และความถี่ในการตรวจเช็ก อาจมีการเปลี่ยนแปลงไปตามแต่ละรัฐ หรือแม้แต่ท้องถิ่น
"เลือกชิ้นส่วนท่อไอเสียสำหรับตกแต่งที่มีการระบุฉลากอย่างชัดเจนว่าเป็นไปตามข้อกำหนด จัดเก็บเอกสารหลักฐานไว้ และตรวจสอบกฎหมายท้องถิ่นให้แน่ชัด — สิ่งที่ถูกกฎหมายในรัฐหนึ่ง อาจไม่ผ่านการตรวจสอบในอีกรัฐหนึ่ง"
การละเลยข้อกำหนดด้านการปล่อยมลพิษและการตรวจสอบ อาจนำไปสู่ค่าปรับ การตรวจทะเบียนไม่ผ่าน หรือแม้กระทั่งการต้องถอยกลับการอัปเกรดที่ทำไว้ หากคุณมีข้อสงสัยใด ๆ ให้ปรึกษาร้านท่อไอเสียในพื้นที่ หรือหน่วยงานตรวจสอบก่อนทำการเปลี่ยนแปลง ในตอนต่อไป เราจะช่วยให้คุณสังเกตสัญญาณของคุณภาพ และเข้าใจเงื่อนไขการรับประกัน เพื่อให้คุณซื้อขายอย่างมั่นใจ และหลีกเลี่ยงการจ่ายเงินมากเกินไปเพื่อความสบายใจ

การรับประกันและสัญญาณของคุณภาพที่คุณวางใจได้
เมื่อคุณกำลังมองหาชิ้นส่วนรถยนต์สำหรับตกแต่ง คุณจะรู้ได้อย่างไรว่าคุณได้รับของมีคุณภาพ — ไม่ใช่แค่จ่ายเงินเพื่อแลกกับฉลากที่ดูดีมีระดับ? ลองจินตนาการว่าคุณยืนอยู่ที่ทางเดินร้านค้า เปรียบเทียบชุดหนึ่ง พาวเวอร์สต็อป เบรกส์ กับอีกยี่ห้อหนึ่ง และสงสัยว่าการรับประกันนั้นมีความสำคัญจริงหรือไม่ มาดูกันว่าอะไรคือสิ่งที่แยกแยะการซื้อที่ชาญฉลาดกับการเสี่ยงโชค ดังนั้นคุณจึงสามารถเลือกซื้ออย่างมีความรู้และอุ่นใจ"
การรับประกันหลังการขายที่ดีควรมีลักษณะอย่างไร
ฟังดูซับซ้อนใช่ไหม ที่จริงแล้วไม่จำเป็นต้องเป็นเช่นนั้น แบรนด์ชิ้นส่วนหลังการขายที่น่าเชื่อถือส่วนใหญ่ เช่น raybestos , kYB Shocks , หรือ energy Suspension มักมีการรับประกันที่ครอบคลุมข้อบกพร่องของวัสดุและงานประกอบ แต่รายละเอียดก็มีความสำคัญ ต่อไปนี้คือสิ่งที่คุณมักจะพบเห็นโดยทั่วไป:
| ระยะเวลาการรับประกัน | ความหมายของมันคืออะไร | สิ่งที่ควรระวัง |
|---|---|---|
| ขอบเขตการคุ้มครอง | ข้อบกพร่องของวัสดุและงานประกอบ | ไม่ครอบคลุมการติดตั้งที่ไม่เหมาะสม การใช้งานในการแข่งรถ หรือความเสียหายจากการสึกหรอ/เสื่อมสภาพ |
| ระยะเวลา | ตั้งแต่ 90 วัน (แบบประหยัด) ไปจนถึงตลอดอายุการใช้งาน (แบบพรีเมียม) | สายน้ำมันพรีเมียมมักมีระยะเวลารับประกันยาวนานกว่า—ตรวจสอบรายละเอียดให้แน่ชัด |
| ขั้นตอนการเคลม | คืนสินค้าให้ผู้ขายหรือผู้ผลิต พร้อมแสดงหลักฐานการซื้อ | บางรายการอาจต้องลงทะเบียนหรือติดตั้งโดยร้านที่ได้รับการรับรอง |
| ค่าธรรมเนียมการจัดเก็บสินค้า | อาจใช้ได้กับการคืนสินค้าที่ไม่ใช่ของเสีย | ศึกษาให้เข้าใจว่าช่วงเวลาคืนสินค้าเป็นอย่างไร และใครเป็นผู้รับผิดชอบค่าจัดส่ง |
| เอกสาร | ใบแจ้งหนี้ เลขซีเรียล รูปถ่ายการติดตั้ง | การไม่มีเอกสารประกอบอาจทำให้การเคลมล่าช้าหรือถูกปฏิเสธ |
ตามแนวทางอุตสาหกรรม ส่วนใหญ่ชิ้นส่วนคุณภาพสูงในตลาดมักมีการรับประกันแบบจำกัดตลอดอายุการใช้งาน ในขณะที่ตัวเลือกมาตรฐานมีระยะเวลารับประกันระหว่าง 12 ถึง 24 เดือน ส่วนสินค้าประหยัดอาจมีระยะเวลารับประกันเพียง 90 วันถึง 1 ปี เสมอควรอ่านเงื่อนไขให้ละเอียด—ค่าแรงมักไม่รวมอยู่ในความคุ้มครอง และมักจะมีข้อยกเว้นสำหรับการติดตั้งผิดวิธีหรือการใช้งานในสนามแข่ง
การรับรองและตัวชี้วัดคุณภาพ
เคยสงสัยว่า จะหาชิ้นส่วนที่มีคุณภาพได้อย่างไร wix filter , แบตเตอรี่ออปติมา หรือ การยกเลิก bds ชุด? ดูสัญญาณที่พิสูจน์ได้
- ชื่อเสียงของแบรนด์: ชื่อที่ตั้งขึ้น เช่น raybestos , kYB Shocks , และ energy Suspension มีชื่อเสียงในเรื่องคุณภาพที่คงที่ และการรับประกันที่แข็งแรง
- ใบรับรอง: มาตรฐานอุตสาหกรรม (เช่น ISO หรือ CAPA สําหรับส่วนของร่างกาย) แสดงความมุ่งมั่นต่อคุณภาพและความสามารถติดตามได้
- เลขส่วนที่ชัดเจน: ระบบหมายเลขชิ้นส่วนที่สม่ําเสมอและมืออาชีพทําให้การนํามาพิจารณาและการสั่งใหม่ง่ายขึ้น
- วัสดุที่ผ่านการทดสอบ: ผลการทดสอบที่เผยแพร่ ข้อมูลจำเพาะของวัสดุ และรีวิวเชิงบวก ทั้งหมดถือเป็นสัญญาณที่ดี
- บรรจุภัณฑ์แบบมืออาชีพ: ชิ้นส่วนที่บรรจุภัณฑ์ดีและมีคำแนะนำที่ชัดเจน แสดงถึงความใส่ใจในรายละเอียด
ควรระมัดระวังชิ้นส่วนที่ดูถูกเกินไป ไม่มีการระบุยี่ห้อ หรือมาในบรรจุภัณฑ์แบบธรรมดา ประสบการณ์ของช่างและรีวิวจากลูกค้าก็เป็นข้อมูลอันทรงคุณค่าในการประเมินตัวเลือกต่าง ๆ
วิธีอ่านรายละเอียดการรับประกัน
เมื่อคุณซื้อชุดใหม่ของ พาวเวอร์สต็อป เบรกส์ หรือ wix filter คุณจะทิ้งเอกสารไปเลยหรือไม่? อย่าทำเช่นนั้น! นี่คือรายการตรวจสอบเพื่อให้การรับประกันทำงานให้คุณ:
- เก็บใบแจ้งหนี้และยืนยันคำสั่งซื้อไว้
- บันทึกรหัส serial และหมายเลขชิ้นส่วน
- ถ่ายภาพการติดตั้ง (โดยเฉพาะการติดตั้งที่ซับซ้อน เช่น การยกเลิก bds หรือ kYB Shocks )
- ลงทะเบียนผลิตภัณฑ์ของคุณหากจำเป็น
- เก็บแหล่งข้อมูลเกี่ยวกับค่าทอร์กและบันทึกการติดตั้งไว้
ปัญหาหลายอย่างสามารถแก้ไขได้เร็วขึ้นเมื่อคุณมีเอกสารพร้อม หากคุณจำเป็นต้องยื่นเรื่องเคลม งานเอกสารที่หายไปคือเหตุผลอันดับหนึ่งที่ทำให้เกิดความล่าช้าหรือถูกปฏิเสธ (อ้างอิง) .
อย่าคิดว่าแบรนด์ใดแบรนด์หนึ่งดีที่สุดเสมอไป — ให้เปรียบเทียบเงื่อนไขการรับประกันที่แท้จริง ตรวจสอบเอกสาร และพิจารณาผลลัพธ์จริงมากกว่าคำโฆษณา
ด้วยการให้ความสำคัญกับสัญญาณของคุณภาพที่ชัดเจน และเข้าใจความคาดหวังจากการรับประกัน คุณจะหลีกเลี่ยงการจ่ายเงินมากเกินไปเพื่อความอุ่นใจ ในขั้นต่อไป เราจะช่วยคุณจัดเก็บเอกสารการซื้อและจัดการการคืนสินค้าเหมือนมืออาชีพ — เพื่อให้คุณพร้อมรับมือทุกสถานการณ์ ไม่ว่างานโปรเจกต์จะนำอะไรมาให้
ชิ้นส่วนโลหะแบบพิเศษเหมาะกับตรงไหน และจะหาจากที่ใด
ทำไมชิ้นส่วนโลหะแบบพิเศษจึงสำคัญในตลาดอะไหล่หลังการขาย
เคยพยายามอัพเกรดระบบกันสะเทือนด้วย ล้อ bbs หรือติดตั้ง ตัวยึดระบบขับเคลื่อน , เพื่อให้ตระหนักในภายหลังว่าชุดคัปปลิ้งหรือฐานยึดที่มีขายตามท้องตลาดนั้นใช้ไม่ได้จริง? นี่คือจุดที่ชิ้นส่วนโลหะแบบเฉพาะทางเข้ามามีบทบาท โลกแห่งชิ้นส่วนแต่งรถยนต์สำรอง ชิ้นส่วนแบบเฉพาะมีความสำคัญอย่างยิ่งต่อการสร้างสรรค์ที่ไม่เหมือนใคร การอัพเกรดสมรรถนะในปริมาณน้อย หรือเมื่อชิ้นส่วนจากโรงงานไม่มีให้ใช้งานเลยสำหรับการใช้งานของคุณ ลองจินตนาการถึงการผลิตชิ้นส่วนเฉพาะสำหรับ แผ่นกันลื่น เพื่อป้องกันการใช้งานแบบออฟโรด หรือตัวแปลงสัญญาณแบบเฉพาะทาง เพลาขับ เพื่อรับมือกับแรงม้าที่เพิ่มขึ้น—ชิ้นส่วนโลหะแบบเฉพาะเหล่านี้ทำให้โครงการเหล่านี้เป็นไปได้จริง
จากงานวิจัยของอุตสาหกรรม ชิ้นส่วนโลหะเฉพาะมีความสำคัญต่อ:
- ชุดคัปปลิ้งและฐานยึดเพื่อเพิ่มสมรรถนะในปริมาณน้อยสำหรับระบบกันสะเทือนหรือเครื่องยนต์เฉพาะทาง
- เรขาคณิตของแขนควบคุมแบบเฉพาะเพื่อปรับแนวให้ตรงหลังจากลดระดับหรือยกตัวถัง
- ตัวแปลงระบบขับเคลื่อนสำหรับการเปลี่ยนเกียร์หรือระบบขับเคลื่อนแบบเฉพาะ ตัวเชื่อมคานแอลด์ โครงสร้าง
- การอัพเกรดโครงสร้าง เช่น พื้นที่ชนที่เสริมความแข็งแรง หรือแผ่นกันความร้อนสำหรับระบบไอเสีย
- การติดตั้งล้อแบบอฟเตอร์มาร์เก็ต—ลองคิดถึง ล้อเวิร์ค หรือ ล้อแข่งวีลด์ ต้องใช้วงแหวนปรับศูนย์หรือสเปเซอร์แบบสั่งทำพิเศษ
การผลิตชิ้นส่วนแบบสั่งทำพิเศษไม่ได้มีดีแค่เรื่องความสวยงาม—แต่คือการบรรลุถึงความพอดีที่สมบูรณ์แบบ ความทนทาน และสมรรถนะที่เหมาะสมกับรถของคุณโดยเฉพาะ
เมื่อใดควรเลือกของสั่งทำพิเศษแทนของทั่วไป
ฟังดูเหมือนจะแพงใช่ไหม? ไม่เสมอไป แม้อะไหล่แต่งแบบทั่วไปจะประหยัดต้นทุนสำหรับงานซ่อมทั่วไป แต่บ่อยครั้งก็ไม่สามารถตอบสนองเมื่อคุณต้องการ:
- ขนาดที่พอดีเป๊ะสำหรับรถที่ดัดแปลงแล้วหรือรถที่หาได้ยาก
- วัสดุที่ดีขึ้นเพื่อเพิ่มความแข็งแรง ลดน้ำหนัก หรือทนความร้อน
- การรวมฟังก์ชันหลายอย่างเข้าด้วยกัน—เช่น การรวมชุดยึดเครื่องยนต์กับ ตัวยึดระบบขับเคลื่อน
- การตกแต่งหรือเคลือบพิเศษเพื่อป้องกันการกัดกร่อนหรือการสึกหรอ
ชิ้นส่วนแบบสั่งทำพิเศษได้รับการออกแบบตามข้อมูลจำเพาะที่แม่นยำของคุณ ดังนั้นคุณจึงหลีกเลี่ยงข้อแลกเปลี่ยนที่เกิดขึ้นจากชิ้นส่วนที่ผลิตเป็นจำนวนมาก ตัวอย่างเช่น ลูกหมากคันชักแบบสั่งทำพิเศษสามารถแก้ไขปัญหาเรขาคณิตของระบบกันสะเทือนที่ไม่เหมือนใคร ในขณะที่แบบที่ออกแบบมาเฉพาะ แผ่นกันลื่น ให้การป้องกันและการปกป้องสูงสุด การวิจัยแสดงให้เห็นว่า การกลึงแบบสั่งทำพิเศษช่วยให้เลือกวัสดุและค่าความคลาดเคลื่อนได้อย่างแม่นยำ ซึ่งมีความสำคัญต่อการใช้งานที่ต้องการประสิทธิภาพสูง
| เกณฑ์ | ชิ้นส่วนโลหะที่กำหนดเอง | ชิ้นส่วนสำเร็จรูป |
|---|---|---|
| ความพอดีและการทำงาน | ออกแบบมาเพื่อการใช้งานที่แม่นยำ | ขนาดที่เป็นมาตรฐาน อาจต้องปรับติดตั้งให้เข้ากัน |
| การเลือกวัสดุ | ปรับแต่งได้เต็มที่สำหรับความแข็งแรง/น้ำหนัก | จำกัดอยู่ในสิ่งที่มีอยู่ในสต็อก |
| ต้นทุน | ราคาเริ่มต้นสูงกว่า แต่ค่าใช้จ่ายระยะยาวต่ำกว่าหากต้องการความพอดีที่แม่นยำ | ต้นทุนเริ่มต้นต่ำกว่า แต่อาจมีค่าใช้จ่ายในการปรับเปลี่ยนในอนาคต |
| ระยะเวลาการจัดส่ง | ใช้เวลานานกว่า แต่ปรับให้เหมาะกับไทม์ไลน์ของคุณ | พร้อมใช้งานทันที |
| ผลกระทบต่อสมรรถนะ | ปรับให้เหมาะสมกับการผลิตของคุณ | อาจจำกัดประสิทธิภาพสูงสุด |
สิ่งที่ควรมองหาในหุ้นส่วนการผลิต
การเลือกพันธมิตรที่เหมาะสมสำหรับชิ้นส่วนแต่งรถยนต์โลหะแบบเฉพาะของคุณ มีความสำคัญเท่าเทียมกับการออกแบบเอง ลองจินตนาการถึงการรวมทุกขั้นตอนไว้ภายใต้หลังคาเดียว — ตั้งแต่การออกแบบไปจนถึงการปั๊มชิ้นส่วน การกลึงด้วยเครื่อง CNC การเชื่อม และการตีขึ้นรูป สิ่งนี้จะช่วยทำให้การจัดการโครงการเป็นไปอย่างราบรื่น รักษาความแม่นยำที่สม่ำเสมอ และเร่งความเร็วในกระบวนการปรับปรุงซึ่งมีความสำคัญอย่างยิ่งต่อการสร้างชิ้นงานที่ซับซ้อนหรือการสร้างต้นแบบอย่างรวด็วเร็ว
- ความสม่ำเสมอของคุณภาพ: เลือกผู้ให้บริการที่ได้รับการรับรอง ISO หรือ IATF
- ความสามารถแบบครบวงจร: มีกระบวนการปั๊มชิ้นส่วน การกลึงด้วยเครื่อง CNC การเชื่อม การตีขึ้นรูป และการควบคุมคุณภาพภายในองค์กร
- การเสนอราคาอย่างรวด็วเร็วและการสื่อสารที่ชัดเจน
- ประสบการณ์ในการทำงานกับวัสดุและค่าความคลาดเคลื่อนมาตรฐานอุตสาหกรรมยานยนต์
- ความสามารถในการขยายกำลังการผลิตจากชิ้นงานต้นแบบเพียงชิ้นเดียวไปจนถึงการผลิตจำนวนมาก
สำหรับผู้ที่กำลังมองหาโซลูชันแบบครบวงจร คู่ค้าเช่น เส้าอี้ นำเสนอชิ้นส่วนโลหะแบบกำหนดเองที่ออกแบบมาอย่างแม่นยำ พร้อมการสนับสนุนแบบครบวงจร การรับรองมาตรฐาน IATF 16949:2016 และการเสนอราคาอย่างรวดเร็วภายใน 24 ชั่วโมง — ช่วยให้คุณมั่นใจได้ในการพัฒนาจากแบบดีไซน์ไปจนถึงการผลิตจำนวนมาก
"ชิ้นส่วนโลหะแบบกำหนดเองจะช่วยเปิดทางสู่ทางแก้ปัญหาที่ชิ้นส่วนสำเร็จรูปไม่สามารถให้ได้ — เลือกคู่ค้าที่เหมาะสม และผลงานสร้างสรรค์ครั้งต่อไปของคุณจะมีความปลอดภัยมากขึ้น มีความแข็งแรงสูงขึ้น และมีเอกลักษณ์เฉพาะตัวที่แท้จริง"
เมื่อเข้าใจอย่างชัดเจนว่าชิ้นส่วนโลหะแบบกำหนดเองเหมาะกับโครงการของคุณอย่างไร คุณก็พร้อมที่จะจัดการด้านลอจิสติกส์หลังการซื้อ และทำให้โครงการสร้างสรรค์ดำเนินไปตามแผน ต่อไปนี้ เราจะแบ่งปันกลยุทธ์เกี่ยวกับเอกสารประกอบและขั้นตอนการคืนสินค้า เพื่อให้คุณเตรียมพร้อมสำหรับทุกสิ่งที่เกิดขึ้นหลังการติดตั้ง

ลอจิสติกส์หลังการซื้อ และขั้นตอนต่อไปอันชาญฉลาด
บันทึกการพอดีและการติดตั้งตั้งแต่วันแรก
เคยติดตั้ง เซ็นเซอร์ตรวจความดันลมยาง หรือเปลี่ยนชิ้นส่วนของคุณเองหรือไม่ พวงมาลัยรถยนต์ , เพิ่งจะรู้ตัวว่าบางอย่างมันไม่ถูกต้องนัก? ลองจินตนาการว่าคุณมีหลักฐานที่จำเป็นทั้งหมดอยู่ในมือ—ใบเสร็จ รูปถ่าย หน้าจอแสดงผลการใช้งานร่วมกัน—พร้อมใช้งานทันที ฟังดูง่ายดี แต่นิสัยเล็กๆ น้อยๆ แบบนี้สามารถช่วยประหยัดเวลาอันแสนน่าหงุดหงิดไปได้ หากคุณต้องส่งคืนหรือเปลี่ยนชิ้นส่วนแต่งรถยนต์ในอนาคต
- บันทึกหน้าสินค้า: ดาวน์โหลดหรือพิมพ์หน้ารายละเอียดสินค้า รวมถึงข้อความเกี่ยวกับความเข้ากันได้และข้อมูลจำเพาะ ขั้นตอนนี้สำคัญมากหากมีปัญหาเกี่ยวกับการติดตั้ง—โดยเฉพาะเมื่อสั่งซื้อจากเว็บไซต์อย่างเช่น rock auto parts.com หรือเว็บไซต์ใดๆ ร้านขายอะไหล่รถยนต์ .
- ถ่ายภาพทุกอย่าง: ก่อนติดตั้ง ถ่ายภาพหมายเลขชิ้นส่วน ฉลาก และขนาดไว้ ระหว่างติดตั้ง ให้บันทึกแต่ละขั้นตอนและปัญหาที่พบ—โดยเฉพาะอุปกรณ์ไฟฟ้า เช่น ขั้วแบตเตอรี่ หรือชิ้นส่วนที่ประกอบกันซับซ้อน
- เก็บรักษารหัสคำสั่งซื้อและใบแจ้งหนี้: จัดเก็บสำเนาเอกสารทั้งในรูปแบบดิจิทัลและกระดาษ เช่น ใบเสร็จ หนังสือยืนยันการจัดส่ง และเอกสารการรับประกันต่าง ๆ เอกสารเหล่านี้จะเป็นหลักฐานของคุณในกรณีที่ต้องการส่งคืนสินค้าหรือใช้สิทธิ์การรับประกัน
- เก็บรักษาบรรจุภัณฑ์: อย่าทิ้งกล่องหรือวัสดุห่อหุ้มจนกว่าคุณจะได้ทดลองใช้ชิ้นส่วนบนรถยนต์ที่เหมาะสมแล้ว เนื่องจากผู้จัดจำหน่ายหลายรายกำหนดให้ต้องใช้บรรจุภัณฑ์เดิมในการส่งคืนสินค้า
- บันทึกข้อมูลการติดตั้ง: จัดทำรายการแบบง่าย ๆ ด้วยโปรแกรมสเปรดชีตหรือสมุดบันทึก เพื่อบันทึกว่าคุณสั่งซื้ออะไรมากจากที่ไหน และข้อมูลเฉพาะที่เกี่ยวข้องกับการติดตั้ง (เช่น ปีผลิตที่แตกต่างกัน หรือรายละเอียดเฉพาะตามรุ่นย่อย)
หลักฐานช่วยให้แก้ปัญหาได้รวดเร็ว การจัดเก็บเอกสารอย่างเป็นระบบจะช่วยเปลี่ยนข้อพิพาทให้กลายเป็นข้อสรุปที่รวดเร็ว แทนที่จะเป็นปัญหายืดเยื้อ
ข้อควรรู้เกี่ยวกับการส่งคืน การเปลี่ยนสินค้า และค่าธรรมเนียมการนำสินค้าเข้าสต็อก
เมื่อชิ้นส่วนไม่พอดีหรือเกิดการชำรุดก่อนเวลา ขั้นตอนการคืนสินค้าที่ราบรื่นเริ่มต้นจากการรู้กฎเกณฑ์ต่าง ๆ ตัวอย่างเช่น CarParts.com เสนอช่วงเวลาคืนสินค้าภายใน 60 วัน ครอบคลุมค่าจัดส่งทั้งไปและกลับ โดยทั่วไปจะดำเนินการคืนเงินภายในหนึ่งสัปดาห์หลังจากได้รับสินค้าคืน อย่างไรก็ตามมีข้อยกเว้น — ชิ้นส่วนไฟฟ้าที่ถูกเปิดใช้งานแล้ว สินค้าที่ผลิตตามสั่ง และชิ้นส่วนที่มีการทาสีอาจไม่อยู่ในเงื่อนไขการคืนสินค้า โปรดตรวจสอบรายละเอียดเพิ่มเติมจากผู้ขายเกี่ยวกับ:
- ระยะเวลาการคืนสินค้า (โดยทั่วไป 30–60 วัน)
- ค่าธรรมเนียมการสต๊อกใหม่หรือข้อยกเว้น (โดยเฉพาะสินค้าสั่งทำพิเศษ)
- ใครเป็นผู้รับผิดชอบค่าจัดส่งในการคืนสินค้า
- สภาพของชิ้นส่วนและบรรจุภัณฑ์ที่ต้องการคืน
- เอกสารที่จำเป็นสำหรับการเคลมการรับประกันหรือคืนแกนหลัก
หากคุณกำลังใช้ คูปอง carparts.com หรือซื้อจากผู้ขายลดราคา ร้านขายอะไหล่รถยนต์ , โปรดตรวจสอบให้แน่ใจว่าสินค้าโปรโมชั่นสามารถคืนได้ สำหรับการเคลมรับประกันนั้น การจัดเตรียมเอกสารอย่างละเอียด — เช่น รูปถ่ายและบันทึกการติดตั้ง จะช่วยเพิ่มโอกาสในการแก้ไขปัญหาอย่างราบรื่น (อ้างอิง) .
ขั้นตอนต่อไปสำหรับการซื้ออะไหล่ในตลาดรองอย่างมั่นใจ
พร้อมที่จะทำการซื้อครั้งต่อไปอย่างสบายใจแล้วหรือยัง? นี่คือรายการตรวจสอบเพื่อให้โครงการของคุณเป็นไปตามแผน และหลีกเลี่ยงปัญหาที่อาจเกิดขึ้นในอนาคต:
- จัดทำรายชื่อผู้จัดจำหน่ายที่เชื่อถือได้ — ตรวจสอบคะแนนประเมิน เงื่อนไขการรับประกัน และนโยบายการคืนสินค้า
- จัดระบบเอกสารของคุณก่อนสั่งซื้อ (ใบเสร็จ รูปถ่าย บันทึกการติดตั้ง)
- บันทึกข้อมูลเฉพาะของรถแต่ละคัน — วันที่ผลิต รุ่นย่อย หรือการปรับเปลี่ยนก่อนหน้านี้ — ไว้ในสมุดบันทึกการติดตั้ง
- เปรียบเทียบสัญญาณบ่งชี้คุณภาพ ไม่ใช่แค่ราคา — มองหาแบรนด์ที่มีชื่อเสียงและการสนับสนุนการรับประกันที่แข็งแกร่ง
- สำหรับชิ้นส่วนโลหะที่ซับซ้อนหรือมีปริมาณการผลิตต่ำ พิจารณาขอใบเสนอราคาจากผู้ผลิตแบบครบวงจรที่ได้รับการรับรอง เช่น เส้าอี้ สำหรับโซลูชันแบบเฉพาะกิจ วิธีการแบบบูรณาการของพวกเขาจะช่วยให้มั่นใจได้ถึงความแม่นยำและความน่าเชื่อถือสำหรับงานประกอบที่ไม่ซ้ำใคร
- เตรียมเครื่องมือที่จำเป็นไว้ใกล้ตัว — เช่น เครื่องชาร์จสำรองแบบพกพาน๊อค สำหรับสถานการณ์ฉุกเฉิน และมีช่องเสียบปลั๊กที่เหมาะสมสำหรับการเปลี่ยนขั้วแบตเตอรี่อย่างรวดเร็ว
ด้วยการจัดระเบียบและเตรียมตัวล่วงหน้า คุณจะใช้เวลาน้อยลงในการจัดการกับการคืนสินค้า และมีเวลามากขึ้นในการเพลิดเพลินกับการอัปเกรดของคุณ และหากคุณจำเป็นต้องกลับไปดูรายการซื้อของในอดีต—ไม่ว่าจะเป็นชิ้นส่วนใหม่ เซ็นเซอร์ตรวจความดันลมยาง หรือแผ่นยึดแบบกำหนดเอง—คุณจะมีทุกสิ่งที่ต้องการสำหรับประสบการณ์ที่รวดเร็วและไม่มีปัญหา
คำถามที่พบบ่อยเกี่ยวกับชิ้นส่วนรถยนต์ในตลาดรอง
1. ชิ้นส่วนรถยนต์ในตลาดรองคืออะไร และแตกต่างจากชิ้นส่วน OEM อย่างไร?
ชิ้นส่วนรถยนต์ในตลาดรองคือชิ้นส่วนที่ผลิตโดยผู้ผลิตบุคคลที่สาม ไม่ใช่ผู้ผลิตรถยนต์ต้นฉบับ ในขณะที่ชิ้นส่วน OEM มาจากผู้ผลิตรถยนต์โดยตรง ชิ้นส่วนตลาดรองมักมีทางเลือกที่หลากหลายกว่า ราคาที่แข่งขันได้ และในบางกรณี อาจมีสมรรถนะหรือความทนทานที่ดีกว่า คุณภาพของชิ้นส่วนอาจแตกต่างกันไปตามยี่ห้อ ดังนั้นการศึกษาและเลือกซื้อจากผู้จัดจำหน่ายที่น่าเชื่อถือจึงเป็นสิ่งสำคัญ
2. ฉันจะทราบได้อย่างไรว่าชิ้นส่วนตลาดรองที่ซื้อมาจะพอดีกับรถยนต์ของฉัน?
เพื่อให้แน่ใจว่าชิ้นส่วนเข้ากันได้กับรถของคุณ ให้ใช้เลขหมายเลขอัตลักษณ์ของรถ (VIN) ในการค้นหาจากแคตตาล็อก เปรียบเทียบหมายเลขชิ้นส่วน และตรวจสอบขนาดเมื่อจำเป็น การบันทึกข้อมูลการเข้ากันได้และเก็บบรรจุภัณฑ์ไว้จนกว่าจะยืนยันการติดตั้งแล้ว สามารถช่วยให้การคืนสินค้ารวดเร็วขึ้นหากจำเป็น
3. การใช้ชิ้นส่วนอะไหล่จะทำให้การรับประกันรถของฉันเป็นโมฆะหรือไม่?
โดยทั่วไปแล้ว การติดตั้งชิ้นส่วนอะไหล่ไม่ได้ทำให้การรับประกันรถเป็นโมฆะโดยอัตโนมัติ แต่การติดตั้งที่ไม่ถูกต้อง หรือการใช้ชิ้นส่วนที่ไม่สอดคล้องตามข้อกำหนดของระบบปล่อยมลพิษ อาจส่งผลต่อการคุ้มครองภายใต้การรับประกัน ควรตรวจสอบเงื่อนไขการรับประกันและข้อบังคับในท้องถิ่นเสมอ และเก็บเอกสารไว้เพื่อใช้ในการอ้างอิงสำหรับการปรับปรุงหรือเปลี่ยนแปลงใด ๆ
4. ฉันควรพิจารณาอะไรบ้างเมื่อเลือกซื้อชิ้นส่วนอะไหล่หรือผู้ผลิตที่มีคุณภาพ?
ควรเลือกแบรนด์ที่มีชื่อเสียงและเชื่อถือได้ มีหมายเลขชิ้นส่วนชัดเจน มีเงื่อนไขการรับประกันที่แข็งแกร่ง และได้รับการรับรองจากอุตสาหกรรม สำหรับชิ้นส่วนโลหะแบบเฉพาะ ควรเลือกทำงานกับผู้ผลิตแบบครบวงจรอย่าง Shaoyi ซึ่งสามารถให้ความแม่นยำ คุณภาพ และการสนับสนุนตั้งแต่ขั้นตอนการออกแบบจนถึงการผลิต
5. ฉันจะจัดการอย่างไรกับการคืนสินค้าหรือการเรียกร้องการรับประกันชิ้นส่วนหลังการขาย
เก็บรักษาหลักฐานการซื้อทั้งหมด บรรจุภัณฑ์สินค้า และเอกสารการติดตั้งไว้ให้ครบถ้วน ทบทวนนโยบายการคืนสินค้าและขั้นตอนการรับประกันของผู้ขายล่วงหน้า การจัดเก็บเอกสารอย่างเป็นระบบจะช่วยเร่งกระบวนการคืนสินค้า เปลี่ยนสินค้า และการเรียกร้องการรับประกัน ลดความยุ่งยากหากเกิดปัญหาใด ๆ ขึ้น