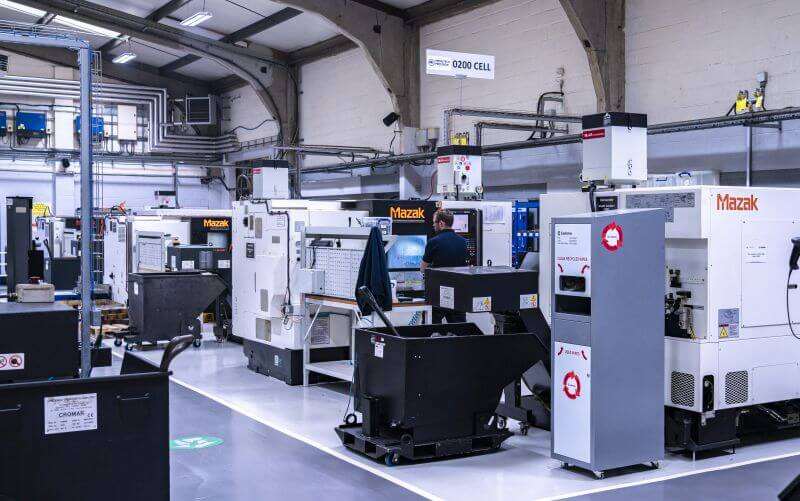
 Малки порции, високи стандарти. Нашата услуга за бързо проектиране на прототипи прави валидацията по-бърза и лесна —

Декодиране на металните фрезовани детайли: От избор на материал до окончателна инспекция
Разбиране на металните обработвани части и техните производствени основи
Когато вземете смартфон, стартирате колата си или се качвате на самолет, вие разчитате на метални обработвани части, дори без да го осъзнавате. Тези прецизно проектирани компоненти са основата на почти всяка механична система в съвременното производство. Но какво точно прави една обработена част различна от другите метални компоненти и защо това различие има значение за вашия следващ проект?
Металните обработвани части са компоненти, създадени чрез отстраняване на материал от цялостна метална заготовка за постигане на точни спецификации. За разлика от части, произведени чрез други методи, всяка машинно обработена метална компонента започва като по-голям парчета суров материал, който се оформя внимателно в окончателния си вид. Този основен подход придава на машинно обработените части уникални характеристики, които ги правят незаменими в различни индустрии — от автомобилостроенето и аерокосмическата промишленост до медицинските устройства и потребителската електроника.
Какво прави машинно обработените части различни от другите метални компоненти
Представете си, че имате нужда от метална компонента за критично приложение. Имате няколко възможности за производство, но всяка от тях води до принципно различни резултати. Разбирането на тези разлики ви помага да вземете по-умни решения при избора на доставчик.
Ковани части се създават чрез прилагане на екстремна топлина върху метал, докато той стане пластичен, след което се използва компресивна сила, за да се преформира. Б. Б. Прайс , коването осигурява изключителна якост, тъй като процесът подрежда вътрешната зърнеста структура на метала, намалявайки наличието на въздушни джобове или празнини. Това прави кованите компоненти идеални за приложения с високо натоварване, изискващи устойчивост към ударни натоварвания.
Лити части включват нагряване на метала до състоянието му на разтопена течност, след което той се залива в форма, където се затвърдява. Леенето се отличава с възможността си да създава сложни и детайлизирани форми по икономичен начин. Въпреки това леените компоненти обикновено имат нееднородна зърнеста структура и по-ниски механични свойства в сравнение с кованите или машинно обработени алтернативи.
Обработени части използват напълно различен подход. Вместо да преформоват или литят метал, машинната обработка работи с цялостен материал, като отстранява всичко, което не е част от крайния компонент. Това осигурява предимства на машинно обработените метални компоненти: по-строги размерни допуски, по-гладки повърхностни финишни обработки и гъвкавост при производството както на единични прототипи, така и на серийни партиди с висока обемност – всички с еднаква прецизност.
Обяснение на принципа на субтрактивното производство
Металообработката работи по принципа на субтрактивно производство. Представете си я като изработване на статуя от мрамор — започвате с повече материал, отколкото ви е необходим, а след това постепенно премахвате материал, докато остане само желаната ви форма.
Както обяснява Dassault Systèmes, субтрактивното производство включва премахване на материал чрез точене, фрезоване, свредене, шлифоване, рязане и разширено свредене (боринг). Този процес обикновено използва метали или пластмаси като суровини и произвежда крайни продукти с гладки повърхности и строги размерни допуски.
Съвременните CNC (компютърно числено управление) машини изпълняват това премахване на материал с изключителна прецизност. Предварително програмиран софтуер управлява сложни машини, за да режат и оформят детайли според точни CAD чертежи. Тази автоматизация осигурява последователни и повтаряеми резултати при стотици или хиляди идентични компонента.
Защо точността е толкова важна? В автомобилните приложения дори малки размерни отклонения могат да повлияят върху начина, по който компонентите се сглобяват помежду си, което потенциално може да доведе до проблеми с безопасността или ускорено износване. В аерокосмическата област изискванията за точност стават още по-строги, тъй като отказът на компонент просто не е възможен на височина 35 000 фута.
Това ръководство ще ви води стъпка по стъпка през всичко, което трябва да знаете за металните машинни части — от избора на подходящите материали и производствени процеси до задаването на допуски и оценката на доставчиците. Независимо дали проектирате първата си машинно обработена част или търсите начини за оптимизиране на вече съществуваща детайла, ще намерите практически насоки, които ще ви помогнат да вземете обосновани решения.
Качествените метални машинни части притежават няколко характерни особености:
- Точност на размерите – Способността последователно да се постигат целевите размери в рамките на зададените допуски
- Повърхностна обработка – Гладки и равномерни повърхности, които отговарят на функционалните и естетичните изисквания
- Материална почтеност – Запазени механични свойства без дефекти, предизвикани от производствения процес
- Повторяемост – Възможността за производство на идентични части при различни производствени серии, независимо дали се произвеждат 10 или 10 000 части
Тези характеристики действат заедно, за да гарантират, че всяка обработена част функционира точно така, както е проектирана — всеки път. В следващите раздели ще разгледаме как подборът на материала, методите за машинна обработка, допуските и контролът на качеството всички заедно допринасят за постигането на тези резултати във вашето конкретно приложение.
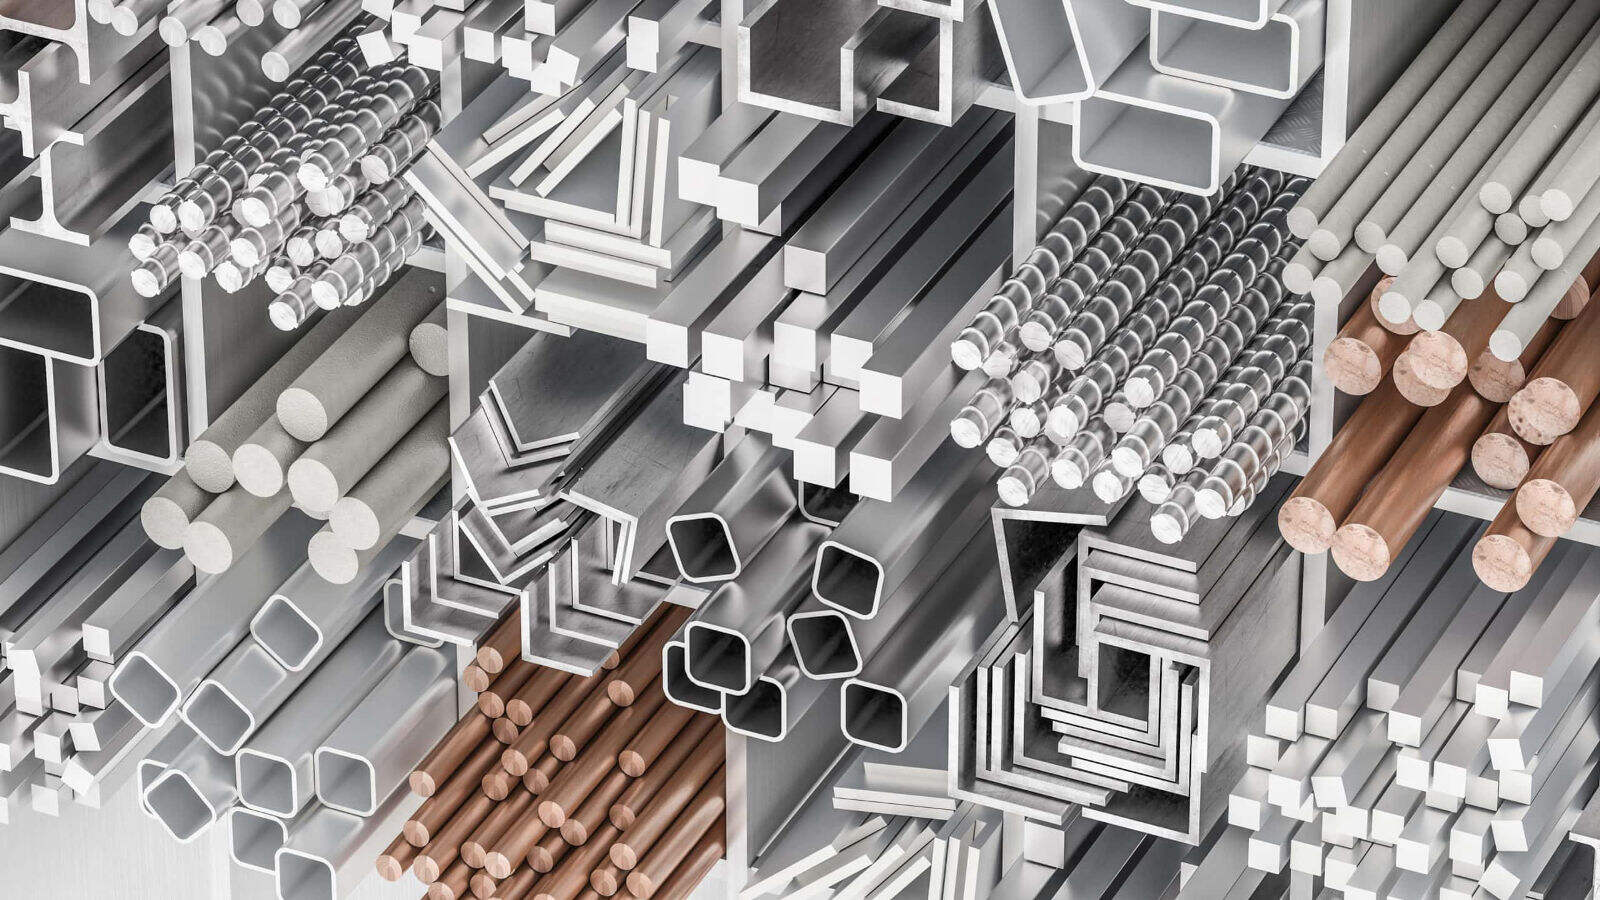
Ръководство за подбор на материали за проектите по машинна обработка на метали
Изборът на подходящия метал за вашия проект по машинна обработка не е просто въпрос на избиране на нещо здраво или евтино — той се свежда до съгласуване на свойствата на материала с конкретните изисквания на вашето приложение. Неправилният избор може да доведе до преждевременно повреждане на компонентите, прекомерни производствени разходи или части, които просто не функционират както се очаква. Как тогава да направите този избор?
Представете си подбора на материала като балансиране на три взаимосвързани фактора каква е функцията на детайла (производителност), колко можете да похарчите (бюджет) и колко ефективно може да се произвежда (обработваемост). Всяко материала предлага компромиси по тези параметри, а разбирането им ви помага да вземате по-умни инженерни решения.
Алуминиеви сплави за леки високопроизводителни приложения
Машинната обработка на алуминий е станала изключително популярна в различни отрасли — и това е напълно оправдано. Тези сплави предлагат изключително добро съотношение между якост и тегло, отлична корозионна устойчивост и забележителна обработваемост, която поддържа производствените разходи на управляемо ниво.
алюминий 6061 често се нарича "джак на всички занаяти" в алуминиевото семейство. Според RapidDirect тази сплав притежава добра обработваемост, отлична корозионна устойчивост и добри показатели на здравина при опън при относително ниска цена. Съставът ѝ от силиций и магнезий я прави изключително заварима и лесна за обработка. Обработени алуминиеви части от сплав 6061 се използват в различни области — от автомобилни компоненти и аерокосмически конструкции до корпуси на потребителска електроника и морски фурнитури.
алюминий 7075 се използва, когато е необходима максимална здравина. Тъй като цинкът е основният легиращ елемент, сплав 7075 осигурява значително по-висока граница на текучест в сравнение с 6061 — което означава, че понася по-голямо въздействие и налягане, без да се деформира. Тази здравина обаче има своите компромиси: 7075 е по-трудна за обработка, по-малко заварима и по-скъпа. Аерокосмическата и отбранителната индустрия често изискват използването на сплав 7075 за самолетни рамки, високонапрегнати структурни компоненти и приложения, при които и намаляването на теглото, и здравината са от критично значение.
При сравняване на тези сплави имайте предвид следното: 6061 предлага по-добра топлопроводност и електропроводност, което я прави идеална за топлообменници и електрически приложения. От друга страна, по-високата твърдост и устойчивост на умора на 7075 я правят предпочитания избор за високопроизводителни приложения, където отказът не е възможен.
Стоманени класове и кога всеки от тях е подходящ
Неръждаемата стомана остава едно от най-универсалните метални семейства за машинно обработвани компоненти. Ключовият момент е да се разбере кой клас отговаря на вашите конкретни изисквания.
Материал 303 неръждаема стомана беше специално проектирана за добра машинна обработваемост. Според Atlantic Stainless съдържанието ѝ на сера я прави най-лесно обработваемата сред аустенитните неръждаеми стомани. Това се превръща директно в по-бързи производствени времена и по-ниски производствени разходи. Често срещани приложения включват гайки, болтове, фитинги за самолети, зъбчати колела, винтове, валове и бушони. Компромисът? Съдържанието на сера леко намалява корозионната ѝ устойчивост в сравнение с други класове.
неръждаема стомана 304 съставлява над 50 % от използваната по света неръждаема стомана. Тя осигурява изключителна корозионна устойчивост както към химично, така и към атмосферно въздействие, като при това запазва висока заваряемост. Среща се в кухненски уреди, машини за преработка на храни, архитектурни профили и автомобилни компоненти. Когато имате нужда от надежден универсален материал с отлична формоваемост, обикновено 304 е най-добрата ви опция.
неръжавеща оцел 316 добавя 2–3 % молибден към състава, което осигурява по-висока устойчивост към корозия и точкова корозия в среди, богати на хлориди. Това я прави незаменима за морски приложения, оборудване за химическа преработка, производство на фармацевтични продукти и медицински устройства. Ако вашите части ще бъдат изложени на морска вода, агресивни химикали или трябва да отговарят на строги хигиенни изисквания, неръждаемата стомана 316 оправдава по-високата си цена.
Въглеродни стомани предлагат друга опция, когато устойчивостта към корозия не е основната грижа. Тези материали осигуряват отлична якост при по-ниски разходи в сравнение с неръждаемите марки, което ги прави подходящи за вътрешни компоненти, части на машини и приложения, при които защитни покрития могат да бъдат нанесени след механична обработка.
Специални метали за изискващи среди
Някои приложения изискват характеристики, които надхвърлят възможностите на алуминия и стоманата. Тук на сцената излизат специалните метали.
месинг 360 (C360) е известен като „лесно обработвама латун“ и това е напълно оправдано — обработва се отлично. Според MakerVerse , CNC обработката на латун произвежда детайли с изключително високо качество на повърхността и стриктни допуски, и то ефективно. Съставът от мед, цинк и олово осигурява добра якост и отлична устойчивост към корозия, което го прави идеален за електрически конектори, тръбни фитинги и декоративни фурнитури.
C110 Мед е първият избор, когато е от решаващо значение електрическата проводимост. Това почти чисто медно сплав с незначително съдържание на кислород предлага най-високата електрическа проводимост сред всички обикновено обработвани метали. Печатни платки, електрически конектори, компоненти за заземяване и топлоотводи често изискват уникалните свойства на мед C110.
Титаний представлява висшата класа на обработвани материали. ЧПУ обработката на титан произвежда компоненти с изключително високо съотношение на якост към тегло, забележителна корозионна устойчивост и биосъвместимост, което ги прави подходящи за медицински импланти. Титановата марка 2 предлага отлична формоваемост и се използва широко в аерокосмическата и химическата промишленост. Марка 5 (Ti-6Al-4V) осигурява още по-висока якост за изискващи приложения в аерокосмическата, медицинската и морската индустрия. Недостатъкът? Титанът е значително по-скъп и изисква специализиран инструментариум и експертни знания за ефективна обработка.
Сравнение на свойствата на материалите
За да ви помогнем бързо да оцените възможностите, по-долу е дадено сравнение „отстрани до страна“ на ключовите свойства:
| Материал | Оценка за обработваемост | Опънна якост | Корозионна устойчивост | Относителна цена | Типични приложения |
|---|---|---|---|---|---|
| Алуминий 6061 | Отличен | Средна (310 MPa) | Отличен | Ниски | Автомобилни, аерокосмически конструкции, морски фурнитури |
| Алуминий 7075 | Добре | Висока (572 MPa) | Добре | Среден | Рамки на самолети, високонапрегнати структурни части |
| неръждаема стомана 303 | Отличен | Висока (620 MPa) | Добре | Среден | Фиксиращи елементи, зъбни колела, валове, втулки |
| неръждаема стомана 304 | Добре | Висока (580 MPa) | Отличен | Среден | Оборудване за хранително-вкусовата промишленост, кухненски уреди, архитектурни приложения |
| неръжавеща оцел 316 | Умерена | Висока (580 MPa) | Начало | Средно-Високо | Морско оборудване, химическа обработка, медицински устройства |
| месинг 360 (C360) | Отличен | Средна (380 MPa) | Добре | Среден | Електрически съединители, водопроводни инсталации, декоративни части |
| C110 Мед | Добре | Ниско (220 MPa) | Отличен | Средно-Високо | Електрически компоненти, радиатори, заземяване |
| Титанова степен 5 | Трудни | Много високо (1100 MPа) | Начало | Високо | Аерокосмическа промишленост, медицински импланти, морски фурнитури |
Как изборът на материал влияе върху производството
Изборът на материал не влияе само върху работата на детайлите — той пряко определя времето за машинна обработка, износа на режещия инструмент и, в крайна сметка, разходите по вашия проект. По-твърдите материали като алуминиевата сплав 7075 и титан изискват по-бавни скорости на рязане и по-чести смяни на инструментите, което увеличава производственото време и разходите. По-меките и по-лесно обработваеми материали като алуминиевата сплав 6061 и неръждаемата стомана 303 се обработват по-бързо и с по-малък износ на инструментите, което поддържа по-ниски разходи.
Връзката действа в двете посоки: ако посочите труднообработваем материал, очаквайте по-дълги срокове за изпълнение и по-високи разходи за всяка отделна част. Обратно, ако изберете високообработваем материал, когато изискванията на приложението го позволяват, това може значително да намали производствения ви бюджет, без да се жертва качеството.
След като сте определили рамката за избор на материали, следващата стъпка е да разберете кои машинни процеси ще превърнат суровия материал в крайния компонент — и как изборът на процес влияе върху постижимото по отношение на геометрия, допуски и повърхностна шлифовка.
Обяснени CNC машинни процеси с технически параметри
Сега, когато сте избрали подходящия материал за проекта си, следващият въпрос е: кой машинен процес всъщност ще превърне суровия метал в крайния компонент? Отговорът напълно зависи от геометрията на детайла, изискванията към допусците и обема на производството. Разбирането на начина, по който работи всеки процес — и в кои аспекти той се отличава — ви помага да комуникирате ефективно с машинните цехове и да получавате точни оферти.
CNC машината за обработка на метали работи чрез следване на предварително програмирани инструкции да насочват режещите инструменти през прецизни движения. Но не всички CNC метални машини работят по един и същ начин. Нека разгледаме основните процеси и кога всеки от тях е подходящ за вашите машинни части.
Операции при CNC фрезоване и конфигурации на осите
CNC фрезоването премахва материал чрез въртящи се режещи инструменти, които се движат по обработваната заготовка. Представете си го като обратното на свреденето — вместо да навлизат направо надолу, фрезите могат да се движат в множество посоки, за да създадат сложни форми, джобове, пази и контурни повърхности.
Броят на осите определя какви геометрии може да произвежда вашата метална CNC машина:
3-осно CNC фрезиране движи режещия инструмент по три линейни посоки: X (ляво-дясно), Y (напред-назад) и Z (горе-долу). Според CNC Cookbook , 3-осовото фрезоване е най-подходящо за плоски фрезовани профили, свредения и резбовани отвори, които са успоредни на една от осите. Тази конфигурация обработва повечето стандартни части ефективно и икономично, но има затруднения при изпълнение на подрязвания и сложни наклонени елементи без множество настройки.
4-осево CNC фрезеруване добавя ротационна ос А, която се върти около оста X. Това изглеждащо просто добавяне разкрива значителни възможности. Заготовката може да се върти по време на фрезоване, което позволява обработването на наклонени елементи, хеликоиди и сложни дъги в рамките на един-единствен монтаж. За производителите, които работят със сложни геометрии, четириосевите машини елиминират смяната на приспособленията, която увеличава разходите и води до удължаване на сроковете.
5-осево CNC фрезеруване представлява златния стандарт за обработване на сложни геометрии. Чрез добавяне на втора ротационна ос тези машини могат да се приближават към заготовката от практически всеки ъгъл. Това позволява обработването на турбинни лопатки, работни колела, аерокосмически компоненти и медицински устройства със сложни криви, които биха били невъзможни — или изключително скъпи — при по-прости машини.
- 3-осевите машини се отличават при: Равни повърхности, прости джобове, отвори, основни контури. Ограничения: не могат да обработват подрязани участъци или наклонени елементи без повторно позициониране.
- 4-осевите машини се отличават при: Детайли, изискващи характеристики от множество страни, спираловидни шарки и цилиндрични компоненти с елементи, разположени извън осите. Ограничения: Все още са ограничени в сравнение с 5-осевите машини при сложни криволинейни повърхности.
- 5-осевите машини се отличават при: Сложни аерокосмически компоненти, медицински импланти, матрици и форми, както и всеки детайл със сложни криволинейни повърхности. Ограничения: По-високите разходи за машините се отразяват пряко в по-високите цени на детайлите.
CNC фрезова машина за алуминий обикновено постига по-високи скорости на рязане в сравнение с машина, обработваща стомана или титан, което влияе директно както върху разходите, така и върху водещото време за вашия проект.
Обработката чрез точене за цилиндрични компоненти
Докато при фрезоването се движи режещият инструмент, CNC точенето работи по различен начин — заготовката се върти, докато неподвижните режещи инструменти отстраняват материала. Това прави точенето идеално за всеки компонент с ротационна симетрия: валове, втулки, пинове, резбовани крепежни елементи и цилиндрични корпуси.
Според CNC WMT, CNC точенето може да постигне толеранс до ±0,0001 инча (±0,0025 мм) и повърхностна шлифовка с гладкост до Ra 0,04 μm — приближаваща огледално качество. Стандартните процеси на точене обикновено постигат Ra 1,6–0,8 μm, докато прецизното точене преминава в този ултрафин диапазон.
Какво прави CNC точенето толкова прецизно? Няколко фактора действат съвместно:
- Стабилност на машината: Структурната стабилност минимизира вибрациите по време на рязане
- Динамика на шпиндела: Точно управление на въртенето осигурява последователно отстраняване на материала
- Избор на инструменти: Инструменти от твърд сплав и с диамантово покритие запазват стабилността при рязане
- Термално управление: Ефективното охлаждане предотвратява разширението на материала, което води до размерна неточност
CNC метално рязане на точилни центрове протича изключително бързо за цилиндрични детайли. Докато фрезоването може да изисква няколко прохода за създаване на кръгла форма, при точенето тя се получава в една операция, докато заготовката се върти срещу режещия инструмент.
Вторични операции, които подобряват качеството на детайлите
Основните машинни процеси довеждат детайлите близо до окончателната им форма, но вторичните операции често осигуряват точността и качеството на повърхността, които критичните приложения изискват.
Стъпка за обработване използва абразивни дискове за отстраняване на минимални количества материал, постигайки допуски и крайна обработка на повърхността, които фрезоването и точенето просто не могат да осигурят. Според MultiSource Manufacturing , шлифовъчните системи завършват обработката на повърхностите и вътрешностите на компонентите с точни допуски, като създават желаната естетична и функционална крайна обработка. Специализираните зъбчати шлифовъчни машини осигуряват висока прецизност при производството на зъбчати предавки, докато централните шлифовъчни машини се използват за изключително внимателна обработка на валове.
Операции по пробиване създават отвори от различни типове. Стандартното свредене се използва за основни проходни отвори, докато пушечно свредене използва режеща течност както за охлаждане, така и за смазване, за да се създадат дълбоки отвори с дълбочина, надвишаваща пет пъти диаметъра им — нещо съществено за хидравлични компоненти и канали за охлаждане в форми.
Обработка чрез електрическо разрядване (EDM) използва напълно различен подход. Вместо рязане, електроерозионното обработване (EDM) използва електрически ток за ерозия на материал от заготовката. Електроерозионното обработване с жица (Wire EDM) може да реже плочи с дебелина до 11,81 инча (300 мм) с прецизност, осигурена от ЧПУ управление. Този процес е изключително ефективен при рязане на закалени метали, които биха предизвикали излишно износване на конвенционални режещи инструменти — например компоненти за инжекционни форми, матрици и аерокосмически части, изработени от екзотични сплави.
Проточна обработка бързо извършва специфични асиметрични резове чрез зъбати режещи инструменти. Ключови пазове, зъбци на зъбчати колела и сложни вътрешни профили, които биха изисквали множество фрезовани операции, могат да се извършат чрез броковане за секунди с допуски до ±0,0005 инча (±0,01 мм).
Съпоставяне на процеса с геометрията на детайла
Как да разберете кой процес е необходим за вашето детайл? Започнете с геометрията:
- Цилиндричен с ротационна симетрия: ЧПУ точенето е най-ефективният ви избор
- Призматичен (подобен на блок) с равни повърхности: трехосното фрезоване обработва тези икономично
- Елементи на множество страни: четириосното фрезоване намалява броя на настройките и подобрява точността
- Сложни извити повърхности: обикновено се изисква фрезоване с 5 оси
- Ултраплътни допуски или фини повърхности: Добавете шлифоване като вторична операция
- Затвърдени материали или сложни вътрешни елементи: Разгледайте електроерозионно обработване (EDM)
Връзката между сложността на конструкцията и разходите е пряка: по-сложни геометрии изискват по-съвършено оборудване, по-дълги цикли на обработка и често множество операции. Детайл, който може да бъде завършен на 3-осова фреза в една настройка, винаги ще струва по-малко от детайл, изискващ 5-осова обработка с вторична шлифовка.
Разбирането на тези възможности за обработка ви помага да проектирате детайли, които могат да бъдат произведени по разумни цени — и установява реалистични очаквания относно допуските и повърхностните финишни изисквания, които можете да определите. Като говорим за допуски, нека разгледаме точно какво означават тези спецификации и как да избегнем прекомерното инженерно проектиране, което увеличава бюджета ви без да добавя функционална стойност.
Демистифициране на спецификациите за допуски и изискванията за прецизност
Ето един сценарий, който се повтаря постоянно в производството: инженерът посочва допуски ±0,001" за цярата чертежна документация на детайла, като смята, че по-строгите допуски винаги са по-добри. Резултатът? Стоимостта на механичната обработка се утроява, сроковете за изпълнение се удвояват, а функционалната производителност на детайла е напълно идентична на тази на детайл, произведен според стандартните допуски. Познато ли ви е това?
Разбирането на спецификациите за допуски не е просто въпрос на познаване на числени стойности — то е въпрос на разпознаване на това, което вашето приложение действително изисква, спрямо това, което добавя разходи без функционална полза. Нека дешифрираме какво означават тези спецификации всъщност и как да ги прилагаме стратегически за вашите прецизно обработени метални детайли.
Класове допуски и тяхното значение в реалния свят
Допуските определят приемливото отклонение в едно измерение. Когато на чертежа е посочен диаметър на отвор от 0,500" ±0,005", действителният диаметър на отвора може да варира от 0,495" до 0,505" и все пак да се счита за приемлив. Но какво се случва, когато този допуск се стесни до ±0,001"? Приемливият диапазон рязко се намалява, което изисква по-бавни скорости на машинна обработка, по-точни режещи инструменти, допълнително време за инспекция и често специализирано оборудване.
Според Protolabs , стандартните двустранни допуски ±0,005" (0,127 мм) са подходящи за повечето общи приложения в машинната обработка. Тези допуски могат да се изразяват и като едностранни стойности (+0,000/−0,010" или +0,010/−0,000") или като гранични размери, при които приемливият диапазон се посочва директно.
Ето какво обикновено означават различните класове допуски за вашия проект:
| Диапазон на допуските | КЛАССИФИКАЦИЯ | Типичен процес | Относително влияние върху цената | Общи приложения |
|---|---|---|---|---|
| ±0,010" (±0,25 мм) | Търговски / стандартни | Стандартна CNC фрезова/обръщаема обработка | Базови (1x) | Кронштейни, капаци, некритични конструктивни части |
| ±0,005" (±0,127 мм) | Стандартна прецизност | Фрезова и точилна CNC-обработка с внимание | 1,2–1,5× | Общи механични компоненти, корпуси |
| ±0,002" (±0,05 мм) | Пределна точност | Прецизна CNC-обработка с качествени режещи инструменти | 1,5–2 пъти | Посадки на лагери, съприкосновени повърхности, CNC-детайли от алуминий |
| ±0,001" (±0,025 мм) | Висока прецизност | Прецизна CNC-обработка + шлифоване | 2-3x | Аерокосмически компоненти, медицински устройства |
| ±0,0005" (±0,013 мм) | Ултрапрецизно | Шлифоване, лапиране, специализирано оборудване | 3–5x+ | Оптични монтиране, прецизни инструменти |
Обърнете внимание как разходите нарастват при по-строги допуски. Детайл с всички размери при ±0,001" може да струва три пъти повече от същия детайл при ±0,005" — дори и по-строгият допуск да не осигурява никаква функционална изгода за некритични характеристики.
Общи допуски срещу критични размери
Умното задаване на допуски разделя размерите на две категории: общи и критични. Общите допуски се прилагат за характеристики, при които точният размер няма съществено влияние върху функционирането — например общата дължина, повърхности, които не се съчетават помежду си, или отвори за зазоряване. Критичните размери са обратното: отвори за лагери, уплътнителни повърхности, повърхности за съчетаване и всички характеристики, при които отклонението директно влияе върху работата.
Според Epec Engineered Technologies една от най-често срещаните грешки при проектирането на прецизни детайли е излишното задаване на толерансите. Прилагането на тесни толеранси към всяко измерение не прави детайла по-добър — то го прави по-скъп и по-труден за производство. Повечето машинни цехове работят със стандартни толерансни стойности като ±0,005" или ±0,010" за общи измерения, а използването на тези стандарти често води до по-добри реални толеранси, тъй като машинистите са свикнали да работят в тези граници.
Разгледайте прост пример: проектирате монтираща скоба с четири отвора и един критичен позициониращ отвор. Четирите монтиращи отвора трябва да имат достатъчна точност, за да се съгласуват със съответстващата им монтажна фурнитура — ±0,005" работи отлично. Но позициониращият отвор, който точно ориентира вашата сглобка? Той може действително да изисква ±0,001". Задаването на тесни толеранси само там, където те са наистина необходими, запазва цената на фрезовани детайли достъпна, без да се компрометира функционалността.
Кога по-тесните толеранси са стойностна инвестиция
Така кога всъщност са ви необходими тези скъпи тесни допуски? Отговорът зависи от функционалните изисквания на вашето приложение:
- Повърхности за монтиране на лагери: Диаметрите на валовете и посадочните отвори за лагери обикновено изискват допуски от ±0,0005" до ±0,001", за да се осигури правилна посадка и да се предотврати преждевременното износване
- Уплътняващи повърхности: Пазещите канали за O-пръстени и уплътнителните повърхности изискват строг контрол, за да се предотвратят течове в хидравлични и пневматични системи
- Прецизни сглобки: Компоненти, които трябва да бъдат подравнени с точност до микрометри за оптични или електронни приложения
- Високоскоростни въртящи се части: Изисквания за балансиране и концентричност за части, които се въртят с хиляди оборота в минута
- Медицински импланти: Изискванията за биосъвместимост и посадка изискват изключителен контрол върху размерите
Обратно, тези приложения обикновено работят отлично със стандартни допуски:
- Отвори за болтове с люфт (болтът не е чувствителен към това дали отворът е с 0,005" по-голям)
- Нефункционални повърхности, които няма да се допират до други компоненти
- Естетически елементи, при които външният вид има по-голямо значение от точните размери
- Прототипни части, при които се тестват формата и функционалността, а не готовността за производство
Разбиране на геометричното размерно и допусково обозначаване (GD&T)
Когато вашите машинно обработени метални части включват сложни взаимовръзки между техните елементи, стандартното обозначаване с плюс/минус допуски понякога не е достатъчно. Тук на сцената излиза геометричното размерно и допусково обозначаване (GD&T).
Според First Mold GD&T е система от символи, която дефинира геометричните елементи на частите и позволява точна продукция дори при незначителни размерни отклонения. За разлика от конвенционалното допусково обозначаване, което се основава на базови координатни размери, GD&T предоставя функционално описание на геометрията на дадена част.
Най-често срещаните GD&T обозначения, с които ще се сблъскате, включват:
- Истинско положение: Определя къде трябва да се намира даден елемент (например отвор) спрямо референтни бази, като допуските се изразяват като цилиндричен зонен допуск
- Плоскостност: Указва, че повърхността трябва да лежи между две успоредни равнини, контролирайки деформацията поради материално напрежение или сили от машинната обработка
- Цилиндричност: Осигурява, че отворите и цилиндричните елементи запазват кръглост по цялата си дължина — предотвратявайки овални форми
- Коаксиалност: Контролира колко добре няколко цилиндрични елемента споделят обща ос, което е критично за въртящи се компоненти
- Перпендикулярност: Определя допустимото отклонение между повърхности, които трябва да са под прав ъгъл
Както отбелязва Protolabs, геометричните размерни и толерантни изисквания (GD&T) осигуряват по-високо ниво на контрол на качеството, включващо взаимовръзките между различните елементи на детайла, както и критериите за форма и прилягане. За персонализирани метални части с взаимодействащи елементи GD&T често позволява по-по-широки индивидуални толеранции, без да се компрометира функционалността на детайла — което потенциално намалява разходите, без да се жертва производителността.
Практически насоки за вашите толерантни спецификации
Готови ли сте да определите толеранции, които балансират прецизността с икономичността? Следвайте този подход:
Първо идентифицирайте критичните размери, които директно влияят върху функцията на детайла. Приложете най-строгите толеранции само за тези области, а за всичко останало използвайте стандартни толерантни блокове (±0,005" до ±0,010").
Имайте предвид натрупването на допуски, когато взаимодействат множество допуски. Ако три части с допуски ±0,005" се монтират една върху друга, сумарната вариация може да достигне ±0,015" — което потенциално може да причини проблеми при сглобяването, въпреки че всяка отделна част е „в рамките на спецификацията“.
Накрая, сътрудничете рано с вашия машинист. Според Epec споделянето на замисъла зад дизайна, а не само на техническите спецификации, позволява на машинистите да предлагат промени, които подобряват производствеността, без да компрометират функционалността. Производствена фирма с по-ново оборудване и по-добри контролни условия за околната среда може да постигне по-тесни допуски по-лесно, докато друга фирма може да препоръча промени в дизайна, които изобщо отстраняват необходимостта от изключителна прецизност.
След като сте определили стратегията си за допуски, следващото нещо, което трябва да имате предвид, е повърхностната шерохватост — защото начина, по който изглежда и се усеща една детайл, може да е толкова важен, колкото и нейните размери, особено когато в уравнението влизат корозионна устойчивост, износостойкост или естетически изисквания.
Опции за повърхностна обработка и функционални предимства
Вие сте посочили идеалния материал и сте задали точните допуски — но сте ли помислили какво се случва с повърхността на вашата детайл? Повърхностната обработка не е само въпрос на визуална привлекателност на компонентите. Тя директно влияе върху корозионната устойчивост, износването, триенето и адхезията на покритията. Разбирането на наличните опции ви помага да постигнете баланс между функционалност и бюджет.
Неравността на повърхността се измерва чрез стойността „средна неравност“, обикновено изразена като Ra. Според Get It Made, Ra представлява изчислена средна стойност между върховете и вдлъбнатините по повърхността. Колкото по-ниска е стойността Ra, толкова по-гладка е повърхността — и обикновено по-висока е производствената цена.
Класове на повърхностна обработка и начини за постигането им
Когато получите обработени по машина части без допълнителна финишка, вие имате повърхност „както е обработена по машина“. Тази финишка показва видими следи от режещия инструмент, но осигурява най-строгите размерни допуски — до ±0,05 мм или по-добри. За прототипи, приспособления и вътрешни компоненти, при които външният вид няма значение, финишката „както е обработена по машина“ е най-икономичното решение.
Стандартните финишни повърхности „както е обработена по машина“ обикновено постигат Ra 3,2 μm, което се усеща гладко на допир, въпреки че са видими следите от машинната обработка. Този клас е подходящ за повечето приложения. Обаче, когато се изискват по-гладки повърхности, са необходими допълнителни обработки по машина или вторични операции.
Ето как различните стойности на Ra се отразяват в практически приложения:
| Стойност Ra | Качество на повърхността | Обичайният метод за постигане | Общи приложения |
|---|---|---|---|
| 3,2 μm | Стандартна машинна обработка | Високоскоростно CNC машинно обработване | Общи компоненти, прототипи, приспособления |
| 1,6 μm | Точно обработени | Финишна обработка с качествен инструмент | Видими части, плъзгащи се повърхности за лека употреба |
| 0.8μm | Прецизна отделка | Бавни финишни обработки, шлифоване | Повърхности на лагери, уплътнителни лица |
| 0,4 μм | Високопрецизна обработка | Шлифоване, полиране | Компоненти, изложени на високо напрежение, оптични монтирана основа |
Производствените разходи нарастват с намаляването на шерохватостта. Според Get It Made постигането на гладки повърхности с ниска стойност Ra може да изисква допълнителни процеси като повърхностно шлифоване или ръчно полиране — и двата са времеемки и трудоемки в сравнение със стандартните машинни операции.
Допълнителни финишни процеси, които добавят функционалност и защита
Освен постигането на определена шерохватост, вторичните финишни процеси могат значително да подобрят експлоатационните характеристики на вашите детайли. Всеки процес предлага специфични предимства в зависимост от изискванията на приложението.
Изстрелване на мъниста използва под налягане въздух, за да изстрелва малки стъклени топчета към повърхността, създавайки равномерна матова или сатенова текстура. Този процес ефективно скрива следите от инструментите и осигурява последователен естетичен вид. Въпреки това, стъкленото пръскане не е високо прецизно по отношение на размерите — критични елементи като отвори трябва да се маскират по време на процеса, за да се запазят допуските.
Анодиране създава защитен оксиден слой върху алуминия чрез електрохимичен процес. За разлика от боядисването или галваничното покритие, този слой става неотделима част от самия метал. Според PTSMAKE анодизирането превръща повърхността в алуминиев оксид — керамикоподобен материал, който е изключително твърд и устойчив на износване. Анодизиране тип II произвежда покрития с дебелина до 25 μm, подходящи за декоративни и приложения с умерено износване. Анодизиране тип III („твърдо покритие“) създава значително по-дебели слоеве (над 25 μm) с твърдост на повърхността, приближаваща твърдостта на инструментална стомана. Анодизираните алуминиеви части също могат да приемат ярки, устойчиви на избледняване бои за бранд-специфични цветове.
Прахово покритие нанася сух прах чрез електростатично зареждане, след което го полимеризира при топлина, за да се получи издръжливо защитно покритие. Този процес осигурява отлична устойчивост на ударни натоварвания и е наличен в практически неограничен брой цветови варианти. Покритията с прахова боя са приложими върху множество материали — не само върху алуминий — което ги прави универсални за сглобени изделия от различни материали.
Пасивиране е задължителна за компонентите от неръждаема стомана. Според AQUASGROUP , тази химическа обработка премахва свободното желязо и замърсяващите вещества от повърхността, което насърчава образуването на еднороден, инертен оксиден слой, подобряващ корозионната устойчивост. Процесът включва почистване, потапяне в разтвор на азотна или лимонена киселина, последвано от изплакване и сушене. Отрасли като производството на медицински устройства, авиационно-космическата промишленост и хранително-вкусовата промишленост разчитат на пасивирането, за да отговарят на изискванията за чистота и съответствие с нормативните разпоредби.
Опции за метално покритие нанасят тънки метални слоеве върху вашите части за различни цели:
- Никелов пласт: Подобрява корозионната устойчивост и осигурява ярка, декоративна повърхност
- Заплащане с цинк: Предлага жертвено корозионно защитно покритие при по-ниска цена
- Хромиране: Осигурява изключителна твърдост и устойчивост на износване за приложения с високо триене
- Златно покритие: Гарантира отлично електрическо проводимост за конекторни приложения
Съответствие между завършека и функцията
Кога всъщност имате нужда от вторична финиш обработка, а не от приемане на повърхностите в състоянието им след машинна обработка? Имайте предвид следните функционални изисквания:
- Корозионна устойчивост: Анодиране за алуминий, пасивиране за неръждаема стомана или галванично покритие за други метали
- Устойчивост към износ: Твърдо анодиране тип III, хромиране или прецизно шлифоване до ниски стойности на Ra
- Електрическа проводимост: Златно или сребърно галванично покритие за конектори; имайте предвид, че анодирането създава електрически непроводима повърхност
- Естетическа привлекателност: Пясъчно пръскане за равномерен матов вид, анодиране с боя за цвят, прахово покритие за устойчиви на удар повърхности
- Намаляване на триенето: По-гладки стойности на Ra (0,8 μm или по-ниски) за плъзгащи се повърхности
Изискванията за довършителни работи влияят пряко както върху времето за изпълнение, така и върху цената. Според Get It Made, често има компромис между грапавостта на повърхността и бюджета – постигането на по-фини повърхностни покрития изисква допълнителни производствени стъпки. Анодирането и пасивацията добавят време за обработка и може да изискват възлагане на външни изпълнители на специализирани съоръжения. Услугите за прахово боядисване се нуждаят от време за втвърдяване след нанасяне.
За части, които няма да са видими, няма да се допират до други повърхности по време на експлоатация и няма да бъдат изложени на корозивни среди, обработените без допълнителна финиш обработка повърхности обикновено напълно отговарят на изискванията. Запазете бюджета за финиш обработка за компоненти, където тя наистина има значение.
След като сте дефинирали изискванията към повърхностната обработка, следващата стъпка е да се уверите, че вашето конструкторско решение може действително да бъде произведено ефективно — защото дори най-добрите избори на материал и повърхностна обработка няма да помогнат, ако геометрията ви поражда ненужни производствени предизвикателства.
Принципи за проектиране с оглед на производството, които намаляват разходите
Избрали сте идеалния материал, задали сте подходящи допуски и определили изискванията към повърхностната обработка. Но ето реалността: нищо от това няма значение, ако конструкторското ви решение поражда ненужни производствени затруднения. Решенията, които вземате по време на фазата на проектиране, оказват влияние върху всеки последващ производствен етап — и изглеждащите незначителни решения могат да превърнат проста CNC-обработка в скъпо струващ кошмар.
Според Modus Advanced , ефективното прилагане на конструиране за производственост (DFM) може да намали производствените разходи с 15–40 % и да съкрати водещото време с 25–60 % в сравнение с неоптимизираните конструкции. Това не са незначителни спестявания — те представляват разликата между проект, който се побира в бюджета ви, и такъв, който го надвишава.
Тогава какво отличава икономичните конструкции от скъпите? Нека разгледаме по-подробно конструктивните особености, които увеличават разходите, и стратегиите, които ги поддържат на управляемо ниво.
Конструктивни особености, които увеличават разходите за машинна обработка
Представете си, че сте машинист и получавате нов чертеж на детайл. Някои особености ви карват да се усмихнете, защото ще бъдат обработени ефективно. Други ви карват да се намръщите, защото изискват специализирани режещи инструменти, множество настройки или изключително бавна и трудоемка обработка. Разбирането на това, към коя категория принадлежи всяка особеност, ви помага още от самото начало да проектирате по-умно.
Остри вътрешни ъгли представляват една от най-често срещаните и проблемни проектиране на конструкции. Ето защо: фрезите са цилиндрични, така че физически не могат да създават истински вътрешни ъгли от 90 градуса. Когато посочите остри ъгли, машинистите трябва да използват все по-малки инструменти, които се огъват повече, износват се по-бързо и рязат по-бавно. Според Modus Advanced остри вътрешни ъгли могат да добавят 50–100 % към времето за програмиране и 25–50 % към разходите по отделна характеристика. Решението? Посочете най-големия радиус, който вашата конструкция може да побере — минимум 0,030" (0,76 мм) осигурява съвместимост със стандартните инструменти.
Ножови ръбове възникват там, където две повърхности се срещат под изключително остри ъгли. Тези крехки елементи водят до образуване на застъпи по време на машинна обработка, които изискват вторични операции за премахване на застъпите. Освен това те са склонни към повреждане по време на дръжка и сглобяване. Добавянето на малки външни закръгления с радиус 0,005–0,015" (0,13–0,38 мм) елиминира тези проблеми, без да се компрометира замисълът на вашата конструкция.
Дълбоки джобове и кухини представляват предизвикателство за машинистите, тъй като по-дългите режещи инструменти се огъват повече под въздействието на рязащите сили. Когато дълбочината на джоба надвишава 4–6 пъти диаметъра на инструмента, ще наблюдавате по-бавни подавания, потенциални вибрационни белези и увеличени разходи. Ако вашето проектиране изисква дълбоки елементи, помислете дали те могат да бъдат разделени между няколко компонента или да се постигнат чрез алтернативни производствени процеси.
Сложни криви и променливи радиуси могат да изглеждат впечатляващи в CAD, но създават значителни производствени задръжки. Според CNC Parts XTJ , тези елементи изискват специализирано програмиране, множество смяни на инструменти и удължено време за обработка — което потенциално може да увеличи времето за програмиране с 100–300 % и времето за обработка с 200–400 %. Задайте си въпроса: дали тази крива изпълнява конкретна функционална роля или е чисто естетическа?
Елементи, изискващи обработка с 5-осева CNC машина струват значително повече от тези, които могат да бъдат постигнати с 3-осово оборудване. Наклонените повърхности, подрязванията и сложните криви често изискват използването на 5-осово оборудване — при разходи, които са с 300–600 % по-високи. Когато е възможно, ориентирайте конструктивните елементи по осите X, Y и Z, за да запазите вашия проект за CNC обработка на алуминий върху по-просто и по-икономично оборудване.
Оптимизиране на вашата конструкция за ефективно производство
Сега, когато знаете какви фактори увеличават разходите, нека се съсредоточим върху конструктивни стратегии, които ги намаляват. Тези принципи ви помагат да обработвате части от алуминий — както и от всеки друг материал — по-ефективно.
Съображения относно дебелината на стените
Тънките стени се огъват под действието на режещите сили, което води до вибрации (чътър), лошо качество на повърхността и потенциална неточност в размерите. За части от алуминий поддържайте минимална дебелина на стените от 0,040" (1 мм) за малки елементи и 0,080" (2 мм) за по-големи неподдържани участъци. Стоманата и титанът могат да имат леко по-тънки стени поради по-голямата им твърдост, но принципът остава същият: по-дебелите стени се обработват по-надеждно.
Съотношение дълбочина-диаметър на отворите
Стандартните въртящи се свредела работят ефективно до дълбочина от около 4–5 пъти диаметъра им. Над тази дълбочина навлизате в областта на специализирани режещи инструменти — цикли за пробиване с паузи, оръдейни свредела или множество операции, които увеличават времето и разходите. Ако проектът ви изисква дълбоки отвори, помислете дали през-отворите (които позволяват пробиване от двете страни) не могат да изпълнят същата функция.
Спецификации за резбата
CAD софтуерът често по подразбиране използва конкретни спецификации за метрически резци, които може да не съответстват на предпочитания подход на вашия производител. Вместо да задавате размерите на свределите и типовете резци, посочете класа на резбата и функционалните изисквания. Тази гъвкавост позволява на машинните цехове да оптимизират своите процеси, като в същото време гарантират изпълнението на вашите функционални изисквания.
Обърнете внимание на дълбочината на нарезване — всеки резец има начална част на резбата, която трябва да бъде предвидена. Според Modus Advanced осигуряването на достатъчна дълбочина за нарезване и съответната дълбочина на свредене, необходима за получаване на пълна резба, предотвратява производствени затруднения. Когато е възможно, проектирайте отвора като през-отвор, за да спестите време и разходи.
Чеклиста с най-добрите практики за проектиране
Готови ли сте да оптимизирате следващия си проект? Следвайте тези принципи:
- Избягвайте ненужно строги допуски за некритични елементи – Прилагайте висока точност само там, където функцията изисква това; използвайте стандартни блокове за допуски (±0,005" до ±0,010") в останалите случаи
- Проектирайте за стандартни инструменти – Използвайте често срещани диаметри на отвори, стандартни резби и радиуси, които съответстват на леснодостъпни фрези
- Минимизирайте броя на настройките чрез продумано разположение на елементите – Групирайте елементи, които могат да се обработят от една и съща посока; имайте предвид начина, по който детайлът ще бъде фиксиран
- Добавете радиуси във вътрешните ъгли – Минимум 0,030" (0,76 мм) за стандартни инструменти; по-големите радиуси намаляват още повече разходите
- Елиминирайте остри ръбове – Добавете заобления с радиус 0,005–0,015" към остри външни ъгли
- Ограничете дълбочината на джобовете – Поддържайте съотношение дълбочина-ширина под 4:1, когато е възможно
- Съгласуване на елементите с машинните оси – Избягвайте наклонени повърхности, които изискват оборудване с 4 или 5 оси, освен ако това не е функционално необходимо
- Стандартизиране на повтарящи се елементи – Използвайте еднакъв диаметър на отворите, еднаква резба или еднаква дълбочина на джобовете по цялата част, когато функционалността го позволява
Как сложността влияе върху разходите и водещото време
Всяко проектно решение поражда вълнов ефект в производствения процес. Според CNC Parts XTJ проектните елементи, които са трудни за обработване, могат да увеличат разходите с 30–40 % дори при оптимизирани допуски и материали. Ето как сложността се натрупва:
Частта, която изисква обработка с 5-осова машина вместо с 3-осова, не струва просто повече на час — може да се наложи планиране на производството върху оборудване с ограничена наличност, което удължава водещото време. Елементите, които изискват специализиран инструментарий, добавят време за набавяне. Няколкото настройки означават допълнително проектиране на приспособления, програмиране и проверка на качеството на всеки етап.
Обратното също е вярно: опростените конструкции се обработват по-бързо, изискват по-малко специализирано оборудване и преминават през производствения процес по-предсказуемо. Когато времето за изпълнение има значение, опростяването на конструкцията често осигурява по-големи спестявания по график от таксите за ускорено изпълнение.
Ефективна комуникация с машинни цехове
Искате ли точни оферти и гладко производство? Ето как да подготвите проекта си за успех:
Споделете целта на конструкцията, а не само техническите ѝ спецификации. Обяснете каква е функцията на детайла и кои характеристики са функционално критични. Този контекст помага на машинистите да предложат модификации, които подобряват производимостта, без да компрометират работата му.
Поискайте DFM обратна връзка навреме. Професионални доставчици като тези, описани в ръководството на Modus Advanced, провеждат задълбочени прегледи с помощта на CAD софтуер, за да симулират пътищата на обработка и да идентифицират потенциални проблеми още преди започване на производството. Възползвайте се от този професионален опит — предложения като „Добавете филет с радиус 0,5 мм във вътрешните ъгли, за да се избегне необходимостта от електроерозионна обработка (EDM)“ могат да спестят 20–30 % при сложни детайли.
Определете йерархията на чертежите. Когато CAD моделите и 2D чертежите са в противоречие, производството спира, докато се изисква уточнение. Ясно посочете кой документ има приоритет в случай на несъответствие.
Идентифицирайте действително критичните размери. Указването на толерансите, които не могат да бъдат разширени, помага на машинистите да насочат усилията си за инспекция и може да разкрие възможности за намаляване на разходите по некритичните характеристики.
Прилагайки тези принципи на проектиране за производимост, вие не само намалявате разходите — създавате и взаимоотношения с доставчиците, които ценят добре проектирани компоненти и съответно ще дават приоритет на вашите проекти. Следващата стъпка? Разбиране на това как точно всички тези фактори се комбинират, за да определят каква цена ще платите за готовите си метални машинни части.
Фактори, влияещи на цената, и съображения относно ценообразуването на метални машинни части
Някога ли сте се чудили защо два видимо подобни компонента могат да имат напълно различни цени? Или защо предложената ви оферта се оказа по-висока от очакваното? Разбирането на това колко ще струва изработката на метален компонент изисква да надникнете зад очевидните фактори. Реалността е, че разходите за производство на метални компоненти не са произволни — те следват предсказуеми закономерности, веднъж като разберете основните драйвъри.
Независимо дали правите бюджет за прототипна серия или планирате високотомна продукция, познаването на факторите, които влияят върху цената, ви помага да вземате по-умни проектиране решения, да водите ефективни преговори и да избягвате скъпи изненади. Нека разгледаме всеки фактор, който формира крайната ви фактура.
Разходи за материали и как те влияят върху вашия бюджет
Изборът на материал създава основата на структурата на разходите за вашия компонент — и не само поради цените на суровите материали. Според PartMFG материалните разходи също се влияят от обработваемостта, която се отнася до това колко бързо един материал може да се реже с помощта на стандартни режещи инструменти. Колкото по-висока е обработваемостта, толкова по-ниска е общата производствена стойност.
Ето как често използваните материали се сравняват както по суровинна стойност, така и по въздействие върху машинната обработка:
| Материал | Приблизителна суровинна стойност | Машинна обработваемост | Въздействие върху общата стойност на детайла |
|---|---|---|---|
| Алуминий 6061 | 3–6 долара на фунт | Отличен | По-кратко време за машинна обработка, намалено износване на инструментите |
| Челюк (мек) | 5–10 долара на фунт | Добре | Умерено време за машинна обработка |
| Стъкани от стомана | 8–16 долара на фунт | Умерена | Увеличено износване на инструментите, по-бавни скорости |
| Неръжавеща стомана 316 | $10–20 на фунт | Трудни | Значително по-високи разходи за машинна обработка |
| Месинг C360 | $8–12 на фунт | Отличен | Бързо рязане, минимален износ на инструментите |
| Титаний | $15–35 на фунт | Бедните. | Специализиран инструмент, ниски скорости, премиални цени |
Обърнете внимание, че суровинната цена на титана е само част от историята. Неговата лоша обработваемост означава по-бавни скорости на рязане, чести смяни на инструментите и използване на специализирано оборудване — което често удвоява или утроява ефективната цена на детайла в сравнение с алуминиеви детайли с подобна геометрия.
Практическият извод? Когато производството на алуминиеви детайли отговаря на вашите функционални изисквания, ще спестите значително в сравнение с по-твърдите материали. Запазете неръждаемата стомана и титана за приложения, при които техните специфични свойства — корозионна устойчивост, биосъвместимост или високо съотношение якост/тегло — наистина оправдават по-високата цена.
Фактори на сложност, които влияят върху цената
Геометрията на вашата част влияе по-непосредствено върху времето за машинна обработка, отколкото почти всеки друг фактор. Според Fictiv, CNC машинната обработка на сложни части е скъпа, тъй като разходите за обработка са директно пропорционални на сложността на дизайна — колкото по-сложна е частта, толкова по-дълго отнема обработката ѝ. Освен това плащате за времето за подготвка, времето за програмиране и действителното време за рязане. Тези разходи набъбват бързо.
Простите конструкции, които изискват само 3-осева машинна обработка, обикновено струват 10–20 USD на час, докато сложните части, изискващи възможности за 5-осева обработка, могат да струват 20–40 USD на час или повече. Но часовите тарифи разкриват само част от картината — сложните части изискват също така:
- Удължено време за програмиране: Създаването на инструментални траектории за сложни криви и изискани елементи отнема часове повече, отколкото при прости геометрии
- Множествени настройки: Всяка промяна на положението на частта води до допълнителни разходи за смяна на приспособленията, повторно нулиране и допълнителни проверки на качеството
- Специализирано оборудване: Уникалните елементи може да изискват специални инструменти, които трябва да бъдат закупени или произведени
- По-бавни скорости на подаване: Тесните завои, тънките стени и дълбоките джобове изискват внимателно избиране на скоростите при фрезоване
Изискванията към допусците усилват тези ефекти. Според Komacut сложните конструкции, които включват елементи като отвори, изрязани участъци, фини детайли и тесни допусци, изискват по-ниски скорости при фрезоване, за да се гарантира точността, което води както до удължаване на времето за фрезоване, така и до по-честа смяна на инструментите.
Как обемът влияе върху цената на детайл
Тук икономиката на производството на персонализирани части става интересна. Всяка CNC-поръчка включва фиксирани разходи — програмиране, подготвителни работи, първоначална инспекция на пробния екземпляр, — които трябва да бъдат възстановени независимо от количеството. При поръчка на една част тези разходи се поемат изцяло от вас. При поръчка на хиляда части те се разпределят върху всяка отделна единица.
Тази таблица илюстрира как обикновено количествените групи влияят върху ценообразуването:
| Фактори на цена | 1-10 броя | 11–100 части | 101–1000 части | над 1000 части |
|---|---|---|---|---|
| Разходи за настройка по единица продукт | Висока (пълно поемане) | Средна (разпределена) | Ниска (амортизирана) | Минимално |
| Разходи за програмиране на част | Високо | Среден | Ниски | Минимално |
| Ефективност на материалите | По-ниско (по-малко оптимизация) | Умерена | По-високо (закупуване на големи количества) | Най-висок |
| Относителна цена на отделна част | Базов (най-висок) | 40–60% намаление | 60–75% намаление | намаляване с 75–85 % |
Според PARTMFG по-високият обем на производство обикновено намалява разходите за единица поради по-ниските относителни разходи за подготвителни работи, разпределени върху по-голям брой единици. Закупуването на материали на големи количества също често дава възможност за отстъпки, които допълнително намаляват разходите.
За проекти в областта на металообработката това създава стратегическа точка за вземане на решение: понякога е икономически оправдано да се поръчат леко повече части, отколкото са незабавно необходими, когато спестяванията за единица надвишават разходите за складиране.
Изисквания за довършителна обработка и тяхното влияние върху разходите
Допълнителните процеси за довършителна обработка добавят както време, така и разходи към вашия проект. Според Fictiv независимо дали става дума за галванизиране, конверсионно покритие, полирване или боядисване, всяка от тези специализирани услуги увеличава цената на детайла. Тези операции трябва да се извършват при специфични, контролирани условия.
Ето как често използваните опции за довършителна обработка влияят върху бюджета ви:
- Както е обработено: Без допълнителна такса — но може да се видят видими следи от инструментите
- Bead blasting: Добавя 10–20 % за еднороден матов външен вид
- Анодиране (тип II): Добавя 15–30 % за корозионна защита на алуминия и за разнообразие в цветовете
- Твърдо анодиране (тип III): Добавя 25–40 % за износостойки повърхности
- Пудрово облагане: Добавя 20–35 % за издръжливи, удароустойчиви покрития
- Химическо никелиране: Добавя 30–50 % за корозионна и износостойка защита
- Пасивация: Добавя 10–15 % за подобряване на корозионната устойчивост на неръждаемата стомана
Всеки тип обработка също удължава времето за изпълнение — понякога с дни, тъй като детайлите може да се наложи да бъдат превозвани до специализирани предприятия за обработка.
Съображения относно времето за изпълнение и ускорено производство
Стандартното време за изпълнение при CNC метална обработка обикновено варира от 1 до 3 седмици, в зависимост от сложността и натовареността на производственото предприятие. Но когато имате нужда от по-бързо доставяне на детайли, влизат в сила такси за ускорено изпълнение.
Ускореното производство има смисъл, когато:
- Разходите за просто стояне на производствената линия надвишават таксите за ускоряване
- Разположението на пазара създава възможности за приходи, които оправдават премиите
- Графиците за изпитания на прототипи не могат да бъдат отложени, без да се повлияят датите на старта
- Незабавно са необходими резервни части за критични за безопасността системи
Обратно, предварителното планиране и приемането на стандартните срокове за изпълнение могат да спестят 20–50 % в сравнение със спешните поръчки. Много производствени цехове предлагат стъпаловидно ценообразуване, което възнаграждава гъвкавостта — ако графикът на вашия проект позволява това, попитайте за опции с икономични срокове за изпълнение.
Разчитане на оферти и вземане на обосновани решения
Когато получите оферта за метални машинни части, не се ограничавайте само до крайната сума. Качествените доставчици разбиват разходите по отделни позиции, които разкриват възможности за оптимизация:
Прегледайте всяка компонента на разходите поотделно: суровини, машинно време, подготвителни работи, довършителни операции и инспекция. Попитайте коя спецификация води до най-високите разходи — след това преценете дали тези спецификации наистина са необходими за вашето приложение.
Въпроси, които е добре да зададете на вашия доставчик:
- "Кои допуски водят към най-високи разходи и каква икономия бихме постигнали при тяхното ослабване?"
- "Би ли постигнал подобна производителност с различен материал, но при по-ниска цена?"
- "Какво количество е необходимо, за да се достигне следващата стъпка в ценовата скала?"
- "Има ли конструктивни промени, които биха намалили времето за машинна обработка?"
Най-добрите доставчици приветстват такива разговори. Те разбират, че помощта им за оптимизиране на спецификациите укрепва дългосрочните взаимоотношения — и води до компоненти, които осигуряват баланс между производителност и бюджетни ограничения.
След като разходните фактори са ясно разбрани, следващото ключово съображение е гарантирането, че тези компоненти действително отговарят на зададените спецификации след производството им. Методите за контрол на качеството и инспекцията осигуряват верификацията, която превръща обещанията в доказана производителност.
Методи за контрол на качеството и стандарти за индустриална сертификация
Детайлите ви изглеждат перфектни след изваждането им от машината — но как всъщност знаете, че отговарят на зададените спецификации? Визуалната инспекция разкрива само част от истината. Реалната проверка се осъществява чрез системни методи за контрол на качеството, които откриват отклонения, преди те да се превърнат в скъпи проблеми по вашата монтажна линия или в крайния продукт.
Независимо дали набавяте CNC обработка от неръждаема стомана за медицински устройства или обработени от алуминий детайли за автомобилни приложения, познаването на процесите за контрол на качеството ви помага да формулирате ясно очакванията си и ефективно да оценявате възможностите на доставчика.
Методи за инспекция, които потвърждават размерната точност
Размерната инспекция потвърждава, че всяка критична характеристика попада в зададените допуски. Използваните методи зависят от сложността на детайла, необходимата прецизност и обема на производството.
Ръчни инструменти остават изненадващо актуални дори в производството с високи технологии. Според Keller Technology , индикаторни часовникови измервателни уреди, цифрови шублери, микрометри и мерни ленти обхващат повечето приложения за размерна инспекция. Те са изключително преносими, леснодостъпни и достъпни по цена — идеални за бързо потвърждаване на стандартните размери по време на производството.
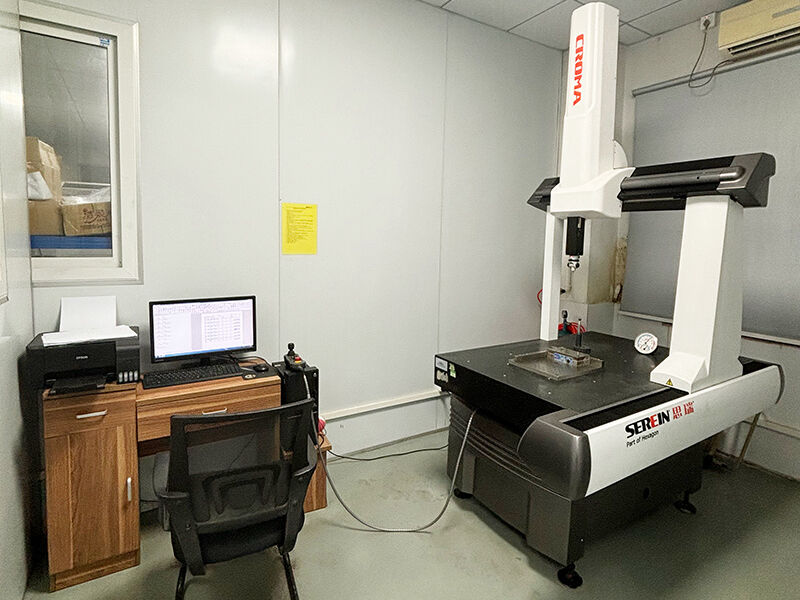
Координатни измервателни машини (CMM) представляват златния стандарт за верификация на сложни детайли. Тези сложни системи използват контактни проби, програмирани да докосват множество точки по повърхността, като преобразуват физическите позиции в цифрови координати в рамките на многовалова система. КОМ-машините (координатно-измервателни машини) могат да измерват големи детайли с точност от няколко микрона — макар че висококласовите системи, способни на такава точност, могат да струват над един милион долара. За CNC-фрезовани детайли със сложна геометрия и тесни допуски инспекцията с КОМ осигурява документацията, която потвърждава съответствието.
Оптични и базирани на зрение системи предлагат безконтактни алтернативи, когато компонентите са твърде деликатни за допир или изискват изключително бързи цикли на инспекция. Измервателните системи, базирани на визуализация, използват уреди със зарядово свързани матрици (CCD), специализирано осветление и аналитично софтуерно обезпечване, за да генерират високоразрешителни изображения с точност в микронов мащаб. Тези системи се отличават в приложения за контрол на качеството, които изискват висока прецизност, като осигуряват бързи и надеждни резултати.
За производители на компоненти от неръждаема стомана, работещи в условия на високотомен производствен процес, пневматично измерване (въздушни измервателни уреди) осигурява бърза, безконтактна инспекция. Тези инструменти измерват размери — най-често външни диаметри или отвори — чрез регистриране на промени във въздушния поток или налягането. Според Keller Technology въздушното измерване обикновено се изисква за детайли с допуски от 0,005" или по-малки, като разрешението и повтаряемостта достигат милионни части от инча.
Проверка на качеството на повърхността осигурява, че вашите части отговарят на спецификациите Ra. Профилометрите проследяват повърхностите, за да измерят върховете и вдлъбнатините, като генерират количествени стойности за шеравост. Тази проверка е особено важна за повърхности за уплътнение, повърхности за контакти с лагери и компоненти, при които характеристиките на триенето влияят върху работата.
Документация и изисквания за сертифициране
Качеството не се свежда само до измерването на части — то включва документиране на процесите, поддържане на проследимост и доказване на съответствие чрез признати стандарти за сертифициране. Сертификатите, които притежава вашият доставчик, показват неговата ангажираност към системно управление на качеството.
ISO 9001 служи като международно признатата основа за системите за управление на качеството. Според American Micro Industries основните принципи на този стандарт включват насоченост към клиента, подход, базиран на процеси, непрекъснато подобряване и вземане на решения, базирани на доказателства. ISO 9001 помага на CNC операциите да установят ясни процедури за всеки аспект от производствения процес — създавайки среда, в която всеки произведен компонент отговаря на точни стандарти.
IATF 16949 се основава на ISO 9001 с изисквания, специфични за автомобилната индустрия. Този глобален стандарт за управление на качеството в автомобилната индустрия комбинира принципите на ISO 9001 с отраслови изисквания за непрекъснато подобряване, предотвратяване на дефекти и строг контрол върху доставчиците. CNC услугите за обработка на неръждаема стомана, насочени към автомобилни приложения, изискват тази сертификация, за да демонстрират надеждна проследимост на продуктите и контрол върху производствените процеси.
AS9100D отговаря на строгите изисквания на аерокосмическата индустрия. Този стандарт се основава на ISO 9001 и въвежда допълнителни изисквания, специфични за аерокосмическата област, като акцентира върху управлението на рисковете, строгата документация и контрола върху цялостността на продуктите по време на сложните доставчески вериги. Получаването на сертификат AS9100D демонстрира дисциплина и способност да се отговаря на изискванията на аерокосмическата индустрия.
ISO 13485 регулира производството на медицински изделия. Този дефинитивен стандарт за управление на качеството определя строги контроли върху проектирането, производството, проследимостта и намаляването на рисковете. Обектите, които търсят тази сертификация, трябва да прилагат подробни практики за документиране, задълбочени проверки на качеството и ефективно обработване на оплаквания.
При оценка на производители на компоненти от неръждаема стомана или на всеки доставчик на прецизно машинно обработване очаквайте операциите, насочени към качество, да предоставят:
- Сертификати за материали: Сертификати за изпитания на суровините, потвърждаващи химичния състав и механичните свойства на суровините
- Протокол за първоначален инспекционен преглед (FAI): Комплексна размерна проверка на първоначалните производствени проби спрямо чертежните спецификации
- Протоколи от инспекции по време на производството: Документиране на извършените проверки на качеството по време на производствените серии
- Доклади от окончателна инспекция: Потвърждение, че завършените части отговарят на всички предварително определени изисквания
- Сертификати за съответствие (CoC): Официални декларации, че частите съответстват на спецификациите от поръчката за покупка
- Документация за проследимост: Регистри, свързващи завършените части с конкретните партиди материали и датите на производство
Статистически контрол на процеса: Защо е важен за последователността в производството
Ето един сценарий, който се случва по-често, отколкото производителите биха искали да признаят: първоначалната инспекция на пробата е изпълнена напълно успешно, но към 200-ата част размерите започват да се отклоняват извън допустимите граници. Никой не е забелязал това, защото системата за контрол не е регистрирала промяната, докато частите не са започнали да се провалят.
Според CNCFirst само първоначалната инспекция не е достатъчна — необходим е и статистическият контрол на процеса (SPC), за да се осъществява непрекъснато наблюдение върху производствения процес. SPC използва статистически методи за анализ на производствените данни, като открива и коригира отклоненията още на ранен етап, преди да бъдат произведени дефектни части.
Традиционното пробно вземане може да провери 10 случайни части от партида от 100. Ако 3 от тях са извън допустимите отклонения, проблемът вече е възникнал — а останалите 90 части също може да крият дефекти. SPC работи по различен начин: той проверява ключовите размери през ранни интервали и нанася данните в реално време върху контролни диаграми. Ако някой размер започне да се отклонява към граничните стойности на допустимите отклонения, незабавно се предприемат мерки — например корекция на компенсацията на инструмента или замяна на резачите — преди проблемите да се умножат.
Източниците на вариации при машинна обработка, които SPC помага да се контролират, включват:
- Прогресиращото износване на инструментите по време на производствените серии
- Топлинно разширение поради загряване на машината и заготовката
- Несъответствия в материала между различните заготовки
- Вариации във фиксиращите устройства, които влияят върху позиционирането на детайлите
- Външни фактори като промени в температурата и влажността
CNCFirst споделя убедителен пример: предишният доставчик на клиент от медицинското оборудване постигнал 92 % доброкачественост. Чрез прилагане на статистически контрол на процеса (SPC) те установили, че ключовият диаметър на отвора бавно се увеличавал, започвайки от 85-ото детайла по време на срок на служба на инструмента. Замяната на режещия ръб на 80-ото детайла и коригирането на офсетите подобрили доброкачествеността до 99,7 % — спестявайки приблизително ¥12 000 за поправки и брак.
Съгласуване на гаранцията за качество с критичността на приложението
Не всяко детайл изисква еднакво ниво на документация за качество. Съгласуването на вашите изисквания за гаранция на качеството с реалните изисквания на приложението осигурява разумни разходи, без да се компрометира адекватната проверка.
За общи индустриални приложения: Сертификатът ISO 9001 предоставя достатъчна гаранция за системата за качество. Поискайте сертификати за материала и доклади за окончателна инспекция за критичните размери.
За автомобилни компоненти: Сертификацията по IATF 16949 трябва да е задължителна. Очакват се данни от статистическия процесен контрол (SPC) за серийното производство и пълна документация за проследимост. Високоточните алуминиеви машинни части за шасита или трансмисии изискват този ниво на контрол.
За авиационни части: Сертификацията по AS9100D е задължителна. Докладите за първична инспекция, изготвени в съответствие с изискванията на AS9102, пълната проследимост на материала и документацията за контрол на процесите стават стандартни изисквания.
За медицински изделия: Сертификацията по ISO 13485 гарантира готовност за съответствие с регулаторните изисквания. Изискванията към документацията се разширяват и включват контрол на дизайна, анализ на риска и протоколи от валидация, освен проверката на размерите.
Нивото на качествена документация, което изисквате, трябва да отразява последствията от повреда на детайла. Един монтажен скоб за потребителски продукт има различни изисквания в сравнение с компонент, който се намира в човешкото тяло или лети на височина 35 000 фута.
Контролът на качеството превръща производствените обещания в потвърдена производителност. Когато методите за инспекция, сертификатите и контролът на процесите са ясно разбрани, последната стъпка е намирането на доставчик, способен да осигури този ниво на качество постоянно — което ни води до оценката и избора на подходящия производствен партньор за вашия проект.
Избор на подходящ доставчик за метална механична обработка за вашия проект
Вие сте проектирали част, която може да се произвежда, сте определили подходящите допуски и сте дефинирали изискванията си за качество. Сега идва решението, което определя дали цялата тази подготовка ще даде резултат: изборът на подходящ производствен партньор. Разликата между надежден доставчик и проблемен един може да означава разликата между доставка навреме на части от високо качество и пропуснати срокове с отхвърлени компоненти.
Независимо дали търсите металообработващи фирми наблизо или оценявате компании, които произвеждат персонализирани метални части по целия свят, критериите за оценка остават едни и същи. Нека преминем стъпка по стъпка през начина, по който системно да оценяваме потенциалните доставчици — и да избягваме скъпите грешки, които възникват при избор единствено въз основа на цена.
Оценка на възможностите и сертификатите на доставчика
Започнете оценката си, като проучите какво оборудване всъщност използва потенциалният доставчик. Според BOEN Rapid доставчик, който разполага с напреднали многокоординатни машинни центрове, прецизно оборудване за точене и автоматизирани инспекционни инструменти, е по-вероятно да изпълни сложни геометрии с висока точност. Интеграцията на съвременен CAD/CAM софтуер е също толкова важна, тъй като тя определя колко ефективно проектите се превръщат в готови части.
Обаче машините разказват само част от историята. Също толкова важна е експертизата по материали. Както се отбелязва в същия анализ, способността да се работи с широк спектър от материали — от метали като неръждаема стомана, алуминий и титан до инженерни пластмаси — гарантира универсалност в различните приложения. Доставчикът, който има опит в работа със специализирани материали за вашата конкретна индустрия, може по-ефективно да подпомага проектно-специфичните ви нужди.
Сертификатите за качество предоставят независима трета страна потвърждение на системите на доставчика. Според Caldera Manufacturing важен документ, който трябва да се търси при избора на металообработващ доставчик, е сертификатът ISO 9001:2015. Този стандарт определя изискванията към системите за управление на качеството, което означава, че металообработващият доставчик с този сертификат прилага практики за управление на качеството във всички процеси на металообработка.
Ето един важен нюанс, който заслужава внимание: сертифицирането се различава от съответствието. Една компания може да твърди, че е съвместима с ISO 9001, но това има по-малко тежест в сравнение със сертифицирането, тъй като няма потвърждение, че производителят всъщност прилага стандарта последователно.
За проекти в областта на изработката на листов метал и прецизното машинно обработване оценете следните основни области на компетентност:
- Обхват и състояние на оборудването: Съвременни CNC машини с 3, 4 и 5 оси с достатъчна мощност за обема на вашия проект
- Асортимент от материали: Доказан опит в работа с конкретните сплави и класове материали, които използвате
- Възможности за инспекция: Координационни измервателни машини (CMM), уреди за измерване на шерохватостта на повърхността и подходящи измервателни инструменти
- Вторична обработка: Вътрешни възможности или установени партньорства за операции по довършителна обработка, като анодизиране, галванизиране или термична обработка
- Инженерна подкрепа: Технически специалисти, които могат да прегледат вашите проекти и да предоставят обратна връзка относно конструктивната пригодност за производство (DFM)
По-специално за автомобилните приложения сертификацията IATF 16949 става задължителна. Това автомобилно-специфично качество се основава на ISO 9001 и включва допълнителни изисквания за непрекъснато подобряване, предотвратяване на дефекти и строг контрол на процесите. Доставчиците, които обслужват автомобилни производители на оригинално оборудване (OEM) и производители от първи ешелон, трябва да демонстрират здрави възможности за статистически контрол на процесите (SPC) — непрекъснати системи за наблюдение, които откриват отклонения в размерите, преди да бъдат произведени дефектни части.
Компании като Shaoyi Metal Technology илюстрират какво трябва да търсите у доставчик, специализиран в автомобилната индустрия: сертификация IATF 16949 в комбинация със строго прилагане на SPC за компоненти с висока точност, като например шасита и персонализирани метални бушировки. Способността им да доставят в срокове до един работен ден демонстрира оперативната ефективност, която поддържа производствените линии в действие.
От прототипиране до мащабиране на обемите на производството
Една от най-ценените — и често пренебрегвани — възможности на доставчиците е способността им да увеличават обемите безпроблемно, от прототипни количества до пълни производствени обеми. Защо това има толкова голямо значение?
Според Modelcraft когато работите с вашия производствен доставчик по прототипирането, вие гарантирате, че прототипът от самото начало съответства директно на производствените възможности. Този подход осигурява безпроблемен преход към пълномащабно производство и намалява необходимостта от скъпи корекции или повторни конфигурации.
Предимствата от прототипирането заедно с вашия производствен партньор надхвърлят удобството:
- Реалистични оценки на разходите: Производствените доставчици предоставят точна представа за производствените разходи още в ранните етапи на процеса, което ви помага да избегнете изненади при мащабирането
- Намален риск от проектиране на дефекти: Доставчиците, които ще произвеждат окончателно вашия продукт, могат да идентифицират потенциални проблеми, преди те да се превърнат в скъпи производствени усложнения
- По-бързи итерации: Оптимизираните процеси означават, че промените в дизайна могат да бъдат приложени и тествани по-бързо, което ускорява излизането на пазара
- Подобряване на контрола върху качеството: Когато доставчиците са включени още от етапа на прототипиране, те имат личен интерес да гарантират, че прототипите отговарят на високите стандарти
Оценката на производствената мощност е също толкова критична. Според BOEN Rapid оценката на производствената мощност е основополагаща за осигуряване на това, че вашият CNC доставчик може да задоволи както текущите, така и бъдещите ви изисквания. Имайте предвид броя на работещите машини, степента им на автоматизация и начина, по който са планирани производствените смени, за да се задоволи търсенето. Доставчик с мащабируема мощност е по-добре подготвен да управлява спешни заявки, разработката на прототипи и пълномащабното производство без забавяния.
Важно е и размерът на работната сила на производителя. По-голямата работна сила означава повече хора, които могат да се фокусират върху вашите проекти, което гарантира навременното им завършване дори и по време на периоди на връхно търсене.
Надеждност на водещото време и качество на комуникацията
Майсторските работилници за изработка наблизо може да предложат географско удобство, но надеждността на сроковете за изпълнение винаги е по-важна от близостта. Според BOEN Rapid сроковете за изпълнение са критичен фактор при определяне на надеждността на доставчика. Надежден партньор трябва да предоставя реалистични временни рамки за проекта и да демонстрира доказано послужебно време в спазването на крайните срокове при различни обеми на производството.
При оценка на потенциални доставчици на стоманени изработки или услуги по CNC обработка на алуминий поискайте конкретни данни:
- Средни срокове за изпълнение на проекти, подобни на вашия
- Гъвкавост при обработване на спешни поръчки
- Планове за извънредни ситуации при неочаквани прекъсвания
- Показател за своевременно доставяне (целта е производителност от 95 % и повече)
Качеството на комуникацията често предсказва успеха на проекта по-добре от всеки технически спецификации. Силната клиентска поддръжка и ефективната комуникация са от жизнено значение за ефикасното управление на проекти по CNC машинна обработка. Оценете колко бързо и професионално доставчиците отговарят на запитванията ви, както и техническата експертиза на техния персонал за поддръжка.
Най-добрите доставчици предлагат специализирани мениджъри на проекти или инженери, които осигуряват ръководство по време на дизайн и производство. Ясните канали за комуникация помагат бързо да се решават проблеми, предотвратяват недоразумения и гарантират съответствие с вашите изисквания. Този вид обслужване не само опростява съвместната работа, но и създава дългосрочни партньорства, базирани на доверие.
Контролен списък за оценка на доставчици
Готови ли сте да оцените потенциалните производствени партньори? Използвайте този изчерпателен контролен списък:
| Категория за оценка | Ключови въпроси, които трябва да зададете | На какво да обърнете внимание |
|---|---|---|
| Технически способности | Какви типове машини и конфигурации по оси са налични? | Съвременно оборудване, съответстващо на изискванията ви за сложност на детайлите |
| Експертност в материалите | Какви материали редовно обработвате? | Доказан опит с конкретните сплави, които използвате |
| Сертификати за качество | Какви сертификати за качество притежавате? | ISO 9001 като минимум; IATF 16949 за автомобилната промишленост; AS9100D за аерокосмическата промишленост |
| ОБОРУДВАНИЕ ЗА КОНТРОЛ | Какви възможности за инспекция имате в собствените си цехове? | Координатно-измервателни машини (CMM), уреди за измерване на шерохватостта на повърхността, оптични измервателни системи |
| Производствен капацитет | Какво е обичайното ви време за изпълнение и производствена мощност? | Възможност за мащабиране от прототипи до серийно производство |
| Комуникация | Кой ще бъде мой основен контакт? | Специализиран мениджър на проекта с технически познания |
| Референции | Можете ли да предоставите препоръки от подобни проекти? | Потвърдена успешност с подобни приложения |
Над рамките на проверочния списък обмислете фокуса на доставчика върху изграждането на взаимоотношения. Според Caldera Manufacturing трябва да оцените дали компанията е по-заинтересована да завърши вашия проект колкото се може по-бързо или проявява готовност да установи дългосрочен партньорски договор с вашата фирма. Производителят, който стреми да установи продължителни взаимоотношения, по-вероятно ще вземе предвид нуждите на вашата компания и ще разбере насоките, в които искате да развивате вашите проекти.
Най-ниската оферта рядко отразява най-добрата стойност. При вземането на окончателното решение оценявайте общата стойност на притежанието — включително качество, надеждност, комуникация и скритите разходи, свързани с проблемите на доставчика.
За читателите, специализирани в автомобилния сектор, сертифицираните производствени партньори, които комбинират висока прецизност с мащабируемост на производството, предлагат най-доброто развитие напред. Доставчици като Shaoyi Metal Technology демонстрират как изглежда тази комбинация в практиката: производствени обекти, сертифицирани според IATF 16949, които доставят автомобилни компоненти с висока точност със скоростта и последователността, изисквани от съвременните производствени графици.
След като сте внедрили рамката си за оценка на доставчиците, сте готови да вземате обосновани решения, които балансират възможностите, качеството и разходите. Последната стъпка е да обобщите всичко, което разгледахме, и да формулирате конкретни следващи действия за вашия проект по метална машинна обработка.
Прилагане на изискванията за вашите части от метална машинна обработка
Преодоляхте пътя през материали, процеси, допуски, повърхностни обработки, фактори, свързани с разходите, контрол на качеството и оценка на доставчиците. Сега настъпва най-важният момент: превръщането на знанията в практически действия. Независимо дали подготвяте първата си заявка за офертна цена (RFQ) или усъвършенствате стратегията си за набавяне на части, изработени чрез метална машинна обработка, решенията, които вземате в следващите стъпки, определят успеха на проекта.
Нека обобщим всичко, което разгледахме, в ключовите аспекти и практически инструменти, от които се нуждаете, за да продължите напред с увереност.
Основни изводи за вашия проект по машинна обработка на метали
През цялото това ръководство няколко принципа се изявиха като основополагащи истини за успешната машинна обработка на метални детайли. Това не са препоръки — те представляват решенията, които разделят гладките проекти от скъпите проблеми.
Първо съгласувайте материала с изискванията на приложението. Задавайте само толерансите, които функцията ви наистина изисква. Проектирайте с оглед на възможностите за производство от самото начало. Проверете сертификатите на доставчика, преди да се ангажирате с производството.
Всеки от тези принципи е директно свързан с резултатите от проекта. Изборът на алуминий, когато титанът не е функционално необходим, спестява значителен бюджет. Прилагането на строги допуски само за критичните размери — а не универсални спецификации — намалява времето и разходите за машинна обработка. Проектирането с използване на стандартни инструменти и разумни съотношения между дълбочина и ширина предотвратява производствени задръжки още преди те да възникнат.
При машинната обработка на метални части взаимовръзката между вашите спецификации и производствената реалност определя всичко. Прекалено инженерно проектираните детайли не водят до по-добри части — те водят до по-скъпи части. Недостатъчно специфицираните изисквания не спестяват пари — те пораждат проблеми с качеството в по-късен етап.
Напредване с увереност
Вашият път от концепцията до готовите персонализирани машинно обработени метални части следва предсказуема последователност. Разбирането на това къде се намирате в това пътуване ви помага да се фокусирате върху правилните приоритети на всеки етап.
Пътят на вземане на решения изглежда по следния начин:
- Определяне на функционалните изисквания: Каква е действителната функция на вашата част? В каква среда ще бъде използвана?
- Изберете подходящ материал: Съответствайте свойствата на изискванията — якост, корозионна устойчивост, тегло, обработваемост
- Проектиране за производственост: Приложете принципите на DFM, за да създадете геометрия, която се обработва ефективно
- Задавайте толеранси целенасочено: Строги допуски там, където функцията изисква това, стандартни допуски в останалите случаи
- Определете нуждите от финиширане: Указвайте вторични финишни покрития само ако те добавят функционална стойност
- Оценявайте доставчиците системно: Сертификати, възможности, комуникация, предишни постижения
- Подготвяйте изчерпателна документация за заявката за цитиране (RFQ): Пълни технически пакети, които осигуряват точни цитирания
Според Zenith Manufacturing ефективната заявка за цитиране (RFQ) за CNC обработка на метални части изисква пълен технически пакет: 3D CAD модел (във формат .STEP) за геометрията, 2D технически чертеж (.PDF), дефиниращ всички допуски, геометрични допуски (GD&T), повърхностна шерохватост и спецификации за материала, както и таблица с указани необходими количества. Тази документация става основата за точни цитирания и успешна производство.
Вашият списък за подготвяне на заявката за цитиране
Готови ли сте да поискате оферти? Използвайте този списък, за да се уверите, че документационният ви пакет е пълен:
- 3D CAD модел – Предоставете файлове във формат .STEP или .IGES с точна геометрия
- 2D технически чертеж – Включете всички допуски, обозначения за геометрични допуски и контрол (GD&T), изисквания за повърхностна шерохватост и спецификации на материала
- Спецификация на материала – Поочетете точния клас сплав (напр. „алуминий 6061-T6“, а не просто „алуминий“)
- Изисквания за количество – Поочетете обема на първоначалната поръчка и предвидения годишен обем
- Идентифицирани критични размери – Отбележете кои допуски не могат да бъдат разширени
- Изисквания за повърхностна отделка – Поочетете стойности Ra за критичните повърхности; посочете къде е приемливо състоянието „както е машинирано“
- Необходимост от вторична обработка – По-подробно опишете анодизирането, галванизирането, пръскането с прахови покрития или други процеси след машинната обработка
- Изисквания за качествена документация – Уточнете изискванията за инспекционни отчети, сертификати и проследимост
- Целеви срок за доставка – Посочете дали са необходими стандартни или ускорени срокове
- Контекст на прилагане – Споделете функцията на детайла, за да могат доставчиците да предоставят обратна връзка относно конструкцията за производството (DFM)
Както е посочено от DGSXCNC , ясното дефиниране на вашите изисквания е от решаващо значение — ранното разбиране на експлоатационните условия, на които ще бъдат изложени компонентите, на обемите и на сроковете за изпълнение помага при избора на доставчици, които могат да отговорят на нуждите на вашия проект.
За читателите от автомобилния сектор рисковете са особено високи. Компонентите трябва да отговарят на строгите изисквания за качество и да се произвеждат безпроблемно в мащаб от прототип до серийно производство. Точно тук сертифицираните производствени партньори доказват своята стойност.
Shaoyi Metal Technology представлява вида партньор, който заслужава внимание: производствена площадка, сертифицирана според IATF 16949, която доставя автомобилни компоненти с висока точност — от сложни шаситайни сглобки до персонализирани метални бушинги — с водещи срокове на изпълнение до един работен ден. Строгото им прилагане на статистичен контрол на процесите гарантира последователността в производството, която се изисква за автомобилни приложения.
Независимо дали търсите първите си CNC-обработени метални части или оптимизирате вече установена верига за доставки, принципите, описани в това ръководство, са вашата насочваща карта. Съгласувайте техническите спецификации с действителните изисквания. Избирайте доставчици въз основа на техните възможности, а не само на цената. Документирайте всичко ясно и подробно. Резултатът? Метални обработени части, които функционират точно както е предвидено — доставени навреме и в рамките на бюджета.
Често задавани въпроси относно метални машинни части
1. Колко струва машинната обработка на детайли?
Разходите за CNC обработка обикновено варират от 50 до 150 щатски долара на час, в зависимост от сложността на оборудването и изискванията към точността. Общата цена на детайла зависи от множество фактора: избор на материал (алуминият е по-евтин за обработка от титаниума), сложност на конструкцията (3-осева срещу 5-осева обработка), спецификации за допуски (по-строгите допуски увеличават разходите с 2–5 пъти), количество (разходите за подготвителни операции, разпределени върху по-голям брой единици, намаляват цената на едно детайла с 60–85 % при по-големи обеми) и изисквания към финишната обработка (анодизиране, галванизиране или пръскащо покритие увеличават базовата цена с 10–50 %). За точна оценка на цената подгответе пълна техническа документация, включваща 3D CAD файлове, 2D чертежи с указани допуски и изисквания за количество.
2. Какви са 7-те основни машини за метална обработка?
Седемте основни машини за метална обработка включват: (1) токарни машини, като токарни станци и фрезови машини за цилиндрични компоненти, (2) строгални и фрезови машини за равни повърхности, (3) свределни машини за създаване на отвори, (4) фрезови машини за сложни геометрии с използване на въртящи се резачи, (5) шлифовъчни машини за прецизно финиране и тесни допуски, (6) електрически триони за рязане на суров материал и (7) преси за формовъчни операции. Съвременната CNC технология е подобрила тези традиционни инструменти чрез компютърно управление, което позволява по-тесни допуски (до ±0,0001 инча) и сложни многосоставни движения за изработване на детайли със сложна геометрия.
3. Какви материали се използват най-често за метални части, изработени чрез CNC обработка?
Популярните материали за CNC машинна обработка включват алуминиеви сплави (6061 за общо използване, 7075 за високопрочни аерокосмически приложения), неръждаеми стомани (303 за отлична обработваемост, 304 за корозионна устойчивост, 316 за морски и медицински среди), въглеродни стомани за структурни части с оптимално съотношение цена-качество, латун C360 за електрически съединители и водопроводни инсталации, мед C110 за приложения, изискващи висока електропроводимост, и титан за аерокосмически и медицински импланти, които изискват изключително високо съотношение якост-тегло. Изборът на материал трябва да балансира изискванията на приложението, обработваемостта (която влияе върху разходите) и бюджетните ограничения.
4. Как да избера между 3-осева, 4-осева и 5-осева CNC машинна обработка?
Изберете според геометрията на детайла и бюджета: обработката с 3 оси обхваща равни повърхности, прости джобове и основни контури по икономичен начин, но не може да обработва подрязвания без повторно позициониране. Обработката с 4 оси добавя въртене на заготовката, което позволява изработването на елементи от няколко страни и хеликоидни шарки при единична настройка, намалявайки броя на смяните на приспособленията с 25–40 %. Обработката с 5 оси осъществява достъп до детайлите от практически всеки ъгъл и е задължителна за сложни криволинейни форми, турбинни лопатки и аерокосмически компоненти — но струва с 300–600 % повече от операциите с 3 оси. Започнете с най-простата конфигурация, която отговаря на вашите геометрични изисквания, за да оптимизирате производствените разходи.
5. Какви сертификати трябва да търся при избор на доставчик на метална обработка?
Основните сертификати зависят от вашата индустрия: ISO 9001 осигурява базово управление на качеството за общи приложения. IATF 16949 е задължителен за автомобилни компоненти и гарантира непрекъснато подобряване и строг контрол на процесите чрез внедряване на статистически контрол на процесите (SPC). AS9100D отговаря на изискванията за авиационно-космическата индустрия, включително строга документация и управление на рисковете. ISO 13485 регулира производството на медицински изделия с всеобхватен контрол на дизайна и проследимост. Освен сертификатите проверете дали доставчиците разполагат с възможности за инспекция с координатно-измервателна машина (CMM), документация за сертифициране на материали и доказана практика при работа с конкретните материали и толерансови изисквания, които имате.