 Малки порции, високи стандарти. Нашата услуга за бързо проектиране на прототипи прави валидацията по-бърза и лесна —

Как работи штамповането? 9 съществени точки от RFQ до производство
Разбиране на начина на работа на штамповането
Задавали ли сте си въпроса как се изработват с такава прецизност и в такива големи количества ежедневни предмети като каросерийни панели, електрически контактни елементи или скоби за уреди? Отговорът се крие в метално штампиране —основен производствен процес, който превръща плоски метални листове в сложни, функционални части. Нека разгледаме как работи штамповането и защо той е предпочитано решение за толкова много индустрии.
Какво е металоштамповане и защо производителите го използват
В основата си, метално штампиране е хладно деформиране процес. Това означава, че оформя метала при стайна температура, вместо да използва топлина, за да създаде крайни или почти крайни форми. Процесът използва щампова машина —мощна машина, която прилага контролирана сила—и комплект персонализирани матрици. Когато пресата се затвори, матриците извършват рязане, огъване или разтягане на металния лист до желаната геометрия. Този метод се цени заради скоростта си, възпроизводимост и способността да произвежда високи обеми еднородни части с малки допуски.
Производителите разчитат на щамповане на листов метал за всичко от автомобилни панели до малки електронни скоби, благодарение на икономичността и универсалността си. Процесът е особено ефективен, когато дизайна на детайла е подходящ за планарни (равни) или умерено оформени форми и когато обемите на производството оправдаят инвестициите в инструменти.
Основни операции: От рязане до дълбоко изтегляне
И така, какво всъщност се случва по време на процес на оттисване ? Представете си метална лента или лист, която напредва през серия станции, като всяка извършва определена операция. Ето най-често срещаните стъпки в штамповане с матрица :
- Изсичане – Изрязване на основната форма от листа
- Проколване – Пробиване на отвори или изрязвания
- Зъбесто отваряне – Премахване на малки участъци от ръбовете
- Изкривяване – Създаване на ъгли или кривини
- Фланширане – Усукване на ръбовете за по-голяма якост
- Изтегляне (штамповане чрез изтегляне) – Формоване на метала в дълбоки, кухи форми
- Монетарен – Пресоване на фини детайли или елементи в детайла
Тези операции могат да бъдат комбинирани в един единствен комплект матрици или последователно разпределени в няколко матрици, в зависимост от сложността на детайла.
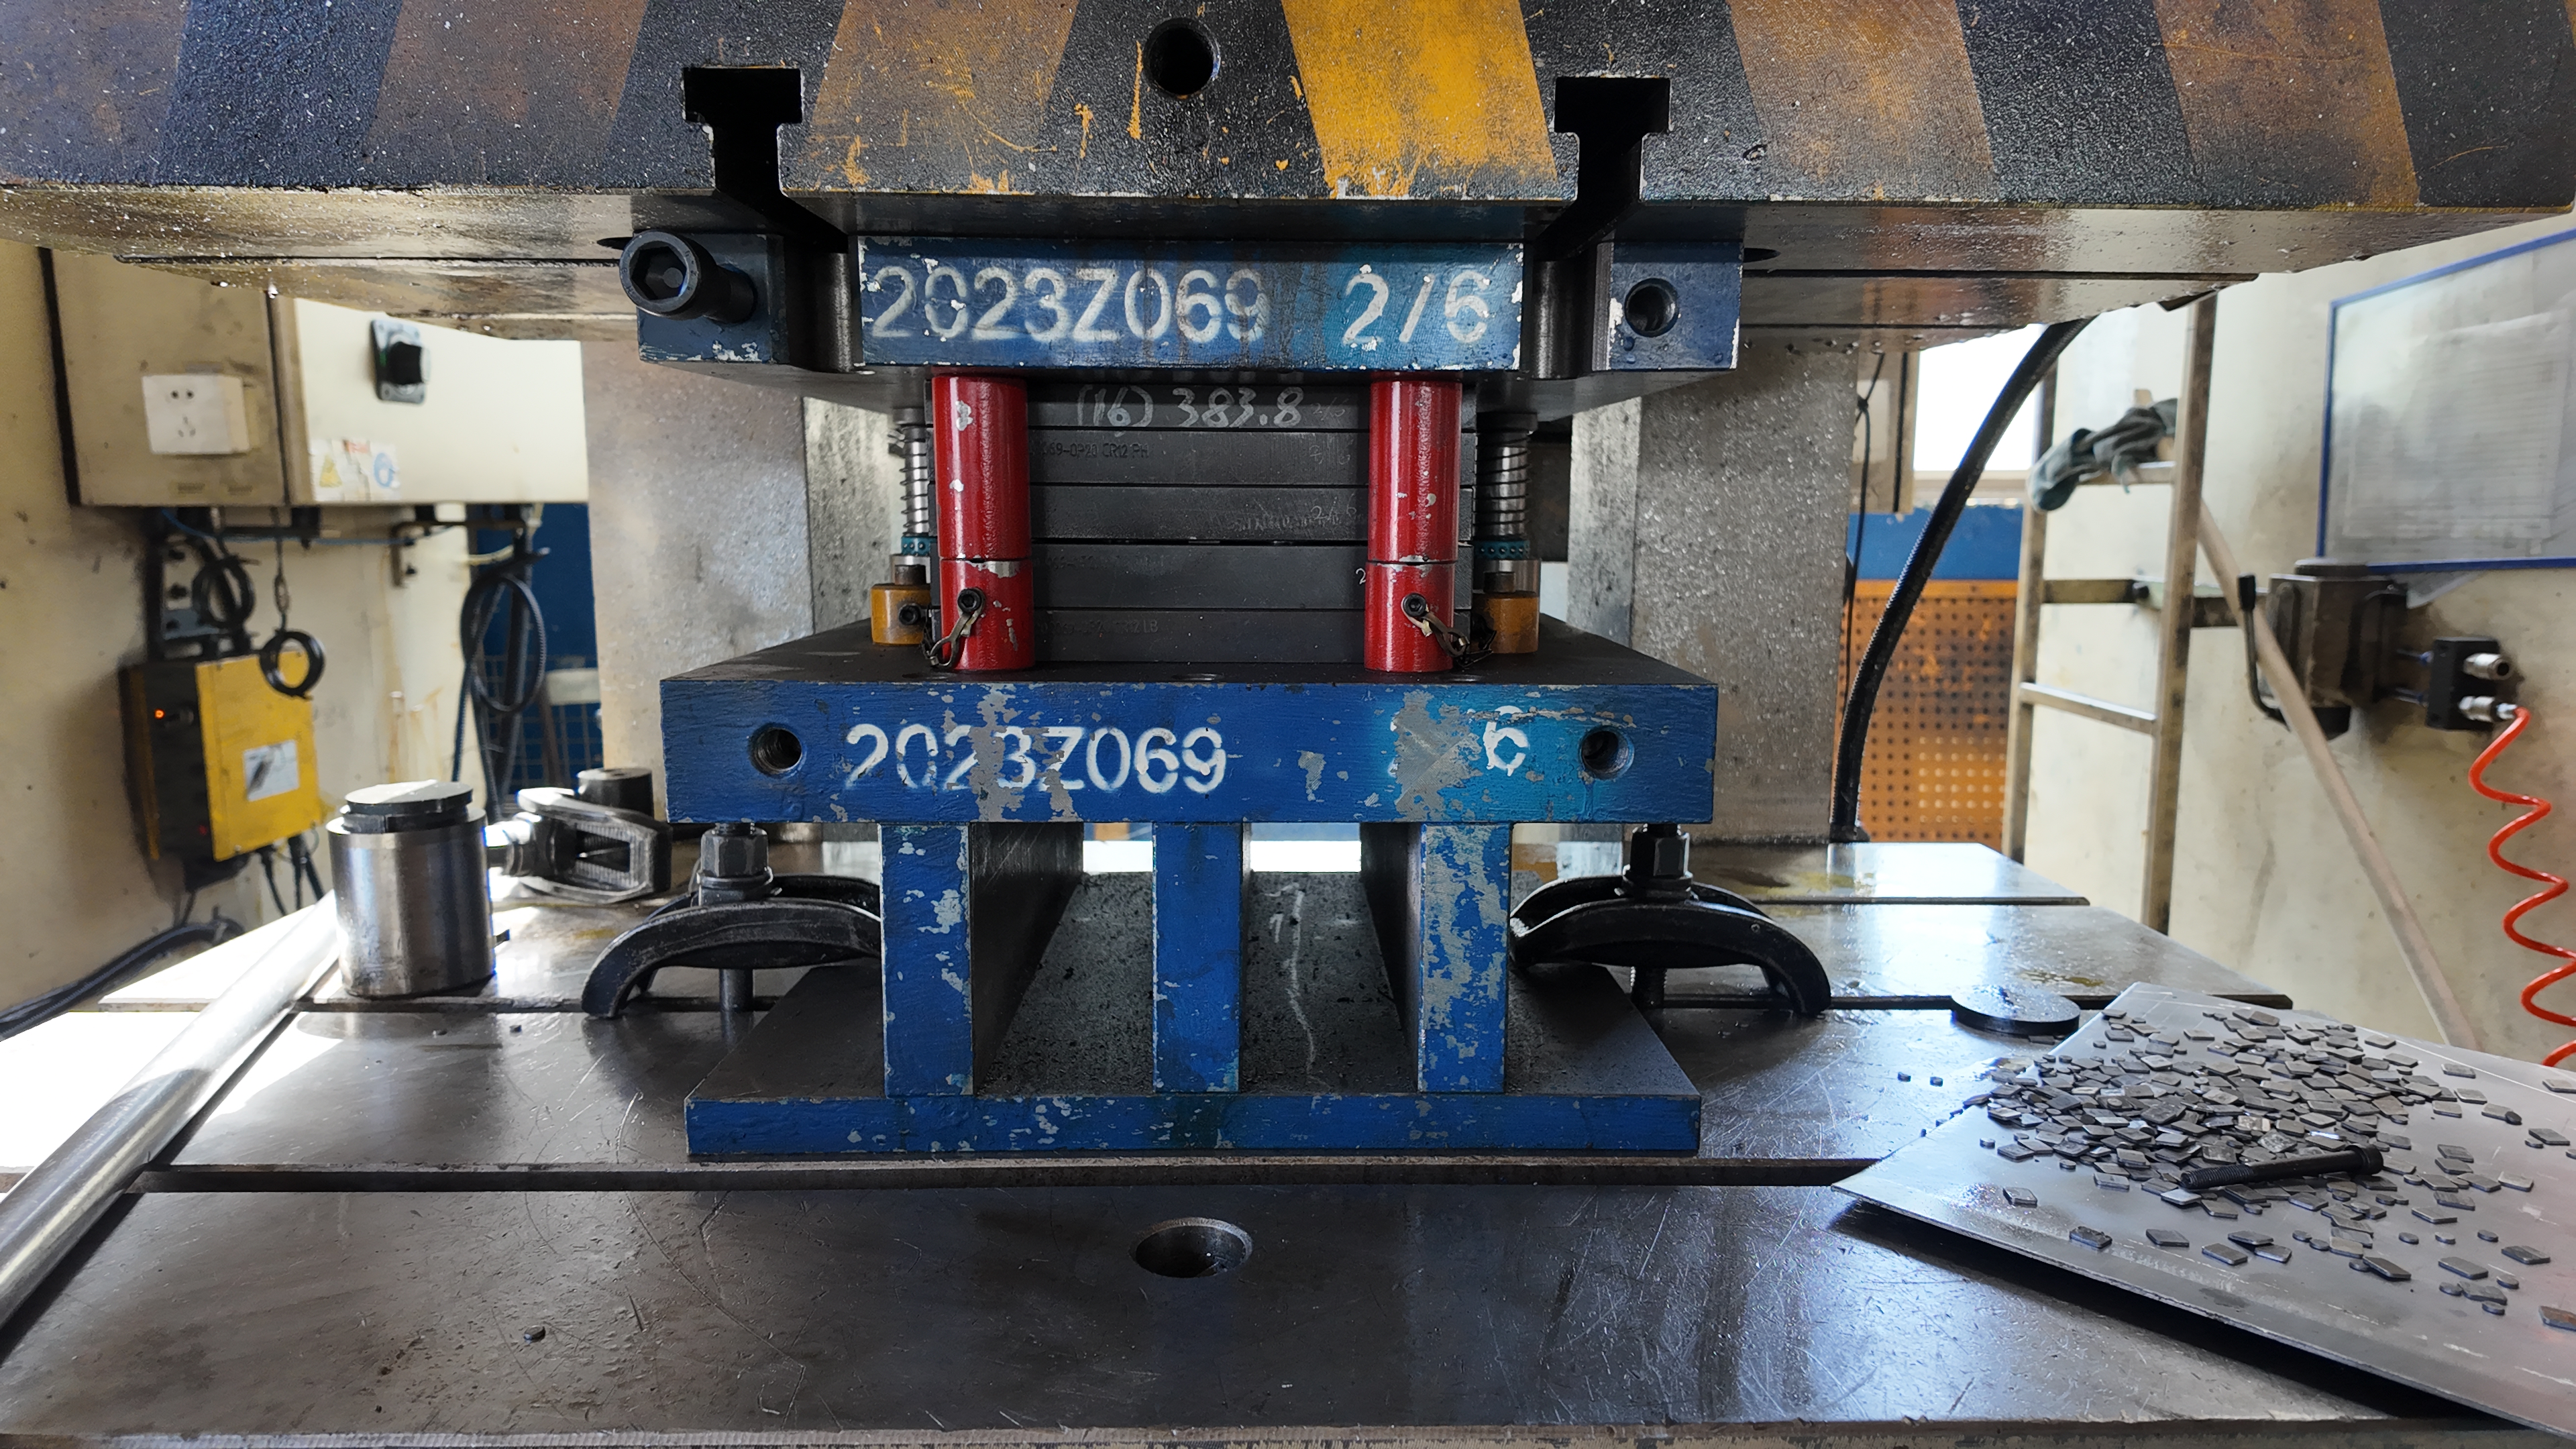
Вътрешност на прес за щамповане: рама, задвижване и ход
Сърцето на метално штамповане е щампова машина . Но как всъщност работи? Представете си преса като голяма, здрава рамка, която съдържа подвижен плунжер, задвижван от механична, хидравлична или серво система. Докато плунжерът се движи надолу, той прилага контролирано усилие през целия си ход, принуждавайки листовия метал да се оформи спрямо матрицата. Контурите, зазорините и насочващите елементи на матрицата гарантират прецизно деформиране на метала, като го изрязват или формират по необходимия начин. Зазорината между пуансона и матрицата е от решаващо значение: ако е твърде малка, инструментът се износва преждевременно; ако е твърде голяма, качеството на детайла пострадва. Автоматизирани системи за подаване преместват лентата през матриците, осигурявайки високоскоростно и повтаряемо производство — особено в прогресивно щамповане на матрици линии.
- Лентата се подава в преса
- Всяка матрица извършва определена операция (рязане, огъване, пробиване и др.)
- Готовата детайл се отделя от лентата и се изхвърля
Този процес е основа за безброй приложения — от каросерии на автомобили до електрически терминали и корпуси на уреди.
Щамповането превъзхожда, когато обемите оправдаят инструменталните разходи, а геометрията отговаря на плоски към оформени части.
Обобщавайки, как работи штамповането ? Това е високотехнологична, задвижвана със сила трансформация на равен метал в функционални форми — разчитаща на съвместното действие на преса, матрица и материал. Дали гледате скоби в автомобил или съединители на платка, вероятно щамповане на листов метал е играло ключова роля при създаването им. Докато навлизате по-надълбоко, ще видите как изборът на материал, дизайна на матрицата и контролът на процеса правят цялата разлика за качеството и ефективността на щамповането.
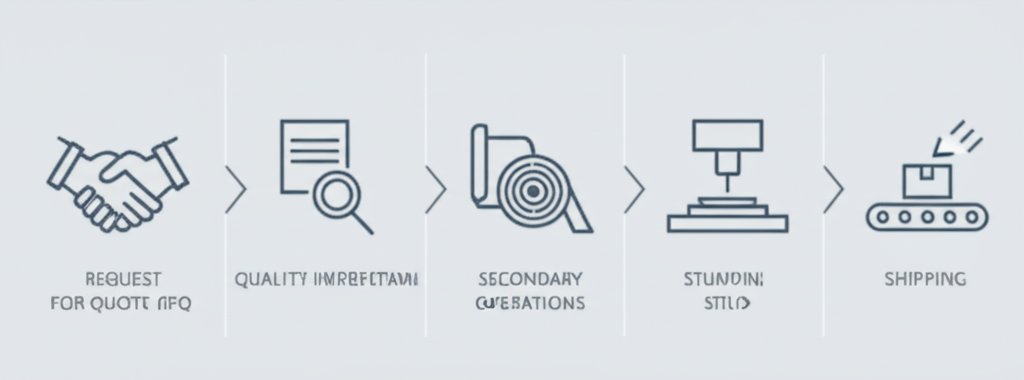
От RFQ до детайли
Когато планирате нова штампосана част, пътят от идеята до масовото производство може да изглежда претрупан. Как превръщате чертеж в готов компонент, готов за монтаж? Нека проследим производство чрез штамоване —от първоначалната ви заявка до стабилното производство—за да знаете точно какво да очаквате на всеки етап.
От RFQ до PO: Какво да включите и какво да очаквате
Всичко започва със Заявка за оферта (RFQ). Колкото повече детайли предоставите в началото, толкова по-гладък ще бъде процесът напред. За персонализирано штампуване на метал проекти, уверете се, че сте включили:
- Годишни и предварителни обеми на употреба
- Желан диапазон на цена на частта (ако е разрешено)
- Предварителни чертежи или 3D CAD модели
- Спецификации за материала и дебелина
- Изисквани допуски и критични размери
- Изисквания за повърхностна обработка и покритие
- Изисквания за опаковане и етикетиране
След като заявка ви е получена, инженерният екип на производителя ще извърши преглед на пригодността за производство (DFM). Те ще проверят дали вашата детайл е изпълнима за пРОЦЕС ЗА ЛИСТОВО МЕТАЛНО ОБРАБОТВАНЕ , ще предложат незначителни корекции за подобряване на качеството или намаляване на разходите и ще посочат всички рискове. След този преглед ще получите прозрачна оферта, включваща както метална форма за оттисъкване така и цена на детайл.
Проектиране, изграждане и проба на форми
След като направите поръчката си, започва истинската инженерна работа. Ето как протичат следващите етапи:
-
Умерта проектиране
- Инженерите използват напреднали CAD софтуери, за да създадат цифров чертеж на метална форма за оттисъкване
- Ключови резултати: компоновка на лентата, разработване на заготовката и план за технологичния процес
- Еталон за качество: одобрение от DFM, съответствие с ISO/IATF
-
Изработка на штамп
- Квалифицирани инструменталници изработват компоненти на матрици — обикновено от закалена инструментална стомана — чрез CNC машинна обработка
- Матрицата е сглобена, калибрирана и проверена за размерна точност
- Резултати: завършен инструмент, протоколи за инспекция
-
Избор на преса и планиране на настройката
- Изберете подходяща преса според размера, материала и сложността на детайла
- Планирайте осигуряването на лента/ролка и настройването на системата за подаване
- Резултати: настройки за пресата, инструкции за оператора
-
Опробване на матрицата и итерации
- Пробни пускове произвеждат първоначални пробни образци с новата матрица
- Инженерите коригират изтегляне на фланец, междинни разстояния и смазване, за да подобрят качеството
- Резултати: пробни части, данни за възможности на процеса
-
Първоначален контрол на артикула (FAI)
- Всеки параметър и размер се измерва спрямо вашите чертежи
- Частите се изпращат при вас за одобрение
- Еталон за качество: контролен списък FAI, PPAP (за автомобилна промишленост)
-
Проверки на възможностите и предварително производствено изпълнение
- Допълнителни серии проверяват стабилността и повтаряемостта на процеса
- Събират се статистически данни за потвърждение на качеството
- Резултати: проучвания за възможности, планове за контрол
-
Нарастване до пълна мощност и текущ SPC/поддръжка
- Производството се увеличава до пълна скорост
- Операторите извършват редовни проверки по време на процеса и превантивна поддръжка
- Доставки: производствени части, SPC диаграми, протоколи за поддръжка
Визуализация на жизнения цикъл на штамповането
- Приемане на заявка RFQ
- Преглед за DFM
- Офериране (цена на брой + инструменти)
- Проектиране на матрици (прогресивни/единични/трансферни)
- Изработка на штамп
- Избор на прес и планиране на настройката
- Закупуване на лента/ролка
- Опробване на матриците и итерации
- Първоначален контрол на артикула (FAI)
- Проверки на възможностите
- Пробно производство
- PPAP или еквивалентно подаване (ако е задължително)
- Рампа до производствена норма
- Непрекъснат SPC и поддръжка
Всеки етап е контролна точка за качество — което означава, че производството не напредва, докато всички изисквания бъдат изпълнени. Тази структура позволява штамповане в производството да постигаме последователни и възпроизводими резултати за всичко от скоби до сложни сглобки.
Чрез разбиране на всеки етап от производство чрез штамоване , ще сте по-добре подготвените за сътрудничество с компании за метално штамповане , ще избегнете скъпоструващи изненади и ще гарантирате правилността на вашите части още при първия път. Следващата стъпка е изборът на материали — защото изборът на правилния метал е толкова критичен, колкото и самият процес.
Избиране на материали, подходящи за штамповане
Как да изберете подходяща сплав за штамповане
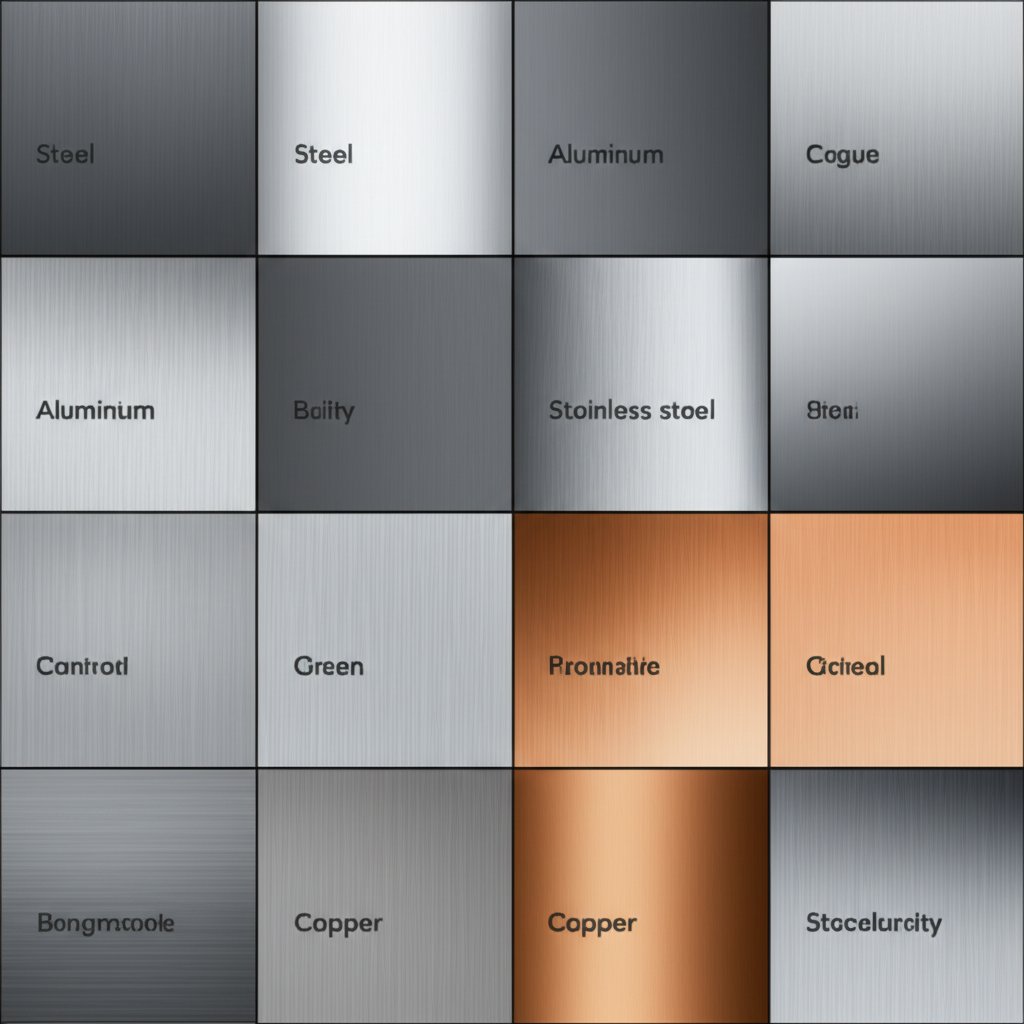
Задавали ли сте си въпроса защо някои штампувани части са леки и устойчиви на корозия, докато други са достатъчно здрави за автомобилни рами? Тайната се крие в избора на правилната метал за штамповане . Изборът на материала директно влияе върху якостта, формируемостта, отделката и цената на детайла. Нека разгледаме най-често срещаните опции, с които ще се сблъскате в метални штампани материали —и какво да имате предвид за следващия си проект.
| Материал | Типичен диапазон на толщината | Относителна формируемост | Склонност към възвръщане | Чести видове финиши/покрития | Бележки за инструменти |
|---|---|---|---|---|---|
| Нисковъглеродна штампована стомана | Тънки до средни | Високо | Ниски | Галванизирана, боядисана, смазана | Стандартно за скоби, панели на купето; икономически ефективно |
| HSLA штампова стомана | Тънки до средни | Среден | Среден | Галванизирана, фосфатирана, E-покритие | Идеална за автомобилни штамповки, където е важно съотношението якост към тегло |
| Неръждаема стомана | Тънки до средни | Средно до ниско | Среден до висок | Пасивирана, полирани, матови | Чудесно за стоманена метална штамповка в корозивни среди |
| Алуминиеви сплавове | От тънки до дебели | Високо | Високо | Анодирани, предварително боядисани, сурови | Изберете шампиран алуминий за леки части – внимавайте за еластичното възстановяване |
| Мед/Латун | Много тънки до средни | Много високо | Ниски | Калай-покрити, сурови, никел-покрити | Предпочитани за електрически контакти и клеми |
Съображения за формируемост и възстановяване след огъване
Звучи сложно? Представете си, че проектирате разединител или скоба. Ако изберете щампосани стоманени , ще получите добра якост и ниска цена, но ако теглото е от значение – например в автомобилна или авиационна промишленост – може да предпочетете алуминиево щамповане . Просто запомнете: алуминият и някои високоякостни стомани имат тенденция към "еластично възстановяване" след формоване, което означава, че детайлът може леко да промени формата си, след като налягането бъде премахнато. Това се нарича еластично възстановяване и е особено важно при щамповане на листов метал за части с малки допуски. Неръждаемата стомана също показва ефект на възстановяване, затова е необходима допълнителна грижа при проектирането на матрици и настройките на процеса, за да се запазят размерите в зададените граници.
- Меки степени на обработка или отжиган материал улесняват формоването и намаляват риска от пукания
- По-твърдите степени стабилизират крайните размери на детайлите, но могат да ограничат сложните форми
Покрития и следваща обработка за поставяне
Не става дума само за основния метал. Покрития като цинково галванизиране, Е-покритие или анодиране осигуряват защита срещу корозия, но могат също така да повлияят на износването на матриците и нуждата от смазване. Например, автомобилно метално штампиране често използва галванизирана или предварително боядисана стомана, за да отговаря на изискванията за дълготрайност и външен вид, но тези покрития може да изискват специални материали за матрици или смазочни вещества, за да се избегне повреда на инструмента. Електрическите части често използват мед или месинг заради тяхната проводимост, с калай или никелово покритие за подобрена възможност за леене и защита срещу корозия.
Избирането на правилния метални штампани материали означава балансиране на изискванията за формируемост, якост, еластичност и крайна обработка. Винаги консултирайте техническите листове на доставчика и отраслови стандарти (като ASTM или SAE) за най-новите препоръки и обмислете ранно сътрудничество с вашия производител на штампета, за да оптимизирате както материала, така и процеса за вашата конкретна употреба.
Следващия път ще разгледаме как умните проектиращи решения могат да намалят преработката и да направят штампираните ви части по-надеждни още от самото начало.
Проектиране за производство
Правила за проектиране, които предотвратяват пукнатини и гънки
Сблъсквали ли сте се някога с неочаквани пукнатини или гънки в штампираните си части? Не сте сами. Много от проблемите в дизайн за щамповане се дължат на малки детайли, пропуснати в началния етап на процеса. Добрата новина? Като следвате няколко проверени конструкции за штамповане на листов метал правила, можете да избегнете скъпоструваща преработка и да задържите проекта си в график.
- Запазвайте минимални разстояния между отвор и ръб, както и между отвор и огъване: При пробити отвори диаметърът трябва да е поне равен на дебелината на листа. Поставяйте отворите на разстояние поне една дебелина материал от ръба или 1,5 до 2 пъти дебелината, ако отворът е близо до огъване. Това предотвратява образуването на заравания и намалява риска от пукнатини.
- Осмислете посоката на зърното: Представете си, че оформяте фланци или уши. Ако ги огъвате успоредно на зърното, по-вероятно е да възникнат пукнатини. Вместо това ориентирайте елементите перпендикулярно или под ъгъл по-малък от 45 градуса спрямо зърното за по-добра издръжливост.
- Избягвайте остри вътрешни радиуси: Остри ъгли са концентратори на напрежение. Използвайте достатъчно големи радиуси при огъване — заоблените ъгли са по-малко склонни към счупване и подобряват както якостта, така и външния вид.
- Стандартизирайте ширината на фланшите и релефите: Поддържайте еднаква ширина на фланшите, за да отговарят на ограничителните плочи, и добавяйте релефи в пресичащите се участъци, за да се предотврати разкъсване по време на формоване.
- Проектирайте за еднаква дебелина на материала: Колебанията в дебелината могат да причинят неравномерни огъвания или повърхностни дефекти. Еднородната дебелина помага за осигуряване на прогнозируемо формоване и сглобяване.
- Посочете структурата на базовите данни за измерване: Ясна схема на базови данни осигурява възпроизводими и надеждни измервания на критични елементи, намалявайки вариациите и проблемите при инспекцията.
- Уточнете изискванията за премахване на заострените ръбове и фаски: Ясно посочвайте нуждите от обработка на ръбовете, за да се избегнат остри ръбове или излишни заострения, които биха могли да повлияят на сглобяването или безопасността.
Ръбове на отвори, огъвания и елементи, които взаимодействат
Когато проектирате отвори, процепи и огъвания, малки решения могат да имат голямо значение. Например, разполагането на отвори твърде близо един до друг или твърде близо до огъване може да отслаби детайла и да причини деформация. Използвайте следните бързи съвети:
- Разстояние между отвори: поне два пъти дебелината на ламарината
- Разстояние от отвор до огъване: поне 1,5 пъти дебелината от радиуса на огъването
- Разстояние от отвор до ръба: поне една дебелина от ръба
- Минимизирайте рязките преходи — използвайте закръгления или радиуси, когато е възможно
Също така, имайте предвид последователността на операциите и подредбата на лентата при работа с матрица за ламарина и матрици за щамповане на листов метал добре планираната подредба на лентата разпределя равномерно силите при формоване, което предотвратява накланяне или движение, способно да повреди матрицата или детайла.
Класове за допуснати отклонения, съответстващи на възможностите за щамповане
Не всички допуснати отклонения са еднакви. Щамповането е високостабилно, но неговите допуснати отклонения се различават от тези при механична обработка или лазерно рязане. Твърде стеснените допуски могат да увеличат разходите и брака. Имайте предвид следното:
- Използвайте приети в индустрията класове за допуснати отклонения (като тези в стандарти DIN или ISO, специфични за щамповане) за повечето елементи
- Поискайте таблиците за корекции при огъване и за зазори от вашия доставчик на щамповани части, за да се осигури точното развитие на развивката
- Посочвайте по-строги допуски само когато функционално е необходимо — некритичните елементи използвайте със стандартни стойности
- Поискайте предпочитаните бележки за окончателна обработка и ги прегледайте с вашия доставчик, за да се осигури съгласуваност
Съгласувайте от самото начало клас по подразбиране за допуснати отклонения и схема за геометрични и размерни допуски (GD&T); допуските при щамповане се различават от тези при механична обработка.
Когато сътрудничите от ранен етап видове штамповни матрици и използвате лентови формати, вие минимизирате преработките и по-бързо стигате до производство. Отворената комуникация с вашия производител осигурява, че дизайна ви ще отговаря както на процеса, така и на целите ви за качество. След това ще разгледаме инструментите и избора на преси, които оживяват вашия дизайн – защото дори и най-добрият дизайн се нуждае от подходящата апаратура, за да бъде успешен.

Матрици, преси и параметри, които правят възможно штамповането
Избор между прогресивни, трансферни и едноударни матрици
Когато си представите линия за штамповане, дали си мислите за единичен инструмент, който изсича детайли един по един, или за сложена система, при която метални ленти се движат през серия операции? Реалността е, че и двата подхода съществуват – и правилният избор зависи от геометрията, обема и бюджета на вашето детайл. Нека да разгледаме основните типове матрици, с които ще се сблъскате в машина за щамповане на метал свят:
- Единични матрици (едностанционни): Извършва една операция на всеки ход на пресата. Идеален за малки серии или когато конфигурациите на детайлите често се променят. Те са прости, гъвкави и имат ниски първоначални разходи, но скоростта на производство е ограничена, а усвояването на материала е относително ниско.
- Каскадни преси: Основната сила при штамповане в големи серии. Тук лента от метал напредва през няколко станции в един и същ штамп, като всяка станция извършва различна операция — изрязване, пробиване, оформяне и други. Готовите детайли се отделят в последния етап. Прогресивните штампи са високоавтоматизирани, осигуряват отлично усвояване на материала и бързи, постоянни резултати. Въпреки това изискват по-големи инвестиции и са най-подходящи за стабилни, повтарящи се конструкции.
- Трансферни матрици: Използва се, когато части трябва да бъдат отделени от лентата по-рано, след което да бъдат премествани (механично или чрез робот) между работни станции за допълнително оформяне. Трансфер матриците са отличен избор за сложни, дълбоко изтеглени или 3D форми, които не могат ефективно да се произвеждат с прогресивна матрица. Те предлагат гъвкавост и могат да обработват по-големи детайли, но увеличават сложността и разходите за производствената линия.
- Комбинирани матрици: Позволяват извършването на множество операции (като пробиване и изрязване) в един ход на същата работна станция. Ефективни са за сериите със среден обем от по-прости части, но са по-малко пригодни за промени в конструкцията.
Изборът на подходящ тип матрица означава баланс между скорост, гъвкавост и разходи. Например, ако произвеждате хиляди малки скоби на ден, прогресивна матрица във високоскоростен пresse за метал вероятно е най-добрият избор. За дълбоки, формовани като чаша части, може да е по-подходяща трансфер матрица или дори комбинирана матрица.
-
Типични компоненти на матрици:
- Пробойници и матрици (самите инструменти за оформяне и рязане)
- Изхвърлячи (премахват детайла от пробойника след оформянето)
- Пилоти (гарантират точно позициониране на лентата)
- Изтегляне на гънки (контролира потока от материал по време на формоване)
- Системи за насочване (поддържат всичко подравнено)
- Сензори (наблюдават положението на лентата, изхвърлянето на детайлите, износването на инструмента)
- Покрития/вложки (специални повърхностни обработки за устойчивост на износване, ако е необходимо)
Съгласувайте сложността на матрицата с обема и броя на елементите; прогресивните матрици се отличават, когато могат да бъдат комбинирани няколко операции с надежден контрол на лентата.
Избор на преси за штамповане и подаване
Сега си представете, че сте избрали своята матрица. А какво ще кажете за метална штампа самата преса? Не всички преси са създадени еднакво. Обикновено се срещат три основни типа: штампувачни тисащи машини самата преса? Не всички преси са създадени еднакво. Обикновено се срещат три основни типа:
- Механични преси: Най-бързи цикли — перфектни за плитки, равни части и прогресивни матрици. Те са основата на повечето високопроизводителни щамповъчни линии.
- Хидравлични преси: Осигуряват прецизен контрол върху хода и налягането, което ги прави идеални за дълбоко изтегляне или сложни форми. По-бавни са, но превъзхождат при оформянето на дебели или сложни части.
- Серво преси: Съчетават скоростта на механичните преси с програмируемото движение на хидравличните. Отличен избор за сложни геометрии и когато е необходимо персонализиране на профила на хода.
При избора на метална штамповъчна преса , разгледайте:
- Тонаж: Максималната сила, която пресата може да приложи. Твърде малка сила води до непълно оформяне или повреда на инструмента. Твърде голяма сила води до загуба на енергия или деформация на детайла.
- Инсулт: Разстоянието, което яремът изминава. Трябва да е достатъчно за височината на детайла и отварянето на матрицата.
- Затворена височина: Разстоянието от ярема (в долната точка на хода) до работната плоча на пресата. Трябва да може да побере вашата матрична система в затворено положение.
- Скорост: Цикли в минута. Механичните преси могат да достигат стотици хода в минута, докато хидравличните и серво пресите варират в зависимост от сложността на детайла.
- Система за подаване: Автоматизираните подаватели вкарват икони или заготовки в матрицата, осигурявайки прецизна повтаряемост и висока производителност при автоматизираното производство штампувачни машини .
Оценка на входните данни за сила и дължина на подаване
Как да разберете колко сила е необходима на вашата стоманен щамповъчен прес матрица? Ето практична формула за операциите по изрязване и пробиване:
- Необходим тонаж = Периметър × Дебелина на материала × Напрежение при срязване
За издърпване или формоване, използвайте крайната якост на опън на материала. Не забравяйте да добавите допълнително за налягането на подложката, изхвърляча и повдигачите. Винаги вземайте предвид всички станции, ако работите с прогресивна матрица – сумирайте натоварванията на всяка стъпка, за да получите общата тонаж ( виж препратка ).
Дължината на подаване и подредбата на лентата са също толкова важни. Крачката – разстоянието между отделните части по лентата – определя колко напредва материала при всеки цикъл. Ефективната подредба подобрява добива от материала и производителността, докато неефективната губи материал и забавя производството.
Когато се съмнявате, консултирайте се с вашия оборудване за штампиране на метал следвайте препоръките на доставчика или производителя на пресата относно тонаж, ход и височина на затваряне. Те ще ви помогнат да постигнете баланс между живота на инструментите, качеството на детайлите и скоростта на производството.
С правилната комбинация от тип матрица, избор на преса и параметри на процеса, вашата щампова операция може ефективно и възпроизводимо да произвежда детайли с високо качество. Следващият етап е да разгледаме как да отстраняваме дефекти и осигуряваме качество на всеки етап от процеса.
Контрол на качеството и отстраняване на неизправности при щамповка
Модели на дефекти и начини за тяхното отстраняване
Винаги ли сте забелязвали малък заострен ръб по ръба на скоба или гънка в метален капак и се чудите какво е станало? Когато става дума за прецизно отпечатване на метали , дори и най-малките дефекти могат да компрометират функционалността, безопасността или външния вид. Нека анализираме най-често срещаните проблеми, които се появяват при производството чрез штамповане и как да ги отстраним, преди да повлияят на вашето компоненти от метално пресоване или шампирани метални компоненти производство:
- Заешки опашки – грапави или остри ръбове, обикновено причинени от износени или тъпи режещи инструменти или неправилен зазор между пробойника и матрицата. Решение: Редовно точете инструментите, проверявайте зазорите и премахвайте заострените ръбове след щамповката.
- Пукане/Разкъсване – Пукнатини или цепнатини често се появяват там, където металът е прекалено разтеглен, особено в близост до огъвания или ъгли. Решение: Настройте радиусите на матриците, подобрете смазването и се уверете, че материала е подходящ за формообразуващата операция.
- Завиване – Вълнисти или неравни повърхности, обикновено в извити или тънки области, причинени от излишен материал или лошо управление на протягане или държача на заготовката. Решение: Оптимизирайте силата на държача на заготовката, настройте протягането, и усъвършенствайте дизайна на матрицата.
- Връщане след извиване – Когато детайлът се връща към първоначалната си форма след формоване, което води до размерни грешки. Решение: Прекомерно огъване на елементите, преточване на инструментите или настройка на геометрията на инструмента и избора на материала.
- Размерно изкривяване – Постепенно губене на точност поради износване на инструмента, деформация на пресата или непостоянно подаване на лентата. Решение: Наблюдавайте състоянието на инструмента, калибрирайте пресата и поддържайте прецизни системи за подаване.
- Повърхностни повреди – Драскотини, вдлъбнатини или въздушни включвания, често причинени от отломки, повърхност на матрицата или мръсния метал. Решение: Поддържайте матриците чисти, проверявайте входящия материал и осигурете чиста производствена среда.
Според препоръките на индустрията, повечето дефекти при тисачни продукти могат да се проследят до избора на материала, дизайна на матрицата или настройките на параметрите. Като системно проверите всеки от тези елементи, ще откривате проблеми навреме и ще намалите скъпоструващото преработване.
Планове за инспекция, които засичат проблемите по-рано
Представете си, че произвеждате голяма партида от штамповани метални части —и чак накрая установявате, че половината не отговарят на спецификациите. Точно тук идва на помощ надежден план за инспекция. Ето как качествено щамповане отборите гарантират, че всеки компонент отговаря на изискванията още от самото начало:
- Първа инспекция по член (FAI): Използвайте номерирани чертежи, за да проверите всяка критична характеристика, провеждайте проучвания за способност по ключови размери и потвърждавайте качеството на повърхностната обработка и състоянието на ръбовете. Това е основата ви за постоянен контрол на качеството.
- Контрол по време на процеса: Оператори или автоматизирани системи измерват детайлите през регулярни интервали, като се фокусират върху характеристиките, които най-вероятно ще се отклонят или износват.
- Планове за проби: Използвайте статистическо съставяне на проби за наблюдение на производството, като коригирате честотата и размера на извадката въз основа на риска от дефекти и изискванията на клиента.
- Проследяване чрез SPC: Графиките за статистически контрол на процесите (SPC) помагат да се откриват тенденции, преди те да станат проблеми, което позволява превантивни корекции.
- Финална проверка: Пълни проверки преди доставка, включително измерване на размери, повърхност и функционални тестове, често с използване на КСМ или оптични системи за високоточни части.
Фиксирайте още в началото референтната схема и извършвайте проверки спрямо нея — това намалява колебанията по некритични характеристики.
В регулираните индустрии или при производство на критични по отношение на задачата шампирани метални компоненти , е задължително спазването на стандарти като ISO 9001 или IATF 16949. Тези рамки насочват както методите за инспекция, така и документацията, осигурявайки проследимост и отговорност през целия производствен процес.
Стабилизиране на производството чрез поддръжка и SPC
Дори и най-добре проектираният процес се нуждае от редовно внимание. Представете си преса, която работи дни наред без проверка на инструмента – в крайна сметка износването настъпва и качеството на детайлите намалява. За да поддържате прецизно штампиране линиите в плавно функциониране:
- Назначавайте превантивно обслужване за матрици, преси и системи за подаване
- Калибрирайте редовно оборудването за инспекция
- Поощрявайте открит обратна връзка между операторите на преси, персонала от инструменталното отделение и екипите по качество, за да се решават проблемите веднага щом възникнат
- Документирайте коригиращи действия и актуализирайте параметрите на процеса въз основа на анализ на основната причина
Комбинирайки предотвратяване на дефекти, надеждна инспекция и превантивно поддържане, ще осигурявате последователно качествено щамповане резултати – независимо дали произвеждате прости скоби или сложни, високоточни тисачни продукти . В следващия раздел ще разгледаме как планирането на разходи и обем играе роля в общата ви стратегия за штампиране, което ще ви помогне да вземате обосновани решения за доставките.
Оценка на разходи, инструменти и стратегия за обем
Какво определя цената на изтеглянето?
Задавали ли сте си въпроса защо цената на брой за метални штампувани части може да варира толкова много? Не става дума само за разходите за материал. В действителност няколко основни фактора взаимодействат и формират крайната оферта. Ако планирате проект за метално изтегляне с голям обем, разбирането на тези фактори ще ви помогне да вземете по-добри решения при осигуряването на доставки и да зададете реалистични очаквания за бюджета си.
| Фактор за разходи | Как влияе върху цената | Какво да уточните в заявката за оферта (RFQ) | Типично смекчаване |
|---|---|---|---|
| Сложност на инструментите | Високи първоначални разходи за персонализиран инструмент за метално изтегляне; повече елементи = по-голяма инвестиция | Брой елементи, сложност на детайла, очакван живот на инструмента | Проектиране с оглед производството (DFM), комбиниране на елементи, когато е възможно |
| Използване на материала / Подредба на лентата | Загубеният материал увеличава разходите за детайл | Подреждане на детайли, ширина на лентата, вид на материала | Оптимизирайте подредбата на лентата в ранен етап, включете доставчика за най-добра икономия |
| Допуски и повърхностна обработка | По-строги допуски или специални повърхностни обработки увеличават разходите за уреди и инспекции | Критични размери, спецификации за обработка, обработка на ръбове | Посочвайте само това, което е функционално необходимо, стандартизирайте където е възможно |
| Честота на цикъла / време за пресоване | По-бавните цикли означават по-високи трудови и накладни разходи за детайл | Геометрия на детайла, дебелина на материала, избор на преса | Опростете дизайна на частта, изберете оптимален прес за работата |
| Вторични операции | Допълнителни стъпки (навиване на резба, отстраняване на ръбове, сглобяване) увеличават разходите | Изисквания след штампирането, нужди от сглобяване | Интегрирайте елементи в штампирането, когато е възможно |
| Опаковане / Логистика | Персонализирано опаковане или дълги маршрути за транспортиране увеличават крайната цена | Спецификации за опаковане, място на доставка, метод на пратка | Стандартизирайте опаковането, набавяйте локално, ако е възможно |
Както виждате, малки избори в дизайна или процеса могат да окажат голямо влияние върху крайната цена. Затова ранното сътрудничество с вашия производител на метални части е толкова ценно — особено при производствени серии штампиране от метал, където мащабът умножава последствията от всяко решение.
Амортизация на инструменти и разсъждения за рентабилност
Нека поговорим за един от най-неправилно разбраните елементи на процеса по изработване на инструменти : амортизиране на разходите за един персонализирана метална штамповка . Инструментът е голяма първоначална инвестиция, но разходите за него могат да бъдат разпределени върху хиляди или милиони части. Ето прост начин да си представим математиката:
- Общ разход за инструменти – Единствен разход за проектиране и изграждане на матрицата ви
- Планиран обем на производството – Колко части очаквате да произведете през целия живот на матрицата
- Амортизация на част – Разделете разходите за инструменти на обема, за да намерите разходите за инструменти на част
- Чувствителност към промени в обема – Ако обемът на поръчката ви намалее, амортизационната разходна стойка за инструменти на детайл расте; ако обемът се увеличи, тя намалява
Представете си, че сте инвестирали 50 000 долара в матрица за производство на 500 000 броя. Това прави по 0,10 долара разход за инструменти на брой. Ако произведете само 50 000 броя, тази сума скачa до 1,00 долар на брой – което показва защо точното прогнозиране и планиране на обемите е толкова важно. Винаги поисквайте два вида оферти: една с амортизация на инструментите в цената на бройка и друга с инструментите като отделна, еднократна такса. Това ви позволява да сравнявате директно и да вземете най-добро решение за вашия бизнес.
Планиране на обем и управление на промените
Когато планирате за отпечатване на метали с голям обем , ще забележите, че колкото повече произвеждате, толкова по-ниска е вашата цена на брой, до определена степен. Но какво се случва, когато прогнозата ви се промени? Ето как да останете гъвкави и да контролирате риска:
- Цитирайте няколко обемни нива: Помолете доставчиците за цени при различни нива на обем, за да разберете ценовите преходи и еластичността
- Валидирайте рано оформлението на лентата: Включването на Вашия партньор по метални штамповки по време на проектирането помага да се максимизира добивът на материали от самото начало
- Заключване на дизайна преди изграждането на инструмента: Промените след изграждането на инструмента могат да бъдат скъпостоящи и да забавят производството
- Планиране за мащабиране и промяна: Помислете дали ще се наложи бързо увеличение или дали вероятно ще има бъдещи корекции в дизайна — изберете инструменти и процеси, които могат да се адаптират
Помнете: успехът на Вашия проект за производство чрез метални штамповки зависи от ясната комуникация, точното прогнозиране и разумните първоначални инвестиции. Като разберете тези фактори, влияещи върху разходите, и стратегиите, можете уверено да сравнявате опциите и да създадете програма за штамповане, която поддържа както бюджета, така и дългосрочните Ви цели.
Следва да видим как штамповането се сравнява с алтернативните процеси за формоване на метали, за да можете да направите най-добрия избор за конкретните изисквания към детайлите.

Как да изберем най-подходящия начин за формоване на метали
Кога да се използва штамповане и кога коване
Представете си, че трябва да произведете високопрочна ос, лека скоба или персонализирана кутия. Трябва ли да използвате стилни штампи , коване или друг процес за формоване на метал? Отговорът зависи от геометрията на детайла, изискванията за якост и обема на производството. Нека разгледаме основните разлики и да ви помогнем да изберете подходящия процес според вашите нужди.
| Опция | Най-добър за | Начални разходи за инструменти | Тенденция на разходите по единица продукт | Механични свойства | Типични допуски | Обем на производството | Бележки |
|---|---|---|---|---|---|---|---|
| Автомобилни ковани части от Шао-И (коване) | Високо натоварени, дебели 3D части; от решаващо значение за безопасността автомобилни и промишлени приложения | Високи (прецизни горещи ковашки матрици) | Намалява с увеличаване на обема | Изключителна якост, устойчивост на удар и умора | Средно до тясна, подходяща за критични размери | Средно до много висока | Идеално за части, при които щанцоване на стомана или заваръчни конструкции биха били недостатъчни; собствено проектиране на штампи и кратки водещи времена |
| Прогресивно щамповане на матрици | Плоски или малко извити 2D/3D части, скоби, кутии | Среден до висок | Много ниска при големи серии | Добра за повечето видове стомана и алуминий; по-ниска от коването при дебели сечения | Много тясна (особено за стомана за штамповане лист) | Високо до много високо | Най-добро за високотонажни, тънкостенни части; бързи цикли |
| Едноетапно щамповане | Прости, малкотонажни или прототипни листови детайли | Ниски | Умерена | Добро (ограничено до дебелина на листа) | Умерена до висока | Ниска до средна | Гъвкаво за кратки серии, персонализирани форми; неподходящо за дебели или структурни части |
| Лазер + Гънка с метален гънгел | Персонализирани кутии, прототипи, производство в малки серии | Много ниско (без твърди форми) | По-висока на част | Добра (само ламарина) | Тясна (зависи от настройката) | Ниска до средна | Най-подходяща за бързо изпълнение, промени в дизайна или сложни изрязвания |
| CNC обработка | Сложни, прецизни или дебели метални части | Ниска до средна | Висока на част | Отлично; поддържа всеки обработваем сплав | Много тясна (подмилиметрова) | Ниска до средна | Идеална за прототипи, сложни геометрии или когато допуснатите отклонения са от решаващо значение |
Как се вписват алтернативи като лазер и CNC
Все още се колебаете? Ако детайлът ви е тънка, плоска скоба или капак, пластов стоманен лист изготовен от стомана за штамповане обикновено е най-бързият и икономически изгоден вариант при производство в големи серии. За прототипи или нестандартни малки серии лазерната рязка в комбинация с метален гънен прес предлага гъвкавост — няма нужда от твърди форми, но разходите за единица продукт са по-високи. CNC машинна обработка е подходяща за дебели, сложни или високоточно изработени компоненти, но е по-малко ефективна за големи партида от прости форми.
Избор според якост, допуски и обем
Кога да изберете коване вместо штамповане или други процеси? Ето няколко сценария:
- Имате ли нужда от максимална якост или устойчивост на удар? Коването подравнява зърнестата структура на метала, осигурявайки по-добри механични свойства в сравнение с стилни штампи или леене. Затова важни автомобилни и индустриални части — като кардани, предавки и безопасностни компоненти — често се коват.
- Правите ли тънки части с висок обем? Щанцоване на стомана с прогресивни матрици е ненадминато по отношение на цена и скорост — мислете за скоби, клипове и електрически терминали.
- Комплексни или дебели 3D форми? Коване или CNC обработка са по-подходящи, тъй като стомана за штамповане обикновено се ограничава до части с еднородна или умерена дебелина.
- Прототипни или специални серии? Лазерно рязане и гънка с гънкащ прес, или CNC обработка, предлагат най-бързия път с минимална подготвка.
Също така е важно да се има предвид процесът на горещо щанцоване за определени автомобилни приложения, където са необходими висока якост и добра формируемост, макар това да изисква загряване на метала преди штамповането — хибрид между студено штамповане и коване.
За силно натоварени, дебели 3D компоненти — където штампованата стомана би изисквала заваръчни съединения или не може да осигури достатъчна дебелина на сечението — обмислете оценка на продуктите на Shaoyi автомобилни ковани части за оптимална якост, мащабируемост и време за доставка.
Накратко, изборът на правилната машина за образуване на метал или процесът е свързан със съпоставяне на геометрията на детайла, механичните изисквания и мащаба на производството с предимствата на всеки метод. Штамповането е най-добро за високотонажни, плоски части; коването е златният стандарт за якост и издръжливост; докато лазерната рязка, гъненето и CNC попълват празнините за персонализирани, малкосерийни или високоточни приложения. Докато преминавате към набавяне, имайте предвид тези компромиси, за да се осигури максимална производителност и икономическа ефективност за следващия проект.
Следващи стъпки и контролен списък за заявка за оферта (RFQ) при набавяне
Основни елементи на заявката за оферта, които вашият штамповчик се нуждае
Готови ли сте да преминете от концепция към производство? Преди да се свържете с металообработваща компания или а производители на штампани метални детайли , уверете се, че вашата RFQ (Заявка за оферта) обхваща всички аспекти. Пълна и ясна заявка не само ускорява процеса на котиране, но и помага да се избегнат скъпоструващи изненади по-късно. Ето практически списък с неща за проверка, който можете да използвате днес:
- Чертежи на детайли и 3D файлове – Включете подробни чертежи и CAD модели заедно с фурнитура, ако е възможно.
- Годишен обем и ЕАЕ (очаквано годишно потребление) – Уведомете доставчика за очакваното търсене.
- Целево водещо време – Кога се нуждаете от първи пробни образци и производствена доставка?
- Спецификация на материала и състоянието му (темпер) – Посочете сплавта, класа и състоянието (напр. алуминий 5052-H32, студеновалцова стомана).
- Дебелина/калибър – Ясно посочете дебелината на материала за вашия платен метал по поръчка проект.
- Критични за качеството размери и допуски – Подчертайте елементите, които изискват строг контрол; включете GD&T, ако е приложимо.
- Изисквания за обработка/покритие – Прахово боядисване, анодиране, пасивиране или други видове покрития.
- Опаковане и етикетиране – Има ли специални инструкции за опаковане или етикетиране?
- Предвидени ревизии – Уведомете доставчиците, ако се очакват промени в конструкцията.
- Изисквания за инспекция – Първа пробна инспекция (FAI), PPAP или друга документация за качество.
- Условия за логистика – Място на доставка, Инкотермс или специални изисквания за доставка.
Покриването на тези точки осигурява вашите производители на метални щампи да могат да предоставят бърза и точна оферта и да настроят правилните стругарско оборудване за ламарини от самото начало.
Проверка на доставчици и препратки към стандарти
Не всички метални щампьори не са еднакви. Как да разберете, че работите с надежден партньор? Ето бърз списък за проверка, който ще ви помогне да сравнявате доставчиците и да намалите риска:
- Опит с подобни части или във вашата индустрия
- Комплексен план за поддръжка на инструменти
- Образци на планове за контрол и процедури за инспекция
- Сертификати като ISO 9001 или IATF 16949
- Възможности за вторични услуги (заваряване, довършителни работи, сглобяване), ако са необходими
- Инвестиции в модерно стругарско оборудване за ламарини и процесни контроли
Когато проверите доставчиците с тези въпроси, ще забележите разликата между прост доставчик и истински производствен партньор – такъв, който може да ви помогне да оптимизирате както разходите, така и качеството през целия производствен процес на штампиране на метали .
Цитирайте при няколко обема и с/без амортизация на инструменти, за да се отчете истинската обща цена.
Следващи стъпки за намаляване на рисковете по графиките
След като сте избрали своя доставчик и финализирали заявката си за оферта, какво следва? Ето няколко разумни стъпки, които ще държат вашия проект в график:
- Поискайте подробен график на проекта, включително ключови етапи (проектиране на инструменти, пробни изпитания, FAI, увеличаване на производството)
- Задайте ясни канали за комуникация относно промените в дизайна или одобренията
- Планирайте ранни прегледи на пробни образци, за да откривате проблеми преди пълното производство
- Съгласувайте документацията и изискванията за инспекция от самото начало
Ако Вашият компонент е на границата между платен метал по поръчка и по-тежък производствен процес, обмислете съвместен преглед на възможностите за производство (DFM) със стампажист и специалист по коване. За дебели компоненти с висока якост, които не са подходящи за стамповане, има смисъл да се оценят решения чрез коване — като тези на Shaoyi автомобилни ковани части —за да сте сигурни, че получавате оптималната комбинация от якост, издръжливост и времетраене.
Като следвате този контролен списък и сътрудничите плътно с Вашия металообработваща компания , ще намалите рисковете по графикa и ще максимизирате стойността на следващия си проект — независимо колко сложни или персонализирани са изискванията Ви.
Често задавани въпроси относно начина, по който работи стамповането
1. Какъв е процесът на стамповане в производството?
Пресоването в производството включва поставяне на плоски листове от метал в преса, където матрицата оформя, реже или формира метала в определени части. Процесът включва операции като изрязване на заготовки, пробиване, огъване и изтягане, всички извършвани при стайна температура за производство в големи серии с висока точност.
2. Какви са основните стъпки в процеса на листово метално пресоване?
Основните стъпки включват проектиране и планиране, настройка на инструменти, подготвяне на металните листове, създаване на матрица и пуансон, изпълнение на пресовата операция, провеждане на контрол на качеството и инспекция, както и извършване на допълнителни операции след пресоването. Всеки етап гарантира, че детайлът отговаря на изискванията за дизайн и качество преди преминаване към производство.
3. Как да избера подходящия материал за метално штамповане?
Изборът на подходящия материал зависи от фактори като якост, обработваемост, еластичност и изисквания за отделна обработка. Често срещани възможности включват нисковъглеродна стомана за икономическа ефективност, алуминий за леки части, неръждаема стомана за устойчивост на корозия и мед или месинг за електрически компоненти. Винаги консултирайте вашия тъпанар и прегледайте техническите листове на доставчика, за да намерите най-подходящия вариант.
4. Кога трябва да разгледам коване вместо табане?
Коването е идеално за части, които изискват максимална якост, дълготрайност и по-дебели триизмерни форми – особено когато табаната стомана би изисквала заваръчни съединения или не може да осигури необходимата дебелина на сечението. За високоякостни автомобилни или индустриални приложения коването често е предпочитаният метод.
5. Каква информация трябва да включа в запитване за оферта (RFQ) за табани металични части?
Подробното заявление за оферта (RFQ) трябва да включва чертежи и 3D файлове, годишни обеми на употреба, спецификации за материал и дебелина, критични размери и допуски, изисквания за отделка, инструкции за опаковане, нужди от инспекция и условия за логистика. Това осигурява точни оферти и гладко стартиране на производството.