 Малки порции, високи стандарти. Нашата услуга за бързо проектиране на прототипи прави валидацията по-бърза и лесна —

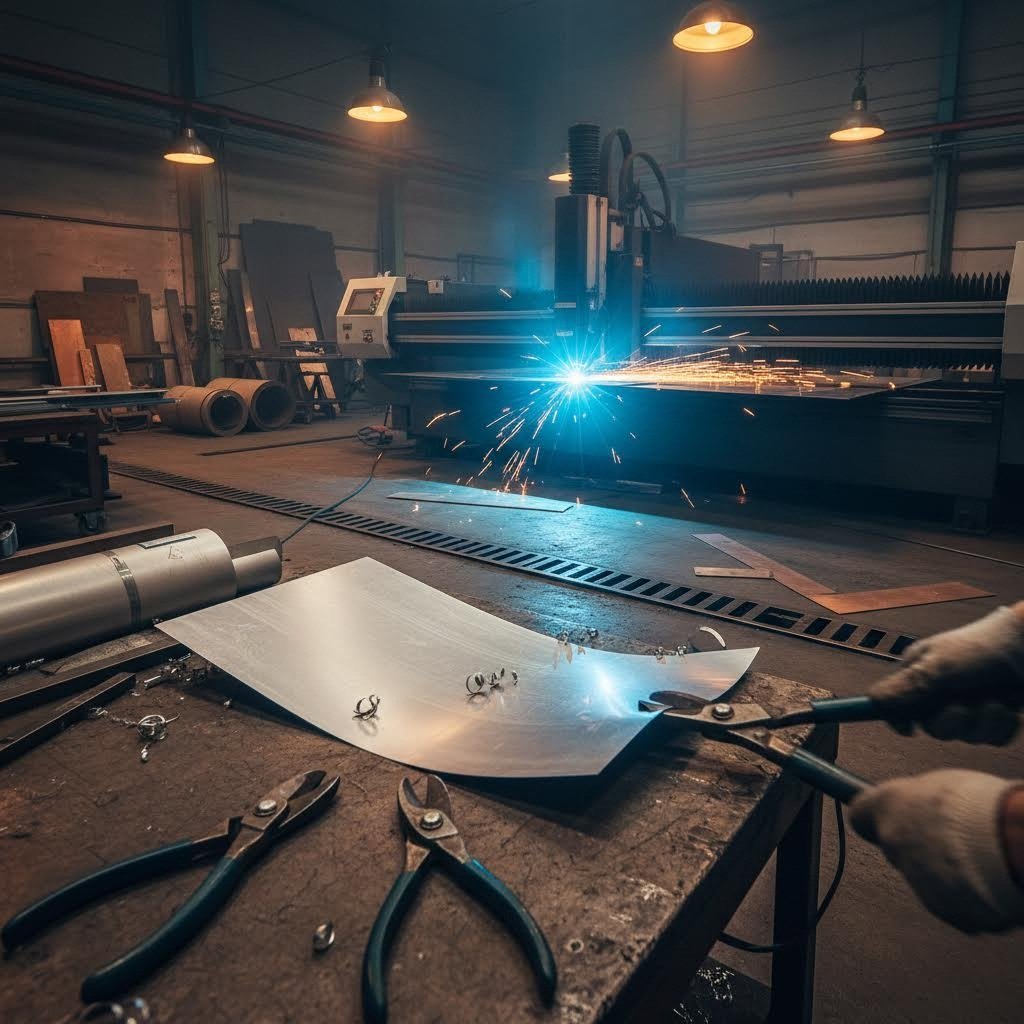
Рязане на метални листове демистифицирано: От ръчни ножици до лазерна прецизност
Разбиране на основите на рязането на листов метал
Задавали ли сте си въпроса какво разделя чистото, професионално рязане на метал от зъбест, негоден за употреба ръб? Отговорът се крие в разбирането на основите на рязането на листов метал. Този задължителен процес при металообработката включва точно премахване на материал от лист от метал, за да се създадат специфични части или компоненти. Независимо дали сте ентусиаст по хоби, заел се с първия си проект, или опитен майстор, работещ по индустриални конструкции, овладяването на тези основи ще преобрази резултатите ви.
Какво дефинира рязането на листов метал
В същността си рязането на листов метал е за трансформиране на плоски метални листове в функционални форми и размери, адаптирани към конкретни нужди. Процесът използва различни инструменти и техники – от прости ножици до сложни лазерни системи, като всеки е разработен за различни приложения и нива на прецизност. Какво прави този умение толкова ценно? То задвижва почти всеки производствен сектор, който можете да си представите – от автомобилна и аерокосмическа промишленост до климатизация и декоративни метални изделия.
Тук започва същността на металообработката. Вие не просто режете материал; формирате суровия метал в нещо с цел. Независимо дали създавате прави линии, извити резове или сложни шарки, успехът зависи от разбирането както на материала, така и на инструментите ви.
Класификации по дебелина, които имат значение
Точно тук много начинаещи се затрудняват. Разликата между метален лист и метална плоча се свежда до един ключов фактор: дебелината. Според отрасловите стандарти, ако метала е с дебелина ¼ инча (6 мм) или повече, той се счита за стоманена плоча. Всичко по-тънко попада в категорията лист.
Защо това различие има значение за вашия проект? Дебелината на плочите обикновено се измерва в инчове, докато за ламарините се използва калибровата система. Тази изглеждаща малка разлика значително влияе върху това кои методи за рязане ще работят ефективно. Метод, идеален за тънки метални листове, може напълно да се провали при по-дебел материал, а използването на погрешен подход при метална плоча може да повреди инструментите ви или да създаде опасни ситуации.
Самата калиброва система първоначално може да изглежда нелогична. По-високи калиброви номера всъщност показват по-тънък материал. Така че лист с калибър 24 е много по-тънък от лист с калибър 10. Ще разгледаме по-подробно спецификите на калибъра в следващия раздел, но засега запомнете: винаги проверявайте дебелината на материала, преди да изберете начина на рязане.
Защо изборът на метод за рязане има значение за вашия проект
Представете си, че се опитвате да изрежете дебела стоманена плоча с ножици за тенекия. Ще се мъчите, ще повредите инструментите си и вероятно ще се нарани. Сега си представете използването на промишлен плазмен резач за деликатна декоративна детайл. Ще харчите пари напразно и може би ще провалите проекта. Принципът е прост: различни дебелини и видове метали изискват специфични методи за рязане.
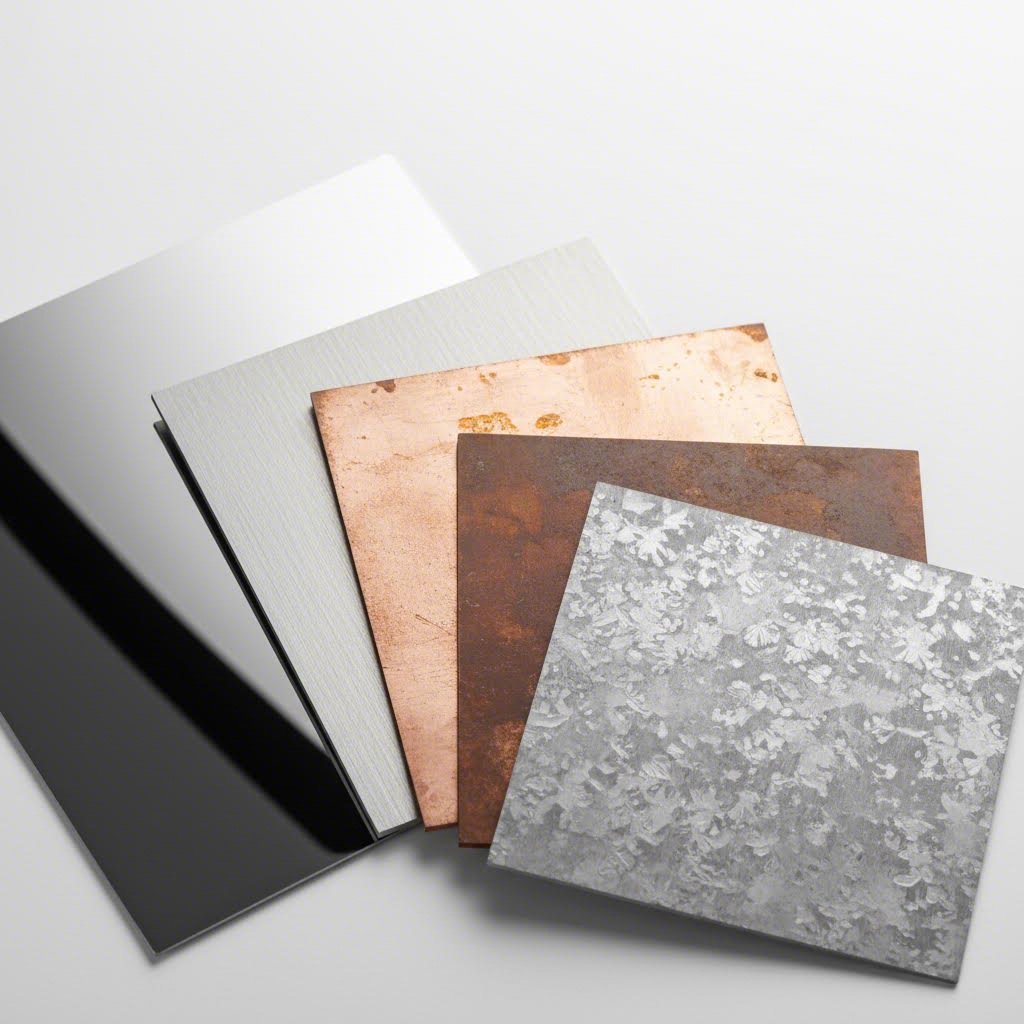
Металите, с които често ще се сблъсквате при рязане на ламарини, включват:
- Алуминиеви – Леки и устойчиви на корозия, но могат да замърсят режещите инструменти
- Стоманения – Универсални и здрави, достъпни в различни класове и дебелини
- Неръждаема стомана – Отлична устойчивост на корозия, но по-трудни за рязане от обикновената стомана
- Мед – Меки и пластични, изискващи специални техники, за да се предотврати деформация
- Галванизирани метали – Покрити с цинк за защита от ръжда, със специални мерки за безопасност по време на рязане
Всеки вид метал реагира по различен начин на режещите сили, топлината и материала на рязещия инструмент. Успехът на вашия проект зависи от избора на правилната техника спрямо типа и дебелината на материала. През цялото ръководство ще разберете кои методи работят най-добре във всеки отделен случай, което ще ви помогне да постигате професионални резултати независимо от нивото ви на опит.
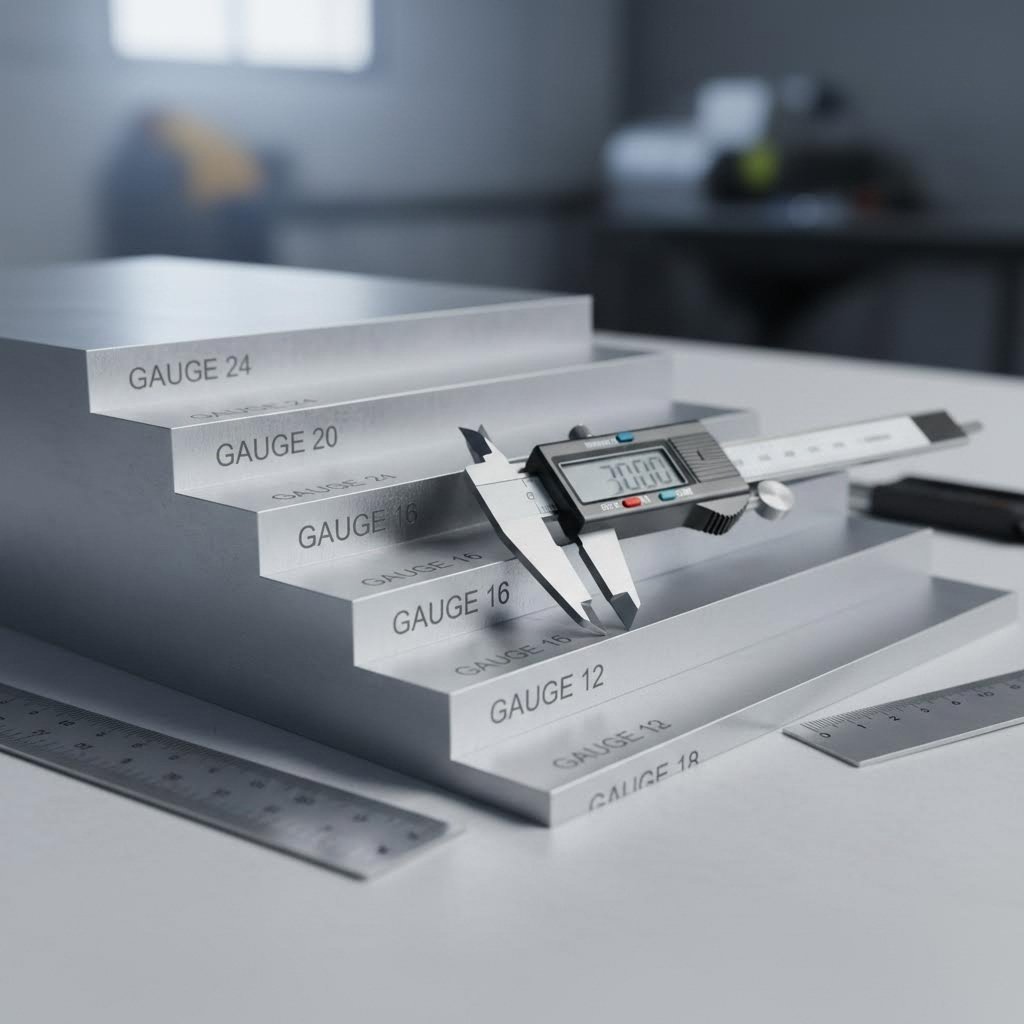
Таблица за калибър на ламарина и ръководство за дебелина
Готови ли сте да разгадаете една от най-заплетените системи в металообработката? Номерирането по калибри затруднява както начинаещи, така и опитни майстори. За разлика от простите метрични мерки, при които по-големите числа означават по-големи размери, системата за калибри на ламарина работи в обратен ред. След като разберете тази особеност, изборът на подходящи инструменти и постигането на чисти резове става значително по-лесно.
Разшифроване на системата за калибри
Системата за калибриране произлиза от британската индустрия за жици, преди да съществуват съвременни измервателни стандарти. Ето ключовото наблюдение: по-нисък номер на калиъра съответства на по-дебел лист, докато по-високият показва по-тънък лист. Така че когато някой спомене 10-калибров стоманолист, има предвид значително по-дебел материал в сравнение с 20-калибров стоманолист.
Защо съществува това обратно номериране? Исторически номерата на калиърите са свързани с това колко пъти жицата е протегната през все по-малки матрици. Повечето преминавания означаваха по-тънка жица и по-високи номера на калиъра . Тази традиционна система продължи да се използва за ламарини, въпреки че днес изглежда противоречива.
Друго усложнение, което заслужава внимание: един и същ калибър не означава една и съща дебелина при различни метали. Например, алуминий с калибър 16 ще има дебелина 1,29 милиметра, докато неръждаема стомана с калибър 16 ще бъде 1,59 милиметра. Това се случва, защото калибровите размери се базират на теглото на металния лист, а различните материали имат различна плътност. Винаги проверявайте дали използвате правилната таблица за калибри за вашия конкретен тип метал.
Ръководство за съвместимост между дебелина и инструмент
Познаването на точната дебелина на вашия материал ви помага да изберете подходящо режещо оборудване. Следната таблица за калибри на ламарини обхваща най-често използваните размери за проекти по рязане на метални листове – от тънки декоративни материали до по-тежки конструкционни стоманени плочи:
| Номер на гейдж | Дебелина (инчове) | Дебелина (мм) | Препоръчителни категории инструменти |
|---|---|---|---|
| 24-ти калибър | 0.0239 | 0.61 | Ръчни ножици, ножици с формата на ножици |
| 22-ти калибър | 0.0299 | 0.76 | Авиационни ножици, ръчни ножици |
| калибър 20 | 0.0359 | 0.91 | Авиационни ножици, ръчни пробойници, електрически ножици с леко натоварване |
| 18-голям | 0.0478 | 1.21 | Електрически ножици, електрически пробойници, джигсей с нож за метал |
| 16-калибър | 0.0598 | 1.52 | Електрически ножици, електрически пробойници, ъглошлайф с отрязващ диск |
| 14-калибър | 0.0747 | 1.90 | Тежкотоварни електрически ножици, ъглошлайф, плазмен рязач |
| 12-калибър | 0.1046 | 2.66 | Ъглошлайф, плазмен рязач, професионално оборудване за изработване |
| 11-gauge | 0.1196 | 3.04 | Плазмен рязач, кислородно-горивна горелка, индустриални ножици |
| 10-калибър | 0.1345 | 3.42 | Плазмен рязач, кислородно-горивна горелка, професионално CNC оборудване |
Забележете как се променят изискванията за инструменти с увеличаване на дебелината. За тънки материали като 24-ти и 20-ти калибър простите ръчни инструменти работят отлично. Когато достигнете 18-ти калибър и по-дебели материали, задължително са електрически инструменти за ефективно рязане. При стомана с дебелина 14 калибър (приблизително 1,90 мм или 0,0747 инча) навлизате в обхват, при който тежкотоварното оборудване показва истинските си предимства. Този калибър често се използва за жилищни стоманени греди, кутии и ограждения.
Дебелината на стоманата от 11 калибър е приблизително 3,04 мм (0,1196 инча). На това ниво работите с материал, подходящ за каросерии на камиони, строителни панели и приложения с носеща функция. Ръчните инструменти просто няма да свършат работа тук. Ще са ви необходими плазмени рязачки, окси-горелки или промишлени ножици, за да работите ефективно със стоманени плочи в този диапазон.
Когато номерата на калибрите объркват
Звучи сложно? Не сте сами в това усещане. Няколко фактора правят системата с калибри особено трудна:
- Съществуват различни стандарти – Американският стандарт за калибри и Бирмингамският калибър използват леко различни стойности
- Видът на метала има значение – Стоманен лист с дебелина 2 мм може да има различен калибров номер в сравнение с алуминиев лист със същата дебелина
- Регионални различия – В някои страни предпочитат директни измервания в милиметри пред калиброви номера
- Обхват на допуските – Действителната дебелина може леко да се различава от номиналните спецификации на калибра
Когато точността има значение, винаги измервайте материала си директно, вместо да разчитате само на посочените номера на калиъра. Прост шублер или микрометър ви дава точни показания за дебелината, което премахва предположенията при избора на режещи инструменти.
За проекти, изискващи точни спецификации, помислете за този практически подход: преобразувайте номерата на калиъра в реални измервания, като използвате надеждна таблица за размери на калиъри, след което потвърдете чрез физическо измерване. Тази двойна проверка предотвратява скъпоструващи грешки, особено при работа със скъпи материали или малки допуски.
След като основите за дебелината вече са ясни, сте готови да изследвате конкретните инструменти, които осигуряват чисти резове. Започвайки с ръчни инструменти за материали с по-малък калибър, ще откриете точно какви оборудване отговаря на нуждите на вашия проект.
Ръчни инструменти за рязане на ламарина
Когато работите с тънки материали по калибър, правилните ръчни инструменти осигуряват изненадващо професионални резултати, без разходите или сложността на електрическо оборудване. Те ръчни ножици за рязане на ламарини опции полагат основата на всеки инструментариум на металоработник, предлагайки контрол и прецизност, които начинаещите бързо могат да овладеят. Нека разгледаме основните ръчни инструменти, които правят рязането с леки натоварвания достъпно за всеки.
Авиационни ножици и кога да използвате всеки цвят
Забелязали ли сте онези ярки дръжки на ножиците за метал в строителния магазин? Тази цветна кодираща система не е само за естетика. Тя ви показва точно какво прави най-добре всеки инструмент. Разбирането на тази проста система предотвратява раздразнение и повредени детайли.
Ето какво означава всеки цвят:
- Червени дръжки – Конструирани за рязане на леви извивки и прави линии. Ориентацията на острието позволява отпадъчният материал да се навива надясно, докато режете наляво.
- Зелени дръжки – Създадени за десни извивки и прави резове. Те работят обратно на червените ножици, като навиват отпадъка наляво, докато следвате десни извивки.
- Жълти дръжки – Конструирани специално за прави резове. Те режат в двете посоки, без да навиват материала, което ги прави идеални за дълги, линейни резове.
За повечето начинаещи е логично да започнат с комплект от всички три цвята. Бързо ще разберете в кои ситуации се налага използването на всеки тип. Когато режете медни листове или други меки материали, тези ножици се плъзгат с минимално усилие. Ключовото е да съпоставите цвета на ножиците с желаната посока на реза, преди да започнете.
Ръчни ножици за прецизни прави резове
Когато проектът ви изисква напълно прави ръбове, специализираните метални ножици надминават авиационните ножици. Тези ножици за рязане на метал имат по-дълги острия и по-голяма рамка за лостово действие, което позволява по-чисти резове през тънки листове до около 1/8 инч дебелина.
Защо е важно правилният подбор на ножици за метал? Металните ножици осигуряват по-чисти, беззастресени резове в сравнение с много алтернативи. Двете зъбести острия създават ножовицащо действие, което прерязва материала, без да деформира заобикалящата област.
Най-добрите варианти за ножици за рязане имат няколко общи характеристики:
- Удобни дръжки за хващане, които намаляват умората по време на продължителна употреба
- Механизми с пружинно задвижване, които автоматично отварят лезвието между отделните резове
- Сменяеми или възможност за заточване лезвия за дългосрочна стойност
- Конструкции със сложен лостов механизъм, които умножават силата на рязане
За рязане на медни листове и други меки материали, ръчни инструменти като метални ножици или авиационни ножици се справят добре, позволявайки чисти и контролирани резове . Винаги закрепвайте медния лист правилно преди рязане, за да се предотврати нежелано движение. Остро лезвие и сигурна ръка правят цялата разлика при работа с този пластичен метал.
Нибелери срещу ножици за извита работа
Сега идва голямата дебата: нибелер срещу ножица за сложни задачи по рязане. И двата инструмента се справят с извита работа, но работят по напълно различни принципи и дават различни резултати.
Режещият нож се задвижва от възвратно движещ се пунч, който бързо се движи нагоре и надолу, премахвайки малки полумесецовидни парчета от метала. Това създава тесен канал, докато насочвате инструмента по линията на рязане. Металните ножици, напротив, използват противоположни остриета, които се движат по подобие на ножици.
Предимства на ножовете
- Отличават се при рязане на дебели материали с минимални отпадъци
- Справят се ефективно със сложни модели и тесни криви
- Не оставят остри ръбове на режещите повърхности, което намалява необходимостта от довършителна обработка
- Работят добре върху гофирани и неравни повърхности
- Предизвикват по-малко деформация на материала по време на рязане
Недостатъци на ножовете
- Създават малки отпадъчни стружки, които изискват почистване
- Произвеждат повече шум в сравнение с ножиците по време на работа
- Може да изисква практика за постигане на прави линии
- По-висока първоначална цена в сравнение с обикновените ножици
Предимства на металните ножици
- Осигуряват изключителна прецизност при тънки листове
- Създават ръбове без задръжки, които изискват минимална довършителна обработка
- По-интуитивни за ефективна употреба от начинаещи
- По-ниска покупна цена и изисквания за поддръжка
- Тиха работа, подходяща за всеки тип среда
Недостатъци на металните ножици
- Затрудняват се при материали с дебелина над 3 мм
- Може да остави бръчки на резените ръбове с по-дебели материали
- Ограничена ефективност върху вълнообразни повърхности
- Може да причини умора на ръцете при продължителна употреба
Какво ще избереш? Ножиците се отличават в резбата на дебели материали и сложни форми, докато металните ножици са идеални за тънки листове и прецизни рязания. За повечето проекти, които включват 20 или по-тънък материал, качествените метални ножици дават отлични резултати. Когато се занимавате с по-дебели габарити или сложни модели, гризачът става по-практичен избор.
Прегледайте типичните си проекти, преди да инвестирате. Ако работите с тънки декоративни метали или с климатични канали, ножиците ще ви служат добре. За метални покриви, автомобилни работи или артистични произведения с сложни извивки, гризачката заслужава своето място в инструментарията.
С овладяването на ръчните режещи инструменти, може да се чудите кога е време да се превърнете в двигателно оборудване. С нарастването на мащаба или сложността на вашите проекти, електрическите инструменти могат драстично да повишат ефективността и способността ви.
Електроинструменти, които ускоряват рязането на метал
Готови ли сте да се справите с по-дебели материали и по-големи проекти? Когато ръчните инструменти достигнат границите си, електрическите инструменти за рязане на ламарина поемат задачата, осигурявайки по-бързи резултати и по-малко физическо натоварване. Тези задвижвани инструменти превръщат трудните резни операции в лесно изпълними задачи и отварят възможности, които ръчните методи просто не могат да осигурят. Нека разгледаме трите основни категории електроинструменти, които ще повишат възможностите ви за рязане на метални листове.
Електрически ножици за работа с дебели материали
Представете си, че режете 14-калибров стоманолист с лекотата, с която ножиците прерязват картон. Точно това предлага качествен електрически ножов резач за метал. Тези инструменти използват задвижвани с мотор blades, които имитират рязещото действие на ръчни ножици, но с много по-голяма мощност и скорост.
Електрическите ножици за ламарина предлагат няколко предимства спрямо своите ръчни аналогове:
- Намалена умора – Моторът върши работата, като вие се фокусирате само върху насочване на рязането
- Постоянна рязеща сила – Всеки рязане получава една и съща мощност, независимо от силата на хватката ви
- По-голяма вместимост по калибър – Повечето модели обработват материали до 12 калибър или по-дебели
- По-кратко време за изпълнение – Това, което ръчно отнема минути, с електрически ножици се извършва за секунди
- По-чисти ръбове – Движени от мотор, лезвиетата осигуряват по-еднородни резултати в сравнение с уморени ръчни движения
Когато избирате тежък металорязачен апарат от категорията ножици, обърнете внимание на максималния калибърен рейтинг. Производителите обикновено посочват отделни стойности за мека стомана и неръждаема стомана, тъй като за рязане на неръждаема се изисква по-голямо усилие. Ножици, оценени за 18 калибър неръждаема стомана, могат лесно да справят с 14 калибър мека стомана.
При работа с електрически ножици за безопасността трябва да пазите пръстите си извън пътя на лезвието и да носите защитни очила, за да се предпазите от малки метални частици. Винаги изключвайте захранването, преди да сменяте лезвията или да извършвате техническо обслужване.
Електрически перфоратори за сложни криви
Трябва ли да навигирате сложни шаблони или тесни криви? Електрическите дупчици комбинират прецизността на ръчните дупчици с моторно задвижвана скорост. Тези инструменти избиват малки полумесецовидни парчета едно след друго, създавайки тесен канал, който следва желания път.
Какво прави електрическите дупчици изключителни като прецизни инструменти за рязане на метал? Те режат, без да деформират заобикалящия материал. За разлика от ножиците, които могат да огънат тънки листове по време на рязане, дупчичите премахват материала чисто. Тази характеристика е от голяма стойност при работа по видими повърхности, където качеството на ръба има значение.
Конструкцията на металичния рязач при електрическите дупчици генерира минимално топлина по време на работа. Това предимство е от решаващо значение при рязане на покрити материали като галванизирана стомана, където излишната топлина може да повреди защитните покрития или да отдели вредни изпарения.
Въпреки това, електрическите изрязващи машини произвеждат отпадъчни стружки, които изискват почистване. Подредете работното си място съответно и помислете за вакуумно приспособление, ако моделът ви го поддържа. Предпазни очила са задължителни, тъй като стружките могат непредсказуемо да излитат по време на рязане.
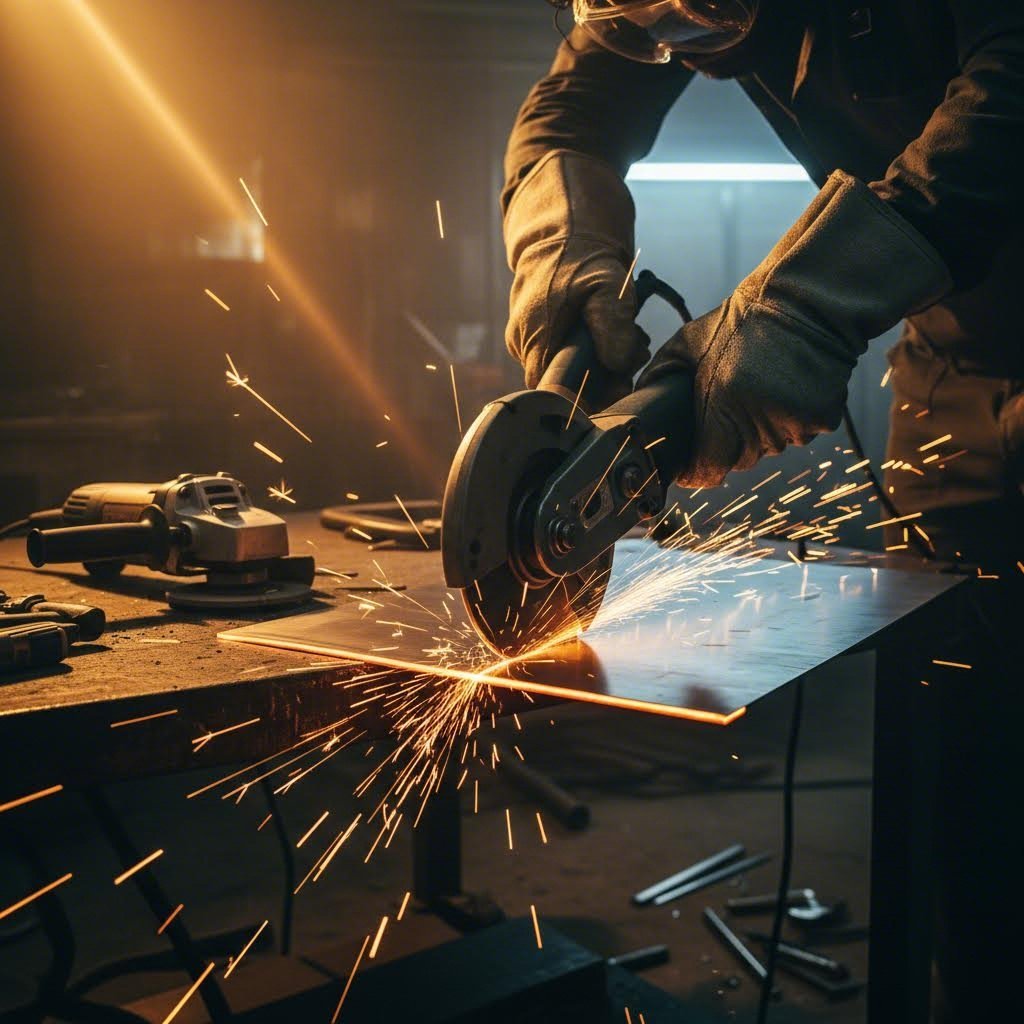
Ъглови шлайфове с режещи дискове
По отношение на универсалността, малко инструменти могат да се сравняват с ъгловия шлайф, оборудван с режещ диск. Тази комбинация се справя с всичко – от тънък листов метал до дебели стоманени плочи, което го прави задължителен инструмент в работилницата за сериозни монтажници.
Разбирането на ширината на реза става особено важно при използване на ъглови шлайфове. Ширината на реза (kerf) се дефинира като ширината на реза или количеството материал, премахнато при процеса на рязане. При режещите дискове тази ширина обикновено е между 1/16 и 1/8 инча, значително по-голяма в сравнение с тази при ножиците или изрязващите машини.
Защо дебелината на рязане е важна за вашите проекти? При рязане на части до прецизни размери трябва да се има предвид отстраняването на материал. Ако програмирате квадрат 6"x6" и процесът на рязане отстрани 0,200" материал, крайната част ще бъде по-малка от предвиденото. За прецизни работи винаги режете от отпадната страна на линията и включете дебелината на рязане при начертаването на контура.
Изборът на дисковете значително влияе на резултатите от рязането. Има различни абразивни зърна, които трябва да се вземат предвид :
- Алуминиев оксид – Най-често срещаният и икономичен избор, идеален за въглеродна стомана, легирани стомани и бронз. Осигурява надеждна издръжливост и добри скорости на рязане.
- Керамично алуминиев оксид – Премиум зърно, което се разрушава при контролирани темпове, постоянно създавайки нови режещи ръбове. Най-добро за прецизни работи и труднообработваеми материали. Реже по-студено, минимизирайки оцветяването.
- Цирконий – Смес от алуминиев оксид и циркониев оксид, която предлага изключителна издръжливост и ниско съотношение цена-рязане. Отличен за високоефективно рязане на различни видове стомана.
резните дискове 045 са проектирани специално за рязане на метал и имат значително по-тънки размери в сравнение с шлифовъчните дискове. Тази по-тънка конструкция, или намаленото напречно сечение, отстранява по-малко материал и изисква по-малко усилия за рязане.
При работа с ъглови шлифовъчни машини безопасността изисква сериозно внимание. Винаги носете маска за лице, предпазни средства за слуха и тежки ръкавици. Закрепете здраво обработвания предмет и никога не премахвайте предпазната капачка на диска. Искрите могат да стигнат на голямо разстояние, затова освободете района от леснозапалими материали преди рязане.
Сравнение на електрически инструменти за рязане на метал
Изборът между тези електрически инструменти за рязане на ламарина зависи от конкретните изисквания на вашия проект. Следното сравнение помага да съпоставите всеки тип инструмент с подходящите приложения:
| Тип електрически инструмент | Скорост на рязане | Прецизен нивелир | Качество на ръба | Максимална вместимост по калибър | Най-добри приложения |
|---|---|---|---|---|---|
| Електрически ножици | Бързо | Високо | Чисто рязане, минимални задръжки | лека стомана с калибър 12 | Прави резове, леки кривини, работа с Вентилация, Отопление и Климатизация (ВОК) |
| Електрически ножици за метал | Умерена | Много високо | Отлично, без деформация | лека стомана с дебелина 14 калибъра | Сложни извивки, гофрирани материали, фини работи |
| Ъглов гред | Много бързо | Умерена | Изисква довършителна обработка | пластина 1/2" и по-дебела | Дебели материали, груби резове, разрушаване |
Забележете как всеки инструмент заема отделна ниша. Електрическите ножици се отличават с бързина на рязане и добро качество на ръба. Електрическите дупчищи устройства жертват част от скоростта в полза на по-висока прецизност и пълно липсваща деформация на материала. Ъгловите шлайф машини жертвят фината обработка на ръба в името на суровата режеща сила при дебели материали.
За работилници, които обработват разнообразни проекти, притежаването на всички три вида инструменти е логично. Всеки инструмент решава ситуации, в които другите се затрудняват. Добре осигурен металоработник използва електрически ножици за тръбопроводи, преминава към дупчищо устройство за декоративни извивки и схваща ъгловата шлайф машина, когато трябва да се режат дебели конструкционни елементи.
Колкото впечатляващи да са тези електрически инструменти, някои проекти изискват още по-голяма прецизност. Когато допуснатите отклонения намалеят и сложността нарасне, напреднали технологии като лазерно рязане и CNC системи осигуряват резултати, които ръчни инструменти просто не могат да постигнат.
Методи за прецизно рязане с лазер и CNC
Какво се случва, когато вашият проект изисква допуснати отклонения, измервани в хилядни от инча? Когато сложни шаблони трябва да се повтарят перфектно в стотици парчета? Тук напредналите технологии за рязане променят възможното. Лазерен рязач или CNC система постигат нива на прецизност, които ръчните инструменти просто не могат да достигнат, отваряйки врати към професионално производство на ламарини, което някога беше достъпно само за големи производствени обекти.
Как лазерното рязане постига прецизни ръбове
Представете си лъч от концентрирана светлина, толкова мощен, че изпарява метал на микроскопично ниво. Това е лазерната рязка в действие. Лазерният лъч е силно фокусиран, което позволява сложни резове с минимални зони, засегнати от топлина. Тази прецизност осигурява създаването на сложни дизайни и фини детайли, които биха били невъзможни при механичните методи за рязане.
Защо лазерната рязка осигурява толкова изключително качество на ръба? Процесът премахва материала чрез топене и изпаряване, а не чрез механично срязване. Лазерната рязка произвежда чисти, без заострени ръбове резове, като по този начин отпада нуждата от допълнителни довършителни процеси . Фокусираният лъч топи или изпарява метала, като резултатът са гладки ръбове без заострени части, шлака или деформации.
Универсалността на лазерните системи обхваща множество материали. Лазерната рязка може да се използва върху широк спектър от метали, включително стомана, алуминий, неръждаема стомана, мед и други. Тя се справя с различни дебелини – от тънки листове до дебели плочи, което я прави подходяща за разнообразни приложения в автомобилната, аерокосмическата, електронната и архитектурната индустрия.
Гъвкавостта при проектирането е още едно голямо предимство. Използването на софтуер за компютърно подпомагано проектиране (CAD) осигурява прецизен контрол върху процеса на рязане, което улеснява създаването на сложни геометрии, шаблони и дори гравиране или етсване върху метални повърхности. Тази гъвкавост насърчава иновациите и персонализацията, които механичните методи трудно могат да повторят.
Значение на CNC в металообработката
Вероятно сте виждали споменаването на „CNC“ в дискусии по металообработка. Но какво всъщност означава това за вашите проекти? Обработката с компютърно числено управление (CNC) е производствен процес, при който програми управляват и задействат машинни инструменти. Тези програми, написани на специализирани езици, контролират всеки аспект на рязането с изключителна последователност.
Превъзходството на CNC технологията се крие в повторяемостта. Като премахва ръчните операции, CNC обработката елиминира човешките грешки, което повишава точността на детайлите. Тя прави възможно постигането на по-строги допуски, като запазва еднаквост през целия производствен цикъл. Независимо дали ви трябват десет или десет хиляди детайла, всяко от тях точно отговаря на първоначалните спецификации.
Подобренията в скоростта усилват тези предимства в точността. CNC обработката намалява времето за изпълнение, като ускорява самите обработки. . Машините оптимизират скоростите на подаване и рязане въз основа на свойствата на материала, осигурявайки ефективно премахване на материала при минимизиране на отпадъците. В комбинация с намалените изисквания за обработка на детайлите, тези фактори значително намаляват общото време за машинна обработка.
Съвременното производство на ламарини често комбинира няколко процеса с ЧПУ. Система с числено програмно управление може да извърши първоначалното формоване, докато лазерното или плазмено рязане се занимава с по-детайлната работа. Машините с ЧПУ могат да произвеждат сложни части, просто следвайки предварително зададена траектория, като софтуерът CAM генерира инструкции дори за най-сложните елементи.
Кога да се аутсорсва към професионални производители
Ето истината за рязането на ламарини със собствени усилия: има момент, в който това вече не е разумно. Разбирането на тази граница ви спестява време, пари и разочарование.
Когато вашият проект изисква допуснати стойности под 0,005 инча, включва производствени количества над 50 броя или изисква сертифицирани стандарти за качество за приложения с критично значение за безопасността, професионалните услуги по обработка обикновено предлагат по-добра стойност спрямо самостоятелно изпълнение на работата.
Търсенето на „рязане на ламарина наблизо“ или „обработка на метал наблизо“ показва множество местни възможности. Но как решавате кога да се обадите? Помислете за следните фактори:
- Изисквания за допуск – Професионалните лазерни системи постигат прецизност, която ръчни инструменти не могат да повторят
- Производствен обем – Първата част от серийното производство винаги е най-скъпата поради настройката , но разходите рязко намаляват с увеличаване на количеството
- Материални разходи – Професионалните цехове закупуват материали на голямо, често предавайки икономията на клиентите
- Качество на финала – Когато външният вид на ръба има значение, лазерното рязане премахва нуждата от последваща обработка
- Ограничения по време – Това, което ви отнема цял уикенд, може да изисква само часове в професионален цех
Икономиката се променя изненадващо бързо. Една малка част струва около 29 долара, когато поръчате само една, но ако поръчате десет, цената пада до само 3 долара на част. Това драстично намаление отразява ефективността, постигната при производството на множество единици. Повечето материали имат отстъпки, започвайки от втората част и продължавайки при големи поръчки, където спестяванията могат да достигнат до 86% в някои случаи.
Производителите професионалисти извършват и операции, които надхвърлят простото рязане. Изработката на ламарини включва огъване, формоване, заваряване и довършителни процеси, изискващи специализирано оборудване. Когато проектът ви изисква множество операции, често е по-икономично да се предаде цялата работа на аутсорсинг, вместо да се инвестират допълнителни инструменти.
След като разберете напредналите методи за рязане, ще сте по-добре подготвени да прецените кой подход отговаря на всеки проект. Но изборът на правилната технология е само част от уравнението. Различните метали реагират по уникален начин на различните методи за рязане, което изисква специфични техники и корекции.
Успешно рязане на различни видове метали
Случвало ли ви се е да използвате същото длето, което сте употребили за стомана, и да опитате да режете алуминий, само за да установите, че инструментът ви е запушен с лепкави метални стружки? Всеки вид метал изисква свой собствен подход. Това, което работи отлично върху мека стомана, може напълно да се провали при рязане на неръждаема стомана или да създаде опасни ситуации при работа с галванизирани материали. Разбирането на тези разлики отличава разочаровашите режещи операции от резултати с професионално качество.
Рязане на алуминиеви листове без залепване
Алуминиевите листове представляват уникално предизвикателство, което хваща много металоработници неподготвени. Този лек и устойчив на корозия материал има склонността да "залепва" режещите инструменти. Меката и лепкава природа на алуминия причинява той да се залепя за зъбите на длетото и режещите ръбове, което намалява ефективността и потенциално може да повреди както инструмента, така и детайла.
Защо алуминият се държи по този начин? Ниската му температура на топене и ковкост означават, че рязането генерира топлина, която нажежда метала точно толкова, че да стане лепкав. Решението включва няколко стратегически корекции:
- Използвайте по-високи скорости на рязане – По-бързо движение на острието намалява времето на контакт, предотвратявайки натрупването на топлина, което причинява залепване
- Изберете подходяща геометрия на зъбите на острието – Остриета с по-малко, по-големи зъби и по-агресивни ъгли на завалка отстраняват стружките по-ефективно
- Прилагайте смазка за рязане – Восъчни пръти, WD-40 или специализирани течности за рязане на алуминий намаляват триенето и предотвратяват залепване
- Избирайте остриета с твърди метални върхове или от бързорежеща стомана – Тези материали по-добре устояват на натрупването на алуминий в сравнение с обикновената въглеродна стомана
За тънки алуминиеви листове авиационните ножици работят добре при рязане на малки участъци. Електрическите пробойници се справят отлично при извиване по криви линии, без проблемите със залепване, които имат инструментите с непрекъснато острие. При използване на циркулярни или лентови триони, наблюдавайте образуваните стружки по време на рязането, за да направите корекции . Идеално е стружките да са тънки и леко навити. Ако стружките изглеждат прашни или силно навити, коригирайте скоростта на подаване и скоростта на диска съответно.
Едно важно предупреждение за проекти, включващи заваряване на алуминий след рязане: поддържайте ръбовете чисти и без остатъци от смазка. Замърсителите пречат на качеството на заварката и могат да причинят порестост в готовите съединения.
Предизвикателства и решения при неръждаема стомана
Неръждаемата стоманена ламарина представлява противоположен проблем спрямо алуминия. Вместо да е прекалено мека, тя е изключително твърда и се утвърждава при обработка по време на рязане. Това означава, че материала всъщност става по-твърд по време на рязането, като всяко следващо преминаване става по-трудно от предишното.
Работата с класове като неръждаема стомана 316 изисква разбиране на това поведение при утвърждаване. Ако спрете по средата на рязане или използвате тъпи дискове, които трият вместо да режат чисто, създавате затвърден повърхностен слой, който се съпротивлява на допълнително рязане. Основните принципи за успех включват:
- Поддържайте постоянно налягане – Никога не оставяйте острието да стои или трие без рязане
- Използвайте по-бавни скорости на рязане – За разлика от алуминия, неръждаемата стомана се нуждае от намалена скорост, за да се избегне прегряване
- Дръжте остриетата остри – Тъпите инструменти предизвикват триене, което ускорява втвърдяването при обработка
- Прилагайте достатъчно рязане флуид – Смазките намаляват триенето и топлината, значително удължавайки живота на инструмента
- Избирайте остриета от кобалт или карбид – Тези материали издържат на абразивния характер на неръждаемата стомана
За листова неръждаема стомана с дебелина до 18 калибъра, качествени електрически ножици с хардунирани остриета работят добре. По-дебелата неръждаема стомана изисква плазмено рязане или лазерни системи за чисти резултати. Ъгловите шлайфове могат да се използват, но генерират значително количество топлина, което може да промени цвета на материала и да наруши корозионната устойчивост в близост до ръбовете на реза.
Съображения за безопасност при работа с оцинковани метали
Тук безопасността става абсолютно от решаващо значение. Оцинкованата стомана представлява въглеродна стомана, покрита със слой цинк, за подобряване на корозионната устойчивост. Въпреки че този слой осигурява отлична защита срещу ръжда, той създава сериозни опасности по време на операциите по рязане.
Разбирането как да се реже безопасно листова оцинкована стомана започва с разпознаването на рисковете. Когато се нагрее над приблизително 900°F (482°C), цинковото покритие изпарява и създава фуми от оксид на цинк. Вдишването на тези фуми причинява "метално треска", състояние като грип, симптомите на което включват треска, главоболие и мускулни болки.
При използване на топлинни методи за рязане, като плазма или ъглови шлайфове, осигурете добра вентилация на помещението. Използвайте локална екстракция на дим или вентилатор с отвод, за да се предотврати натрупването на оксид на цинк в затворени пространства. Силно се препоръчва използването на подходящо прилегнал респиратор, сертифициран за метални дими, при всяка операция, при която може да се отделят дими.
За проекти с оцинковани листове студените методи за рязане минимизират образуването на дими:
- Ламаринени ножици и авиационни ножици – Най-ефективни за ръчно рязане на оцинковани стоманени листове с дебелина под 1 мм
- Електрически ножици и пробойни устройства – Идеални за оцинкована стомана със средна дебелина (1–2 мм), особено при контурно рязане. За разлика от абразивни инструменти, те не създават значително топлина, което запазва цялостта на цинковия слой
- Кръгли триони с подходящи дискове – Диск с карбидни зъбци и 24–40 зъба на инч при по-ниски обороти (приблизително 3500–4000 об/мин) минимизира отлущването на цинка
След рязане на оцинковани материали, изложената стомана по ръбовете на реза е особено податлива на ръжда. Нанесете съединение за студено оцинковане, богато на цинк, или спрей боя, специално формулирана за оцинковани повърхности, за да възстановите защитата срещу корозия.
Параметри на рязане при различните видове метали
Адаптирането на подхода спрямо всеки вид метал значително подобрява резултатите. Следната сравнителна таблица дава отправни точки за често използвани материали:
| Метален тип | Препоръчителни инструменти | Тип нож/диск | Настройка на скоростта | Специални съображения |
|---|---|---|---|---|
| Алуминиев лист | Авиационни ножици, електрически пробойни устройства, кръгли със съдържащи карбид дискове | Бързорежеща стомана или карбид с голямо разстояние между зъбите | Висока скорост, умерено подаване | Използвайте смазка, за да предотвратите залепване; почистете ръбовете преди заваряване |
| Мека стомана | Електрически ножици, ъглов шлайф, плазмен рязач | Дискове с абразив от алуминиев оксид или цирконий | Умерена скорост, постоянна подаване | Стандартен подход; най-предпазлив тип метал |
| Неръждаема стомана (304/316) | Плазмен рязане, лазер, тежки ножици | Клинчета от кобалт или карбид; керамични абразиви | Бавна скорост, постоянно налягане | Избягвайте задържане; използвайте режеща течност; очаквайте по-бързо износване на диска |
| Оцинкована стомана | Ножици, перфоратори, ножици (предпочитат се студени методи) | С върхове от карбид за електрически инструменти | По-ниски скорости за намаляване на топлината | Осигурете вентилация; носете респиратор; обработете ръбовете след рязане |
| Мед | Авиационни ножици, ръчни ножици, скарифициращи устройства | Лезвия с фини зъби; избягвайте агресивни зъби | Умерена скорост, леко налягане | Поддържайте материала, за да се предотврати деформация; внимателно премахвайте заострените ръбове |
| Мед | Ръчни ножици, джигсави, лентови триони | Лезвия с фини зъби от биметал | Умерена скорост, постоянна подаване | Материалът може да се напука при натоварване; фиксирайте го стабилно |
Мед и месинг: Премеждията с меките метали
Медта и месингът имат свои собствени предизвикателства. И двата материала са сравнително меки, което означава, че лесно се деформират под налягане при рязане. Ключът към успеха е правилната поддръжка и внимателна техника.
Когато режете мед, задържайте здраво материала, за да се предотврати движение, но избягвайте прекомерно стягане, което причинява вдлъбнатини. Използвайте само остри инструменти, тъй като тъпите лезвия разкъсват вместо да режат, оставяйки неравни ръбове, които изискват обширна довършителна обработка. Ръчните ножици и авиационните ножици работят отлично за тънки медни листове, докато моторизираните скарифициращи устройства обработват по-дебели сечения без деформация, която може да възникне при използване на ножици.
Латунта изисква подобна грижа, но добавя притеснения относно крехкостта. За разлика от снизходителната ковкост на медта, латунта може да се напука, ако се огъва или подлага на прекомерно напрежение по време на рязане. Поставяйте резовете възможно най-далеч от ръбовете и използвайте инструменти с рязане като трион, а не с ножица за по-дебели участъци от латун. Лентови триони с финозъби биметални дискове осигуряват чисти резове през латун до 1/4 инч дебелина.
И двата метала се възползват от прилагането на леко рязане масло. Тази смазващо намалява триенето, предотвратява натрупването върху инструмента и осигурява по-чисти ръбове, които изискват по-малко довършителна работа след рязане.
Сега, когато разполагате с техники, специфични за металите, сте подготвени да работите с практически всеки материал. Но дори и опитните металоработници срещат проблеми по време на операциите по рязане. Разбирането на често срещаните грешки и техните решения предотвратява скъпоструващи грешки и загуба на материали.
Чести грешки и как да ги поправите
Избрали сте правилния инструмент за вашия тип метал, следвали сте правилната техника, а все пак нещо се обърка. Зъбести ръбове, изкривени листове или резове, които отклоняват от начертаната ви линия. Звучи познато? Дори опитните майстори се сблъскват с тези досадни проблеми. Разликата между любителите и професионалистите не е в това да избягват напълно проблемите, а в това да знаят точно как бързо да ги диагностицират и поправят. Нека заедно отстраним най-често срещаните проблеми при рязане на ламарина и превърнем неуспешните опити във възможности за учене.
Поправяне на заострените ръбове и неравности
Нищо не може да развали един чист проект по-бързо от ръбове, които биха могли да ви разрежат пръстите. Заострените ръбове и неравностите са сред най-често срещаните оплаквания при рязане на ламарина, но те напълно могат да се предотвратят при подходящия подход.
Защо изобщо се образуват заострените ръбове? Ръбовете, които трябва да са чисти и остри, стават зъбести или покрити с буркан поради няколко чести причини:
- Износени режещи инструменти – Тъпите ножове изместват метала, вместо да го отрязват чисто
- Скорост на рязане твърде висока – Твърде високата скорост попречва на чистото отделяне на материала
- Неправилно подравняване на ножовете – Неподравнените режещи ръбове разкъсват, вместо да режат
- Неподходящ инструмент за дебелина на материала – Слабите по мощност инструменти се преборват и създават неравни ръбове
Най-добрият начин за рязане на ламарина без заострения започва с превенция. Редовно проверявайте състоянието на лещата и дюзата, намалете скоростта на подаване и нагласете параметрите на помощния газ, ако използвате термични методи за рязане. При механично рязане се уверете, че ножовете са остри и правилно подравнени, преди да започнете проекта.
Когато все пак се появят заострения, имате няколко варианта за довършване. Инструменти за премахване на заострения с въртящи се ножове бързо премахват издадените ръбове. При серийно производство, обработката чрез тресене или вибрационно полирване осигурява последователни резултати за множество детайли. Въпреки това, инвестирането на време в отстраняване на основната причина напълно предотвратява нуждата от обширна следваща обработка.
Защо вашите резове се деформират
Представете си, че сте направили прецизно рязане, а след това наблюдавате как плоският ви лист се извива като картофено шишарче. Деформацията засяга особено тънки алуминиеви и неръждаеми стоманени листове, превръщайки пригоден материал в отпадък. Разбирането на причините ви помага да предотвратите този скъп проблем.
Топлината е основната причина. Натрупването на топлина по време на лазерно или плазмено рязане води до термична деформация, особено при тънки материали. Металът се разширява неравномерно, когато топлината се концентрира по линията на рязане, създавайки вътрешни напрежения, които се проявяват като деформация след охлаждането на детайла.
Но топлината не е единственият фактор. Имайте предвид и следните причини, както и техните решения:
- Недостатъчна подкрепа – Големи листове без достатъчна опора се огъват по време на рязане, което води до постоянна деформация. Използвайте жертвените подложки или осигурете правилна поддръжка на масата.
- Неправилно стегане – Твърде силното стегане създава точки на напрежение, докато слабото позволява движение. Разпределете равномерно натиска от стегането по цялата повърхност на заготовката.
- Геометрия с тесни ъгли – Остри вътрешни ъгли концентрират напрежението. Когато е възможно, добавете малки радиуси за релеф, за да се намали концентрацията на напрежение.
- Вътрешни напрежения в материала – Някои листове пристигат с остатъчно напрежение от производството. Отслабване на напрежението чрез отжигане преди рязане елиминира този фактор.
Използвайте импулсно лазерно рязане, за да се минимизира топлинният вход, или преминете към водна струя за рязане без топлина. Когато термичните методи са неизбежни, рязането в алтернативни секции вместо непрекъснати пътища разпределя топлината по-равномерно и намалява възможността за деформация.
Разбиране и минимизиране на шлаката
Какво точно е шлака и защо е важно? Просто казано: това е нежелан остатък, който се образува от долната страна на нарязания метал, особено при термични процеси за рязане. Разтопен материал се залепва от долната страна, което затруднява почистването и пречи на точното сглобяване.
Шлаката е нежеланият остатък, който се образува от долната страна на материала, който се реже , и създава проблеми, които отиват далеч зад рамките на чисто естетичните въпроси. Делове с прекалено много шлака не пасват правилно, изискват допълнително време за шлайфане и показват, че параметрите на рязането трябва да бъдат коригирани.
Чести причини за образуването на шлака включват:
- Налягане на помощния газ твърде ниско – Недостатъчен дебит на газа не успява да издуха разтопения материал от реза
- Неправилно разстояние до повърхността – Височината на дюзата влияе върху ефективността, с която газът почиства процепа
- Материалът е твърде дебел за текущите настройки – Слабо мощни резни операции оставят разтопен метал след себе си
- Износени разходни материали – Намалените по качество дюзи и електроди водят до нестабилни резни процеси
Решенията се фокусират върху правилната настройка на параметрите. Регулирайте разстоянието между рязещата глава и повърхността, увеличете налягането на помощния газ и използвайте повишени опори за рязане, за да позволявате на шлаката да пада свободно. Редовната смяна на разходните материали и оптимизирането на параметрите за всяка дебелина на материал предотвратява образуването на шлака.
Признаци за износване на ножовете, които не бива да игнорирате
Инструментите Ви за рязане на стомана няма да траят завинаги и разпознаването на износването преди то да причини проблеми спестява както материали, така и пари. Ножовете се износват поради триене, топлина и неправилна употреба. Знанието кога е необходимо подмяна предотвратява лошо рязане и потенциални опасности за безопасността.
Обръщайте внимание на следните предупредителни сигнали, които показват, че е необходимо смяна на ножа:
- Увеличено време и усилие при рязане – Когато рязането изисква по-голямо усилие или отнема повече време от очакваното, острието на ножа е загубило остротата си
- Изcessive вибрация – Износените ножове създават нестабилни условия за рязане, които усещате през инструмента
- Следи от изгаряне върху материалите – Петната от изгаряне показват, че ножът трие, вместо да реже чисто
- Забележими отломки или тъпи ръбове – Визуалната проверка разкрива повреди, преди те да засегнат качеството на рязане
- Намалена точност на рязане – Забележимото намаляване на точността и гладкостта при рязане е сигнал за износени режещи инструменти
За удължаване живота на инструмента е необходима правилна техника и поддръжка. Оставете острието да върши работата — избягвайте прекомерно налягане, използвайте равномерно и постоянno движение и съобразявайте скоростта на острието с материала. След всяка употреба премахвайте остатъци и натрупвания от режещите повърхности. При диамантени дискове използвайте почистващ камък, за да се открият нови диаманти и да се запази ефективността на рязане.
Правилното охлаждане значително удължава живота на диска. Използвайте вода при влажно рязане с диамантени дискове, за да се предотврати прегряването, прилагайте подходящи смазки за дискове за рязане на метал и давайте време за охлаждане след продължителна употреба. Съхранявайте дисковете правилно — сухи, на безопасно разстояние от екстремни температури и окачени или поставени плоско, за да се предотврати деформация.
Бърза справка за чести грешки на начинаещи
Освен конкретните проблеми, разгледани по-горе, начинаещите често допускат тези избягвани грешки:
- Пропускане на пробното рязане – Винаги проверявайте настройките върху отпадъчен материал, преди да започнете рязането на основния си заготовка
- Недостатъчна подкрепа на заготовката – Големите листове се нуждаят от подкрепа и зад линията на рязане, за да се предотврати огъването и движението
- Игнориране на компенсацията на реза – Компенсирайте ширината на реза в CAD/CAM софтуера си когато размерите трябва да са точни
- Използване на неподходящ дисков нож за материала – Използването на неподходящ дисков нож за материала ускорява износването и дава лоши резултати
- Рязане без подходящо затегняване – Използвайте подходящи стегове, щепселни устройства или вакуумни маси, за да задържите тънките листове изправени
- Пренебрегване на защитното оборудване – Защита за очите, слуха и ръцете предотвратява наранявания, които могат да прекъснат вашия проект
Всеки проблем с рязането има решение, като повечето от решенията са по-прости, отколкото бихте очаквали. Правилната подготовка, подборът на подходящ инструмент и вниманието към изискванията, специфични за дадения материал, предотвратяват голяма част от проблемите още преди да възникнат. Когато възникнат проблеми, систематичното диагностициране бързо установява основната причина.
С придобитите знания за диагностициране сте готови да приложите тези принципи към реални проекти. Независимо дали произвеждате тръбопроводи за отоплителни, вентилационни и климатични системи, подготвяте автомобилни панели или създавате декоративни метални изделия, техниките, които сте научили, директно водят до професионални резултати.
Техники и работни потоци при рязане, базирани на проекти
Само теорията не върши работа. Когато стоите пред истински лист метал и срокът за проекта наближава, ви трябват конкретни работни процеси, които превръщат знанието в резултати. Независимо дали учите как да режете ламарина за първи път или подобрявате техники, които използвате от години, подходите, специфични за проекта, правят голяма разлика. Нека преминем през цялостни процеси за рязане за три често срещани приложения, като обхванем всичко – от първоначалната подготовка до окончателните довършителни етапи.
Техники за рязане на Вентилационни канали
Работата с вентилационни канали представлява едно от най-честите приложения за рязане на ламарина както за професионалисти, така и за амбициозни любители. Производството на вентилационни канали включва преобразуването на плоски метални листове в тръби и компоненти, които насочват въздуха през сградите с прецизност и контрол. Рисковете са реални: лошо изработени канали водят до теч на въздух, шум и по-високи експлоатационни разходи.
Повечето жилищни вентилационни тръби използват галванизирана стомана с дебелина от 26 до 22 калибър. Този подбор на материал осигурява отлична защита срещу корозия и структурна якост, като остава удобен за обработка със стандартни инструменти за рязане на ламарини. Преди да започнете рязането, внимателно измерете, тъй като климатичните системи изискват прецизно прилягане за правилен въздушен поток.
- Измервайте и маркирайте точно – Прехвърлете размерите от плана си върху листа метал с помощта на перманентен маркер или чертилка. Включете размерите за шевове и фланци за свързване при измерванията си.
- Закачете работния материал – Закрепете листа към стабилна работна повърхност, като изкарвате линията за рязане извън ръба. При дълги прави резове поддържайте целия лист, за да се предотврати огъването му.
- Изберете подходящи ножици – Ножици с жълти дръжки (авиационни) са най-добри за прави участъци на канали. За лактови и преходни елементи използвайте червени или зелени ножици в зависимост от посоката на кривата.
- Направете първоначалния рез – Започнете малко извън отбелязаната линия, като първо режете в зоната за отпадъци. Това позволява корекция при нужда.
- Завършете правите участъци – Поддържайте постоянен натиск и оставете инструментът да върши работата. При електрически ножици запазете постоянна скорост на подаване, за да осигурите чисти ръбове.
- Формиране на профили за съединение – Машини за заключващи съединения произвеждат често използвани профили за съединение, като Питсбъргски шевове и фланци TDF/TDC, които позволяват свързването на тръбни секции по време на монтаж.
- Запечатване и довършване – След сглобяване, връзките и шевовете на каналите се запечатват, за да се ограничи изтичането на въздух, чрез мастика, одобрени ленти и течни запечатващи вещества.
За сложни форми на вентилационни канали, CNC ножиците се използват широко за прави резове и големи обеми от части за канали, докато плазмената рязка ефективно обработва по-дебели листове и сложни профили. Когато точността е от значение и обемът оправдава инвестициите, професионалното производство осигурява последователни резултати за цели HVAC системи.
Подготовка на автомобилни панели
Работата в автомобилната индустрия изисква прецизност, която отличава професионалните резултати от любителски опити. Независимо дали поправяте корозия на класическа кола или изработвате персонализирани панели, разбирането как да режете стоманени листове за автомобилни приложения изисква внимание към детайла на всяка стъпка.
Заварката на тенки листове за каросерии може да бъде особено предизвикателна поради тяхната дебелина, което прави правилната техника за рязане още по-важна. Лошо изрязани ръбове усложняват заварката и могат да доведат до зазорявания, препокриване или слаби съединения.
- Оценете зоната с повреди – При ремонт от корозия определете цялата засегната метална част. Изрежете далеч зад видимата корозия, за да сте сигурни, че работите със здрав материал.
- Създайте шаблон за поправката – Прекрийте и закрепете новата поправка към стария панел, като я позиционирате точно. Това прекриване позволява прецизно очертаване.
- Начертайте линията за рязане – С поправката, закрепена на място, използвайте чертич за маркиране на стария панел за подрязване.
- Премахнете повредения материал – Първата стъпка е отрязването на повредения метал, след което панелът се оформя точно по начертаната линия, за да се подготви за изработване на фалцов заваръчен шев.
- Отрежете заместващата заплатка – Съгласувайте размерите на заплатката с оформения отвор. При криви повърхнини електрическите ножици дават по-чист резултат в сравнение с ножиците.
- Проверете прилягането внимателно – Колкото по-добро е прилягането, толкова по-добър ще бъде заваръчният шев, затова направете необходимите корекции, за да постигнете възможно най-доброто прилягане.
- Заварете с точкови шевове за центриране – След като бъдат затегнати, панелите се заваряват с точкови шевове, като разстоянието между тях не надвишава 1 инч.
Когато учите как да режете неръждаема ламарина за изпускателни компоненти или декоративни части, имайте предвид, че неръждаемата стомана се усилва при рязане. Поддържайте постоянно налягане и използвайте остри инструменти, за да предотвратите още по-голямо затвърдяване на материала по време на работа.
При шасита, окачвания и конструктивни елементи, изискващи прецизни допуски и сертифицирано качество, професионалното производство става задължително. Сложните автомобилни части често се нуждаят от съответствие със стандарти за сертифициране по IATF 16949, които гарантират безопасността и спазването на строги спецификации. Когато вашият проект включва сериено производство или изисква точност, надхвърляща възможностите за самостоятелно изработка, партньорството с установени производители като Shaoyi (Ningbo) Metal Technology осигурява бързо прототипиране и автоматизирано масово производство с пълна поддръжка при проектиране за производствена реализуемост (DFM).
Художествена и декоративна метална обработка
Декоративните проекти предлагат най-голяма творческа свобода, но изискват и най-чистите ръбове, тъй като качеството на рязане директно влияе на крайния вид. От стенни творби и бижута до градински скулптури, знанието как да се режат метални листове за естетически приложения изисква баланс между прецизност и художествено виждане.
Тънки листове от мед, месинг и алуминий често служат за декоративни цели. Тези материали се обработват добре с ръчни инструменти при подходящо подпомагане, макар че сложните форми може да изискват електрически ножици или професионална лазерна рязка.
- Прехвърлете своя дизайн – Отпечатайте или нарисувайте шаблона си в пълен мащаб. Закрепете го към металната повърхност с помощта на спрей лепило или лепенка, за да насочи рязането.
- Определете последователността на рязане – Планирайте рязането си от вътрешните детайли навън. Завършете вътрешните изрязвания преди периметричните, за да запазите стабилността на материала.
- Направете пробойни дупки за вътрешно рязане – При рязане на вътрешни форми пробийте начални дупки, достатъчно големи, за да може острието или ножниците да проникнат.
- Първо изрежете вътрешните детайли – Движете се бавно по кривите, точно следвайки линиите на шаблона. При тесни завои завъртайте инструмента, а не материала.
- Завършете периметричното рязане – След приключване на вътрешната обработка, изрежете външния контур. Поддържайте отпадъчния материал, за да се предотврати разкъсване в края на резовете.
- Премахнете остриетата по всички ръбове – Премахнете остри ръбове с помощта на инструменти за обработка, напилници или фини наждачки. При декоративни елементи качеството на ръба значително влияе на крайния външен вид.
- Приложете завършителна обработка – Помислете за използване на прахово покритие за дълготрайни цветни повърхности или прозрачни покрития, за да запазите естествения вид на метала и да предотвратите зацапване.
Съвременни технологии като CNC обработка и лазерно рязане улесняват създаването на сложни форми и прецизни резове, което се оказва особено ценно за изящни декоративни шарки. Когато дизайна включва детайли, по-малки от тези, които могат да бъдат изработени с ръчни инструменти, професионалното лазерно рязане осигурява чисти ръбове дори при най-сложни модели.
Съображения за завършителна обработка след рязане
Рязането е само един от етапите в процеса на производство. Това, което се случва след последното рязане, често определя дали проектът ви ще изглежда професионално или любителски.
За всички приложения имайте предвид следните завършителни стъпки:
- Обработка на ръба – Премахнете заострените ръбове и неравности, подходящи за конкретното приложение. При работата с Вентилация, отопление и климатизация (ВОК) са необходими безопасни за докосване ръбове, докато декоративните елементи изискват визуално чисти ръбове.
- Подготовка на повърхността – Почистете ръбовете от масла, остатъци и окисления преди заваряване, боядисване или сглобяване.
- Корозионна защита – Откритите ръбове на галванизирани или покрити материали трябва да бъдат довършени повторно, за да се запази защитата.
- Дименсионална верификация – Потвърдете критичните размери преди преминаване към сглобяване или монтаж.
Контролът на качеството и тестването са от съществено значение при обработката на ламарина, за да се гарантира, че крайният продукт отговаря на изискваните отраслови стандарти. Независимо дали работите по единичен декоративен елемент или серийни компоненти, проверката на работата ви преди напредване предотвратява скъпоструващи поправки.
Тези работни процеси показват, че успешното рязане на ламарини следва едни и същи принципи независимо от приложението. Правилната подготовка, подборът на подходящ инструмент и вниманието към крайната обработка превръщат суровините в професионален резултат. С овладяването на тези техники изборът на подходящ метод за рязане за всеки проект се свежда до съпоставяне на изискванията с възможностите.
Избиране на подходящия метод за рязане според вашите нужди
Вие разгледахте целия спектър от опции за рязане на ламарини, от прости ръчни ножици до сложни лазерни системи. Сега идва практическият въпрос: кой подход всъщност е уместен за вашата конкретна ситуация? Отговорът зависи от комбинация от фактори, включително нивото на вашите умения, изискванията на проекта, бюджетните ограничения и дългосрочните цели. Нека анализираме процеса на вземане на решение, за да можете разумно да инвестираме времето и парите си.
Основни елементи за начален инструментариум
Започването на металообработката не изисква да опразните портфейла си. Добре подбран стартов комплект се справя с повечето леки проекти, докато изгражда основни умения, които могат да се приложат и при по-напреднала работа.
Всеки начинаещ трябва да притежава тези основни инструменти:
- Комплект авиационни ножици (червени, зелени, жълти) – Тези три инструмента обхващат рязане по леви извивки, десни извивки и прави линии в материали до 20 калибър. Очаквайте да похарчите между 25 и 50 щатски долара за качествен комплект, който ще трае години наред.
- Комбиниран квадрат и черталка – Прецизното маркиране предотвратява загуба на материал и досадно преправяне. Приличен комбиниран квадрат струва под 20 щатски долара.
- Инструмент за отстраняване на заострените ръбове – Чистите ръбове са важни както за безопасността, така и за външния вид. Основните инструменти за отстраняване на заострени ръбове струват между 10 и 15 щатски долара.
- Скрепи и работна повърхност – Правилното фиксиране на детайлите предотвратява движение и подобрява качеството на рязане. Пружинни скрепи и C-образни скрепи струват по 5–15 щатски долара всяка.
- Охранны оборудване – Ръкавици, предпазни очила и защита за слуха са задължителни инвестиции в здравето ви.
Този основен инструментариум, струващ приблизително 100–150 долара, позволява работа с тънки листове алуминий, мед и въглеродна стомана за занаятчийски проекти, прости ремонти и учебни упражнения. Много любители намират тази конфигурация за напълно достатъчна през годините на продуктивна дейност, преди да почувстват нужда от подобрения.
Какво прави човек способен да се нарече компетентен в работата с ръчни инструменти? Когато можете последователно да следвате маркираните линии с точност до 1/16 инча, да получавате ръбове, които изискват минимална довършителна обработка, и да извършвате рязане без прекомерна умора, тогава сте овладели основите.
Кога да актуализирате оборудването си
Надграждането твърде рано води до загуба на пари, но отлагането твърде дълго губи време и води до по-лоши резултати. Познайте тези признаци, че сте надраснали текущите си инструменти:
- Изискванията за дебелина на материала надхвърлят възможностите на инструмента – Когато постоянно се борите да режете материали с дебелина на или над максималните граници на инструментите си, ефективността силно намалява.
- Увеличение на обема на производството – Изрязването на десет идентични парчета ръчно има смисъл; изрязването на сто – не. Времето има стойност.
- Изискванията за качеството на ръба се затегат – Декоративната работа и прецизните сглобки изискват по-чисти резове, отколкото тези, които осигуряват основните ръчни инструменти.
- Физическата умора става ограничаващ фактор – Болки в ръцете и уморени ръце показват, че работите по-усилено, отколкото е необходимо.
- Сложни криви се появяват често – Сложните модели претоварват възможностите на обикновените ножици.
Логичната първа надстройка за повечето потребители включва електрически ножици или електрически перфоратор. Тези инструменти обработват по-дебели материали с по-малко усилие, като запазват преносимостта и достъпността на ръчните устройства. Качествени електрически ножици струват между 150 и 400 долара, в зависимост от капацитета за дебелина на материала и репутацията на бранда.
За онези, които работят редовно с по-дебели материали, ъгловата шлайф машинка с подходящи отрязващи дискове е изключително добра инвестиция. Надеждна шлайф машинка струва между 50 и 150 долара, като разходните дискове добавят постоянни разходи. Тази комбинация се справя с материали, които биха били непрактични за отрязване с ръчен инструмент.
Кога трябва да разгледате най-добрите варианти за рязане на ламарини в по-високия ценови клас? Професионални електрически ножици, плазмени рязачки и специализирани триони за метал имат смисъл, когато работата ви генерира приход или когато обемът на проектите оправдава инвестициите. Плазмена рязачка за 500 долара се изплаща бързо, ако спести часове работа по шлифоване и довършване при проекти с дебел стоманен материал.
Ръководство за вземане на решение: Любителско изработване срещу професионално производство
Ето истината, която много ръководства за самостоятелна работа избягват: понякога най-умният избор е да не го правите сами. Професионалните производствени услуги съществуват, защото определени проекти действително имат полза от специализирано оборудване, експертност и сертификати за качество, които отделните работилници не могат икономически да възпроизведат.
Следната сравнителна таблица поставя всеки метод на рязане спрямо ключови фактори за вземане на решение, като професионалните производствени услуги задават еталона за качество и възможности:
| Метод за рязане | Приблизителна цена | Трябва да има умения | Качество на ръба | Най-добри приложения |
|---|---|---|---|---|
| Професионално производство (лазер/CNC) | Ценообразуване на детайл; отстъпки при големи обеми | Липсва (външно изпълнение) | Отличен | Серийно производство, тесни допуски, изисквания за сертифицирано качество, сложни геометрии |
| Плазмен резач (DIY) | $300-1 500 оборудване | Средно | Добро до отлично | Дебела стомана, художествена работа, умерено производство |
| Ъглов гред | $50-150 + разходни материали | Начинаещ до напреднал | Изисква довършителна обработка | Груби рязания, разрушаване, дебели материали |
| Електрически ножици/нибълери | $150-400 | За начинаещи | Добре | Листове от средна дебелина, Вентилация, климатизация и отопление (HVAC), автомобилни панели |
| Ръчни ножици/ножици за рязане | $25-100 | За начинаещи | Удовлетворително до добро | Тънка дебелина, малки проекти, обучение |
Кога професионалното производство е по-добро решение от самостоятелна изработка? Помислете за външно изпълнение, когато:
- Изискванията за допуски са под 0,010 инча – Ръчните инструменти не могат последователно да осигурят точността, която лазерните и CNC системи предоставят рутинно.
- Количество надхвърля 25–50 броя – Разходите за настройка, разпределени върху по-големи поръчки, значително намаляват цената на единичен компонент.
- Сертификатите за безопасност имат значение – Приложения в автомобилната, аерокосмическата и строителната индустрия често изискват документирани стандарти за качество.
- Вторичните операции увеличават сложността – Когато детайлите се нуждаят от огъване, заваряване, анодиране или друга отделка освен рязане, интегрираните услуги за фабрикуване опростяват работния процес.
- Ограниченията по време притискат проекта – Това, което във вашата гаражна работилница отнема уикенд, може да бъде доставено за дни от професионално предприятие.
Търсенето на „цехове за металообработка наблизо“ или „производители на метални конструкции наблизо“ разкрива местни възможности, но не пренебрегвайте специализираните производители за конкретни приложения. За автомобилни компоненти, изискващи шасита, окачвания или конструктивни части със сертификат IATF 16949, партньорството с установени производители на стоманени изделия като Shaoyi (Ningbo) Metal Technology предоставя достъп до бързо прототипиране за 5 дни, автоматизирано масово производство и комплексна DFM поддръжка с възможност за оферта за 12 часа. Тези възможности надхвърлят всичко, което може да бъде постигнато в домашна работилница.
Решението за металообработка в крайна сметка е баланс между възможностите и икономическата изгода. Малки единични проекти с по-леки допуски предпочитат самостоятелно изпълнение. За серийни количества, прецизни изисквания или сертифицирани стандарти за качество решението се накланя към професионални услуги. Повечето металоработници намират оптималния си баланс някъде по средата: изпълняват прости задачи вътрешно, докато сложни или високотомнажни проекти изпращат към специалисти.
Пътят ви през рязането на листови метали – от разбирането на системите за дебелини до избора на подходящия инструмент за всеки вид метал – ви дава възможност да вземате обосновани решения за всеки проект, с който се сблъсквате. Независимо дали се тягате към авиационни ножици или подавате заявка за оферта до професионални производители, вече разбирате компромисите и възможностите, които определят успеха. Металът ви чака; вашият следващ проект започва сега.
Често задавани въпроси за рязане на листови метали
1. Какви са честите грешки при рязане на листови метали?
Най-честите грешки включват използване на износени режещи инструменти, които образуват заострени ръбове и неравни ръбове, прилагане на неправилна скорост на рязане според типа материал, неправилно подравняване и затегчане на листовете, което причинява деформация, както и пренебрегване на изискванията, специфични за материала. Начинаещите често пропускат пробни резове на отпадъчен материал, не компенсират ширината на реза при прецизни измервания и пренебрегват правилната опора на заготовката. Отстраняването на тези проблеми изисква редовна поддръжка на инструментите, съгласуване на скоростта на диска със свойствата на материала и използване на подходящи стеги или ъгломери за фиксиране на листовете в равнина по време на рязане.
2. Може ли трионът да реже ламарина?
Нож за универсални цели може да реже много тънки листови метали, обикновено с дебелина под 0,5 мм, като метал за канали или тънки алуминиеви фолиа. Техниката включва многократно надраскване на метала по ръб на линийка, вместо прерязване с един замах, след което листът се огъва по линията на драскотината, за да се счупи чисто. Този метод запазва метала плосък, без навиване, което често се получава при използване на ножици. Въпреки това, за всичко по-дебело от стандартни материали за фолиа, специализирани инструменти за рязане на метал, като авиационни ножици или електрически ножици, осигуряват по-сигурни и чисти резултати с по-малко усилия.
3. Как да предотвратите ръждането след рязане на листов метал?
Защитата на ръбовете от рязане от ръжда изисква незабавно внимание, тъй като оголената стомана е подложена на окисляване. Нанесете цинково богато студено галванизиращо съединение или спрей за предпазване от ръжда върху ръбовете на галванизирани материали. За други видове стомана вариантите включват прахово покритие за дълготрайни цветни повърхности, маслено покритие за временна защита, метално покритие или галванизиране за дългосрочна издръжливост и боя за предпазване от ръжда. Правилното съхранение в сухи условия, далеч от влага, както и редовното поддържане значително удължават живота на металните части след рязане.
4. Какъв е най-добрият начин да се нареже 2 мм стоманен лист с минимални инструменти?
За стоманен лист от 2 мм (приблизително 14 калибър), най-ефективният подход с минимален инструмент използва ъглов шлифовъч с тънък режещ диск. Тази комбинация ефективно се справя с дебелината, като остава достъпна и лесно достъпна. Ако няма електрически инструменти, тежки авиационни ножици или ръчни ножици с вложено действие могат да режат 2 мм стомана, макар и с голямо усилие и най-добре работят за кратки резове. За по-чисти ръбове и по-малко довършителна обработка, електрическите ножици, предназначени за стомана 14 калибър, предлагат най-добрия баланс между цена, лесота на употреба и качество на рязане.
5. Кога трябва да предам рязането на метал на професионални производители?
Производствените услуги се превръщат в по-умния избор, когато допуснатите отклонения са под 0,010 инча, производствените количества надхвърлят 25–50 броя или са необходими сертификати за безопасност като IATF 16949. Сложните геометрии, вторични операции като огъване или заваряване и кратките срокове също благоприятстват професионалните цехове. Производители като Shaoyi (Ningbo) Metal Technology предлагат бързо прототипиране за 5 дни, пълна подкрепа при проектиране за производство (DFM) и автоматизирано масово производство за автомобилни шасита, окачвания и конструктивни компоненти, където най-голямо значение имат сертифицираното качество и прецизността.