 Lilla partier, höga standarder. Vår snabba prototypservice gör validering snabbare och enklare —

Hur pulverlackerar man aluminium? 9 steg till felfria resultat
Steg 1: Planera arbetet och se till att det är säkert och efterlevs
Vad du behöver innan du börjar
Undrar om du kan pulverisera aluminium säkert och få professionella resultat? Absolut, men bara om du tar rätt steg innan du ens rör en del. Förfarandet med att belysa aluminium med pulver är beroende av noggrann planering, rätt utrustning och ett starkt fokus på säkerhet. Oavsett om du startar en hembaserad pulverbehandlingstation eller driver en professionell butik, börjar en framgångsrik pulverbehandling långt innan pulvret träffar metallen.
- Personligt skyddsutrustning (PPE): NIOSH-godkänd respirator för pulver, skyddsglasögon, kemiresistenta handskar och rena kläder.
- Jordsatta arbetsområden: Kontrollera att rackar, delar och kabinen är ordentligt jordade för att förhindra statisk uppbyggnad och brandrisk.
- Stall luftflöde och damminsamling: Säkerställ att luftflödet i montern uppfyller rekommenderad ansiktsfart (vanligtvis 100 FPM; justera efter monterns/delens storlek). Kontrollera att dammuppsamlingen fungerar och att filtren är rena.
- Uppdelning av rena/smutsiga zoner: Dela in förberedelse-, beläggnings- och härdområden fysiskt för att undvika korskontamination.
Härda aldrig pulverbelagda delar i en ugn för mat. Använd alltid en dedikerad härduvn för att förhindra kontamination och eldhazards.
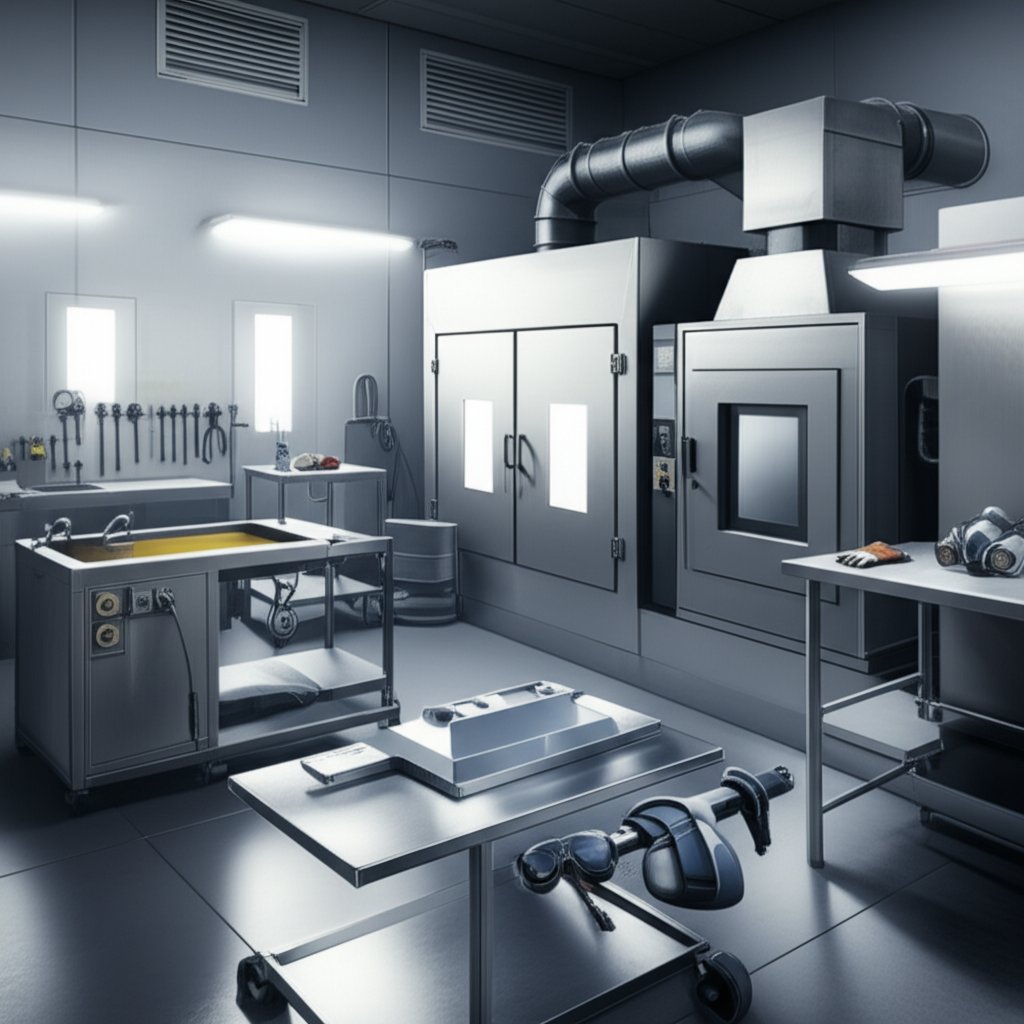
Verkstadslayout och luftflödesgrunder
Föreställ dig att du går in i din verkstad: att förbereda delar i ett område, belägga i en ren monter med rätt luftflöde och härda i ett separat, ventilerat ugnsområde. Denna layout handlar inte bara om utseende – det handlar om säkerhet och kvalitet. Ett bra luftflöde fångar upp översprut och minimerar damm, medan dammuppsamlingsystem hjälper till att hålla andningsluften säker och förhindrar bildning av brandfarligt pulver.
Reglerings- och säkerhetsaspekter
Innan du påbörjar något projekt med pulverlack på aluminium, granska lokala och federala säkerhets- och miljöregler. Kontrollera säkerhetsdatabladet (SDS) för varje kemikalie och pulver du kommer att använda. Förbehandlingslakor och uttjänta kemikalier kan behöva samlas in och tas om hand på rätt sätt – aldrig hällas i avloppet. OSHA, EPA och brandregler (såsom NFPA 33) gäller både för kommersiella och hemmamässiga pulverlackoperationer. Pulverlack Online ).
- Kontrollera GFCI-uttag för tvättmaskiner och fuktområden.
- Undersök efter klämmor, heta ytor och halkrisker.
- Verifiera att all jordning är ansluten i lackkabinerna och på ställningarna.
- Se till att din spraypistol och utrustning är listad av en erkänd säkerhetsorganisation.
Checklista före produktion för felfria resultat
- Definiera arbetskrav (legering, geometri, maskning, yta, användningsmiljö, häft-/korrosionsmål, grund-/täcklackbehov).
- Inventera och inspektera all personlig skyddsutrustning (PPE) och säkerhetsutrustning.
- Bekräfta luftflödet i lackkabinen och dammuppsamlingen.
- Separera rena och smutsiga arbetsområden.
- Granska miljökrav för avfallshantering.
- Tilldela verkstadsroller (förberedningstekniker, applicerare, kvalitetskontroll, underhåll) eller förtydliga stegen för din hemmaanläggning för pulverlackering.
- Utför en riskgranskning: kontrollera att det finns GFCI-skydd, korrekt potentialutjämning och ta bort tändkällor.
Låter det komplicerat? Det är bara smart förberedelse. Omsorgsfull planering är grunden för varje lyckad pulverlackeringsprocess, oavsett om du arbetar med en enskild komponent eller en produktionsserie. Nu när du vet hur du pulverlackerar aluminium säkert och effektivt är du redo att med självförtroende gå vidare till ytbehandling – nästa avgörande steg mot en felfri yta.
Steg 2: Bemästra ytbehandling och förbehandling av aluminium
Varför ytets kemi spelar roll vid pulverlackering av aluminium
Har du någonsin undrat varför vissa jobb med pulverlack på aluminium håller i åratal medan andra flagnar eller korroderar mycket för tidigt? Svaret ligger nästan alltid i ytbehandlingen. Innan du ens tänker på att pulverlacka måste du få till den rätta kemien - för att hållbarhet och korrosionsbeständighet på lång sikt beror på hur ren, aktiv och korrekt omvandlad din aluminiumyta är. Föreställ dig att du förbereder ett vackert aluminiumräcke bara för att se bubblor eller flagnande månader senare. Därför är det oumbärligt att behärska förberedelsen av aluminiumytan.
Avfetta och rengör aluminium effektivt
Börja med att ta bort all synlig smuts, oljor och tidigare beläggningar. För de flesta projekt med pulverlack på aluminium är mekanisk rengöring (såsom lätt abrasivstrålning eller borstning) den första åtgärden, särskilt om du arbetar med återanvända eller mycket smutsiga delar. Detta steg tar inte bara bort skräp utan skapar också en enhetlig yta för den kemiska rengöringen.
Använd sedan en alkalisk rengöringsmedel – helst ett som är formulerat för aluminium. Dessa rengöringsmedel emulgerar och lyfter oljor och verkstadssmuts utan att angripa grundmetallen. Undvik silikathaltiga eller frätande produkter, särskilt på polerade eller dekorativa ytor, eftersom de kan fräta eller göra ytans finish matt. Ytbehandling och påläggning ).
Frät och avlägsna slagg vid behov
Efter att ha sköljt är det dags att fräta. Frätning (med antingen svagt alkaliska eller sura lösningar) tar bort den naturliga oxidskinnen och skapar en mikroskopiskt jämn yta, vilket ger pulverlacken något att fästa vid. Valet mellan stark eller mild frätning beror på din legering och den nivå av ytmetall du vill ta bort. Delar med hög legeringshalt eller gjutdelar kan behöva mer aggressiv frätning, medan fina eller polerade ytor drar nytta av mildare behandlingar.
Ätning lämnar ofta efter sig en mörk restprodukt – eller smuts – som består av olösliga oxider från legeringselement. Avsmutsning, vanligtvis med utspädd syra eller specialiserad deoxidator, är avgörande för vissa legeringar (särskilt serier 2xxx och 7xxx) för att säkerställa en ren, aktiv yta för beläggning av aluminium. Resultatet? En vitaktig, mikro-ätad yta som är redo för konverteringsbeläggning.
| Legeringsfamilj | Typisktillstånd | Förbehandlingssekvens | Noteringar (fördelar/nackdelar) |
|---|---|---|---|
| 1000/3000/6000 | Svept, extruderad, allmänt bruk | Basisklädsel → Skölj → Lätt syreatning → Skölj → Avlägsna smuts (salpetersyra- eller järnbaserad) → Skölj → Konverteringsbeläggning | Lämplig för de flesta byggnadsmässiga och industriella delar; lättätning bevarar detaljer |
| 5000/7000 | Hög-magnesium eller hög-zink legeringar | Basisklädning → Aggressiv företarning → Sköljning → Tri-syra avfettningsmedel → Sköljning → Konversionsbeläggning | Tri-syra avfettningsmedel nödvändigt för envisa oxider; aggressiv företarning kan göra ytan matt |
| 2000-serien | Högkopparlegeringar | Basisklädning → Syraföretarning → Sköljning → Salpetersyra eller tri-syra avfettningsmedel → Sköljning → Konversionsbeläggning | Extra uppmärksamhet vid avfettningssteget för bästa adhesion |
| Gjuten aluminium (380, 412, etc.) | Porös, ojämn, ofta förorenad | Slipblästring → Basisklädning → Aggressiv företarning → Tri-syra avfettningsmedel → Sköljning → Konversionsbeläggning | Blästring tar bort tunga smutsar; tri-syra avfettningsmedel hanterar blandade oxider |
Välj rätt konversionsbeläggning
Konvertningsbeläggningar – med eller utan krom – är den sista kemiska förberedelsen innan pulverbeläggning av aluminium. De reagerar kemiskt med aluminiumytan och bildar ett tunt lager med korrosionsmotstånd som också förbättrar pulverbihäftningen ( Beläggningars katalog ). För de flesta tillämpningar är konvertningsbeläggningar utan krom (zirkonium- eller titanbaserade) att föredra på grund av miljö- och säkerhetsfördelar. Kontrollera alltid kompatibilitet och applikationsparametrar i datablad från din leverantör av pulver och konvertningsbeläggning.
Om en konvertningsbeläggning inte är möjlig kan man överväga att använden av en frätgrundfärg som är anpassad för aluminium. Dessa kan vara ett bra alternativ för mindre eller hemmabit, men kontrollera alltid kompatibilitet med det valda pulverbeläggningssystemet.
- Kontrollera sköljvätskans kvalitet efter varje kemiskt steg: vattnet ska rinna jämnt över ytan utan att brytas upp eller bilda droppar.
- Bekräfta att ytan är fri från vattenbrytning innan pulverapplikationen påbörjas.
- Upprätthåll korrekta badkoncentrationer och dokumentera titreringar regelbundet.
- Minimera tiden mellan den sista sköljningen/torkningen och pulverapplikationen för bästa resultat.
Nyckelinblick: Ju kortare tid mellan torkning av din komponent och applicering av pulver, desto lägre risk för flashoxidation och adhäsionsfel.
Snabba påminnelser: Undvik att använda silikonfet i förberedelseområdet – det kan orsaka fiskögon och förstöra din yta. Hantera komponenter med rena handskar efter den sista sköljningen och torkningen för att undvika fingeravtryck eller föroreningar. Genom att följa dessa detaljerade steg skapar du förutsättningar för en hållbar och attraktiv pulverbeläggning av aluminium som tål testet av tid. Nästa steg: fixturing, maskering och jordning för bästa transferverkningsgrad och ytkvalitet.
Steg 3: Maskera, fixtura och jorda för maximal transferverkningsgrad
Jordning och rackdesign för konsekventa pulverbeläggningsresultat av aluminium
Har du någonsin försökt att belysa aluminium och märkt att pulvret inte håller jämnt eller att du får frustrerande nakna fläckar? Det är oftast en grundning eller fixering. För att kunna använda aluminiumpulver av hög kvalitet behöver varje del en stark och direkt anslutning till marken. - Varför? - Jag vet inte. Pulvret dras till delen av elektrostatisk laddning, utan jord, utan attraktion, utan ens ytbeläggning.
- Använd en särskild markstang: Installera en kopparstang på 810 fot så nära din pulverförpackning som möjligt för lägsta motstånd ( - Det är inte så. ).
- Håll alla kontaktpunkter rena: Skrapa krokar och kontaktpunkter på rack innan varje språng.
- Använd aldrig målade krokar eller rackar: Även ett tunt lager av beläggning blockerar den elektriska vägen.
- Provningens kontinuitet: Använd en megohmmätare eller kontinuitetsprövare. Branschstandarder kräver att jordningsmotståndet för hela spraysystemet måste vara mindre än 10 ohm (10 Ω), och det ideala värdet är vanligtvis mellan 1-5 ohm. Detta krav är för att säkerställa att statisk elektricitet snabbt och säkert kan ledas ner till jord.
- Minimera kopplingar: Färre leder från komponent till jord innebär mindre motstånd och mer pålitlig pulverattraktion.
Proffs tips: Rätt jordning handlar inte bara om säkerhet – det är din hemliga vapen för perfekt pulverbeläggning av aluminiumdelar, särskilt på svåra geometrier och vid flerlagersbeläggning.
Maskering av gängor och precisionsytor
Föreställ dig att du förbereder en batch lackerade aluminiumpelare med gängor eller maskinerade ytor. Att lämna kvar pulver på dessa områden kan förstöra passform och funktion. Där maskering kommer in i bilden. Använd högtemperaturbeständiga silikontappar och proppar för hål och gängor samt polyesterband för plana eller formade ytor. Dessa material tål ugnstemperaturer och lossnar lätt efter härdning.
- Dokumentera maskeringspositioner med foton eller diagram för återkommande jobb.
- Märk maskeringspaket med delnummer för att snabba upp framtida produktion.
- Kontrollera alla maskeringar före pulverlackering – frånvaro eller lösa maskeringar kan leda till kostsam reparation.
För hemmaanvändning med pulverlack på aluminium hjälper en enkel maskeringsplan och märkta påsar dig att hålla ordning. I en produktionsverkstad bör du standardisera dina maskeringspaket och ha en logg över kraven för varje komponent.
Balans i produktionslinjen och komponentplacering: Undvik Faraday-burars effekt och säkerställ jämn täckning.
Har du någonsin sett en belagd aluminiumdel med tunna fläckar i hörn eller djupa fördjupningar? Det är Faradaycage-effekten - där pulver undviker trånga utrymmen på grund av elektrisk skärmning. Lösningen? Orientera delarna så att öppningarna är riktade mot pulverpistolen och håll siktraden fria. Justera ditt rackdesign för att minimera skuggade eller dolda ytor.
- Placera delar med mellanrum för att tillåta luftcirkulation och förhindra pulverskuggning.
- Häng delar på samma höjd för jämn uppvärmning i ugnen.
- Använd skarpa, rena krokar - trubbiga eller pulverbelagda krokar kan blockera både pulver och ström.
- Håll en skrapstation tillgänglig för snabb krokunderhåll mellan olika serier.
- Standardisera krokstorlekar för upprepade geometrier för att effektivisera installationen.
- Kontinuitetstest för rack: Verifiera jordledningen från varje del till stången.
- Maskininventering: Kontrollera alla positioner och byt vid behov.
- Delavstånd: Säkerställ att inga delar nuddar varandra och att luftflödet är obstruktionfritt.
- Dokumentera ESD-testresultat i arbetsjournalen.
För både små och stora pulverlackeringsjobb med aluminium säkerställer dessa steg att varje del får en jämn och slitstark yta. Konsekvent maskering, smart fixtur och noggrann jordning är det som skiljer en professionell aluminium pulverlackering från en misslyckad. Är du redo att välja rätt pulverlacksystem för ditt projekt med lackerad aluminium? Därefter går vi igenom hur du väljer filmtjocklek och yta för din specifika applikation.
Steg 4: Välj pulverlacksystem – filmtjocklek och utseende
Välj harpik och yta utifrån användningsmiljö
När du kommer till stadiet där du väljer pulverlackens finish kan det bli överväldigande med alla valmöjligheter. Ska det vara en hård polyester, en kemikaliebeständig epoxi eller en specialiserad hybrid? Svaret beror på var och hur din lackerade del kommer att användas. Ställ dig frågorna: Kommer den att utsättas för stark sol, fukt eller kemikalier? Är den avsedd för inomhusdekoration eller utomhusarkitektur? Din användningsmiljö avgör ditt val av pulverlackens finish.
- Polyester: Bäst för utomhusdrift, UV-resistens och färgstabilitet – idealisk för arkitektoniska eller yttre delar.
- Epoxid: Utmärkt kemisk och korrosionsbeständighet, men inte UV-stabil – bra för inomhus- eller industritillämpningar.
- Hybrid (epoxy-polyester): Balanserar flexibilitet och prestanda för allmänt bruk.
- Fluorpolymer: Premiumväderbeständighet och färgretention för högklassiga arkitektoniska och utsatta projekt.
Konsultera alltid din pulvertillverkares datablad för rekommenderat härdningsschema och filmtjocklek. Typisk pulverlacköverdragstjocklek varierar mellan 2 och 4 mil (cirka 50–100 mikron), men kontrollera din leverantörs riktlinjer och bekräfta med en torrtfilmcmätare efter härdning.
Grundfärg eller ej på aluminium?
Undrar du om grundfärg i pulverlack är värd det extra steget? För de flesta inomhus- eller lätt använda delar kan en robust förbehandling vara tillräckligt. Men om din aluminium är på väg till korrosiva, kustnära eller industriella miljöer – eller om det är en samling av olika metaller – är en grundfärg din bästa försäkring. Rätt grundfärg, såsom en epoxi-baserad pulverlack som är zinkfri, erbjuder överlägsen korrosionsskydd och täckning vid kanter ( Tiger Coatings ).
- Primer powder coating skyddar underlaget och förlänger livslängden på ditt pulverlackssystem.
- Det är särskilt viktigt för krävande arkitektoniska eller maritima applikationer.
- Verifiera alltid att din grundfärg och täckfärg är kompatibla – kör ett litet provfält för mellanliggande vidhäftning.
För högpresterande konstruktioner kan din valprocess se ut så här:
- Bruksmiljö → Välj hartstyp → Välj yta (glans, struktur, metallisk) → Ställ in önskad skikttyckelse → Bestäm val av grundfärg och skyddande ytterlack
Alternativ för skyddande ytterlack för utseende och skydd
Föreställ dig att du precis uppnått en blank pulverlack eller en borstad metallisk yta. Hur behåller du den skarpaste utseendet i åratal? En klar pulverlack kan låsa fast utseendet, förbättra motståndet mot repor och lägga till en skyddande barriär mot UV och kemikalier. Tunnlar används också för att finjustera glans eller struktur, samt för att försegla metalliska eller effektpulver.
- Glansnivå: Hög glans betonar varje detalj (och varje fel), medan matta eller strukturerade ytor kan dölja mindre ojämnheter.
- Textur: Släta, krusade eller sandstrukturerade ytor förändrar både utseende och känsla – och kan hjälpa till att dölja ytdefekter.
- Metalliska färger: Pärlglänsande eller metalliska pulver kan förändra färg beroende på tjocklek; testa alltid på en provplatta innan en full produktion.
Utför alltid ett litet provtest med metalliska eller effektpulver. Färg och utseende kan förändras beroende på tjocklek, så kontrollera resultaten innan du går vidare till produktion.
Se till att registrera dina valda ytfärg, hartstyp och önskad skiktbyggnad i din arbetsinstruktion eller processblad. Detta säkerställer att resultatet kan upprepas i framtiden och gör det enklare att felsöka om du behöver justera pulverbeläggningens ytfärg vid ett senare tillfälle.
Sammanfattningsvis är det nyckeln till en felfri och långvarig ytfärg att anpassa ditt pulverbeläggningssystem till komponentens miljö och användning. Ta dig tid att granska tekniska datablad, köra provtester och bekräfta din skiktbyggnad med hjälp av en våt-torkmätare. Nästa steg: justera dina pulverpistolinställningar och appliceringsmetod för jämn och enhetlig täckning – så att din valda ytfärg verkligen får chans att lysa.
Steg 5: Applicera pulver med kontrollerad elektrostatik och passeringar
Justera elektrostatiken för omslutning och penetration
Är du redo att ge din aluminiumkomponent liv? Magin i pulverbeläggning sker vid sprayboxen, där elektrostatiken avgör om ytfärgen blir perfekt eller inte. Men hur gör du för att pulverbelägga svåra hörn eller djupa fördjupningar utan att lämna nakna fläckar eller orsaka pulveransamling?
Det börjar med dina pistollägen. Tillverkare rekommenderar att börja med en kilovolt (kV) inställning inom intervallet 50–80 kV för de flesta arbeten, men den egentliga hemligen är att justera för geometri. För plana ytor förbättrar högre kV täckningen och "wrap" – vilket innebär att pulver kommer att dras även till komponentens baksida. Men när du kommer till tajta hörn (den omtalade Faraday-cageffekten) sänker du kV och flyttar pistolen närmare med långsamma, kontrollerade passeringar. Detta hjälper pulver att nå dessa skärmade områden utan att studsa tillbaka från den närmaste kanten.
- Börja med 50–80 kV för allmän täckning; sänk till 20–40 kV för Faraday-områden.
- Justera mikroampere (µA) inställningar efter behov – 20–25 µA är ofta idealiskt för komplexa former.
- Håll avståndet mellan pistol och komponent på 6–10 tum för de flesta applikationer; flytta närmare för fina detaljer.
- Öka luftflödet endast vid behov och varna för back-ionisering (små gropar eller fördjupningar från för mycket spänning).
Rätt jordning är lika viktig som pistolläget. Utan en stark jordning bryts den elektrostatiska attraktionen ner, vilket leder till ojämn eller svag täckning. Kontrollera alltid din jordledning före och under arbetet.
Sprutteknik som undviker apelsinskal
Har du någonsin sett en pulverlackerad yta med en bucklig, "apelsinskal"-liknande struktur? Det betyder oftast att för mycket pulver har sprutats på ett område eller att belägget byggts upp för tjockt i ett enda pass. Det bästa sättet att undvika detta – och uppnå en jämn, professionell yta – är att använda lätta pass som överlappar varandra och bygga upp belägget i två eller tre lager om det behövs.
- Starta pistolen bort från arbetsdelen tills en jämn moln bildas – därefter börjar du sprutpasset.
- Spruta i en långsam och kontrollerad rörelse, och håll pistolen vinkelrätt mot plana ytor för jämn täckning.
- Använd korsvis sprutning (sidsätt, sedan upp-och-ned) för jämn beläggsuppbyggnad.
- Fjädra kanter och undvik att översvämma hörn eller detaljer.
- Granska med stark belysning före härdning – komplettera tunna ställen, men överdriv inte.
Att hålla din kabin ren och ditt pulverförråd torrt är också avgörande. Fukt eller olja i luftledningarna, eller en smutsig kabin, kan leda till pulverförorening och finishfel. Använd endast ren, torr, oljefri komprimerad luft och kontrollera dina filter regelbundet.
Jordningskontroller under körning
Föreställ dig att du kommer halvvägs genom en körning bara för att inse att ditt pulver inte fastnar. Ofta beror det på en dålig jordning – kanske en pulverbelagd krok eller en löst klammer. För att hålla din pulvermålningssprocess på rätt köl, gör jordningskontroller till en del av operatörens rutin:
- Verifiera jordkontinuitet från varje komponent till jordstaven innan du börjar måla.
- Testa målning på en provpanel för att bekräfta jämn pulverpådragning.
- Måla först bakre sidor, fördjupningar och Faraday-områden; avsluta med framsidor och kanter.
- Övervaka pistolkonfigurationen och justera den efter behov beroende på komponentens geometri.
- Registrera slutgiltiga pistolldata (kV, µA, luftflöde) i din arbetsinstruktion för återupprepning.
Tips: Rena krokar och skarpa kontaktplatser på ställningen är lika viktiga som din pistols spänning. En smutsig eller trubbig krok kan blockera strömmen och förstöra överföringseffektiviteten – ha en skrapstation tillgänglig och kontrollera krokar ofta.
Om du är nybörjare på hur man gör pulverlack eller vill finjustera din pulverlackprocess, behåll detaljerade anteckningar på varje jobb. Följ vilka inställningar som fungerade för vilka delar, och du kommer snabbt att bygga upp en guide för perfekta resultat varje gång.
Genom att justera din pistolinställning, använda smarta spraytekniker och göra jordningskontroller rutin, kommer du att behärska hur man pulverlackerar aluminium med konsekvent, professionell kvalitet. Därefter kommer du att se hur korrekt härdning låser fast den perfekta ytan.
Steg 6: Härd korrekt med ugnsladdning och temperaturreglering
Läs och följ härdningsschemat
Har du någonsin undrat varför en pulverlackering ibland flagnar, spricker eller ser matt ut – även efter perfekt förberedelse och applicering? Det beror på härdningen. Härdning är den kritiska fasen i pulverlackeringsprocessen, där tid och temperatur omvandlar pulver till en hållbar, vacker yta. Men hur hög temperatur ska man använda för pulverlackering, och hur länge? Svaret finns alltid i din pulverleverantörs tekniska datablad. De flesta pulver som används på aluminium kräver en baketidstemperatur för pulverlackering mellan 325–400°F (163–204°C) och en hålltid på 10–25 minuter – men dessa siffror avser den faktiska metalltemperaturen , inte bara ugnsluften ( Keystone Koating ).
Låter det komplicerat? Föreställ dig att du bakar en kaka: om mitten inte är ordentligt genombakad, faller hela saken isär. Samma sak gäller för temperatur vid pulverlackering – om den tjockaste delen av din aluminiumdel inte når rätt temperatur och håller den under rätt tid, kommer ytan inte att prestera som den ska. Kontrollera alltid ditt datablad för exakta specifikationerna temperatur för pulverlackering och tidsinställning. Om du inte är säker, välj en försiktig approach och verifiera med leverantören.
| Pulverkod | Substrat | Målkomponentens metalltemperatur (°F/°C) | Hålltid (min) | Uppvärmningstid (min) | Termoparplacering |
|---|---|---|---|---|---|
| EX1234 | Aluminium (6061) | 375°F / 191°C | 15 | 10 | Tjockaste sektionen, centrum |
| EX5678 | Kastaluminium | 400°F / 204°C | 20 | 12 | Nära kärnan, bort från kanterna |
Obs: Använd alltid specifika siffror från din pulverdatas blad.
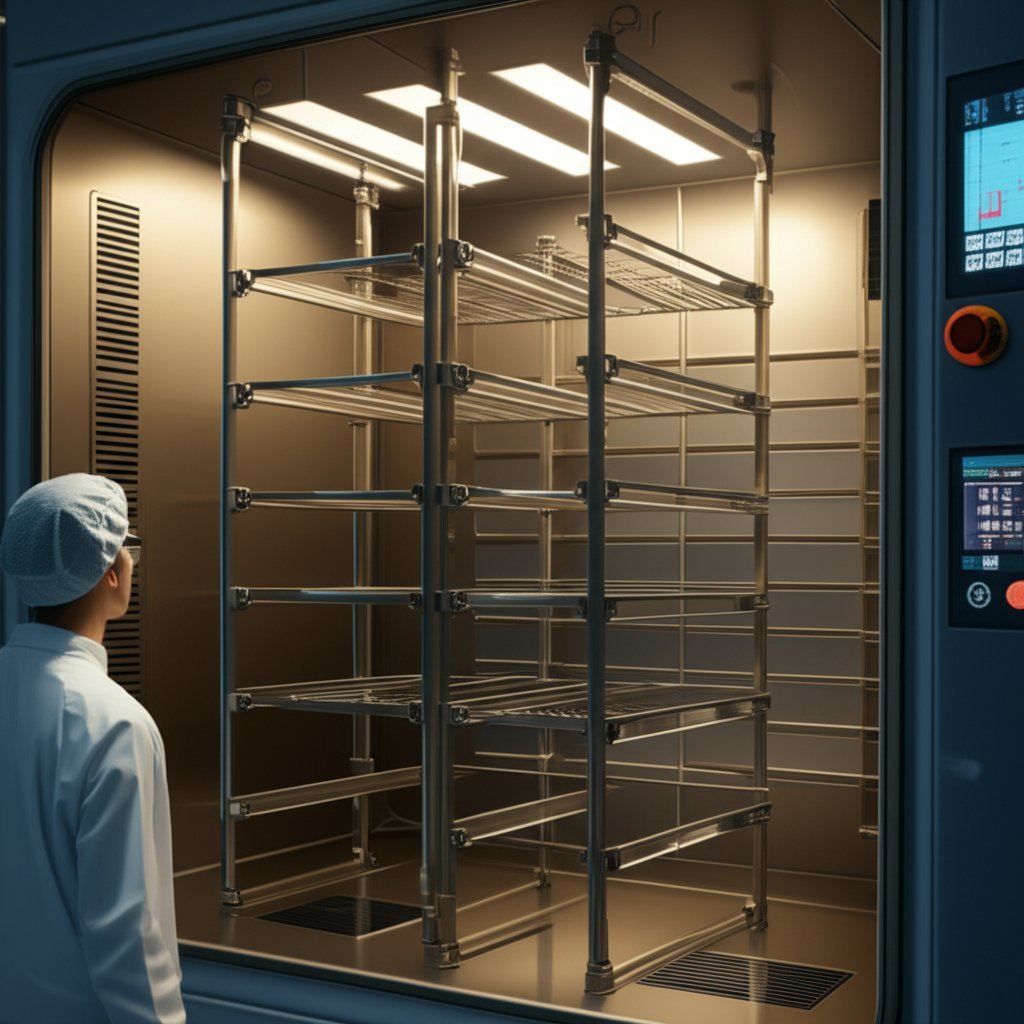
Ladda ugnen för jämn värme
Föreställ dig detta: du har precis pulverlackat en batch med aluminiumbeslag, men efter härdning är vissa blanka och andra matta. Vad hände? Ojämn laddning av ugnen eller blockerad luftcirkulation kan orsaka varma och kalla fläckar, vilket leder till inkonsistenta resultat. För en perfekt finish, följ dessa bästa metoder för laddning av ugnen:
- Kontrollera cirkulationsfläkten: Se till att alla fläktar är igång och oblockerede för jämn värme distribution.
- Kontrollera dörrtätningarna: Undersök ugnens dörrar för att säkerställa tätning för att förhindra värmeförlust.
- Hängdelar för vertikal luftcirkulation: Ordna delarna så att luften kan cirkulera fritt runt alla ytor. Undvik att stapla eller tränga ihop dem.
- Behåll delarnas orientering: Säkerställ att avståndet och orienteringen är desamma från kabine till ugn för att förhindra dropp eller tunna ställen.
- Bekräfta termoelementmätningar: Placera ett termoelement på den tjockaste delen av en representativ komponent och övervaka tills den når måltemperaturen innan du startar tidklockan.
Verifiera delarnas metalltemperatur
Här är verkligheten: ugnsluften värms upp snabbt, men dina delar – särskilt tunga eller tjocka aluminiumdelar – tar längre tid att nå den nödvändiga temperaturen för pulvermålning. Att enbart lita på ugnens display kan leda till underbakade delar, vilket gör dem känsliga för flagnings- eller adhesionsproblem. Använd istället ett termoelement eller en infraröd termometer för att mäta den faktiska metalltemperaturen. Starta tidklockan först när den tjockaste delen av din komponent har nått den angivna temperaturen.
Börja alltid din härdningstid efter att delen - inte bara ugnen - har nått måltemperaturen. Detta enkla steg minskar risken för ofullständig härdning och säkerställer en slitstark och långlivad yta.
För svåra gjutningar eller delar med mycket massa, överväg en förvärmning för att avlägsna inneslutna gaser (avgasning), applicera sedan pulverlacken och härdna som vanligt. Detta hjälper till att förhindra punktformiga hål eller blåsor i din yta.
Genom att ta dig tid att justera din ugnsladdning, övervaka den faktiska deltemperaturen och följa pulverlackens härdningstemperatur från din datablad säkrar du en yta som tål verkliga användningsförhållanden. Är du redo att se om ditt hårda arbete lönt sig? Därefter lär du dig hur du inspekterar och validerar din beläggningskvalitet med standardtester.
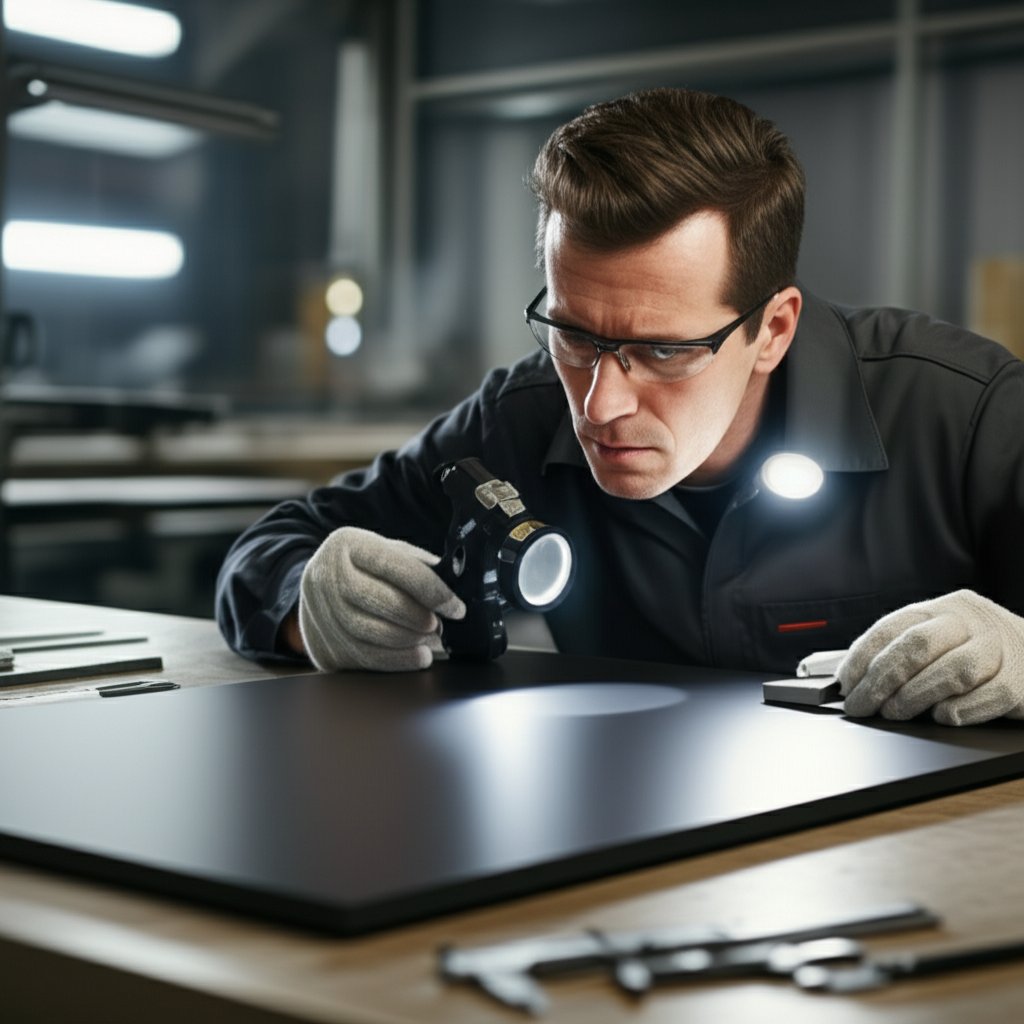
Steg 7: Inspektera och validera beläggningskvalitet med standardtester
Mät filmtjocklek och utseende
När du har investerat tid och omsorg i din pulverlackering, hur vet du att den kommer att hålla? Föreställ dig att du öppnar din nyligen pulverlackerade metallkomponent – kommer färgen, strukturen och täckningen att uppfylla dina förväntningar? Det är här objektiv kvalitetskontroll spelar in. För varje pulverlackerad yta är det avgörande att verifiera beläggningen både med mätverktyg och med egna ögon.
Börja med filmtjocklek. Använd en kalibrerad torkfilmstjockleksmätare som är utformad för aluminiumunderlag – vissa mätare fungerar endast på stål, så dubbelkolla ditt verktyg. Ta mätningar på flera platser på varje komponent, särskilt på kanter och fördjupningar, för att bekräfta att pulverlackeringen ligger inom din tillverkares rekommenderade toleranser. För tunn, och du löper risken för dålig täckning eller korrosion; för tjock, och du kan få apelsinskalstruktur eller förlorad detaljkvalitet.
Granska därefter visuellt under jämn belysning. Leta efter jämn färg, fullständig täckning och korrekt pulverlackerad aluminiumstruktur – oavsett om du specifierat slät, matt eller strukturerad. Kontrollera efter vanliga defekter som dropp, hål eller ojämn täckning. Kom ihåg, kundens första intryck är visuellt, så hoppa inte över detta steg!
Adhesion och lösningsmedelsbeständighet
Hur bra håller din pulverlack på metallen fast på aluminiumn? Testet med korsriffel (ASTM D3359) är ett enkelt sätt att ta reda på. Använd ett skarp kniv för att rita ett rutnät genom beläggningen, applicera känsligt tejp och dra bort den i en vinkel på 180 grader. Om beläggningen sitter kvar – inga rutor lossade – är testet godkänt. Detta test avslöjar snabbt om din ytbehandling och härdbarhet var tillräcklig.
För att kontrollera härdning, prova lösningsmedelstestet (ASTM D5402). Gnugga en bomullstavle blöt i metyletylketon (MEK) eller aceton fram och tillbaka över ytbehandlingen. Att ytan mattas ner eller att en liten färgavtryckning uppstår är normalt, men om pulverlacken mjuknar eller gnuggas bort kan den vara underhärdad. Referera alltid till din pulverlacks tekniska datablad för acceptabla resultat – olika kemier kan reagera olika.
Vill du kontrollera hållbarheten? Blyertshårdhetstestet (ASTM D3363) använder blyertspennor med ökande hårdhet för att repa ytan i en fast vinkel och med ett fast tryck. Om beläggningen motstår repor upp till den angivna hårdheten klarar den testet. För flexibla delar kan dornböjningstestet (ASTM D522) visa om din ytbehandling kommer att spricka under belastning.
Dokumentera resultat för spårbarhet
Kvalitetskontroll av konsekvent pulverlack innebär att följa varje arbetsorder. Skapa en kontrolllista kopplad till ditt pulverlåks datablad och kundens krav:
- Mät och registrera filmtjocklek i flera punkter.
- Granskning av färg, glans, struktur och täckförmåga.
- Utför adhesionstester och lösningsmedelstvätttester på provpaneler eller provdelar.
- Kontrollera hårdhet och flexibilitet om det är specificerat.
- Dokumentera alla testresultat, inklusive kriterier för godkänt/underkänt och eventuella korrigerande åtgärder.
För projekt med hög korrosionskänslighet kan du också behöva saltnebelsprövning (ASTM B117) eller väderbeständighetstester – dessa kräver laboratorieutrustning men är avgörande för pulverlackerade ytor avsedda för arkitektoniska eller marin användning.
Registrera lottnummer, härdningsdata, pistollägen och kvalitetskontrollresultat för varje arbete för att säkerställa reproducerbarhet.
Låter det som mycket? Med övning blir dessa kontroller rutin. De är din bästa garanti för att varje pulverlackerad aluminiumyta matchar kundens förväntningar och att beläggningen håller i längden. Genom att dokumentera och granska dina resultat bygger du upp en kvalitetshistorik – och gör det lättare att felsöka om problem skulle uppstå.
När din inspektion är klar är du redo att ta itu med eventuella defekter. Därefter går vi igenom hur du felsöker och gör om vanliga problem med pulverlack för att uppnå felfria resultat varje gång.
Steg 8: Felsök defekter och planera effektiv reparation
Orsaksanalys – apelsinskalsyta, piggmärken och fiskögon
Har du någonsin avslutat ett pulverlackstvättjobb bara för att upptäcka ojämn apelsinskalsyta, små piggmärken eller konstiga fiskögon som stirrar tillbaka på dig? Du är inte ensam. Även den bästa pulverlackprocessen kan stöta på problem, särskilt när man arbetar med aluminiums unika yt-kemi. Men med en tydlig felsökningsmetod kan du snabbt diagnostisera problemen och sätta projektet tillbaka på rätt köl.
| Defekt | Förmodliga orsaker | Omedelbara kontroller | Korrektiva åtgärder | Förebyggande åtgärder |
|---|---|---|---|---|
| Apelsinskal | För stor lagerstyrka, överbakning, för reaktivt pulver, ojämn substrattemperatur | Kontrollera lagerstyrka, ugnstemperatur, pistolkonfiguration | Minska pulverflödet, justera avståndet mellan pistol och yta, kontrollera härdningsschema | Använd lätta, jämna lager; följ härdningstider enligt databladet; övervaka ugnen med termoelement |
| Piggmärken | Porösa gjutningar, avgasning, hög filmbildning, fuktkvot i pulver | Undersök underlaget, kontrollera efter instängd luft, granska förvärmningsprocessen | Förvärm delar, använd avgasvänliga pulver, minska filmbildning | Förvärm alla gjutna eller tjocka delar; förvara pulver i torr, klimatstyrd miljö |
| Fisheyes (fisheyes) | Silikon- eller oljekontamination, luftburen smuts, felaktig rengöring | Kontrollera förberedningsområde och tryckluftsledningar, sök efter silikonrester | Avlägsna pulverlack från påverkade områden, grundlig rengöring, eliminera silikonkällor | Förbjuda silikonprodukter i förberednings- och målningsområden; använd endast ren, oljefri luft |
| Dålig adherens | Otillräcklig förbehandling, undertorkning, tjock oxidlager, inkompatibelt pulver | Kontrollera ytförberedningsprotokoll, verifiera härdning med lösningsrubbning | Förbered och belägg igen; justera förbehandling; bekräfta ugnstemperatur | Följ komplett förbehandling; verifiera metalltemperatur, inte bara ugnsluft |
| Färgskiftning | Blandade pulverpartier, ojämn härdning, varierande filmtjocklek | Jämför partinummer, kontrollera ugnens enhetlighet | Separera pulverpartier, justera härdningsprofil, standardisera filmtjocklek | Använd ett enda partinummer per arbete; följ alltid tillverkarens härdningsschema |
Adhäsionsfel och färgskiften
Ser du fortfarande att pulverflisor lossnar eller färger som inte matchar ditt prov? Föreställ dig att du förbereder en batch anodiserad aluminium och ser beläggningen lyftas efter härdning. I dessa fall ska du gå igenom förbehandlingsdetaljer och bekräfta om du kan pulverbelägga anodiserad aluminium eller om du måste ta bort den anodiska lagret först. För bästa resultat ska du lätt slita eller avlägsna anodiserade ytor innan du applicerar nytt pulver. Och om du undrar, ja – du kan pulverbelägga över anodiserad aluminium, men endast om ytan är ren, sliten och fri från föroreningar.
Åtgärder och avlägsnande av beläggning
Misstag händer – vilken är då den bästa metoden att ta bort pulverlack från aluminium utan att skada grundmaterialet? Här är dina huvudalternativ:
- Kemisk rensning: Lägg delen i en särskild lösningsmedel för pulverlack, och följ alla säkerhetsåtgärder och hanteringsföreskrifter. Detta är ofta den säkraste och mest tillgängliga metoden för hemmabruk eller småserietillverkning.
- Slipblästring: Använd fina medier som glaskulor eller aluminiumoxid vid lågt tryck. För högt tryck eller grova medier kan skada det mjuka aluminiumt, så agera försiktigt ( KGE-beklädnad ).
- Termisk avlägsnande: Industriugnar kan bränna bort pulverlack vid höga temperaturer, men denna metod är riskabel för aluminium, som kan förlora hållfasthet om det blir för hett. Använd endast om du har erfarenhet och rätt utrustning.
- Laseravskalning: En exakt och professionell lösning för känsliga eller högvärderade delar, men sällan tillgänglig för hemmamarknader.
Efter avlägsnande av beläggning, förbered alltid ytan på nytt – rengör, slipa och skölj – innan pånytt applicering. Om du behöver avlägsna pulverlack från aluminium upprepade gånger bör du överväga att skriva ut arbetet till en professionell ytbehandlare för att undvika skador på grundmaterialet och säkerställa konsekventa resultat.
Tips: Ändra en variabel i taget och dokumentera resultatet. Ta bilder före och efter för att verifiera att dina korrigerande åtgärder faktiskt löser problemet.
Genom att metodiskt diagnostisera defekter och använda rätt revideringsmetoder behåller du kontroll över dina projekt med pulverlack på aluminium – oavsett om du reparerar en enskild komponent eller förbättrar hela din process. Därefter kommer vi att undersöka hur du väljer rätt partner om du ska skala upp produktionen eller behöver specialiserad ytbehandling.
Steg 9: Välj rätt partner vid skalning av produktion
När det är rimligt att skriva ut arbetet
Föreställ dig att du behärskat pulverlackeringsförfarandet för ett fåtal anpassade delar, men nu står du inför ett projekt med hundratals – eller tusentals – pulverlackerade aluminiumfönster, komplexa profiler eller specialtuber. Låter det överväldigande? Då blir det en klok idé att skriva ut produktionen av dina pulverlackerade aluminiumkomponenter till en specialist. Varför? Därför att att skala upp innebär mer än att bara tillverka fler delar – det innebär tuffare specifikationer, högre konsekvens och ofta efterlevnad av krävande industristandarder.
Att skriva ut produktionen är särskilt värdefullt om du arbetar med:
- Komplexa geometrier eller sammanställningar som kräver exakt aluminiumbeläggning inne och ute
- Massproduktion där upprepbarhet och hastighet är avgörande
- Bilindustriella, arkitektoniska eller industriprojekt som kräver certifierade kvalitetssäkringssystem
- Integrerade processer – såsom bearbetning, montering och beläggning – under samma tak
För många tillverkare är den kapitalinsats, plats och expertis som krävs för intern pulverlackning helt enkelt inte hållbar. Genom att outsourca kan du fokusera på din kärnverksamhet och samtidigt dra nytta av erfarenhet och utrustning från specialiserade leverantörer.
Hur man jämför leverantörer
Alla partners inom pulverlackning är inte lika. När du utvärderar leverantörer för aluminiumbeläggningar i stor skala bör du titta bortom priset. Beakta deras förmåga att leverera konsekvent kvalitet, uppfylla internationella standarder och stödja din specifika applikation – oavsett om det gäller pulverlackerad aluminiumrör för infrastruktur eller komplexa fönsterprofiler för byggsektorn.
| Leverantör | Förmågor | Kvalitetskontrollens omfattning | Bilindustrinerfarenhet | Värde/Anteckningar |
|---|---|---|---|---|
| Shaoyi Metal Parts Supplier | Integrerad pressning, CNC-bearbetning och pulverlackning; anpassade profiler; stora volymer | Avancerad kvalitetskontroll för bilindustrin; IATF 16949-certifierad; full spårbarhet; redo för PPAP | Omfattande – levererar till globala bil-tillverkare och Tier 1-leverantörer | Helhetslösning; effektiviserad arbetsflöde; provkuponger tillgängliga; gratis designanalys |
| Regionalt/Lokalt pulverlackeringsföretag | Batchlackering, begränsad intern produktion | Grundläggande kvalitetssäkring (ISO 9001 eller liknande); kan sakna bilindustris spårbarhet | Begränsad eller ingen | Snabba leveranser för små serier; mindre lämplig för komplexa monteringsjobb |
| Global OEM/varumärkeslackföretag | Högeffektiv produktion, internationella certifieringar, brett urval av ytbehandlingar | Stark kvalitetssäkring; regelbundna revisioner; avancerad labbtestning | Stark, men kan kräva stora minimiorderkvantiteter | Utmärkt för stora volymer; mindre smidig för specialanpassade jobb |
När du granskar kandididater, begär alltid följande:
- Typ av konverteringsbeläggning och processdetaljer
- Metod för härdningsverifiering (t.ex. ugnar, testpaneler)
- Tjocklekskontrollplan och mätverktyg
- Referensstandarder (ISO, ASTM, Qualicoat, AAMA, etc.)
- Exempelpaneler och senaste inspektionsrapporter
För internationella eller bilindustriprojekt, begär datablad, PPAP-dokumentation (Production Part Approval Process) och spårbarhetsregister. Dessa kommer att hjälpa dig att säkerställa att din aluminium pulverlackerade delar uppfyller både tekniska och lagstadgade krav.
Bilkomponenter av högkvalitativt aluminium: Ett fall för integrerade partners
När projektet kräver strikt kvalitetskontroll, komplex bearbetning och felfri finish – tänk på bilchassin, EV-batterilådor eller synlig trim – så är integrerade partners som Shaoyi Metal Parts Supplier specialister. Istället för att behöva hantera flera leverantörer för extrusion, CNC och aluminiumbeläggning så drar du nytta av en enskild källa som hanterar hela processen. Det minskar riskerna, förkortar leveranstiden och säkerställer att varje aluminium pulverlackerade del uppfyller höga standarder från råvara till slutlig granskning.
Kan aluminium pulverlackeras enligt bilindustrins eller arkitekturens specifikationer? Absolut – om du väljer en leverantör med beprövade system, avancerad utrustning och erfarenhet inom din bransch. Till exempel täcker Shaoyis arbetsflöde allt från DFM (Design for Manufacturability) granskning till slutlig kvalitetskontroll, med full dokumentation och provgodkännande innan full produktion – vilket gör dem till ett idealiskt val för stora och viktiga projekt.
- Fråga om deras kompetens inom pulverlackade aluminiumfönster eller pulverlackerad aluminiumprofilering om projektet kräver sådana produkter.
- Begär provplattor för att verifiera vidhäftning, färg, glans och korrosionsprestanda innan skalförläggning.
- Bekräfta att de uppfyller miljö- och regelverkskrav för din målmarknad.
Rekommendation: Genomför pilot på provplattor, granska kvalitetssäkring och bekräfta repeterbarhet innan produktion påbörjas. Den rätta parten kommer att välkomna din granskning och erbjuda transparenta och spårbara resultat varje steg på vägen.
Genom att noggrant granska din ytbehandlingspartner och specificera rätt krav säkerställer du att dina aluminiumkomponenter – oavsett hur komplexa eller krävande de är – levereras perfekt behandlade, i tid och redo för världens tuffaste applikationer. Nyfiken på nästa steg i pulverlackens utveckling eller vill du utforska mer om kan man pulverlacka aluminium för ditt nästa stora projekt? Börja med ett samtal – och kräv bevis innan du går i land.
Vanliga frågor om pulverlackering av aluminium
1. Kan man pulverlacka aluminium, och är det ett bra val?
Ja, aluminium kan effektivt pulverlackeras. Med rätt ytbehandling och härdbedömning erbjuder pulverlack exzellent adhesion, korrosionsbeständighet och en hållbar, attraktiv yta för aluminiumdelar. Det används flitigt för arkitektoniska, bilindustriella och industriella applikationer.
2. Vilka är de viktigaste stegen för att pulverlacka aluminium framgångsrikt?
Processen innebär grundlig rengöring och förbehandling, korrekt märkning och jordning, val av rätt pulver och finish, applicering av pulver med exakt elektrostatisk teknik samt härdbedömning vid rätt temperatur. Varje steg är avgörande för att säkerställa en långlivad, högkvalitativ pulverlackerad aluminiumyta.
3. Behöver jag särskild utrustning för att pulverlacka aluminium hemma?
För en hemmavist med pulverlack, behöver du en dedikerad härdningsovn (aldrig en matovn), en pulverlacksprutpistol, ett jordat arbetsområde och personlig skyddsutrustning såsom andningsskydd och handskar. Bra ventilation och dammkontroll är också viktigt för säkerheten och kvaliteten på ytbehandlingen.
4. Hur tar jag bort pulverlack från aluminium om jag gör fel?
Pulverlack kan tas bort från aluminium med kemiska avlakningslösningar som är formulerade för pulverlack eller med försiktig strålningsmetod med fint strålmateriel. Kom alltid ihåg att rengöra och förbereda aluminiumytan ordentligt innan du applicerar ny pulverlack för att undvika adhäsionsproblem.
5. När bör jag överväga att skriva ut pulverlackering av aluminium?
Skriv ut när du behöver konsekventa resultat för komplexa former, stora volymer eller projekt som kräver certifierad kvalitetssäkring, såsom bilindustrin eller byggnadsdelar. Integrerade leverantörer som Shaoyi erbjuder pressning, bearbetning och pulverlack i en arbetsflöde, vilket säkerställer kvalitet och effektiv produktion.