 Małe partie, wysokie standardy. Nasza usługa szybkiego prototypowania sprawia, że weryfikacja jest szybsza i łatwiejsza —

Niestandardowe tłoczenie blachy: od surowego materiału do gotowego elementu – wyjaśnione krok po kroku
Co tak naprawdę oznacza niestandardowe wytłaczanie blachy
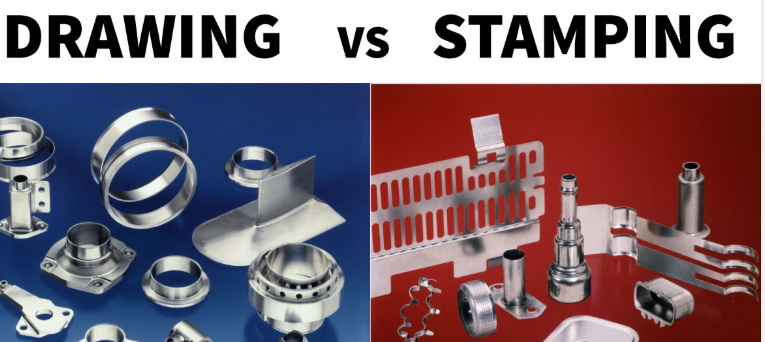
Czy kiedykolwiek zastanawiałeś się, jak producenci wytwarzają tysiące identycznych elementów metalowych z prawie doskonałą precyzją? Odpowiedź tkwi w niestandardowym wytłaczaniu blachy — procesie produkcyjnym zimnego kształtowania, który przekształca płaską blachę metalową w złożone części trójwymiarowe przy użyciu specjalistycznych matryc i pras o dużej sile .
Czym więc dokładnie jest wytłaczanie metalu? W swojej istocie wytłaczanie metalu wykorzystuje prasy mechaniczne lub hydrauliczne do cięcia, gięcia i kształtowania blachy metalowej w precyzyjnie określone kształty. Proces ten opiera się na dopasowanych zestawach tłoczników i matryc, które działają siłą kontrolowaną, aby przekształcić materiał bez stosowania ciepła. W przeciwieństwie do frezowania CNC, które usuwa materiał, lub odlewania, wymagającego stopionego metalu, wytłaczanie przemieszcza materiał poprzez szybką deformację plastyczną.
Indywidualne tłoczenie blachy to precyzyjny proces produkcyjny, który wykorzystuje dopasowane narzędzia, specyficzny dobór materiału oraz zaprojektowane tolerancje w celu wytworzenia unikalnych elementów metalowych przeznaczonych wyłącznie do konkretnego zastosowania.
Od płaskiej blachy do precyzyjnego elementu
Wyobraź sobie, że zaczynasz od prostego, płaskiego kawałka metalu, a kończysz na skomplikowanym uchwycie, obudowie lub elemencie konstrukcyjnym. Ta transformacja odbywa się w ciągu kilku sekund dzięki starannie zaplanowanym operacjom tłoczenia.
Droga od surowego materiału do gotowego, wtłoczonego elementu metalowego przebiega w określonej kolejności. Najpierw płaska blacha lub taśma metalowa są podawane do prasy. Następnie precyzyjne matryce — które mogą ważyć setki lub nawet tysiące kilogramów — zamykają się z ogromną siłą. W tym właśnie momencie ostrza tnące przecinają materiał, podczas gdy powierzchnie kształtujące zaginają i formują go, nadając ostateczną geometrię.
To, co czyni ten proces wyjątkowym, to jego powtarzalność. Gdy narzędzia zostaną zoptymalizowane, tłoczenie zapewnia wyjątkową spójność części w całych partiach produkcyjnych liczących tysiące, a nawet miliony sztuk. Typowe tolerancje wymiarowe mieszczą się w zakresie od ±0,1 mm do ±0,5 mm, przy czym kluczowe cechy mogą osiągać precyzję ±0,05 mm przy użyciu wysokiej jakości matryc i kontrolowanych warunków pracy prasy.
Dlaczego dostosowanie do indywidualnych potrzeb ma znaczenie w tłoczeniu metali
Właśnie w tym miejscu standardowe i niestandardowe podejścia różnią się istotnie. Standardowe tłoczenie metali wykorzystuje gotowe narzędzia przeznaczone do ogólnych kształtów — np. proste podkładki lub podstawowe wsporniki. Tłoczenie metali na zamówienie polega natomiast na zastosowaniu matryc zaprojektowanych wyłącznie dla konkretnej części zamawiającego.
Ta różnica ma znaczenie z trzech kluczowych powodów:
- Dostosowane narzędzia: Niestandardowe matryce są projektowane od podstaw tak, aby produkować dokładnie określony kształt danej części — niezależnie od tego, czy chodzi o złożony wspornik samochodowy, czy o element precyzyjnego urządzenia medycznego.
- Wybór odpowiedniego materiału: Twoje zastosowanie określa materiał — stal węglowa dla wytrzymałości, stal nierdzewna dla odporności na korozję lub aluminium w celu redukcji masy — a oprzyrządowanie projektowane jest odpowiednio.
- Dopuszczalne odchyłki wymiarowe: Kluczowe wymiary otrzymują niezbędną precyzję, przy czym geometria matrycy kompensuje zachowania materiału charakterystyczne dla danego typu materiału, np. sprężynowanie.
W przeciwieństwie do masowo produkowanych części tłoczonych, niestandardowe tłoczenie blachy uwzględnia unikalne wymagania funkcjonalne. Podejście to okazuje się niezbędne, gdy Twoja część musi dokładnie pasować do współpracujących elementów, spełniać określone kryteria wydajnościowe lub odpowiadać wymogom certyfikacji branżowych. Wstępna inwestycja w niestandardowe oprzyrządowanie przynosi korzyści w postaci niższych kosztów przypadających na pojedynczą sztukę przy dużych partiach oraz spójnej jakości w trakcie długotrwałych serii produkcyjnych.
Zrozumienie trzech podstawowych procesów tłoczenia
Teraz, gdy rozumiesz, czym jest niestandardowe tłoczenie blachy, kolejnym pytaniem staje się: który proces tłoczenia najlepiej sprawdzi się w Twoim projekcie? Nie wszystkie metody tłoczenia są jednakowo skuteczne dla każdego elementu. Wybrany proces tłoczenia blachy ma bezpośredni wpływ na szybkość produkcji, jakość wykonywanych części oraz całkowite koszty.
Trzy główne metody dominują w precyzyjnym tłoczeniu metalu : tłoczenie matrycą postępującą, tłoczenie matrycą transferową oraz tłoczenie głębokie. Każda z nich wyróżnia się w określonych warunkach – a wybór niewłaściwej metody może oznaczać niepotrzebne wydatki lub pogorszenie właściwości końcowej części. Przeanalizujmy szczegółowo, kiedy należy stosować każdą z tych metod.
Tłoczenie matrycą progresywną dla wysokiej wydajności
Wyobraź sobie ciągłą taśmę metalu przesuwającą się przez wiele stacji, przy czym każda z nich dodaje do Twojej części kolejny element konstrukcyjny. To właśnie tak działa tłoczenie matrycą postępującą – i jest ono podstawową metodą stosowaną w operacjach tłoczenia blachy w wysokich ilościach.
Oto jak to działa: Długa taśma blachy wprowadzana jest przez pojedynczy blok matrycy zawierający wiele zintegrowanych stacji. W miarę przesuwania się taśmy każda stacja wykonuje określoną operację — wytłaczanie otworów, gięcie występów, wykuwanie powierzchni lub cięcie profili. Wykonane części pozostają połączone z taśmą aż do ostatniej stacji, która oddziela je od materiału nośnego.
Dlaczego to ma znaczenie dla Twoich serii produkcyjnych? Wytłaczanie progresywne zapewnia wyjątkową szybkość. Zgodnie z poradnikiem produkcyjnym Fictiv prasy wytłaczające mogą produkować kilkadziesiąt do setek identycznych części na minutę, zachowując przy tym ścisłą spójność wymiarową przez miliony cykli. W przypadku stalowych elementów wytłaczanych, wymagających wielu cech konstrukcyjnych, ta metoda minimalizuje manipulacje i maksymalizuje wydajność.
Wytłaczanie progresywne daje najlepsze rezultaty, gdy:
- Objętość produkcji przekracza 10 000 sztuk rocznie
- Części wymagają wielu cech konstrukcyjnych tworzonych sekwencyjnie
- Elementy są wystarczająco małe, aby pozostać połączone z taśmą nośną
- Spójna i powtarzalna jakość ma znaczenie w trakcie długotrwałych serii produkcyjnych
Wyjaśnienie metod transferowej i głębokiego tłoczenia
Co dzieje się, gdy Twoje części są zbyt duże na matryce postępujące lub gdy potrzebujesz geometrii w kształcie kubka? Wtedy na scenę wchodzą tłoczenie metodą transferową i tłoczenie głębokie.
Wyciskanie przenośne
W tłoczeniu metodą transferową proces tłoczenia metalu rozpoczyna się inaczej. Na pierwszej stacji wykrawane są pojedyncze płytki z materiału, a mechaniczny mechanizm transferowy przesuwa każdą płytkę osobno przez kolejne stacje kształtujące. Jak wyjaśnia firma Aranda Tooling, w tej metodzie na każdej stacji stosowane są techniki takie jak gięcie, wykrawanie, przebijanie oraz inne, zanim gotowa część zostanie wypchnięta ze stacji.
Tłoczenie transferowe wyróżnia się przy większych tłoczonych elementach, które nie mogą pozostać przyczepione do taśmy nośnej. Oddzielne stacje matrycy poprawiają również wydajność materiału, ponieważ płytki można bardziej efektywnie rozmieszczać (nestować) na arkuszu.
Tłoczenie głębokie
Potrzebujesz bezszwowych kubków, obudów lub elementów cylindrycznych? Tłoczenie głębokie tworzy puste części przez rozciąganie płaskiego blachy w gnieździe matrycy. Wtrącanie wymusza przepływ materiału w kierunku radialnym do wewnątrz, tworząc charakterystyczny kształt kubka bez szwów ani połączeń.
Złożone części wykonane metodą tłoczenia głębokiego często wymagają wielu etapów tłoczenia z dokładną kontrolą przepływu materiału. Bez odpowiedniej techniki części mogą pękać na dnie lub marszczyć się wzdłuż ścianek. Ta metoda wytwarzania tłoczonych elementów okazuje się niezbędna w zastosowaniach takich jak zbiorniki paliwa w pojazdach samochodowych, naczynia kuchenne oraz obudowy urządzeń elektronicznych, gdzie kluczowe jest wykonanie bezszwowe.
Porównanie trzech procesów tłoczenia
Wybór odpowiedniego procesu tłoczenia zależy od konkretnych wymagań. Poniższe porównanie podkreśla kluczowe różnice:
| Czynnik | Stamping progresywny | Wyciskanie przenośne | Tłoczenie głębokie |
|---|---|---|---|
| Optymalna geometria części | Małe do średnich części płaskich z wieloma cechami | Większe części wymagające oddzielnych operacji kształtowania | Części w kształcie kubka, cylindryczne lub puste |
| Typowy zakres objętości | Wysoki wolumen (powyżej 10 000 sztuk rocznie) | Średnia do wysoka objętość (powyżej 5000 sztuk rocznie) | Średnia do wysoka objętość w zależności od złożoności |
| Możliwości złożoności | Wiele cech w kolejności; skomplikowane profile 2D | Złożone formy 3D; duże elementy konstrukcyjne | Bezszwowe kształty puste; zmienna grubość ścianek |
| Względna inwestycja w oprzyrządowanie | Niższy koszt (pojedynczy zintegrowany blok matrycy) | Wyższy koszt (wymagane są wiele oddzielnych matryc) | Umiarkowany do wysokiego (wymagane są specjalne matryce do tłoczenia) |
| Prędkość produkcji | Najszybszy | Umiarkowany | Zależy od głębokości tłoczenia i liczby etapów |
Zrozumienie tych różnic pozwala na właściwe określenie odpowiedniego procesu od samego początku. Jednak wybór procesu to tylko jedna część równania — materiał, który wybierzesz, wpływa na wszystko: od możliwości kształtowania po końcową wydajność elementu.
Przewodnik doboru materiału dla tłoczonych elementów
Wybrałeś odpowiedni proces tłoczenia — ale co z materiałem doprowadzanym do prasy? Metal, który wybierzesz, wpływa na wszystko: sposób, w jaki matryca kształtuje Twój element, jakie tolerancje można osiągnąć oraz jak gotowy komponent zachowuje się w użytkowaniu . Błędny wybór materiału może skutkować awariami kształtowania, nadmiernym zużyciem narzędzi lub elementami nie spełniającymi wymagań aplikacyjnych.
Oto rzeczywistość: każdy metal zachowuje się inaczej pod wpływem sił tłoczenia. Niektóre materiały łatwo się rozciągają, podczas gdy inne pękają. Niektóre odkształcają się sprężynowo po kształtowaniu, inne zaś zachowują przyjętą formę. Zrozumienie tych cech pozwala dobrać odpowiedni materiał do danej aplikacji oraz uniknąć kosztownych niespodzianek w trakcie produkcji.
Stale stopowe i ich właściwości tłocznościowe
Stal dominuje w niestandardowym tłoczeniu blachy metalowej – i to z dobrego powodu. Oferuje nieosiągalną kombinację wytrzymałości, kutej plastyczności i opłacalności, dzięki czemu jest domyślnym wyborem w zastosowaniach konstrukcyjnych.
Stal węglowa: materiał uniwersalny
Gdy najważniejsze są wytrzymałość i przystępność cenowa, stal węglowa spełnia te wymagania. Zgodnie z przewodnikiem wyboru materiałów firmy Talan Products, stal węglowa jest szeroko stosowana w tłoczeniu ze względu na połączenie wytrzymałości z doskonałą kutej plastycznością. Różne gatunki oferują różne właściwości:
- Stal węglowa o niskiej zawartości węgla (1008–1020): Doskonała kształtowalność przy złożonych gięciach i głębokich tłoczkach; idealna do uchwytów, obudów i elementów konstrukcyjnych
- Stal średniowęglowa (1030–1050): Wyższa wytrzymałość przy umiarkowanej kształtowalności; nadaje się do części obciążonych wymagających odporności na zużycie
- Wysokowytrzymała stal niskostopowa (HSLA): Zapewnia doskonałą wytrzymałość bez dodatkowej masy; stosowana głównie w zastosowaniach motocyklowych i ciężkiego sprzętu
Płyty stalowe w większych grubościach wymagają wyższego tonażu prasy i mogą potrzebować operacji tłoczenia progresywnego w celu zapobieżenia pękaniom. Dla większości zastosowań tłoczarskich blacha stalowa w zakresie grubości od kalibru 22 (0,030 cala) do kalibru 10 (0,135 cala) oferuje optymalny balans między kształtowalnością a wydajnością konstrukcyjną.
Stal nierdzewna: odporność na korozję połączona z trwałością
Gdy Twoje zastosowanie wymaga zarówno wytrzymałości, jak i odporności na korozję, blacha ze stali nierdzewnej staje się niezbędna. Materiał ten wymaga bardziej ostrożnego obsługi podczas operacji tłoczenia stali nierdzewnej ze względu na wyższą szybkość utwardzania przez deformację oraz tendencję do zacierania się na powierzchniach narzędzi.
- stal nierdzewna 304: Najczęściej stosowana gatunkowość; doskonała odporność na korozję przy dobrej kutej formowalności do zastosowań ogólnego przeznaczenia
- stal 316: Wysoka odporność chemiczna przeznaczona do środowisk morskich, medycznych oraz przetwórstwa spożywczego
- stal nierdzewna 430: Magnetyczna gatunkowość ferrytyczna zapewniająca dobrą odporność na korozję w niższej cenie
Kluczowy aspekt projektowania: blachy ze stali nierdzewnej wykazują znaczne odkształcenie sprężyste po kształtowaniu. Zgodnie z Przewodnikiem Projektowania Blach ESI , otwory w materiałach o wysokiej wytrzymałości na rozciąganie, takich jak stopy stali nierdzewnej, powinny mieć średnicę co najmniej dwukrotnie większą niż grubość materiału — czyli dwa razy większą niż standardowy współczynnik 1,2 dla stali węglowej. Zapobiega to pękaniu stempla i zapewnia czystą geometrię otworów.
Uwagi dotyczące aluminium i materiałów nieżelaznych
Co, jeśli redukcja masy decyduje o wymaganiach projektowych? Blacha aluminiowa zapewnia doskonałą wytrzymałość względem masy, zachowując przy tym dobrą odporność na korozję bez konieczności stosowania powłok ochronnych.
Stopy aluminium do lekkich zastosowań
Tłoczenie aluminium wymaga innych rozważań dotyczących narzędzi niż tłoczenie stali. Materiał ten jest miększy, co zmniejsza zużycie narzędzi, ale jednocześnie jest bardziej podatny na powstanie rys i zacierania powierzchni. Typowe gatunki blach aluminiowych to:
- aluminium 1100: Wysoka kutejność oraz doskonała odporność na korozję; idealne do głębokich tłoczeń i złożonych kształtów
- aluminium 3003: Średnia wytrzymałość przy dobrej obrabialności; powszechnie stosowane w ogólnych zastosowaniach tłoczenia
- aluminium 5052: Wyższa wytrzymałość dla zastosowań konstrukcyjnych; dobra odporność na zmęczenie przy obciążeniach dynamicznych
- aluminium 6061: Poddawalne hartowaniu w celu zwiększenia wytrzymałości po kształtowaniu; typowe dla precyzyjnych elementów stosowanych w przemyśle lotniczym
Zgodnie z poradnikiem materiałowym firmy Peterson Manufacturing, aluminium pozwala na tworzenie lekkich produktów zachowujących wysoką wytrzymałość, a także zapewniające przewodność cieplną i naturalną odporność na korozję.
Miedź, mosiądz i materiały przewodzące
Wymagania dotyczące przewodności elektrycznej i cieplnej wskazują na miedź i jej stopy. Materiały te łatwo się tłoczy ze względu na dużą plastyczność, jednak ich miękkość wymaga ostrożnego obchodzenia się z nimi, aby uniknąć uszkodzeń powierzchni.
- Miedź (C110, C101): Wyróżniająca się przewodność elektryczna i cieplna; niezbędna w zaciskach elektrycznych, szynach zbiorczych i radiatorach ciepła
- Mosiądz (C260, C360): Dobra przewodność przy poprawionej obrabialności; popularny w elementach dekoracyjnych i kontaktach elektrycznych
- Brąz fosforowy: Doskonałe właściwości sprężyste oraz odporność na zmęczenie; idealny do złączy elektrycznych i elementów przełączników
Zrozumienie grubości blachy (oznaczenia kalibru) i granic kształtowania
Grubość materiału ma bezpośredni wpływ na możliwości tłoczenia. Tabela kalibrów przekształca standardowe oznaczenia w rzeczywiste wymiary — i pomaga zrozumieć możliwości kształtowania.
| Grubość | Grubość stali (cale) | Grubość aluminium (cale) | Typowe zastosowania |
|---|---|---|---|
| 26 | 0.018 | 0.016 | Ekranowanie elektryczne, obudowy lamp |
| 22 | 0.030 | 0.025 | Uchwyty, pokrywy, obudowy elektroniczne |
| 18 | 0.048 | 0.040 | Uchwyty konstrukcyjne, elementy nadwozia |
| 14 | 0.075 | 0.064 | Wytrzymałe uchwyty, płyty montażowe |
| 10 | 0.135 | 0.102 | Ramy konstrukcyjne, części nośne |
Większość operacji tłoczenia obsługuje materiały o grubości od 26 gauge (cienkie) do 10 gauge z dużą wydajnością. Powyżej 10 gauge siły kształtujące znacznie rosną, co może wymagać zastosowania pras hydraulicznych lub alternatywnych procesów, takich jak cięcie laserem w połączeniu z gięciem na prasie krawędziowej.
Wpływ wyboru materiału na narzędzia i wydajność części
Wybór materiału wpływa na każdy aspekt procesu tłoczenia. Oto, co zmienia się w zależności od określonego metalu:
- Projektowanie narzędzi: Twardsze materiały wymagają bardziej wytrzymałej konstrukcji matryc z zastosowaniem specjalnych powłok zapobiegających zużyciu; miększe materiały wymagają polerowanych powierzchni, aby zapobiec zaciskaniu (galling)
- Granice kształtowania: Każdy materiał ma określoną wartość wydłużenia procentowego, która określa, jak daleko można go rozciągnąć przed pęknięciem – jest to kluczowe przy głębokim tłoczeniu i złożonych gięciach
- Kompensacja odbicia sprężystego: Materiały o wysokiej wytrzymałości bardziej odkształcają się sprężynowo po kształtowaniu, co wymaga dostosowania geometrii matrycy w celu osiągnięcia końcowych wymiarów
- Wykończenie powierzchni: Twardość materiału i wymagania dotyczące powłoki wpływają na końcowy wygląd i mogą determinować konieczność dodatkowych operacji wykańczających
Związek między właściwościami materiału a skutecznością procesu kształtowania wyjaśnia, dlaczego projektowanie z myślą o możliwościach produkcyjnych (DFM) odgrywa tak istotną rolę w niestandardowych projektach tłoczenia. Wczesne zrozumienie tych oddziaływań pozwala uniknąć kosztownych modyfikacji narzędzi i opóźnień w produkcji.
Zasady projektowania optymalizujące skuteczność tłoczenia
Wybrałeś/-aś proces tłoczenia oraz materiał — jednak właśnie w tym miejscu wiele projektów napotyka trudności. Projekt, który wygląda idealnie w oprogramowaniu CAD, może stać się koszmarem produkcyjnym po wprowadzeniu go do prasy. Rozwiązaniem jest zastosowanie zasad projektowania z myślą o możliwościach produkcyjnych (DFM) jeszcze przed rozpoczęciem opracowywania narzędzi.
Wyobraź sobie DFM jako most łączący zamierzenia inżynierskie z rzeczywistością produkcyjną. Blachy nie zachowują się jak pełne bryły — gięją się, rozciągają i odzyskują pierwotny kształt w sposób przewidywalny, ale często pomijany. Zgodnie z Badaniami inżynierskimi EABEL wiele błędów projektowych powstaje, ponieważ inżynierowie zbyt mocno polegają na geometrii cyfrowej, nie uwzględniając rzeczywistych ograniczeń procesu kształtowania.
Jakie są korzyści z prawidłowego zaprojektowania? Mniej iteracji narzędzi, krótsze czasy realizacji oraz znacznie wyższe wskaźniki powodzenia przy pierwszym wyprodukowanym egzemplarzu. Przeanalizujmy kluczowe zasady, które oddzielają płynne produkcje od kosztownych przeprojektowań.
Kluczowe wymiary i zasady rozmieszczenia
Każda tłoczona część z blachy stalowej musi przestrzegać określonych ograniczeń geometrycznych. Nieprzestrzeganie tych zasad prowadzi do zniekształconych cech konstrukcyjnych, pęknięć materiału lub części, których po prostu nie da się wytworzyć. Oto nieodpowiedzialne zasady projektowania tłoczki z blachy:
Minimalne promienie gięcia
Wyobraź sobie zgięcie kawałka tektury zbyt ostro – zewnętrzna powierzchnia pęka lub pokrywa się siecią drobnych pęknięć. Metal zachowuje się podobnie. Zgodnie z wytycznymi DFM firmy Norck promień wewnętrznego zgięcia powinien być co najmniej równy grubości materiału. Dla blachy o grubości 1 mm należy określić minimalny promień wewnętrznego zgięcia wynoszący 1 mm.
Dlaczego to ma znaczenie dla niestandardowych matryc do tłoczenia metali? Gdy wszystkie zgięcia mają ten sam promień, producenci mogą używać jednego narzędzia do każdego zgięcia — co skraca czas przygotowania i obniża koszty produkcji. Twardsze materiały, takie jak stal nierdzewna, często wymagają jeszcze większych promieni (1,5–2 razy grubość materiału), aby zapobiec pękaniom.
Odległość otworu od gięcia
Umieszczenie otworu zbyt blisko linii zgięcia spowoduje jego rozciągnięcie w kierunku kształtu owalnego podczas procesu kształtowania. Wówczas elementy mocujące nie będą pasować, a montaż stanie się niemożliwy. Zasada jest prosta: odległość między otworem a linią zgięcia powinna wynosić co najmniej 2,5 razy grubość materiału plus promień zgięcia.
Na przykład przy materiale o grubości 1,5 mm i promieniu zgięcia 2 mm otwory powinny znajdować się w odległości co najmniej 5,75 mm od linii zgięcia. Jeśli ograniczenia układu konstrukcyjnego zmuszają do umieszczania cech bliżej tej odległości, rozważ wykonanie otworów po zgięciu, a nie w trakcie operacji tłoczenia.
Wymagania dotyczące odstępów między cechami
Wąskie wycięcia i blisko siebie położone cechy powodują skupianie się ciepła podczas cięcia laserowego oraz osłabienie materiału podczas gięcia. Zgodnie z ustanowionymi wytycznymi dotyczącymi obróbki metali należy zachować minimalną szerokość dowolnego wąskiego wycięcia na poziomie co najmniej 1,5 grubości materiału. Dzięki temu zapobiega się odkształceniom i uzyskuje się płaskie, dokładne elementy, które montują się bez konieczności stosowania siły.
Minimalne długości flanszy
Flansza – czyli część blachy, która jest zaginana w górę – musi mieć wystarczającą długość, aby prasa giętka lub matryca mogły ją prawidłowo chwycić. Jeśli flansza jest zbyt krótka, materiał ślizga się, co prowadzi do niestabilnych kątów gięcia. Wytyczna brzmi: długość flanszy powinna wynosić co najmniej cztery razy grubość materiału. Krótkie flansze wymagają drogiego, specjalnego narzędziowania, które może podwoić koszty produkcji.
Przy korzystaniu z tabeli grubości blachy pamiętaj, że grubsze materiały wymagają proporcjonalnie dłuższych flanszy. Część stalowa o grubości 14 (0,075 cala) wymaga minimalnej długości flanszy wynoszącej 0,300 cala, podczas gdy dla grubości 22 (0,030 cala) wystarczy flansza o długości 0,120 cala.
Unikanie kosztownych błędów projektowych
Ponad podstawowe zasady wymiarowe, kilka decyzji projektowych powoduje systematyczne problemy podczas tłoczenia. Wczesne rozpoznanie tych pułapek pozwala zaoszczędzić znaczne kwoty pieniędzy i czas.
Brak nacięć kompensacyjnych przy gięciu
Gdy linie gięcia przecinają krawędzie lub inne cechy bez nacięć kompensacyjnych, blacha pęka lub ulega wygięciu w narożniku. Rozwiązanie? Dodaj małe prostokątne lub okrągłe nacięcia na końcach linii gięcia. Zgodnie ze specjalistami od obróbki blachy, zapewnia to czyste i profesjonalne wykończenie oraz zapobiega pęknięciom spowodowanym naprężeniami, które mogą prowadzić do awarii w warunkach eksploatacji.
Ignorując kierunek ziarna
Blacha metalowa ma strukturę włókien — powstającą podczas walcowania w hucie — podobnie jak drewno. Gięcie równolegle do tej struktury znacznie zwiększa ryzyko powstania pęknięć, zwłaszcza przy małych promieniach zaokrąglenia. Projektuj części tak, aby gięcia odbywały się prostopadle do struktury włókien, a nie wzdłuż niej. Ta „ukryta” zasada zapobiega awariom, które mogą się pojawić dopiero miesiące po dostarczeniu produktu.
Przesadne określanie tolerancji
Traktowanie tłoczonych blach jak części wykonanych metodą CNC powoduje gwałtowny wzrost kosztów. Formowanie blachy wiąże się z naturalnymi odchyleniami — takimi jak odbicie sprężyste, różnice w grubości materiału czy zużycie narzędzi. Zgodnie z badaniami nad tolerancjami produkcyjnymi, określanie ścisłych tolerancji dla cech uzyskanych przez kształtowanie wymaga zastosowania specjalnych uchwytów lub dodatkowych operacji frezowania. Ścisłe tolerancje należy zarezerwować wyłącznie dla rzeczywiście krytycznych wymiarów, a w pozostałych przypadkach stosować realistyczne, oparte na procesie tolerancje.
Niestandardowe wymiary otworów
Określenie otworu o średnicy 5,123 mm zmusza producentów do zakupu niestandardowego narzędzia. Standardowe średnice — np. 5 mm, 6 mm lub ich odpowiedniki w ułamkach calowych — pozwalają na szybkie przebijanie przy użyciu istniejących narzędzi. Wynik: krótszy czas realizacji i niższe koszty projektu obróbki metali.
Lista kontrolna najlepszych praktyk DFM
Zanim przekażesz swój projekt do wykonania narzędzi, sprawdź zgodność z poniższymi podstawowymi wytycznymi:
- Promienie gięcia: Równa lub większa niż grubość materiału (1,5–2× dla materiałów twardych)
- Odległość otworu od gięcia: Minimum 2,5 × grubość + promień gięcia
- Długość płetwy: Przynajmniej 4 × grubość materiału
- Szerokość szczeliny: Minimum 1,5 × grubość materiału
- Wycięcia kompensacyjne przy zginaniu: Dodano we wszystkich przecięciach zgięć z krawędzią
- Orientacja ziarna: Zgięcia prostopadłe do kierunku toczenia, o ile to możliwe
- Wielkości otworów: Standardowe średnice dopasowane do dostępnych narzędzi do przebijania
- Dopuszczenia: Standardowe допусki dla blachy, z wyjątkiem cech krytycznych
- Współczynnik K: Poprawne wartości wprowadzone w oprogramowaniu CAD w celu uzyskania dokładnych wzorów rozwinięć
- Operacje wtórne: Grubość powłoki oraz odkształcenia spawalnicze uwzględnione przy dopasowaniach
Współczynnik K — stosunek położenia osi obojętnej do grubości materiału — wymaga szczególnej uwagi. Zgodnie z Poradnik projektowania blach Geomiq ta wartość zwykle mieści się w zakresie od 0,25 do 0,50 w zależności od materiału, kąta zgięcia oraz metody kształtowania. Niepoprawne wartości współczynnika K wprowadzone w oprogramowaniu CAD prowadzą do uzyskania wzorów rozwinięć niezgodnych z rzeczywistym zachowaniem materiału, co powoduje błędy wymiarowe w gotowym elemencie.
Uzasadnienie biznesowe inwestycji w projektowanie na wczesnym etapie
Dlaczego warto poświęcić dodatkowy czas na analizę DFM przed rozpoczęciem prac nad narzędziem? Obliczenia są przekonujące. Każda modyfikacja narzędzia w trakcie jego projektowania wydłuża harmonogram o kilka tygodni i zwiększa budżet o tysiące jednostek. Elementy, które nie przejdą pierwszej kontroli próbki, wymagają przeglądu inżynieryjnego, modyfikacji matrycy oraz powtórnej produkcji próbek.
Z kolei projekty zoptymalizowane od samego początku pod kątem gięcia i kształtowania pozwalają na bezproblemowe budowanie narzędzi. Pierwsze próbki przechodzą kontrolę zgodności. Produkcja szybko osiąga pełną moc produkcyjną. Wczesne inwestycje w prawidłowe projektowanie wyrobów blacharskich przynoszą korzyści przez cały cykl życia produktu.
Gdy projekt został zoptymalizowany pod kątem wykonalności produkcyjnej, rozpoczyna się kolejna kluczowa faza: opracowanie niestandardowego narzędzia, które przekształci zaprojektowaną geometrię w rzeczywistość produkcyjną.
Jak projektuje się i buduje niestandardowe narzędzie
Projekt został zoptymalizowany i jest gotowy do produkcji — ale oto, co dzieje się dalej i czego większość producentów nigdy nie wyjaśnia. Zanim pierwsza część z blachy stalowej opuści prasę, ktoś musi wykonać niestandardową matrycę do tłoczenia metalu, która umożliwia realizację całego procesu. Etap opracowania narzędzi stanowi zarówno największy początkowy koszt inwestycyjny, jak i największą szansę na długoterminowe oszczędności.
Wyobraź sobie opracowanie matrycy jako budowę precyzyjnej maszyny produkcyjnej wewnątrz innej maszyny. Według ekspertów ds. narzędzi firmy Jennison Corporation niestandardowe matryce są frezowane specjalnie tak, aby odpowiadały geometrii Twojej części i kształtowały metal podczas jego przesuwania przez prasę. Nie są to urządzenia gotowe do natychmiastowego użycia — każda matryca jest zaprojektowana wyłącznie z uwzględnieniem unikalnych wymagań Twojego komponentu.
Zrozumienie tego procesu pozwala na realistyczne planowanie harmonogramów, odpowiednie przygotowanie budżetu oraz skuteczne ocenianie potencjalnych partnerów z zakresu tłoczenia.
Harmonogram opracowania matrycy
Jak długo trwa tworzenie niestandardowego stempla tłocznego? Odpowiedź zależy od złożoności, ale kolejne etapy pozostają takie same we wszystkich projektach. Oto, co dzieje się od wstępnego pomysłu do gotowego do produkcji narzędzia:
- Wstępna analiza części (1–2 tygodnie): Inżynierowie analizują geometrię części, specyfikacje materiału oraz wymagania dotyczące dopuszczalnych odchyłek. Identyfikują potencjalne trudności związane z kształtowaniem i proponują modyfikacje konstrukcji, które poprawiają wykonalność technologiczną bez kompromisów w zakresie funkcjonalności.
- Opracowanie koncepcji stempla (1–2 tygodnie): Zespół odpowiedzialny za narzędzia określa optymalne podejście do tłoczenia i prasowania — stemple wielostopniowe, stemple transferowe lub stemple do głębokiego tłoczenia. Określa również liczbę stacji, układ paska materiału w celu zapewnienia maksymalnej efektywności zużycia materiału oraz ogólną konfigurację stempla.
- Szczegółowe projektowanie stempla (2–4 tygodnie): Inżynierowie CAD tworzą szczegółowe modele 3D każdego elementu matrycy: profili wybijaków, bloków matryc, wyjmników, prowadnic i podnośników. Etap ten obejmuje analizę metodą elementów skończonych w celu przewidzenia przepływu materiału oraz kompensacji odkształceń sprężystych.
- Wybór stali narzędziowej (równolegle z projektowaniem): Na podstawie prognozowanej liczby sztuk do produkcji oraz materiału, który będzie tłoczony, inżynierowie dobierają odpowiednie stale narzędziowe. Matryce przeznaczone do masowej produkcji tłoczącej żądliwe stopy stalowe nierdzewne wymagają wysokiej klasy gatunków, takich jak D2 lub M2, z zastosowaniem specjalnych powłok.
- Precyzyjne frezowanie (3–6 tygodni): Operacje frezowania CNC, elektroerozyjnego cięcia drutem (wire EDM) oraz szlifowania przekształcają surową stal narzędziową w gotowe elementy matrycy. Kluczowe powierzchnie są wykonywane z dokładnością do tysięcznych cala, aby zapewnić stałą jakość wytwarzanych części.
- Złożenie i dopasowanie matrycy (1–2 tygodnie): Wykwalifikowani narzędziarze dokonują montażu matrycy, starannie dopasowując poszczególne elementy i weryfikując ich współosiowość. Ta praca ręczna wymaga doświadczenia, którego nie może zastąpić żadna precyzja projektowania CAD.
- Próba robocza i walidacja (1–2 tygodnie): Gotowe matryce uruchamiają próbne części w prasie produkcyjnej. Inżynierowie mierzą uzyskane wyniki w odniesieniu do specyfikacji, dokonując drobnych korekt w celu zoptymalizowania jakości części i stabilności procesu.
W przypadku prostej matrycy postępującej należy spodziewać się okresu 8–12 tygodni od zatwierdzenia do zweryfikowanej matrycy. Złożone matryce z wieloma operacjami kształtowania, ścisłymi tolerancjami lub trudnymi materiałami mogą wymagać nawet 12–16 tygodni lub dłużej. Zgodnie z doświadczeniem branżowym matryce postępujące są z natury bardziej złożone — zawierają wiele stacji kształtujących ułożonych sekwencyjnie, co wiąże się z większym nakładem czasu na projektowanie, godzinami obróbki skrawaniem oraz koniecznością precyzyjnego wyrównania.
Inwestycja w narzędzia i długoterminowa wartość
To właśnie tutaj ekonomika tłoczenia stalowego staje się atrakcyjna. Tak, niestandardowe narzędzia wymagają znacznych środków finansowych na etapie początkowym — często tysięcy lub dziesiątek tysięcy dolarów, w zależności od stopnia złożoności. Jednak ta inwestycja fundamentalnie zmienia strukturę kosztów dla każdej kolejnej serii produkcyjnej.
Rozważmy obliczenia: niestandardowa matryca progresywna może kosztować 15 000 USD w fazie opracowania. Rozłożony na 10 000 części w pierwszej serii produkcyjnej koszt ten wynosi 1,50 USD na część dla narzędzi. Ale co, jeśli wyprodukujesz 100 000 części w całym okresie użytkowania matrycy? Wówczas koszt narzędzi spada do 0,15 USD na część. Im więcej komponentów tłoczonych za pomocą matrycy wyprodukujesz, tym niższy staje się Twój rzeczywisty koszt narzędzi.
Zgodnie z analizą kosztów przeprowadzoną przez Jennisona, oto jakie oszczędności zapewnia wysokiej jakości narzędzia w dłuższej perspektywie czasowej:
- Mniej wadliwych części: Precyzyjne matryce zapewniają powtarzalne rezultaty, zmniejszając wskaźnik odpadów oraz obciążenie związane z kontrolą jakości
- Mniej przestoju: Solidnie wykonane narzędzia są odporne na uszkodzenia i zachowują swoje właściwości robocze nawet przy długotrwałej eksploatacji
- Szybsze prędkości produkcji: Optymalizowane matryce pozwalają na wyższą liczbę uderzeń na minutę bez pogorszenia jakości
- Niższy koszt pojedynczej części: Amortyzacja inwestycji w narzędzia w połączeniu z efektywną produkcją znacznie obniża koszty jednostkowe
- Minimalna liczba operacji wtórnych: Dokładne kształtowanie zmniejsza potrzebę wykonywania operacji takich jak usuwanie wyprasek, wyprostowywanie lub korekcja wymiarów
Różnica między „narzędziami twardymi” a „narzędziami miękkimi” ma tutaj znaczenie. Narzędzia twarde wykonywane są z hartowanej stali przeznaczonej do produkcji masowej i długotrwałego użytku. Narzędzia miękkie – zwykle z aluminium lub miększej stali – są tańsze w początkowym zakupie, ale szybciej się zużywają i mogą nie zapewniać wymaganej dokładności wymiarowej w trakcie długotrwałej produkcji. W przypadku części stalowych wykonanych metodą tłoczenia, przeznaczonych na ciągłą produkcję, narzędzia twarde zapewniają lepszą wartość mimo wyższych początkowych inwestycji.
Wewnętrzne versus zewnętrzne możliwości budowy narzędzi
Oceniając partnerów oferujących różnorodne matryce i usługi tłoczenia, jedno pytanie zasługuje na szczególne uwagi: kto faktycznie buduje narzędzia?
Producenci posiadający własne możliwości projektowania i budowy matryc oferują wyraźne korzyści. Zgodnie z Analizą branży produkcyjnej firmy NetSuite , produkcja wewnętrzna pozwala firmom bezpośrednio kontrolować każdy etap procesu produkcyjnego – umożliwiając szybsze rozwiązywanie problemów oraz natychmiastowe wprowadzanie korekt w razie potrzeby.
W przypadku specjalnych usług tłoczenia wewnętrzna budowa narzędzi oznacza:
- Szybszą komunikację: Inżynierowie projektowi, narzędziowcy i operatorzy pras pracują w tej samej hali, eliminując opóźnienia wynikające ze współpracy między oddzielnymi firmami
- Szybsze modyfikacje: Gdy podczas prób lub produkcji konieczne stają się korekty matryc, zmiany są wprowadzane bez konieczności wysyłania narzędzi do innych miejsc
- Lepsza kontrola jakości: Zespół, który buduje matrycę, odpowiada również za produkcję, co zapewnia przejrzystość i odpowiedzialność za osiągane rezultaty
- Skróconych czasów realizacji: Brak oczekiwania na to, aż zewnętrzne warsztaty narzędziowe dopasują Państwa projekt do swojego harmonogramu
Zlecenie wykonania narzędzi zewnętrznie nie jest z natury rzeczy problematyczne — wiele doskonałych dostawców tłocznictwa współpracuje z wyspecjalizowanymi warsztatami do obróbki matryc. Należy jednak zdawać sobie sprawę z tego, na co się decyduje: potencjalnie niższe koszty mogą wiązać się z dłuższymi terminami realizacji oraz bardziej skomplikowanymi łańcuchami komunikacyjnymi. Gdy podczas prób pojawiają się problemy, ich rozwiązanie wymaga koordynacji między wieloma organizacjami zamiast prostego rozmowy przez halę produkcyjną.
Dla projektów wymagających szybkiej realizacji lub części, które potrzebują ciągłej doskonalenia, wewnętrzne możliwości produkcji narzędzi zmniejszają ryzyko. Zgodnie z opiniami doświadczonych narzędziowców, zakłady produkujące i serwisujące własne narzędzia mogą naprawiać lub dostosowywać matryce bez konieczności wysyłania ich poza teren zakładu — co stanowi cenną elastyczność w dynamicznie rozwijających się branżach lub na wczesnym etapie rozwoju produktu.
Gdy proces opracowywania narzędzi został wyjaśniony, kolejnym logicznym pytaniem staje się: kiedy niestandardowe tłoczenie jest bardziej opłacalne niż alternatywne metody produkcji?
Kiedy tłoczenie przewyższa alternatywne metody produkcji
Znasz proces tłoczenia, materiały, zasady projektowania oraz rozwój narzędzi. Ale to pytanie rzeczywiście decyduje o tym, czy niestandardowe tłoczenie blachy ma sens w przypadku Twojego projektu: kiedy należy wybrać tłoczenie zamiast cięcia laserowego, frezowania CNC lub innych metod obróbki metalu?
To przewodnik decyzyjny jest zaskakująco pomijany w większości dyskusji na temat produkcji. Faktem jest, że każda metoda ma swoje ekonomiczne optimum. Nieprawidłowy wybór oznacza albo nadpłacenie za produkcję małych serii, albo utratę ogromnych oszczędności przy masowej produkcji. Przeanalizujmy dokładnie, kiedy tłoczenie okazuje się najlepszym rozwiązaniem – a kiedy bardziej uzasadnione są alternatywy.
Tłoczenie w porównaniu z cięciem laserem i frezowaniem CNC
Wyobraź sobie, że potrzebujesz 500 precyzyjnych uchwytów. Czy powinny być one tłoczone, cięte laserem, czy frezowane z pełnego materiału? Odpowiedź zależy od zrozumienia, w jakich obszarach każda z tych metod osiąga najlepsze wyniki.
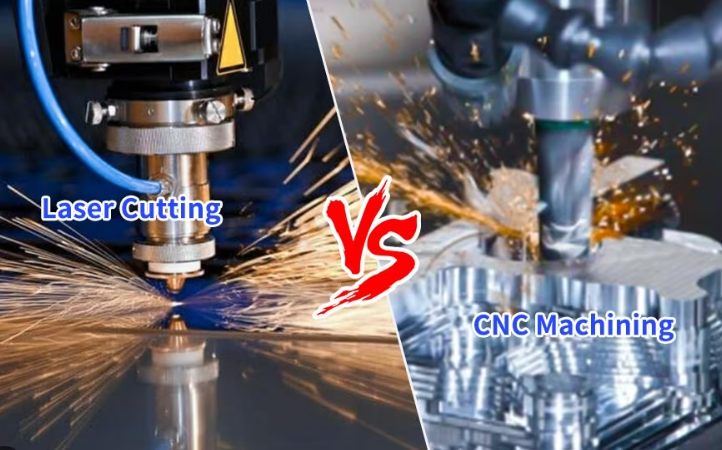
Cięcie laserem: szybkość i elastyczność bez konieczności stosowania narzędzi specjalnych
Maszyna do cięcia laserem przekształca cyfrowe projekty w gotowe elementy w ciągu kilku godzin – bez konieczności wykonywania niestandardowych narzędzi. Zgodnie z analizą produkcji przeprowadzoną przez The Supplier, cięcie laserem jest najlepszym wyborem w przypadku, gdy wymagane są zarówno szybkość, jak i elastyczność projektowa. Proces ten szczególnie sprawdza się przy produkcji prototypów, próbnych serii oraz w sytuacjach, w których często występują zmiany projektowe.
Kiedy cięcie laserem jest uzasadnione?
- Ilości produkcji poniżej 1000–3000 sztuk (w zależności od rozmiaru i złożoności)
- Projekty wciąż ewoluujące w wyniku zmian inżynieryjnych
- Ścisłe terminy realizacji wymagające czasu dostawy w ciągu 24–72 godzin
- Mieszane numery katalogowe (SKU) o niskiej powtarzalności
Kompromis? Koszt przypadający na pojedynczą sztukę pozostaje stosunkowo stały niezależnie od wielkości zamówienia. Nie zaobserwujesz znacznych obniżek kosztów przy większych ilościach, ponieważ każda sztuka wymaga tego samego czasu cięcia. W operacji cięcia metalu dominującymi składnikami kosztu są materiał i czas pracy maszyny, a nie amortyzowalne narzędzia.
Obróbka CNC: precyzja bez zależności od wielkości serii
Obróbka CNC rozpoczyna się od materiału stałego, z którego usuwane jest wszystko, co nie stanowi końcowej części. Zgodnie z analizą kosztów i korzyści firmy Pengce Metal, obróbka CNC niemal nie wiąże się z początkowymi kosztami narzędzi — można przejść bezpośrednio od modelu 3D do gotowej części.
To podejście ubytkowe szczególnie sprawdza się w przypadku:
- Złożonych geometrii 3D, których niemożliwe jest wytworzenie z blachy
- Ścisłych tolerancji (osiągalnych ±0,001 cala) dla kluczowych cech
- Ilości prototypowe lub produkcja małoseryjna poniżej 1000 sztuk
- Części wymagające wewnętrznych cech konstrukcyjnych, podcięć lub głębokich wnęk
Jaka jest ograniczająca czynnik? Koszty przypadające na pojedynczą część pozostają wysokie, ponieważ każda z nich wymaga znacznej ilości czasu pracy maszyny. Zgodnie z porównaniem metod produkcyjnych przeprowadzonym przez Frigate, frezowanie CNC generuje również znaczne ilości odpadów materiałowych – zamienia drogi surowy materiał w wiórkę zamiast gotowych części.
Gdzie tłoczenie przewyższa obie te metody
Tłoczenie niestandardowych elementów blachy opiera się na zasadniczo innej zasadzie ekonomicznej. Tak, należy ponieść początkowe koszty inwestycji w narzędzia. Jednak gdy matryca już istnieje, części powstają w ciągu sekund, a nie minut. Zgodnie z analizą branżową prasa tłoczeniowa może wykonywać setki cykli na minutę, osiągając takie tempo produkcji części, jakiego żadna z metod cięcia laserowego czy frezowania CNC nie jest w stanie osiągnąć.
Ta przewaga szybkości przekłada się bezpośrednio na przewagę kosztową – ale wyłącznie przy odpowiednio dużych ilościach. Wykonanie elementów stalowych metodą tłoczenia staje się opłacalne, gdy:
- Roczna produkcja przekracza 5000–10 000 sztuk
- Projekt jest stabilny i zablokowany do produkcji
- Części wymagają wielu cech (otworów, gięć, kształtowań), które tłoczenie tworzy jednocześnie
- Spójna jakość w trakcie długotrwałych serii produkcji ma większe znaczenie niż elastyczność projektu
Progowe wartości ilościowe i rozważania dotyczące punktu zwrotnego
To właśnie w tym miejscu decyzja staje się obliczeniowa. Każdy projekt ma punkt zwrotny – ilość sztuk, przy której niższe koszty jednostkowe tłoczenia rekompensują wyższe inwestycje w narzędzia.
Obliczanie punktu zwrotnego
Zgodnie z analizą kosztów produkcji wzór na punkt zwrotny jest prosty:
Ilość w punkcie zwrotnym = Koszt narzędzi ÷ (Koszt jednostkowy cięcia laserowego/CNC − Koszt jednostkowy tłoczenia)
Załóżmy, że koszt narzędzi wynosi 12 000 USD. Cięcie laserowe wytwarza części po 8 USD za sztukę, podczas gdy tłoczenie (po zakupie narzędzi) wytwarza je po 1,50 USD za sztukę. Punkt zwrotny wynosi: 12 000 ÷ (8 − 1,50) ≈ 1 850 sztuk.
Poniżej 1850 sztuk całkowite koszty cięcia laserowego są niższe. Powyżej tego progu każda dodatkowa część tłoczona pozwala zaoszczędzić 6,50 USD w porównaniu z cięciem laserowym. Dla 10 000 sztuk oszczędność wynosi 65 000 USD w stosunku do metody laserowej — ponad pięciokrotnie więcej niż inwestycja w matryce.
Czynniki obniżające punkt równowagi
Kilka zmiennych przesuwa punkt równowagi na korzyść tłoczenia:
- Powtarzające się zamówienia: Planowanie roczne obejmujące wiele wersji pozwala szybciej rozprowadzić koszty matryc
- Materiał cewki: Tłoczenie z taśmy zamiast z oddzielnych arkuszy poprawia wydajność materiału
- Operacje wewnątrz matrycy: Połączenie operacji przebijania, kształtowania i gwintowania eliminuje procesy wtórne
- Złożoność części: Wiele cech wymagających osobnych operacji laserowych jest realizowanych jednocześnie w procesie tłoczenia
Zgodnie ze specjalistami ds. zakupów, często uzasadnione jest podejście hybrydowe: rozpoczęcie od cięcia laserowego w celu zweryfikowania montażu oraz wymagań GD&T, ustalenie ostatecznej wersji projektu, a następnie przejście na tłoczenie po osiągnięciu rocznej ilości części przekraczającej punkt równowagi.
Porównanie metod produkcji
Wybór odpowiedniej metody wymaga jednoczesnego uwzględnienia wielu czynników. Poniższe zestawienie podsumowuje kluczowe kryteria decyzyjne:
| Czynnik | Własne wycinanie blach metalowych | Cięcie laserowe | Obróbka CNC | FORMOWANIE |
|---|---|---|---|---|
| Optymalny zakres wielkości produkcji | ponad 5000 części rocznie | 1–3 000 sztuk | 1–1000 sztuk | 1000+ sztuk |
| Możliwości geometryczne | Kształty blachy, gięcia, otwory, płytkie wyciągi | profil 2D, otwory; bez kształtowania | Złożone kształty 3D, cechy wewnętrzne, podcięcia | Złożone kształty 3D, wnęki wewnętrzne |
| Efektywność materiałowa | Wysoka (zoptymalizowane rozmieszczenie na taśmie) | Dobra (rozmieszczone na arkuszu) | Niska (proces ubytkowy powoduje powstawanie wiórków) | Wysoki (kształt bliski końcowemu) |
| Wymagania dotyczące narzędzi | Wymagana niestandardowa matryca (5000–100 000 USD i więcej) | Brak (programowanie z CAD) | Brak (programowanie z CAD) | Wymagana niestandardowa forma (10 000–100 000+ USD) |
| Trend kosztów na sztukę | Znacznie spada wraz ze wzrostem objętości | Względnie stała niezależnie od objętości | Względnie stała; wysoka cena za element | Spada wraz ze wzrostem objętości po amortyzacji formy |
| Czas realizacji pierwszych części | Tygodnie (wymagane wykonanie narzędzi) | Godziny do dni | Dni do tygodni | Od tygodni do miesięcy |
| Wpływ zmiany projektu | Wymagana modyfikacja matrycy (kosztowna) | Ponowne zaprogramowanie i ponowne rozmieszczenie (minimalny koszt) | Ponowne zaprogramowanie (minimalny koszt) | Wymaga modyfikacji formy (kosztowne) |
Wybieranie właściwego rozwiązania dla swojego projektu
Decyzja dotycząca wybierania tłoczenia w porównaniu z alternatywnymi metodami zależy ostatecznie od położenia projektu na skali objętości produkcji i stabilności projektu.
Wybierz cięcie laserowe, gdy:
- Przeprowadzasz prototypowanie lub produkcję pilotażową
- Zmiany inżynieryjne są nadal wprowadzane
- Ilość pozostaje poniżej kilku tysięcy sztuk
- Potrzebujesz części szybko, bez opóźnień związanych z przygotowaniem narzędzi
Wybierz obróbkę CNC, gdy:
- Części wymagają złożonych geometrii 3D, których nie da się wykonać metodą tłoczenia
- Dopuszczalne odchylenia przekraczają możliwości tłoczenia
- Objętości pozostają niskie (poniżej 1000 sztuk)
- Materiał jest zbyt gruby lub egzotyczny, aby można go było kształtować
Wybierz niestandardowe tłoczenie blachy, gdy:
- Projekt został ostatecznie ustalony i jest stabilny
- Roczna produkcja przekracza 5000–10 000 sztuk
- Części wymagają jednoczesnego kształtowania wielu cech
- Kluczowe są spójna jakość i powtarzalność
- Głównym priorytetem jest długoterminowe obniżenie kosztu pojedynczej części
Wiele udanych programów zaczyna się od prototypów wykonanych metodą laserową lub frezowanymi, weryfikuje projekt, a następnie przechodzi na tłoczenie w celu produkcji seryjnej. Zgodnie ze specjalistami z zakresu produkcji zachowanie ciągłości dostawcy w trakcie tego przejścia zapewnia płynne przekazanie zadania oraz stałą jakość części.
Zrozumienie sytuacji, w których tłoczenie przewyższa alternatywne metody, jest kluczowe — ale równie ważne jest poznanie sposobu, w jaki różne branże stosują te zasady do swoich konkretnych wymagań technicznych.
Zastosowania przemysłowe i wymagania techniczne
Widziałeś już, kiedy tłoczenie przewyższa metody alternatywne — ale oto co naprawdę oddziela tłoczenie towarowe od precyzyjnego wytwarzania: branżowe wymagania techniczne. Zastosowania w motocyklowej, lotniczej i medycznej nie wymagają jedynie tłoczonych elementów metalowych. Wymagają one certyfikatów, śledzalności materiałów oraz systemów jakości, których większość uniwersalnych zakładów nie jest w stanie zapewnić.
Zrozumienie tych wymagań ma znaczenie zarówno wtedy, gdy określasz parametry części, jak i podczas oceny potencjalnych dostawców. Przyjrzyjmy się, czego każda z tych branż rzeczywiście wymaga od niestandardowych operacji tłoczenia blach.
Wymagania i certyfikaty dotyczące tłoczenia w motoryzacji
Gdy Twoje tłoczone elementy trafiają do pojazdów przewożących pasażerów z prędkością drogową, ryzyko nie może być wyższe. Tłoczenie metalu dla przemysłu motocyklowego funkcjonuje w ramach jednych z najbardziej rygorystycznych w branży systemów jakości — i to z dobrego powodu.
IATF 16949: Standard jakości dla przemysłu motoryzacyjnego
Czy kiedykolwiek zastanawiałeś się, co wyróżnia dostawców z zakresu przemysłu motocyklowego i samochodowego spośród wszystkich innych? Zgodnie z przeglądem certyfikacji Xometry, norma IATF 16949 to system zarządzania jakością specjalnie zaprojektowany dla producentów samochodowych. Ten standard opiera się na ISO 9001, ale dodaje wymagania specyficzne dla branży motocyklowej i samochodowej dotyczące zapobiegania wadom, redukcji odchylenia oraz eliminacji marnotrawstwa w całym łańcuchu dostaw.
Oto, co certyfikacja IATF 16949 oznacza w praktyce dla operacji tłoczenia w przemyśle motocyklowym i samochodowym:
- Udokumentowane sterowanie procesami: Każda operacja tłoczenia odbywa się zgodnie z zweryfikowanymi procedurami i podlega statystycznemu monitorowaniu
- Skupienie na zapobieganiu wadom: Systemy zaprojektowane tak, aby wykrywać problemy jeszcze przed dotarciem wadliwych części na linie montażowe
- Ciągłe doskonalenie: Trwające działania mające na celu redukcję odchylenia oraz poprawę jakości w całym cyklu produkcji
- Zarządzanie łańcuchem dostaw: Wymagania są przekazywane dalej do dostawców niższego szczebla, zapewniając spójność w całym łańcuchu dostaw
Certyfikacja nie jest opcjonalna w poważnej działalności motocyklowej i motocyklowo-samochodowej. Zgodnie ze standardami branżowymi dostawcy, podwykonawcy oraz klienci OEM często odmawiają współpracy z producentami, którzy nie posiadają certyfikatu IATF 16949. Certyfikat ten świadczy o Państwa zaangażowaniu w ograniczanie wad i redukcję marnotrawstwa – wymogów bezwzględnie koniecznych w przypadku części stalowych wykonanych metodą tłoczenia przeznaczonych do zastosowań w pojazdach.
Wymagania techniczne dla części stalowych wykonanych metodą tłoczenia do przemysłu motocyklowego i motocyklowo-samochodowego
Ponad systemy zapewnienia jakości, tłoczenie części motocyklowych i motocyklowo-samochodowych wymaga określonych kompetencji technicznych:
- Przetwarzanie stali wysokowytrzymałej: Uchwyty podwozia i wzmocnienia konstrukcyjne wymagają zaawansowanych stali wysokowytrzymałych (AHSS), które są trudne w kształtowaniu, ale zapewniają odpowiednią odporność na uderzenia
- Wysoka dokładność wymiarowa: Powierzchnie stykowe i punkty mocowania muszą być spójne z dokładnością ±0,1 mm, aby zagwarantować prawidłową montażowość
- Certyfikaty Materiałowe: Sprawozdania badawcze z huty dokumentujące skład chemiczny i właściwości mechaniczne każdej taśmy
- Dokumentacja PPAP: Dokumenty procesu zatwierdzania części produkcyjnych (PPAP), potwierdzające zdolność produkcyjną przed rozpoczęciem masowej produkcji
- Śledzenie partii: Możliwość śledzenia dowolnej gotowej części z powrotem do konkretnych partii materiałów i serii produkcyjnych
Wytłaczanie metalu ze stali nierdzewnej dla zacisków elektrycznych dodaje kolejną warstwę: stałą przewodność elektryczną w każdej części. Zmienność właściwości materiału lub stanu powierzchni wpływa bezpośrednio na wydajność elektryczną w złączach, czujnikach i modułach sterujących.
Uwagi dotyczące przemysłu lotniczego i medycznego
Jeśli wymagania motocyklowe wydają się surowe, to wytłaczanie metalu w przemyśle lotniczym i medycznym podnosi standardy jeszcze wyżej. Życia ludzkie zależą od bezwzględnej spójności i pełnej śledzalności.
Przemysł lotniczy: śledzalność ponad wszystko
Wyobraź sobie wykrycie wadliwego komponentu w silniku samolotu — teraz wyobraź sobie próbę zidentyfikowania wszystkich innych samolotów zawierających części pochodzące z tej samej partii materiału. Badania zgodności AMFG — śledzalność części jest absolutnie kluczowa w produkcji lotniczej. Komponenty niezgodne nie tylko niosą ryzyko sankcji — stanowią zagrożenie dla życia ludzkiego, gdy są wbudowywane w konstrukcję samolotów.
Jakie wymagania stawiają programy lotnicze i kosmiczne dostawcom części wykonywanych metodą tłoczenia:
- Pełna śledzalność materiałów: Możliwość śledzenia każdej tłoczonej części w odniesieniu do konkretnych partii cieplnych, certyfikatów hutniczych oraz dokumentacji procesowej
- Trwałe oznakowanie części: Oznakowanie punktowe (dot-peen) lub trwałe grawerowanie laserem, które przetrwa cały okres eksploatacji elementu
- Inspekcja pierwszego wyrobu (FAI): Kompleksowa weryfikacja wymiarów zgodnie z wymaganiami normy AS9102
- Badania zdolności procesu: Dane statystyczne potwierdzające stabilność i zdolność procesów w czasie
- Kontrola obcych materiałów (FOD): Czyste środowisko produkcyjne zapobiegające zanieczyszczeniom
Zdaniem ekspertów ds. zgodności w branży lotniczej i kosmicznej nowe przepisy coraz częściej skupiają się na przejrzystości łańcucha dostaw. Wiele producentów nie posiada przejrzystości poza swoimi dostawcami pierwszego stopnia — luka ta wiąże się z ryzykami dla programów lotniczych, które wymagają pełnej dokumentacji historii każdej części.
Tłoczenie elementów urządzeń medycznych: biokompatybilność i czystość
Blachy tłoczone przeznaczone do przemysłu medycznego stają przed wyjątkowymi wyzwaniami: elementy te mogą kontaktować się z tkankami ludzkimi, płynami ustrojowymi lub być trwale wszczepiane w organizm pacjenta. Skutki zanieczyszczenia lub niezgodności materiałów wykraczają daleko poza zwykłe odwołania produktów.
Według Wskazówki Rimsys dotyczące biokompatybilności , ISO 10993 to międzynarodowa norma określająca wymagania dotyczące badania i oceny biokompatybilności urządzeń medycznych. Ta 23-częściowa norma obejmuje wszystkie aspekty — od badań cytotoksyczności po badania implantacyjne — i ma zastosowanie do każdego urządzenia mającego kontakt z pacjentem.
Główne wymagania dotyczące tłoczenia metalu w przemyśle medycznym obejmują:
- Materiały biokompatybilne: Dokumentowane gatunki materiałów, które zostały potwierdzone jako bezpieczne w kontakcie z tkankami ludzkimi
- Normy czystości: Środowisko produkcyjne oraz procesy końcowe eliminujące oleje, cząstki i inne zanieczyszczenia
- Charakterystyka chemiczna: Pełne zrozumienie składu materiału oraz potencjalnych substancji wydzielanych
- Zarządzanie ryzykiem: Ocena ryzyka zgodna z normą ISO 14971, uwzględniająca zagrożenia biologiczne
- Zgodność z procesem sterylizacji: Materiały i powłoki powierzchniowe odpornie na wymagane metody sterylizacji
Zgodnie z opiniami ekspertów ds. wyrobów medycznych, producenci powinni uwzględniać wymagania normy ISO 10993-1 już na wczesnych etapach projektowania produktu. Wczesne przeprowadzenie charakterystyki chemicznej oraz oceny toksykologicznej zapewnia biokompatybilność urządzenia i jednocześnie przyspiesza jego rejestrację oraz wprowadzenie na rynek.
System klasyfikacji wyrobów medycznych uwzględnia zarówno rodzaj kontaktu (urządzenie powierzchniowe, urządzenie zewnętrzne komunikujące się lub implant) jak i czas trwania kontaktu (ograniczony, przedłużony lub stały). Skomplikowane elementy wykonane metodą tłoczenia do narzędzi chirurgicznych podlegają innym wymaganiom niż urządzenia wszczepialne — zrozumienie tej różnicy pozwala określić odpowiednie wymagania dotyczące materiałów i procesów technologicznych.
Porównanie wymagań branżowych
Wybór partnera wykonującego tłoczenie oznacza dopasowanie jego certyfikatów i kompetencji do konkretnych potrzeb branżowych:
| Wymaganie | Motoryzacyjny | Aeronautyka i kosmonautyka | Medycyna |
|---|---|---|---|
| Główny standard jakości | IATF 16949 | AS9100 | ISO 13485 |
| Śledzenie materiałów | Wymagane na poziomie partii | Oznaczenie partii termicznej + oznaczenie części | Pełna dokumentacja |
| Dokumentacja procesu | Plany kontroli, PPAP | Weryfikacja pierwszej sztuki (FAI) zgodnie z normą AS9102 | Rekordy główne urządzenia |
| Wymagania specjalne | PPAP, badania zdolności procesu | Kontrole FOD, NADCAP | Zgodność z wymaganiami biologicznymi, czystość |
| Częstotliwość audytów | Roczne audyty nadzorcze | Roczne audyty oraz audyty przeprowadzane przez klientów | Inspekcje coroczne oraz inspekcje FDA |
Zrozumienie tych wymagań specyficznych dla danej branży pozwala skutecznie ocenić potencjalnych dostawców usług tłoczenia. Dostawca certyfikowany do wykonywania prac w przemyśle motocyklowym może nie posiadać systemów śledzenia wymaganych w przemyśle lotniczym; warsztat doświadczony w produkcji ogólnoprzemysłowych części metalowych może nie spełniać standardów czystości obowiązujących w przemyśle medycznym. Dopasowanie możliwości dostawcy do konkretnych wymagań pozwala uniknąć kosztownych niespodzianek podczas audytów kwalifikacyjnych.
Gdy wymagania branżowe zostaną wyjaśnione, kolejnym kluczowym aspektem staje się zrozumienie czynników wpływających na koszty tłoczenia oraz sposób, w jaki podejmowane przez Ciebie decyzje bezpośrednio oddziałują na cenę końcową.
Zrozumienie kosztów tłoczenia i czynników wpływających na cenę
Przeanalizowałeś dwie oferty cenowe na pozornie identyczne precyzyjne części metalowe wykonane metodą tłoczenia. Jeden dostawca podał cenę 0,75 USD za sztukę, drugi – 4,50 USD za sztukę. Twoja pierwsza reakcja? Ktoś albo pomija istotne etapy procesu, albo zawyża marżę. Oto rzeczywistość – obie oferty mogą być całkowicie uzasadnione.
Proces produkcji części metalowych metodą tłoczenia obejmuje zmienne kosztowe, które nie są od razu widoczne na podstawie rysunków części. Zrozumienie czynników rzeczywiście wpływających na koszty tłoczenia pozwala poprawnie interpretować oferty cenowe, podejmować uzasadnione decyzje oraz identyfikować możliwości obniżenia wydatków bez pogarszania jakości.
Przeanalizujmy czynniki wpływające na cenę, które pozwalają odróżnić konkurencyjne oferty od tych zawyżonych — oraz od zaniżonych, które mogą sygnalizować nadchodzące problemy.
Główne czynniki wpływające na koszty niestandardowego tłoczenia
Każdy projekt tłoczenia opiera się na równowadze kilku kategorii kosztów. Zrozumienie ich względnego wpływu pozwala skupić działania optymalizacyjne tam, gdzie przyniosą one największą korzyść.
Formy tłoczeniowe: dominująca inwestycja początkowa
Oto czynnik, który zaskakuje większość kupujących: narzędzia stanowią największy początkowy wydatek — nie materiały, nie praca, ani nie czas pracy maszyn. Zgodnie z analizą kosztów przeprowadzoną przez Jennison Corporation, niestandardowe matryce są frezowane specjalnie tak, aby odpowiadały geometrii Twojego elementu, a każda z nich stanowi znaczne inwestycje w zakresie inżynierii i produkcji.
Jakie czynniki wpływają na koszty narzędzi?
- Złożoność matrycy: Proste matryce cięcia kosztują od 5 000 do 15 000 USD; złożone matryce postępujące z wieloma stacjami kształtowania mogą przekraczać 50 000–100 000 USD
- Liczba stacji: Każda dodatkowa operacja w matrycy postępującej zwiększa czas projektowania, liczbę godzin frezowania oraz złożoność montażu
- Wymagania dotyczące tolerancji: Matryce precyzyjne wymagają wysokiej jakości stali narzędziowej, ścisłej obróbki skrawaniem oraz bardziej szczegółowego testowania
- Oczekiwana wielkość produkcji: Wyższe wolumeny uzasadniają zastosowanie wysokiej klasy stali narzędziowej o dłuższym okresie eksploatacji
Zgodnie z przewodnikiem cenowym Manor Tool, matryce produkowane za granicą często wykorzystują stal niższej klasy, która szybciej się zużywa i powoduje wytwarzanie niestabilnych części. Wysokiej jakości narzędzia krajowe, gwarantowane na ponad 1 000 000 uderzeń przed koniecznością konserwacji, zapewniają lepszą wartość długoterminową mimo wyższego początkowego kosztu.
Materiał: skład chemiczny, grubość oraz zmienność rynkowa
Wybór materiału ma bezpośredni wpływ zarówno na cenę pojedynczego elementu, jak i na długoterminową stabilność kosztów. Zgodnie z analizą kosztów przemysłowych stal węglowa pozostaje zdecydowanie najbardziej opłacalnym materiałem do tłoczenia produktów w dużych ilościach. Niska cena zakupu połączona z doskonałą wytrzymałością czyni ją domyślnym wyborem w zastosowaniach, w których kluczowe są koszty.
Czynniki wpływające na koszt materiału obejmują:
- Klasa stali podstawowej: Stal nierdzewna jest 3–5 razy droższa od stali węglowej; stopy specjalne powodują dalszy wzrost kosztów
- Wymagania dotyczące grubości: Grubsze materiały są droższe za funt i wymagają większej nośności prasy
- Szerokość i kształt materiału: Niestandardowe szerokości cięcia lub specjalne formy cewek generują dodatkowe koszty obróbki
- Fluktuacje rynkowe: Ceny stali i aluminium mogą wahać się o 20–30% w zależności od warunków globalnych
Większość usług tłoczenia metali radzi sobie z wahaniami cen materiałów poprzez mechanizmy opłat dodatkowych powiązanych z publikowanymi indeksami. Zrozumienie podejścia dostawcy do cen materiałów pozwala na odpowiednie zaplanowanie budżetu i uniknięcie niespodzianek.
Objętość produkcji: Wielki wyrównywacz kosztów
To właśnie w tym miejscu ekonomia tłoczenia staje się atrakcyjna. Koszty narzędzi stanowią stałą kwotę, która jest rozdzielana pomiędzy wszystkie wyprodukowane części. Obliczenia są proste: przy produkcji 1000 części matryca o wartości 15 000 USD zwiększa koszt każdej sztuki o 15 USD; przy produkcji 100 000 części ta sama matryca zwiększa koszt każdej sztuki jedynie o 0,15 USD.
Według Przewodnik po kosztach Carsai Precision Parts , usługi tłoczenia metali stają się najbardziej opłacalne przy rocznych objętościach przekraczających 10 000+ części miesięcznie. Poniżej tego progu alternatywne procesy, takie jak cięcie laserem, mogą okazać się bardziej opłacalne.
Wpływające na cenę czynniki związane z objętością:
- Roczne zobowiązania: Zamówienia ramowe z zaplanowanymi wydawaniami umożliwiają uzyskanie lepszych cen dzięki poprawie planowania u dostawców
- Amortyzacja kosztów przygotowania: Każde uruchomienie produkcji wiąże się z kosztami przygotowania niezależnie od ilości — większe serie rozprowadzają ten koszt na większą liczbę sztuk
- Korzyści zakupowe materiałów: Wyższe wolumeny pozwalają na zakupy materiałów hurtowych po niższych cenach
Jak decyzje projektowe wpływają na wynik finansowy
Każda inżynierska decyzja wpływa na koszty produkcji. Zrozumienie tych powiązań pozwala zoptymalizować projekty jeszcze przed rozpoczęciem wytwarzania narzędzi — wtedy zmiany kosztują kilka groszy zamiast tysięcy złotych.
Specyfikacje tolerancji i koszty
Brzmi znajomo? Zgodnie ze słowami doświadczonych inżynierów zajmujących się tłoczeniem, wymagane przez klientów tolerancje wymiarowe systematycznie stają się coraz ścislejsze. To, co kiedyś było ±0,005 cala, dziś to ±0,002 cala, a czasem nawet ±0,001 cala.
Surowa prawda: ścislsze tolerancje oznaczają wyższe koszty. Za każdym razem, gdy określasz dokładność przekraczającą standardowe zakresy ±0,005–±0,010 cala, żądasz:
- Bardziej złożone i droższe narzędzia
- Wolniejsze prędkości produkcji oraz częstsze kontrole
- Potencjalne operacje wtórne w celu korekty wymiarów
- Wyższy odsetek odpadów w związku z zawężeniem dopuszczalnych odchyłek
Mądry sposób postępowania? Określać ścisłe tolerancje wyłącznie tam, gdzie tego wymagają funkcjonalne potrzeby. Według ekspertów ds. optymalizacji kosztów nadmierne specyfikowanie tolerancji często prowadzi do niepotrzebnych wzrostów kosztów bez korzyści funkcjonalnych.
Geometria części i złożoność jej cech
Każda dodana cecha — otwory, wycinki, gięcia, wytłoczenia — zwiększa złożoność narzędzi i tempo ich zużycia. Według ekspertów ds. projektowania matryc każdy otwór, wycinek i wytłoczony detal wymaga dodatkowej stacji w matrycy postępującej lub kolejnej operacji technologicznej.
Zasady projektowania z uwzględnieniem kosztów:
- Stosować standardowe promienie gięcia równe lub większe niż grubość materiału
- Określać typowe średnice otworów zgodne z dostępnymi narzędziami do przebijania
- Zachowaj odpowiednią odległość między cechami, aby zapobiec osłabieniu matrycy
- Unikaj ostrych wewnętrznych narożników, które przyspieszają zużycie narzędzi
Operacje wtórne
Czasem tłoczenie samo w sobie nie kończy produkcji elementu. Spawanie, gwintowanie, montaż elementów złącznych, pokrywanie powłoką lub metalizacja zwiększają zarówno czas, jak i koszt produkcji. Zgodnie z ekspertami z zakresu tłoczenia metali, skuteczne łączenie operacji podczas tłoczenia pozwala obniżyć całkowity koszt obróbki.
Gwintowanie w matrycy, montaż elementów złącznych PEM lub spawanie oporowe wbudowane w postępujące matrycy zwiększają złożoność narzędzi, ale często zmniejszają koszty manipulacji w porównaniu do oddzielnych operacji wtórnych.
Ocenianie ofert i zrozumienie różnic cenowych
Przy porównywaniu ofert usług tłoczenia metali skup się na całkowitym koszcie dostarczenia, a nie tylko na cenie za sztukę. Dwie oferty o różnych cenach często odzwierciedlają różne założenia dotyczące:
- Amortyzacja narzędzi: Czy narzędzia są wyceniane osobno, czy ich koszt jest zawarty w cenie za sztukę?
- Opłaty za przygotowanie: W jaki sposób obsługiwane są przygotowania serii produkcyjnych?
- Wymagania jakościowe: Jakie czynności kontroli jakości i dokumentacji są uwzględnione?
- Operacje wtórne: Czy operacje wykończeniowe są uwzględnione w ofercie, czy są wyceniane osobno?
- Wysyłka i pakowanie: Jakie koszty logistyczne są zawarte w cenie?
Zgodnie z oceną ekspertów branżowych ds. cen, bardzo niskie ceny często wskazują na niezrozumienie wymagań, niewystarczające inwestycje w oprzyrządowanie lub problemy z kompetencjami dostawcy. Brakujące elementy w propozycjach — np. niejasne założenia dotyczące tolerancji, pominięte opłaty za przygotowanie maszyn lub nieprecyzyjne odniesienia do specyfikacji — często prowadzą do niespodzianek kosztowych w trakcie produkcji.
Celem nie jest znalezienie najniższej ceny, lecz zrozumienie czynników generujących wartość oraz zapewnienie, że oferty odzwierciedlają rzeczywiste wymagania Zamawiającego. Gdy czynniki wpływające na koszty są dobrze rozumiane, ostatnim krokiem staje się wybór odpowiedniego partnera ds. tłoczenia, który zapewni realizację zobowiązań dotyczących jakości, terminów i cen.
Wybór odpowiedniego partnera do tłoczenia dla Państwa projektu
Opanowałeś podstawy techniczne — procesy tłoczenia, dobór materiałów, zasady projektowania dla wytwarzania (DFM) oraz czynniki wpływające na koszty. Nadszedł teraz moment decyzji, która określa, czy cała ta wiedza przekształci się w udaną produkcję: wybór partnera ds. niestandardowego tłoczenia blach.
Oto, co odróżnia frustrujące relacje z dostawcami od produktywnych: dokładna, wstępna ocena. Według poradnika KY Hardware dotyczącego wyboru dostawców, wybór odpowiedniego dostawcy tłoczników to kluczowa decyzja, która bezpośrednio wpływa na jakość produktu, harmonogram produkcji i wynik finansowy. Idealny partner oferuje więcej niż tylko produkcję części – oferuje wiedzę inżynierską, zapewnia rygorystyczną kontrolę jakości i stanowi rozszerzenie Twojego zespołu.
Przeanalizujmy krok po kroku, co należy ocenić oraz jakie pytania zadać przed podjęciem współpracy z jakimkolwiek producentem metalowych części tłoczonych.
Kluczowe umiejętności do oceny
Zanim poprosisz o wyceny, musisz mieć jasność, jakie umiejętności i możliwości są rzeczywiście istotne dla Twojego projektu. Nie każdy zakład tłocznicy obsługuje wszystkie zastosowania – niezgodność pomiędzy wymaganymi a rzeczywistymi możliwościami prowadzi do problemów z jakością, przekroczenia terminów realizacji oraz napięć w relacjach.
Zakres nośności pras i wyposażenie
Lista wyposażenia dostawcy jest bezpośredniym wskaźnikiem jego możliwości. Według ekspertów z branży tłoczenia typ i nośność pras określają rozmiar, grubość oraz złożoność wykonywanych części.
Przy poszukiwaniu usług tłoczenia metali w pobliżu lub ocenie oddalonych dostawców sprawdź:
- Zakres siłowni: Czy nośność ich pras odpowiada wymaganiom dotyczącym Twoich części? Prasy o zbyt małej nośności nie są w stanie kształtować materiałów o dużej grubości; prasy o nadmiernej nośności marnują zasoby przy produkcji małych części.
- Rozmiar łóżka: Czy ich matryce mogą pomieścić wymiary Twoich części wraz z niezbędnymi marginesami taśmy?
- Możliwości prędkości suwu: Wyższe prędkości oznaczają szybszą produkcję — ale tylko wtedy, gdy systemy zapewniające jakość utrzymują stałość wyników.
- Prasy serwonapędowe kontra prasy mechaniczne: Prasy serwonapędowe oferują programowalne profile ruchu, co ułatwia obróbkę trudnych materiałów.
Obsługa materiału i doświadczenie
Znajomość przez dostawcę określonego przez Państwa materiału jest kluczowa. Zgodnie z najlepszymi praktykami branżowymi różne materiały — takie jak stali wysokowytrzymałosciowe, aluminium, stopy miedzi oraz stal nierdzewna — zachowują się inaczej w matrycy. Dostawca posiadający duże doświadczenie w pracy z Państwa materiałem potrafi przewidzieć potencjalne wyzwania i zoptymalizować proces.
Zapytaj o relacje dostawcy w łańcuchu dostaw. Czy ma on silne powiązania z renomowanymi hutami i dystrybutorami? Zapewnia to dostępność materiałów, stabilne ceny oraz pełną śledzilność wraz z certyfikatami materiałowych.
Certyfikaty jakości i systemy
Solidny system zarządzania jakością (QMS) jest warunkiem koniecznym. Zgodnie z wytycznymi doboru dostawców firmy Banner Metals Group, solidny QMS obejmujący cały cykl od projektowania części po jej pakowanie jest nieodzowny. Szukaj dostawców stosujących zaawansowane technologie, takie jak elektroniczne zbieranie danych, czujniki oraz automatykę, umożliwiające monitorowanie i utrzymanie stałych standardów jakości.
Kluczowe certyfikaty do zweryfikowania:
- ISO 9001: Podstawowa certyfikacja zarządzania jakością potwierdzająca istnienie udokumentowanych procesów oraz zaangażowanie w ciągłą poprawę
- IATF 16949: Niezbędna w zastosowaniach motocyklowych i samochodowych — potwierdza zgodność z wymaganiami jakościowymi specyficznymi dla przemysłu motocyklowego i samochodowego
- AS9100: Wymagana w branży lotniczej do tłoczenia z dodatkowymi wymaganiami dotyczącymi śledzalności oraz kontroli procesów
- ISO 13485: Niezbędna w produkcji urządzeń medycznych zgodnie ze standardami biokompatybilności i czystości
Zgodnie z opiniami ekspertów ds. jakości, należy zapytać o ich 12-miesięczne, kumulacyjne wskaźniki wewnętrznych i zewnętrznych usterek na milion sztuk (PPM). Ten wskaźnik ujawnia rzeczywistą wydajność jakościową — nie tylko dokumenty polityki.
Własne narzędzia kontra outsourcing
Kto faktycznie wykonuje matryce? To pytanie ma istotne konsekwencje dla czasów realizacji, szybkości rozwiązywania problemów oraz kontroli projektu. Producentom posiadającym własne możliwości projektowania i budowy matryc towarzyszą istotne korzyści:
- Szybsza komunikacja między inżynierami projektowymi, technikami narzędziowymi oraz operatorami pras
- Szybsze modyfikacje matryc w przypadku konieczności wprowadzenia korekt
- Lepsza odpowiedzialność, ponieważ ten sam zespół tworzy narzędzia i obsługuje produkcję
- Skrócone czasy realizacji bez konieczności oczekiwania na zewnętrzne warsztaty narzędziowe
Możliwości operacji wtórnych
Zgodnie z opiniami ekspertów ds. łańcucha dostaw należy rozważyć potrzebę dodatkowych usług, takich jak hartowanie, pokrywanie powłokami, usuwanie wyprasek, montaż lub specjalistyczne opakowania. Firma specjalizująca się w niestandardowym tłoczeniu metali, która oferuje te usługi dodatkowe wewnętrznie lub zarządza nimi poprzez zaufaną sieć partnerów, może znacznie uprościć Państwa łańcuch dostaw.
Wartość prototypowania i wsparcia DFM
To właśnie w tym momencie naprawdę kompetentni partnerzy różnią się od zwykłych wykonawców zamówień: co dzieje się przed rozpoczęciem produkcji narzędzi?
Dlaczego wiedza specjalistyczna w zakresie DFM ma znaczenie
Zgodnie z badaniami Xometry dotyczącymi DFM (projektowania z myślą o produkcji), projektowanie z myślą o produkcji odgrywa kluczową rolę dla inżynierów produkcyjnych i projektantów wyrobów. DFM zapewnia zgodność celów projektowych z możliwościami produkcyjnymi, gwarantując, że prototypy będą innowacyjne oraz możliwe do wyprodukowania w rozsądnym czasie i koszcie już na wczesnym etapie projektowania.
Najlepsi dostawcy tłocznictwa to prawdziwi partnerzy, którzy zapewniają wiedzę inżynierską, a nie tylko zdolności produkcyjne. Według ekspertów oceniających dostawców ich wcześniejsze zaangażowanie może przynieść znaczne oszczędności kosztów oraz bardziej wytrzymałej konstrukcji elementów.
Co rzeczywiście oferuje wsparcie DFM:
- Zmniejszona liczba iteracji narzędzi: Wykrywanie problemów projektowych przed budową matryc zapobiega kosztownym modyfikacjom
- Skrócenie czasu wprowadzenia produktu na rynek: Optymalizowane projekty płynnie przechodzą od koncepcji przez próbną produkcję do masowej produkcji
- Obniżenie całkowitych kosztów projektu: Inwestycja w inżynierię na wczesnym etapie zapobiega niespodziankom na późniejszych etapach
- Poprawa sukcesu pierwszego egzemplarza: Elementy spełniają określone wymagania bez konieczności przeprowadzania wielokrotnych cykli prób
Zgodnie z ekspertami ds. produkcji, projektowanie z myślą o wykonalności produkcyjnej (DFM) usprawnia proces tworzenia prototypów, czyniąc go bardziej efektywnym i mniej podatnym na błędy. Wczesne uwzględnienie ograniczeń produkcyjnych w ramach DFM pozwala na zaprojektowanie wielofunkcyjnych elementów łatwiejszych w produkcji, co przyspiesza rozwój produktu.
Zalety prototypowania przez tłoczenie metali
Prototypowanie pozwala zweryfikować projekt przed rozpoczęciem produkcji narzędzi. Powstaje pytanie: jak szybko potencjalni dostawcy mogą dostarczyć próbki części do testów?
Możliwości szybkiego prototypowania są istotne, ponieważ:
- Potwierdzają dopasowanie i funkcjonalność względem współpracujących komponentów jeszcze przed inwestycją w narzędzia
- Ujawniają problemy montażowe, których modele CAD mogą nie ujawnić
- Umożliwiają testowanie i zatwierdzenie przez klienta reprezentatywnych części
- Zmniejszają ryzyko poprzez weryfikację założeń przed dokonaniem znacznej inwestycji kapitałowej
Przy ocenie usług precyzyjnego tłoczenia metali należy zapytać o czas realizacji prototypów oraz stosowane metody. Niektórzy dostawcy mogą dostarczyć próbki wykonane za pomocą miękkich narzędzi w ciągu kilku dni, inni potrzebują tygodni. Ten harmonogram ma bezpośredni wpływ na ogólny harmonogram realizacji projektu.
Lista kontrolna oceny dostawcy
Zanim ostatecznie wyznaczysz partnera świadczącego usługi niestandardowego tłoczenia metali, sprawdź następujące kluczowe czynniki:
| Kategoria oceny | Kluczowe pytania do zadania | Czego szukać |
|---|---|---|
| Możliwości Techniczne | Jaki zakres nośności pras oferujecie? W jakich materiałach specjalizujecie się Państwo? | Sprzęt dopasowany do wymagań dotyczących Państwa części; bogate doświadczenie w obróbce określonych przez Państwa materiałów |
| Systemy o wysokiej jakości | Jakie certyfikaty posiadacie? Jaka jest obecna wartość wskaźnika liczby wadliwych sztuk na milion (PPM)? | Certyfikaty odpowiednie dla Państwa branży; udokumentowane wskaźniki jakości z wykresami trendów poprawy |
| Możliwości związane z budową narzędzi | Czy projektujecie i budujecie matryce we własnym zakresie? Jaki jest typowy czas realizacji narzędzi? | Możliwości wewnętrzne zapewniające szybszą reakcję; realistyczne harmonogramy dostosowane do potrzeb projektu |
| Wsparcie techniczne | Czy udzielacie Państwo opinii dotyczącej projektowania przygotowanego do produkcji (DFM)? Jak szybko możecie przygotować ofertę cenową oraz prototyp? | Proaktywne sugestie dotyczące optymalizacji projektu; szybkie czasy reakcji |
| Możliwości i dostawy | Jakie jest obecne wykorzystanie Państwa możliwości produkcyjnych? Czy oferujecie programy zapasów? | Dostępne moce produkcyjne dla Państwa zamówień; elastyczne opcje dostaw dopasowane do Państwa potrzeb |
| Komunikacja | Kto jest moim głównym punktem kontaktowym? Jaki jest typowy czas odpowiedzi? | Dedykowani przedstawiciele z doświadczeniem branżowym; kultura komunikacji charakteryzująca się operatywnością |
Zgodnie z ekspertami ds. selekcji dostawców, wiarygodna komunikacja stanowi podstawę zaufania w relacjach biznesowych B2B. Należy wziąć pod uwagę lata działalności oraz wskaźnik rotacji kluczowych kontaktów — niska rotacja oznacza stabilność i wysokie kompetencje, co gwarantuje spójną i niezawodną obsługę.
Znalezienie odpowiedniego partnera spełniającego Państwa wymagania
Przy poszukiwaniu firm zajmujących się tłoczeniem metali w pobliżu lub ocenie dostawców na skalę globalną należy pamiętać, że najniższa cena rzadko oznacza najlepszą wartość. Zgodnie z wytycznymi branżowymi prawdziwa wartość wynika od dostawcy działającego jako strategiczny partner – oferującego systemy zapewnienia jakości, wiedzę inżynierską oraz szybką obsługę klienta przy jednoczesnym konkurencyjnym cenowaniu.
Dla zastosowań motocyklowych wymagających certyfikacji IATF 16949, szybkiego prototypowania oraz kompleksowego wsparcia w zakresie DFM producenci tacy jak Shaoyi (Ningbo) Metal Technology demonstrują, co oferuje kompetentny partner z zakresu tłoczenia: szybkie prototypowanie w ciągu 5 dni, systemy zapewnienia jakości certyfikowane zgodnie z normą IATF 16949, czas przygotowania oferty wynoszący 12 godzin oraz wyspecjalizowaną wiedzę w zakresie elementów nadwozia, zawieszenia i komponentów konstrukcyjnych. Te umiejętności stanowią punkt odniesienia, względem którego należy oceniać każdego potencjalnego dostawcę.
Ostateczna decyzja powinna opierać się na kompleksowej ocenie możliwości, jakości, obsługi oraz całkowitych kosztów posiadania – nie tylko na cenie jednostkowej. Zgodnie z opiniami ekspertów ds. oceny dostawców, opracowanie ważonej karty oceny pozwala wyeliminować subiektywne preferencje i wyraźnie wskazuje dostawcę najlepiej odpowiadającego najważniejszym potrzebom zamówienia.
Wybór odpowiedniego producenta tłoczników metalowych to inwestycja w sukces Państwa produktu. Przeprowadzając dogłębną ocenę możliwości produkcyjnych, weryfikując systemy zapewnienia jakości oraz oceniając wsparcie inżynieryjne, przechodzisz od relacji transakcyjnych do strategicznych partnerstw, które zapewniają stałą jakość, konkurencyjne koszty oraz szybką i elastyczną obsługę na każdym etapie cyklu życia produkcji.
Najczęściej zadawane pytania dotyczące niestandardowego tłoczenia blachy
1. Jaka jest różnica między tłoczeniem za pomocą matrycy postępującej a tłoczeniem za pomocą matrycy transferowej?
Wytłaczanie progresywne przesuwa ciągłą taśmę metalową przez wiele zintegrowanych stacji w obrębie jednego bloku matrycy, przy czym części pozostają do końca procesu połączone ze sobą, a ostateczne oddzielenie następuje dopiero na końcu. Metoda ta sprawdza się szczególnie w przypadku produkcji masowej (powyżej 10 000 sztuk rocznie) mniejszych elementów. Wytłaczanie transferowe najpierw wycina pojedyncze blanki, a następnie przesuwa je osobno przez oddzielne stacje kształtujące za pomocą mechanicznych mechanizmów transferowych. Podejście to lepiej nadaje się do większych części, które nie mogą pozostawać połączone z taśmą nośną, a także zazwyczaj zapewnia lepsze wykorzystanie materiału dzięki bardziej efektywnemu rozmieszczeniu blanków.
2. Jakie materiały są najlepsze do tłoczenia metali?
Stal węglowa pozostaje najbardziej opłacalnym wyborem do zastosowań konstrukcyjnych, zapewniając doskonałą kuteść i wytrzymałość. Stal nierdzewna zapewnia odporność na korozję w zastosowaniach medycznych i przetwórstwie spożywczym, ale wymaga ostrożnego obchodzenia się z powodu wyższego odskoku sprężynowego. Stopy aluminium zapewniają lekkie rozwiązania o dobrej odporności na korozję, idealne do redukcji masy w przemyśle lotniczym i motocyklowym. Miedź i mosiądz wyróżniają się w zastosowaniach elektrycznych wymagających przewodności. Dobór materiału powinien uwzględniać kuteść, wymagania końcowego zastosowania, implikacje dla narzędzi oraz koszty – większość operacji tłoczenia obsługuje materiały o grubości od kalibru 26 do kalibru 10.
3. Ile kosztuje niestandardowe narzędzie do tłoczenia metali?
Koszty niestandardowych matryc do tłoczenia różnią się znacznie w zależności od ich złożoności. Proste matryce do wykrawania zwykle kosztują od 5 000 do 15 000 USD, podczas gdy złożone matryce postępujące z wieloma stacjami kształtowania mogą przekraczać 50 000–100 000 USD. Kluczowymi czynnikami wpływającymi na koszt są złożoność matrycy, liczba stacji, wymagania dotyczące dokładności wymiarowej oraz planowany wolumen produkcji. Jednakże narzędzia stanowią inwestycję, która obniża koszt pojedynczej sztuki przy dużych partiach: matryca o wartości 15 000 USD powoduje dodatkowy koszt w wysokości 15 USD na sztukę przy 1 000 sztukach, ale tylko 0,15 USD na sztukę przy 100 000 sztukach. Wysokiej jakości krajowe narzędzia gwarantowane na ponad 1 000 000 uderzeń zapewniają lepszą wartość długoterminową niż tańsze alternatywy.
4. Kiedy należy wybrać tłoczenie zamiast cięcia laserowego lub frezowania CNC?
Dostosowane tłoczenie blachy staje się opłacalne pod względem ekonomicznym, gdy roczne woluminy przekraczają 5 000–10 000 sztuk i projekt został ostatecznie zatwierdzony. Cięcie laserem jest lepszym wyborem dla prototypów, próbnych serii poniżej 3 000 sztuk lub w przypadku częstych zmian konstrukcyjnych – bez inwestycji w narzędzia, ale przy stałych kosztach na sztukę. Obróbka CNC nadaje się do złożonych geometrii 3D, ścisłych tolerancji lub woluminów poniżej 1 000 sztuk. Obliczenie punktu równowagi porównuje inwestycję w narzędzia z oszczędnościami na jednostkę; powyżej ilości odpowiadającej punktowi równowagi tłoczenie zapewnia znaczne obniżki kosztów, które wzrastają wraz ze wzrostem woluminu.
5. Jakie certyfikaty powinien posiadać dostawca usług tłoczenia metali?
Wymagane certyfikaty zależą od branży, w której działa Państwo. ISO 9001 stanowi podstawowy standard zarządzania jakością dla każdego poważnego producenta. IATF 16949 jest obowiązkowy w zastosowaniach motocyklowych i samochodowych, potwierdzając zgodność z branżowymi wymaganiami jakościowymi, w tym zapobieganiem wadom oraz zarządzaniem łańcuchem dostaw. AS9100 ma zastosowanie do tłoczenia w przemyśle lotniczym i kosmicznym, wprowadzając dodatkowe wymagania dotyczące śledzalności. ISO 13485 reguluje produkcję wyrobów medycznych, uwzględniając standardy biokompatybilności i czystości. Poza certyfikatami należy ocenić rzeczywistą jakość wykonywanych usług na podstawie wskaźników PPM (liczba wadliwych sztuk na milion) oraz zapytać o systemy śledzenia materiałów, możliwości kontroli jakości oraz praktyki dokumentacyjne.