 Pienet erät, korkeat standardit. Nopea prototyypinkehityspalvelumme tekee vahvistamisen nopeammaksi ja helpommaksi —

Valssattujen alumiinirengaiden hiosesta peilikateeseen kotona
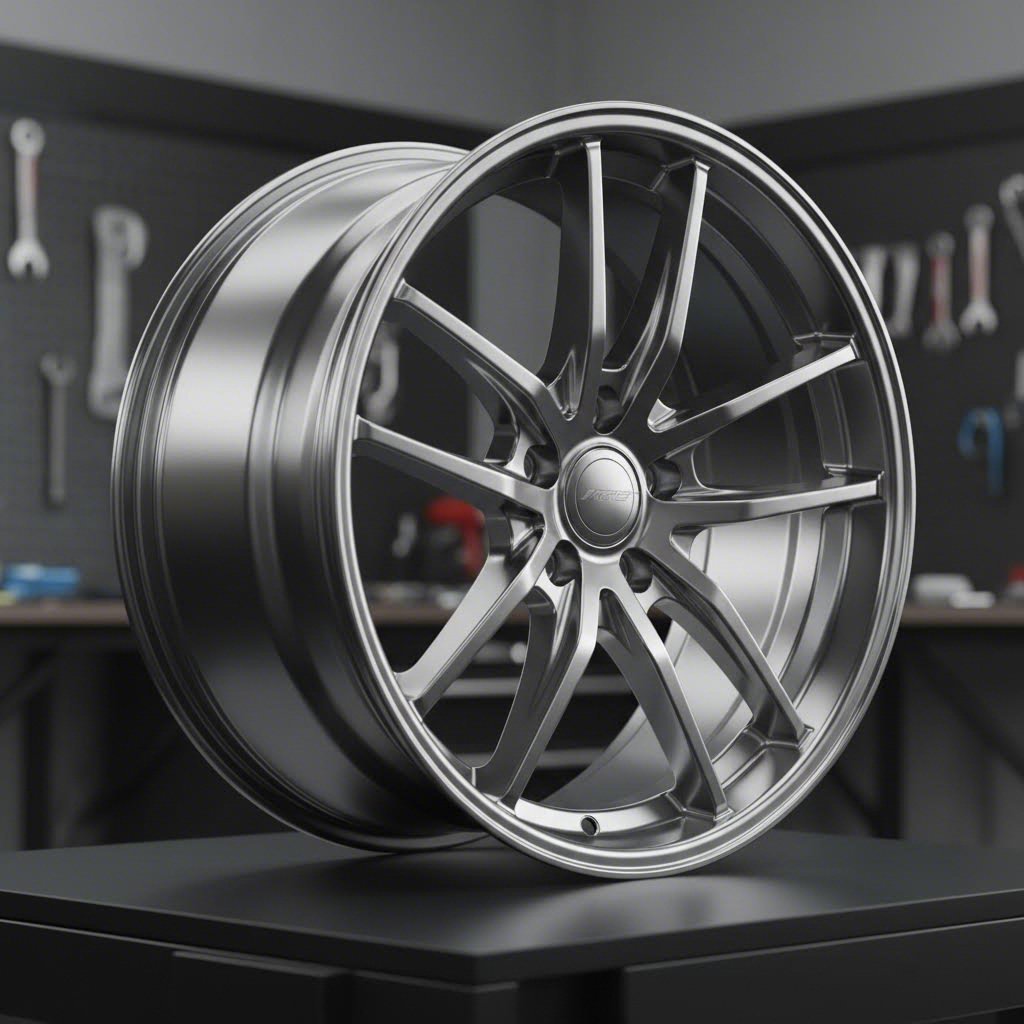
Kovetettujen alumiinipyörien ymmärtäminen ja niiden kiillotusmahdollisuudet
Oletko koskaan miettinyt, miksi kiillotetut alumiinipyöräsi eivät koskaan aivan saavuta näyttävyyden peilikatetta? Salaisuus ei piile pelkästään tekniikassasi, vaan siinä, että ymmärrät, mikä tekee kovetetusta alumiinista perustavanlaatuisesti erilaisen muista pyörämateriaaleista. Kovetettujen alumiinipyörien kiillottaminen vaatii erityistä tietämystä, joka menee paljon pidemmälle kuin tavallinen pyörähuolto – ja kun olet kerran ymmärtänyt nämä periaatteet, upeiden tulosten saavuttaminen on täysin mahdollista kotona.
Miksi kovetettu alumiini vaatii erityistä huomiota
Vaatimattomat alumiinipyörät eivät ole vain muotoiltua alumiinia – ne on suunniteltu tiukalla valmistusprosessilla, joka muuttaa niiden rakennetta. Kaatettujen alumiinipyörien, jotka valmistetaan kaatamalla sulaa metallia muotteihin, kanssa vertailtaessa vaatimattomat pyörät valmistetaan puristamalla yhtä palaa korkealaatuista alumiinia erittäin kuumassa ja paineessa. Tämä prosessi luo tiheämmän ja yhtenäisemmän rakeenrakenteen, joka vaikuttaa suoraan siihen, miten metalli reagoi kiillotukseen.
Kun kiillotat alumiinia vaatimattomalla pyörällä, työskentelet materiaalin kanssa, jolla on parempi lujuus-painosuhde ja tiiviimpi molekyylikoostumus. Tämä tiheys tarkoittaa, että vaatimattomilta pyöriltä voidaan saavuttaa syvempiä ja heijastavampia pintoja kuin kaatetuista pyöristä – mutta se myös tarkoittaa, että alumiinipyörän pinta reagoi eri tavalla yhdisteisiin ja hionnepaperityyppeihin.
Tieteellinen selitys peilikarva-alueelle
Seuraavat tekijät tekevät valssattujen alumiinipyörien kiillottamisesta ainutlaatuisen: valssausprosessi poistaa huokoisuuden, joka on yleistä valumuotissa valmistetuissa pyörissä. Valmistusteknisesti asiantuntijoiden mukaan valssausprosessi tuottaa tiheämmän ja jatkuvamman kuiturakenteen, mikä parantaa materiaalin lujuutta ja sitkeyttä. Kiillottamisen harrastajille tämä tarkoittaa pintaa, joka pystyy pitämään erinomaisen kiillon kun se on kerran oikein valmisteltu.
Olitpa sitten palauttamassa hapettuneita pyöriä, jotka ovat menettäneet kiilttonsä, tai ylläpitämässä jo olemassa olevaa kiiltoa, oikeanlaisen alumiinin kiillottamisen ymmärtäminen alkaa metallurgisten ominaisuuksien kunnioittamisella. Paras tapa kiillottaa alumiinia – erityisesti valssattua alumiinia – on työskennellä kuiturakenteen mukana eikä sitä vastaan.
Tässä kattavassa oppaassa opit kaiken alustavasta arvioinnista lopulliseen suojaukseen asti. Kyllä, oppimiskäyrä on mukana. Mutta sitkeyttä osoittaville harrastajille, jotka ovat valmiita panostamaan aikaa, tylsiin ja säästä kärsineisiin kehät muuttaa kiillotetuiksi alumiinikehoiksi on täysin mahdollista. Aloitetaan tämä matka yhdessä.
Esikäsittelyn arviointi ja projektisuunnittelu
Ennen kuin sijoitat tunneittain työtä sekä rahan kiillonaineisiin ja välineisiin, sinun täytyy vastata yhteen keskeiseen kysymykseen: voitko kiillottaa alumiinipyörät onnistuneesti nykyisessä tilassaan? Tämä arviointivaihe erottaa onnistuneet harrastajaprojektit turhauttavista epäonnistumisista – ja se on vaihe, jonka useimmat oppaat kokonaan ohittaakset.
Pyörien kunnon arviointi ennen aloittamista
Ota taskulamppu käteesi ja tarkastele pyöriäsi tarkasti. Etsit tiettyjä osoittimia, jotka kertovat, onko alumiinin kiillotus mahdollinen vai kohtaako hanke monimutkaisemman restaurointiprojektin.
Aloita vedämällä kynsiesi reunoja pyörän pinnalla. Kevyt hapettuminen tuntuu liituiselta mutta sileältä – tämä reagoi erinomaisesti valuraudoitetun pyörän kiillottamiseen. Syvä hapettuminen puolestaan luo karkean, melkein hiekka-allasmaisen tuntemuksen, joka vaatii voimakkaampaa käsittelyä ennen kuin kiillotusta voidaan aloittaa.
Tarkista seuraavaksi pinta syövytyksistä aiheutuvia kuoppumaisia vikoja – pieniä kraatterimaisia epätäydellisyyksiä, joita esiintyy kun korroosio on tunkeutunut metalliin. GM:n pyörien uusimisohjeiden mukaan sellainen vahinko, jota ei voida poistaa hionnalla tai kiillottamalla, saattaa edellyttää ammattilaishoitoa tai pyörän vaihtoa.
Käytä tätä tarkistuslistaa ennen kuin aloitat kiillotetun alumiinipyörän kiillotushankkeen:
- Pinnan tekstuurin arviointi: Vedä kätesi kaikkien pintojen yli – säteiden, rungon ja rengaslevyn. Huomaa kaikki karkeat kohdat, kohonneet alueet tai epätavalliset tekstuurit, jotka viittaavat vaurioon tai aiempiin korjauksiin.
- Päällysteen tunnistustesti: Käytä vähän metallikiillotetta huomaamattomalle alueelle. Jos kangas muuttuu mustaksi, työskentelet puhdisti alumiinin kanssa. Ei mustaa jäännöstä? Todennäköisesti on olemassa selkeä päällyste joka täytyy käsitellä ensin.
- Vaurion tunnistaminen: Tarkista rengaspintaiskut, syvät naarmut, halkeamat tai taipuneet reunat. Vaikka pienet naarmut voidaan hioa pois, halkeamat tarkoittavat, että pyörä tulisi hävittää – älä koskaan kiillota uudelleen.
- Hapotuksen syvyyden arviointi: Pinnalla oleva valkoinen, jauhoisa hapotus on hallittavissa. Tummanharmaa tai musta hapotus, joka tunkeutuu metalliin, viittaa vakavempaan korroosioon.
- Aiemman korjauksen tarkastus: Etsi värimuutoksia, täyteainetta tai epätasaisia pintoja, jotka viittaavat aiempaan korjaustyöhön ja voivat vaikeuttaa kiillotusta.
Alumiinivantejen kunnostamisen ymmärtäminen alkaa rehellisellä arvioinnilla. Vanteen koko ja sädekuvion monimutkaisuus vaikuttavat merkittävästi siihen käytettävään aikaan. Yksinkertaisen viisisäteisen suunnittelun 18-tuumainen vanteessa voi kestää 2–3 tuntia per vane. Mutkikkaissa monisäteisissä kuvioissa 22-tuumaisissa vanteissa? Katso 4–6 tuntia kussakin – olettaen, että olosuhteet ovat edulliset.
Koska ammattilaishuolto on järkevämpi vaihtoehto
Tässä totuus: ei kaikkiin vanteisiin kannata ryhtyä itse käsittelyyn. Tieto siitä, milloin hakea lähialueen alumiinivanteiden kiillotuspalveluja, säästää sinut tuhlatulta vaivalta ja mahdollisesti vahingoittuneilta vanteilta.
Harkitse ammattimaista uudelleenpintakäsittelyä, kun:
- Pintakuplia ulottuu syvemmälle kuin 1–2 mm metallipinnan sisään
- Edelliset läpinäkyvät päällysteet tai pulverimaalaukset vaativat kemiallista poistoa
- Vanteissa näkyy halkeamien merkkejä, myös hiussuorat murtumat
- Taipuneet rengaspohjat ovat läsnä – niitä ei voida turvallisesti suoristaa kotona
- Kromatut alumiinivanteet vaativat kunnostusta (tämä vaatii erikoislaitteita)
GM:n virallinen kanta on selkeä: hitsausta, taivutusta, suoristusta tai uudelleen koneistusta ei suositella. Ainoastaan kosmeettinen renkaiden pinnoitteen viimeistely oikeilla menetelmillä on sallittua. Tämä ei ole mielivaltainen varovaisuus – kyse on rakenteellisen eheyden ylläpitämisestä, joka pitää sinut turvassa moottoritien nopeuksilla.
Aseta realistiset tavoitteet ennen kuin aloitat. Jos renkaissasi on kohtalaista hapettumista ja pieniä pintaviivoja, peilipinta on täysin saavutettavissa. Mutta jos kohtaamasi on vakavaa syöpymistä, useita vanhojen pinnoitteiden kerroksia tai rakenteellista vahinkoa, ammattipalvelut tai vaihto voivat olla järkevämpi sijoitus.
Nyt kun tiedät, millä työkalulla olet tekemisissä, varmistetaan, että olet riittävän suojattu ennen kuin kosketat mitään yhdisteitä tai laitteita.
Turvavarusteet ja työtilan valmistelu
Olet arvioinut renkaat ja olet valmis muuntamaan niitä. Mutta ennen kuin nostat alumiinipyörän hoitopyörää tai hiot alumiinirenkaita ensimmäistä kertaa, on jotain tärkeämpää kuin täydellisen lopputuloksen saavuttaminen – oma turvallisuutesi. Metallin kiillottaminen aiheuttaa vaaroja, joita monet harrastajakäsikirjat sivuuttavat, mutta näiden riskien ymmärtäminen on välttämätöntä kaikille, jotka haluavat oppia hio- ja kiillottamaan alumiinirenkaita turvallisesti.
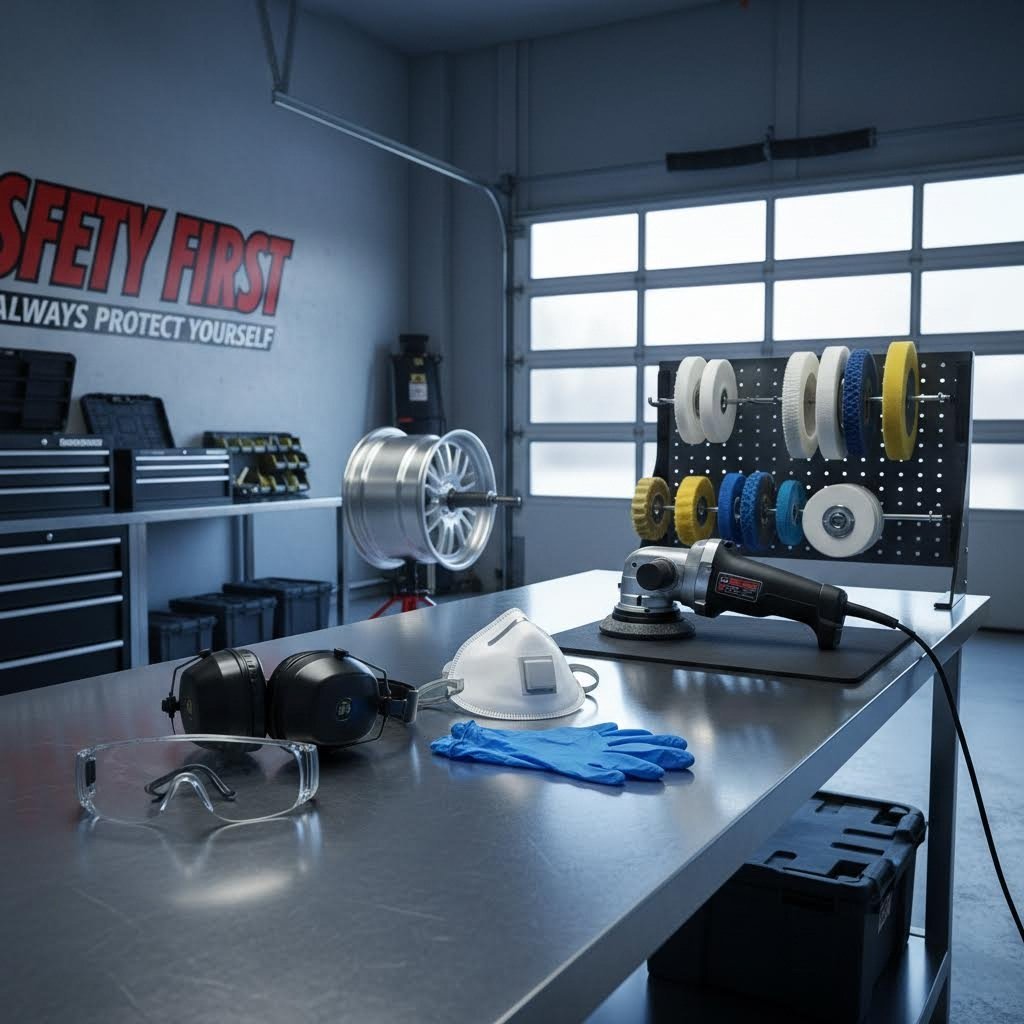
Välttämättömät turvavarusteet renkaiden kiillottamiseen
Mukaan lukien OSHA:n turvallisuusohjeet , metallin kiillotus aiheuttaa useita vaaraluokkia, mukaan lukien kemikaalialtistuminen, puristumisvaarat, melualtistuminen ja ergonomiset huolenaiheet. Varusteluun kuuluva polttomoottorirenkaiden kiillotustarvikkeet -luettelo tulisi aloittaa henkilökohtaisilla suojavarusteilla – ei yhdisteillä ja padoilla.
Tässä on täydellinen turvavarustelista:
- Silmien suojaus: Suojalasit sivusuojauksella ovat pakollisia. Kun alumiinia hiotetaan suurilla nopeuksilla, hiomaliuos ja metallipilkat muuttuvat lentäviksi kappaleiksi. Koko kasvonsuojus tarjoaa lisäsuojaa voimakkaan hionnan vaiheissa.
- Takit: Käytä nitrilihansikkaita kemikaalien kestävyyden vuoksi käsiteltäessä puhdistusaineita ja hiomaliuoksia. Vaihda nahkahansikkaisiin tai leikkauskestäviin hansikkaisiin pyörien ja reunojen käsittelyssä ihovamman estämiseksi. Älä koskaan käytä löysiä hansikkaita pyörivän laitteiston läheisyydessä.
- Hengitynsuojaus: Se CDC:n raportit että työntekijöillä, jotka hengittävät suuria määriä alumiinipölyä, voi kehittyä keuhkovaurioita ja neurologisia vaikutuksia. Käytä vähintään N95-suodattinta hionnassa; vaihda P100-suodattimeen kemiallisten aineiden käytössä suljetuissa tiloissa.
- Kuulonsuojaus: Pyörivät työkalut ja hiomakoneet tuottavat merkittävää melua. Korvatulppien tai kuulosuojaimien käyttö estää pitkäaikaisia kuulovaurioita jatkuvissa kiillotustöissä.
- Sopiva vaatetus: Käytä tiukasti istuvia, pitkähihaisia paitoja ja housuja. Poista korut, pidä hiukset sidottuina ja vältä löysää vaatetusta, joka voisi kelautua pyörivään koneeseen.
Suojautuminen yleisiltä vaaroilta
Tietyn tietoisuus riskeistä auttaa sinua välttämään niitä. Tässä on mitä suojautut vastaan:
Alumiinipölyn hengittäminen: Hiomisen aikana syntyvät hienot alumiinipartikkelit leviävät helposti ilmassa. OSHA rajoittaa työntekijöiden altistumista alumiinipölylle 15 mg/m³:ksi kokonaispölyssä ja 5 mg/m³:ksi hengitettävässä fraktiossa. Vesihionta vähentää merkittävästi ilmassa olevia partikkeleita – toinen syy miksi tätä menetelmää suositellaan renkaiden kohdalla.
Pyörivän työkalun aiheuttamat vaarat: Pyörivät hiomapyörät ja kiillotuspäädylät voivat tarttua vaatteisiin, hiuksiin tai sormiin millisekunnissa. Turvallisuusasiantuntijat suosittelevat, että kiinteät koneet, joissa on näkyvillä olevia pyöriviä akselia, varustetaan suojuksilla ja akselien päät peitetään korkinutmilla. Käsin käytettäviä työkaluja käytettäessä on pidettävä tiukka otteessa ja pidettävä työkalu liikkeessä estämällä siten lämpötilan nousu ja hallinnan menetys.
Kemikaalialtistuminen: Hiomaiset ja puhdistusaineet voivat olla syttyviä tai vaarallisia. Tarkista aina kunkin tuotteen turvallisuustiedote (SDS) ennen käyttöä. Älä sekoita kemikaaleja , ja hävitä hiomaisella kostutetut riepot asianmukaisesti estääksesi itsestään syttymisen.
Työskentelytilan ilmanvaihto: OSHA-standardi 1910.94 määrittää ilmanvaihtovaatimukset toimille, joissa syntyy pölyä ja höyryjä. Työskentele mahdollisuuksien mukaan ulkona tai varmista, että autotallissasi on riittävä ilmanvaihto. Aseta tuuletin siten, että se suuntaa hiukkaset pois hengitysvyöhykkeeltäsi – älä kohti sinua.
Järjestä työskentelytilasi niin, että se edistää sekä turvallisuutta että tehokkuutta: työskentele mukavalla korkeudella vähentääksesi selkärasitusta, huolehdi riittävästä valaistuksesta virheiden havaitsemiseksi ja pidä alueesi siistinä. Liian paljon ilmassa leijuvaa hienoa alumiinipölyä luo räjähdysvaaran, joten imuroi ja puhdista usein pidempien istuntojen aikana.
Kun suojavarusteet ovat valmiina ja työskentelytila on varustettu, olet nyt valmis valitsemaan oikeat hiomaiset kullekin hiomisprosessin vaiheelle.
Hiomaineen valinta ja käyttöperiaatteet
Kävele mihin tahansa autotarvikeliikkeeseen, ja edessäsi on seinä täynnä hiomaineita – jokainen lupaamassa parhaat tulokset. Mutta totuus on tämä: alumiinirenkaiden paras hioma-aine ei riipu merkkiloyalistiudesta. Kyse on siitä, että ymmärtää, mitä kukin aine oikeastaan tekee, ja valitsee sen oikeaan hiointivaiheeseen. Hallitse tämä tieto, niin voit arvioida mitä tahansa alumiinirenkaiden hiomaintaa millä tahansa hyllyllä itsevarmasti.
Hiomaintojen sovittaminen hiontavaiheeseen
Ajattele hiomaintoja etenemisjärjestelmänä, kuten aiemmassa osiossa opitut paperitiiviysluokat. Jokaisella hiomaimella on tietty tehtävä prosessissa, ja niiden käyttö oikeassa järjestyksessä muuttaa tylsät renkaat peilikirkkaiksi pintoiksi.
Kolmivaiheinen hiomainejärjestelmä toimii näin:
- Leikkaavat hiomainta: Nämä tehokkaat kaavat sisältävät suurempia hiomapartikkeleita, jotka poistavat hapettumista, kevyitä naarmuja ja hionnasta jääneitä pinnan virheitä. Hionta-aineiden valmistajien mukaan leikkausyhdisteet "poistavat enemmän naarmuja" ja ne on suunniteltu pinnan valmistelua varten tarkempiin viimeistelyvaiheisiin.
- Välivaiheen yhdisteet: Niitä kutsutaan usein "esipolish"- tai "toisen vaiheen" yhdisteiksi, ja ne toimivat siirtymänä voimakkaan leikkauksen ja lopullisen viimeistelyn välillä. Ne tasoittavat leikkausyhdisteiden jättämän naarmukuvion poistamatta merkittävää määrää materiaalia.
- Viimeistelyyhdisteet: Nämä hienojakoiset kaavat sisältävät mikroskooppisia hiomapartikkeleita, jotka luovat varsinaisen peilikimaltisen. Niitä kutsutaan joskus myös "väriytys"-yhdisteiksi, koska ne tuovat esiin syvän, heijastavan kiillon sen sijaan, että ne poistaisivat materiaalia.
Yleinen virhe? Välivaiheen ohittaminen. Saatat saavuttaa kiiltävän tuloksen, mutta tarkempi tarkastelu paljastaa hienoja pyörteitä, jotka olisi voitu poistaa oikealla vaiheittaisella menettelyllä. Kun etsit parasta alumiinirenkaiden kiillotetta, muista, että yksi tuote ei voi tehokkaasti hoitaa kaikkia kolmea tehtävää.
Leikkausvoiman ja viimeistelyn ymmärtäminen
Jokainen alumiinirenkaiden kiillote sijoittuu jonnekin asteikolle voimakkaasta leikkaamisesta lempeään viimeistelyyn. Alan asiantuntijat huomauttavat että "rougeja käytetään yleensä kiillottamiseen ja viimeistelyyn, kun taas tripolikiillotteita käytetään naarmujen poistoon metallista leikkaamiseen ja hioontiin". Tämän eron ymmärtäminen auttaa sinua arvioimaan mitä tahansa tuotetta, riippumatta sen markkinointiväitteistä.
Tässä on tyypillinen vastaavuus kiillotteen värin ja toiminnon välillä – mutta tarkista aina valmistajan tekniset tiedot:
| Kiillotetyyppi | Hionnepitoisuus | Paras käyttötarkoitus | Käyttötapa |
|---|---|---|---|
| Musta emerikivi | Erittäin voimakas | Voimakkaan hapettumisen poisto, maalin/pinnoitteen poistaminen | Käytä jäykällä puskipyörällä kohtuukokoisella nopeudella; työskentele osissa |
| Harmaa/Greystar | Aggressiiviset | Alustava leikkaus ruostumattomalle teräkselle tai voimakkaasti hapettuneille pinnoille | Käytä jäykällä puskupyörällä; käytä tasaisesti painetta |
| Brown Tripoli | Keskitasoinen–voimakas | Ensisijainen leikkausvaihe alumiinille ja pehmeille metalleille | Vakiomuovauspyörä; suositellaan ensimmäiseksi pastaksi alumiinille |
| White Rouge | Keski-hieno | Välivaihe viimeistelyyn vaikeissa metalleissa ja alumiinissa | Pehmeämpi hiomapyörä; kevyempi paine kuin leikkausvaiheessa |
| Vihreä rouge | Hieno | Lopullinen peilipinta ruostumattomalle teräkselle ja alumiinille | Pehmeä villapyörä; vähäinen paine korkean kiillon saavuttamiseksi |
| Sininen rouge | Erittäin hieno | Lopullinen kiillotus ei-rautametalleille ja muoveille | Puhdas, pehmeä pyörä; hellittävät pyöreät liikkeet |
Valkaistujen alumiinipyörien hiomiseen erityisesti kokeneet hiojat suosittelevat aloittamaan harmaalla hionnepastalla, jota seuraa ruskea tripoli, ja sen jälkeen siirtyä valkoiseen rousuun. Tämä eteneminen antaa yleensä peilikirkkaan tuloksen, jonka useimmat innokkaimmat haluavat.
Pyöräsi nykyinen kunto määrittää, mistä kohdasta tätä etenemissarjaa aloitat. Kevyesti hapettuneet pyörät voivat aloittaa ruskeasta tripolista. Raskaammin sääolojen vaikutuksessa olevat pinnat tarvitsevat ensin mustan emerin tai harmaan pastan. Tässä nopea viiteliite:
- Kevyt sumu tai vähäinen himo: Aloita valkoisesta roususta (viimeistelypasta saattaa riittää)
- Kohtalainen hapettuminen kevyine naarmuineen: Aloita ruskeasta tripolista, siirry sitten valkoiseen rousuun
- Raskas hapettuminen tai näkyvät naarmut: Aloita harmaasta pastasta, edisty ruskean tripolin kautta valkoiseen rousuun
- Erittäin raskas hapettuminen hionnan jälkeen: Aloita mustasta emeristä, edisty kaikissa vaiheissa
Yksi keskeinen sääntö alumiinipuuhinnan käytössä missä tahansa vaiheessa: älä koskaan käytä samaa kiillotuskiekkoa eri yhdisteillä. Yhdisteen sekoittaminen kiekkoon on ristiriidassa tarkoituksen kanssa siirtyä jauhoisammalle abrasiville jokaisella askeleella. Käytä erillisiä kiekkoja jokaista yhdistettä kohti, ja säilytät edistymisjärjestelmäsi eheyden.
Hyvä alumiinipuuhinta tulee tuntua pehmeältä levitettäessä, levitä helposti pinnalle ja pyyhkiä puhtaasti pois. Jos yhdiste jättää runsaasti jäämää tai kuivuu liian nopeasti, käytät joko liikaa tuotetta tai huonompilaatuista kaavaa. Käytä säästeliäästi – vähällä on paljon tehtyä laadukkailla yhdisteillä.
Nyt kun ymmärrät, miten yhdisteet toimivat yhdessä, syvennytään hiomistekniikoihin ja rakeisuuden etenemiseen, jotka valmistavat renkaat näitä kiillotusvaiheita varten.
Hiomistekniikat ja rakeisuuden etenemisen hallinta
Tässä oikea muutos alkaa. Olet tarkastanut renkaat, pukeutunut asianmukaiseen suojavarusteisiin ja valinnut hiomapaperilaadut. Mutta ennen kuin jokin taikatemppu kiillottaa alumiinirengashuulet, sinun on luotava perusta – täydellisesti hiotu pinta. Tämä vaihe määrittää, saavutatko näyttävän laitteen kaupan kaltaiset kiillotetut alumiinirenkaat vai päädätteletkö viimeistelyyn, joka paljastaa jokaisen ottamasi oikotien.
Kriittinen hiomapaperin raakkuuden etenemisjärjestys
Kun opit kiillottamaan alumiinirenkaita, raakkuuden etenemisen ymmärtäminen on välttämätöntä. Empire Abrasivesin asiantuntijoiden mukaan hierontasäännön kultainen sääntö on, että pinnoitetta hioessa ei saa ohittaa yli yhtä raakkuustasoa kerrallaan. Vahvoihin alumiinirenkaisiin tämä sääntö tulee vielä tärkeämmäksi, koska tiheä rakeen rakenne reagoi ennustettavasti oikeaan tekniikkaan – ja rankaisee oikoteita armottomasti.
Alumiinirengashien kiillottamisen paras tapa alkaa aloituspisteen valinnalla renkaiden kunnosta riippuen. Tässä on täydellinen vaiheittainen ohje alumiinirenkaiden hiontaan ja kiillotukseen:
- 320-hioma (voimakas hapettuminen/syvät naarmut): Käytä vain tarvittaessa—tämä karkea hioma poistaa materiaalia nopeasti, mutta aiheuttaa syviä naarmuja, jotka vaativat merkittävää tasoitusta. Säilytä pyöriin, joissa on vakavia kuoppia tai voimakasta korroosiota. Arvioitu aika: 20–30 minuuttia per rengas 18-tuumaisille; lisää 10 minuuttia jokaista ylimääräistä 2 tuumaa kohti.
- 400-hioma (tyypillinen aloituspiste): Mukaan lukien alumiinin kiillotusasiantuntijat , 400-hioma poistaa tehokkaasti voimakkaan hapettumisen ja naarmut samalla kun luo hallittavan naarmukuvion. Tämä on yleensä aloituspisteesi keskivaikeasti hapettuneille renkaille. Arvioitu aika: 15–25 minuuttia per rengas.
- 600-hioma (siirtymävaihe): Tämä kriittinen välivaihe pehmentää karkeat merkit, jotka 400-hioma on jättänyt. Tämän vaiheen ohittaminen on houkuttelevaa, mutta kallista – käytät kaksinkertaisen ajan 800-hiomalla korvataksesi sen. Arvioitu aika: 15–20 minuuttia per rengas.
- 800-hioma (Tarkennus alkaa): Asiantuntijoiden mukaan 800-hioma tasaisee karkeat naarmut ja valmistaa pinnan tarkempaa työtä varten. Huomaat, että pinta alkaa saada yhtenäisen, satiinimaisen olemuksen. Arvioitu aika: 12–18 minuuttia per rengas.
- 1200-hioma (Heijastavuusvaihe): Pinta alkaa näyttää heijastuvuuden varjoksia. Viimeistelyasiantuntijoiden mukaan tämä hiomarake parantaa läpinäkyvyyttä ja luo satiinimaisen pinnan, joka on valmis viimeiseen käsittelyyn. Arvioitu aika: 10–15 minuuttia per rengas.
- 1500-hioma (Esivalmistelu ennen kiillotusta): Valinnainen, mutta suositeltava vaihe 1200- ja 2000-hiomien välissä. Se vähentää hiomarake-eron vaikutusta ja tuottaa huomattavasti paremman lopputuloksen. Arvioitu aika: 8–12 minuuttia per rengas.
- 2000-hioma (Lopullinen hionta): Viimeinen hiomavaihe ennen yhdisteiden käyttöönottoa. Pinta tulisi näyttää lähes heijastavalta, ja sen pinnassa pitäisi olla tasainen, hieno naarmukuvio, joka on tuskin nähtävissä paljaalla silmällä. Arvioitu aika: 8–12 minuuttia per rengas.
Näille, jotka pyrkivät esityslaadukkaisiin pintoihin, jatkaminen 2500- tai jopa 3000-hiomaan luo vielä paremman perustan alumiinirengaiden hiomiseen. Ammattilaiset suosittelevat viimeistelyä 3000-hiomalla täysin peilipintaan valmiiksi pinnaksi ennen siirtymistä kiillotusyhdisteisiin.
Miksi hiomien sulkeminen maksaa sinulle aikaa
Vaikuttaa houkuttelevalta hypätä suoraan 400:sta 1200:iin, eikö niin? Tässä miksi tämä ajatus takkuu spektakulaarisesti.
Kun hiomat, et vain tasoita – kaiverrät tuhansia pieniä naarmuja alumiiniin. Kuten abrasiiiviasiantuntijat selittävät , "jokainen seuraava hioma korvaa suuret naarmut pienemmillä, matalammilla ja lukumäärältään useammilla naarmuilla, tasoittaen pinnan haluttuun sileystasoon."
Jos ohitat raerajan, hienompi hionepaperi ei yksinkertaisesti pysty poistamaan karkeamman paperin jättämiä syvempiä uria. Teollisuustutkimusten mukaan raerajojen ohittaminen johtaa useisiin ongelmiin:
- Näkyvät naarmukuvioit: Syvät naarmut pysyvät piilossa, kunnes käytät hiomapastaa – sitten ne ilmestyvät sumuna tai viivoina "valmiille" pinnalle
- Työn keston pidentyminen: Käytät kolme kertaa pidemmän ajan hienommalla raerajalla yrittäen poistaa naarmuja, joita se ei ole tarkoitettu käsittelemään
- Hionepaperin ennenaikainen kuluminen: Hienommat paperit tukkeutuvat ja kuluu nopeasti, jos niitä pakotetaan suorittamaan karkeaa työtä
- Turhauttavat tulokset: Peilikirkkaus jää saavuttamatta, riippumatta siitä, kuinka paljon pastaa käytät
"50 %:n sääntö" tarjoaa käytännöllisen ohjeen: seuraavan raerajan numero ei saa olla enempää kuin noin 50 % korkeampi kuin edellinen raeraja. Siirtyminen 400:sta 600:aan (50 % kasvu) noudattaa sääntöä. Hyppy 400:sta 1200:aan (200 % kasvu) rikkoo sitä selvästi.
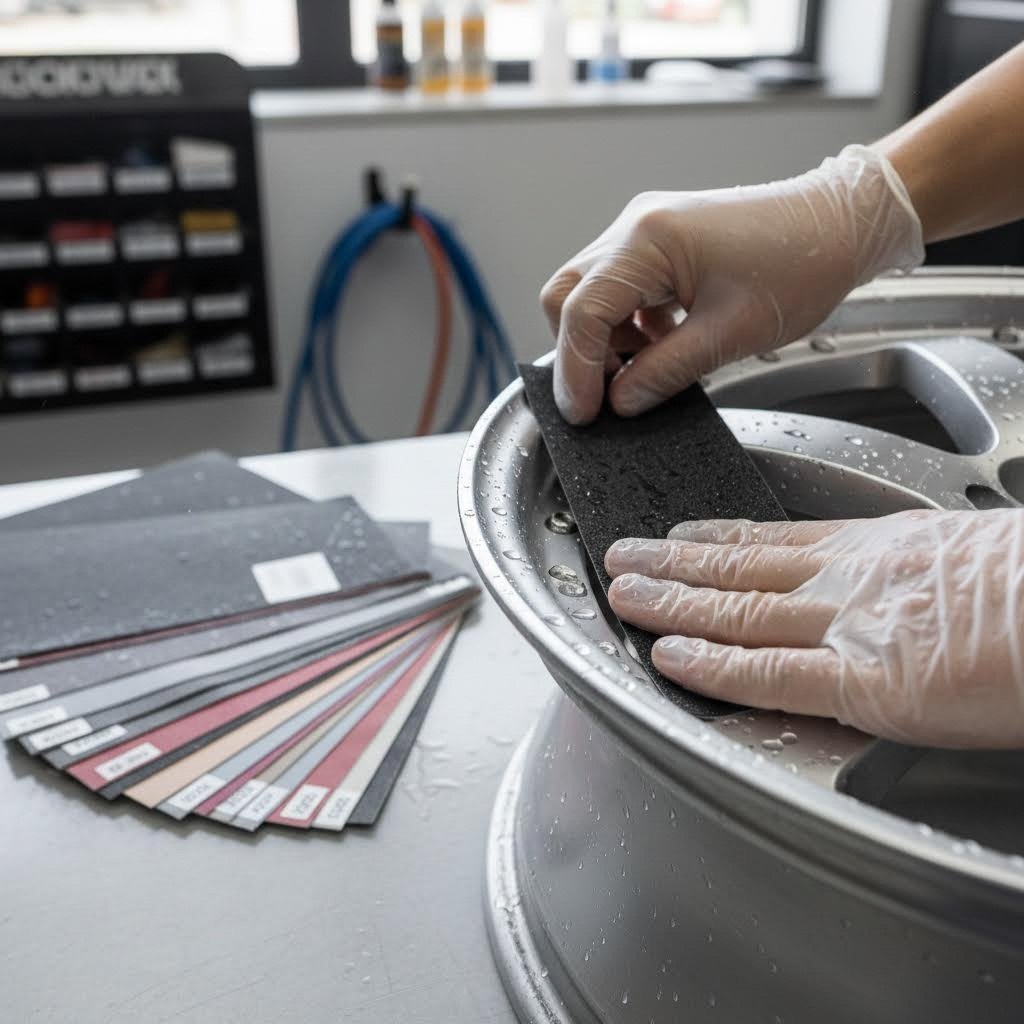
Kostea hiomistekniikka parhaiden tulosten saavuttamiseksi
Kun opit kuinka kiillottaa alumiini täydelliseksi, kostea hiominen on salaisuutesi aseesi. Ammattilaiskiillottajat vahvistavat että kosteassa hiomisessa käytetään esikasteltua hiomapaperia ja alumiinipinta on pidettävä koko ajan kosteana. Vesi toimii voiteluaineena ja estää lämpötilan nousun, joka voi taivuttaa tai pehmentää alumiinipintaa.
Tässä on kosteahiomistekniikkasi alumiinirengashihnojen kiillottamiseen:
- Valmistus: Kastuta hiomapaperisi puhtaaseen veteen 10–15 minuutiksi ennen käyttöä. Silikonikarbidipaperi (wet/dry) sopii parhaiten alumiinille.
- Pidä se märkänä: Käytä ruiskutuspulloa pinnan jatkuvaan sumutukseen. Paperin tulisi liukua sujuvasti – jos se tarttuu, lisää vettä.
- Paineen ohjeet: Käytä kohtalaista, tasaisesti jakautuvaa painetta. Anna karheuden tehdä työ – liian tiukka painallus kuluuttaa paperin nopeammin ja aiheuttaa epätasaisia kohtia.
- Ristikkomainen kuviointi: Hieja vuorotellen eri suuntiin jokaisen karheusasteen vaihtuessa. Jos hiovat vaakasuunnassa 400-karheudella, vaihda pystysuuntaisiin viiltoihin 600-karheudella. Tämä varmistaa täydellisen peittävyyden ja auttaa tunnistamaan, milloin edelliset naarmut on täysin poistettu.
Alumiinirenkaiden kiillottamisessa monimutkaisten sädekaksojen kohdalla kannattaa käyttää kumista tai vaahtomuovista tukialustaa tasaisen paineen saavuttamiseksi. Viimeistelyalan ammattilaiset suosittelevat tätä menetelmää tasaisen pinnan luomiseen, joka on täydellinen peilikirkkauden saavuttamiseksi.
Tiedon saaminen siitä, milloin kukin vaihe on valmis
Miten tiedät, milloin on aika siirtyä seuraavaan karheusasteeseen? Katso näitä osoittimia:
Yleinen temppu on vetää kevyesti lyijykynällä viivoja pintaa pitkin ennen hiontaa. Kun kaikki viivat ovat hävinneet, se tarkoittaa, että olet hiovanut tasaisesti ja voit siirtyä seuraavaan karheusasteeseen.
Lyijykynätempun lisäksi tarkkaile näitä merkkejä:
- Yhtenäinen naarmukuvio: Koko pinta näyttää yhtenäisiä, rinnakkaisia naarmuja ilman näkyviä syvempiä merkkejä
- Ei näkyviä jälkiä: Edellisen hiomarasin aiheuttamat naarmut ovat täysin hävinneet
- Yhtenäinen ulkonäkö: Pinta näyttää samalta kaikilla alueilla – ei kiiltäviä kohtia sekoittuen mattiin alueisiin
- Värin yhtenäisyys: Alumiini on yhtenäisen värinen ilman tummempien tai vaaleampien alueiden esiintymistä, mikä osoittaisi naarmujen erilaisia syvyyksiä
Jokaisen hiomarasin vaihdoksen yhteydessä pyyhi pinta täysin puhtaaksi mikrokuituliinalla. Jäljelle jäävät partikkelit saastuttavat hienommankin paperin ja aiheuttavat syvempiä naarmuja kuin kyseinen hiomarasi pitäisi tuottaa. Juuri tämä huolellisuus siisteydessä erottaa ammattitason kiillotetut alumiinirengaspyörät harrastetasoisista yrityksistä.
Kun pinta on systemaattisella hiomarasiasteikon etenemisellä oikein valmisteltu, olet nyt valmis käyttämään kiillotustuotteita ja muuntamaan hiotut renkaat loistaviksi, peilikirkkaisiksi esineiksi.
Vaiheittainen kiillotusprosessi ja tekniikka
Rengashuomasi on hiotu, yhdisteet on valittu, ja olet valmis muutokseen, joka tekee kaikista valmisteluista sen arvoisen. Tässä vaiheessa alumiinirenkaiden kiillottaminen muuttuu aidosti tyydyttäväksi – näet kuinka tylsät, mattapintaiset pinnat saavat syvän, heijastavan kiillon. Mutta johdonmukaisten, ammattimaisen tulosten saavuttaminen edellyttää tekniikan, ajoituksen ja paineenhallinnan tarkan ymmärtämistä.
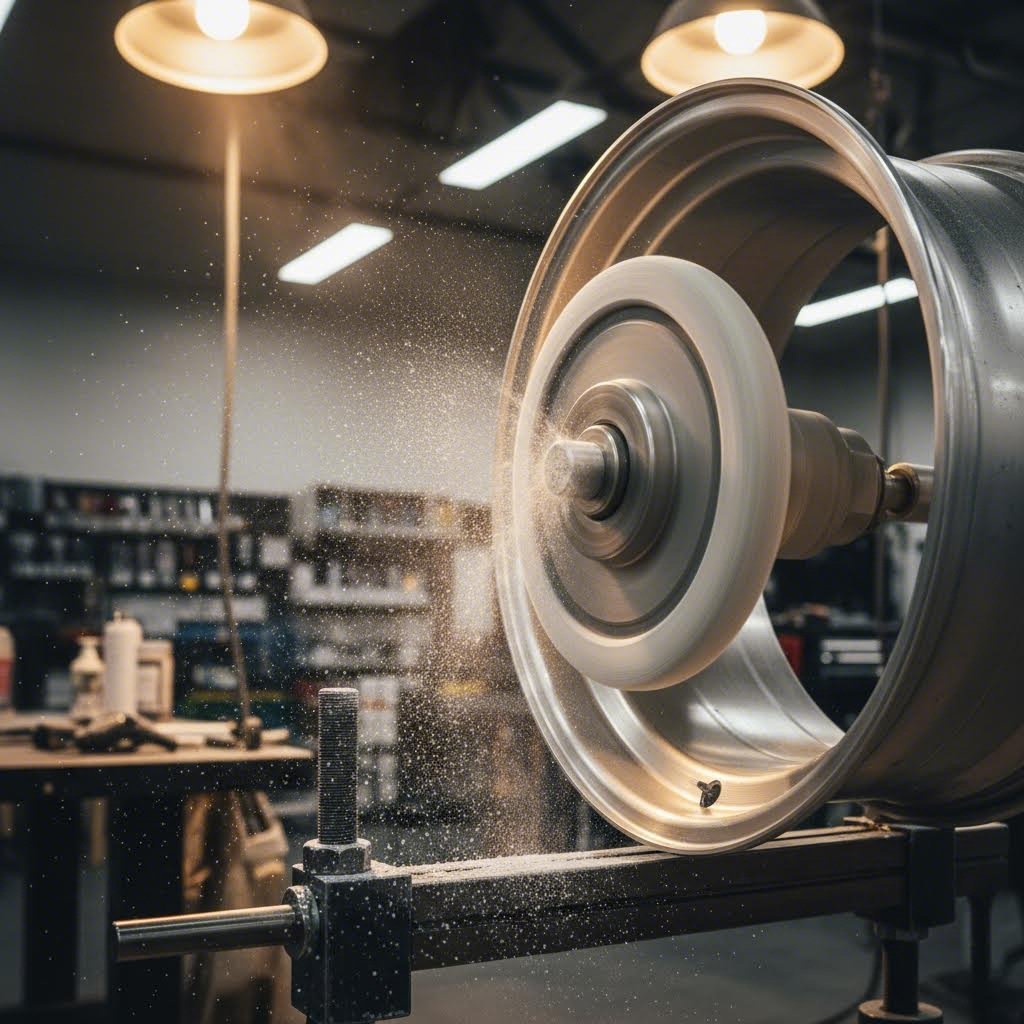
Konekiillotustekniikka ja liikekuviot
Kun olet valmis kiillottamaan alumiinirenkaita, käyttämäsi kiillotustyökalu vaikuttaa merkittävästi sekä prosessiin että lopputulokseen. Pyörö- ja kaksitoimintoisen kiillottimen erojen ymmärtäminen auttaa sinua valitsemaan parhaan tavan kiillottaa alumiinirenkaat juuri sinun tilanteeseesi sopivasti.
Pyörökiillotimen teknologia:
Pyöröhiomakone—jota kutsutaan myös korkean nopeuden puskuriksi—pyörittää hiomapäätä yhdessä ympyräsuunnassa. Metallin viimeistelyn ammattilaisten mukaan pyöröhiominen on tehokkain tapa saada tylsistyneet renkaat kiiltäviksi. Aloittelijoille muuttuvanopeuksinen hiomakone, joka on asetettu 1500–2500 rpm:n väliin, tarjoaa riittävän hallinnan oppimisen aikana. Kokeneet viimeistelijät käyttävät usein vakionopeuslaitteita korkeammilla kierrosluvuilla nopeampia tuloksia varten.
Tärkeät pyöröhiomatekniikan seikat:
- Nopeusasetukset: Aloita 1500 rpm:llä massan levityksessä ja lisää vähitellen nopeutta 2500–3000 rpm:iin aktiivisen hiomisen aikana. Ammattilaisten suositus on korkeintaan 3000 rpm viimeistelyvaiheissa.
- Liikekuvio: Käytä limittäisiä rivejä ruudukkomaisesti. Siirry vaakasuunnassa yhden osan yli, sitten pystysuunnassa varmistaaksesi täydellisen peittävyyden. Älä koskaan pidä puskuria paikallaan—jatkuva liike estää lämmön kertymisen ja polttamisen.
- Paineen ohjeet: Anna työkalun painon tuottaa suurin osa paineesta. Lisää vain kevyt alaspäin suuntautuva voima. Liiallinen paine luo lämpöä, joka voi taivuttaa alumiinia ja saada hoitotuotteet palamaan kiiltoon sijaan.
- Hoitotuotteen käyttö: Käytä hoitotuotetta noin 5–8 cm pitkänä viivana suoraan puhdistuspyörään, älä pinnalle. Käytä uudelleen, kun pyörä ei enää leikkaa tehokkaasti – tyypillisesti joka 30–60 sekunnin välein aktiivisen kiillottamisen aikana.
Dual-Action -kiillotustekniikka:
Dual-Action (DA) -kiillotin heilahtelee samalla kun se pyörii, luoden turvallisemman ja lempeämmän liikemallin. Alan asiantuntijat huomauttavat että dual-action -kiillotimen käyttö mikrokuitu- tai vaa'apadoilla toimii erinomaisesti sileille, tasaisille pinnoille. DA:n satunnainen kiertoliike vähentää merkittävästi pyörremerkkien syntymisen riskiä tai pintakerroksen polttamista läpi.
DA-kiillotimen tiedot:
- Nopeusasetukset: Käytä nopeuksia 4–6 useimmilla säädettävällä mallilla (noin 4 000–6 000 OPM). Alhaisemmat nopeudet leikkaushoitotuotteisiin; korkeammat nopeudet viimeistelyyn.
- Padin valinta: Käytä keltaista tai oranssia vaahtopadlia leikkausvaiheissa ja valkoista tai sinistä vaahtopadia viimeistelyyn. Mikrokuitupadit tarjoavat enemmän leikkausvoimaa kuin vaahto, kun sitä tarvitaan.
- Käyttömäärä: Käytä 3–4 herneen kokoista tippaa nestemäistä yhdistettä suoraan padille. Levitä alhaisella nopeudella ennen työnopeuden nostamista.
- Liikekuvio: Työskentele 30x30 cm osissa hitailla, päällekkäisillä menoilla. Liiku noin 2,5 cm sekunnissa – nopeampi liike vähentää tehokkuutta.
Minkä alumiinipyöränhiomakoneen tulisi valita? Erityisesti valssattuun alumiiniin pyörivät hiomakoneet soveltuvat erinomaisesti voimakkaisiin korjauksiin ja syvimmän mahdollisen kiillon saavuttamiseen. DA-hiomakoneet ovat lempeämpiä ja toimivat hyvin huoltopyörityksessä tai kevyesti hapettuneisiin pyöriin. Monet harrastajat omistavat molemmat, käyttäen DA:ta ensimmäisissä vaiheissa ja vaihtaen pyörivään viimeistelyä varten.
Käsikäyttöiset kiillotusmenetelmät yksityiskohtien kohdalla
Konemetalloijat eivät pääse joka paikkaan – osiin tarvitaan tarkkuutta, jota vain käsityö voi tarjota. Rengashalkojen risteykset, mutterinuppien syvennykset ja monimutkaiset suunnitteluelementit vaativat manuaalista huomiota täydellisen peittävyyden saavuttamiseksi.
Käsimetalloinnin perustarvikkeet:
- Sovitinvalinta: Käytä vaahto- tai mikrokuitusovitinmattoja laajoille pinnoille. Kapeissa syvennyksissä käy puuvillapallot tai kiedottu mikrokuitu. Kokemuksella varustetut metalloijat suosittelevat mikrokuitusovittimia yhdessä käsipoloinnin kanssa nopeaan kiiltoon sileillä tai pyöristetyillä pinnoilla.
- Yhdisteen määrä: Vähemmän on enemmän. Käytä sovittimeen rahamunan kokoinen määrä. Ylimääräinen yhdiste aiheuttaa jäämien kertymistä eikä lisää kiiltävyyttä.
- Tekniikka: Käytä tiukkoja pyöreitä liikkeitä, joiden jälkeen suoraviivaisia viimeistelyliikkeitä. Työskentele pienissä osissa – noin 10x10 cm – ja viimeistele jokainen ennen siirtymistä seuraavaan.
- Kiillotus: Poista yhdistejäämät puhtaalla mikrokuituliinalla ennen kuin ne kuivuvat. Käännä liinaa usein, jotta voit aina käyttää puhdasta pintaa.
Renkaan eri alueiden metallointi
Jokainen vanteen osio asettaa omat haasteensa. Tässä on järjestelmällinen tapa lähestyä niitä:
Puristeen kiillotus:
Puristeet ovat usein näkyvin vanteen osa, minkä vuoksi täydellisyys tässä kohtaa on erityisen tärkeää. Käsittele jokaista puristetta yksitellen, kuin erillistä projektia. Tasomaisille puristeille vanteenkiillotin liukuu luonnollisesti. Muotoilluille tai viistetyille puristeille säädä kulmaasi pitääksesi koko patjan kosketuksessa. Ammattilaiset suosittelevat pienien työkalujen käyttöä tiukkoihin tiloihin pääsemiseksi ja liiallisen kiillottamisen välttämiseksi.
Vanteen reunan viimeistely:
Ulkoisin reuna kerää usein eniten näkyvää hapettumista ja ajouraan aiheutunutta vahinkoa. Tätä aluetta voidaan hoitaa tehokkaalla konekiillotuksella, mutta varoja renkaan tiivistealueen lähellä. Suojaa rengas maalariteipillä estääksesi yhdisteen pääsyn. Työskentele osissa kehän ympäri, limittäen kierroksiasi noin 50 %.
Vanteen rungon viimeistely:
Välilevy—navan väliin jäävä sisäinen rumpu—aiheuttaa haasteita pääsyn kannalta. Syväreunaisille vanteille saattaa olla tarpeen irrottaa väänne ajoneuvosta ja työskennellä vanteen ollessa alaspäin paremman levytason saannin varmistamiseksi. Käyrämuotoiset kiillotuslisäosat tai pienemmät hiovatiedot, jotka on suunniteltu kapeisiin tiloihin, toimivat hyvin tässä. Käsikillotus on usein käytännöllisempää leveissä kuin taistella täysikokoisten konekiillotimien kanssa.
Arvioitu aika täydelliseen vanteiden kiillotukseen
Kuinka kauan vanteiden kiillottaminen todella kestää? Aikataulusi riippuu vanteiden kunnosta, monimutkaisuudesta ja valitusta menetelmästä. Tässä on realistista ohjeistusta perustuen 18–20 tuuman vanteeseen:
| Vanteen kunto | Konekiillotusaika | Käsiviimeistelyaika | Yhteensä per väänne |
|---|---|---|---|
| Heikko hapettuminen, yksinkertainen säteensuunnittelu | 30-45 minuuttia | 15–20 minuuttia | 45–65 minuuttia |
| Kohtalainen hapettuminen, standardisuunnittelu | 45–60 minuuttia | 20-30 minuuttia | 65–90 minuuttia |
| Voimakas hapettuminen, monimutkainen monisäteinen | 60-90 minuuttia | 30-45 minuuttia | 90–135 minuuttia |
| Näyttölaatu, mikä tahansa suunnittelu | 90-120 minuuttia | 45–60 minuuttia | 135–180 minuuttia |
Lisää noin 20 % lisäaikaa jokaista yli 20 tuuman tarkan pyörän halkaisijan 2 tuumaa kohti. Syväreunaiset tai kolmisosaiset pyörät voivat vaatia kaksinkertaisen ajan arvioiden mukaan lisätyön vuoksi.
Sovelluskohtaiset huomiot
Pyörän kiillotustekniikoita voidaan soveltaa laajasti, mutta tietyt ajoneuvot vaativat erityistä huomiota:
- Urheiluautot ja suorituskykyajoneuvot: Usein käytetään valssattuja pyöriä monimutkaisilla sädepinnoilla. Varataan lisäaikaa monimutkaisiin yksityiskohtiin. Tiukat renkaustilat joissakin jarrujärjestelmissä tarkoittavat usein sitä, että pyörien irrottaminen ajoneuvosta on pakollista.
- Rekka- ja SUV-ajoneuvot: Suuremmat pyörän halkaisijat lisäävät kokonaispinta-alaa merkittävästi. 22-tuumainen kuorma-auton pyörä on noin 40 % suurempi pinta-ala kuin 18-tuumainen pyörä – suunnittele aikasi ja hiomapaperimääräsi sen mukaan.
- Klassiset ja näyttöajoneuvot: Näillä vaaditaan yleensä korkeinta viimeistelylaatua. Harkitse useita yhdistelmävaiheita ja käsikäsittele jokainen päästävissä oleva pinta saavuttaaksesi kilpailutasoisen tuloksen.
- Päivittäisajot: Keskity tehokkuuteen täydellisyyden sijaan. Luja konehiomonta vähällä käsityön yksityiskohdilla tuottaa erinomaisia tuloksia pyörille, jotka keräävät jarruruostetta uudelleen muutamassa päivässä.
Pyörien hiomisen aikana tarkista työtäsi usein eri valaistuskulmien alla. Se, mikä näyttää täydelliseltä suoran ylävalon alla, saattaa paljastaa pyörreviivoja tai unohtuneita kohtia, kun sitä katsotaan sivulta. Korjaa virheet välittömästi – on paljon aikaa vievämpää palata korjaamaan ongelmia koko sarjan jälkeen kuin korjata ne heti havaittuaan.
Vaikka tekniikka olisi täydellistä, ongelmia esiintyy joskus silti. Tarkastellaan yleisimpiä ongelmia ja tarkalleen miten ne ratkaistaan.
Yleisten hiomisongelmien vianmääritys
Olet seurannut jokaisen vaiheen huolellisesti, mutta silti jotain näyttää väärältä. Ehkä kiillotetut renkaat näyttävät salaperäisiä pyörteitä tai peilikuvan sijaan näkyy hankalasti häviävä sumu. Älä panikoita – äläkä missään tapauksessa aloita alusta. Renkaiden tehokkaan kiillottamisen ymmärtäminen tarkoittaa ongelmien diagnosoimisen ja korjaamisen tiedostamista silloin, kun ne väistämättä ilmenevät.
Pyörremerkkien ja sumuisuusongelmien korjaaminen
Pyörremerkit ovat yleisin harmi rengaskiillotuksessa, ja ne näkyvät ympyrämäisenä naarmuna suoran valon alla. Sumu luo pilkullisen ulkonäön, joka estää todellisen heijastavuuden. Molemilla ongelmilla on tiettyjä syitä – ja niihin liittyy myös tiettyjä ratkaisuja.
Kun hiottuessa huomaat renkaiden pinnalla pyörremuotoisia jälkiä, ongelma johtuu yleensä joko kolmesta syystä: saastuneet hiomapyörät, liiallinen nopeus tai väliin jätetyt karheusvaiheet. Saastunut hiomapyörä leikkaa edellisen komponentin jäämien kanssa epäsäännöllisiä naarmuja pintaan jokaista kierrosta kohti. Vastaavasti liian suuri nopeus yli 3 000 RPM käytettäessä leikkaavia komponentteja aiheuttaa lämpöä, joka pehmentää alumiinipintaa epätasaisesti.
Sumuisuusongelmat viittaavat yleensä epätäydelliseen komponenttien poistoon tai päätöskomponentin käyttöön riittämättömästi valmistellulla pinnalla. Kun hiotaan rengaspintoja, joita ei ole asianmukaisesti hiotu, hienimmat komponentit vain kulkevat syvempien naarmujen yli niiden poistamisen sijaan – luoden harhakuvan valmiista pinnasta, joka paljastaa puutteensa tarkasteltaessa.
Korjaavat toimenpiteet pyörremuotoisten jälkien osalta:
- Vaihda puhtaaseen, erityiseen hiomapyörään – älä koskaan käytä samaa pyörää eri komponenteille
- Vähennä hiomakoneen nopeutta 500–1 000 RPM ja käytä kevyempää painetta
- Siirry yhden hiomavaiheen taaksepäin ja käsittele vaikutettu alue uudelleen oikeilla limittäisillä ohituskerroksilla
- Varmista, että hiomapastasi sopii padosi tyyppiin – leikkaavat pastat vaativat kovemmat padot
Korjaavat toimenpiteet sumuiselle pinnalle:
- Pyyhi pinta mikrokuituliinalla, joka on kostutettu isopropyylialkoholilla, poistaaksesi hiomapastan jäämät
- Jos sumu jatkuu puhdistuksen jälkeen, palaa välihiomavaiheeseesi
- Tarkista hapettumisen paluu – tämä edellyttää paluuta leikkaavaan pastaan
- Anna pastojen vaikuttaa pidempään ennen kuin poistat ne; aikainen poisto jättää jäämiä
Epätasaisen pinnan ongelmien ratkaiseminen
Epätasainen kiilto – jossa osa alueista kiiltää loistavasti, kun taas toiset ovat edelleen tylsiä – viittaa epäjohdonmukaiseen tekniikkaan tai pinnanvalmisteluongelmiin. Tämä ongelma on erityisen yleinen pyörärimojen kiillottamisessa monimutkaisten varren suunnitelmien tai vaihtelevien pintakulmien yhteydessä
Keskeinen kysymys: johtuuko epätasaisuus nykyisestä hiomistunnistasi vai syntyikö se hionnan aikana? Tässä näet, miten erotetaan: jos tylsät kohdat tuntuvat karkeammilta kuin kiiltävät alueet, hiontasi oli epätasainen. Jos pinta on yhteneväinen kosketeltaessa, mutta ulkonäkö vaihtelee, sinun tulisi säätää hiomismenetelmääsi.
| Ongelman oire | Mahdollinen syy | Korjaava toimi |
|---|---|---|
| Pyörremuodot näkyvissä suorassa valossa | Saastunut hiomapäätä tai liiallinen nopeus | Käytä puhdasta, erillistä päätä; vähennä kierroslukua 2000–2500 RPM:iin; uudelleenhuolto välipintakomponentilla |
| Hämärtyneen näköinen haihtuma pinnalla | Kuivunut komponenttijäännös tai riittämätön valmistelu | Pese isopropyylialkoolilla; jos ongelma jatkuu, palaa edelliseen komponenttivaiheeseen |
| Tylsät laikut kiiltävien alueiden keskellä | Epätasainen hionta tai huomitsemattomat kohdat hiomisen aikana | Hieja uudelleen tylsät alueet kahdella hionnastepäällä taaksepäin; hio täydellisellä peittävyydellä |
| Yhdistelmäjäännös halkeamissa | Liiallinen käyttö tai riittämätön puhdistusaika | Käytä yksityiskohtaista harjaa laimennetulla monikäyttöpuhdistimella; käytä vähemmän yhdistettä jatkossa |
| Hapotuminen palaa muutamassa päivässä | Syväkerroksen hapettumista ei poistettu kokonaan | Hieja uudelleen 600-hioma-aineella poistaaksesi hapettuneen kerroksen; toista kaikki vaiheet uudelleen |
| Palaminen tai värimuutos | Liiallinen paine tai paikalla tapahtuva puhdistus | Hieja kohteinen alue 800-hioma-aineella poistaaksesi vaurioituneen kerroksen; aloita hionta uudelleen kevyellä paineella |
| Näkyvät hiomisjäljet kiillottamisen jälkeen | Hiomisvaiheiden ohittaminen hionnan aikana | Palaa hiontiin; noudatta oikeaa 50 %:n rakeisuuskehitystä ilman oikoteitä |
Milloin vetäytyä taaksepäin ja milloin jatkaa eteenpäin
Tässä on päätöskehys, joka säästää tunteja turhautumista: jos olet tehnyt kaksi kiillotuskertaa ongelmakohtaan parannuksen sijaan, lopeta ja diagnosoi ennen jatkamista. Lisäämällä yhä enemmän hoitokalvoa et lähes koskaan korjaa perustavanlaatuisia valmisteluongelmia – se vain tuhlaa tuotetta ja aikaa.
Vetäydy, kun:
- Voit tuntea tekstuurierot ongelmallisilla alueilla ja valmiiden osien välillä
- Hiomisjäljet ovat edelleen näkyvissä usean leikkaushiontelun käytön jälkeen
- Pinta ei parane vaihdettaessa hienommilla hiotteilla
- Hapotuminen ilmestyy uudelleen tunneissa kiillottamisen jälkeen
Työnnä eteenpäin kun:
- Pinta tuntuu yhtenäisen pehmeältä, mutta siltä puuttuu optinen selkeys
- Ongelmat rajoittuvat vain hiomajäämään tai kevyeseen hämärteen
- Huomaat jatkuvaa parantumista jokaisella kierroksella
- Ongelmat koskevat ainoastaan pieniä, paikallisia alueita
Yleisten virheiden ehkäisymenetelmät
Paras ongelmanratkaisu tapahtuu ennen kuin ongelmat syntyvät. Tee näistä tavoista tapa pyörän polkaisurutiinissa:
- Merkitse puhdistuspyöräsi: Merkitse jokainen pyörä sen tarkoitetulla hiomapastalla estääksesi ristisaastumisen
- Tarkasta välivaiheissa: Tarkista työsi useista valokulmista ennen kuin siirryt hienommille yhdistelmille
- Työskentele systemaattisesti: Suorita jokainen puhdistus tai osio loppuun saakka ennen kuin siirryt eteenpäin – hyppiminen edestakaisin aiheuttaa epäjohdonmukaisuuksia
- Valvo lämpötilaa: Jos pinta tulee liian kuumaksi kosketeltavaksi, pysähdy ja anna sen jäähtyä ennen jatkamista
- Pyyhi säännöllisesti: Poista yhdistelmän jäämät ennen kuivumista; kuivunut yhdiste vaatii voimakkaampaa poistotapaa
Näillä vianmääritysstrategioilla voit luottavaisin mielin käsitellä minkä tahansa ongelman, joka nousee esiin hiomisprojektisi aikana. Mutta täydellisen lopputuloksen saavuttaminen on vain puoli taistelua – pitkäkestoisuuden varmistava suojaus vaatii oman strategiaryhmänsä.
Hiomisen jälkeinen suojaus ja jatkuva hoito
Olet käyttänyt tunteja muuttaaksesi tylsät, hapettuneet renkaat kiiltäviksi peilikuviksi – mutta mitä nyt? Ilman asianmukaista suojaa tuo upea pintakäsittely alkaa heikentyä heti ajon alettua. Ympäristön vaikutukset, jarrutöhrän kertyminen ja tien saasteet työskentelevät jatkuvasti kiillotetun pinnan vastaisesti. Alumiinirenkaiden puhdistustavan ymmärtäminen niiden kiilan säilyttämiseksi on yhtä tärkeää kuin itse kiillotusprosessikin.
Peilikuvan pitkäaikainen suojaus
Kiillotettu valssattu alumiini on olennaisesti paljasta metallia alttiina sääoloille. Maalattuihin tai pulverimaalattuihin renkaisiin verrattuna, ei ole tehdasvalmista suojakerrosta peilikuvan ja hapettumista aiheuttavan ilmakehän välissä. Suojausstrategiasi määrittää, kestääkö kiilto kuukausia vai ainoastaan muutaman viikon.
Sinetöintivaihtoehdot:
Metallisinetöintiaineet muodostavat esteen kiillotetun alumiinin ja ympäristösaasteiden välille. Alueen mukaan alumiinisuojausasiantuntijat , laadukas läpinäkyvä suojapeite "luo kestävän esteen kiillotetun alumiinin yli, sinetöi pinnan ja estää hapen ja kosteuden pääsyn metalliin." Tämä estää tehokkaasti hapettumisen jo ennen sen alkamista.
Suorakäyttöiset tiivisteet ovat helpoin vaihtoehto harrastajille. Kiillottamisen jälkeen varmista, että pinta on täysin puhdas ja jäännösvapaa – käytä isopropyylialkoholia lopulliseen valmisteluun. Käytä ohuita, tasaisia kerroksia, joissa on 5–10 minuuttia väliaikaa kerrosten välillä. Kaksi tai kolme kevyttä kerrosta tarjoaa paremman suojauksen kuin yksi raskas käyttökerta.
Vahakuoritukset:
Perinteinen karnaubavaha sopii hyvin kiillotettuun alumiiniin, tarjoten uhrautuvan kerroksen, joka suojelee samalla kun lisää kiillon syvyyttä. Vahasuojan kesto on kuitenkin tyypillisesti vain 4–8 viikkoa normaalissa ajokäytössä. Päivittäisille ajoneuvoille tulisi suunnitella kuukausittaiset vahakuoritukset suojan ylläpitämiseksi.
Synteettiset polymeeritiivisteet tarjoavat pitkäaikaista kestävyyttä – tyypillisesti 3–6 kuukautta per sovellus. Vaikka ne eivät välttämättä anna yhtä lämmintä kiiltoa kuin karnaubavahti, niiden pitkä ikä tekee niistä käytännöllisen vaihtoehdon harrastajille, jotka haluavat suojaa ilman jatkuvaa huoltoa.
Ceramic-kerrosten huomioonotettavat seikat:
Ceramic-kerrokset edustavat huippuluokan suojauksen tasoa ja tarjoavat 1–3 vuoden kestävyyden, kun ne on asennettu oikein. Nämä piidioksidipohjaiset tuotteet muodostavat kemiallisen sidoksen alumiinipinnan kanssa, luoden erittäin kovan suojakerroksen. Ceramic-kerrokset vaativat kuitenkin huolellista pinta-esivalmistelua ja tarkasti ohjattuja soveltamisolosuhteita. Useimmille harrastetasoisille hiottajille ammattimainen ceramic-kerroksen asennus antaa parhaat tulokset – erityisesti ottaen huomioon jo tehdyn sijoituksen peilikirkkaan lopputuloksen saavuttamiseksi.
Minkä tahansa suojauksen perusta on pyörä itse. Laadukas kovaluotaus luo tiheän, yhtenäisen rakeen rakenteen, joka pitää kiiltoa erinomaisesti. Tarkka kuumanmuovaus valmistajilta kuten Shaoyi (Ningbo) Metal Technology tuottaa pyörät, joilla on yhtenäiset metallurgiset ominaisuudet koko komponentin alueella – heidän IATF 16949 -sertifioitujen prosessiensa ansiosta tämä yhdenmukaisuus taataan. Niille, jotka haluavat ymmärtää, miten laadukas kovaluotaus vaikuttaa pyörän suorituskykyyn ja kiillon säilymiseen, lisätietoja löytyy osoitteesta heidän automaatiokomponenttien resurssistaan .
Hoito-ohjelmat kestävään kiiltoon
Kuinka puhdistan alumiinipyörät vahingoittamatta saavutettua kiiltoa? Vastaus piilee oikeiden tuotteiden käytössä oikealla taajuudella. Monet yleiset pyöränpesuaineet sisältävät happoja tai voimakkaita kemikaaleja, jotka hyökkäävät kiillotettuja alumiinipintoja vastaan – juuri sitä, mitä yrität suojella.
Kun puhdistat ja kiität alumiinirenkaita säännöllisesti, estät saastumisen kertymisen, joka johtaa pintavaurioihin. Tässä ylläpitosuunnitelmasi parhaimpiin tuloksiin:
- Viikoittain: Huuhtele renkaat puhtaalla vedellä poistaaksesi löysän jarrujauhan ja tienlikan. Käytä pH-neutraalia autopesusaboonia ja pehmeää mikrokuituliinaa – älä koskaan käytä kovia harjoja kiillotetuilla pinnoilla.
- Kahden viikon välein: Suorita perusteellinen puhdistus alumiinille turvallisella renkaanpuhdistimella. Tarkista tuotemerkinnät huolellisesti; vältä kaikkea, jossa on fluorivetyhappoa, fosforihappoa tai voimakkaita emäksisiä yhdisteitä.
- Kuukausittain: Käytä spray-vahaa tai pikahiomateriaalia, joka on erityisesti suunniteltu paljaille metalleille. Tämä uudistaa suojakerroksen täysihoitojen välillä.
- Neljännesvuosittain: Tarkista hapettumispisteet, erityisesti mutterialueiden ja säteiden juurien ympäriltä. Korjaa kehittyviä ongelmia kevyellä hiomisella ennen kuin ne vaativat voimakasta korjausta.
- Vuosittain: Arvioi tarvitaanko täydellinen uudelleenkiiloutus. Vaikka ylläpito olisi täydellistä, ympäristövaikutukset himmentävät lopulta pintaa.
Puhdistustuotteiden yhteensopivuus:
Kaikki renkaanpesuaineet eivät toimi turvallisesti hiotulla alumiinilla. Suojauksen asiantuntijat vahvistavat että oikein suojatun pinnoitteen »vastustaa likaa ja jarrutusta, mikä tekee tulevista pesuista nopeampia ja helpompia«. Valitse tuotteita, jotka on erikseen merkitty turvallisiksi hiotulle tai raakapinnalle alumiinille. Epävarmuuden sattuessa testaa ensin huomaamattomassa kohdassa.
Vältä automaattisia pesuloita kovilla harjoilla tai kierrätetyllä vedellä, jossa on epäpuhtauksia. Käsipesu puhtaalla vedellä ja sopivilla tuotteilla on edelleen turvallisin tapa hoitaa hiotut alumiinirenkaat.
Ympäristötekijät ja uudelleenhionnan aikataulu
Maantieteellinen sijaintisi vaikuttaa merkittävästi peilikarheuden kestoon. Rannikkoalueiden suolaiset ilmamassat kiihdyttävät hapettumista huomattavasti. Talviajot suolatuilla teillä aiheuttavat samankaltaisia haasteita. Aavikoilla voimakas UV-säteily voi hajottaa suojapinnoitteita nopeammin kuin lempeämmät ilmastot.
Tarkkaile näitä merkkejä, joista ilmenee, että uudelleenhionta on lähellä:
- Pilkkua tai hämärää ulkonäköä, joka ei parane puhdistamisella
- Näkyviä valkoisia hapettumiskohtia, erityisesti suojatuilla alueilla kuten varrenpohjissa
- Heijastavuuden menetys, vaikka uusi tiivistysaine olisi käytetty
- Jarrutähti, jota on yhä vaikeampi poistaa täysin
Huolellisella hoitotavalla voidaan odottaa 12–18 kuukauden väliaikoja täyden kiillottamisen välillä arkitilanteessa kohtuuklimaateissa. Harvoin ajettavia esitysajoneuvoja voidaan säilyttää ulkonäkö niiden viimeistelyssä 2–3 vuotta. Rata-ajoneuvoja tai ajoneuvoja kovissa olosuhteissa saattaa tarvita huomiota joka 6–8 kuukausi.
Alumiinirenkaiden puhdistuksen pitkäaikaisen menestyksen avain on säännöllisyys. Muutaman minuutin asianmukaista hoitoa viikossa estää tuntien kiintiön korjaavaa kiillotusta myöhemmin. Sijoituksesi peilikirkkaaseen tulokseen tuottaa hyötyjä aina kun näet ne loistavan – mutta vain jos suojaat luomasi.
Nyt kun ymmärrät suojauksen ja hoidon, varmista että sinulla on oikeat työkalut toteuttaa tehokkaasti jokainen kiillotusprosessin vaihe.
Välttämättömät työkalut ja laitteet suositukset
Oletko valmis rakentamaan kiillotustyökaluvarastosi? Riippumatta siitä, onko budjettisi tiukka vai sijoitatko ammattilaisluokan varusteisiin, oikeilla työkaluilla on valtava merkitys turhauttavien yritysten ja upeiden tulosten välillä. Selvitään tarkalleen, mitä tarvitset – ja mitä voit jättää väliin – tavoitteesi ja budjettisi mukaan.
Kiillotustyökalujen hankkiminen millä tahansa budjetilla
Hyvä uutinen? Sinun ei tarvitse kuluttaa tuhansia saavuttaaksesi vaikuttavia tuloksia. Avain on ymmärtää, mitkä osat ovat välttämättömiä ja missä voit säästellä ilman, että luovut laadusta.
Aloittelijoille täydellinen rengaskiillotussarja tarjoaa helpoimman aloitusvaihtoehdon. Nämä paketit sisältävät yleensä kiillotuspyörät, peruspastat ja joskus myös tukilevyt – mikä poistaa epävarmuuden yhteensopivuudesta. Ammattilaisten kiillotusresurssit vahvistavat että jopa perus"kuljettajapaketti", joka sisältää suorakulmaisen hiomakoneen, kolme pitsauspyörää (voimakas leikkaus, keskileikkaus, viimeistely), sopivat yhdistelmät ja olennaiset puhdistustarvikkeet, hoitaa suurimman osan huoltotarpeista.
Alumiinipyöräjen pitsauspaketin olennaiset osat sisältävät:
- Sähkötyökalu: Muuttuvanopeuksinen kulmahioma tai erillinen pitsaaja (1500–3000 r/min)
- Pitsauspyörät: Vähintään kolme – leikkaus-, kiillotus- ja viimeistelyvaiheet
- Yhdisteet: Sopivat yhdistelmätangot tai nesteet kullekin pyörälle
- Hiomapaperilaatut: 400–2000-karkaisematon kostea/kuiva silikonikarbidi
- Turvallisuusvarusteet: Suojalasit, hengityssuoja, hansikkaat ja kuulosuojaimet
- Puhdistustarvikkeet: Mikrokuituliinat, alumiinivahviste ja isopropyylialkoholi
Kun valitset parasta alumiinirengashioittajaa tarpeisiisi, ota huomioon kuinka usein sitä käytetään. Edullinen vaihtuvanopeuksinen hiomakone selviytyy hyvin satunnaisista projekteista. Säännölliseen huoltoon tai useisiin ajoneuvoihin sijoittaminen erikoistuneeseen hiontimiseen maksaa itsensä takaisin mukavuudessa ja hallinnassa.
Ammattilaisten ja harrastajien laitevalinnat
Mitä erottaa ammattimaiset tulokset harrastelijoiden yrityksistä, ei usein ole taito – vaan laitteiden laatu. Tässä miten vaihtoehdot vertautuvat budjettitasojen mukaan:
| Tuotekategoria | Edullinen vaihtoehto | Ammattilaisvaihtoehto | Tarkoitus |
|---|---|---|---|
| Pääasiallinen hiotin | Vaihtuvanopeuksinen kulmahiomakone (50–80 €) | DeWalt DWP849X tai Flex PE-14 (150–300 €) | Käyttää puskipyöriä yhdistelmän levittämiseen ja materiaalin poistamiseen |
| Leikkauspyörä | Sisapellava tai voimakas ilmakanavan puskipyörä (8–15 €) | Premium sisalpyörä teräsytimellä ($25–40) | Voimakas hapettuman poisto ja alustava pinnan korjaus |
| Kiillottimoottori | Spiraalinauhatu kuitupyyhkeepyörä ($10–18) | Ilmakanavapyörä, keskikova tiheys ($30–50) | Tarkentaa naarmukuvioita ja luo alkushiötöä |
| Viimeistelypyörä | Löysäkuituinen pyyhkeepyörä tai fanelipyörä ($8–15) | Käsitelty valkoinen tai faneli-ilmakanava ($25–45) | Luo viimeisen peilikirkkaan pintteen ilman leikkausta |
| Yksityiskohtainen polkuri | Porakoneeseen asennettava vaahtopallo ($12–20) | Flex PXE-80 akkukäyttöinen minipoleroija ($200–350) | Pääsee kapeisiin varren alueisiin ja monimutkaisiin suunnitteluun |
| Kompottisetti | Perus 3-tuotepakkauksen sarja ($15–25) | Ammattikäyttöön tarkoitetut alumiinille erityisesti suunnitellut kompotit ($40–80) | Mahdollistaa hionnan, poleroinnin ja viimeistelyn |
| Tukilevy | Vakiomallinen 5-tuumainen levy ($10–15) | Joustava tukilevy värähtelyjen vaimentamisella ($25–40) | Kiinnittää hohtopyörät hiomakoneen akseliin |
| Hiontajärjestelmä | Käsikäyttöiset hiontalohkot lehtipaperilla (15–25 $) | Satunnaisliikeratas, kiekkovalikoima mukana (80–150 $) | Valmistaa pinnan raehioman edistymisen avulla |
| Alumiinipuhdistuspyörä | Mikrokuitu pesunäppy (8–12 $) | Erityinen pyöränpuhdistus harjasetti (25–40 $) | Poistaa jarrutussin ja epäpuhtaudet turvallisesti |
Ammattimaisen detaljien tekemän käytännön testauksen mukaan Flex PXE-80 akkukäyttöinen minihioja, jossa on joustava akseliliitin, toimii paremmin kuin porakoneeseen kiinnitettävät vaihtoehdot detaljityössä. Pienet kartiomaiset ja lieriömäiset vaa'at ovat erinomaisia saavuttaessaan monimutkaiset varren alueet, joita tavallinen varustus ei pysty tehokkaasti käsittelemään.
Niille, jotka etsivät parasta hopeanhoitopyörää alumiinille, ammattilaisten luokitukset vahvistavat että ilmakanavapyörät suoriutuvat paremmin kuin perinteiset saumatut mallit. Sinitetty rakenne mahdollistaa ilman kulkemisen keskiosan läpi, jolloin pyörä pysyy huomattavasti viileämpänä kuin kiinteät hoitopyörät. Tämä tarkoittaa pidempiä hoito-istuntoja ilman, että hoitoliros liiallisesti lämpenee tai alumiinipinta ylikuumenee.
Aloittelijaystävälliset suositukset renkaiden hoitoon
Vasta aloittelet? Nämä alumiinirenkaiden hoitopyöräpaketit saavat sinut hoitamaan ilman liiallista monimutkaisuutta:
Aloittelijapaketti (75–125 $):
- Muuttuvanopeuksinen kulmahiomakone lukittavalla akselilla
- Kolmen pyörän hoitopyöräsetti (sisal, kierreompulla, löysäpuuvilla)
- Kolmen komponentin sauvasetti (ruskea tripoli, valkoinen rouge, vihreä rouge)
- Sorapaperien valikoima (400–2000 karkaistettu)
- Perusturvavarusteet
Keskitaso sarja (200–350 $):
- Laadukas vaihtonopeudella varustettu hiomakone pehmeällä käynnistyksellä
- Ilmasäleikköjen hiomapäät ja niihin tarkoitetut hiomapastat
- Porakoneeseen asennettava yksityiskohtien hoito-osa (Mothers PowerBall2 tai Flitz 5" Buff Ball voimakkaiden hapettumien hoitoon)
- Täydellinen kostea/kuiva hiontapaperijärjestelmä tukialustoineen
- Ammattiluokan hengityssuoja ja turvavarusteet
- Mikrokuituliinasetti ja alumiinille soveltuvat puhdistusaineet
Testit paljastivat tärkeitä eroja eri hiotalojen välillä. Ammattiarvioinnissa todettiin, että Flitz 5" Buff Ball – jossa on viskoosikuituista villaa ja lokeroidulla liitoskappaleella varustettu rakenne – "suoriutui parhaiten hapettumisen ja tahrojen poistamisessa sekä kirkkaan, kromin kaltaisen kiillon palauttamisessa." Liitoskappaleen rakenne soveltuu erinomaisesti monimutkaisten pyöräpintojen kaikkiin nurkkiin ja raotukoihin.
Niille innostuneille, jotka arvostavat renkaiden käsityötä, valmistusalkuperän ymmärtäminen lisää harrastukseen uuden ulottuvuuden. Laadukas kohdistus luo perustan, joka mahdollistaa erinomaiset kiillotustulokset. Autoteollisuudessa toimiville tai räätälöityjä kohdistettuja komponentteja harkitseville Shaoyi (Ningbo) Metal Technology tarjoaa nopean prototyypinvalmistuksen jo 10 päivässä, ja tarkkuuskomponenteissa hyödynnetään sisäistä konetekniikkaa. Sijainti Ningbon sataman läheisyydessä mahdollistaa nopeat toimitukset kaikkialle maailmaan räätälöityjen renkaiden ja suspenssikomponenttien osalta. Lisätietoja heidän auton kohdistusosien sivulla .
Riippumatta budjettitasostasi, sijoita laatuun siellä missä se on tärkeintä: päähiomalaiteeseen ja hiomapäihin. Nämä työkalut koskettavat suoraan alumiinipyöriäsi ja määräävät lopputuloksen laadun. Voit säästää kulutustarvikkeissa, kuten hiomapaperissa ja puhdistusaineissa – näitä tarvitaan säännöllisesti vaihtaa riippumatta alkuperäisestä laadusta. Oikeilla välineillä varustautuneena olet täysin valmis muuntamaan mitä tahansa himmeää valssattua alumiinipyörää silmiä miellyttäväksi peiliksi.
Usein kysytyt kysymykset valssatun alumiinipyörän hionnasta
1. Mitä hiomakarkausta tulisi käyttää valssatuille renkaille?
Käytä aluksi 400-hiomausta kohtalaisesti hapettuneisiin pyöriin tai 320-hiomausta voimakkaasti hapettuneisiin. Siirry vaiheittain 600-, 800-, 1200-, 1500- ja lopuksi 2000-hiomaan esipolkkia varten. Tienraivausvaurioille renkaan reunoissa 600-hiomaus usein riittää. Älä koskaan ohita yli yhtä hiomaustasoa – 50 %:n säännön noudattaminen varmistaa, että viiltojäljet hionnassa tasoittuvat oikein jokaisessa vaiheessa.
2. Kuinka usein valssatut pyörät on hiotava?
Asian suojauksen ja huollon avulla voidaan odottaa 12–18 kuukauden väliaikoja täydellisten kiillotusten välillä arjessa ajettaville ajoneuvoille kohtuullisissa ilmastoissa. Näyttöajoneuvoille väliaika voi olla 2–3 vuotta, kun taas rata-autoille tai ajoneuvoille kovissa olosuhteissa huoltoa tarvitaan joka 6–8 kuukauden välein. Viikoittaiset huuhtelut, kahden viikon välein tehtävä perusteellinen puhdistus ja kuukausittainen vahakuorin käyttö pidentävät merkittävästi näitä väliaikoja.
voiko alumiinirengashihnoja kiillottaa ilman hiontaa?
Vain jos renkailla on kevyt hämäryys tai vähäinen tylsistyneisyys eikä ole hapettumista tai naarmuja. Tällöin valkoisen hiotepastan (white rouge) käyttö saattaa riittää. Kuitenkin kohtalaisesti tai voimakkaasti hapettuneet renkaat vaativat hionnan vaurioituneen kerroksen poistamiseksi ennen kuin yhdisteet voivat luoda todellisen peilikomean. Hionnan ohittaminen hapettuneilla pinnoilla johtaa hämärään, jota ei voida kiillottaa pois.
mikä on paras yhdiste kuidutetun alumiinin rengashihnojen kiillottamiseen?
Käytä kolmivaiheista järjestelmää: ruskea tripoli alustavaan hiontaan, valkoinen rousku keskivaiheen hiomiseen ja vihreä rousku lopulliseen peilipintaan. Rengaskierron kunto määrittää aloituskohdan – voimakkaasti hapettuneet pinnat vaativat ensin harmaan tai mustan emerin. Älä koskaan sekoita yhdisteitä samalla hiomapäällä, ja sovita yhdisteen kovuus hiomisvaiheeseen.
5. Kuinka kauan kestää yhden valssattavan alumiinirenkaan hiominen?
Aika vaihtelee renkaan kunnon ja rakenteen mukaan. Lievä hapettuminen yksinkertaisilla säteillä vie 45–65 minuuttia rengasta kohden. Keskimääräinen hapettuminen tavallisilla rakenteilla vaatii 65–90 minuuttia. Voimakas hapettuminen tai monimutkaiset monisäteiset mallit vaativat 90–135 minuuttia. Näyttelykelpoiset pinnat voivat viedä jopa 3 tuntia rengasta kohden. Lisää 20 % aikaa jokaista yli 20 tuuman läpimitan 2 tuumaa kohden.