 Små partier, høje standarder. Vores hurtige prototyperingservice gør validering hurtigere og nemmere —

Lasergravering i aluminium: 9 trin til holdbare, skarpe mærkninger
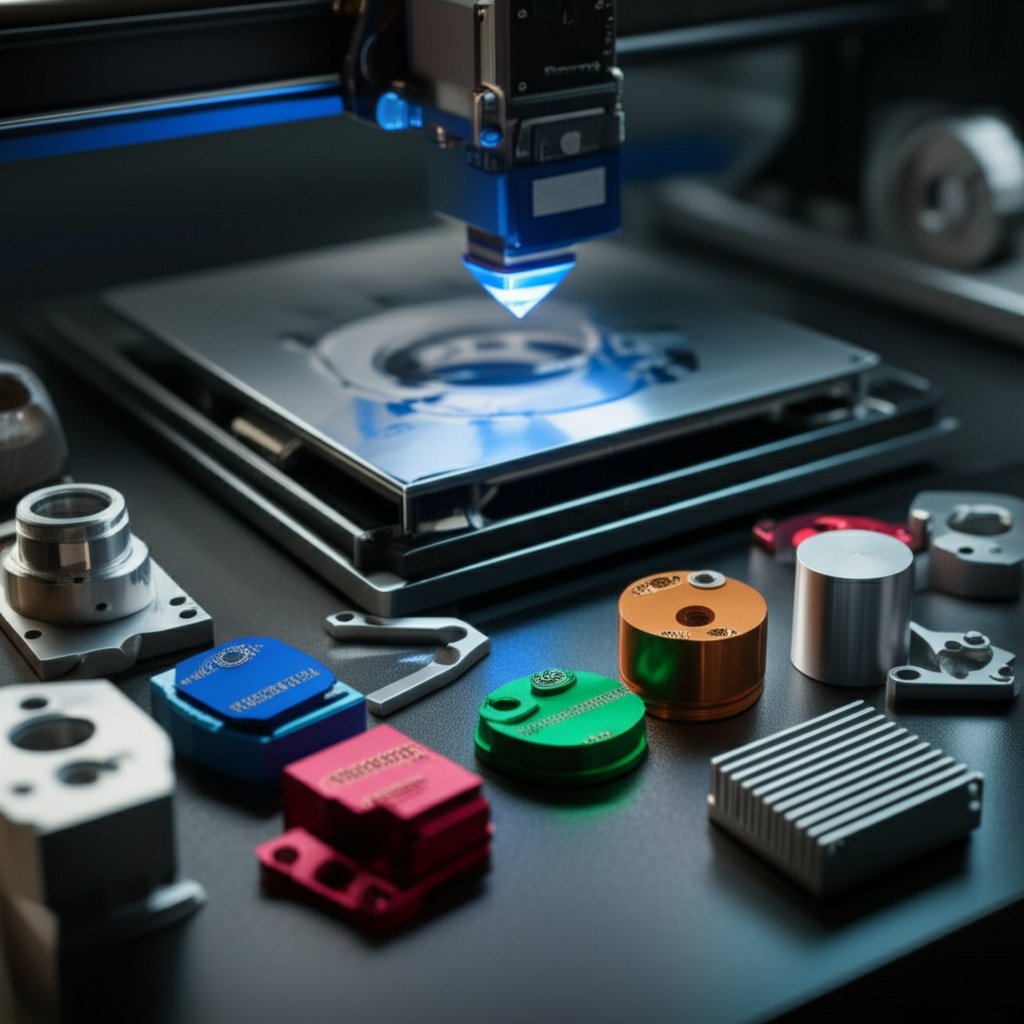
Trin 1: Definer mål og vælg det rigtige aluminium til lasergravering
Afbild dine graveringsemål, før du tager laseren i brug
Når du starter en laser aluminium engraving projekt, er dit første skridt ikke at tænde for maskinen – det er at afklare, hvad du ønsker, at dit mærke skal opnå. Markerer du et produkt til branding, tilføjer du sporbarhedskoder til industrielle krav, eller skaber du funktionelle etiketter til sikkerhed og drift? Hvert mål vil forme de valg, du træffer herefter.
- Branding prioriter æstetik og høj kontrast for logoer eller dekorative design.
- Sporbarhed fokuser på varighed, læsbarhed med scannere og modstandskraft over for slid.
- Funktionelle etiketter sørg for læsbarhed på afstand og holdbarhed mod rengøring eller slibning.
Hvorfor valg af legering ændrer mærkningskontrast
Lyd komplekst? Det kan det være, men ved at bryde det ned efter legering gør det processen mere håndterbar. Almindelige aluminiumslegeringer som 5052, 6061 og 7075 reagerer hver især forskelligt på laserenergi på grund af deres unikke termiske ledningsevne og hårdhed. For eksempel kan højt ledende legeringer kræve højere energitæthed eller flere passager for at opnå ens og synlige mærkninger. Ifølge Laserax , er hårde legeringer eller dem med mere refleksivitet ofte mere udfordrende, og de kræver nogle gange justeringer af parametrene eller forbehandling af overfladen for at øge absorptionen og mærkningskvaliteten.
| Legering | Temperament | Færdigbehandling | Mærkningsmål | Påkrævet kontrast | Laser type | Målproduktion |
|---|---|---|---|---|---|---|
| 5052 | H32 | Anodiseret | Sporbarhed | Høj | Fiber | Høj |
| 6061 | T6 | Blot | Branding | Medium | Fiber | Medium |
| 7075 | T73 | Pulverlakeret | Funktionsmærkning | Høj | CO2/Fiber | Medium |
Når anodisering slår ubehandlet aluminium
Forestil dig, at du har brug for skarpe, højkontraste mærkninger, der springer ud på afstand. I de fleste tilfælde er anodiseret aluminium din bedste løsning. Den anodiserede lag forbedrer ikke kun holdbarheden og korrosionsbestandigheden, men overfladen kan også farves for at opnå højkontrastblegning eller ablation, hvilket gør det ideelt for både lasergravering anodiseret aluminium og lasergravering anodiseret aluminium applikationer. Som nævnt af CNCSourced kan farven og tykkelsen af det anodiserede lag vælges for at maksimere kontrasten, og resultatet er en mærkning, der er vanskelig at skrabe af og visuelt slående.
Ubearbejdet aluminium giver derimod ofte lavkontraste, grå til hvide mærkninger – egnet til subtil branding eller hvor kontrast ikke er kritisk. Overflader med pulverlakering eller maling kan også graveres, hvor laseren fjerner belægningen for at afsløre det lyse grundmateriale darunder og derved opnå højkontrastresultater.
- Læsbarhed på den tiltænkte betragtningsafstand
- Kontrast på både matte og glatte overflader
- Minimum linjebredde opfylder designkrav
- Mærkets holdbarhed svarer til den miljømæssige påvirkning
Hovedkonklusion: Kontrast afhænger mere af overfladens finish end af rå effekt – optimer valg af finish tidligt for at undgå usikkerhed senere
Fastlæg dine acceptkriterier og specifikationer tidligt
Inden du går videre, dokumentér dine valg. Angiv legering, styrke, finish og mærkningsmål. Beslut om du har brug for den højeste kontrast (tænk lasergravering af anodiseret aluminium til skilte), eller om en mere subtil effekt er acceptabel. Denne enkle specifikation forbinder dine mål for aluminiumsgravering med materiale og finish og sparer dig tid og unødvendigt arbejde senere.
For mere information om passende aluminiumstyper og finishmuligheder, se de detaljerede guider på LaserPecker og Laserax
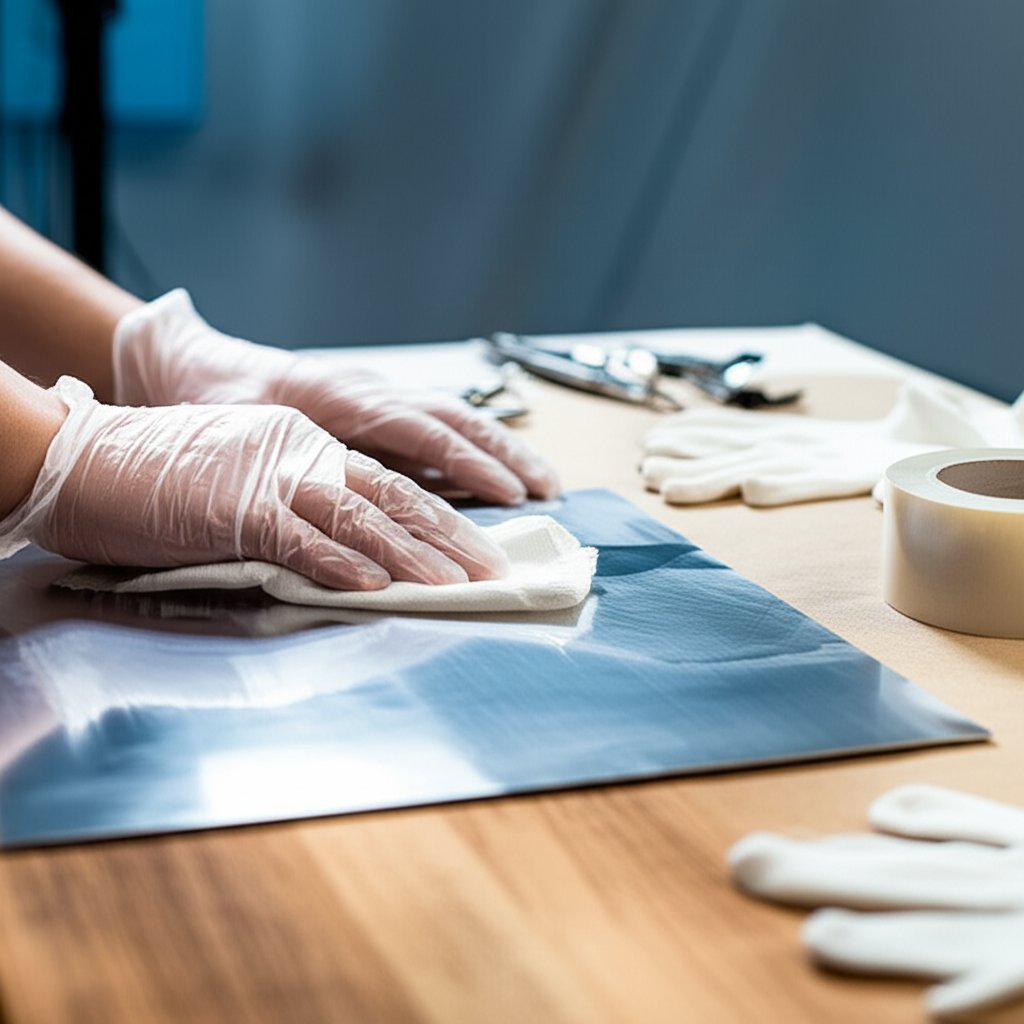
Trin 2: Forbered overflader og gør dig klar til rene mærkninger
Overfladeforberedelse, der forhindrer udsmearing og lysringe
Bemærker du ikke ofte, hvordan nogle lasergraverede aluminiumsprojekter kommer ud skarpe og fejlfri, mens andre ser ud smudsig eller ujævne? Forskellen skyldes ofte overfladeforberedelsen. Før du overvejer at tænde din laser, vil nogle få simple rengøringsforskrifter gøre eller bryde dine resultater – især hvis du sigter efter professionel kvalitet laserætsering på aluminium eller arbejder med detaljerede logoer på anodiserede dele.
- Tørtørning : Start med at fjerne løst støv og affald med en ren, flossfri klud.
- Opløsningsmiddel rengøring : Fjern fedt fra overfladen ved hjælp af isopropylalkohol eller en mild rengøringsopløsning for at eliminere olie og rester. Dette trin er afgørende for både ubehandlede og anodiserede aluminiumsdele, da urenheder kan forårsage ujævn ætsering eller misfarvning ( OMTech ).
- Tøring med komprimeret luft : Blæs de resterende partikler eller opløsningsmiddel væk med komprimeret luft – undgå derved vandpletter eller floss.
- Kun håndtering med handsker : Træk rene handsker på for at forhindre, at overfladen forurenes igen med fingeraftryk før gravering.
Afskærmning og fastspænding for gentagne resultater
Forestil dig at grave i et glat beklædt panel, kun for at finde røgaftryk, der ødelægger finishen. Det er her, afskærmning kommer ind i billedet. Til bevæget metal til lasergravering —som pulvermalet eller glat anodiseret aluminium—sæt et lavt klistrende, lasersikkert afskærmningsbånd. Dette beskyttende lag hjælper med at forhindre brandskader og kan nemt fjernes uden at efterlade rester ( SynergyCrafts ).
- Test klistret fast på et skrabet stykke for at sikre, at det løfter rent.
- Afskærm kun graveringområdet for at minimere oprydning.
Sæt derefter din komponent fast. Fladhed og ingen vobbler er afgørende for konstant fokus og skarpe mærkninger. Hvis dine komponenter varierer i højde, skal du bruge underlagsplader for at holde graveringsoverfladen i vandret plan. Korrekt fastspænding sikrer, at du ikke ved en fejl får uklart fokus, hvilket kan sløre detaljer—især vigtigt for fine laserætning af anodiseret aluminium arbejde.
Afslutningsspecifikke forberedelsestips
- Anodiseret aluminium : Brug kun bløde, ikke-slidende rengøringsmidler for at undgå at skade oxidlaget. Hårde slidmidler kan fjerne farve og reducere kontrast.
- Delparter med pulverlak : Før du laserætner pulverlak , skal du bekræfte, at belægningen er fuldt hærdet, og teste en lille plet for at se, hvordan den reagerer på laseren. Nogle belægninger fjernes rent, mens andre måske kan blive forkullet eller misfarvede.
- Poleret aluminium : Placer dit design i overensstemmelse med metalstrukturen for et premium-udseende, og undgå kraftig gnidning, som kunne skabe synlige ridser.
Ved at følge disse trin vil du bemærke, at dine mærkninger er skarpere, mere ensartede og kræver mindre rengøring efter ætningen. Korrekt forberedelse og omhyggelig fastspænding er grundlaget for enhver succesfuld laserætning af anodiseret aluminium - Det er et projekt.
Nu hvor din overflade er ren og din del er sikret, er du klar til at gå videre til sikkerhedsforanstaltninger og sikre, at dit arbejdsmiljø er lige så sikkert, som dine mærkninger er rene.
Trin 3: Implementer sikkerhedsforanstaltninger for reflekterende metaller
Farer ved reflekterende metaloverflader og kontrol af tilbage-refleksion
Når du arbejder med en lasergravéringsmaskine til aluminium , har du nogensinde undret dig over, hvad der sker med tilfældige stråler eller refleksioner? Aluminiums høje reflektivitet gør det unikt farligt – tilfældige laserstråler kan sprette uforudsigeligt og true både operatører og udstyr. Forestil dig en kraftfuld fiberlaser, der reflekteres fra et poleret mærkeskilt og hopper tilbage i arbejdsområdet. Derfor er effektive sikkerhedsforanstaltninger absolut nødvendige for enhver aluminiumslasergravéringsmaskine opsætning.
- Brug en lukket kabinet med sikkerhedsafbrydere, der matcher din laserens effekt og type. Et lukket design, som i mange trotec lasermarkeringssystemer , hjælper med at indeholde både direkte og reflekterede stråler.
- Installér stråledæmpere eller ret din belysning, så al reflekteret energi absorberes sikkert – ikke rettet ud i det frie rum.
Beskyttelsesudstyr og interlock-systemer, der faktisk anvendes
Lydens almindeligt, men personligt beskyttelsesudstyr (PPE) overses ofte, indtil det er for sent. Ved enhver aluminium laser markeringsmaskine – især dem i klasse 3 eller 4 – skal der bæres certificerede lasersikkerhedsbriller, der er tilpasset din maskines bølgelængde. Brug aldrig almindelige beskyttelsesbriller; briller, der er specifikke for bølgelængden, er nødvendige for at blokere for farlig energi.
- Interlock-afbrydere skal slukke for laseren øjeblikkeligt, hvis en kabinet åbnes. Dette er standard i kvalitetssystemer, såsom dem, der anvendes i trotec lasermarkeringssystemer arbejdsgange.
- Nødstoppere skal være let tilgængelige og jævnligt testet.
- Tydelige skilte og operatørtræning sikrer, at alle kender risikoen og den korrekte respons, hvis noget går galt.
Ventilation og reststofhåndtering
Har du lagt mærke til dis eller lugt efter ætsning af beklædt eller anodiseret aluminium? Det er luftbåren reststof – potentielt skadeligt ved indånding. Din lasergravéringsmaskine til aluminium bør bruges sammen med effektiv udrøgning og filtrering. Dette holder ikke kun luften ren, men forhindrer også restaflejringer på optik og elektronik, hvilket forlænger din maskines levetid og sikrer et sikkert arbejdsmiljø.
- Installer en røgudsuget med prefiltre til metaller og belægninger.
- Tjek og udskift filtrene med jævne mellemrum.
- Sørg for at have udstyr til brandsikkerhed i nærheden og overvåg hele driften, især ved brug af klasse 4-lasere.
| Lasersikkerhedscheckliste |
|---|
| Beskyttelsesbriller med specifikation for din laserbølgelængde |
| Indkapsling med interlock og nødstop |
| Ikke-reflekterende spændemidler og vinklede monteringer |
| Bekræftet røgudsuget og prefiltre |
| Brandssikkerhedsudstyr og overvågede kørsler |
Kør aldrig reflekterende metaljob uden kabinet, interlocks og bølgelængde-certificerede beskyttelsesbriller.
For detaljerede standarder for laserklassers sikkerhed, personlig beskyttelsesudstyr og krav til kabinetter, skal du kontakte fabrikantens dokumentation og internationale standarder som IEC 60825 ( Technomark ). Ved at følge disse procedurer sikres at din aluminiumslasergravéringsmaskine eller lasergravéringsmaskine til aluminium leverer professionelle resultater – uden at kompromittere sikkerheden. Herefter lærer du, hvordan du finindstiller din proces med en reproducerbar testmatrix for parametre.
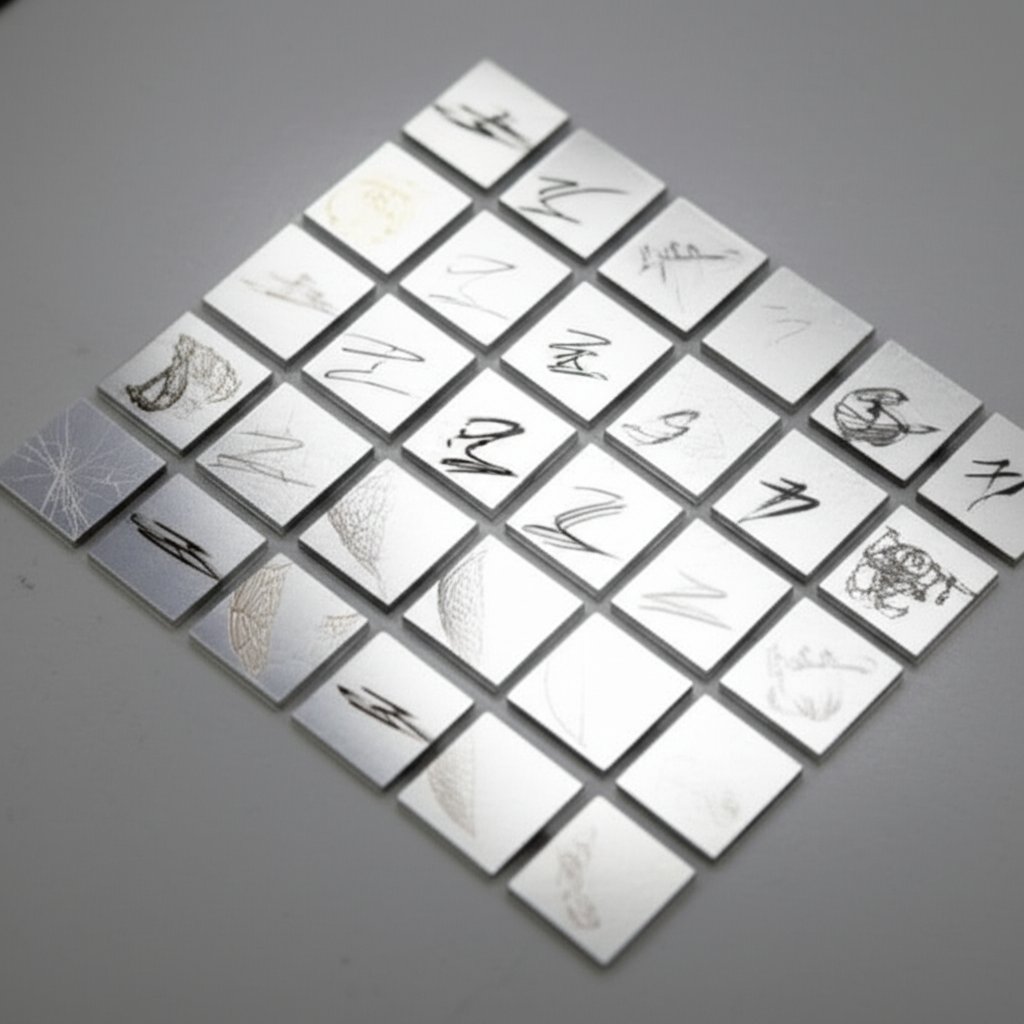
Trin 4: Opret en testmatrix for parametre for reproducerbare resultater
Design en parametertrappe, der afslører det optimale interval
Har du nogensinde undret dig over, hvorfor det samme laser-aluminiumsgravering arbejde kan se fejlfrit ud en dag og udblegnet den næste? Svaret ligger typisk i dine maskindstillinger. I stedet for at gætte, kan du opbygge en parametertestmatrix – et simpelt, men kraftfuldt værktøj, der gør det muligt at finde den perfekte kombination af hastighed, effekt, frekvens og mere. Forestil dig at have en slå-it-ud-liste, der præcis viser, hvordan du opnår skarpe, højkontrastmærkninger hver gang, du graverer aluminium, uanset om det er ubehandlet, anodiseret eller belagt.
Lyd komplekst? Sådan her bryder du det ned. Start med at oprette et gitter, der systematisk varierer dine nøgleparametre. Juster for eksempel:
- Hastighed : Hvor hurtigt laserhovedet bevæger sig.
- Effekt : Procentdelen af den totale laserenergi, der bruges.
- Frekvens : Antallet af laserpulser per sekund.
- Antal passager : Hvor mange gange laseren følger mønsteret.
- Hatch-vinkel/afstand : Retningen og densiteten af udfyldningslinjer.
- Fokusafvigelse : Den vertikale afstand fra det optimale fokuspunkt.
Ved at gravere en lille sektion af aluminium for hver kombination, vil du hurtigt se, hvilke indstillinger der giver de bedste resultater for din specifikke legering og finish. Denne metode virker for alle typer lasermarkering på aluminium, herunder laserætning af sort anodiseret aluminium til højkontrastdesign eller lasergravering af aluminium til subtil branding.
| Hastighed (mm/s) | Effekt (%) | Frekvens (kHz) | Gennemgår | Hatch-vinkel/afstand | Fokusafvigelse (mm) | Resultatkontrast | Kantkvalitet | Cyklustid | Noter |
|---|---|---|---|---|---|---|---|---|---|
| 1000 | 40 | 45 | 1 | 0°/0.05 | 0 | Høj | Skarp | 0:30 | Rent mærke |
| 1500 | 35 | 50 | 2 | 45°/0.07 | +0.1 | Medium | God | 0:40 | Let fadfærdig |
| 2000 | 30 | 60 | 1 | 90°/0.05 | -0.1 | Lav | Blød | 0:25 | Kræver flere passager |
Reference startpunkter for laserætning af aluminium eller laserætning af sort anodiseret aluminium omfatter 30–45 % effekt, 1000–2000 mm/s hastighed og 0,05 mm linjeafstand for en 30 W fiberlaser. Justér efter behov i forhold til din effekt og materiale.
Fokusjustering og skravuringsstrategier for kontrast
Bemærker du, at dine mærkninger er for lyse eller mangler skarphed? Prøv at svagt defokusere laseren – nogle gange kan en lille positiv eller negativ forskydning forbedre kontrasten, især når du laver laserætning på anodiseret aluminium. Eksperimenter med skravuringsvinkler (0°, 45°, 90°) og afstande; tættere skravurering giver ofte kraftigere og mere ensfarvede mærkninger. Sørg for at afprøve forskellige kombinationer, da hver legering og overflade reagerer unikt på disse justeringer.
Medtag en QR-test for at dokumentere læsbarhed i praksis
Vil du sikre, at dine mærkninger gør mere end blot at se godt ud? Tilføj en lille QR- eller stregkodeskærm til din matrix. Brug en pålidelig QR-kodegenerator og eksportér som SVG for at fastholde skarphed. Efter engraving, skalér koden med en smartphone-app i forskellige vinkler og afstande. Ifølge brancheets bedste praksis bør hver QR-kodens modul være mindst 0,5 mm bred med en klar margin ("stille zone") omkring koden for pålidelig scanning ( OMTech ). Denne trin er afgørende for applikationer såsom aktivsporing eller produktgodkendelse, hvor laser ætser QR-kode ydelse er uforhandlig.
- Engraver din komplette parametermatrix på en skrabet del af samme legering og finish.
- Fotografer hvert resultat under ensartet belysning.
- Ranger hver celle efter kontrast, kantkvalitet og læselighed.
- Vælg de to bedste kandidater og udfør bekræftende tests på nye plader.
- Engraver og scan en QR-kode for at bekræfte ydelsen i den virkelige verden.
Denne tilgang fjerner usikkerheden fra lasermærkning af aluminium og giver dig en dokumenteret basislinje til fremtidige opgaver. Uanset om du arbejder med lasergravering af sort anodiseret aluminium til elektronik eller fine laserætning af aluminium til industrielle mærkninger, så er en god parametermatrix din vejviser til ensartede, professionelle resultater.
Når du først har fundet dine optimale indstillinger, er du klar til at validere din arbejdsgang med en virkelig opgave – og sikre, at hver eneste mærkning lever op til dine standarder, batch efter batch.
Trin 5: Udfør din første lille opgave og valider hurtigt
Forbered grafik med linjetykkelser, der graverer rent
Klar til at se din laser aluminium engraving arbejdsgang i aktion? Forestil dig, at du har fundet de perfekte indstillinger – nu er det tid til at udføre en rigtig opgave og sikre, at alt fungerer, som det skal. laserætset bærbar computer til sikkerhed eller branding, eller oprettelse billeder ætsede i metal til et unikt gave, dette trin handler om at oversætte dit digitale design til et skarpt, fysisk mærke.
Start med dit digitale kunstværk. Importér dit design som en vektorfil (SVG, DXF eller AI-formater er almindelige) og konverter al tekst til konturer. Dette forhindrer fontproblemer og sikrer, at hver detalje gengives nøjagtigt af laseren. Indstil dine linjetykkelser ud fra de bedste resultater fra din parametermatrix – tynde linjer kan forsvinde eller brænde ud, så brug en minimum linjestregtykkelse, der matcher dine testresultater. Som reference anbefaler mange lasersystemer en minimum linjebredde på 0,2–0,5 mm for konsistente resultater, men valider altid med dit eget materiale og indstillinger.
Kør et lille parti for at teste fixturgenlæselighed
Før du går i gang med en stor produktion, er det afgørende at teste med et mindre parti. Dette validerer ikke kun dine laserindstillinger, men også din fixtur- og justeringsproces. Placer justeringsfiducials eller markører på din laserbænk eller Vorrichtung for at sikre, at hver enkelt del placeres på samme sted. Hvis din overflade er udsat for røgaftrykninger – såsom glansanodiseret eller beklædt aluminium – skal du påsætte en periferimaskering med lasersikker tape.
- Importér vektorgrafik og konverter skrifttyper til konturer.
- Indstil minimum stregbredde ud fra din bedste parametercelle.
- Placer justeringsfiducials på benken eller Vorrichtung for at sikre gentagelig placering.
- Påsæt en periferimaskering, hvis det er nødvendigt for at forhindre røgaftrykninger.
- Kør en enkelt testdel med dine valgte indstillinger.
- Undersøg under forstørrelse for kantsmeltning, halos eller bånddannelse.
- Kør 3–5 identiske dele for at kontrollere konsistent resultat.
- Notér cyklustiden og notér alle rengøringsprocesser, der er nødvendige.
For opgaver med qr-kode laserætning , generér din QR-kode i en størrelse, der matcher din testmatrix – typisk bør hver modul være mindst 0,5 mm bred for at sikre pålideligt scanningsresultat. Brug en laser qr-kodeætning indstilling, der er afprøvet i dine tidligere tests, og scan den færdige kode med en telefonapp for at bekræfte læsbarheden fra forskellige vinkler og afstande.
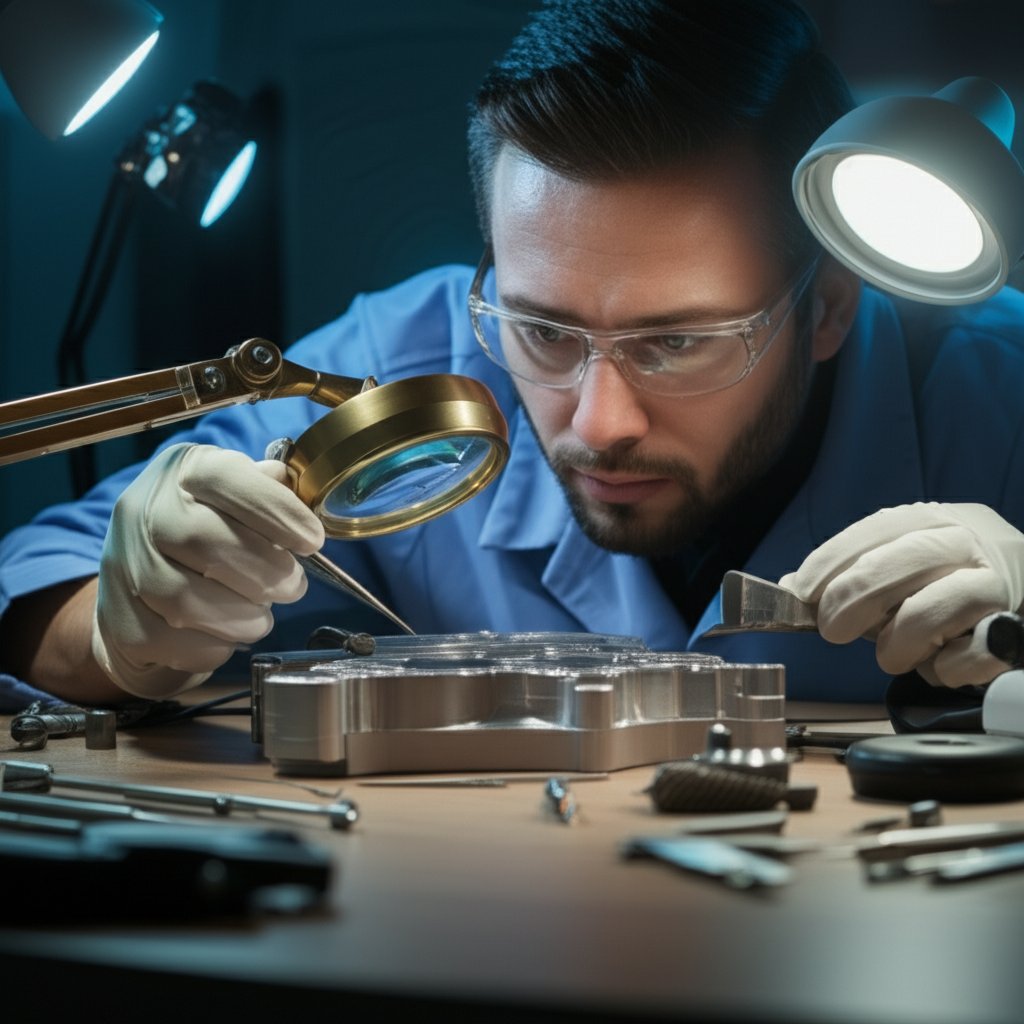
Vurder og dokumentér resultaterne med det samme
Efter ætningen skal du inspicere dine dele under god belysning og, hvis muligt, forstørrelse. Læg mærke til kontrast, læsbar tekst og skarpe kanter uden burrs eller sot. Til laserætset aluminium og lasergravuret anodiseret aluminium sørg for, at mærkningen tydeligt adskiller sig fra overfladen, og at mikrotekst eller koder kan læses tydeligt fra den ønskede betragtningsafstand.
- Tekst med høj kontrast, som er læsbar fra den ønskede afstand
- Rene kanter – ingen burrer, sot eller smeltezoner
- QR- eller mikrotekst læsbar i målstørrelse
- Minimal eller ingen efterbehandling påkrævet
Dokumentér din opsætning ved at fotografere tilbehøret, færdige dele og eventuelle bemærkelsesværdige defekter. Link dine laserindstillinger til den specifikke tilbehørsrevisionsnummer og gem parameterfiler med tydelig versionering. Dette gør det nemt at reproducere succesfulde resultater eller fejlsøge problemer i fremtidige batches.
Om du nu graverer et brugerdefineret navneskilt, en laserætset bærbar computer til aktivsporing eller artistisk billeder ætsede i metal , giver denne mindre validering dig tillid til at skabe op – med visheden om, at dit arbejdsgang leverer den kvalitet og konsistens, du forventer. Dernæst tester du dine mærkninger for at sikre, at de er klar til den virkelige verden.
Trin 6: Test holdbarhed og kodelæsbarhed med henblik
Simple slidtests, du kan udføre internt
Har du nogensinde undret dig over, om dine anodiseret aluminiums lasergravering kan holde til virkelige forhold? Forestil dig en stregkode på en maskin, der skal forblive læsbar i årevis, eller et navneskilt, der udsættes for daglig rengøring. At teste mærkningens holdbarhed er afgørende for ethvert laser aluminium engraving projekt – især når dit arbejde er beregnet til industrielle eller udendørs miljøer.
- Tørtværtest : Tag en standardiseret klud og tør det mærkede område et bestemt antal gange (f.eks. 50 gange). Kontroller om farven falmer eller smudser. Dette simulerer almindelig brug og slitage.
- Opløsningsmiddel-tværtest : Brug en almindelig rengøringsmiddel fra din facilitet (såsom isopropylalkohol eller mildt vaskepulver) og tør det graverede område. Undersøg om kontrasten er svækket eller om farven er smurt. Dette er især vigtigt for anvendelser, hvor der forventes regelmæssig rengøring.
- Let slibningstest : Gnid mærket forsigtigt med en ikke-metallisk pad (såsom en nylon-rengøringspad). Vurder om kanterne forbliver skarpe og om mærkets integritet fastholdes. Dette trin hjælper dig med at forstå din gravering anodiseret aluminium til ridser og mindre stød.
Korrosionsudlægthed for aluminium
Når dine mærkninger udsættes for hårde miljøer – tænk saltstøv, fugtighed eller udeudsættelse – bliver korrosionsmodstand en vigtig bekymring. Anodiseret aluminium foretrækkes på grund af dets evne til at modstå disse forhold. Faktisk viste en undersøgelse af fotolaseranodiseret aluminium mærkningstavler udsat for naturligt havvand og saltstøv "meget god korrosionsmodstand" over en række testscenarier.
- Saltstøv- eller fugtighedstest : For kritiske dele skal prøver sendes til et laboratorium til neutral saltstøvtest eller accelereret fugtighedstest. Efter udsættelse skal man kontrollere, at mærkningen stadig er læselig og at aluminiummet ikke viser tegn på væsentlig korrosion. Dette er afgørende for lasermærkbar aluminium der anvendes i marine, automobil- eller industriapplikationer.
Kontrol af vedhæftning og varighed af koder
Hvordan sikrer du, at dine lasergraverede stregkoder eller serienumre forbliver læsbare over tid? Kodevalidering er mere end blot en hurtig scan - det handler om at bekræfte, at dine mærkninger kan læses af alle scannere, under alle lysforhold og efter miljøpåvirkning. Brug en stregkodeverifikator eller scanningsapp til at tjekke læsbarheden under forskellige vinkler og afstande. Hvis din anvendelse hører under regulerede industrier, skal du sikre, at dine koder opfylder de relevante DPM (Direct Part Mark)-kvalitetsstandarder ( Cognex Barcode Verification Guide ).
- Test af kode-læsbarhed : Scan dine stregkoder eller QR-koder ved brug af både en verifikator og en smartphone-app. Bekræft læsbarheden efter hver holdbarhedstest og eksponeringstest. Dokumentér eventuelle fejl og juster parametrene efter behov for at forbedre kontrasten eller kantdefinitionen.
Definer accept-/afvisningskriterier, før du påbegynder test; holdbarhedskrav varierer afhængigt af industrien og skal være i overensstemmelse med kundens eller interne standarder.
Dokumentér dine resultater med klare fotos og noter. Til hvert test, skal du tage billeder før og efter for at følge forringelse. Hvis du producerer lasermærkbar aluminium mærkninger til sikkerhedskritiske miljøer, bliver disse optegnelser en del af din kvalitetssikringsproces.
- Højkontrastmærkninger forbliver synlige efter slibning og rengøring
- Ingen markant fadfornelse, smearing eller tab af stregkodelæsbarhed
- Korrosionsbestandighed opfylder eller overstiger anvendelseskravene
Ved at udføre disse praktiske tests får du dokumenteret tillid til at din anodiseret aluminiums lasergravering modstår virkelige brugsforhold. Dernæst lærer du at fejlsøge eventuelle defekter og sikre proceskonsistent for hver batch du kører.
Trin 7: Fejlsøgning og sikring af konsistent
Ret lavkontrastmærkninger uden at brænde over
Er du færdig med en laser aluminium engraving arbejde og opdage, at mærkerne ser blege eller ujævne ud? Du er ikke alene – lav kontrast er en af de mest almindelige udfordringer inden for aluminiumsgravering . Men før du øger effekten og risikerer at brænde overfladen, kan du prøve følgende praktiske løsninger:
- Øg skraveringstæthed eller justér frekvens: Tættere linjeafstand og en højere pulsfrekvens kan forstærke mærkningen uden overdreven varme. Dette hjælper især, når du laserætser aluminium til datakoder eller fin kunst.
- Justér fokus let på anodiserede overflader: En lille positiv eller negativ fokusforskydning kan forbedre kontrasten, især ved gravering i aluminium tags eller plader.
- Tjek for overfladeforurening: Olier, støv eller ujævne oxidlag kan gøre resultaterne slørede. Rengør og test igen, før du ændrer parametrene.
Får du stadig ikke skarpe resultater? Prøv at udføre en hurtig testmatrix med variationer i hastighed og effekt. Ofte kan en lille justering – såsom at reducere hastigheden eller tilføje en ekstra passering – gøre en stor forskel uden at forårsage overbrænding.
Stop smeltning, flænger og varmefarvning på råt aluminium
Har du lagt mærke til ru kanter, smeltede kanter eller misfarvning efter lasergravering på aluminium jobs? Disse symptomer skyldes typisk for meget varme eller dårlig luftstrøm. Sådan får du kontrol tilbage:
- Reducer effekt eller øg hastighed: Høj energitæthed kan smelte overfladen og forårsage flænger og varmefarvning. Sænk effektindstillingen eller gravér hurtigere for at minimere varmeophobning.
- Begræns antallet af passager: Mere er ikke altid bedre. For mange passager kan opvarme emnet, så brug kun så mange som nødvendigt for den ønskede dybde.
- Forbedr fokus og luftstrøm: Sørg for, at din laser er korrekt fokuseret, og brug luftassistent til at blæse smeltet affald væk. Dette skærper mærkningen og afkøler overfladen, hvilket reducerer smeltning og ridser.
- Overvej masking: Til delikate eller polerede overflader kan du anvende en lasersikker maske for at beskytte omkringliggende områder mod varme og rester.
Forestil dig at producere et parti med lasergravering på aluminium navneplader til industrielt brug – ved at justere disse indstillinger opnår du skarpe, ridsefrie kanter, der er klar til enhver miljøpåvirkning.
Afslutningsbånd og inkonsekvente resultater
Har du nogensinde lagt mærke til svage linjer, usikker tekst eller mærkninger, der varierer fra emne til emne? Bånddannelse og inkonsekvens kan underminere endog de bedste aluminium lasergravering proces. Her er en hurtig fejlfinding:
- Tjek bælter, skinner og værktøj: Mekanisk ustabilt er en af de vigtigste årsager til bånddannelse. Spænd bælter og skinner og sørg for, at dit værktøj holder hver enkelt del flad og stabil.
- Reducer acceleration: Hurtige opgaver kan forårsage vibrationer, så reducér accelerationsindstillingerne for en mere jævn bevægelse.
- Gør reservedelens højde ens og verificer fokus: Hvis reservedelene ikke alle har samme højde, kan laseren miste fokus. Justér eller værktøjjs delene til et ens niveau og kontroller altid fokus, før et parti startes.
- Udfør en parameterkontrol ved hver vagt: Miljømæssige ændringer eller udstyrets drift kan påvirke resultaterne. En hurtig test ved starten af hver vagt hjælper med at opdage problemer tidligt.
Beslutningstræ: Fejlsøgning ved almindelige fejl
-
Lav kontrast?
- Forøg skraveringstæthed
- Juster frekvens
- Defokuser lidt
- Rengør overflade igen
-
Smeltede kanter/grat?
- Lavere strøm
- Forøg hastighed
- Reducer antallet af passager
- Forbedr luftassistent
-
Sod/Halo?
- Forbedr fumudsugning
- Brug kantmaskering
- Øg hastighed, sænk frekvens
-
Bånddannelse/Vibration?
- Spænd remme/skinner
- Sænk acceleration
- Tjek spændet
-
Uensartede Partimærkninger?
- Bekræft fokus over hele spændet
- Standardiser højden på dele
- Udfør parameterkontrol ved hver vagt
Vedligeholdelsesadvarsler for stabil og høj kvalitet af gravering
- Rengør linser og spejle jævnligt for at forhindre energitab og affaldsophobning
- Bekræft fokusmålerens kalibrering før hver større produktion
- Undersøg lufttilførsel og filtre til røg—udskift efter behov for at opretholde luftstrøm
- Notér driftstimer og planlæg forebyggende kontroller for at opdage slid før det forårsager fejl
Ved at følge disse fejlsøgningstrin vil du bemærke, at din lasergravering af aluminium projekter bliver mere forudsigelige, med færre afvisninger og mindre reparation. Almindelig vedligeholdelse og en systematisk tilgang til indstillinger er nøglerne til professionel, gentagelig gravering gravering af aluminium —uanset batchstørrelse eller anvendelse.
Når din proces er stabiliseret, er du klar til at gå videre og vælge de rigtige værktøjer og leverandører til at skabe effektiv produktion i større skala.
Trin 8: Vælg værktøjer og leverandører med en TCO-betænkning
Vælg en laserklasse, der matcher dine mærkninger
Når du skalerer op laser aluminium engraving , er valg af rigtig udstyr mere end blot at vælge en populær maskine. Stil dig selv følgende spørgsmål: Skal du mærke komplicerede logoer på anodiserede skilte, afvikle batches af graveret aluminiumsskilt uden tekst dele, eller skabe storformatsskilte? Hvert scenarie kræver en bestemt lasertype og opsætning.
| Laser type | Bedst til | Fordele | Ulemper | Eksempel på anvendelser |
|---|---|---|---|---|
| Fiber laser | Industriel, høj kapacitet | Hurtige, præcise, holdbare mærkninger | Højere initielle omkostninger | Batch aluminiumsplader til lasergravering , serienumre |
| CO2-laser (med mærkningsmiddel) | Almindelig brug, større overflader | Fleksibel, kan gravere belagte aluminiumsplader | Kræver mærkningsspray til ubehandlet aluminium | Skilte, belagte paneler |
| Diodelaser | Hobbybrug, små virksomheder, bærbar | Overkommelig, kompakt og nem at bruge | Langsom, bedst til små varer | Tilpassede gaver, små mærkninger, hobbyarbejde |
F.eks. hvis du planlægger at gravere et stort antal anodiserede mærkninger eller industrikomponenter, er en fiber aluminiumsgravér din bedste mulighed med hensyn til hastighed og holdbarhed ( LaserPecker ). Hvis du eksperimenterer med belagte paneler eller har brug for at mærke rent aluminium med en CO2-laser, har du brug for en lasermærkningsspray til diodelaser eller en lignende forbindelse for at sikre skarpe resultater.
Udlicitering, hybrid- eller egenproduktion?
Lyd overvældende? Det behøver det ikke. At beslutte, om man skal købe en aluminiumsgravermaskine eller udlicensere mærkningsarbejdet afhænger af din mængde, leveringstid og kvalitetsbehov. Her er en hurtig opgørelse:
- Internt: Bedst til høj volumen, hurtig levering og stram proceskontrol. Kræver investering i udstyr, træning og vedligeholdelse.
- Hybrid: Udlicenser overskydende eller specialiserede opgaver, mens man ejer en lasergravér for aluminium til hverdagsarbejdet.
- Fuld udlicensering: Ideel til lav volumen eller når du har brug for specialiserede overflader og har begrænset kapital eller gulvplads.
Overvej din samlede ejepris (TCO): ikke kun maskinens pris, men også forbrugsvarer, vedligeholdelse, operatørtræning, support under drift og facilitetskrav. For eksempel kan en fiber aluminiumsgravermaskine koste mere i starten, men dens hastighed og lave vedligeholdelsesbehov kan spare penge over tid for store operationer.
Sikr konsistente ekstrusioner og råmaterialer
Har du nogensinde kørt et parti af aluminiumsplader til lasergravering og lagt mærke til inkonsekvente mærkninger? Pålidelig levering er lige så vigtig som det rigtige udstyr. At samarbejde med en leverandør, der forstår kravene til laserbare produkter vil spare dig tid og reducere affald.
- Shaoyi Metal Parts Supplier – Førende integreret leverandør af præcise autometaldele i Kina. Deres automobilkvalitets aluminiumsekstrusionsdele leverer konsistent geometri, legering og overfladebehandling – ideel til højpræcise lasermarkering arbejdsgange.
- Maintrophysupply – Tilbyder et bredt udvalg af lasergravérbare aluminiumsplader i forskellige farver og overfladebehandlinger.
- Lokale metalbutikker – Kan levere blanks tilpasset, men kvalitet og finish kan variere fra parti til parti.
Forestil dig, at du skal levere en ordre på hundredvis af graveret aluminiumsskilt uden tekst dele. Ved at købe ind fra en specialister som Shaoyi sikrer du, at hver enkelt blank opfylder dine specifikationer for legering, anodisering og fladhed. Dette minimerer reparationer og giver dig mulighed for at aluminiumsgravermaskine levere gentagelige, professionelle resultater.
Nøgterne overvejelser i forbindelse med indkøbs- og udstyrsplanen
- Gennemstrømning: Kan din aluminiumsgravér håndtere den nødvendige mængde?
- Delstørrelse: Er maskinebordet stort nok til at rumme din største vare?
- Kompleksitet i spænd: Har du brug for specialfremstillede Vorrichtungen for at sikre præcis og gentagelig placering?
- Drift og support: Er service hurtigt tilgængelig, hvis noget går i stykker?
- Forbrugsvarer: Tag højde for omkostninger til linser, filtre, mærkningssprayer og rengøringsmidler.
- Operatørtræning: Allokér tid og ressourcer til færdighedsudvikling.
- Facilitet: Har du korrekt ventilation, strøm og plads?
At vælge de rigtige laservenlige produkter og en pålidelig leverandør er lige så vigtigt som dit maskinvalg. Konsistent materiale og finish er grundlaget for enhver succesfuld workflow til lasergravering af aluminium.
Med udstyret og en sourcingplan på plads er du klar til at færdiggøre din workflow og sikre en pålidelig forsyningskæde – og dermed sikre, at hver graverede plade, blank eller færdigdel lever op til dine standarder, batch efter batch.

Trin 9: Færdiggør workflow og sikr en pålidelig forsyning
Lås workflow og gem dine parametre
Har du nogensinde følt, at du har mestret en lasergravering af aluminium arbejde, kun for at kæmpe med at gentage det næste gang? Forskellen mellem en enkeltvis succes og en skalerbar arbejdsgang er dokumentation. Forestil dig at åbne din projektmappen og finde hver indstilling, fixture og acceptkriterium klar til brug. Det er kraften i en fastlåst proces.
- Afslut din parametersætning : Gem dine afprøvede hastighed, effekt, fokus og hatch-indstillinger i din laser-software. Brug tydelige filnavne og versionsnumre for nem genfinde.
- Dokumentér fixture-opsætning og fokusreferencer : Tag fotos eller lav diagrammer, der viser, hvordan du aligner og sikrer dine dele. Notér eventuelle shims eller særlige værktøjer brugt til anodiserede aluminiumsplader til lasergravering eller specialdesignede former.
- Udgiv acceptkriterier : Skriv ned, hvad der betragtes som en "godkendt" kvalitet – f.eks. minimumskontrast, linjebredde eller læsbarhed af kode. Dette er især vigtigt for anodiserede aluminiumsplader til lasergravering bruges i regulerede industrier.
Indstil vedligeholdelses- og kvalitetssikringsintervaller
Når du ofte engraverer aluminium, er vedligeholdelse ikke frivilligt – det er din forsikring for at opnå konsistente resultater. Forestil dig, at du kører en stor produktion og pludselig opdager midtvejs, at dine mærkninger bliver svagere på grund af en snavset linse eller en forkert monteret fixtur. Undgå overraskelser med en enkel og tilbagevendende tjekliste:
- Planlæg forebyggende vedligeholdelse : Sæt påmindelser om at rengøre optik, tjekke bevægelsesskinner og udskifte filtre på din aluminium laser graveringsmaskine . Almindelig vedligeholdelse betyder færre defekter og mindre nedetid.
- Opret en testprøveprocedure : Ved hver ny batch, finish eller leverandør skal du først engravere en lille testprøve. Dette trin hjælper dig med at opdage problemer med anodiseret aluminium til lasergravering – såsom farveskift eller uventede overfladereaktioner – før du går i gang med hele produktionen.
- Definer regler for genarbejde og affald : Beslut på forhånd, hvad der sker, hvis en komponent ikke lever op til dine krav. Kan du gengravere? Skal du kassere den? Klare regler sparer tid og forhindrer forvirring på gulvet.
Sikr op til levering og færdiggørelse før produktion
Har du nogensinde oplevet forsinkelser, fordi dine råmaterialer eller ekstruderinger ikke ankom til tiden, eller overfladen ikke matchede din specifikation? Konstante leverancer er rygraden i en pålidelig lasergravering af anodiseret aluminium operation. Sådan sikrer du det:
- Bekræft levering af ekstruderinger, anodisering og råmaterialer : Samarbejd med leverandører, der forstår behovene i lasergravering af aluminium . For eksempel Shaoyi Metal Parts Supplier tilbyder ekstruderinger og anodiserede overflader i bilkvalitet og sikrer, at dine komponenter er klar til gravering hver gang. Deres ekspertise i at kontrollere legering, fladhed og overfladeforbredelse betyder færre overraskelser og mere forudsigelige resultater batch efter batch.
| Produktionsklar Tjekliste |
|---|
| Afslut og gem parameterprofiler |
| Dokumentér fixtur- og fokussætning |
| Udsted acceptkriterier for kontrast og læsbarhed af kode |
| Planlæg preventive vedligeholdelsesopgaver for optik, bevægelse og filtre |
| Opret testmetode for hvert nyt parti eller finish |
| Definer regler for genarbejde og affald |
| Bekræft levering af ekstruderinger, anodisering og råmaterialer |
Hovedkonklusion: Den bedste. lasergravering af aluminium resultater kommer fra en låst proces, almindelig vedligeholdelse og en verificeret leverandørkæde – så du kan grave i aluminium med tillid, hver gang.
Strategisk indkøb af højkvalitets dele klar til gravering
Forestil dig, at du aldrig mere behøver at fejlsøge uensartede blanke eller usammenhængende finisher. Ved tidlig koordinering med en leverandør som Shaoyi sikrer du, at dine specifikationer – fra anodiseringsdybde til fladhed – er i tråd med din parametermatrix. Hvis leverandørens datablade angiver anodiseringsdybde eller fladhed, skal disse noteres i din kvalitetsplan. Hvis ikke, skal de måles og dokumenteres under modtagelsesinspektionen. Dette sikrer, at hvert parti anodiserede aluminiumsplader til lasergravering eller specialfremstillede presseprofiler er klar til din arbejdsgang – med mindre rework og maksimal gennemstrømning.
Med din arbejdsgang, vedligeholdelse og leveringsekæde på plads, er du klar til at skabe operationer, der leverer skarpe, holdbare mærkninger, som lever op til dine standarder hver gang lasergravering af anodiseret aluminium operation—delivering crisp, durable marks that meet your standards every time.
Ofte stillede spørgsmål om lasergravering på aluminium
1. Hvilken type aluminium er bedst til lasergravering?
Anodiseret aluminium er typisk det bedste valg til lasergravering på grund af de høje kontraster og holdbarhed. Den anodiserede lag reagerer godt på laserenergi og skaber skarpe, permanente mærkninger, som er ideelle til branding, sporbarhed og teknisk mærkning. Almindelige legeringer som 5052, 6061 og 7075 har hver deres egne graveringsegenskaber, men anodiserede overflader leverer konsekvent bedre læsbarhed og slidstyrke.
2. Hvordan forbereder man aluminiumsflader til lasergravering?
Forberedelse indebærer grundig rengøring med isopropylalkohol og uldefri klude for at fjerne olier og støv. Til råt aluminium kan overfladen let blive slibet for at reducere refleksiviteten. Anodiserede dele bør rengøres forsigtigt for ikke at skade oxidlaget, mens overfladebehandlede metaller måske kræver afprøvning af et lille område for at bekræfte opførsel under ablation. Passende fastgørelse og valgfri afmaskering med laser-sikker tape forhindrer bevægelse og røgflekker og sikrer rene og ensartede mærkninger.
3. Hvilke sikkerhedsforholdsregler er nødvendige ved gravering af reflekterende metaller som aluminium?
Lasergravering af aluminium kræver strenge sikkerhedsforanstaltninger på grund af dets refleksivitet. Brug altid en laserindkapsling med interlocks, bær øjenbeskyttelse, der er specifik for bølgelængden, og sørg for korrekt udsugning af dampe. Vedligeholdelse af vinklede fixturer og brug af strålestopper hjælper med at kontrollere refleksion. Overholdelse af producentens og internationale sikkerhedsstandarder, såsom dem, der anbefales for trotec lasermarkeringssystemer, er afgørende for operatørens sikkerhed.
4. Hvordan kan jeg sikre, at mine lasergraverede mærkninger på aluminium er holdbare?
For at sikre holdbarhed skal du udføre interne slidtests såsom tørrub, opløsningsmiddelvisk og let slibningstests. For mærkninger, der udsættes for hårde miljøer, bør du overveje saltstest eller fugtighedstests. Ved anvendelse af anodiseret aluminium og optimering af laserparametre for stærk kontrast forbedres både holdbarheden og læsbarheden af mærkningerne. Vedligeholdelse af din procesdokumentation og regelmæssig validering af kodelæsbarhed med scannere sikrer også en konsekvent ydelse.
5. Hvorfor skal jeg købe aluminiumsdelen hos en specialiseret leverandør til gravering?
Ved at samarbejde med en specialiseret leverandør, såsom Shaoyi Metal Parts Supplier, sikrer du dig mod modtagelse af aluminiumsdelene med konstant legering, overfladebehandling og fladhed – afgørende for høj kvalitet og reproducerbar gravering. Deres ekspertise inden for automotivkvalitets ekstrudering og anodisering optimerer din arbejdsgang, reducerer reparationer og sikrer, at dine dele er klar til gravering, hvilket understøtter skalerbar produktion med pålidelig kvalitet.