 Majhne serije, visoki standardi. Naša storitev hitrega prototipiranja omogoča hitrejšo in enostavnejšo validacijo —

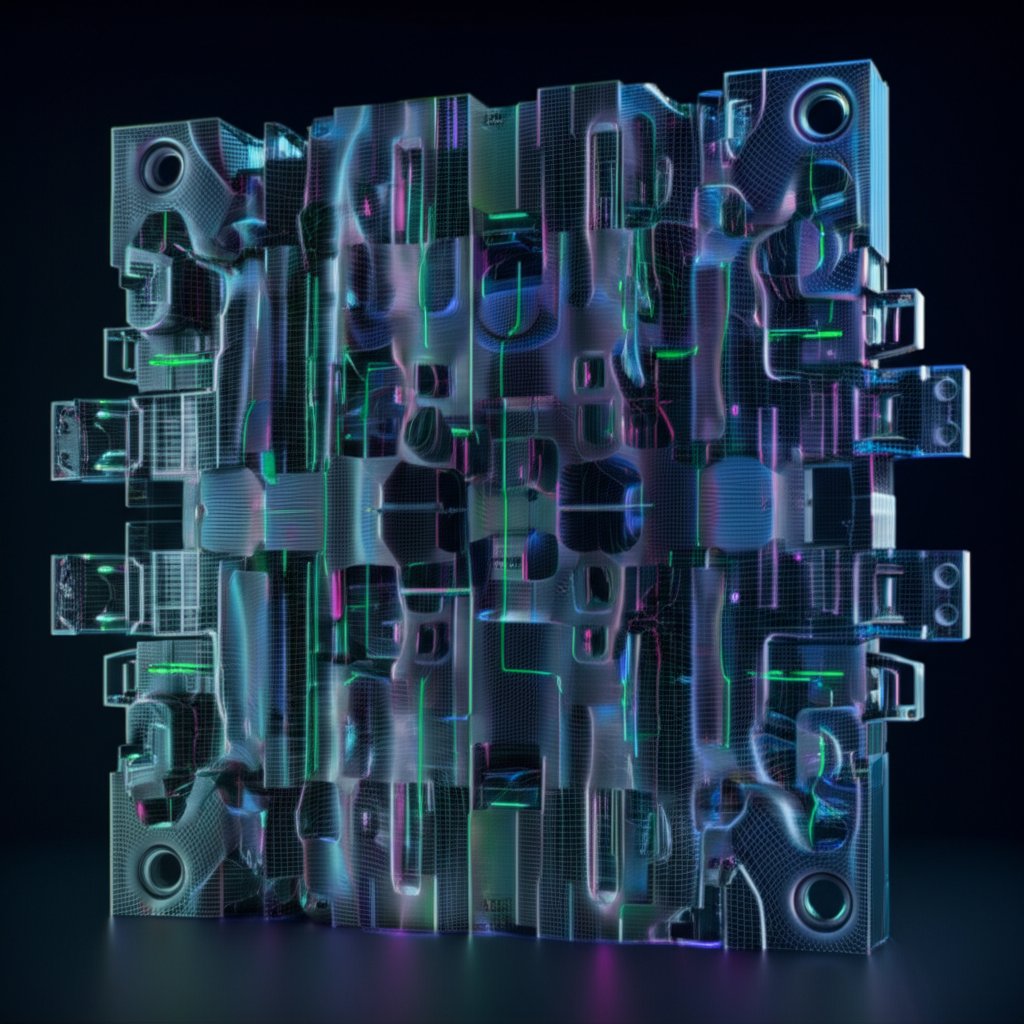
Osnovno vzdrževanje kalibrov za litje pod tlakom za najvišjo zmogljivost
POVZETEK
Učinkovito vzdrževanje kalupov za litje pod tlakom je celovit proces, ki je ključen za podaljšanje življenjske dobe orodij in zagotavljanje dosledne kakovosti izdelkov. Najboljše prakse temeljijo na treh osnovnih področjih: proaktivnem oblikovanju in negi pred proizvodnjo, skrbnem spremljanju parametrov med proizvodnjo, kot so temperatura in tlak, ter meticuloznem čiščenju in shranjevanju po proizvodnji. Dosledno uporaba teh strategij zmanjšuje obrabo, preprečuje dragocene okvare in maksimizira donosnost vašega vlaganja.
Proaktivno vzdrževanje: Oblikovanje kalupov za dolgo življenjsko dobo
Temelj dolgotrajne litjevalne opreme se zasnuje že preden se začne prva serija proizvodnje. Preventivno vzdrževanje se začne s kakovostnim načrtovanjem, ki naprej predvideva in zmanjšuje napetosti, ki nastanejo med postopkom litja. Ta pristop, ki se pogosto imenuje načrtovanje za izdelavo (DFM), vključuje inženirska načela za poenostavitev proizvodnje, zmanjšanje stroškov in izboljšanje vzdržljivosti opreme. S poudarkom na fazi načrtovanja lahko proizvajalci preprečijo mnoge pogoste vzroke za predčasno obrabo in okvare.
Ključna oblikovalna razmišljanja vključujejo ustrezen nagib za enostavno izmetovanje delov, uporabo gladkih zakrivljenih prehodov in zaobljenj, da se izognemo točkam koncentracije napetosti ter optimizacijo razporeditve tekalnikov in vrat za uravnotežen tok kovine. Kot je podrobno opisano v virih od Tops Precision , ti elementi zmanjšujejo obrabo in preprečujejo napake. Prav tako je ključno primerno toplotno obdelovanje visokokakovostnega orodnega jekla, kot je H13, da se doseže potrebna trdnost in odpornost na termično utrujanje. Tudi optimizirana konstrukcija hladilnega sistema je bistvena, saj zagotavlja učinkovito postavitev kanalov za upravljanje toplote ter zmanjšanje tveganja za termični šok.
Sodelovanje s strokovnjaki izkušenih dobaviteljev v tej fazi je neprecenljivo. Na primer, specializirani strokovnjaki za konstrukcijo in izdelavo kalibrov uporabljajo notranje izkušnje za inženiring robustnih orodij že od začetka. Njihova usmerjenost na natančnost in kakovostno kontrolo zagotavlja, da so modeli izdelani za dolgo življenjsko dobo, pri čemer uporabljajo napredne tehnike in znanje o materialih, da zadostijo zahtevnim proizvodnim pogojem, zlasti v panogah, kot je avtomobilska industrija.
Spodaj je kontrolni seznam bistvenih dejavnikov pred začetkom proizvodnje:
- Izbira materiala: Izberite visokokakovostno orodno jeklo (npr. H13), primerno za litinski zlitin in pričakovano količino proizvodnje.
- Postopek toplotnega obdelovanja: Zagotovite, da se kalibr premakne skozi ustrezno kaljenje, popuščanje in odpravljanje napetosti, da doseže optimalno trdoto in žilavost.
- Analiza DFM: Preglejte konstrukcijo dela glede na izdelovalnost, optimizirajte kote izvlečenja, debeline sten in ločilne ploskve, da zmanjšate napetost v kalibru.
- Simulacija tokokroga: Uporabite programske rešitve, kot je Moldflow, za simulacijo toka kovine, določitev potencialnih vročih točk ter optimizacijo položaja vhodov in kanalov.
- Načrtovanje hladilnega sistema: Strategično postavite hladilne kanale, da zagotovite enakomerno porazdelitev temperature in preprečite termično utrujenost.
- Postopek predogrevanja: Ustanovite standardiziran postopek za predogrevanje kalibra na njegovo optimalno obratovalno temperaturo (običajno 180–220 °C), preden začnete proizvodnjo, da preprečite termični šok.
Najboljše prakse med proizvodnjo za ohranjanje zmogljivosti
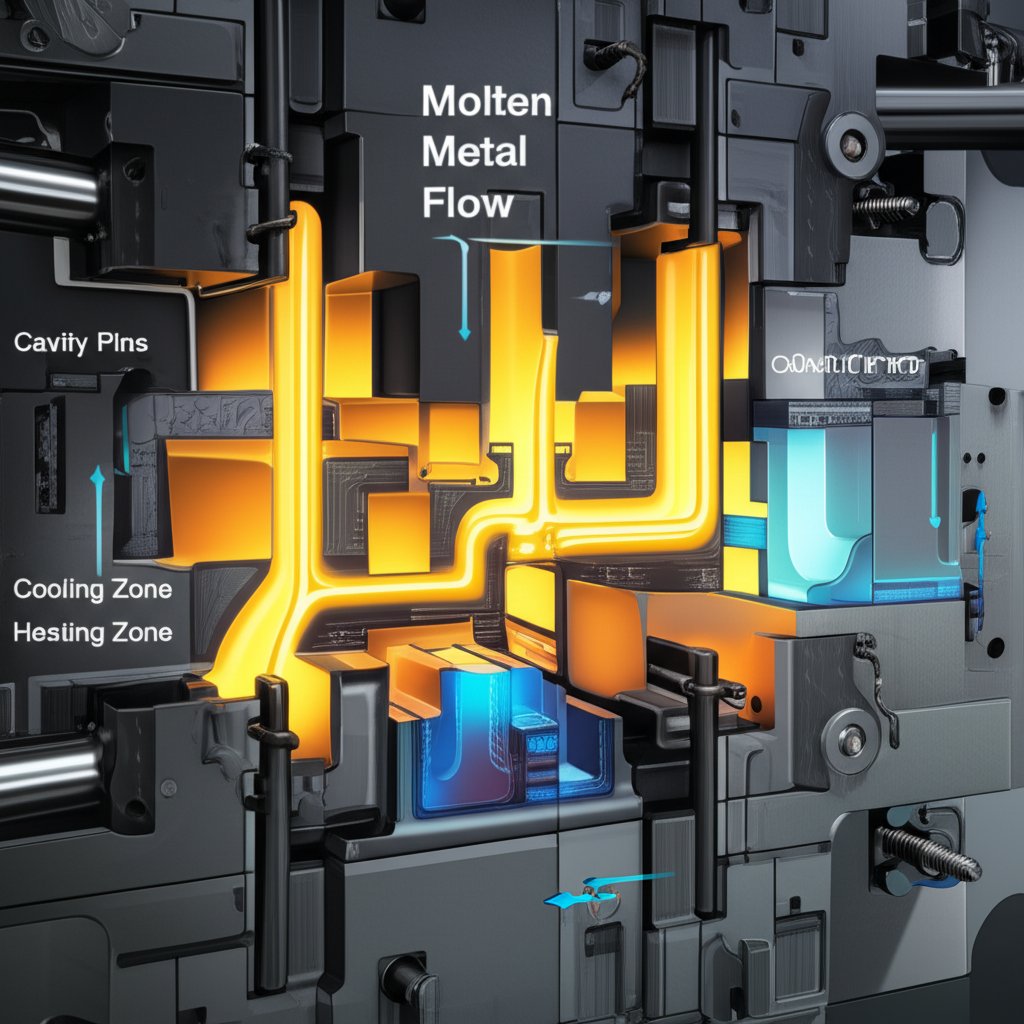
Ko je kalup enkrat v proizvodnji, za ohranjanje njegove učinkovitosti zahteva stalno pozornost in strogo upoštevanje obratovalnih parametrov. Intenzivni tlaki in ekstremne spremembe temperature, ki so značilne za litje pod tlakom, lahko hitro poslabšajo orodje, če tega ne upravljamo ustrezno. Glavni cilj med proizvodnjo je ustvariti stabilen, ponovljiv proces, ki zmanjša obremenitev kalupa in hkrati zagotavlja visoko kakovost izdelkov.
Nadzor temperature je verjetno najpomembnejši dejavnik. Kot pojasnjuje Yuda Casting , ekstremne temperaturne razlike povzročajo toplotno utrujenost, kar je eden glavnih vzrokov okvar kalupov. Kalupe je treba pred uporabo enakomerno segreti in med celotnim proizvodnim ciklusom ohranjati pri stabilni temperaturi. Vzporedno proizvodnjo je bolje uporabljati kot občasne cikle, saj se s tem izognemo ponavljajočemu segrevanju in hlajenju, ki povzročata napetost. Uporaba regulatorja temperature kalupa ali sistema z vročim oljem pomaga ohranjati to stabilnost.
Poleg temperature morajo biti natančno nadzorovani tudi parametri vbrizgavanja. Spremenljive spremembe hitrosti vbrizgavanja ali prevelik tlak lahko povzročijo udarni učinek na model, kar vodi do erozije in mehanskega obraba, zlasti okoli vhodnega odseka. Večstopenjski profil vbrizgavanja – ki se začne s počasno hitrostjo, nato pospeši pri polnjenju in nato ohranja tlak – omogoča bolj enakomeren proces, ki je manj škodljiv za orodje. Prav tako je bistveno pomembna ustrezna mazanje, da se prepreči lepljenje taljenega litja na površine modela, kar olajša izmet delov in zmanjša obrabo na tulah in votlinah.
Operatorji morajo med vsako izmeno slediti strukturiranemu postopku nadzora:
- Preverite temperaturo modela: Uporabite termopare ali infrardeče senzorje, da zagotovite, da je model v predpisanem območju temperature pred in med proizvodnjo.
- Nadzorujte parametre vbrizgavanja: Preverite, ali so hitrost vbrizgavanja, tlak in časi cikla stabilni ter skladni z uveljavljenim postopkovnim listom.
- Preverite nanos maziva: Prepričajte se, da avtomatski sistem za razprševanje pravilno deluje in nanese enakomerno, minimalno količino sredstva za ločevanje na površine votline.
- Preverite znake zgodnjega opozarjanja: Vizualno preglejte litje glede prisotnosti lis, zatikanja ali površinskih napak, ki bi lahko kazale na obrabo ali poškodbo kalupa.
- Poslušajte nenavadne hrupe: Med obratovanjem posvečajte pozornost zvokom stroja in kalupa, saj lahko nenavadni hrupi nakazujejo težave z izrovnimi iglami ali drugimi premičnimi deli.
Postopki čiščenja in shranjevanja po izdelavi
Negovanje kalupa za tlačno litje takoj po končanem proizvodnem ciklu je enako pomembno kot med samim obratovanjem. Vzdrževanje po izdelavi je usmerjeno v preprečevanje korozije, kontaminacije in poškodb med shranjevanjem. Zanemarjanje teh korakov lahko povzroči rjo, jamice in nabiranje ostankov, kar lahko poslabša zmogljivost kalupa ter zahteva draga popravila, preden bo lahko spet uporabljen.
Postopek se začne s temeljito čiščenjem. Takoj po izdelavi je treba odstraniti vse ostanki, maziva in odpadke s površin kalupa, vključno s votlinami, delilnimi ploskvami, prezračevalnimi odprtinami in hlajenjskimi kanali. Glede na Quickparts , je uporaba stisnjenega zraka in primernih netlačnih čistilnih sredstev nujna, da se izognemo poškodbam obdelane površine kalupa. Po čiščenju je nujno zagotoviti popolno suhost kalupa, da se prepreči ujetje vlage, ki lahko povzroči rjo.
Ko je kalup čist in suh, je naslednji korak preprečevanje rje. Na vse jeklene površine je treba nanašati kakovostno protirjeno olje ali aerosol. Za dolgotrajno shranjevanje, CEX Casting priporoča ovijanje plošče v VCI (Vapor Corrosion Inhibitor) folijo, ki ustvari zaščitno mikrookolje in orodje zaščiti pred vlago in oksidacijo. Plošče je treba hraniti na čistem, suhem in temperaturno nadzorovanem mestu, oddaljenem od območij z intenzivnim prometom, kjer bi jih lahko nenamerno poškodovali. Prav tako je pomembno ustrezno označevanje in dokumentiranje stanja plošče za učinkovito upravljanje.
Spodaj je povzetek najboljših praks za shranjevanje plošč:
| Počnite | Ne dela |
|---|---|
| Ploščo temeljito očistite in posušite takoj po uporabi. | Shranite ploščo brez predhodnega čiščenja. |
| Nanesite visoko kakovostno sredstvo proti rji na vse površine. | Pustite ploščo izpostavljeno vlažnemu ali nestabilnemu temperaturnemu okolju. |
| Za dolgoročno shranjevanje ovijte ploščo v VCI folijo. | Nakladajte plošče neposredno eno na drugo brez zaščite. |
| Hranite v določenem, nadzorovanem in suhem okolju. | Postavite težke predmete na ali ob shranjeno ploščo. |
| Označite model s statusom in datumom zadnjega vzdrževanja. | Ne pozabite občasno pregledovati shranjenih modelov na znake korozije. |
Napredno vzdrževanje: tehnike popravila in obnove
Čeprav se uporabljajo najbolj preventivni ukrepi, bodo vsi modeli za litje pod tlakom na koncu vseeno izkazovali znake obrabe. Toplotno razpokanje, erozija in mehansko poškodbe so neizogibne posledice visokoobremenjenega proizvodnega okolja. Napredno vzdrževanje vključuje zgodnje odkrivanje teh poškodb ter uporabo ustrezne tehnike popravila in obnove, da se podaljša življenjska doba orodja in odloži potreba po dragi popolni zamenjavi.
Ko pride do poškodb, je temeljit pregled prvi korak za določitev najboljše postopne rešitve. Vključuje oceno stopnje obrabe, razpok ali erozije na kritičnih področjih, kot so jedra, vratnice in ločilne ploskve. Pri manjših površinskih poškodbah ali obrabi lahko tehnike, kot so brušenje in poliranje, obnovijo površinsko gladkost in dimenzijsko natančnost. Ti postopki odstranijo mikroskopske točke napetosti in lahko preprečijo nadaljnje širjenje majhnih razpok.
Pri večjih poškodbah, kot so globoki razpoki ali hud razjed, je popravilo z varjenjem pogosta rešitev. To pa je zelo specializiran postopek, ki ga je treba pravilno izvesti, da se izognemo dodatni škodi. Kot opažajo strokovna navodila, je bistveno upoštevati ustrezne protokole predgrevanja in postranskega segrevanja med varjenjem, da se prepreči toplotni napetosti in nastanek novih razpok v toplotno vplivni coni. Uporaba pravilnega materiala za varilni dodatek je prav tako bistvena za trajen popravek. Po varjenju je treba popravljeno območje skrbno obrusiti, politi in izravnati, da se prilega prvotnim konturam kalupa. Odločitev med popravkom in zamenjavo pogosto temelji na analizi razmerja med stroški in koristmi, pri čemer se upošteva obseg poškodb in pričakovana preostala življenjska doba orodja, kar poudarjajo Dynacast .
Pri ocenjevanju kalupa za popravek upoštevajte naslednje kriterije:
- Lokacija in resnost poškodbe: Ali je poškodba na kritični, visoko natančni površini ali na manj pomembnem območju? Ali gre za površinsko težavo ali globoki strukturni razpok?
- Starost orodja in skupno število ciklov: Ali se orodje približuje koncu predvidenega življenjskega veka? Velik popravek starega orodja morda ni ekonomsko upravičen.
- Strošek popravila v primerjavi s stroškom zamenjave: Primerjajte ocenjene stroške zanesljivega popravila s cenom novega orodja ali vstavka orodja.
- Vpliv na kakovost izdelka: Ali popravilo omogoča obnovitev orodja v stanje, ki zagotavlja izdelavo kosov v skladu s specifikacijami?
- Razpoložljivost usposobljenih tehnikov: Ali vaša ekipa ali zanesljiv dobavitelj razpolaga s potrebnim znanjem za izvedbo zahtevanega varjenja in dokončne obdelave na visoki ravni?
Pogosta vprašanja
1. Kako pogosto je treba čistiti orodje za litje pod tlakom?
Litje v obližu mora po vsakem proizvodnem teku preiti osnovno čiščenje, da se odstranijo ostanki in delci. Temeljitejše čiščenje in pregled naj bosta načrtovana kot del rednega preventivnega vzdrževanja, pri čemer pogostost izvedbe zavisi od količine proizvodnje, vrste zlitine, ki se lije, in zapletenosti oblike.
2. Kaj je najpogostejši vzrok okvare litje v obližu?
Toplotna utrujenost je eden najpogostejših vzrokov za okvaro kalibrov. Pojavlja se zaradi cikličnega segrevanja in hlajenja kalibrov med postopkom litja, kar vodi do nastanka mikropoklin (pregled toplote), ki se s časom povečujejo in končno povzročijo okvaro kalibra. Ustrezen nadzor temperature je najboljša zaščita pred toplotno utrujenostjo.
3. Ali je mogoče popraviti razpokan kaliber za litje?
Da, mnoge razpoke v litju pod tlakom je mogoče popraviti s posebnimi tehnikami mikro-varjenja. Uspeh popravila je odvisen od lokacije in resnosti razpoke, veščine tehnika ter strogega upoštevanja pravih postopkov predgrevanja in požiganja, da se prepreči nadaljnje napetost v orodni jeklu.