 Mažas partijas, augsti standarti. Mūsu ātra prototipēšanas pakalpojums padara validāciju ātrāku un vieglāku —

Kā jūs krāsojat alumīniju bez nošķelšanās? Sekojiet 9 soļiem
1. solis: Kā krāsot alumīniju?
Īsa atbilde
Lai krāsotu alumīniju bez nošķelšanās, rūpīgi notīriet un nožāvējiet virsmu, nosmērējiet vai iegrieziet vienmērīgu zīmi, noņemiet visu putekļus, uzklājiet grunti, kas paredzēta alumīnijam (piemēram, pašūdeņojošu vai epoksīda grunti), un pabeidziet ar izturīgu virsējo slāni, kas atbilst jūsu projekta videi. Katrs solis ir svarīgs ilglaicīgai saķerei un profesionālam izskatam.
Plānojiet savu projektu
Vai jūs kad domājāt, kāpēc dažas alumīnija krāsošanas darbības ilgst vairākus gadus, bet citas nošķeļas vienā sezonā? Viss ir atkarīgs no pareiza plānošanas un sagatavošanas. Pirms paņemat suku, pašķiriet brīdi, lai izplānotu savu pieeju. Sāciet ar identifikāciju:
- Ko jūs krāsojat: Vai tā ir logu apdare, divriteņa rāmis, automašīnas paneļa daļa vai kuģa korpusa daļa?
- Pašreizējais pārklājums: Vai jūs strādājat ar neapstrādātu alumīniju, anodētu vai kaut ko agrāk nokrāsotu?
- Iedarbības apstākļi: Vai tā atradīsies ārā, saskarsies ar jūras vidi vai tiks izmantota transportlīdzeklī?
Šie atbildes veidos jūsu darba plūsmu un palīzēs izvēlēties labāko veidu, kā krāsot alumīniju atbilstoši jūsu vajadzībām. Katram projektam noteikti skaidru apjomu un laika grafiku – steiga var novest pie izlaistiem soļiem un nošķīdušās krāsas. Pirms sākšanas vienmēr:
- Noteikt projektam apjomu un laika grafiku.
- Izlasīt tehnisko datu lapu (TDS) un drošības datu lapu (SDS) katram izmantotajam produktam.
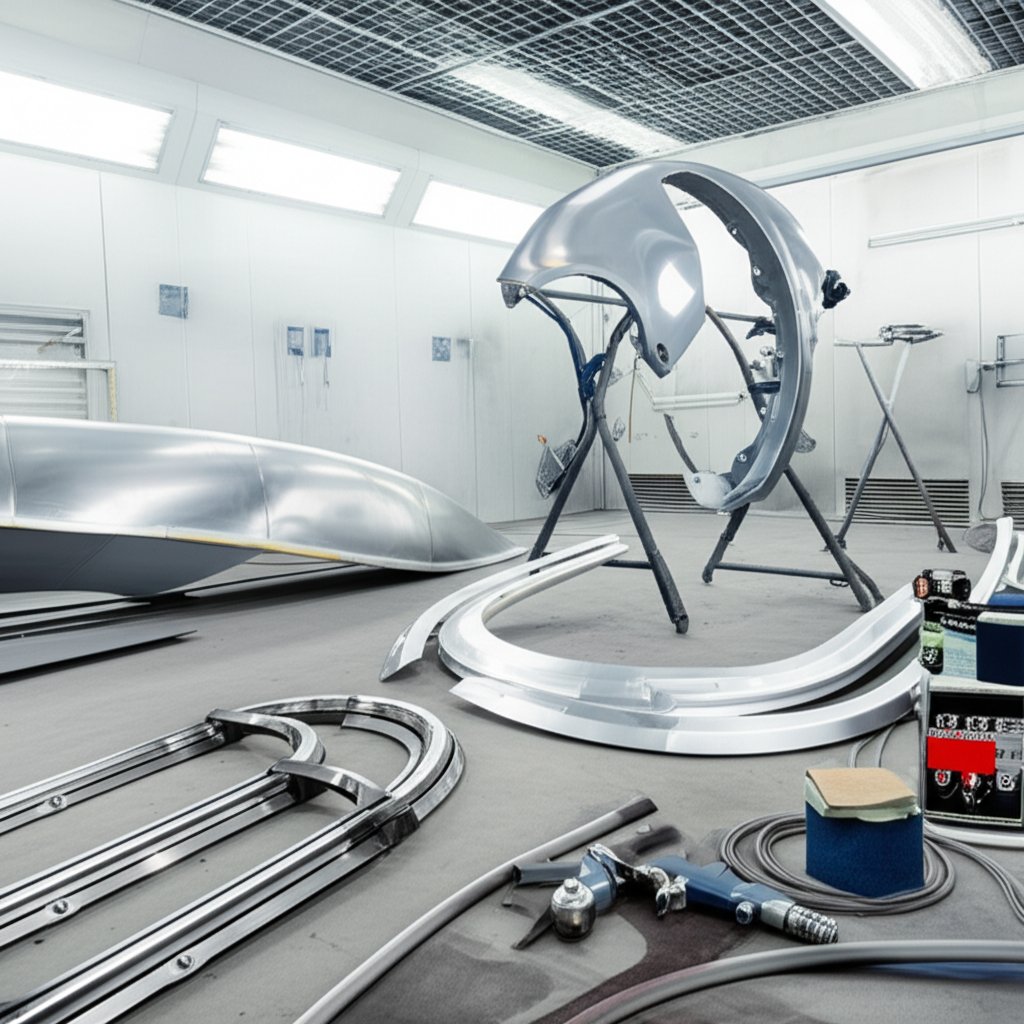
- Iekārtot kontroli pārziņu un labi vēdināmu darba vietu – gaisa cirkulācija ir būtiska drošībai un tīras pārklājuma iegūšanai.
Rīku un materiālu pārbaudes saraksts
Iedomājieties, ka stāvat veikalā pie rīku nodaļas – kas jums patiesībā ir nepieciešams, lai veiksmīgi nokrāsotu alumīniju? Šeit ir pārbaudes saraksts, kas palīzēs jums palikt uz pareizā ceļa:
- Mazgāšanas šķidrums un tīras bezpūkainas drānas
- Abrīvi: apstrādes padzi vai smalkgraudains smilšpapīrs (180–220 grit)
- Maskēšanas lente un papīrs vai plastmasas plēve
- Līmīga drāna pēdējā putekļu noņemšanai
- Alumīnijam piemērots gruntis (pašiezobiens vai epoksīds, atkarībā no jūsu projekta)
- Pārklājuma krāsa: akrila emalja, uretāna krāsa, jūras krāsa vai ārējai lietošanai paredzēts lats (sienām)
- Iedzīvotāju aizsardzības līdzekļi: cimdi, drošības brilles un elšanas aizsargierīce, kas paredzēta organiskiem tvaikiem
Meklējat projektam paredzētu komplektu? Skatiet zemāk piemērus:
- Velosipēda rāmis: berzes paklājiņi, epoksīda gruntis, 2K uretāna pārklājuma krāsa
- Loga apdare: pašiezobena grunts, ārējai lietošanai paredzēta akrila krāsa
- Mašīnas paneļa krāsa: epoksīda gruntis, bāzes krāsas/pārklājošās sistēmas
- Mazu detaļu labojumi: notaukotājs, abrazīvs, alumīnija krāsa sprejs
Pareizo materiālu izvēle ir tikpat svarīga kā sagatavošanas darbi. Labākais veids, kā krāsot alumīniju, vienmēr sākas ar tīru, abradētu virsmu un grunti, kas paredzēta neporainiem metāliem. Vai brīnāties, kādu krāsu izmantot uz alumīnija? Akrila latekss, eļļas bāzes, epoksīds, poliuretāna krāsas visas darbojas – tikai jāsaskaņo virsējā kārta ar eksponēšanas vajadzībām un jāizmanto savietojamu grunti, lai nodrošinātu saķeri. Vai iespējams veiksmīgi krāsot alumīniju? Protams – ja sekojat pārbaudītam plānam un izmantojat pareizos produktus. Nākamajos soļos jūs uzzināsiet tieši to, kā krāsot alumīniju, lai jūsu pārklājs izskatītos lieliski un izvairītos no lupašanās vēl daudzus gadus.
2. solis: Identificējiet savu alumīnija virsmu un pārliecinieties, ka tā ir gatava krāsošanai
Identificējiet savu alumīnija virsmu
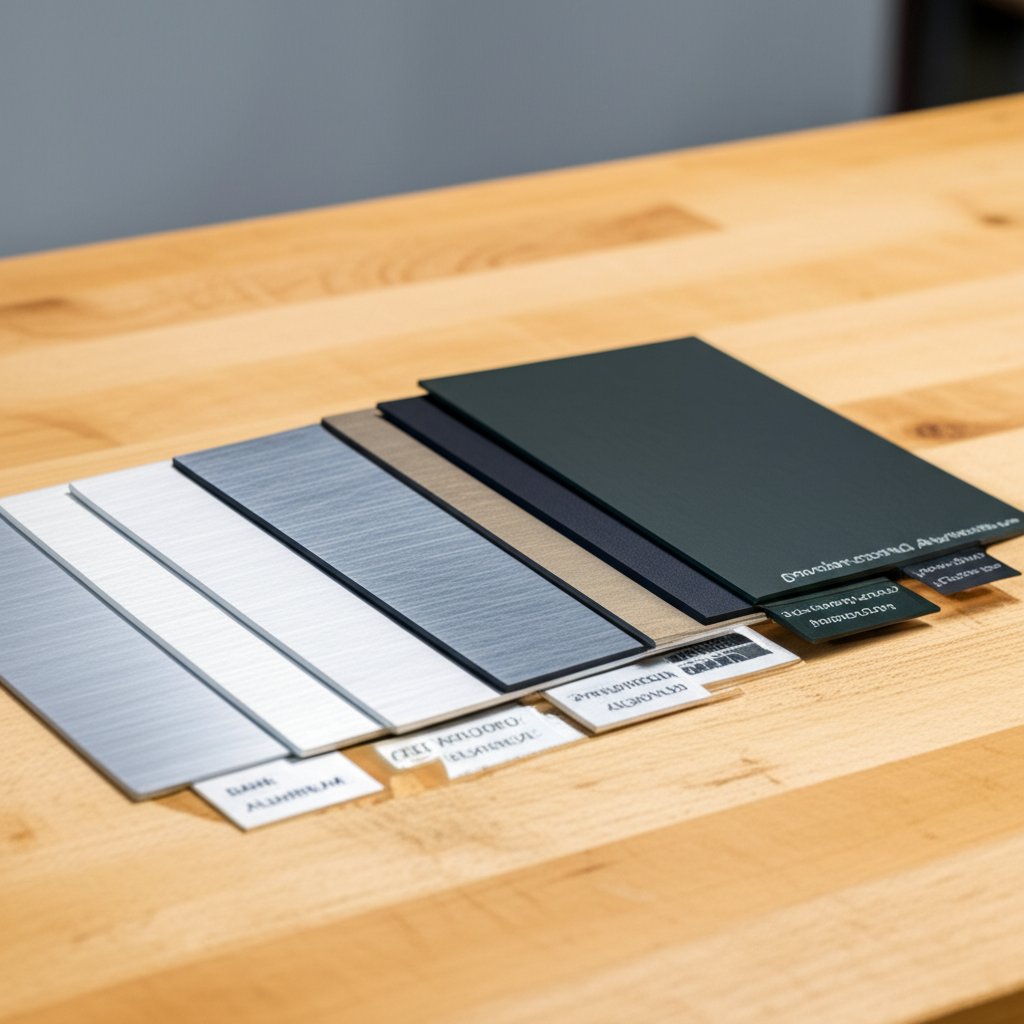
Vai, skatoties uz savu projektu, zināt tieši, kāda veida alumīniju jūs izmantojat? Pirms ķeraties pie detaļām par to, kā krāsot alumīniju, ir svarīgi saprast izvēles punktu. Katram virsmas tipam — neapstrādātam, anodētam, agrāk nokrāsotam, ar pulvera krāsu pārklātam vai deformētam — nepieciešama nedaudz atšķirīga sagatavošanās. Šeit ir īsa salīdzinājuma tabula, kas palīdzēs noteikt, ar ko jūs strādājat, un kādus soļus būs nepieciešams veikt:
| Stāvoklis | Sagatavošanās process | Gruntēšanas izvēle |
|---|---|---|
| Neapstrādāts rūpnīcas apdarei | Notriept → Noņemt oksīdu → Apstrādāt ar smilšpapīru/nodilumu līdz vienmērīgam zīmējumam | Pašiezīmējošs vai epoksīda |
| Anodēta | Nomazgāt/notriept → Pilnībā noņemt spīdumu un nodilumu | Īpaša ķīmiska apstrāde vai epoksīda sistēma (skatīt padomus par anodēta alumīnija krāsošanu zemāk) |
| Agrāk nokrāsots | Nomazgāt → Apstrādāt ar smilšpapīru → Apgruntesēt atsevišķas vietas ar atklātu metālu | Atbilst oriģinālajai sistēmai (parasti epoksīda vai akrila lateksa) |
| Pulverkrāsā pārklāti | Ja neskarts, rūpīgi noslīpēt; ja bojāts, noņemt līdz metālam | Epoksīda vai metālam piemērots gruntis |
| Ievilkts/aizpildīts | Remonts → Noslīpēt gludu → Notīriet un uzklāj grunti | Epoksīda vai aizpildītājam piemērots gruntis |
Pieņemšanas kritēriji: Kad virsma ir gatava?
Izskatās sarežģīti? Tā nav jābūt. Šeit ir redzamie un taustāmie signāli, kurus pirms gruntēšanas vajadzētu izmantot:
- Tīrs vizuāli un taustāmi: Bez eļļas, putekļiem vai miltainas atlikumiem.
- Vienmērīga mehāniska zīme: Virsmām jāizskatās vienmērīgi matētām, nevis spīdīgām.
- Malas izplūdušas: Jūs nejūtat soli, kur vecā krāsa saskaras ar tukšu metālu.
- Sausa un bez putekļiem: Mitruma un putekļi var sabojāt saķeri.
Anodētam alumīnijam virsma ir dabiski cietā un gludā. Tāpēc krāsošanai uz anodēta alumīnija nepieciešama rūpīga matēšana un abrazija – iedomājieties, ka krāsojat stiklu salīdzinājumā ar apstrādātu dēli. Ja jūs brīnāties, vai var krāsot anodētu alumīniju? Atbilde ir jā, bet tikai tad, ja tiek izveidots pietiekams reljefs, lai gruntējums varētu pieķerties.
Izvēlieties pareizo darba plūsmu katram virsmas veidam
Apskatīsim darbību secību katram scenārijam:
- Neapstrādāts alumīnijs: Notīriet, noūdeņradiet, smilšojiet, pēc tam gruntējiet ar pašūdeņrošanas vai epoksīda grunti.
- Anodēts alumīnijs: Notīriet un attaukāt, pēc tam rūpīgi abrazīvi apstrādājiet – neizlaidiet šo soli! Notīriet, pēc tam izmantojiet ēšanas vai epoksīda grunti, kas paredzēta neporainiem metāliem. Tas ir galvenais, kā krāsot anodētu alumīniju, lai tā nenoplēstu.
- Iepriekš krāsots (vesels): Nomazgājiet, nosmilkšojiet, uzklājiet grunti uz visām atklātajām vietām, pēc tam uzklājiet pilnu gruntēšanas kārtu.
- Ar pulverkrāsu pārklāts: Ja pārklājums ir stabils, smilšojiet, lai izveidotu mehānisko saķeri. Ja tas ir bojāts, noņemiet pārklājumu un apstrādājiet kā neapstrādātu alumīniju.
- Iedevisies vai aizpildīts: Pabeidziet remontu, nosmilšojiet gludu, notīriet un uzklājiet grunti pirms vispārējas gruntēšanas.
Diagnostikas padoms: Pēc tam, kad jūsu gruntējums būs sacietējis, veiciet šķērseniskās līmes testu (saskaņā ar ASTM D3359 vai līdzīgām metodēm). Izvelciet nelielu režģi, uzklājiet līmi un strauji norāviet – ja pacēlās kvadrāti, pārskatiet savu virsmas sagatavošanu. Vai nu jūs sagatavojat krāsu alumīnija durvīm vai atjaunojat anodētās logu apdari, pareiza virsmas identifikācija un sagatavošana dara visu atšķirību. Pavadiet šeit laiku, un jūs nodrošināsiet ilgstošu pabeigšanu. Tālāk jūs redzēsiet tieši, kā notīrīt un noārdīt alumīniju, lai nodrošinātu labāko iespējamo krāsu pielīmēšanu.
3. solis: Alumīnija tīrīšana un deoksidēšana
Vispirms attaukot: eļļu un netīrumu noņemšana
Iemācoties, kā sagatavot alumīniju krāsošanai, pirmais, ko jārisina, ir virsmas piesārņojums. Iedomājieties, ka mēģināt pielīmēt līmi uz eļļainas pannas – tā vienkārši nenoturēsies. Tas pats attiecas uz krāsu uz alumīnija. Eļļas no jūsu rokām, vecās smērvielas vai pat gaisā esošie netīrumi var visi sabotēt pielīmēšanu. Šeit ir veids, kā rūpīgi notīrīt alumīniju:
- Notriept: Izmantojiet speciālu alumīnija tīrītāju, vieglu mazgāšanas līdzekli vai uz virsmaktīvo vielu bāzētu tauku noņēmēju. Strādājiet ar divu drānu metodi – vienu mitru, lai uznestu tīrītāju, un vienu sausu, lai noslauktu atlikumus. Atkārtojiet, kamēr drānas pēc slaucīšanas paliek tīras.
- Pliķis: Ja tīrītājs to prasa, virsmu rūpīgi noskalojiet ar tīru ūdeni. Atlikušais ziepju vai tīrītāja daudzums var ietekmēt krāsas pielīmēšanos.
Droši noārdiet oksīda slāni: noņemiet neredzamo barjeru
Pat pēc tīrīšanas alumīnijā gandrīz uzreiz pēc saskares ar gaisu veidojas plāns oksīda slānis. Šī neredzamā plēve ir galvenais iemesls, kāpēc krāsa no alumīnija lūžņojas. Risinājums? Veiciet deoksidēšanu pirms gruntēšanas.
- Deoksidēšana: Izmantojiet speciāli paredzētu metāla sagatavošanas līdzekli, vieglu skābes mazgāšanu (piemēram, vienādās daļās etiķi un ūdeni), vai komerciāli pieejamu deoksidētāju, kas piemērots jūsu lietojumam. Uzmanīgi notīriet virsmu, īpaši oksidētās vietās. Rūpnieciskiem vai stipri oksidētiem komponentiem efektīvi un videi drošāki nekā hromskābe ir azotskābes bāzēti deoksidētāji ( Pabeigšana un pārklāšana ).
- Neitralizēt un nosusināt: Lai neitralizētu, sekojiet produkta instrukcijām—daži skābes tīrītāji prasa rūpīgu noskalošanu vai neitralizējošu šķīdumu. Virsmu nosusiniet līdz pilnībā sausai ar tīru, bezpūkainu dvieļa vai ļaujiet tai nožūt gaisā.
- Pēdējā tīrīšana ar līmējošu drānu: Tieši pirms smilšošanas vai gruntēšanas izmantojiet līmējošu drānu, lai noņemtu visu atlikušo putekļu vai pūku. Šis solis samazina atkārtotas oksidācijas risku pirms nākamā posma.
Vides un iznīcināšanas piezīmes
- Cimdi: Aizsargājiet ādu no tīrītājiem un skābēm.
- Acu aizsardzība: Drošības brilles ir obligātas, strādājot ar ķīmiskām vielām.
- Elpošanas aizsardzība: Ja strādājat ar šķīdinātājiem vai stiprām skābēm, izmantojiet respiratoru, kas paredzēts organisko tvaiku filtrēšanai.
- Ventilācija: Vienmēr strādājiet labi vēdināmā vietā, lai izvairītos no tvaiku ieelpošanas.
Padoms par iznīcināšanu: Sakrājiet visus izmantotos šķīdinātājus, drānas un skābes atlikumus apstiprinātās tvertnēs. Izmetiet tos saskaņā ar vietējiem bīstamo atkritumu noteikumiem. Nekad nemetiet skābes vai tīrīšanas līdzekļus kanalizācijā.
Profesionāls padoms: Neskariet notīrītās un noārdītās virsmas ar tukšām rokām. Tauki no jūsu ādas var atcelt visu jūsu rūpīgo sagatavošanos. Sagatavojot alumīniju krāsošanai, izmantojiet tīras cimdiņas.
Vizua pārbaude: Ūdens pārtraukšanas tests
Kā jūs zināt, ka jūsu virsma patiešām ir tīra? Izprobat ūdens pārtraukšanas testu: pēc tīrīšanas uzlejiet nedaudz ūdens uz alumīnija. Ja ūdens vienmērīgi notek, viss ir kārtībā. Ja ūdens veido ripiņas, atkārtojiet atžavelošanas procesu — šis ir svarīgs solis, kā sagatavot alumīniju krāsošanai. Neaizmirstiet, ka tīrīšana un dezoksidēšana ir svarīga ne tikai estētikas dēļ. Tā ir kritiski svarīga pirmā darbība, kā sagatavot un krāsot alumīniju, lai jūsu pārklājums būtu ilgi izturīgs. Kad virsma ir bez traipiem un brīva no oksīdiem, jūs esat gatavi nākamajam posmam: šķērēšanai un virsmas strukturēšanai.
4. solis: Abrāzija un virsmas strukturēšana
Izvēlieties abrāzijas metodi
Attiecībā uz alumīnija krāsošanas sagatavošanu, atšķirība starp pārklāju, kas lūžņojas, un pārklāju, kas ilgst gadiem, bieži vien ir atkarīga no tā, kā jūs apstrādājat virsmu. Iedomājieties, ka mēģināt krāsot uz stikla plāksnes — gluds alumīnijs ir tikpat sarežģīts. Galvenais ir izveidot smalku, vienmērīgu svītru rakstu, lai gruntējums varētu droši pieķerties. Neesat pārliecināts, kur sākt? Šeit ir, kā sagatavot alumīniju krāsošanai atkarībā no jūsu projekta:
- Priekš esošās krāsas: Izmantojiet neaustas mazgāšanas plāksnes vai smalku smilšpapīru (180–220 grit), lai novājinātu spīdumu. Jūs pamanīsiet, ka virsma no spīdīgas kļūst vienmērīgi matēta — tas ir jūsu mērķis. Neberziet cauri līdz neapstrādātam metālam, ja tas nav nepieciešams.
- Priekš neapstrādāta alumīnija: Berziet ar 120–220 grit smilšpapīru vai maruna krāsošanas plāksni. Veiciet pārklājošās berzes, vienmērīgi un uzmanīgi pieliekot spiedienu. Jūsu mērķis ir vienmērīgs, smalks svītru raksts — izvairieties no dziļiem iegriezumiem vai vijīgām svītrām, kas var izpausties caur pārklāju ( Divu dienu krāsošana ).
- Priekš grūti sasniedzamām vietām: Izmantojiet smirgļa sūkļus vai elastīgus berzes padi. Tie pielāgojas malām un līkumiem, kas padara alumīnija virsmas sagatavošanu krāsošanai vieglāku sarežģītām formām.
Pāreja un Vienmērīgums: Svarīgākie sīkumi
Vai jūs kādreiz pārvilka pirkstu pār lāpām un sajutāt pārejas vietu, kur vecā krāsa saskaras ar tīru metālu? Tā ir vieta, kur krāsa var atdalīties. Noslīpējiet visas malas, līdz nejūtat nekādu izcilni. Alumīnija virsmas sagatavošanai krāsošanai tas nozīmē, ka pārejas jāveic gludi — īpaši apgabalos pēc remonta vai iepriekšējas krāsošanas. Alumīnija sagatavošanas kritēriji krāsošanai:
- Nav spīdīgu plankumu — viss jābūt vienmērīgi matētam.
- Nav atdalījusies krāsa vai raupjas malas — slīpējiet, līdz virsma kļūst gluda.
- Nav redzamu piesārņotāju — putekļi, atkritumi vai eļļas jānoņem.
Strādājot ar stūriem un malām, samaziniet slīpēšanas spiedienu, lai izvairītos no pārkaršanas. Ja tomēr atklājat tīru metālu, vienkārši atkārtoti noslīpējiet pāreju un notīriet pirms turpināt darbu.
Putekļu kontrole: Uzturiet virsmu tīru
Pēc smilšošanas jūs ievērosiet plānu putekļu slāni—tas jānoņem pirms gruntēšanas. Šeit ir ātra rutīna putekļu kontrolei:
- Noņemiet putekļus ar tīru, sausu kompresētu gaisu (ja iespējams).
- Notīriet ar līmētu drānu tieši pirms gruntētāja uzklāšanas.
- Aizklājiet blakus esošās zonas, lai novērstu putekļu uzkrāšanos uz jūsu darba.
Ja smilšojat iekštelpās, putekļu sūcēji ir lieliska iespēja, kā saglabāt darbvirsmu tīru un samazināt gaisā esošos putekļus. Jebkādi aizmirstie putekļi var sabojāt adhēziju, kuru jūs esat tik smagi strādājis, lai izveidotu.
| Abrāzijas opcija | Pareizākais risinājums |
|---|---|
| Zīmītes (sarkani brūnas) | Reljefi, grūti sasniedzamas vietas, viegla zīmīšana |
| Smilšpapīrs ar smalku graudu (180–220 grit) | Plaknes, plašas virsmas, spīduma noņemšana |
| Slīpēšanas sūklis | Malas, stūri, izliekti profili |
Padoms: Pēc abrazijas alumīnijs ātri oksidējas. Ja jūs sagatavojat alumīniju krāsošanai, bet nevarat uzreiz uzklāt grunti, plānojiet pirms gruntēšanas atkārtoti notīrīt un noslaukīt. Šis solis ir kritiski svarīgs, lai nodrošinātu alumīnija pareizu sagatavošanu krāsošanai un ilgstošu saķeri ( Endura Paint ).
Izveidojot vienmērīgu mehānisko profilu un kontrolējot putekļus, jūs nodrošināt bezvainīgu un ilgstošu krāsojumu. Tālāk jūs uzzināsiet, kā visu savu smago darbu nostiprināt ar pareizo gruntēšanas sistēmu.
5. solis: Alumīnija gruntēšana, lai nodrošinātu ilgstošu saķeri un bezvainīgu pabeigšanu
Izvēlieties pareizo alumīnija grunti
Vai jūs kādreiz esat brīnījies, kāpēc krāsa dažreiz no alumīnija noplēšas, pat pēc rūpīgas tīrīšanas un slīpēšanas? Atbilde bieži slēpjas gruntī, kuru izmantojat. Alumīnija dabiski slidenā un oksīda veidošanās pakļautā virsma prasa speciālu grunts, lai nodrošinātu saķeri. Tātad, kāda ir labākā krāsa alumīnijam? Apskatīsim galvenās iespējas:
| Grunts tips | Galvenās īpašības | Ļaunākās izmantošanas gadījumi |
|---|---|---|
| Pašēcošā grunts | - Ķīmiski saistās ar tīru, nozāģētu alumīniju - Izveido stipru bāzi virsējai krāsai - Bieži zaļš vai pelēks |
- Atkailināti alumīnija komponenti - Automobiļi, divriteņi, logu apdare - Kad nepieciešams ātrs izžūšana |
| Epoksidbase | - Izcila līme un korozijizturība - Noturīgs pret mitrumu un ķīmiskām vielām - Var tikt izmantots zem visām virsējām krāsām |
- Jūras, automobiļu, āra projektu izmantošana - Pārremontētiem vai aizpildītiem laukumiem - Kur maksimālā izturība ir kritiska |
| Mazgājuma gruntis | - Specializēts rūpnieciskai/aviācijas lietošanai - Prasa stingru sistēmas savietojamību |
- Rūpnīcas vai OEM lietojumprogrammām - Kad to norāda ražotājs |
Kāpēc gan neizmantot vienkārši vecu grunti alumīnijam? Standarta gruntis bieži nespēj cieši saistīties ar neporainiem metāliem, izraisot lūžņus un nošķelšanos. Tāpēc jums nepieciešama alumīnija gruntij paredzēta krāsa, kas ir speciāli izstrādāta šim nolūkam.
Uzklājiet kontrolētās, vienmērīgās kārtās
Gatavs gruntēt? Šeit ir veids, kā iegūt labāko rezultātu:
- Maisiet līdz pat pilnīgai viendabīgai masai: Labi iekrataiet vai samaisiet savu alumīnija grunti. Ja pulverējat, izfiltrējiet, lai noņemtu pikas.
- Viegli, vienmērīgi slāņi: Nanāciet plānos slāņos – biezi slāņi var plūst vai iestrēdzināt šķīdinātājus. Sekojiet lūžņiem, šuvēm un uzgriežņiem, kuri bieži tiek aizmirsti.
- Ievērojiet sausināšanas laiku: Ievērojiet tehnisko datu lapu (TDS) attiecībā uz žāvēšanu starp slāņiem. Šo soli steidzinot, var rasties burbuli vai sliktāka saķere.
- Pilna pārklāšana: Pārliecinieties, ka visa apstrādātā zona ir pārklāta, īpaši stūri un remontētās vietas.
Ja izmantojat populāru iespēju, piemēram, Rust-Oleum alumīnija grunts, vienmēr pārbaudiet etiķeti attiecībā uz alumīnija saderību un sekojiet ražotāja lietošanas padomiem.
Saķeres pārbaude pēc sacietēšanas
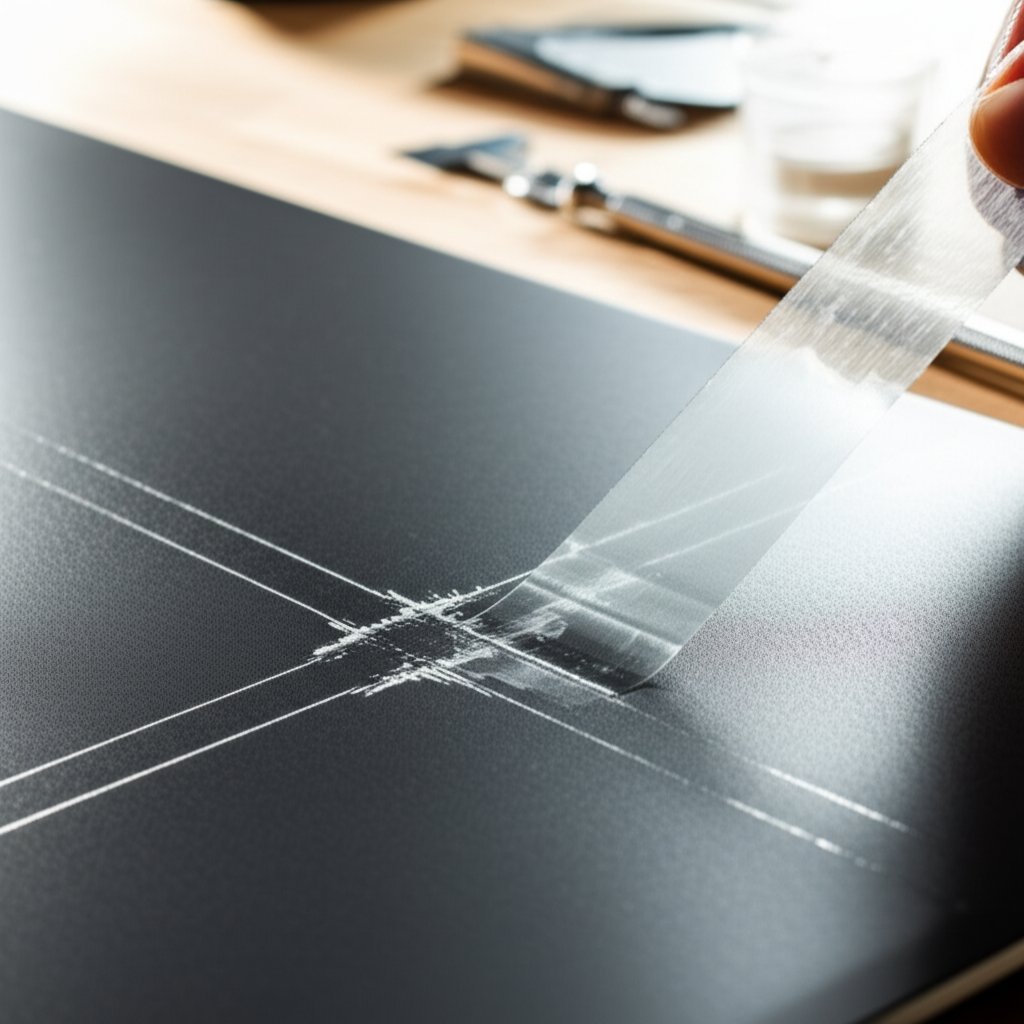
Kā zināt, ka gruntis patiešām ir uzlīmusi? Pirms pārejas uz krāsas slāņiem, pārbaudiet saķeri, izmantojot vienkāršu krustveida līmlentes testu (sīkāk skat. ASTM D3359):
- Pēc tam, kad gruntis ir pilnībā nožuvusi, izmantojiet asu nazi, lai uzklātu nelielu režģa rakstu caur pārklājumu līdz tīram metālam.
- Uzspiediet stipru līmlenti pār režģi un strauji norāviet to.
- Pārbaudiet: ja kvadrāti paliek savā vietā, jūsu alumīnija grunts ir gatava krāsošanai. Ja kāda grunts norāpjas, pārskatiet tīrīšanas un abrazīvās darbības.
Šis ātrās pārbaudes tests var ietaupīt stundām ilgas nepatikšanas nākotnē. Tā ir standarta prakse profesionālā krāsošanā un nodrošina, ka jūsu alumīnija grunts un krāsas sistēma kalpos ilgi ( DeFelsko ).
Piezīme: Neļaujiet maisīt sistēmas (piemēram, uzklāt pašattīrošu grunti uz svaiga epoksīda), ja vien TDS īpaši nerunā, ka tas ir droši. Nesaderīgu produktu maisīšana ir izplatīta iemesla, kāpēc krāsa atsāk darbu agrāk laikā.
Gruntēšana ir galvenais solis, kas nostiprina visu iepriekš sagatavo darbu. Ar pareizo alumīnija grunti, ko uzklāj rūpīgi un vienmērīgi, jūs nodrošināt virsējā slāņa izturību pret lūžņiem un izturību pret reālām lietošanas situācijām. Tālāk izvēlēties un uzklāt perfekto pabeigšanas slāni savam projektam.
6. solis: Virsējā slāņa izvēle un uzklāšana
Izvēlieties pareizo virsējā slāņa krāsu savam projektam
Kad sasniedzat krāsošanas stadiju, izvēlētā pabeigšanas krāsa rada vislielāko atšķirību. Vai jūs kādreiz brīnījāties, kāpēc daži alumīnija krāsojumi izskatās svaigi gadiem ilgi, bet citi noveco vai lūžņojas? Viss ir atkarīgs no tā, vai virsējais slānis atbilst darba prasībām un vai to uzklāj ar rūpēm. Labākā krāsa alumīnijam nav vienota visām situācijām – tā ir atkarīga no tā, kur un kā tiks izmantots jūsu projekts. Apskatīsim sīkāk pēc pielietojuma:
- Ārējās apdare vai sienas apšuvums: Izvēlieties augstas kvalitātes ārējo akrila lateksu. Tas ir elastīgs, izturīgs pret UV starojumu un labi saķeras ar gruntētu alumīniju. Šī ir vispiemērotākā krāsa alumīnija apšuvumam un logu apdarei.
- Automobiļu paneļi un riteņi: Uzklājiet 2K poliuretāna vai automobiļu klases akrilāta emalju uz epoksīda gruntēm. Šādas sistēmas nodrošina izturīgu, spīdīgu pārklājumu, kas izturīgs pret nobružojumiem un izbalēšanu.
- Jūras kuģu korpusi vai armatūra: Krāsa alumīnija laivai vai piestātnes armatūrai izvēlieties specializētu alumīnija jūras krāsu. Šādi pārklāji ir izstrādāti, lai izturētu sāli, berzi un pastāvīgu mitrumu – svarīgi ilgtermiņa darbībai uz ūdens.
- Mazie komponenti un armatūra: Alumīnija aerosola krāsa, kas paredzēta metālam, var būt ātra un efektīva risinājuma grilēm, kronšteinām vai armatūrai. Meklējiet produktus ar iebūvētu grunti, lai nodrošinātu labāko saķeri.
Ko jāņem vērā, izvēloties virskrāsu? Īsa atlases pārbaudes saraksts:
- Iedarbība: Vai tai būs jāiztur UV, sāls vai berze?
- Vēlamā spīdīgums: Spīdīgs, daļēji spīdīgs vai matēts?
- VOC ierobežojumi: Vai ir vides vai telpu gaisa kvalitātes prasības?
- Nanāšanas metode: Ar suku, rulli vai smidzināšanu?
- Pārklājuma laiks: Cik ātri jums būs nepieciešams uzklāt papildu slāņus?
Ar suku, rulli vai smidzināšanu: efektīvas nanāšanas tehnikas
Iedomājieties, ka jūs krāsojat lielu terases durvju konstrukciju salīdzinājumā ar loga režģu komplektu. Pareizs rīks ir svarīgs! Tā šeit var iegūt labāko rezultātu, izmantojot katru metodi:
- Kārtojot ar suku: Mazām apdarei vai detaļu darbiem izmantojiet kvalitatīvu sintētisko suku. Lai mazinātu sukas pēdas, viegli noņemiet krāsu. Akrila lateksa un eļļas bāzes alumīnija krāsa abas labi uzklājamas ar suku, ja darbs tiek veikts uzmanīgi.
- Velošana: Lielām, plakaniem virsmām—piemēram, sienām vai durvīm—izmantojiet putu vai īsās vilnas rullīti. Tas palīdz nodrošināt gludu pabeigšanu ar minimālu struktūru. Rullīti pārvietojiet „W” veidā, pēc tam pārvilciet atpakaļ vienmērīgai pārklāšanai. Ārējai izmantošanai paredzēta alumīnija krāsa ir ideāla šim nolūkam.
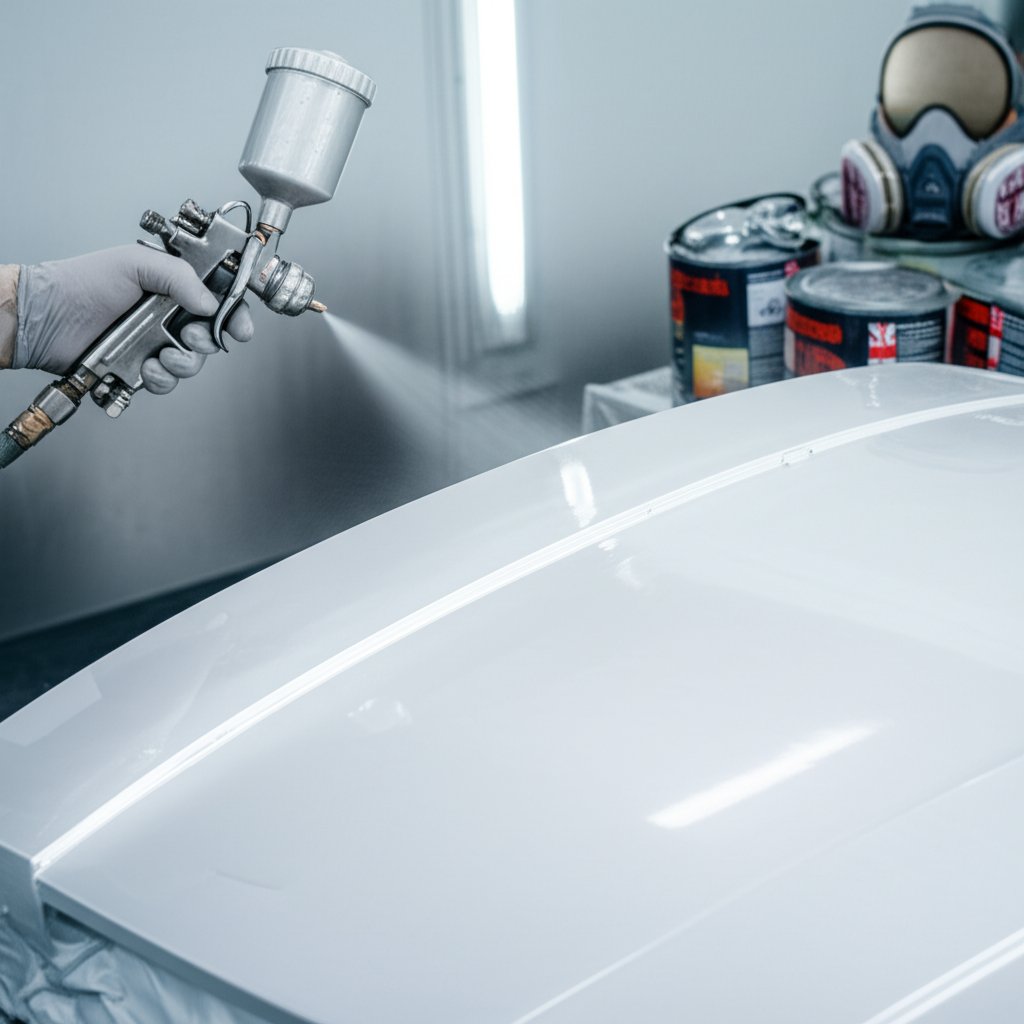
- Spraust: Kad vēlaties bezvainīgu, stikla pabeigšanu (piemēram, automašīnai vai laivai), vislabākā izvēle ir krāsas smidzināšana. Pārklājiet apmēram 50% no iepriekšējās līnijas un turiet stabilu roku. Viensmēr izmantojiet plānas, vienmērīgas kārtas—biezas kārtas var noritēt vai veidot burbulīšus. Alumīnija jūras krāsu un automobiļu poliuretāna krāsas parasti smidzina, lai sasniegtu labākos rezultātus.
Pareizi veidojiet pārklājumu: ilgstošu rezultātu noslēpums
Izrādiet pacietību, krāsojot alumīniju. Vai brīnāties, cik daudz krāsas kārtu patiesībā nepieciešams? Parasti divas līdz trīs plānas virskrāsas kārtas ir ideālas. Iemesls ir sekojošs:
- Plānas kārtas izžūst vienmērīgāk un tām mazāk iespējams notecēt vai satecēt.
- Katra kārta labāk saistās ar iepriekšējo, izveidojot izturīgāku un elastīgāku pabeigšanu.
- Pilnīga pārklāšana ar vairākām kārtām novērš vājās vietas, kas var izraisīt nošķelšanos.
Starpsi slāņiem ļaujiet krāsai nožūt saskaņā ar ražotāja norādījumiem – akcilatēm tas var būt dažas stundas, bet eļļas bāzes formulām pat līdz 24 stundām. Neuztraucieties: pareizs starpīgs žūšanas laiks un izžūšana ir svarīgi izturībai. Jūras vai automobiļu projektu gadījumā vienmēr pārbaudiet Tehnisko datu lapu (TDS), lai iegūtu precīzas informācijas par pārklāšanas logiem un izžūšanas laiku.
Profesionāls padoms: Lai iegūtu labāko krāsu alumīnijspundim vai apdari, pārdomājiet iespēju pēc krāsas slāņiem pievienot caurspīdīgu pārklājumu. Papildu slānis palielina UV un nodiluma izturību, palīdzot jūsu pārklājumam izturēt saules un sāļa iedarbību.
Jāņem vērā specifiski gadījumi:
- Mazs hardware un režģi: Aerosola krāsa alumīnijam var nodrošināt ātru, vienmērīgu rezultātu – tikai rūpīgi aizklājiet un uzklājiet vairākus vieglus slāņus.
- Lielas, plakani paneļi: Rullīša izmantošana un pēc tam viegla suku apstrāde (pārklājot ar rullīti uzklāto krāsu) nodrošina profesionālu izskatu bez nepieciešamības izmantot aerosola aprīkojumu.
Atcerieties, ka labākais veids, kā krāsot alumīniju, ir koncentrēties uz virsmas sagatavošanu, izmantot pareizo grunti un uzklāt izvēlēto virskārtu plānās, vienmērīgās kārtās. Vai nu jūs risināt krāsošanu uz alumīnija apšuvuma vai meklējat labāko krāsu alumīnija laivu projektu vajadzībām, šīs tehnikas palīdzēs panākt lielisku un ilgstošu rezultātu. Tālāk jūs uzzināsiet, kā pilnveidot smidzināšanas tehniku, lai sasniegtu patiešām profesionālus rezultātus.
7. solis: Alumīnija smidzināšanas meistarība
Iestatījums un testa smidzināšana: Veidojot pamatu panākumiem
Kad esat gatavs pārveidot savu projektu, izmantojot alumīnija smidzināšanu, precizitāte iestatījumos ir viss. Vai esat redzējis nevienmērīgu pārklājumu vai negaidītas pilienus? Tas bieži ir atkarīgs no sākotnējiem uzstādījumiem. Šeit ir, kā sākt pareizi:
- Pārbaudiet ventilatora modeli un šķidruma plūsmu uz maskēšanas papīra vai kartona gabala. Regulējiet savu krāsas pistoli, kamēr redzat vienmērīgu ovālu – bez smagām malām vai sausām vietām. Šis vienkāršais solis palīdz novērst svītras un plankumainību ( Labākā krāsošana ).
- Noturiet vienādu attālumu —parasti 10–12 collas no virsmas—un turiet pistoli perpendikulāri. Tas nodrošina vienmērīgu pārklājumu un samazina pārblīvējumu vai plānu vietu risku.
- Pārklājiet katru nākamo līniju apmēram par pusi no zāģa platumā. Šī metode palīdz izvairīties no svītrām un nodrošina vienmērīgu pārklājumu, kas ir nepieciešams profesionālam izskatam, kad krāsojat alumīniju.
- Sāciet kustēties pirms krāsas izsmidzināšanas un atbrīvojiet krāsas pogu pirms apstāšanās. Tas novērš pārblīvējumus vai ieliekumus katras līnijas sākumā un beigās.
- Sarežģītiem formām vai malām izmantojiet krustenisku krāsošanu—krāsojiet vienā virzienā, pēc tam veiciet vieglu pārklāšanu 90 grādu leņķī. Tā tiek pārklāti stūri un nodrošināta vienmērīga pārklājuma visās vietās.
Tehnika, kas novērš defektus: izvairieties no tipiskām kļūdām
Iedomājieties, ka pabeidzāt darbu, bet pamanāt apelsīnu miziņu vai zivs acis. Zināšana par to, uz ko jāpievērš uzmanība, rada lielu atšķirību. Šeit ir īsa saraksta ar biežāk sastopamām problēmām un to novēršanas veidiem, izmantojot alumīnija krāsu aerosolā:
- Apelsīna miza: Parasti izraisīta ar pārāk mazu reduktora daudzumu, sliktu atomizāciju vai pārāk biezu slāņu uzklāšanu. Regulējiet savu pistoli un uzklājiet vieglākus slāņus.
- Zivs acis: Šīs mazās krāterveida vietas rodas no virsmas piesārņojuma – nekavējoties apstādiet darbu, rūpīgi notīriet un sāciet no jauna. Pat nospiedums ar pirkstu var izraisīt šādu efektu.
- Tekošana vai sagšana: Bieži vien rodas pārāk liela materiāla daudzuma vai pārāk lēnas kustības dēļ. Ja pamanāt šādas vietas, ļaujiet šai vietai sacietēt, nosmērējiet gludi un uzklājiet jaunu krāsu.
Arī aprīkojuma uzstādījumi ir svarīgi. Vienuvienmēr izmantojiet tādu sprauslu un spiediena iestatījumus, kas ieteikti Tehniskajā datu lapā (TDS) jūsu alumīnija virsmu krāsai. HVLP (augsta tilpuma, zema spiediena) krāsošanas pistoles ir iecienītas to kontroles un efektivitātes dēļ, īpaši lielām, plakaniem panelēm vai apšuvumam.
Drošība un tīrīšana: Jūsu un jūsu darba aizsardzība
Alumīnija virsmu krāsošana var būt gluda un efektīva procedūra – bet tikai tad, ja vispirms prioritāte ir drošībai. Vienuvienmēr valkājiet:
- Elpošanas aizsarglīdzekli, kas paredzēts krāsu izgarojumiem
- Drošības brilles
- Cimdi un aizsargapģērbs
Strādājiet labi vēdināmā vietā vai iespējams ārā. Pēc krāsošanas, rūpīgi iztīriet smidzinātāju, traukus un visus šķīdinātāja konteinerus ar ieteikto šķīdinātāju. Pareiza tīrīšana novērš iekārtu aizsprostošanos un nodrošina, ka nākamais projekts būs bez problēmām.
Profesionāls padoms: Vislabākie rezultāti rodas no rūpīgas sagatavošanās, stabila tehniskā paņēmiena un tīras vides. Paņemiet laiku, un Jūs pamanīsiet, ka alumīnija smidzinātās krāsas pārklājums izskatās gluds un vienmērīgs – tieši tāpat kā profesionāļiem.
Tagad, kad esat apguvis alumīnija smidzināšanas tehniku, Jūs esat gatavi svarīgajam solim –pārbaudīt darbu un novērst problēmas, pirms projektu uzskatīt par pabeigtu.
8. solis: Cietināšanas pārbaude un problēmu novēršana
Līmīguma pārbaude: Vai krāsa pielīmēsies alumīnijam?
Vai jūs jebkad pabeidzāt projektu un uztraucāties: "Vai krāsa ilgstoši turēsies uz alumīnija?" Tieši šeit vienkāršs saistīšanās tests sniedz mieru. Kad jūsu gruntējums vai virsējais slānis ir sacietējis saskaņā ar Tehnisko datu lapu (TDS), veiciet režģa līmlentes testu — metodi, kuru atzīst ASTM D3359 standarti ( Dabiskie pigmenti ). Tā šeit pārbaudīt savu darbu:
- Iezīmējiet nelielu režģi: Izmantojiet asu nažu, lai izgrieztu režģa rakstu (apmēram 1 mm attālumā) cauri pārklājumam līdz alumīnijam.
- Uzklājiet augstas saķeres līmlenti: Uzspiediet stipru līmlenti cieši pār režģi.
- Ātri noņemiet: Norauciet līmlenti ātri 180° leņķī.
- Pārbaudiet: Minimāla vai nav vispār krāsas noņemšana nozīmē, ka jūsu krāsa ir labi saķērusies. Ja pārklājuma kvadrāti pacēlās, pārskatiet tīrīšanas, abrazīvo vai gruntēšanas darbus, pirms turpināt.
Šis ātrās pārbaudes palīdz nodrošināt, lai jūsu pārklājums laika gaitā izturētu nošķelšanos, plaisāšanu vai atslāņošanos – obligāti jebkurā alumīnija krāsas noņemšanas projektā vai tad, kad vēlaties izvairīties no krāsas noņemšanas alumīnija virsmām vēlāk.
Defektu diagnostika: izplatītu problēmu atklāšana un novēršana
Iedomājieties, ka pēc krāsošanas pamanāt defektu – ko tagad? Agrīna diagnostika jūs pasargās no lielākiem remontiem nākotnē. Šeit ir īss pārskats par izplatītām krāsošanas problēmām un to novēršanas veidiem:
- Nošķelšanās malās: Parasti izraisīta ar nepietiekamu izlīdzināšanu vai nepietiekamu virsmas sagatavošanu. Risinājums: nosmērējiet bojāto vietu līdz gludai pārejai, rūpīgi notīriet un pirms pārkrāsošanas atkārtoti gruntējiet.
- Pūslis (burbuļi): Bieži vien tāpēc, ka mitrumā vai šķīdinātājā zem krāsas. Ļaujiet apgabalam pilnībā nožūt, nosmērējiet gludi un pārklājiet atkārtoti. Uzlabojiet gaisa cirkulāciju un ievērojiet ieteiktos žāvēšanas laikus, lai novērstu atkārtošanos.
- Zivs acis (krāterveida plankumi): Tās norāda uz kontamināciju - iespējams, no eļļas vai silikona. Smagos gadījumos noņemiet krāsu no alumīnija skartajā apgabalā, rūpīgi notīriet, pēc tam atkārtoti gruntējiet un krāsojiet.
- Melnās plankumi vai izbalēšana: To izraisa UV starojums vai zemas kvalitātes krāsa. Izmantojiet stabilākas UV staru izturīgas virskrāsas un uzturiet tās ar maigu tīrīšanu. Smagā izbalēšanā apsveriet iespēju pilnībā noņemt alumīnija krāsu un pārkrāsot.
Labojumi un ilgtermiņa aizsardzība
Maziem nobraukumiem vai svītrām pieskāriena krāsa var atjaunot izskatu un aizsardzību. Bet kā to uzklāt, lai tā bez šuvēm saplūstu?
- Vieglītēm noberziet apgabalu ar smalku šmirgli mehāniskai saķerei.
- Notīriet, lai noņemtu putekļus un eļļas.
- Spot-prime jebkuru atklātu alumīniju, ievērojot to pašu procesu kā galvenajā darbā.
- Uzklājiet labojumu krāsu plānās, pakāpeniskās kārtās, izmantojot mazu gleznieka suku—mazāk ir vairāk. Pārmērīga lietošana var izraisīt agrīnu noblāķēšanos vai lūžņu veidošanos.
Ja jūsu sistēma to atļauj, savietojams bezkrāsains slānis pievieno papildu spīdumu un UV pretestību, īpaši āra vai jūras projektos. Šis solis palīdz pagarināt pārklājuma kalpošanas laiku un samazina alumīnija krāsas noņemšanas iespēju nākotnē.
Turpiniet tikai tad, kad virsmas ir tīras vizuāli un taustāmi, vienmērīgi abrazīvas un adhēzijas tests izturēts ar līmlenti.
Brīnāties, kā no alumīnija noņemt krāsu, ja pamanāt lielu defektu? Nelieliem apgabaliem pietiks ar smilšošanu un rūpīgu tīrīšanu. Lielākiem bojājumiem, iespējams, pirms darbu atkārtotas uzsākšanas būs nepieciešams pilnībā noņemt alumīnija krāsu — izmantojot ķīmiskus noņēmējus vai mehānisku smilšošanu. Veicot šos pārbaudes jau tagad, jūs ietaupīsiet laiku un nodrošināsiet, ka jūsu projekts izturēs reālas lietošanas apstākļus. Tālāk jūs uzzināsiet, kā saglabāt pārklāja svaigu izskatu un kad laikā jāizsauc speciālists sarežģītiem remontiem.
9. solis: Apkope, drošība un kad laikā jāizsauc speciālists krāsotam alumīnijam
Apkopes grafiks: Saglabājiet alumīnija pārklāja izskatu kā jaunam
Jūs esat ieguldījuši pūles, lai uzzinātu, kā krāsot alumīniju — tagad, kā saglabāt pārklāja ilgstošu un dzīvīgu izskatu? Regulāra kopšana ir noslēpums ilgstošam un spilgtam virsmas izskatam, vai nu tā būtu ārējā krāsa alumīnija apdarei, vai nesen nokrāsota durvis. Iedomājieties, kā pēc dažiem gadiem dodaties uz savu māju un joprojām redzat bez vainas pārklāju. To var panākt ar vienkāršu apkopes plānu:
| Uzdevums | Frekvence | Ko meklēt | Darbība |
|---|---|---|---|
| Delikāta mazgāšana ar maigu mazgāšanas līdzekli | 2–4 reizes/gadā | Netīrumi, netīrumu veidošanās, sāls atlikumi | Izmantojiet mīkstu drānu vai sūkli; noskalojiet kārtīgi |
| Pārbaudiet malas un šuves | Katru 6 mēnešus | Nošķiņošanās, lūžņi vai rūsa savienojumos | Apstrādājiet ar smilšpapīru, pārklājiet ar grunti un pārkrāsojiet |
| Labojiet krāsojuma nodilumus vai zīmes | Pēc vajadzības | Mazi nodilumi, atsegtā metāla vietas | Notīriet, uzklājiet grunti un uzklājiet atbilstošu krāsu |
| Nokonservējiet vai uzklājiet aizsargpārklāju* | Reizi gadā (ja piemērojams) | Migla, spīduma zudums | Izmantojiet tikai tad, ja to iesaka jūsu krāsu sistēma |
*Piezīme. Daži pārklāji, īpaši ārējai izmantošanai paredzēti krāsas alumīnija apdarei, var nereikalot vai neatļaut nokonservēt. Vienmēr pārbaudiet ražotāja norādījumus.
Drošības un vides aizsardzības pasākumi: atbildīga izmantošana no sākuma līdz beigām
Pabeidzis krāsošanu, kas notiek ar atlikušo krāsu, izmantotajām drānām vai tīrīšanas šķīdinātājiem? Droša uzglabāšana un utilizācija pasargā jūsu veselību un vidi. Šeit ir tas, ko jāpatur prātā:
- Uzglabājiet atlikušos pārklājumus: Turiet krāsas kārbas cieši noslēgtas vēsā, sausā vietā, ārpus tiešas saules gaismas un temperatūras ekstremālu ietekmes. Pareiza uzglabāšana pagarina gan ūdenī, gan eļļā bāzēto krāsu dzīvi ( ACT Enviro ).
- Atbildīgi izmetiet šķīdinātājus, lupatas un abrazīvus: Nekad nemetiet krāsu vai atšķaidītāju kanalizācijā. Savāciet atkritumus atļautās tvertnēs un ievērojiet vietējos noteikumus par bīstamo atkritumu nodošanu vai izvešanu uz ielas.
- Ventilācija un personīgā aizsardzība: Turpiniet lietot elšanas aizsarglīdzekli, strādājot ar šķīdinātāju saturošiem produktiem, un vienmēr valkājiet cimdus un acu aizsargus, veicot mazākos labojumus vai tīrīšanu.
- Pārbaudiet vietējos noteikumus: Dažās vietās ir īpaši noteikumi krāsu utilizācijai, īpaši aerosola baloniņiem vai eļļas bāzes formulām.
Iedomājieties, cik mierīgi būtu zināt, ka jūs ne tikai saglabājat pārklāja svaigumu, bet arī aizsargājat savu ģimeni un planētu. Tieši tā atšķir īstu speciālistu – pat tad, ja darbs tiek veikts ar DIY metodi.
Kad jāsauc speciālists: sarežģīti alumīnija projekti un OEM klases rezultāti
Dažreiz pat vislabākā DIY pieeja nav pietiekama. Ja strādājat ar sarežģītiem profiliem, liela mēroga projektu vai nepieciešams OEM līmeņa pabeigšanas kvalitāte - piemēram, kad jānoskaidro, kā krāsot alumīnija durvis komerciālai ēkai vai jāiegādājas labākā krāsa alumīnija apdarei daudzdzīvokļu īpašumam - ir prātīgi konsultēties ar speciālistu. Automobiļu rūpniecības izstrādājumiem, sarežģītām montāžām vai kad pabeigšanas viendabīgums ir kritiski svarīgs, apsveriet sadarbību ar partneri, kuram ir integrētas inženierijas un pabeigšanas iespējas. Piemēram, Shaoyi Metal Parts Supplier nodrošina pilna cikla, precīzas alumīnija ekstrūzijas risinājumus ar iekšējo pabeigšanu - ideāli, kad vēlaties rūpnīcas līmeņa rezultātu bez nejaušībām.
Oficiāli resursi turpmākai vadībai
Nezināt, kādu krāsu izvēlēties alumīnijam savā nākamajā projektā? Vai nepieciešams apstiprināt savu procesu? Vienmēr pārbaudiet šos avotus:
- Tehniskie datu lapiņas (TDS) un Drošības datu lapas (SDS) no jūsu pārklājuma ražotāja
- Atzīti saķeres pārbaudes standarti (piemēram, ASTM D3359 šūniņu metodes)
- Vietējie vides noteikumi attiecībā uz VOŠ, krāsu un šķīdinātāju utilizāciju
- Profesionāli norādījumi par labāko krāsu āra alumīnijam un apkopes padomiem
Notīriet, naberzējiet, gruntējiet ar alumīnijam saderīgu sistēmu, uzklājiet plānas un vienmērīgas virskārtas, pārbaudiet saķeri un veiciet preventīvu apkopi.
Šo soļu izpilde nodrošina, ka alumīnija pārklājums iztur laika pārbaudi – vai nu uzturot ārējo krāsu alumīnija apšuvumam, mācoties pirmo reizi krāsot alumīniju vai izvēloties labāko krāsu alumīnija apšuvuma krāsošanai, lai panāktu ilgstošu estētisku efektu.
Bieži uzdotie jautājumi par alumīnija krāsošanu
1. Kāda ir labākā metode alumīnija krāsošanai, lai krāsa nenoplīstu?
Uzticamākā metode ir rūpīgi nomazgāt un nožāvēt virsmu, nosmiltēt vai noskrāpēt, lai izveidotu vienmērīgu zīmi, noņemt visu putekļus, uzklāt grunti, kas paredzēta alumīnijam (piemēram, pašūdeņražojošu vai epoksīda), un pēc tam pabeigt ar izturīgu virsējo slāni, kas piemērots videi. Šīs sīkās procedūras ievērošana nodrošina stipru saķeri un ilgstošu izturību.
2. Vai var krāsot anodēto alumīniju un kā tam jāsagatavojas?
Jā, jūs varat krāsot anodēto alumīniju, bet tam ir nepieciešama papildu sagatavošana. Virsmu rūpīgi jānotīra, jānoņem spīdums un jāapstrādā, lai noņemtu gludo pārklāju. Izmantojiet ēdināšanas vai epoksīda grunti, kas speciāli izgatavota neporainiem metāliem, lai garantētu, ka krāsa droši saķeras.
3. Kāda veida krāsu un grunti vajadzētu izmantot uz alumīnija virsmām?
Izvēlieties grunti, kas paredzēta alumīnijam, piemēram, pašiezāmīgu vai epoksīda grunti. Pārklājkrāsai izvēlieties atkarībā no pielietojuma: akrila lateksa sānu apdarei un apdarei, 2K uretāna vai automašīnu krāsai paredzētu emalju transportlīdzekļiem, jūras izmantošanai paredzētus pārklājumus laivām. Lai panāktu labāko rezultātu, vienmēr saskaņojiet grunti un pārklājuma sistēmu.
4. Kā novērst alumīnija krāsas lobešanos vai burbuļošanos?
Lobešanos vai burbuļošanos parasti izraisa nepareiza virsmas sagatavošana vai mitrums. Noslīpējiet bojāto vietu līdz gludai pārejai, rūpīgi notīriet, uzklājiet atkārtoti grunti, kas saderīga ar alumīniju, un nokrāsojiet vēlreiz. Smagos gadījumos var būt nepieciešama pilnīga krāsas noņemšana un process sākt no jauna.
5. Vai ir profesionālas alternatīvas, salīdzinot ar alumīnija krāsošanu ar DIY metodi?
Jā. Pakalpojumi, piemēram, Shaoyi automašīnu alumīnija ekstrūzijas, nodrošina integrētu ražošanu un pabeigšanu, tostarp profesionālu anodēšanu, krāsošanu ar pulvera metodi un krāsas cepšanu. Tas nodrošina izturīgu, OEM kvalitātes pārklājumu un novērš grūtības, kas saistītas ar DIY virsmas sagatavošanu un saķeri.