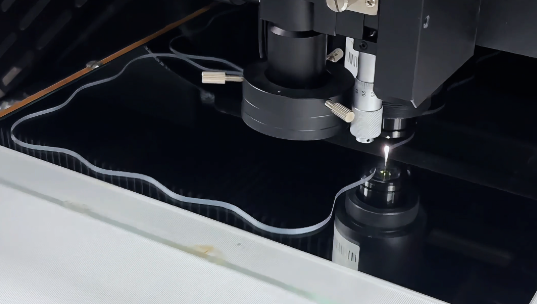
 ছোট ছোট ব্যাচ, উচ্চ মান। আমাদের তাড়াতাড়ি প্রোটোটাইপিং সার্ভিস যাচাইকরণকে আরও তাড়াতাড়ি এবং সহজ করে —

খরচসাপেক্ষ ত্রুটি ছাড়াই সিএনসি অংশগুলির যান্ত্রিক প্রক্রিয়াকরণ: মৌলিক বিষয়গুলি
সিএনসি মেশিনিং এবং এর উৎপাদন প্রভাব সম্পর্কে ধারণা
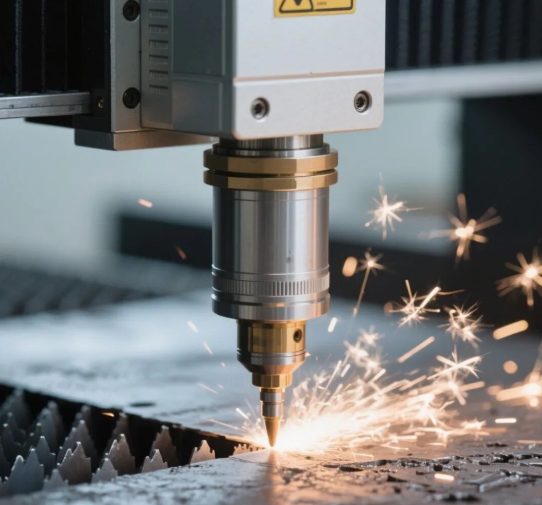
যখন আপনার প্রয়োজন হয় হাজার ভাগের এক ইঞ্চি পর্যন্ত সূক্ষ্ম টলারেন্সে মেশিন করা অংশ, তখন হাতে করা পদ্ধতি সহজেই তা পূরণ করতে পারে না। এখানেই সিএনসি মেশিনিং-এর প্রবেশ। সিএনসি বলতে "কম্পিউটার নিউমেরিক্যাল কন্ট্রোল" বোঝায়, এবং এটি একটি বর্জনমূলক উৎপাদন প্রক্রিয়া যেখানে কম্পিউটারাইজড নিয়ন্ত্রণ মেশিন টুলগুলিকে নির্দেশ দেয় যাতে কাঁচামাল থেকে পদ্ধতিগতভাবে উপাদান অপসারণ করে সূক্ষ্ম প্রকৌশল ভিত্তিক উপাদানে রূপান্তরিত করা যায়।
এই প্রযুক্তি সবকিছুই তৈরি করে বিমান ও মহাকাশ ইঞ্জিনের অংশ থেকে শুরু করে চিকিৎসা যন্ত্রপাতি পর্যন্ত , যেসব শিল্পে নির্ভুলতা ঐচ্ছিক নয়—এটি অপরিহার্য। কিন্তু ঠিক কী কারণে সিএনসি ঐতিহ্যগত মেশিনিং থেকে আলাদা, এবং কেন এটি আধুনিক উৎপাদনের মূল ভিত্তি হয়ে উঠেছে?
হাতে করা মিল থেকে কম্পিউটার নিয়ন্ত্রণ পর্যন্ত
সিএনসি প্রযুক্তির অস্তিত্বের আগে, যন্ত্রপাতিগুলি মেশিনগুলিকে ম্যানুয়ালি পরিচালনা করত, তাদের দক্ষতা, অভিজ্ঞতা এবং শারীরিক দক্ষতার উপর নির্ভর করে অংশগুলি তৈরি করতে। যদিও প্রতিভাবান অপারেটররা চিত্তাকর্ষক ফলাফল অর্জন করতে পারে, তবে মেশিনের মেশিনের অভ্যন্তরীণ সীমাবদ্ধতা ছিল। মানুষের হাতগুলি নিখুঁত ধারাবাহিকতার সাথে গতিবিধিগুলি পুনরাবৃত্তি করতে পারে না, এবং জটিল গণনাগুলি মস্তিষ্কে বা মৌলিক সরঞ্জামগুলির সাথে সম্পাদন করা দরকার।
কম্পিউটার নিয়ন্ত্রণে পরিবর্তন সবকিছু বদলে দিয়েছে। শিল্পের গবেষণার মতে, CNC প্রযুক্তির সাথে পুনরায় সজ্জিত মেশিনগুলি তাদের ম্যানুয়াল প্রতিপক্ষের তুলনায় 75-300% দ্রুত অংশ উত্পাদন করে। আরও গুরুত্বপূর্ণ, সিএনসি মেশিনিং মিনিটের মধ্যে এক ইঞ্চির এক হাজারতম সহনশীলতা সরবরাহ করে কাজের জন্য যা ঘন্টা সেটআপ, গণনা এবং ম্যানুয়াল সরঞ্জামগুলিতে পরিমাপ প্রয়োজন।
এই সিএনসি মেশিনের মৌলিক জ্ঞানটি কম্পিউটার নিয়ন্ত্রিত মেশিনিং কেন আজকের নির্ভুলতা উত্পাদনকে প্রভাবিত করে তা বোঝার ভিত্তি গঠন করে।
সিএনসি প্রযুক্তির মূল নীতি
এর মূলে, সিএনসি মেশিনিং একটি সরাসরি কাজের প্রবাহ অনুসরণ করে:
- CAD ডিজাইন: ইঞ্জিনিয়াররা কম্পিউটার-সহায়ক ডিজাইন সফটওয়্যার ব্যবহার করে ২ডি বা ৩ডি মডেল তৈরি করেন, যার মধ্যে প্রতিটি মাত্রা এবং জ্যামিতিক বৈশিষ্ট্য সংজ্ঞায়িত করা হয়
- CAM প্রোগ্রামিং: কম্পিউটার-সহায়ক উৎপাদন সফটওয়্যার ডিজাইনটিকে মেশিন নির্দেশনায় রূপান্তরিত করে, টুলপাথ তৈরি করে এবং অপটিমাল কাটিং গতি গণনা করে
- মেশিন কার্যকরীকরণ: সিএনসি মেশিন এই নির্দেশনাগুলি (সাধারণত জি-কোড) পড়ে এবং প্রতিটি আন্দোলন নির্ভুলভাবে সম্পাদন করে, যতক্ষণ না চূড়ান্ত অংশটি উদ্ভাবিত হয়
এই ডিজিটাল থেকে ভৌত পাইপলাইন অনুমান-ভিত্তিক কাজ দূর করে। সিএএম সফটওয়্যার অপটিমাল কাটিং পাথ গণনা করে, উপাদানের বিশেষীকরণ অনুযায়ী গতি সামঞ্জস্য করে এবং এমনকি কোনও ধাতু কাটার আগেই সম্ভাব্য সমস্যাগুলি শনাক্ত করার জন্য সম্পূর্ণ প্রক্রিয়াটি অনুকরণ করতে পারে।
কেন নির্ভুল উৎপাদন সিএনসি-এর উপর নির্ভরশীল
বিশ্বব্যাপী সিএনসি মেশিন বাজারটি ২০২১ সালে ৮৩.৯৯ বিলিয়ন মার্কিন ডলার থেকে ২০২৮ সালের মধ্যে ১২৮ বিলিয়ন ডলারের বেশি হয়ে উঠতে যাচ্ছে—এটি এই প্রযুক্তির গুরুত্বের একটি প্রমাণ। এত বড় পরিমাণে বৃদ্ধির কারণ কী? কারণ সিএনসি ডিজাইন ক্ষমতা এবং নির্বাচন নির্ভুলতা অংশগুলিকে সম্পূর্ণরূপে পরিবর্তনযোগ্য করে তোলে, যা আধুনিক অ্যাসেম্বলি লাইন এবং মানের মানদণ্ডের জন্য একটি অপরিহার্য শর্ত।
বিবেচনা করুন যে সিএনসি মেশিনিং সিএনসি অংশগুলি উৎপাদন করে যার প্রত্যাখ্যানের হার হাতে করা পদ্ধতির তুলনায় অনেক কম। ৫০,০০০ ইউনিটের একটি উৎপাদন চক্রের তুলনা করলে দেখা যায় যে সিএনসি অপারেশন থেকে ত্রুটিপূর্ণ অংশের সংখ্যা উল্লেখযোগ্যভাবে কম। যখন যন্ত্রপাতির অংশগুলি—যে it স্বায়ত্তশাসিত গিয়ারবক্স হোক বা শল্য চিকিৎসা যন্ত্রপাতি—একে অপরের সাথে নিখুঁতভাবে মিলতে হয়, তখন এই ধরনের সামঞ্জস্য শুধুমাত্র সুবিধাজনক নয়, বরং এটি অপরিহার্য।
পরবর্তী অংশগুলি এই ভিত্তির উপর ভিত্তি করে গড়ে উঠবে, যেখানে সিএনসি মেশিনিং অংশগুলি তৈরি করার জন্য প্রয়োজনীয় নির্দিষ্ট উপাদানগুলি, বিভিন্ন অ্যাপ্লিকেশনের জন্য উপলব্ধ পদ্ধতিগুলি এবং সফল প্রকল্পগুলিকে ব্যয়বহুল ব্যর্থতা থেকে পৃথক করে দেওয়ার জন্য ডিজাইন নীতিগুলি নিয়ে আলোচনা করা হবে।
সিএনসি মেশিনগুলিকে চালিত করে এমন অপরিহার্য উপাদানসমূহ
এখন আপনি সিএনসি মেশিনিংয়ের মৌলিক কাজের প্রবাহটি বুঝতে পেরেছেন , আপনি হয়তো ভাবছেন: এই মেশিনগুলির ভিতরে আসলে কী আছে যা এত নির্ভুলতা সম্ভব করে? প্রতিটি সিএনসি সিস্টেম একটি সুসংগঠিত সেটের উপর নির্ভর করে যা সিএনসি মেশিনের অংশগুলি সুসংগতভাবে কাজ করে। সিএনসি মেশিনের এই অংশগুলি বুঝতে পারলে আপনি নির্মাতাদের সঙ্গে আরও কার্যকরভাবে যোগাযোগ করতে পারবেন এবং সম্ভাব্য সমস্যাগুলি সমাধান করতে পারবেন—যাতে সেগুলি ব্যয়বহুল ত্রুটিতে পরিণত না হয়।
আপনি যদি আপনার সুবিধার জন্য সরঞ্জাম মূল্যায়ন করছেন অথবা শুধুমাত্র আপনার পার্টগুলি কীভাবে তৈরি হয় তা বুঝতে চাইছেন, তবে সিএনসি-এর প্রধান উপাদানগুলি সম্পর্কে জ্ঞান আপনাকে উল্লেখযোগ্য সুবিধা প্রদান করবে। চলুন, এই মেশিনগুলির কার্যপ্রণালী বিশ্লেষণ করি।
অপারেশনের পেছনের মস্তিষ্ক — নিয়ন্ত্রণ ব্যবস্থা
কল্পনা করুন, আপনি যদি একটি অর্কেস্ট্রা পরিচালনা করতে চান কিন্তু কোনো পরিচালক না থাকে। এটাই হবে সিএনসি মেশিনিং—যদি উপযুক্ত নিয়ন্ত্রণ ব্যবস্থা না থাকে। মেশিন কন্ট্রোল ইউনিট (MCU) সিস্টেমের মস্তিষ্কের মতো কাজ করে, প্রোগ্রামিং নির্দেশাবলী ডিকোড করে এবং টুল গতি থেকে শুরু করে স্পিন্ডল গতি পর্যন্ত সমস্ত প্রাথমিক অপারেশন নিয়ন্ত্রণ করে।
CNC ইন্টারফেস কন্ট্রোল প্যানেল হল অপারেটরদের মেশিনের সাথে যোগাযোগ করার স্থান। এটিকে সিস্টেমে প্রোগ্রামিং নির্দেশাবলী প্রবেশ করানোর হৃদয় হিসেবে ভাবুন। আধুনিক কন্ট্রোল প্যানেলগুলিতে নিম্নলিখিত বৈশিষ্ট্য রয়েছে:
- ইনপুট ডিভাইস: এগুলি মেশিনে প্রোগ্রামিং নির্দেশাবলী প্রেরণ করে, যা ঐতিহ্যবাহী পাঞ্চ টেপ রিডার থেকে শুরু করে RS-232-C বা ইথারনেটের মাধ্যমে সংযুক্ত কম্পিউটার পর্যন্ত বিস্তৃত।
- ডিসপ্লে ইউনিট: একটি মনিটর যা প্রোগ্রাম, নির্দেশাবলী, মেশিনের অবস্থা এবং অপারেশনের সময় রিয়েল-টাইম ফিডব্যাক প্রদর্শন করে।
- ম্যানুয়াল ওভাররাইড কন্ট্রোল: বোতাম এবং ডায়ালগুলি যা অপারেটরদের মেশিনিংয়ের সময় সামঞ্জস্য করার অনুমতি দেয়।
- জরুরি স্টপ ফাংশন: গুরুত্বপূর্ণ নিরাপত্তা বৈশিষ্ট্য যা সমস্ত মেশিন অপারেশন তৎক্ষণাৎ বন্ধ করে দেয়।
ফিডব্যাক সিস্টেমটি এই নিয়ন্ত্রণগুলির সঙ্গে সমান্তরালভাবে কাজ করে, কাটিং টুলের সঠিক অবস্থান ট্র্যাক করার জন্য অবস্থান ও গতি ট্রান্সডিউসার ব্যবহার করে। এই সেন্সরগুলি এমসিইউ-কে সংকেত পাঠায়, যা প্রয়োজন হলে টেবিল ও স্পিন্ডেলের গতি ও অবস্থান সংশোধন করে—প্রায়শই মানুষের চোখ দিয়ে ধরা যাওয়ার চেয়েও দ্রুত সামঞ্জস্য সাধন করে।
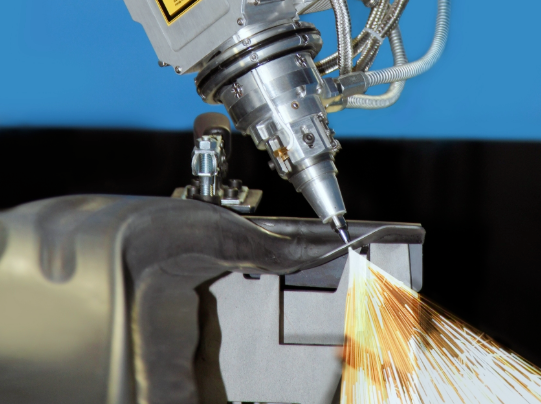
স্পিন্ডেল ও টুলিং যান্ত্রিকী ব্যাখ্যা
যদি নিয়ন্ত্রণ সিস্টেমটি মস্তিষ্ক হয়, তবে স্পিন্ডেল হল পেশী। এই ঘূর্ণায়মান উপাদানটি মিলিং মেশিনে কাটিং টুল ধরে রাখে ও চালিত করে, অথবা লেথে কাজের বস্তু (ওয়ার্কপিস) ধরে রাখে ও ঘোরায়, যার ঘূর্ণন গতি উচ্চ-গতির মেশিনিং অপারেশনে ২০,০০০ আরপিএম-এর বেশি হতে পারে।
টুলিং সিস্টেমের প্রধান সিএনসি মিলিং মেশিনের অংশগুলি হল:
- স্পিন্ডেল মোটর: কাটিং অপারেশনের জন্য আবশ্যক ঘূর্ণন শক্তি প্রদান করে
- স্পিন্ডেল ড্রাইভ: উপাদানের প্রয়োজন ও কাটিং পরিস্থিতির ভিত্তিতে গতি ও টর্ক নিয়ন্ত্রণ করে
- চাক: প্রধান স্পিন্ডেলের উপর অবস্থিত একটি কাজ-ধরে রাখার যন্ত্র, যা টুল বা কাজের বস্তুকে সুদৃঢ়ভাবে স্থানে স্থির করে
- টুল হোল্ডার: কাটিং টুল ও স্পিন্ডেলের মধ্যে সূক্ষ্ম ইন্টারফেস, যা সঠিক অবস্থান নিশ্চিত করে
- অটোমেটিক টুল চেঞ্জার: উন্নত মেশিনে, এই অপারেটর হস্তক্ষেপ ছাড়া সেকেন্ডের মধ্যে সরঞ্জাম swap
এই অপারেশনগুলিকে সমর্থনকারী ড্রাইভ সিস্টেমে এম্প্লিফায়ার সার্কিট, বল ড্রাইভ মোটর এবং লিড স্ক্রু অন্তর্ভুক্ত রয়েছে। সিএনসি সার্ভো ড্রাইভ এবং এসি সার্ভো মোটর সবকিছুকে ব্যতিক্রমী নির্ভুলতার সাথে চালিত রাখে, ডিজিটাল কমান্ডগুলিকে শারীরিক গতিতে রূপান্তর করে।
অক্ষের গতি এবং সঠিক অবস্থান
কিভাবে একটি কাটার যন্ত্র মাইক্রন স্তরের সঠিকতা সঙ্গে সরানো হয়? একটি উন্নত অক্ষ সিস্টেমের মাধ্যমে। বেসিক সিএনসি মিলগুলি তিনটি অক্ষের উপর কাজ করেএক্স (বাম থেকে ডান), ওয়াই (সামনের-পিছনে) এবং জেড (উপরে থেকে নীচে) । কিন্তু সিএনসি ফ্রিজিং মেশিন কনফিগারেশনের আধুনিক উপাদানগুলিতে জটিল জ্যামিতির জন্য পাঁচ বা তার বেশি অক্ষ অন্তর্ভুক্ত থাকতে পারে।
| উপাদান | সিএনসি মিল ফাংশন | সিএনসি টার্ন ফাংশন | মাল্টি-অক্ষের পরিবর্তন |
|---|---|---|---|
| কাজের টেবিল/বিছানা | কাজ টুকরা সমর্থন; X এবং Y অক্ষ উপর সরানো | স্থিতিশীলতার জন্য কাস্ট আয়রন থেকে তৈরি বেস কাঠামো | ঘূর্ণন টেবিল (A, B অক্ষ) অন্তর্ভুক্ত করতে পারে |
| স্পিন্ডল | কাটিং টুলকে ধরে রাখে এবং ঘোরায় | ওয়ার্কপিসকে ধরে রাখে এবং ঘোরায় | কোণিক কাটিংয়ের জন্য ঝুঁকে যেতে পারে (B অক্ষ) |
| হেডস্টক | সাধারণত উপস্থিত থাকে না | মেশিনিংয়ের সময় ওয়ার্কপিসের সাথে সংযুক্ত হয় | লাইভ টুলিং অন্তর্ভুক্ত করতে পারে |
| টেইলস্টক | সাধারণত উপস্থিত থাকে না | অতিরিক্ত ওয়ার্কপিস সমর্থন প্রদান করে | প্রোগ্রামযোগ্য অবস্থান নির্ধারণ সম্ভব |
| ফুটপেডাল | কুল্যান্ট বা স্পিন্ডেল নিয়ন্ত্রণ করতে পারে | চাক খোলে এবং বন্ধ করে | প্রায়শই স্বয়ংক্রিয় নিয়ন্ত্রণ দ্বারা প্রতিস্থাপিত হয় |
সিএনসি মিলের অংশগুলি টার্নিং মেশিনের উপাদানগুলি থেকে উল্লেখযোগ্যভাবে ভিন্ন, কারণ উপাদান অপসারণের পদ্ধতিটি আলাদা। মিলগুলি একটি স্থির বা ধীরগতির কাজের টুকরোর উপর দিয়ে কাটিং টুলটি সরায়, অন্যদিকে টার্নিং মেশিনগুলি একটি আপেক্ষিকভাবে স্থির টুলের বিপরীতে কাজের টুকরোটি ঘোরায়। এই মৌলিক পার্থক্যটি সিএনসি মেশিনের অন্যান্য সমস্ত উপাদানের বিন্যাসকে গঠন করে।
মাল্টি-অ্যাক্সিস মেশিনগুলি ঘূর্ণন গতি (A অক্ষ X-এর চারপাশে ঘোরে, B অক্ষ Y-এর চারপাশে ঘোরে, C অক্ষ Z-এর চারপাশে ঘোরে) যোগ করে, যার ফলে কাজের টুকরোটি পুনরায় স্থাপন না করেই জটিল কাটিং সম্ভব হয়। এটি সেটআপ সময় কমায় এবং নির্ভুলতা বৃদ্ধি করে—এটি বিমান চলাচল বা চিকিৎসা ক্ষেত্রের জটিল উপাদানগুলি প্রস্তুত করার সময় অত্যন্ত গুরুত্বপূর্ণ বিবেচ্য বিষয়।
এই প্রাথমিক উপাদানগুলি বোঝা আপনাকে পরবর্তী গুরুত্বপূর্ণ সিদ্ধান্ত নেওয়ার জন্য প্রস্তুত করে: আপনার নির্দিষ্ট পার্টের প্রয়োজনীয়তা অনুযায়ী কোন সিএনসি মেশিনিং পদ্ধতি সবচেয়ে উপযুক্ত তা নির্বাচন করা।
আপনার পার্টগুলির জন্য সঠিক সিএনসি মেশিনিং পদ্ধতি নির্বাচন করা
আপনার ডিজাইনটি প্রস্তুত হয়েছে এবং মেশিনের উপাদানগুলি সম্পর্কে আপনি অবহিত—কিন্তু আসলে কোন মেশিনিং প্রক্রিয়াটি ব্যবহার করা উচিত? এই সিদ্ধান্তটি আপনার প্রকল্পের সফলতা নির্ধারণ করতে পারে। ভুল পদ্ধতি নির্বাচন করলে উপকরণ নষ্ট হয়, বাজেট অতিক্রম করা হয় এবং নির্দিষ্টকৃত মান অর্জন করা যায় না।
ভালো খবরটা কী? অংশের প্রয়োজনীয়তার সাথে পদ্ধতির মিলিয়ে নেওয়া যুক্তিসঙ্গত নীতি অনুসরণ করে। একবার আপনি প্রতিটি প্রক্রিয়া কীভাবে সর্বোত্তমভাবে কাজ করে তা বুঝতে পারলে, সাধারণত সিদ্ধান্তটি স্পষ্ট হয়ে যায়। চলুন প্রধান বিকল্পগুলি একটি একটি করে দেখি এবং CNC পার্টগুলি মেশিন করার সময় বুদ্ধিমানের মতো সিদ্ধান্ত নেওয়ার জন্য একটি কাঠামো গড়ে তুলি।
মিলিং বনাম টার্নিং — জ্যামিতি সিদ্ধান্ত নির্ধারণ করে
এখানে অধিকাংশ পরিস্থিতি কভার করে এমন একটি সরল নিয়ম: যদি আপনার পার্টটি সিলিন্ড্রিক্যাল বা ঘূর্ণন-সমমিত হয়, তবে টার্নিং আপনার প্রথম পছন্দ। যদি এতে সমতল পৃষ্ঠ, পকেট, স্লট বা জটিল ৩ডি কনটুর থাকে, তবে মিলিং প্রাধান্য পায়।
সিএনসি টার্নিং এটি আপনার কাজের টুকরোটিকে ঘোরায় যখন একটি স্থির কাটিং টুল এটিকে আকৃতি দেয়। শ্যাফট, বুশিং, পিন এবং সূত্রযুক্ত উপাদানগুলির কথা ভাবুন। মেশিনিং প্রক্রিয়া বিশেষজ্ঞদের মতে, টার্নিং গোলাকার অংশগুলিতে ছিদ্র, খাঁজ, সূত্র এবং টেপার তৈরি করতে অত্যন্ত দক্ষ। এই প্রক্রিয়াটি সমমিত জ্যামিতিক আকৃতির জন্য অত্যন্ত দক্ষ কারণ অংশটি ঘুরছে থাকাকালীন উপাদান অপসারণ চলতে থাকে।
সিএনসি ফ্রেজিং এটি বিপরীত পদ্ধতি অবলম্বন করে—কাটিং টুলটি ঘোরে যখন কাজের টুকরোটি আপেক্ষিকভাবে স্থির থাকে (অথবা প্রোগ্রাম করা পথ বরাবর চলে)। এই নমনীয়তা সিএনসি মিলিং পার্টসকে নিম্নলিখিত ক্ষেত্রে আদর্শ করে তোলে:
- সমতল পৃষ্ঠ এবং তীব্র প্রান্ত সহ প্রিজম্যাটিক আকৃতি
- বহু-অক্ষ গতির প্রয়োজনীয় জটিল ৩ডি কনটুর
- পকেট, স্লট এবং জটিল পৃষ্ঠ বিবরণ সহ অংশ
- বহু পাশে বৈশিষ্ট্য প্রয়োজন হয় এমন উপাদান
সহজ মনে হচ্ছে? সাধারণত এটি সত্য। কিন্তু অনেক বাস্তব-জগতের পার্টস উভয় জ্যামিতিক আকৃতির সমন্বয় করে। মিলড ফ্ল্যাট, কীওয়ে, বা ক্রস-ড্রিলড হোলসহ একটি শ্যাফট সম্ভবত একটি লেথ এবং একটি মিল উভয়েই ব্যবহার করবে। আধুনিক টার্ন-মিল সেন্টারগুলি একক সেটআপে উভয় অপারেশন সম্পাদন করতে পারে, যা হ্যান্ডলিং কমায় এবং নির্ভুলতা বৃদ্ধি করে।
যখন EDM আপনার সেরা বিকল্প হয়ে ওঠে
যখন চিত্রিত কাটিং টুলগুলি কাজটি সম্পন্ন করতে পারে না, তখন কী ঘটে? এখানেই ইলেকট্রিক ডিসচার্জ মেশিনিং (EDM) কাজে আসে। EDM মেশিনিং যান্ত্রিক কাটিং বলের পরিবর্তে বৈদ্যুতিক স্পার্ক ব্যবহার করে উপাদান ক্ষয় করে—এটি একটি মৌলিকভাবে ভিন্ন পদ্ধতি যা অনন্য সম্ভাবনা খোলে।
ওয়্যার ইডিএম (যা ওয়্যার ডিসচার্জ মেশিনিং নামেও পরিচিত) আপনার ওয়ার্কপিসের মধ্য দিয়ে একটি পাতলা বৈদ্যুতিকভাবে চার্জ করা তার পাস করে, যা অত্যন্ত নির্ভুলতার সাথে জটিল আকৃতি কাটে। বৈদ্যুতিক ডিসচার্জ মেশিনটি কখনও উপাদানের সাথে শারীরিকভাবে যোগাযোগ করে না, যার ফলে টুল ওয়্যার সম্পর্কিত চিন্তা দূর হয় এবং কঠিন ইস্পাতে কাট করা সম্ভব হয় যা চিত্রিত টুলিংকে ধ্বংস করে দিত।
আপনার যখন নিম্নলিখিত বৈশিষ্ট্যসম্পন্ন অংশগুলির প্রয়োজন হয়, তখন EDM বিবেচনা করুন:
- তীক্ষ্ম অভ্যন্তরীণ কোণ: মিলিং-এর বিপরীতে, যা গোলাকার কাটিং টুল থেকে বক্রতা রেখে যায়, ওয়্যার EDM মেশিনিং সত্যিকারের ধারালো কোণ তৈরি করে।
- অত্যন্ত কঠিন উপকরণ: শক্তিশালী টুল স্টিল, কার্বাইড এবং ঐসব বিদেশি মিশ্র ধাতু যা সাধারণ কাটিং-এর বিরুদ্ধে প্রতিরোধ করে।
- অত্যন্ত কঠোর সহনশীলতা: ওয়্যার EDM সাধারণত ±০.০০০১" নির্ভুলতা অর্জন করে।
- জটিল থ্রু-কাট: উপাদানের সম্পূর্ণ মাধ্যমে কাটা জটিল আকৃতি।
বিনিময়ের বিষয়টি কী? একজন শিল্প বিশেষজ্ঞ মন্তব্য করেছেন, "EDM ঐতিহ্যগত CNC মেশিনিং-এর তুলনায় বেশ ব্যয়বহুল; তাই আমরা শুধুমাত্র তখনই EDM সুপারিশ করি যখন অংশগুলি চরম নির্ভুলতা, ধারালো কোণ বা CNC টুলিং-এর মাধ্যমে করা সম্ভব নয় এমন বৈশিষ্ট্য সহ তৈরি করা প্রয়োজন।" এই প্রক্রিয়াটি ঐতিহ্যগত পদ্ধতির তুলনায় ধীরগতির হওয়ায় সরল জ্যামিতিক আকৃতির জন্য এটি কম অর্থনৈতিক।
বৈদ্যুতিক ডিসচার্জ মেশিনিং-এর প্রকারভেদের মধ্যে সিঙ্কার EDM (যা একটি আকৃতিযুক্ত ইলেকট্রোডকে কাজের টুকরোতে ঢুকিয়ে দেয়) এবং ওয়্যার EDM অন্তর্ভুক্ত। সিঙ্কার EDM জটিল গহ্বর তৈরি করে—যেমন ইনজেকশন মোল্ড কোর—যেখানে ওয়্যার EDM প্লেট উপাদানের মধ্য দিয়ে প্রোফাইল কাটার ক্ষেত্রে উৎকৃষ্ট কাজ করে।
অংশের প্রয়োজনীয়তার সাথে পদ্ধতির মিলিয়ে নেওয়া
মিলিং, টার্নিং এবং ইডিএম-এর পাশাপাশি ফিনিশিং অপারেশনের জন্য গ্রাইন্ডিং-এর দিকেও মনোযোগ দেওয়া উচিত। এই প্রক্রিয়ায় অত্যুৎকৃষ্ট পৃষ্ঠের ফিনিশ এবং কঠোর মাত্রিক সহনশীলতা অর্জনের জন্য অ্যাব্রেসিভ হুইল ব্যবহার করা হয়। সাধারণত এটি একটি দ্বিতীয় অপারেশন, যা প্রাথমিক মেশিনিং-এর পরে পৃষ্ঠগুলিকে পরিশীলিত করে।
আপনার পদ্ধতি নির্বাচন করার সময় নিম্নলিখিত বিষয়গুলি পদ্ধতিগতভাবে বিবেচনা করুন:
| পদ্ধতি | সেরা জ্যামিতি | উপাদানগত সামঞ্জস্য | সাধারণ সহনশীলতা | পৃষ্ঠের সমাপ্ত (Ra) | আপেক্ষিক খরচ |
|---|---|---|---|---|---|
| সিএনসি ফ্রেজিং | প্রিজম্যাটিক, ৩ডি কনট্যুর, পকেট | অধিকাংশ ধাতু ও প্লাস্টিক | ±0.001" থেকে ±0.005" | 32–125 μin | নিম্ন থেকে মাঝারি |
| সিএনসি টার্নিং | সিলিন্ড্রিক্যাল, ঘূর্ণন সমমিতি | অধিকাংশ ধাতু ও প্লাস্টিক | ±0.001" থেকে ±0.005" | 32–125 μin | নিম্ন থেকে মাঝারি |
| তারের EDM | জটিল প্রোফাইল, ত ост্র কোণ | শুধুমাত্র তড়িৎপরিবাহী উপাদান | ±0.0001" থেকে ±0.001" | ৮-৩২ μin | উচ্চ |
| গ্রাইন্ডিং | সমতল পৃষ্ঠ, সিলিন্ড্রিক্যাল ওডি/আইডি | ধাতু, বিশেষ করে কঠিনীভূত | ±0.0001" থেকে ±0.0005" | ৪–১৬ মাইক্রোইঞ্চ | মাঝারি থেকে উচ্চ |
জটিল অংশগুলি প্রায়শই বিভিন্ন পদ্ধতিকে কৌশলগতভাবে একত্রিত করে তৈরি করা হয়। উদাহরণস্বরূপ, একটি হাইড্রোলিক ভাল্ভ বডি: রাফ মিলিং বুল্ক উপাদান অপসারণ করে, প্রিসিশন বোরিং গুরুত্বপূর্ণ পাসেজগুলি তৈরি করে এবং গ্রাইন্ডিং সিলিং পৃষ্ঠগুলিকে ফিনিশ করে। প্রতিটি প্রক্রিয়া নিজ নিজ সেরা ক্ষমতা অনুযায়ী অবদান রাখে।
আপনার বিকল্পগুলি মূল্যায়ন করার সময় মনে রাখবেন যে যন্ত্রকৃত পদ্ধতি নির্বাচন করার সময় নির্ভুলতার প্রয়োজনীয়তা এবং অর্থনৈতিক বিবেচনার মধ্যে ভারসাম্য বজায় রাখা উচিত। সবচেয়ে দক্ষ প্রক্রিয়াটি সর্বদা সঠিক পছন্দ হয় না—এটি হল সেই প্রক্রিয়া যা আপনার নির্দিষ্টকরণগুলি পূরণ করে এবং সর্বোত্তম মূল্যে প্রদান করে।
উৎপাদন পরিমাণও গুরুত্বপূর্ণ। ভর উৎপাদনে উচ্চ-দক্ষতাসম্পন্ন পদ্ধতিগুলি সবচেয়ে ভালোভাবে কাজ করে, অন্যদিকে প্রোটোটাইপ এবং ছোট ব্যাচের ক্ষেত্রে নমনীয়তা আরও গুরুত্বপূর্ণ হয়ে ওঠে। আপনার বিদ্যমান সরঞ্জাম, প্রযুক্তিগত দক্ষতা এবং নতুন পদ্ধতিগুলি আপনার সামগ্রিক প্রক্রিয়াকে উন্নত করতে পারে কিনা তা বিবেচনা করুন।
আপনার যন্ত্রকৃত পদ্ধতি নির্বাচন করার পর, পরবর্তী গুরুত্বপূর্ণ সিদ্ধান্তটি অপেক্ষা করছে: আপনার অ্যাপ্লিকেশনের জন্য সঠিক উপাদান নির্বাচন করা।
সিএনসি মেশিন করা পার্টের জন্য উপাদান নির্বাচন গাইড
আপনি আপনার যন্ত্রকর্ম পদ্ধতি নির্বাচন করেছেন—এখন একটি সমানভাবে গুরুত্বপূর্ণ সিদ্ধান্ত নেওয়ার পালা: আপনার অংশটি কোন উপাদান দিয়ে তৈরি করা হবে? এই পছন্দটি টুল ক্ষয়, কাটিং গতি থেকে শুরু করে চূড়ান্ত অংশের কার্যকারিতা ও খরচ—সবকিছুর উপর প্রভাব ফেলে। ভুল উপাদান নির্বাচন করলে আপনি অত্যধিক যন্ত্রকর্ম সময়, টুলের প্রারম্ভিক ব্যর্থতা বা নির্দিষ্ট প্রয়োগে টিকে না থাকা অংশগুলির মুখোমুখি হবেন।
সঠিক উপাদানটি যান্ত্রিক প্রয়োজনীয়তা, যন্ত্রকর্মযোগ্যতা এবং বাজেট সীমাবদ্ধতার মধ্যে ভারসাম্য বজায় রাখে। ধাতু অংশ যন্ত্রকর্ম করার সময় আপনি দেখবেন যে, কিছু উপাদান প্রায় স্বতঃস্ফূর্তভাবে কাটার জন্য আহ্বান জানায়, অন্যদিকে কিছু উপাদান প্রতিটি পদক্ষেপে প্রতিরোধ করে। চলুন আমরা আপনার বিকল্পগুলি পরীক্ষা করি এবং তথ্যভিত্তিক সিদ্ধান্ত গ্রহণের জন্য একটি কাঠামো গড়ে তুলি।
হালকা ওজন ও নির্ভুলতার জন্য অ্যালুমিনিয়াম মিশ্র ধাতু
যদি আপনি কাস্টম মেশিন করা পার্টস-এর ক্ষেত্রে নবীন হন, তবে অ্যালুমিনিয়াম প্রায়শই আপনার সর্বোত্তম শুরুর বিকল্প। সিএনসি উপকরণ বিশেষজ্ঞদের মতে, অ্যালুমিনিয়াম মিশ্র ধাতুগুলি ওজনের তুলনায় চমৎকার শক্তি-অনুপাত, উচ্চ তাপীয় ও বৈদ্যুতিক পরিবাহিতা এবং প্রাকৃতিক ক্ষয়রোধী সুরক্ষা প্রদান করে। আরও ভালো কথা হলো, এগুলি মেশিন করার জন্য সবচেয়ে সহজ উপকরণগুলির মধ্যে একটি—যা প্রোটোটাইপ এবং উৎপাদন পার্টস উভয়ের জন্যই প্রায়শই সবচেয়ে অর্থনৈতিক বিকল্প হয়ে ওঠে।
কিন্তু সমস্ত অ্যালুমিনিয়াম সমান নয়। নিম্নলিখিত সাধারণ গ্রেডগুলি সম্পর্কে আপনার যা জানা প্রয়োজন:
- অ্যালুমিনিয়াম ৬০৬১: অ্যালুমিনিয়াম সিএনসি সেবা প্রদানকারীদের কাজের ঘোড়া। এই সাধারণ উদ্দেশ্যের মিশ্র ধাতুটি ভালো শক্তি, চমৎকার মেশিনযোগ্যতা প্রদান করে এবং পৃষ্ঠের কঠোরতা বৃদ্ধির জন্য অ্যানোডাইজ করা যায়। এটি আপনার অধিকাংশ অ্যাপ্লিকেশনের জন্য প্রথম পছন্দ।
- অ্যালুমিনিয়াম 7075: যখন ওজন হ্রাস অত্যন্ত গুরুত্বপূর্ণ হয় এবং শক্তি কমানো যায় না, তখন ৭০৭৫ এগিয়ে আসে। এই এয়ারোস্পেস-গ্রেড মিশ্র ধাতুটি ইস্পাতের সমতুল্য কঠোরতা অর্জনের জন্য তাপ চিকিৎসা করা যায় এবং এর চমৎকার ক্লান্তি প্রতিরোধ ক্ষমতা রয়েছে। উচ্চতর উপকরণ খরচ আশা করুন, কিন্তু অসাধারণ কার্যকারিতা পাবেন।
- অ্যালুমিনিয়াম ৫০৮৩: সমুদ্রের জল বা ক্রায়োজেনিক পরিবেশে প্রবেশ করছেন? এই সংকরটি সমুদ্রের জলের বিরুদ্ধে উৎকৃষ্ট ক্ষয় প্রতিরোধ ক্ষমতা এবং চরম তাপমাত্রায় অসাধারণ কার্যকারিতা প্রদান করে। এটি ওয়েল্ডেড অ্যাসেম্বলিগুলির জন্যও অত্যন্ত উপযুক্ত।
যন্ত্রচালিত প্রক্রিয়াকরণের দৃষ্টিকোণ থেকে, অ্যালুমিনিয়াম আক্রমণাত্মক কাটিং গতি এবং ফিড সমর্থন করে। টুলগুলি দীর্ঘ সময় ধরে ধারালো থাকে, চক্র সময় কমে যায় এবং পৃষ্ঠের ফিনিশগুলি মেশিন থেকে বের হওয়ার পর পরিষ্কার দেখায়। অ্যালুমিনিয়াম মেশিনিং সেবা সাধারণত কঠিন উপকরণগুলির জন্য প্রয়োজনীয় বিশেষায়িত টুলিং ছাড়াই কঠোর টলারেন্স বজায় রাখতে পারে।
ইস্পাত এবং স্টেইনলেস স্টিল মেশিনিং বিবেচনা
যখন আপনার অ্যাপ্লিকেশনে উচ্চতর শক্তি, কঠোরতা বা তাপমাত্রা প্রতিরোধ ক্ষমতা প্রয়োজন হয়, তখন স্টিল পছন্দের উপাদান হয়ে ওঠে। তবে, স্টিল থেকে পার্টস মেশিন করার জন্য আরও সাবধানতাপূর্ণ পরিকল্পনা প্রয়োজন—এই উপকরণগুলি অ্যালুমিনিয়ামের মতো সহজে চিপ তৈরি করে না।
মৃদু ইস্পাত (১০১৮ এবং ১০৪৫ এর মতো নিম্ন কার্বনযুক্ত স্টিল) যান্ত্রিক বৈশিষ্ট্য এবং যান্ত্রিক বৈশিষ্ট্যগুলির মধ্যে একটি ভাল ভারসাম্য সরবরাহ করে। এগুলি তুলনামূলকভাবে সস্তা, সহজেই ঝালাই করা যায় এবং জগ, ফিক্সচার এবং সাধারণ উদ্দেশ্য উপাদানগুলির জন্য ভাল কাজ করে। ট্রেড অফ? সুরক্ষা লেপ ছাড়া ক্ষয় প্রতি সংবেদনশীলতা।
এলয় স্টিল (যেমন ৪১৪০ এবং ৪৩৪০) উন্নত কঠোরতা, দৃঢ়তা এবং পরিধান প্রতিরোধের জন্য কার্বনের বাইরে উপাদান যুক্ত করুন। এই উপকরণগুলি কঠোর শিল্প অ্যাপ্লিকেশনগুলি পরিচালনা করে তবে কম কাটার গতি এবং আরও শক্তিশালী সরঞ্জামগুলির প্রয়োজন।
স্টেইনলেস স্টীল সিএনসি মেশিনিং পরিষেবাদির জন্য, উপাদান নির্বাচন আরও nuanced হয়ে যায়ঃ
- 304 স্টেইনলেস: দুর্দান্ত ক্ষয় প্রতিরোধের এবং ভাল মেশিনযোগ্যতার সাথে সর্বাধিক সাধারণ স্টেইনলেস খাদ। রান্নাঘরের যন্ত্রপাতি, পাইপিং, এবং স্থাপত্য অ্যাপ্লিকেশন জন্য নিখুঁত.
- 316 স্টেইনলেস: ৩০৪ এর চেয়ে বেশি রাসায়নিক প্রতিরোধ ক্ষমতা, বিশেষ করে লবণীয় দ্রবণগুলির বিরুদ্ধে। সামুদ্রিক এবং চিকিৎসা অ্যাপ্লিকেশন প্রায়ই এই গ্রেড নির্দিষ্ট।
- ১৭-৪ PH: একটি অধঃক্ষেপণ-দৃঢ়ীকৃত গ্রেড যা কর্মক্ষমতা সংরক্ষণ করে টুল স্টিলের মতো কঠোরতা অর্জন করতে পারে। বাতাসের টারবাইনের উপাদান এবং উচ্চ-কর্মক্ষমতাসম্পন্ন অ্যাপ্লিকেশনগুলি এই বহুমুখী মিশ্র ধাতুর উপর নির্ভর করে।
স্টেইনলেস স্টিলে ধাতব যন্ত্রাংশের যান্ত্রিক প্রক্রিয়াকরণের জন্য সাধারণত কার্বাইড টুলিং, কম কাটিং গতি এবং প্রায়শই প্লাড কুল্যান্ট ব্যবহার করা হয় তাপ সঞ্চয় নিয়ন্ত্রণের জন্য। এই বিষয়গুলি অ্যালুমিনিয়ামের তুলনায় যান্ত্রিক প্রক্রিয়াকরণের খরচ বৃদ্ধি করে, কিন্তু চাহিদাপূর্ণ অ্যাপ্লিকেশনগুলির জন্য উন্নত যান্ত্রিক বৈশিষ্ট্যগুলি এই বিনিয়োগকে যৌক্তিক করে তোলে।
বিশেষায়িত উপকরণ এবং তাদের সংশ্লিষ্ট আপোস-প্রতিপক্ষ
অ্যালুমিনিয়াম এবং স্টিলের পাশাপাশি, কয়েকটি বিশেষায়িত উপকরণ নির্দিষ্ট কর্মক্ষমতা প্রয়োজনীয়তা পূরণ করে—প্রতিটির আলাদা যান্ত্রিক প্রক্রিয়াকরণ বৈশিষ্ট্য রয়েছে।
টাইটানিয়াম একটি অসাধারণ শক্তি-ওজন অনুপাত এবং চমৎকার ক্ষয় প্রতিরোধ ক্ষমতা প্রদান করে। গ্রেড ৫ টাইটানিয়াম (Ti-6Al-4V) এটি বিমান চলাচল, চিকিৎসা এবং সামুদ্রিক প্রয়োগগুলিতে প্রভাব বিস্তার করে। কিন্তু সমস্যা কী? টাইটানিয়াম যন্ত্রকরণ করা অত্যন্ত কঠিন। এটি উল্লেখযোগ্য তাপ উৎপন্ন করে, দ্রুত কঠিন হয়ে ওঠে এবং বিশেষায়িত টুলিং এবং সাবধানতাপূর্ণ প্যারামিটার নিয়ন্ত্রণ প্রয়োজন করে। উপাদান এবং যন্ত্রকরণ উভয় ক্ষেত্রেই উল্লেখযোগ্যভাবে উচ্চ খরচ হবে।
পিতল C360 যন্ত্রকরণের সহজতার বিপরীত প্রান্তে অবস্থিত—এটি কাটার জন্য সবচেয়ে সহজ উপাদানগুলির মধ্যে একটি। ফিটিং, কানেক্টর এবং সজ্জামূলক হার্ডওয়্যারের মতো উচ্চ-পরিমাণ প্রয়োগগুলি ব্রাসের চমৎকার চিপ গঠন এবং টুল জীবন থেকে উপকৃত হয়। এই উপাদানটি প্রাকৃতিক ক্ষয় প্রতিরোধ ক্ষমতা এবং আকর্ষণীয় সোনালী রঙের দৃশ্যমান গুণাবলীও প্রদান করে।
ইঞ্জিনিয়ারিং প্লাস্টিক হালকা ওজনের পার্টস, বৈদ্যুতিক অন্তরণ বা রাসায়নিক প্রতিরোধের প্রয়োজন হয় এমন প্রয়োগগুলিতে ব্যবহৃত হয়:
- POM (ডেলরিন): সবচেয়ে সহজে যন্ত্রকরণযোগ্য প্লাস্টিক, যা উচ্চ দৃঢ়তা, নিম্ন ঘর্ষণ এবং চমৎকার মাত্রিক স্থিতিশীলতা প্রদান করে
- পিইইকে (PEEK): একটি উচ্চ-কার্যকরী পলিমার যা ওজন-সংবেদনশীল প্রয়োগগুলিতে ধাতুর পরিবর্তে ব্যবহার করা যেতে পারে, যার অসাধারণ তাপীয় এবং রাসায়নিক প্রতিরোধ ক্ষমতা রয়েছে
- নাইলন: উচ্চ আঘাত শক্তি সহ ভালো যান্ত্রিক বৈশিষ্ট্য, যদিও আর্দ্রতা শোষণের প্রবণতা রয়েছে
| উপাদান | মেশিনযোগ্যতার রেটিং | সাধারণ সহনশীলতা | সাধারণ অ্যাপ্লিকেশন | আপেক্ষিক খরচ |
|---|---|---|---|---|
| অ্যালুমিনিয়াম 6061 | চমৎকার | ±0.001" থেকে ±0.005" | প্রোটোটাইপ, বিমান ও মহাকাশ, স্বয়ংচালিত যানবাহন | কম |
| অ্যালুমিনিয়াম 7075 | ভাল | ±0.001" থেকে ±0.005" | বিমান ও মহাকাশ গঠন, সামরিক | মাঝারি |
| স্টেইনলেস 304 | মাঝারি | ±0.001" থেকে ±0.005" | খাদ্য সরঞ্জাম, স্থাপত্য | মাঝারি |
| স্টেইনলেস 316 | মাঝারি | ±0.001" থেকে ±0.005" | ম্যারিন, মেডিকেল, রাসায়নিক প্রক্রিয়াকরণ | মাঝারি-উচ্চ |
| টাইটানিয়াম গ্রেড 5 | দরিদ্র | ±0.001" থেকে ±0.003" | বিমান ও মহাকাশ, চিকিৎসা প্রতিরোপ | খুব বেশি |
| পিতল C360 | চমৎকার | ±0.001" থেকে ±0.005" | ফিটিংস, বৈদ্যুতিক, সজ্জামূলক | মাঝারি |
| POM (ডেলরিন) | চমৎকার | ±0.002" থেকে ±0.005" | গিয়ার, বেয়ারিং, অন্তরক | কম |
| পিইইকে | ভাল | ±0.002" থেকে ±0.005" | চিকিৎসা, বিমান ও মহাকাশ, রাসায়নিক | খুব বেশি |
উপাদান নির্বাচন আপনার যন্ত্রকর্ম প্যারামিটারগুলিকে কীভাবে প্রভাবিত করে? খারাপ যন্ত্রকর্মযোগ্যতা সম্পন্ন উপাদানগুলির জন্য ধীর স্পিন্ডল গতি, হালকা কাটিং এবং আরও ঘন ঘন টুল পরিবর্তন প্রয়োজন। টাইটানিয়ামের জন্য কাটিং গতি অ্যালুমিনিয়ামের সহনীয় গতির পাঁচ ভাগের এক ভাগ হতে পারে। এই সমস্ত সামঞ্জস্যগুলি সরাসরি চক্র সময় এবং খরচকে প্রভাবিত করে—এই সম্পর্কটি উৎপাদন পরিমাণের ক্ষেত্রে অত্যন্ত গুরুত্বপূর্ণ হয়ে ওঠে।
টুল নির্বাচন উপাদান নির্বাচনের পরে অনুসরণ করে। অ্যালুমিনিয়াম হাই-স্পিড স্টিল বা অকোটেড কার্বাইড দিয়ে পরিষ্কারভাবে কাটা যায়। স্টেইনলেস স্টিলের জন্য কোটেড কার্বাইড টুল পছন্দনীয়। টাইটানিয়ামের জন্য প্রায়শই সেই বিশেষ অ্যাপ্লিকেশনের জন্য নির্দিষ্টভাবে ডিজাইন করা বিশেষ জ্যামিতি এবং কোটিং প্রয়োজন। আপনার উপাদান সংক্রান্ত সিদ্ধান্তটি যন্ত্রকর্ম প্রক্রিয়ার প্রতিটি দিককে প্রভাবিত করে।
উপাদান নির্বাচন সম্পূর্ণ হয়ে গেলে, পরবর্তী চ্যালেঞ্জ হলো এমন অংশগুলির ডিজাইন করা যা উৎপাদনকারীরা আসলে দক্ষতার সাথে উৎপাদন করতে পারবেন—এটি এমন একটি বিষয় যেখানে ছোট ছোট সিদ্ধান্তই খরচ ও মানের উপর বিশাল প্রভাব ফেলে।
সিএনসি অংশ উৎপাদনের জন্য উৎপাদনযোগ্যতা বিবেচনা করে ডিজাইন
আপনি আপনার উপাদান এবং মেশিনিং পদ্ধতি নির্বাচন করেছেন—কিন্তু এখানেই অনেক প্রকল্প ভুল দিকে যায়। ক্যাড-এ যা নিখুঁত দেখাচ্ছে, তা কারখানার ফ্লোরে একটি দুঃস্বপ্নে পরিণত হতে পারে। কেন? কারণ সিএনসি মেশিন ডিজাইনের নিয়মগুলি ভালো কারণেই বিদ্যমান, এবং এগুলি উপেক্ষা করলে অংশগুলি প্রত্যাখ্যাত হয়, বাজেট অতিক্রম করা হয় এবং উৎপাদনকারীরা হতাশ হন।
উৎপাদনযোগ্যতা বিবেচনা করে ডিজাইন (DFM) আপনার যা চান এবং যা মেশিনগুলি আসলে উৎপাদন করতে পারে—এই দুটির মধ্যে ফাঁক পূরণ করে। যখন আপনি সিএনসি মেশিনিং-এর জন্য ডিজাইনে এই নীতিগুলি প্রয়োগ করেন, তখন আপনি দ্রুততর টার্নঅ্যারাউন্ড, কম খরচ এবং প্রথমবারেই কাজ করে এমন অংশগুলি পাবেন। চলুন সবচেয়ে গুরুত্বপূর্ণ নিয়মগুলি বিশদভাবে বিশ্লেষণ করি।
দেয়ালের পুরুত্ব এবং ফিচারের গভীরতার নিয়ম
আপনার পার্টের একটি পাতলা দেয়াল কাটার কথা কল্পনা করুন। যখন কাটিং টুলটি কাজ শুরু করে, কম্পন বাড়তে থাকে। দেয়ালটি বাঁকে। পৃষ্ঠের ফিনিশ খারাপ হয়ে যায়। চরম ক্ষেত্রে, দেয়ালটি ফেটে যায় অথবা সম্পূর্ণরূপে বিকৃত হয়ে যায়। ডিজাইনাররা যখন ন্যূনতম দেয়াল পুরুত্বের প্রয়োজনীয়তা উপেক্ষা করেন, তখন এই পরিস্থিতি ধারাবাহিকভাবে ঘটে।
অনুযায়ী শিল্প বিশেষজ্ঞদের দ্বারা প্রদত্ত DFM নির্দেশিকা , এখানে আপনার লক্ষ্য হওয়া উচিত:
- ধাতু: ন্যূনতম ০.৮ মিমি (০.০৩১") দেয়াল পুরুত্ব—অত্যন্ত পাতলা দেয়ালগুলি কাটার সময় বাঁকানো, ভাঙানো এবং বিকৃত হওয়ার ঝুঁকির মুখে পড়ে
- প্লাস্টিক: নিম্ন দৃঢ়তা এবং তাপ-সংবেদনশীলতার কারণে ন্যূনতম ১.৫ মিমি (০.০৫৯") দেয়াল পুরুত্ব
- প্রস্থ-সহ-উচ্চতা অনুপাত: অসমর্থিত দেয়ালের জন্য ৩:১ অনুপাত বজায় রাখুন—উচ্চতর ও পাতলা দেয়ালগুলি কম্পন সমস্যাকে আরও বাড়িয়ে দেয়
ক্যাভিটির গভীরতা একই যুক্তি অনুসরণ করে। সিএনসি কাটিং টুলগুলির সীমিত পৌঁছানোর দূরত্ব থাকে, যা সাধারণত তাদের ব্যাসের ৩ থেকে ৪ গুণ পর্যন্ত হয়, তারপর থেকে ডিফ্লেকশন সমস্যাযুক্ত হয়ে ওঠে। টুল ঝুলে যাওয়া রোধ করতে এবং চিপ নির্গমনকে সহজতর করতে ক্যাভিটিগুলির উপযুক্ত গভীরতা-থেকে-প্রস্থ অনুপাত নিয়ে ডিজাইন করুন। অধিকাংশ অপারেশনের জন্য ক্যাভিটির গভীরতা টুলের ব্যাসের তিন গুণের মধ্যে সীমিত রাখুন। গভীর ক্যাভিটিগুলি (টুলের ব্যাসের ছয় গুণের বেশি) এর সর্বোচ্চ গভীরতা তাদের প্রস্থের চার গুণ হওয়া উচিত।
এই সীমাগুলি অতিক্রম করলে কী ঘটে? টুল ডিফ্লেকশনের কারণে মাত্রাগত ত্রুটি দেখা দেয়। সারফেস ফিনিশ চ্যাটার চিহ্নের কারণে ক্ষতিগ্রস্ত হয়। মেশিনিস্টরা হালকা ও ধীরগতির পাস নেওয়ার কারণে সাইকেল সময় বৃদ্ধি পায়। প্রতিটি অত্যন্ত পাতলা দেয়াল বা অত্যধিক গভীর পকেট সরাসরি উচ্চতর খরচ এবং গুণগত ঝুঁকির দিকে নিয়ে যায়।
অর্জনযোগ্য টলারেন্সের জন্য ডিজাইন করা
অসংখ্য কাস্টম পার্ট ডিজাইন প্রকল্পে যে ব্যয়বহুল ভুলটি প্রায়শই দেখা যায়, তা হলো: অতি-টলারেন্সিং। ইঞ্জিনিয়াররা প্রতিটি মাত্রায় কঠোর টলারেন্স নির্দিষ্ট করেন "শুধু নিরাপত্তার জন্য", কিন্তু এর ঘাতক ব্যয় বৃদ্ধির প্রভাব সম্বন্ধে অবগত থাকেন না।
মানক CNC মেশিনিং অপারেশনগুলি ডিফল্টভাবে ±০.১৩ মিমি (±০.০০৫") নির্ভুলতা প্রদান করে—যা অধিকাংশ অ্যাপ্লিকেশনের জন্য বেশ নির্ভুল। আরও কঠোর সহনশীলতা অর্জনের জন্য ধীর ফিড, অতিরিক্ত পাস এবং প্রায়শই দ্বিতীয় ধাপের অপারেশন প্রয়োজন। কোনো কঠোর সহনশীলতা নির্দিষ্ট করার আগে নিজেকে প্রশ্ন করুন: এই মাত্রাটি আসলে উন্নত নির্ভুলতার প্রয়োজন হয় কি?
সহনশীলতা প্রয়োজনীয়তা সরাসরি উপাদানের বৈশিষ্ট্য এবং জ্যামিতির সঙ্গে সম্পর্কিত:
| উপাদান প্রকার | স্ট্যান্ডার্ড টলারেন্স | অর্জনযোগ্য কঠোর সহনশীলতা | প্রধান বিবেচনা |
|---|---|---|---|
| এলুমিনিয়াম লৈগ | ±0.005" | ±0.001" | উত্তম স্থিতিশীলতা; যথাযথ খরচে কঠোর সহনশীলতা অর্জন সম্ভব |
| স্টেইনলেস স্টিল | ±0.005" | ±0.001" | কাজের কারণে শক্তিকরণ ঘটলে গুরুত্বপূর্ণ মাত্রাগুলির জন্য পীড়ন মুক্তির প্রয়োজন হতে পারে |
| টাইটানিয়াম | ±0.005" | ±0.002" | স্প্রিংব্যাক প্রভাব; একাধিক হালকা পাসের প্রয়োজন হতে পারে |
| ইঞ্জিনিয়ারিং প্লাস্টিক | ±0.005" | ±0.002" | তাপীয় প্রসারণের চিন্তা; আর্দ্রতা শোষণ মাত্রাগুলিকে প্রভাবিত করে |
কঠোর সহনশীলতা শুধুমাত্র সেইসব বৈশিষ্ট্যের জন্য সংরক্ষণ করুন যার জন্য এটি প্রকৃতপক্ষে প্রয়োজন—যুগ্ম পৃষ্ঠ, বেয়ারিং ফিট, সিলিং ইন্টারফেস। অন্য সমস্ত জায়গায় মানক সহনশীলতা প্রয়োগ করুন। CNC কাটিং ডিজাইনে এই পদ্ধতি খরচকে যথাযথ রাখে এবং একইসাথে কার্যকরী প্রয়োজনীয়তা পূরণ নিশ্চিত করে।
সাধারণ ডিজাইন ভুলগুলি এড়িয়ে চলা
তীব্র অভ্যন্তরীণ কোণগুলি ডিজাইন ত্রুটিগুলির তালিকায় সর্বোচ্চ স্থান অধিকার করে। প্রোটোল্যাবস উল্লেখ করেছেন যে, সিলিন্ড্রিক্যাল কাটিং টুলগুলি শারীরিকভাবে তীব্র অভ্যন্তরীণ প্রান্ত তৈরি করতে পারে না—এগুলি সর্বদা টুলের জ্যামিতির সমান ব্যাসার্ধ রেখে যায়। তীব্র অভ্যন্তরীণ কোণ ডিজাইন করা উৎপাদকদের ব্যয়বহুল বিকল্পগুলির দিকে ঠেলে দেয়, যেমন ইলেকট্রো-ডিসচার্জ মেশিনিং (EDM) বা অত্যন্ত ছোট (ভঙ্গুর) টুল।
সমাধান কী? আপনার কাটিং টুলের ব্যাসার্ধের চেয়ে অন্তত ৩০% বড় অভ্যন্তরীণ কোণের ব্যাসার্ধ যোগ করুন। একটি ১০ মিমি এন্ড মিলের জন্য, অভ্যন্তরীণ প্রান্তগুলি ১৩ মিমি ন্যূনতম ব্যাসার্ধ সহ ডিজাইন করুন। এই অনুমতি টুলের চাপ হ্রাস করে, কাটিং গতি বৃদ্ধি করে এবং পৃষ্ঠের ফিনিশকে উল্লেখযোগ্যভাবে উন্নত করে।
সিএনসি মেশিনিংয়ের জন্য: অভ্যন্তরীণ কোণগুলিতে ফিলেট এবং বহিঃস্থ কোণগুলিতে চ্যাম্ফার ব্যবহার করুন। একটি ৪৫° বহিঃস্থ চ্যাম্ফার বহিঃস্থ ব্যাসার্ধের তুলনায় দ্রুত মেশিন করা যায় এবং এর খরচও উল্লেখযোগ্যভাবে কম।
ছিদ্রের বিশেষকরণগুলি আরেকটি সাধারণ সমস্যার কারণ হয়ে ওঠে। মানক ড্রিল সাইজগুলি দক্ষতার সাথে কাজ করে কারণ এগুলি সহজলভ্য টুলিংয়ের সাথে মিলে যায়। অ-মানক ছিদ্রগুলির জন্য এন্ড মিল ব্যবহার করে ধীরে ধীরে প্রয়োজনীয় মাত্রা মেশিন করতে হয়—যা সময় ও খরচ উল্লেখযোগ্যভাবে বাড়িয়ে দেয়। সূত্রযুক্ত ছিদ্রের ক্ষেত্রে, সংযোগের শক্তি প্রধানত প্রথম কয়েকটি সূত্রে অবস্থিত হওয়ায়, সূত্রের গভীরতা ছিদ্রের ব্যাসের তিন গুণের বেশি না করা উচিত।
সিএনসি মেশিন করা উপাদানগুলি চূড়ান্ত করার সময় এই চেকলিস্টটি ব্যবহার করুন:
- অভ্যন্তরীণ কোণ: প্রত্যাশিত টুল ব্যাসার্ধের চেয়ে কমপক্ষে ১/৩ অংশ বড় ব্যাসার্ধ যোগ করুন
- গর্তের গভীরতা: মানক ড্রিলিংয়ের জন্য ব্যাসের ৪ গুণ পর্যন্ত সীমিত রাখুন; গভীর ছিদ্রগুলির জন্য বিশেষায়িত টুলিং প্রয়োজন
- থ্রেডের গভীরতা: সর্বোচ্চ ৩ গুণ ছিদ্র ব্যাস; অন্ধ ছিদ্রের তলদেশে ০.৫ গুণ ব্যাসের অ-সূত্রযুক্ত দৈর্ঘ্য রেখে দিন
- আন্ডারকাট: সম্ভব হলে এড়িয়ে চলুন; প্রয়োজন হলে মানক টি-স্লট বা ডোভেটেইল মাপ ব্যবহার করুন
- পাঠ্য ও লোগো: উত্থিত (উঁচু) না করে খোদাই করা (অবনমিত) ব্যবহার করুন—উত্থিত বৈশিষ্ট্যগুলি চারপাশের সমস্ত উপাদান অপসারণ করতে হয়
- পৃষ্ঠের ফিনিশ: কার্যকারিতা যদি আরও মসৃণ পৃষ্ঠ চায় না, তবে ডিফল্ট হিসাবে ৩.২ µm Ra নির্দিষ্ট করুন; আরও মসৃণ পৃষ্ঠ মেশিনিং সময়কে গুণিত করে
প্রতিটি ডিজাইন সিদ্ধান্তের সাথে খরচের প্রভাব জড়িত। সজ্জামূলক নকশা এবং খোদাই করা নকশা সহ সৌন্দর্যবোধ সম্পর্কিত বৈশিষ্ট্যগুলি কার্যকরী সুবিধা ছাড়াই যন্ত্রকরণ সময় বৃদ্ধি করে। ৫-অক্ষ যন্ত্রকরণ বা EDM প্রয়োজনীয় জটিল জ্যামিতিক আকৃতি সহজ বিকল্পগুলির তুলনায় উল্লেখযোগ্যভাবে বেশি খরচ সাপেক্ষ। সেই সুন্দর ফিলেট বা জটিল পকেটটি যোগ করার আগে বিবেচনা করুন যে, সহজ জ্যামিতি কি একই কার্যকরী লক্ষ্য অর্জন করতে পারে।
একটি মেশিন পার্ট ডিজাইন করার পদক্ষেপগুলিতে সর্বদা উৎপাদনযোগ্যতা পর্যালোচনা অন্তর্ভুক্ত থাকা উচিত। আপনার CAD মডেলগুলি আপলোড করে স্বয়ংক্রিয় DFM প্রতিক্রিয়া পান, অথবা যন্ত্রকরণ পার্টনারের সাথে শুরুতেই—যন্ত্রপাতি অর্ডার করা হওয়ার আগে এবং উৎপাদন সময়সূচী নির্ধারণের আগে—পরামর্শ নিন। এই পর্যায়ে কয়েকটি ডিজাইন সামঞ্জস্য পরে বড় ধরনের সমস্যা এড়াতে সাহায্য করে।
আপনার পার্টটি দক্ষ উৎপাদনের জন্য ডিজাইন করার পর, পরবর্তী গুরুত্বপূর্ণ পদক্ষেপ হল টলারেন্স এবং পৃষ্ঠ সমাপ্তি (সারফেস ফিনিশ) বিশেষকরণগুলি কীভাবে পরিমাপযোগ্য মানসম্পন্ন গুণগত মানদণ্ডে রূপান্তরিত হয় তা বোঝা।

টলারেন্স এবং পৃষ্ঠ সমাপ্তি (সারফেস ফিনিশ) মানদণ্ড ব্যাখ্যা
আপনি আপনার পার্টটি উৎপাদনযোগ্যতা বিবেচনা করে ডিজাইন করেছেন—কিন্তু "যথেষ্ট ভালো" বলতে ঠিক কী বোঝায়, সেটা কীভাবে স্পষ্টভাবে যোগাযোগ করবেন? সহনশীলতা (টলারেন্স) এবং পৃষ্ঠের শেষ প্রক্রিয়া (সারফেস ফিনিশ) এর বিশেষকরণগুলি হলো গুণগত মান নির্ধারণের জন্য আপনার ভাষা। এগুলি ভুলভাবে নির্দিষ্ট করলে আপনি অপ্রয়োজনীয় নির্ভুলতার জন্য অতিরিক্ত খরচ বহন করবেন অথবা যেমনটা প্রয়োজন তেমন কাজ করবে না এমন পার্ট পাবেন।
এই বিশেষকরণগুলি বোঝা শুধু কৌশলগত জ্ঞান নয়—এটা আপনার পকেটে টাকা বাঁচানোর ব্যাপার। শিল্প খাতের সহনশীলতা নির্দেশিকা অনুযায়ী, কঠোর সহনশীলতা বজায় রাখতে বিশেষায়িত কাটিং টুল এবং দীর্ঘ মেশিনিং সময় প্রয়োজন হয়, যা পার্টের খরচকে উল্লেখযোগ্যভাবে বাড়িয়ে দেয়। মোট পার্টের মাত্র প্রায় ১% এর কঠোরতম সহনশীলতা পরিসরের প্রয়োজন হয়। চলুন এই সংখ্যাগুলির অর্থ বোঝার চেষ্টা করি এবং এগুলি বুদ্ধিমানের মতো কীভাবে নির্দিষ্ট করতে হয় তা শিখি।
টলারেন্স ক্লাস এবং তাদের প্রয়োগ বোঝা
সহনশীলতাকে গ্রহণযোগ্য ত্রুটির পরিমাণ হিসেবে ভাবুন। যদি একটি বোল্টের দৈর্ঘ্য ১০০ মিমি হওয়ার কথা হয় এবং সহনশীলতা ±০.০৫ মিমি হয়, তবে ৯৯.৯৫ মিমি থেকে ১০০.০৫ মিমি পর্যন্ত যেকোনো চূড়ান্ত দৈর্ঘ্য পরীক্ষায় পাস করবে। এই সীমার বাইরে চলে গেলে? পার্টটি প্রত্যাখ্যাত হবে।
ISO 2768 সাধারণ সহনশীলতার জন্য আন্তর্জাতিক মান প্রদান করে, যা চারটি শ্রেণি-এ বিভক্ত:
- ফাইন (f): যেসব প্রিসিশন সিএনসি উপাদানের ঘনিষ্ঠ ফিট প্রয়োজন, তাদের জন্য সবচেয়ে কঠোর সাধারণ সহনশীলতা
- মিডিয়াম (m): অধিকাংশ প্রিসিশন সিএনসি মেশিনিং সেবার জন্য স্ট্যান্ডার্ড ডিফল্ট—সাধারণত ±০.০০৫" (০.১৩ মিমি)
- মোটা (c): অ-গুরুত্বপূর্ণ মাত্রার জন্য শিথিল সহনশীলতা
- খুব মোটা (v): যেসব অস্পষ্ট অংশের মাত্রা কার্যকরভাবে গুরুত্বপূর্ণ নয়, তাদের জন্য সবচেয়ে ঢিলে সহনশীলতা
প্রিসিশন মেশিনিং সেবা প্রদানকারীদের জন্য, উচ্চ-প্রিসিশন কাজের মাধ্যমে ধাতব অংশগুলিতে ±০.০০১" (০.০২৫ মিমি) পর্যন্ত সহনশীলতা অর্জন করা সম্ভব। সার্জিক্যাল সরঞ্জামের মতো বিশেষায়িত অ্যাপ্লিকেশনগুলি ±০.০০০২" (০.০০৫০৮ মিমি) পর্যন্ত যেতে পারে—কিন্তু এই চরম প্রিসিশন বিরল এবং অত্যন্ত ব্যয়বহুল।
মানক ± ফরম্যাটের পাশাপাশি, আপনি কয়েকটি সহনশীলতা পদ্ধতির সম্মুখীন হবেন:
- দ্বিপার্শ্বিক: নমিনালের উপরে ও নীচে সমানভাবে পরিবর্তন অনুমোদিত (যেমন: ২৫.৮ মিমি ±০.১ মিমি)
- একপার্শ্বিক: শুধুমাত্র একটি দিকে পরিবর্তন (যেমন: ১.২৫ মিমি +০.১/-০.০ মিমি)
- সীমা: সরাসরি ঊর্ধ্ব ও নিম্ন সীমা উল্লেখ করা (যেমন: ১০.৯–১১.০ মিমি)
কোন পদ্ধতি ব্যবহার করা উচিত? দ্বিপক্ষীয় সহনশীলতা বেশিরভাগ সাধারণ অ্যাপ্লিকেশনের জন্য কাজ করে। একতরফা সহনশীলতা তখনই প্রযোজ্য যখন এক দিকের বিচ্যুতি গ্রহণযোগ্য হয় কিন্তু অন্য দিকটি নয়। যেমন শ্যাফট-বেয়ারিং ফিট যেখানে সামান্য আলগা ভাল কিন্তু হস্তক্ষেপ নয়।
পৃষ্ঠের সমাপ্তি পরামিতিগুলি ডিকোড করা হয়েছে
পৃষ্ঠের সমাপ্তি মেশিনিংয়ের পরে আপনার অংশে থাকা টেক্সচার বর্ণনা করে। সর্বাধিক সাধারণ পরিমাপ হল Ra (রুক্ষতা গড়) মাইক্রোইঞ্চি (মাইক্রো ইঞ্চি) বা মাইক্রোমিটার (মাইক্রোমিটার) এ পরিমাপ করা পৃষ্ঠের উচ্চতার পরিবর্তনের গাণিতিক গড়।
এই সংখ্যাগুলো আসলে কেমন দেখাচ্ছে? এখানে পৃষ্ঠের রুক্ষতার মান থেকে একটি ব্যবহারিক রেফারেন্স আছে:
| Ra মান (μin) | আরএ (Ra) মান (মাইক্রোমিটার) | চাক্ষুষ চেহারা | টাইপিক্যাল অ্যাপ্লিকেশন |
|---|---|---|---|
| 125 | 3.2 | দৃশ্যমান টুল দাগ | সাধারণ যন্ত্রপাতি |
| 63 | 1.6 | সামান্য টুল চিহ্ন দৃশ্যমান | ভাল মানের যন্ত্রাংশ |
| 32 | 0.8 | মসৃণ, ন্যূনতম চিহ্ন | যথার্থ সিএনসি মিলিং পৃষ্ঠ |
| 16 | 0.4 | অত্যন্ত মসৃণ | লেয়ারিং পৃষ্ঠ, সিল |
| 8 | 0.2 | আয়নার মতো শুরু | উচ্চ-নির্ভুলতাসম্পন্ন উপাদানসমূহ |
ইঞ্জিনিয়াররা সাধারণত চাপ, কম্পন বা গতির অধীনে কাজ করা নির্ভুল CNC উপাদানগুলির জন্য ০.৮ μm Ra নির্দিষ্ট করেন। এই ফিনিশটি মিলিত অংশগুলির মধ্যে ঘর্ষণ ও ক্ষয়ক্ষতি কমায়। তবে, এই স্তরটি অর্জন করা সাধারণত প্রক্রিয়া নিয়ন্ত্রণকে আরও কঠোর করার কারণে যন্ত্রকর্মের খরচে প্রায় ৫% বৃদ্ধি করে।
অর্জনযোগ্য পৃষ্ঠ ফিনিশকে বিভিন্ন বিষয় প্রভাবিত করে: কাটিং টুলের অবস্থা, ফিড রেট, স্পিন্ডেল গতি এবং উপাদানের বৈশিষ্ট্য। অ্যালুমিনিয়ামের মতো নরম উপাদানগুলি সাধারণত কার্ড-হার্ডেনড স্টেইনলেস স্টিলের তুলনায় সহজেই আরও নিখুঁত ফিনিশ অর্জন করে।
অংশের গুণগত মান পরিদর্শন ও যাচাইকরণ
উৎপাদকরা কীভাবে যাচাই করে যে অংশগুলি আপনার নির্দিষ্টকরণ মেনে চলছে? বিভিন্ন পরিদর্শন পদ্ধতি বিভিন্ন উদ্দেশ্য পূরণ করে:
- স্থানাঙ্ক পরিমাপ মেশিন (CMM): মাত্রিক পরিদর্শনের সোনার মানদণ্ড। CMM-গুলি স্পর্শজনিত বা অপটিক্যাল প্রোব ব্যবহার করে নির্ভুল ৩ডি পরিমাপ গ্রহণ করে, যা জটিল জ্যামিতি এবং কঠোর সহনশীলতার সম্পূর্ণ নির্ভুলতার সাথে যাচাই করে।
- মাইক্রোমিটার এবং ক্যালিপার: উৎপাদনের সময় দ্রুত মাত্রিক পরীক্ষার জন্য হাতে ব্যবহৃত যন্ত্র
- অপটিক্যাল কম্পারেটর: প্রকল্পের বৃহদায়িত অংশের প্রোফাইলগুলি দৃশ্যমান যাচাইয়ের জন্য রেফারেন্স ড্রয়িংয়ের সাথে তুলনা করা
- পৃষ্ঠের প্রোফাইলমিটার: স্টাইলাসটি পৃষ্ঠের উপর দিয়ে টানার মাধ্যমে Ra এবং অন্যান্য রাফনেস প্যারামিটার পরিমাপ করা
- গো/নো-গো গেজ: উচ্চ-খণ্ড উৎপাদন পরীক্ষার জন্য সরল পাস/ফেইল টুল
সিএনসি মেশিনিং প্রোটোটাইপিংয়ের ক্ষেত্রে, প্রথম-নিবন্ধিত নমুনা পরীক্ষায় সাধারণত সমস্ত গুরুত্বপূর্ণ মাত্রার বিস্তারিত CMM পরিমাপ অন্তর্ভুক্ত থাকে। উৎপাদন চক্রগুলি পরিসংখ্যানিক নমুনা পরীক্ষায় স্থানান্তরিত হতে পারে—অর্থাৎ প্রতিটি অংশ নয়, বরং একটি প্রতিনিধিত্বমূলক অংশের পরীক্ষা করা হয়।
| সহনশীলতার মাত্রা | সাধারণ পৃষ্ঠের ফিনিশ | পরিদর্শন পদ্ধতি | আপেক্ষিক খরচের প্রভাব |
|---|---|---|---|
| স্ট্যান্ডার্ড (±০.০০৫") | ১২৫ μin (৩.২ μm) | ক্যালিপার্স, মৌলিক CMM | বেসলাইন |
| নির্ভুলতা (±০.০০১") | ৩২–৬৩ μin (০.৮–১.৬ μm) | CMM, অপটিক্যাল পরিদর্শন | +15-25% |
| উচ্চ নির্ভুলতা (±০.০০০৫") | ১৬–৩২ μin (০.৪–০.৮ μm) | উচ্চ-নির্ভুলতা CMM | +40-60% |
| অতি-নির্ভুলতা (±0.0002") | ৮-১৬ μin (০.২-০.৪ μm) | বিশেষায়িত মেট্রোলজি | +100%+ |
সর্বোত্তম যন্ত্রকৃত ফলাফল পাওয়া যায় যখন সহনশীলতা (টলারেন্স) উপযুক্তভাবে—অর্থাৎ সমস্ত জায়গায় একরূপ কঠোর না করে—নির্দিষ্ট করা হয়। যেখানে কার্যকারিতা নির্ভর করে, সেখানেই নির্ভুলতা প্রয়োগ করুন: যুগ্ম পৃষ্ঠগুলি, বেয়ারিং ফিট, সিলিং ইন্টারফেস। অ-গুরুত্বপূর্ণ মাত্রাগুলিকে মানক সহনশীলতায় রাখুন। এই লক্ষ্যভিত্তিক পদ্ধতি অতি-প্রকৌশলীকরণের খরচ এড়িয়ে কার্যকরী যন্ত্রাংশ সরবরাহ করে।
যখন দুটি অংশ একত্রিত হয়, তখন তাদের সহনশীলতাগুলি একত্রিত হয়—এই ধারণাটি সহনশীলতা স্ট্যাক-আপ নামে পরিচিত। সব যুগ্ম মাত্রার মধ্য দিয়ে সর্বাধিক সম্ভাব্য পরিবর্তন গণনা করে ওয়ার্স্ট-কেস বিশ্লেষণ ফিট সমস্যা রোধ করতে সাহায্য করে। যখন প্রয়োজনীয়তা মানক ডিফল্ট থেকে ভিন্ন হয়, তখন আপনার ড্রয়িংগুলিতে একটি সহনশীলতা টেবিল অন্তর্ভুক্ত করুন, যাতে মেশিনিস্ট এবং পরীক্ষকরা সঠিকভাবে জানতে পারেন কোন সীমা প্রযোজ্য।
গুণগত বিবরণগুলি স্পষ্টভাবে সংজ্ঞায়িত করার পর, পরবর্তী বিবেচনাটি সমানভাবে ব্যবহারিক হয়ে ওঠে: যন্ত্রকৃত খরচকে কী নিয়ন্ত্রণ করে এবং আপনার বিনিয়োগকে কীভাবে অপ্টিমাইজ করা যায় তা বোঝা।
সিএনসি অংশের জন্য খরচ নির্ধারক কারক এবং অপ্টিমাইজেশন কৌশল
আপনি আপনার পার্টটি ডিজাইন করেছেন, উপকরণ নির্বাচন করেছেন এবং সহনশীলতা নির্দিষ্ট করেছেন—কিন্তু এখানে এমন একটি প্রশ্ন রয়েছে যা নির্ধারণ করে যে আপনার প্রকল্পটি এগিয়ে যাবে কিনা: এটা আসলে কত খরচ হবে? সিএনসি মেশিনিংয়ের অর্থনীতি বোঝা শুধুমাত্র অনলাইনে একটি সিএনসি কোটেশন পাওয়ার বিষয় নয়। এটা হল সেই সমস্ত সিদ্ধান্তগুলি চিহ্নিত করা যা মূল্য বৃদ্ধি করে এবং যেসব কৌশল মূল্য হ্রাস করে।
আপনি যদি অনলাইন মেশিনিং কোটেশনগুলির তুলনা করছেন বা স্থানীয় সিএনসি সেবা মূল্যায়ন করছেন, তবে একই খরচ-চালকগুলি প্রযোজ্য হয়। অনুযায়ী মেশিনিং অর্থনীতি গবেষণা , মেশিনিং সময় সবচেয়ে গুরুত্বপূর্ণ খরচ-চালক—যা প্রায়শই উপকরণ খরচ, সেটআপ ব্যয় এবং ফিনিশিং অপারেশনগুলির সমষ্টির চেয়ে বেশি হয়। চলুন দেখি আপনি আসলে কী জন্য প্রদান করছেন এবং প্রতিটি টাকা অপ্টিমাইজ করার উপায়।
সিএনসি মেশিনিং খরচকে কী নির্ধারিত করে
যখন কাস্টম সিএনসি মেশিনিং সেবাগুলি আপনার প্রকল্পের জন্য কোটেশন দেয়, তখন তারা কয়েকটি পরস্পর-সংযুক্ত ফ্যাক্টর গণনা করে। এই ফ্যাক্টরগুলি বোঝা আপনাকে উৎপাদনে প্রতিশ্রুতিবদ্ধ হওয়ার আগে তথ্য-ভিত্তিক ট্রেড-অফ করতে সাহায্য করে।
উপকরণের খরচ: কাঁচামাল একটি বেসলাইন ব্যয় নির্দেশ করে যা ধরন ও বাজার পরিস্থিতির উপর নির্ভর করে ব্যাপকভাবে পরিবর্তিত হয়। সাধারণত অ্যালুমিনিয়ামের দাম স্টেইনলেস স্টিলের চেয়ে কম, আবার স্টেইনলেস স্টিলের দাম টাইটানিয়ামের চেয়ে কম। কিন্তু কাঁচামালের দাম উপলব্ধতা, পরিমাণ এবং বৈশ্বিক সরবরাহ পরিস্থিতির উপর নির্ভর করে পরিবর্তিত হয়। ক্রয়মূল্যের পাশাপাশি বিবেচনা করুন যে, সিএনসি মেশিনিং মূল ব্ল্যাঙ্কের আয়তনের ৩০% থেকে ৭০% পর্যন্ত অংশ বর্জ্য হিসেবে অপসারণ করে—অর্থাৎ আপনি কারখানার ফ্লোরে চিপস হয়ে যাওয়া কাঁচামালের জন্য দাম প্রদান করছেন।
সেটআপ সময়: কোনও কাটিং শুরু হওয়ার আগে, মেশিনিস্টদের টুলপাথ প্রোগ্রাম করতে হয়, ফিক্সচার প্রস্তুত করতে হয়, টুল লোড করতে হয় এবং মেশিনটি ক্যালিব্রেট করতে হয়। এই একবারের প্রস্তুতি খরচগুলি প্রযোজ্য হয় যাই হোক না কেন—একটি অংশ তৈরি করছেন না হাজারটি অংশ তৈরি করছেন। একটি একক প্রোটোটাইপের জন্য সেটআপ মোট ব্যয়ের ৫০% বা তার বেশি হতে পারে। উৎপাদন পরিমাণে বৃদ্ধি করলে একই সেটআপ শতাধিক অংশের উপর বিস্তৃত হয়।
মেশিনিং জটিলতা: জটিল জ্যামিতিগুলি অধিক মেশিন সময়, বিশেষায়িত টুলিং এবং প্রায়শই বহু-অক্ষ সরঞ্জামের প্রয়োজন হয়। যেসব অংশে কাজের টুকরোটিকে ধারাবাহিকভাবে পুনরায় অবস্থান করা বা কাস্টম ফিক্সচার প্রয়োজন হয়, সেগুলির খরচ উল্লেখযোগ্যভাবে বৃদ্ধি পায়। যেমন সিএনসি খরচ বিশেষজ্ঞরা উল্লেখ করেন , ৫-অক্ষ মেশিনিংয়ের খরচ ৩-অক্ষ মেশিনিংয়ের চেয়ে বেশি, কারণ এটি মেশিন বিনিয়োগ, বিশেষায়িত টুলিং এবং অপারেটরের দক্ষতা প্রয়োজন করে।
সহনশীলতার প্রয়োজনীয়তা: সেই নির্ভুল বিবরণগুলি মনে আছে? কঠোর সহনশীলতা ধীর ফিড, একাধিক পাস এবং সূক্ষ্ম মান নিয়ন্ত্রণের প্রয়োজন হয়। ±০.০০১" সহনশীলতা অর্জন করা ±০.০০৫" এর মানদণ্ডের তুলনায় উল্লেখযোগ্যভাবে বেশি প্রচেষ্টা নেয়—যা সরাসরি চক্র সময় বৃদ্ধি এবং পরীক্ষা-নিরীক্ষার খরচ বৃদ্ধির দিকে নিয়ে যায়।
সারফেস ফিনিশ এবং পোস্ট-প্রসেসিং: উৎকৃষ্ট পৃষ্ঠের ফিনিশ অতিরিক্ত মেশিনিং পাসের প্রয়োজন হয়। অ্যানোডাইজিং, প্লেটিং বা তাপ চিকিত্সা সহ দ্বিতীয়ক অপারেশনগুলি আরও বেশি খরচ যোগ করে। প্রতিটি ফিনিশিং ধাপে হ্যান্ডলিং, প্রক্রিয়াকরণ সময় এবং প্রায়শই বিশেষায়িত ভেন্ডরদের কাছে আউটসোর্সিং জড়িত থাকে।
পরিমাণ ভাঙ্গন ও উৎপাদন স্কেলিং
এখানেই স্কেলের অর্থনৈতিকতা শক্তিশালী হয়ে ওঠে। সেই ব্যয়বহুল সেটআপ খরচ? এটি পরিমাণ নির্বিশেষে স্থির থাকে। বড় উৎপাদন চক্রের মধ্যে এটি বণ্টিত হলে প্রতি-ইউনিট খরচ ব্যাপকভাবে কমে যায়।
এই বাস্তব উদাহরণটি বিবেচনা করুন: একটি একক পার্ট মেশিনিং করতে হয় £134। দশটি ইউনিট অর্ডার করলে মোট খরচ হয় £385—যা প্রতি-ইউনিট মূল্যকে £38 এ নামিয়ে আনে (70% হ্রাস)। 100টি ইউনিটের জন্য মোট খরচ £1,300 হলে, প্রতিটি পার্টের মূল্য মাত্র £13 হয় (একক ইউনিট মূল্যের তুলনায় 90% কম)।
এই মূল্য নির্ধারণ কাঠামোটি ব্যাখ্যা করে কেন ব্যাচ অর্ডার আর্থিকভাবে যুক্তিসঙ্গত। একটি CNC টার্নিং সার্ভিস বা মিলিং প্রদানকারী প্রতিটি রানের জন্য একই প্রোগ্রামিং, টুলিং এবং সেটআপ প্রয়োগ করে। সেই একক সেটআপ থেকে আরও বেশি পার্ট উৎপাদন করা মেশিনের ব্যবহার সর্বাধিক করে এবং প্রতি-পার্ট খরচ সর্বনিম্ন করে।
উৎপাদন পরিমাণ পরিকল্পনা করার সময় নিম্নলিখিত বিষয়গুলি বিবেচনা করুন:
- প্রোটোটাইপ বনাম উৎপাদন: প্রাথমিক প্রোটোটাইপের জন্য উচ্চতর প্রতি-ইউনিট খরচ গ্রহণ করুন; উৎপাদনের জন্য ভলিউম-ভিত্তিক মূল্য নির্ধারণের পরিকল্পনা করুন
- স্টক ধারণ খরচ: বড় ব্যাচ অর্ডার করা প্রতি-পার্ট খরচ কমায়, কিন্তু স্টোরেজ এবং মূলধন প্রয়োজনীয়তা বাড়ায়
- চাহিদা নিশ্চয়তা: কেবলমাত্র তখনই বড় পরিমাণে অর্ডার করুন যখন চাহিদা নিশ্চিত হয়—অবিক্রিত ইনভেন্টরি খরচ সাশ্রয়কে বাতিল করে দেয়
যোগান অংশের খরচ কমানোর বুদ্ধিমান কৌশল
খরচ অপ্টিমাইজেশন আপনি যখন কোটেশন অনুরোধ করেন তার অনেক আগে থেকেই শুরু হয়। এই কৌশলগুলি আপনাকে আরও বুদ্ধিমানের মতো ডিজাইন করতে এবং অর্ডার করতে সাহায্য করে:
- অংশের জ্যামিতি সরলীকরণ করুন: বৈশিষ্ট্যগুলি কমান, পুনঃস্থাপনের প্রয়োজনীয়তা কমান এবং যান্ত্রিক সময় বাড়ানোর জন্য অপ্রয়োজনীয় জটিলতা এড়ান
- খরচ-কার্যকর উপকরণ নির্বাচন করুন: কার্যকরী প্রয়োজনীয়তা পূরণ করে এমন সবচেয়ে সস্তা উপাদান নির্বাচন করুন—অ্যালুমিনিয়াম 6061 প্রায়শই অনেক বেশি ব্যয়বহুল বিকল্পগুলির চেয়ে ভালো কাজ করে এবং তার খরচ মাত্র একটি ভগ্নাংশ
- শুধুমাত্র প্রয়োজনীয় সহনশীলতা নির্দিষ্ট করুন: কেবলমাত্র যেখানে কার্যকারিতা এটি দাবি করে সেখানেই কঠোর সহনশীলতা (টলারেন্স) প্রয়োগ করুন; অন্যত্র স্ট্যান্ডার্ড সহনশীলতা (±0.005") ব্যবহার করুন
- স্ট্যান্ডার্ড পৃষ্ঠ ফিনিশ ব্যবহার করুন: ডিফল্ট 3.2 µm Ra ফিনিশের জন্য কোনো অতিরিক্ত খরচ লাগে না; আরও মসৃণ ফিনিশ প্রয়োজন হলে খরচ 2.5% থেকে 15% পর্যন্ত বৃদ্ধি পায়, যা প্রয়োজনীয়তার উপর নির্ভর করে
- স্ট্যান্ডার্ড টুলিংয়ের জন্য ডিজাইন: স্ট্যান্ডার্ড ড্রিল সাইজ এবং টুল জ্যামিতি কাস্টম মাপের তুলনায় দ্রুত মেশিনিং করে, যার জন্য বিশেষায়িত টুলিং প্রয়োজন হয়
- উপাদান অপচয় কমান: মানক ব্ল্যাঙ্ক আকারের মধ্যে দক্ষতার সাথে প্যাক করা যায় এমন ডিজাইন পার্টস তৈরি করুন, যাতে কাঁচামালের খরচ কমানো যায়
- অর্ডারগুলি একত্রিত করুন: একই ধরনের পার্টসগুলিকে একসাথে ব্যাচ করুন, যাতে একাধিক ডিজাইনের জন্য সেটআপ খরচ ভাগ করা যায়
- উৎপাদনের আগে প্রোটোটাইপ তৈরি করুন: বড় পরিমাণে উৎপাদনে যাওয়ার আগে ছোট পরিমাণে ডিজাইনগুলি যাচাই করুন—ত্রুটিগুলি তাড়াতাড়ি ধরা পড়লে ব্যয়বহুল স্ক্র্যাপ এড়ানো যায়
আমার কাছাকাছি মেশিনিং সেবা খুঁজছেন হলে, দরখাস্তগুলি সাবধানে তুলনা করুন। নিম্নতম মূল্যটি সর্বদা সেরা মূল্য নাও হতে পারে, যদি গুণগত মান কমে যায় বা লিড টাইম বাড়ে। উপকরণ, মেশিনিং এবং ফিনিশিং খরচ আলাদাভাবে দেখানো বিস্তারিত বিভাজন অনুরোধ করুন—এই স্বচ্ছতা অপ্টিমাইজেশনের সুযোগগুলি চিহ্নিত করতে সাহায্য করে
ডিজাইন সিদ্ধান্ত এবং চূড়ান্ত খরচের মধ্যে সম্পর্ককে অতিমূল্যায়ন করা যায় না। কোণার ব্যাসার্ধ, দেয়ালের পুরুত্ব বা টলারেন্স নির্দিষ্টকরণে একটি ছোট পরিবর্তন খরচকে ২০% বা তার বেশি পরিমাণে পরিবর্তন করতে পারে। ডিজাইন প্রক্রিয়ার শুরুতেই আপনার মেশিনিং পার্টনারের সাথে যোগাযোগ করুন; তাদের DFM প্রতিক্রিয়া প্রায়শই এমন সঞ্চয়ের সুযোগ উন্মোচন করে যা আপনি একাই চিহ্নিত করতে পারবেন না
খরচের কারকগুলি বোঝা আপনাকে একটি চূড়ান্ত গুরুত্বপূর্ণ চ্যালেঞ্জের জন্য প্রস্তুত করে: সেই ত্রুটিগুলি চিহ্নিত করা এবং প্রতিরোধ করা যা লাভজনক প্রকল্পগুলিকে ব্যয়বহুল শিক্ষায় পরিণত করে।
সাধারণ CNC মেশিনিং ত্রুটিগুলি প্রতিরোধ করা
এমনকি সবচেয়ে উন্নত CNC সরঞ্জামগুলিও ত্রুটিপূর্ণ অংশ উৎপাদন করতে পারে। ত্রুটিগুলি কেন ঘটে—এবং কীভাবে সেগুলি প্রতিরোধ করা যায়—তা বোঝা সফল প্রকল্পগুলিকে ব্যয়বহুল ব্যর্থতা থেকে পৃথক করে। উৎপাদন মানের বিশেষজ্ঞদের মতে, প্রতিরোধের জন্য একটি ব্যবস্থিত পদ্ধতির প্রয়োজন যা উৎপাদনযোগ্যতার জন্য শক্তিশালী ডিজাইন, বুদ্ধিমান সরবরাহকারী নির্বাচন এবং স্পষ্ট প্রক্রিয়া নিয়ন্ত্রণের উপর ফোকাস করে।
যখন একটি CNC মেশিনিং অংশ মেশিন থেকে বেরিয়ে আসে দৃশ্যমান ত্রুটি সহ বা মাত্রিক পরীক্ষায় ব্যর্থ হয়, তখন খরচ শুধুমাত্র নষ্ট হওয়া উপকরণের চেয়ে অনেক বেশি হয়। এখানে নষ্ট হওয়া মেশিন সময়, বিলম্বিত সময়সূচী এবং সম্ভাব্যভাবে ক্ষতিগ্রস্ত গ্রাহক সম্পর্ক অন্তর্ভুক্ত। আসুন সবচেয়ে সাধারণ ত্রুটিগুলি পরীক্ষা করি এবং আপনার সমস্যা নির্ণয় করার টুলকিট গড়ে তুলি।
পৃষ্ঠ ত্রুটিগুলি এবং সেগুলি প্রতিরোধ করার উপায়
পৃষ্ঠের গুণগত সমস্যাগুলি বিভিন্নভাবে প্রকাশ পায়—প্রতিটি ক্ষেত্রে নির্দিষ্ট মূল কারণের ইঙ্গিত দেয়। এই ধরনের প্যাটার্নগুলি চিহ্নিত করা আপনাকে সমস্যাগুলি দ্রুত নির্ণয় করতে এবং কার্যকর সমাধান বাস্তবায়ন করতে সাহায্য করে।
চ্যাটার মার্ক: ওই বিশিষ্ট তরঙ্গাকার বা ঢেউযুক্ত প্যাটার্নটি স্পষ্টভাবে "কম্পন সমস্যা" বোঝায়। চ্যাটার (চিপ গঠনের অস্থিরতা) কেবল দৃশ্যত অপ্রিয় নয়—এটি যন্ত্রচালিত কাটার প্রক্রিয়ায় প্রবল দোলনের সংকেত দেয়, যা টুলগুলিকে ক্ষতিগ্রস্ত করতে পারে এবং মাত্রিক নির্ভুলতা হ্রাস করতে পারে।
- কারণ: অপর্যাপ্ত ওয়ার্কপিস দৃঢ়তা, অত্যধিক টুল ওভারহ্যাং, অপ্রাসঙ্গিক স্পিন্ডেল গতি, অথবা টুল ও উপাদানের মধ্যে অনুরণন
- প্রতিরোধঃ টুল ওভারহ্যাং কমিয়ে সর্বনিম্ন ব্যবহারযোগ্য দৈর্ঘ্যে নামিয়ে আনুন, অনুরণন এড়াতে স্পিন্ডেল গতি অপ্টিমাইজ করুন, ওয়ার্কপিস ক্ল্যাম্পিং দৃঢ়তা বাড়ান এবং গতিশীল স্থিতিশীলতার জন্য ডিজাইন করা টুল নির্বাচন করুন
- ডিজাইন সংযোগ: কম্পন বাড়ানোর জন্য পাতলা দেয়াল এবং গভীর পকেট এড়ান; অসমর্থিত বৈশিষ্ট্যগুলির জন্য ৩:১ প্রস্থ-সংক্রান্ত উচ্চতা অনুপাত বজায় রাখুন
খারাপ পৃষ্ঠের ফিনিশ: দৃশ্যমান টুল চিহ্ন, খারাপ টেক্সচার বা অসঙ্গত চেহারা প্রায়শই মেশিনের সীমাবদ্ধতা নয়, বরং প্রক্রিয়া নিয়ন্ত্রণের সমস্যার ইঙ্গিত দেয়।
- কারণ: ক্ষয়প্রাপ্ত কাটিং টুল, ভুল ফিড হার, অপর্যাপ্ত চিপ নির্মূলন, অথবা কাটারের উপর গঠিত ধার (বিল্ট-আপ এজ)
- প্রতিরোধঃ দৃশ্যমান ক্ষয় ঘটার আগেই নির্দিষ্ট সময়ে CNC টুল প্রতিস্থাপন করুন, প্রতি-দাঁতে ফিড গণনা অপ্টিমাইজ করুন, সঠিক কুল্যান্ট প্রবাহ নিশ্চিত করুন এবং নির্দিষ্ট উপকরণের জন্য কাটিং প্যারামিটারগুলি সামঞ্জস্য করুন
- ডিজাইন সংযোগ: অর্জনযোগ্য পৃষ্ঠ ফিনিশ নির্দিষ্ট করুন (স্ট্যান্ডার্ড মেশিনিংয়ের জন্য ৩.২ µm Ra); আরও কঠোর স্পেসিফিকেশনের জন্য ধীর ফিড এবং অধিক পাস প্রয়োজন
যেমন অ্যালুমিনিয়াম মেশিনিং বিশেষজ্ঞদের মন্তব্য , ফিনিশ ম্যাট হয়ে যাওয়া এবং স্থানীয় রঙ পরিবর্তনের মতো সমস্যাগুলি সাধারণত তখনই প্রকট হয় যখন ব্যাচ অপারেশন দীর্ঘ সময় ধরে চলে এবং তাপীয় লোড ও টুল ক্ষয় জমা হয়—এই কারণে প্রাক-ক্রমিক মনিটরিং অত্যাবশ্যক।
মাত্রাগত নির্ভুলতা সংক্রান্ত সমস্যার সমাধান
অ্যাসেম্বলি দলগুলিকে আর কিছুই বেশি বিরক্ত করে না যেমন অংশগুলি দেখতে নিখুঁত হলেও ফিট করা যায় না। মাত্রাগত অনির্ভুলতা পরীক্ষা-নিরীক্ষার সময় নষ্ট করে, অ্যাসেম্বলি বিলম্ব ঘটায় এবং সরবরাহকারীর বিশ্বস্ততা ক্ষুণ্ণ করে।
মাত্রিক ড্রিফট: চালু হওয়ার সময় সঠিকভাবে মাপা অংশগুলি উৎপাদন চলাকালীন ধীরে ধীরে টলারেন্স থেকে বেরিয়ে যায়।
- কারণ: অবিরত যন্ত্রচালনা, ধীরে ধীরে টুল ক্ষয়, বা কুল্যান্ট তাপমাত্রার পরিবর্তনের কারণে তাপীয় প্রসারণ
- প্রতিরোধঃ গুরুত্বপূর্ণ কাটিং-এর আগে মেশিনগুলিকে তাপীয় সাম্যাবস্থায় পৌঁছাতে দিন, স্বয়ংক্রিয় অফসেট সংশোধনসহ প্রক্রিয়া-মধ্যে পরিমাপ বাস্তবায়ন করুন, এবং কুল্যান্ট তাপমাত্রা স্থির রাখুন
- ডিজাইন সংযোগ: সম্ভব হলে স্ট্যান্ডার্ড টলারেন্স (±0.005") অনুসরণ করুন; শুধুমাত্র অত্যাবশ্যকীয় বৈশিষ্ট্যগুলির জন্য কঠোর টলারেন্স সংরক্ষণ করুন
বিকৃতি এবং বিকৃতি: সিএনসি মিলড পার্টস যা যন্ত্রচালনার পরে বাঁক নেয়, বো হয় বা মোড়া হয়—বিশেষ করে পাতলা দেয়ালযুক্ত বা বড় সমতল উপাদানগুলিতে এটি সাধারণ
- কারণ: যন্ত্রচালনার সময় অভ্যন্তরীণ উপাদান চাপ মুক্তি, আক্রমণাত্মক উপাদান অপসারণ হার, বা অপর্যাপ্ত ফিক্সচার সাপোর্ট
- প্রতিরোধঃ যন্ত্রচালনার আগে কাঁচামালের চাপ মুক্তি করুন, বলগুলি সমানভাবে বণ্টন করে এমন বহু-পাস রাফিং কৌশল ব্যবহার করুন, এবং সম্পূর্ণ ওয়ার্কপিসকে সমর্থন করে এমন ফিক্সচার ডিজাইন করুন
- ডিজাইন সংযোগ: ন্যূনতম পার্শ্ব প্রাচীর পুরুত্ব বজায় রাখুন (ধাতুর জন্য ০.৮ মিমি, প্লাস্টিকের জন্য ১.৫ মিমি) এবং সম্ভব হলে সমমানের উপাদান অপসারণ করুন
সিএনসি মানের বিশেষজ্ঞদের মতে, সিএডি/ক্যাম টুল ব্যবহার করে উপাদান আচরণ বিশ্লেষণ এবং চাপ অনুকরণ করা যেতে পারে যাতে বিকৃতি ঘটার আগেই তা পূর্বাভাস দেওয়া যায়—এতে প্রতিরোধমূলক প্রক্রিয়া সমন্বয় সম্ভব হয়।
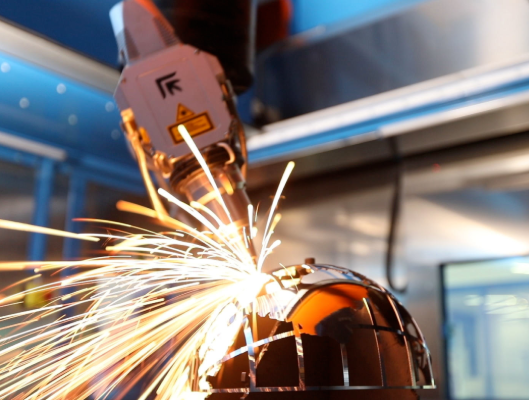
টুল-সম্পর্কিত সমস্যা এবং তার প্রতিরোধ
সিএনসি টুল হল যেখানে তত্ত্ব বাস্তবের সম্মুখীন হয়। টুলের সমস্যাগুলি অংশের গুণগত মানের প্রতিটি দিককে প্রভাবিত করে, যার ফলে মাত্রা, পৃষ্ঠের সমাপ্তি এবং উৎপাদন দক্ষতা সবগুলোই ক্ষতিগ্রস্ত হয়।
বার্স: ছিদ্র, কোণ এবং কাটা প্রান্তগুলির চারপাশে দেখা যাওয়া ছোট ধাতব উঁচু অংশ বা ঝালরের মতো প্রান্তগুলি অল্প বলে মনে হলেও এগুলি পরবর্তী প্রক্রিয়ায় বড় সমস্যা সৃষ্টি করে।
- কারণ: কাটিং এজ ক্ষয় বা ক্ষতিগ্রস্ত হওয়া, উপাদানের জন্য অপ্রাসঙ্গিক টুল জ্যামিতি, অপ্রাসঙ্গিক ফিড/গতি সংমিশ্রণ, অথবা চিপ অপসারণে অপর্যাপ্ততা
- প্রতিরোধঃ উপযুক্ত ধার প্রস্তুতি সহ তীব্র টুল ব্যবহার করুন, উপাদানের বৈশিষ্ট্যের সাথে মেল রেখে জ্যামিতি নির্বাচন করুন, কাটিং প্যারামিটারগুলি অপ্টিমাইজ করুন এবং প্রক্রিয়া প্রবাহে ডিবারিং অপারেশন বাস্তবায়ন করুন
- ডিজাইন সংযোগ: সম্ভব হলে বাহ্যিক প্রান্তগুলিতে চ্যামফার যোগ করুন—এগুলি তীব্র কোণগুলির তুলনায় মেশিন করা দ্রুত এবং স্বাভাবিকভাবেই বার গঠন কমিয়ে দেয়
টুল ভাঙনের প্রভাব: যখন কাটিংয়ের মাঝখানে টুলগুলি ব্যর্থ হয়, তখন সেগুলি ক্ষতিগ্রস্ত পৃষ্ঠ, অন্তর্ভুক্ত টুকরো বা বিপর্যয়কর পার্ট ধ্বংস রেখে যায়।
- কারণ: অত্যধিক কাটিং বল, টুলের সীমার বাইরে বিচ্যুতি, অপর্যাপ্ত প্যারামিটার সহ বিচ্ছিন্ন কাটিং বা কাটারের উপর আঘাত-লোড সৃষ্টিকারী উপাদান অন্তর্ভুক্তি
- প্রতিরোধঃ টুল ক্ষয়ের প্যাটার্ন নজর রাখুন এবং আগামীকালের জন্য প্রতিস্থাপন করুন, টুলের ব্যাসের জন্য উপযুক্ত স্তরে কাটিংয়ের গভীরতা সীমিত করুন, বিচ্ছিন্ন কাটিংয়ের জন্য ফিড হার কমান এবং উপাদানের গুণগত মান যাচাই করুন
- ডিজাইন সংযোগ: অত্যধিক টুল ওভারহ্যাং প্রয়োজনীয় গভীর পকেট এড়ান; কঠিন টুল সেটআপের সাথে অ্যাক্সেসযোগ্য ডিজাইন বৈশিষ্ট্য তৈরি করুন
তাপীয় বিকৃতি: মেশিনিং কাটিং অপারেশনের সময় তাপ সঞ্চয় কাজের টুকরো এবং মেশিনের উপাদান উভয়কেই প্রসারিত করে, যা মাত্রা অপ্রত্যাশিতভাবে পরিবর্তন করে।
- কারণ: পর্যাপ্ত শীতলীকরণ ছাড়াই উচ্চ কাটিং গতি, স্থানীয় তাপ সৃষ্টিকারী ঘনীভূত উপাদান অপসারণ বা দীর্ঘ সময় ধরে চলমান মেশিনিং
- প্রতিরোধঃ কাটিয়া জোন শীতল সরবরাহ অপ্টিমাইজ, উপাদান অপসারণ একটি এলাকায় কেন্দ্রীভূত পরিবর্তে অংশ জুড়ে বিতরণ, এবং স্পষ্টতা অপারেশন জন্য তাপ স্থিতিশীল বিরতি অনুমতি
- ডিজাইন সংযোগ: সমালোচনামূলক অ্যাপ্লিকেশনগুলির জন্য নিম্ন তাপ প্রসারণ সহগগুলির সাথে উপাদানগুলি নির্দিষ্ট করুন; মেশিনিং সিকোয়েন্স তাপ বিতরণকে কীভাবে প্রভাবিত করে তা বিবেচনা করুন
কার্যকর ত্রুটি প্রতিরোধের জন্য নকশা পছন্দগুলিকে একটি অবিচ্ছিন্ন ফিডব্যাক লুপে মেশিনিং পরামিতিগুলির সাথে সংযুক্ত করা হয়। আপনার যন্ত্রপাতিগুলির সিএনসি মেশিনিং ক্ষমতা গুরুত্বপূর্ণ, কিন্তু সেই যন্ত্রগুলি বাস্তবসম্মতভাবে কী অর্জন করতে পারে তা আপনার বোঝারও। কোন মেশিনযুক্ত অংশের নকশা চূড়ান্ত করার আগে, এই প্রশ্নগুলি জিজ্ঞাসা করুনঃ
- দেয়ালের বেধ এবং গহ্বরের গভীরতা কি প্রস্তাবিত সীমাতে রয়েছে?
- অভ্যন্তরীণ কোণার ব্যাসার্ধ কি স্ট্যান্ডার্ড টুল ব্যাসার্ধের সাথে সামঞ্জস্যপূর্ণ?
- কেবলমাত্র কার্যকরীভাবে প্রয়োজনীয় হলেই কি tolerances নির্দিষ্ট করা হয়?
- মেশিনিং স্ট্রেস অধীনে উপাদান আচরণ বিবেচনা করা হয়েছে?
- ডিজাইনটি কি ওয়ার্কপিসকে সঠিকভাবে ফিক্স করতে দেয়?
শূন্য-ত্রুটি উৎপাদন কোনো ভাগ্যবিধান নয়—এটি ডিজাইন, প্রক্রিয়া এবং প্রতিটি পর্যায়ে মান নিয়ন্ত্রণের প্রতি ব্যবস্থিত মনোযোগের ফলাফল। ত্রুটি প্রতিরোধের কৌশলগুলি প্রয়োগ করার পর, চূড়ান্ত ধাপটি হল এমন একটি যন্ত্রকরণ অংশীদার নির্বাচন করা যিনি আপনার প্রয়োজনীয়তা ধারাবাহিকভাবে পূরণ করতে সক্ষম।
বিশ্বস্ত সিএনসি যন্ত্রকরণ অংশীদার নির্বাচন
আপনি উৎপাদনযোগ্যতার জন্য যন্ত্রাংশগুলি ডিজাইন করেছেন, সুষ্ঠুভাবে সহনশীলতা নির্দিষ্ট করেছেন এবং ত্রুটি প্রতিরোধ করার উপায় বুঝতে পেরেছেন—কিন্তু আপনার যন্ত্রকরণ অংশীদার যদি এই সমস্ত কাজ সঠিকভাবে সম্পাদন করতে না পারেন, তবে এই সমস্ত জ্ঞান বেকার হয়ে যাবে। সঠিক সিএনসি যন্ত্রকরণ দোকান নির্বাচন করা আপনার প্রকল্পের সফলতা বা বিক্রেতা মূল্যায়নের একটি ব্যয়বহুল শিক্ষায় পরিণত হওয়ার মধ্যে পার্থক্য নির্ধারণ করে।
আপনি যে CNC সরবরাহকারীকে নির্বাচন করেন, তা আপনার বাজারে প্রবেশের গতি, পণ্যের বিশ্বস্ততা এবং মোট লাভজনকতাকে প্রভাবিত করে। শিল্প ক্রয় বিশেষজ্ঞদের মতে, ভুল পছন্দের ফলে বিলম্ব, গুণগত সমস্যা বা বাজেট অতিক্রম—সবগুলোই গ্রাহকদের আস্থা এবং অভ্যন্তরীণ দক্ষতাকে ক্ষতিগ্রস্ত করে। চলুন, এই গুরুত্বপূর্ণ সিদ্ধান্ত গ্রহণের জন্য একটি কাঠামো তৈরি করি।
গুণগত নিশ্চয়তার জন্য প্রাসঙ্গিক সার্টিফিকেশন
অনলাইন CNC মেশিনিং সেবা বা স্থানীয় সরবরাহকারীদের মূল্যায়ন করার সময়, সার্টিফিকেশনগুলি গুণগত ব্যবস্থার বস্তুনিষ্ঠ প্রমাণ প্রদান করে। সমস্ত সার্টিফিকেশনই সমান ওজন বহন করে না—প্রতিটি সার্টিফিকেশন কী নির্দেশ করে তা বুঝতে পারলে আপনি বিক্রেতার ক্ষমতাকে আপনার প্রয়োজনীয়তার সাথে মিলিয়ে নিতে পারবেন।
- ISO 9001: গুণগত ব্যবস্থাপনা সংক্রান্ত প্রাথমিক সার্টিফিকেশন, যা কাঠামোবদ্ধ প্রক্রিয়া এবং লিখিত পদ্ধতির উপস্থিতি নির্দেশ করে। অধিকাংশ সম্মানিত CNC মেশিন করা যাওয়া যন্ত্রাংশ সরবরাহকারী এই সার্টিফিকেশনটি কমপক্ষে রাখেন।
- IATF 16949: গাড়ি শিল্পের কঠোর মানের মানদণ্ড, যা ISO 9001-এর উপর ভিত্তি করে ত্রুটি প্রতিরোধ, ধারাবাহিক উন্নয়ন এবং সরবরাহ শৃঙ্খল ব্যবস্থাপনার জন্য অতিরিক্ত প্রয়োজনীয়তা যোগ করে। এই সার্টিফিকেশনটি উচ্চ-পরিমাণে, শূন্য-ত্রুটিযুক্ত উৎপাদনের ক্ষমতার ইঙ্গিত দেয়।
- AS9100D: বিমান ও মহাকাশ শিল্পের বিশেষ মানের প্রয়োজনীয়তা, যা অসাধারণ ট্রেসেবিলিটি, ডকুমেন্টেশন এবং প্রক্রিয়া নিয়ন্ত্রণ চায়। বিমান ও মহাকাশ অ্যাপ্লিকেশনের জন্য এটি আবশ্যক এবং উচ্চমানের মানের সিস্টেমের ইঙ্গিত দেয়।
সার্টিফিকেশনের পাশাপাশি, নির্দিষ্ট মান নিয়ন্ত্রণ পদ্ধতি নিয়ে গভীরভাবে অনুসন্ধান করুন। সরবরাহকারী কি উৎপাদন প্রক্রিয়া বাস্তব সময়ে পর্যবেক্ষণ করার জন্য পরিসংখ্যানিক প্রক্রিয়া নিয়ন্ত্রণ (SPC) ব্যবহার করে? তারা কোন পরীক্ষা সরঞ্জাম বজায় রাখে—যেমন CMM, অপটিক্যাল কম্প্যারেটর, সারফেস প্রোফাইলোমিটার? তাদের ডকুমেন্টেশনের মান মূল্যায়নের জন্য নমুনা পরীক্ষা প্রতিবেদন চান।
উদাহরণস্বরূপ, শাওয়াই মেটাল টেকনোলজি iATF 16949 সার্টিফিকেশন বজায় রেখেছে, যা কঠোর SPC বাস্তবায়ন দ্বারা সমর্থিত—যা গাড়ি-মানের CNC মেশিনড পার্টস উৎপাদনের জন্য প্রয়োজনীয় ব্যবস্থাগত মান নিয়ন্ত্রণকে প্রদর্শন করে।
উৎপাদন ক্ষমতা এবং লিড টাইম মূল্যায়ন
প্রযুক্তিগত দক্ষতা খুব কম অর্থপূর্ণ হয় যদি আপনার পার্টসগুলি অত্যধিক বিলম্বিত হয়ে আসে। একটি সরবরাহকারীর উৎপাদন ক্ষমতা এবং ডেলিভারি নির্ভরযোগ্যতা বোঝার মাধ্যমে প্রকল্পের বিলম্ব রোধ করা যায় এবং আত্মবিশ্বাসী পরিকল্পনা করা সম্ভব হয়।
সম্ভাব্য অংশীদারদের কাছে জিজ্ঞাসা করার মূল প্রশ্নগুলি:
- অনুরূপ পার্টসের জন্য সাধারণত কতদিনের লিড টাইম প্রয়োজন? মেশিনিং সোর্সিং গাইড অনুযায়ী, পরিমাণ ও জটিলতার উপর নির্ভর করে স্ট্যান্ডার্ড সিএনসি মেশিনিং-এর লিড টাইম সাধারণত ১-৩ সপ্তাহের মধ্যে হয়।
- আপনি জরুরি প্রকল্পের জন্য দ্রুত সিএনসি মেশিনিং সেবা প্রদান করেন কি? কিছু সরবরাহকারী ত্বরিত সেবা প্রদান করে—যা প্রোটোটাইপ মেশিনিং সেবা বা জরুরি মেরামতের পরিস্থিতিতে আদর্শ। উদাহরণস্বরূপ, শাওই মেটাল টেকনোলজি দ্রুত প্রোটোটাইপিংয়ের প্রয়োজনে মাত্র এক কর্মদিবসের মধ্যে লিড টাইম প্রদান করে।
- আপনি ক্ষমতার ওঠানামা কীভাবে ম্যানেজ করেন? শিডিউলিং সফটওয়্যার, অতিরিক্ত ক্ষমতা বাফার এবং রিয়েল-টাইম অর্ডার ট্র্যাকিং সম্পন্ন সরবরাহকারীরা অনিশ্চয়তা কমায় এবং আপনার পরিকল্পনার নির্ভুলতা বৃদ্ধি করে।
- আপনার সময়মতো ডেলিভারির রেকর্ড কী? কার্যকারিতা মেট্রিক্স অনুরোধ করুন—বিশ্বস্ত সরবরাহকারীরা এই তথ্যগুলি ট্র্যাক করে এবং শেয়ার করে।
উপকরণ সংগ্রহের ক্ষমতা লিড টাইমকেও প্রভাবিত করে। জিজ্ঞাসা করুন যে উপকরণ ক্রয় কাজটি অভ্যন্তরীণভাবে না হয়ে তৃতীয় পক্ষের মাধ্যমে পরিচালিত হচ্ছে কিনা। প্রতিষ্ঠিত সরবরাহ শৃঙ্খল সম্পর্ক এবং অভ্যন্তরীণ উপকরণ প্রস্তুতি ক্ষমতা সম্পন্ন সরবরাহকারীরা সাধারণত দ্রুততর এবং আরও সুসংগতভাবে ডেলিভারি দেয়।
প্রোটোটাইপ থেকে ভর উৎপাদন
আদর্শ মেশিনিং অংশীদার আপনার প্রকল্পের সাথে বৃদ্ধি পায়। সিএনসি প্রোটোটাইপ মেশিনিং অর্ডার দিয়ে শুরু করা আপনাকে উৎপাদন পরিমাণে প্রতিশ্রুতিবদ্ধ হওয়ার আগেই ক্ষমতাগুলি যাচাই করতে দেয়—এটি সরবরাহকারীর প্রকৃত ক্ষমতা, প্রক্রিয়া অনুশাসন এবং গুণগত মানসিকতা যাচাই করার দ্রুততম উপায়।
প্রোটোটাইপ থেকে উৎপাদন বিশেষজ্ঞদের মতে, সেরা অংশীদারগুলি নিম্নলিখিতগুলি প্রদান করে:
- উৎপাদনযোগ্যতার জন্য ডিজাইন পরামর্শ: অভিজ্ঞ সরবরাহকারীরা প্রোটোটাইপিংয়ের সময় ডিজাইন উন্নতি চিহ্নিত করে যা উৎপাদন স্কেলে খরচ কমায়
- পরিমাণ পরিবর্তনের মধ্যে সুসংগত গুণগত মান: ১০টি পিসের ক্ষেত্রে গুণগত মান বজায় রাখার জন্য প্রক্রিয়া নিয়ন্ত্রণগুলি ১০,০০০টি পিসের ক্ষেত্রেও সহজেই স্কেল করা যেতে হবে
- নমনীয় উৎপাদন পদ্ধতি: পরিমাণ বৃদ্ধির সাথে সাথে সিএনসি প্রোটোটাইপিং সার্ভিস সেটআপ থেকে উচ্চ-দক্ষতাসম্পন্ন উৎপাদন টুলিং-এ স্থানান্তরের ক্ষমতা
- স্কেলিংয়ের সময় পরিষ্কার যোগাযোগঃ ক্ষমতা, সময় এবং যে কোনও সমস্যা সম্পর্কে প্রাক-অপডেট
শাওই মেটাল টেকনোলজি এই স্কেলিং ক্ষমতা উদাহরণস্বরূপ তাদের অটোমোটিভ দক্ষতা প্রাথমিক চ্যাসি সমাবেশ প্রোটোটাইপ থেকে কাস্টম ধাতু বুশিংগুলির ভর উত্পাদন পর্যন্ত বিস্তৃত, পুরো রূপান্তর জুড়ে আইএটিএফ 16949 স্তরের মান বজায় রেখে
| মূল্যায়ন মানদণ্ড | কি দেখতে হবে | লাল পতাকা |
|---|---|---|
| মান সার্টিফিকেশন | ন্যূনতম ISO 9001; গাড়ি শিল্পের জন্য IATF 16949; বিমান চলাচল শিল্পের জন্য AS9100D | সার্টিফিকেশন নেই; সার্টিফিকেশন মেয়াদ শেষ হয়েছে; অডিট ফলাফল ভাগ করে নেওয়ার অনিচ্ছুকতা |
| পরিদর্শন ক্ষমতা | সিএমএম সরঞ্জাম; নথিভুক্ত পরিদর্শন প্রোটোকল; প্রথম নিবন্ধ পরিদর্শন | শুধুমাত্র ম্যানুয়াল পরিদর্শন; কোন আনুষ্ঠানিক মানের নথি নেই |
| ম্যাটেরিয়াল বিশেষজ্ঞতা | আপনার নির্দিষ্ট উপকরণগুলির সাথে অভিজ্ঞতা; সরবরাহকারীর সাথে প্রতিষ্ঠিত সম্পর্ক | সীমিত উপাদান পছন্দ; সাধারণ উপকরণ জন্য দীর্ঘ সীসা সময় |
| নেতৃত্ব সময় নির্ভরযোগ্যতা | সুস্পষ্ট সময়সীমা; দ্রুততর বিকল্প; সময়মত বিতরণ মেট্রিক্স | অস্পষ্ট প্রতিশ্রুতি; সময়সীমা মিস করার ইতিহাস |
| স্কেলযোগ্যতা | প্রোটোটাইপ থেকে উৎপাদন ক্ষমতা; ভলিউম বৃদ্ধি করার ক্ষমতা | সীমিত সরঞ্জাম; বড় অর্ডারের জন্য কোন বৃদ্ধি পথ নেই |
| যোগাযোগ | ডিএফএম প্রতিক্রিয়া; প্রতিক্রিয়াশীল প্রযুক্তিগত সহায়তা; পরিষ্কার প্রকল্প আপডেট | ধীর প্রতিক্রিয়া; কোন প্রযুক্তিগত পরামর্শ দেওয়া হয় না |
কোন অংশীদারিত্ব চূড়ান্ত করার আগে, আপনার মত অংশের সাথে সরবরাহকারীর অভিজ্ঞতা যাচাই করুন। কেস স্টাডিজ পর্যালোচনা করুন, গ্রাহকদের রেফারেন্স চাইুন, এবং তাদের সরঞ্জাম তালিকা পরীক্ষা করুন। আপনার শিল্পের বিশেষজ্ঞ সরবরাহকারী সাধারণ সমস্যাগুলি বোঝে এবং আপনার প্রকল্পকে প্রভাবিত করার আগে সমস্যাগুলি পূর্বাভাস দিতে পারে।
খ্যাতি বিষয় গুগল রিভিউ, ইন্ডাস্ট্রি ফোরাম এবং পেশাদার নেটওয়ার্কগুলি পরীক্ষা করুন। প্রতিষ্ঠিত নির্মাতাদের কাছ থেকে শক্তিশালী সমর্থন সময়ের সাথে সাথে ধারাবাহিক পারফরম্যান্সের ইঙ্গিত দেয়। পুঙ্খানুপুঙ্খ বিক্রেতা মূল্যায়নে বিনিয়োগ আপনার উৎপাদন সম্পর্ক জুড়ে শেয়ার প্রদান করে।
আপনি যদি প্রাথমিক ডিজাইন যাচাইকরণের জন্য প্রোটোটাইপ মেশিনিং সেবা সংগ্রহ করছেন অথবা সম্পূর্ণ উৎপাদনে স্কেল করছেন, তবে সঠিক পার্টনার আপনার দলের একটি বাহ্যিক সম্প্রসারণ হয়ে ওঠে—যা ভালো ডিজাইনগুলিকে সফল পণ্যে রূপান্তরিত করতে প্রযুক্তিগত দক্ষতা, মান নিশ্চিতকরণ এবং নির্ভরযোগ্য বাস্তবায়নে অবদান রাখে।
CNC মেশিনিং পার্টস সম্পর্কিত প্রায়শই জিজ্ঞাসিত প্রশ্নসমূহ
১. একটি পার্ট সিএনসি মেশিনিং করতে কত খরচ হয়?
সিএনসি মেশিনিংয়ের খরচ সাধারণত সরঞ্জামের জটিলতা এবং নির্ভুলতার প্রয়োজনীয়তার উপর নির্ভর করে প্রতি ঘণ্টায় ৫০ ডলার থেকে ১৫০ ডলার পর্যন্ত হয়ে থাকে। সেটআপ ফি ৫০ ডলার থেকে শুরু হয় এবং জটিল কাজের ক্ষেত্রে এটি ১,০০০ ডলারেরও বেশি হতে পারে। প্রধান খরচ-নির্ধারকগুলি হলো উপাদান নির্বাচন, মেশিনিং সময়, সহনশীলতা (টলারেন্স) বিবরণ এবং পরিমাণ। একটি একক প্রোটোটাইপের খরচ হতে পারে ১৩৪ ডলার, অন্যদিকে ১০০টি ইউনিট অর্ডার করলে সেটআপ খরচ ভাগ করে নেওয়ার কারণে প্রতি ইউনিটের খরচ মাত্র ১৩ ডলারে নেমে আসতে পারে। জ্যামিতিক আকৃতি সরলীকরণ, শুধুমাত্র প্রয়োজনীয় সহনশীলতা নির্দিষ্ট করা এবং স্ট্যান্ডার্ড টুলিং মাত্রা ব্যবহার করা মোট খরচ উল্লেখযোগ্যভাবে কমিয়ে দেয়।
২. সিএনসি মেশিনিংয়ের জন্য পার্টস কীভাবে ডিজাইন করবেন?
কার্যকরী সিএনসি পার্ট ডিজাইন উৎপাদনযোগ্যতা নীতি অনুসরণ করে: কম্পন ও বিকৃতি প্রতিরোধের জন্য ধাতুর জন্য ন্যূনতম প্রাচীর পুরুত্ব ০.৮ মিমি এবং প্লাস্টিকের জন্য ১.৫ মিমি বজায় রাখুন। কাটিং টুলগুলি তীব্র অভ্যন্তরীণ কোণ তৈরি করতে পারে না বলে অভ্যন্তরীণ কোণের ব্যাসার্ধ টুলের ব্যাসার্ধের চেয়ে অন্তত ৩০% বড় হতে হবে। গহ্বরের গভীরতা টুলের ব্যাসের তিন গুণের বেশি না হওয়া উচিত এবং স্ট্যান্ডার্ড ড্রিলিং-এর জন্য ছিদ্রের গভীরতা ব্যাসের ৪ গুণের চেয়ে কম রাখুন। কার্যকারিতা যেখানে আরও কঠোর মানদণ্ড চায়, সেখানে ব্যতিক্রম করে সাধারণ সহনশীলতা (±০.০০৫") ব্যবহার করুন এবং মেশিনিং সময় কমানোর জন্য উঠে থাকা লেখার চেয়ে খোদাই করা লেখা ব্যবহার করুন।
৩. সিএনসি মেশিনের প্রধান উপাদানগুলি কী কী?
সিএনসি মেশিনগুলি একাধিক অপরিহার্য উপাদান নিয়ে গঠিত যা একত্রে কাজ করে। মেশিন কন্ট্রোল ইউনিট (MCU) প্রোগ্রামিং নির্দেশাবলী ডিকোড করে মস্তিষ্কের মতো কাজ করে। কন্ট্রোল প্যানেলটি অপারেটর ইন্টারফেস হিসাবে কাজ করে, যার মধ্যে ইনপুট ডিভাইস, ডিসপ্লে ইউনিট এবং জরুরি স্টপ রয়েছে। স্পিন্ডলটি কাটিং-এর জন্য ঘূর্ণন শক্তি প্রদান করে, যখন ড্রাইভ সিস্টেম (যার মধ্যে সার্ভো মোটর এবং বল স্ক্রু অন্তর্ভুক্ত) সূক্ষ্ম অক্ষ গতি সক্ষম করে। ওয়ার্কটেবিল কাজের বস্তুটিকে সমর্থন করে, এবং ফিডব্যাক সিস্টেমগুলি টুলের অবস্থান ট্র্যাক করতে ট্রান্সডিউসার ব্যবহার করে রিয়েল-টাইম সংশোধন করে। মাল্টি-অ্যাক্সিস মেশিনগুলিতে জটিল জ্যামিতির জন্য রোটারি টেবিল যোগ করা হয়।
৪. সিএনসি মেশিনিং-এর জন্য কোন কোন উপাদান সবচেয়ে ভালো কাজ করে?
অ্যালুমিনিয়াম খাদ, বিশেষ করে 6061 অসাধারণ মেশিনযোগ্যতা প্রদান করে এবং প্রোটোটাইপ এবং উৎপাদন অংশগুলির জন্য আদর্শ। স্টেইনলেস স্টিল 304 এবং 316 খাদ্য, চিকিৎসা এবং সামুদ্রিক অ্যাপ্লিকেশনগুলির জন্য জারা প্রতিরোধের সরবরাহ করে তবে কার্বাইড টুলিং এবং ধীর গতির প্রয়োজন। টাইটানিয়াম গ্রেড ৫ এয়ারস্পেস এবং মেডিকেল ইমপ্লান্টের জন্য ব্যতিক্রমী শক্তি-ও-ওজনের অনুপাত সরবরাহ করে তবে মেশিন করা কঠিন। ব্রাস সি৩৬০ মেশিনগুলি সহজেই উচ্চ ভলিউম ফিটিংগুলির জন্য। POM (Delrin) এবং PEEK এর মতো ইঞ্জিনিয়ারিং প্লাস্টিকগুলি হালকা ওজনের অংশ বা বৈদ্যুতিক নিরোধক প্রয়োজন এমন অ্যাপ্লিকেশনগুলির জন্য কাজ করে।
৫. কিভাবে আমি একটি নির্ভরযোগ্য সিএনসি মেশিনিং অংশীদার নির্বাচন করব?
মানের শংসাপত্রের ভিত্তিতে অংশীদারদের মূল্যায়ন করুনআইএসও 9001 ন্যূনতম, অটোমোটিভের জন্য আইএটিএফ 16949 এবং এয়ারস্পেসের জন্য এএস 9100 ডি। সিএমএম সরঞ্জাম এবং নথিভুক্ত প্রোটোকল সহ পরিদর্শন ক্ষমতা যাচাই করুন। প্রোটোটাইপ এবং উৎপাদন স্কেলিং উভয়ের জন্য নেতৃত্বের সময় নির্ভরযোগ্যতা এবং ক্ষমতা মূল্যায়ন করুন। নমুনা পরিদর্শন প্রতিবেদন এবং গ্রাহকের রেফারেন্সের জন্য অনুরোধ করুন। শাওই মেটাল টেকনোলজির মতো অংশীদাররা আইএটিএফ ১৬৯৪৯ শংসাপত্র, এসপিসি মান নিয়ন্ত্রণ, এক দিনের দ্রুত প্রোটোটাইপিং লিড টাইম এবং চ্যাসি সমাবেশের প্রোটোটাইপ থেকে কাস্টম ধাতব বুশিংয়ের ভর উত্পাদনে নির্বিঘ্নে